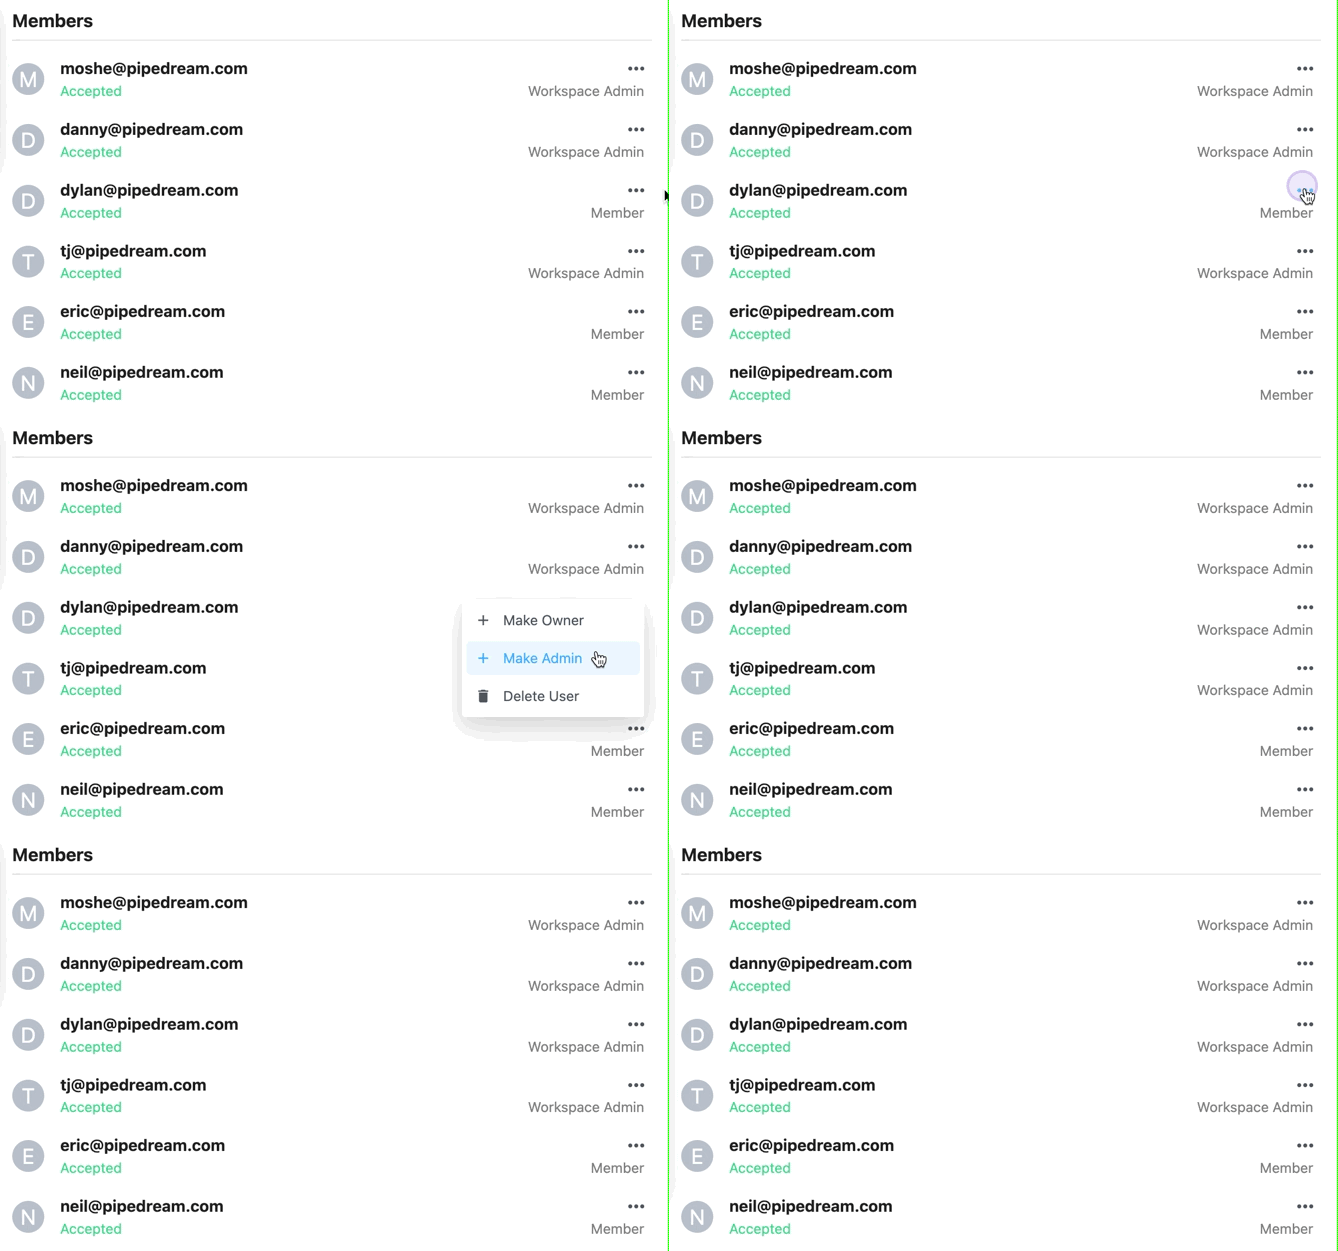
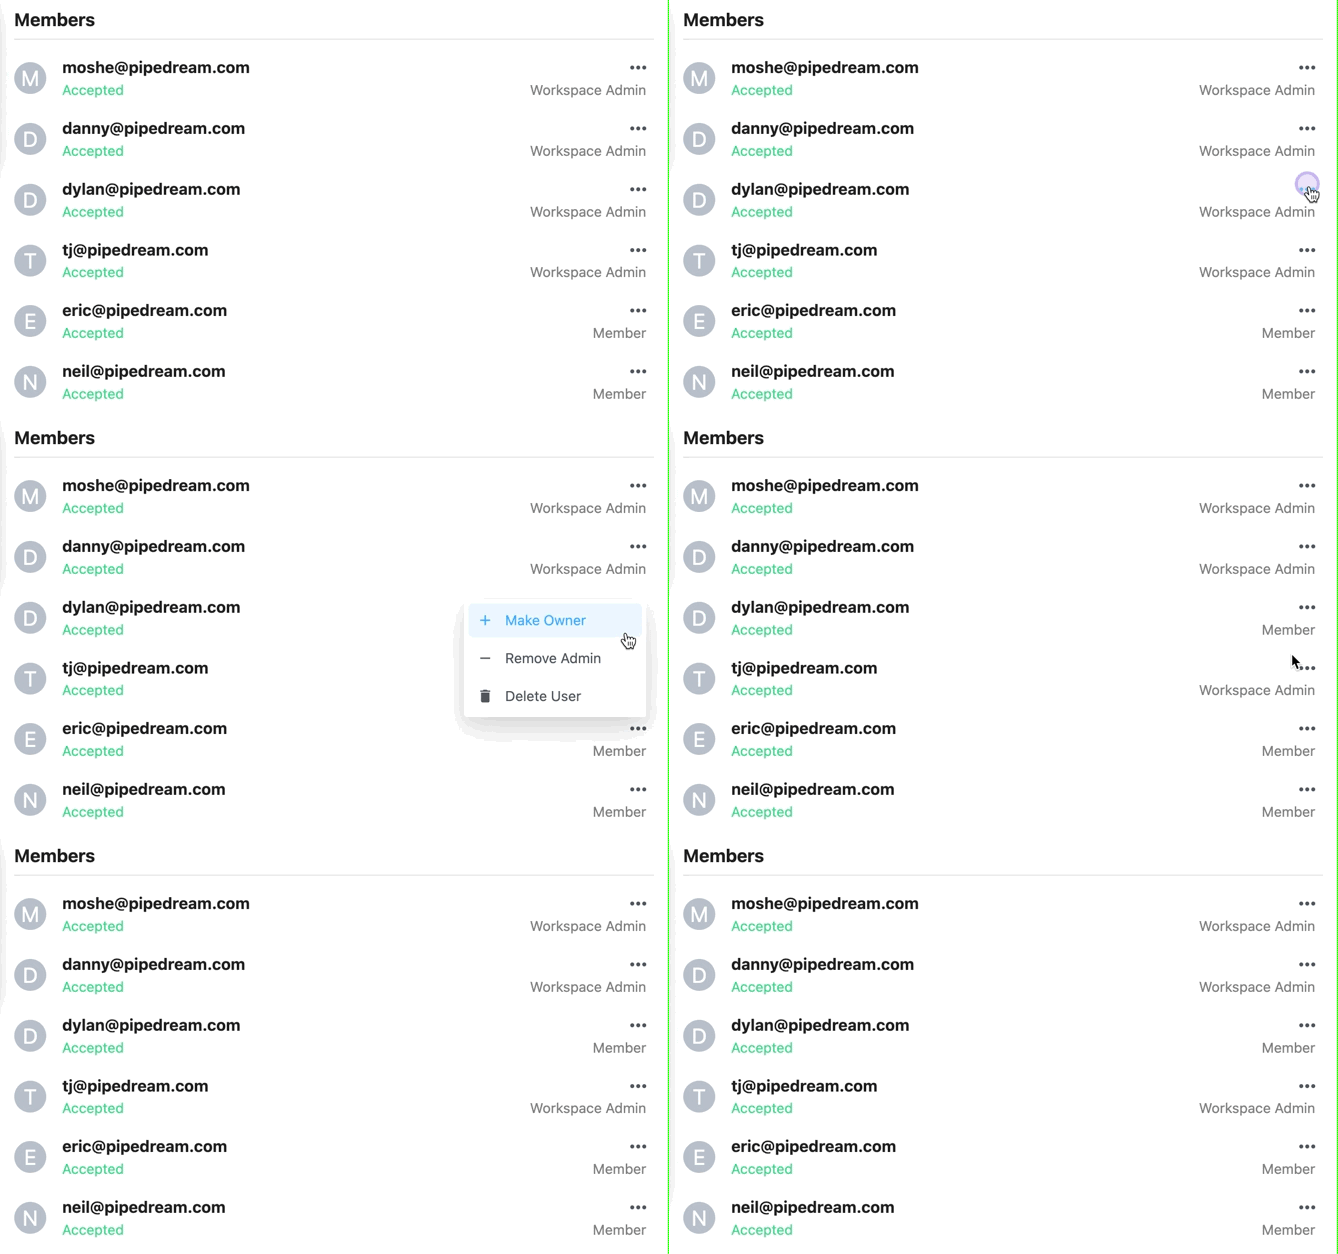
# Billing Settings Source: https://pipedream.com/docs/account/billing-settings You’ll find information on your usage data in your [Billing Settings](https://pipedream.com/settings/billing). You can also upgrade to [paid plans](https://pipedream.com/pricing) from this page. ## Subscription If you’ve already upgraded, you’ll see an option to **Manage Subscription** here, which directs you to your personal Stripe portal. Here, you can change your payment method, review the details of previous invoices, and more. ## Usage [Credits](/docs/pricing/#credits-and-billing) are Pipedream’s billable unit, and users on the [free plan](/docs/pricing/#free-plan) are limited on the number of daily free credits allocated. The **Usage** section displays a chart of the daily credits across a historical range of time to provide insight into your usage patterns. > [!WARNING] > > Credit usage from [Connect](/docs/connect/) is not yet reflected in this section. Hover over a specific column in the chart to see the number of credits run for that specific day: ![](https://mintcdn.com/pipedream/xnRKrRxEtt3vxd6I/images/ccb11716-image.png?fit=max\&auto=format\&n=xnRKrRxEtt3vxd6I\&q=85\&s=c71a193badbe3d3dd2eb25e742267b83) Daily credits tooltip Click on a specific column to see credits for that day, broken out by workflow / source: ![](https://mintcdn.com/pipedream/xnRKrRxEtt3vxd6I/images/ca4f3b3a-image.png?fit=max\&auto=format\&n=xnRKrRxEtt3vxd6I\&q=85\&s=c64d1439eca7b00bcfd551c5f59c541e) Credits broken out by workflow / source Users on the free tier will see the last 30 days of usage in this chart. Users on [paid plans](https://pipedream.com/pricing) will see the cumulative usage tied to their current billing period. ## Compute Budget Control the maximum number of credits permitted on your account with a **Credit Budget**. This will restrict your workspace-wide usage to the specified number of [credits](/docs/pricing/#credits-and-billing) on a monthly or daily basis. The compute budget does not apply to credits incurred by dedicated workers or Pipedream Connect. To enable this feature, click on the toggle and define your maximum number of credits in the period. > [!NOTE] > > Due to how credits are accrued, there may be cases where your credit usage may go slightly over the cap. > > In an example scenario, with a cap set at 20 credits and a long-running workflow that uses 10 credits per run, it’s possible that two concurrent events trigger the workflow, and the cap won’t apply until after the concurrent events are processed. ## Limits For users on the [Free tier](/docs/pricing/#free-plan), this section displays your usage towards your daily credits quota for the current UTC day. # User Settings Source: https://pipedream.com/docs/account/user-settings You can find important account details, text editor configuration, and more in your [User Settings](https://pipedream.com/user). ## Changing your email Pipedream sends system emails to the email address tied to your Pipedream login. You can change the email address to which these emails are delivered by modifying the **Email** in your Account Settings. Once changed, an email will be delivered to the new address requesting you verify it. Pipedream marketing emails may still be sent to the original email address you used when signing up for Pipedream. To change the email address tied to marketing emails, please [reach out to our team](https://pipedream.com/support). ## Two-Factor Authentication [Two Factor Authenitcation](https://www.youtube.com/embed/M2_JrDh6cVI) Two-factor authentication (2FA) adds an additional layer of security for your Pipedream account and is recommended for all users. ### Configuring 2FA 1. Open your [Account Settings](https://pipedream.com/user) 2. Click **Configure** under **Two-Factor Authentication** 3. Scan the QR code in an authenticator app like [1Password](https://1password.com/) or Google Authenticator (available on [iOS](https://apps.apple.com/us/app/google-authenticator/id388497605) and [Android](https://play.google.com/store/apps/details?id=com.google.android.apps.authenticator2\&hl=en_US\&gl=US)) 4. If you’re unable to scan the QR code, you can view the setup key to configure 2FA manually in your authenticator app 5. Enter the one-time-password (OTP) from your authenticator app 6. **Save your recovery codes in a secure location**. You’ll need these to access your Pipedream account in the case you lose access to your authenticator app. > [!WARNING] > > Save your recovery codes > > If you lose access to your authenticator app and your recovery codes, you will permanently lose access to your Pipedream account. **Pipedream Support cannot recover these accounts.** ### Signing in with 2FA 1. You’ll be prompted to enter your OTP the next time you sign in to Pipedream 2. When prompted, you can enter the OTP from your authenticator app or a recovery code > [!NOTE] > > Using recovery codes > > Each recovery code is a one-time-use code, so make sure to generate new recovery codes in your [Account Settings](https://pipedream.com/user) when you need to. All previously generated recovery codes expire when you generate new ones. > [!WARNING] > > 2FA is not currently supported with Single Sign On Pipedream recommends enabling 2FA with your identity provider. ### Requiring 2-Factor Authentication Workspaces on the Business plan can [require all workspace members to configure 2FA](/docs/workspaces/#requiring-two-factor-authentication) in order to log in to Pipedream. If you are a member of any workspace where 2FA is required, you cannot disable 2FA, but you can still reconfigure it in your [account settings](https://pipedream.com/account/) if necessary. > [!NOTE] > > Admins and Owners control 2FA settings > > Only workspace owner and admin members can enable or disable 2FA for an entire workspace. ## Pipedream API Key Pipedream provides a [REST API](/docs/rest-api/) for interacting with Pipedream programmatically. You’ll find your API key here, which you use to [authorize requests to the API](/docs/rest-api/auth/). You can revoke and regenerate your API key from here at any time. ## Delete Account You can delete your Pipedream account at any time by visiting your Account Settings and pressing the **Delete your Account** button. Account deletion is immediately and irreversible. ## Application You can change how the Pipedream app displays data, and basic text editor config, in your [Application Settings](https://pipedream.com/settings/app). For example, you can: * Change the clock format to 12-hour or 24-hour mode * Enable Vim keyboard shortcuts in the Pipedream text editor, or enable word wrap * Set the number of spaces that will be added in the editor when pressing `Tab` ## Environment Variables Environment variables allow you to securely store secrets and other config values in your workspace. You can also define [variables and secrets at the project level](/docs/projects/secrets/) and restrict access to them. # Privacy Policy Source: https://pipedream.com/docs/additional-resources/privacy # Status Source: https://pipedream.com/docs/additional-resources/status # Support Source: https://pipedream.com/docs/additional-resources/support # Terms of Service Source: https://pipedream.com/docs/additional-resources/terms # Using AI Tooling with Pipedream Source: https://pipedream.com/docs/ai-tooling Enable your AI tools to help integrate Pipedream Connect Pipedream provides developer tools to make it easy to work with Pipedream Connect alongside whatever AI tools you use. You can use these tools to get instant access to Pipedream's documentation, API references, and code examples directly in your AI assistant or IDE. ## AI contextual menu Pipedream's documentation includes built-in tools to make it easy to share content with AI assistants: ### Copy a page as Markdown Press Command + C (Ctrl + C on Windows) on any page in the docs to copy it as Markdown to your clipboard. You can then paste this directly into your AI assistant for context-aware help. ### Send a page to your AI assistant Click the AI menu in the top right of any page in the docs to send the current page to ChatGPT, Claude, or Perplexity to easily get immediate help with the specific topic you're reading about. ## LLM-optimized documentation Pipedream's documentation is optimized for AI consumption with automatically generated `llms.txt` and `llms-full.txt` files: ### llms.txt Similar to how a sitemap helps search engines, `llms.txt` provides a structured index of all the pages in the docs. AI tools can use this to quickly understand our documentation structure and find relevant content. View it at: [pipedream.com/docs/llms.txt](https://pipedream.com/docs/llms.txt) ### llms-full.txt For comprehensive context, `llms-full.txt` flattens the entire docs site into a single file. You can provide this URL to AI tools for more accurate responses about Pipedream. View it at: [pipedream.com/docs/llms-full.txt](https://pipedream.com/docs/llms-full.txt) ## Pipedream Docs MCP Server For a more integrated development experience, you can add the Pipedream Docs MCP ([Model Context Protocol](https://modelcontextprotocol.io/)) server directly to your IDE. This enables your AI assistant or agent to directly access and search Pipedream's documentation without leaving your development environment. > [!NOTE] > > If you're looking to use Pipedream MCP to add thousands of tools to the app you're building, see [these docs](/docs/connect/mcp/developers). ### Benefits Adding the Pipedream Docs MCP server to your development environment provides: * **Instant docs access**: Your AI assistant can search and reference Pipedream docs without leaving your IDE * **Faster development**: Reduce context switching between documentation and code * **Accurate answers**: AI responses are grounded in our official documentation ### Installation To add the Pipedream Docs MCP server, use this URL: ``` https://pipedream.com/docs/mcp ``` The Pipedream Docs MCP server works with any IDE or AI assistant that supports MCP, including: * Cursor * VSCode * Claude Code * claude.ai * Any other MCP-compatible IDE ### What you can do With the Pipedream Docs MCP server enabled, your AI assistant can help you: * Find the right Connect SDK methods and parameters * Generate code examples for common integration patterns * Troubleshoot authentication and API issues * Discover available endpoints and capabilities ### Example prompts Here are some example prompts you can use with your AI assistant once the MCP server is configured: * "How do list apps in Pipedream Connect?" * "Show me how to send a Slack message on behalf of my users with Pipedream Connect" * "How can I add Pipedream MCP to my agent?" * "How do I deploy a Google Sheets trigger for my end users?" ## Next steps * Go through the [Pipedream Connect Quickstart](/docs/connect/quickstart) to get started * Check out the [SDK playground](https://pipedream.com/connect/demo) to see Connect in action * Use [Pipedream Chat](https://chat.pipedream.com) to see how you can add Pipedream MCP to your AI app # Product Changelog Source: https://pipedream.com/docs/changelog New updates and improvements **October 1, 2025** ## OAuth for Pipedream MCP + ChatGPT Support **We've shipped major upgrades to Pipedream's MCP server, and you can now [use Pipedream MCP in ChatGPT](/docs/connect/mcp/users#chatgpt).** **What's new:** * **Better security**: OAuth authentication with a static URL: `https://mcp.pipedream.net/v2` * **Richer metadata**: All 10,000+ tools now include `toolAnnotations` to help MCP clients understand which tools are read vs write, destructive, etc. * **Easier UX**: No pre-setup required - just enter the MCP server URL in your chat client and Pipedream will automatically prompt you to connect your accounts * **Developer-first**: Powered by Connect, developers building apps or agents can [use Pipedream MCP](/docs/connect/mcp/developers) to connect their agent to 10,000+ tools from 3,000+ APIs - **framework and LLM provider agnostic** **Get started:** * **ChatGPT**: [Read the docs](https://pipedream.com/docs/connect/mcp/users#chatgpt) * **Claude**: [Read the docs](https://pipedream.com/docs/connect/mcp/users#claude) Pipedream MCP makes it easier and more secure to bring all your work tools into your AI conversations. **September 9, 2025** ## Python, TypeScript, and Java SDKs + Interactive AI-Friendly Docs We're excited to ship two major upgrades that make it easier for developers to integrate Pipedream Connect: **multi-language SDKs** and **completely redesigned, interactive, AI-friendly documentation**. **Python, TypeScript, and Java SDKs for Connect** For the first time, we now offer SDKs for [Python](https://github.com/PipedreamHQ/pipedream-sdk-python) and [Java](http://github.com/PipedreamHQ/pipedream-sdk-java), and we've completely rewritten our [TypeScript SDK](https://github.com/PipedreamHQ/pipedream-sdk-typescript) with better type definitions, namespaced methods, and overall improved DX. * Read more about installing and using the SDKs [in our docs](https://pipedream.com/docs/connect/api-reference/sdks) * Refer to the full [Connect API reference](https://pipedream.com/docs/connect/api-reference/introduction) for code snippets for REST, TypeScript, Python, Java, and Go * ⚠️ **Note**: there are no plans to deprecate the `1.x` TypeScript SDK, so if you've already implemented that version, make sure to read through [the migration guide](https://pipedream.com/docs/connect/api-reference/sdk-migration) before upgrading to version `2.x` **All new documentation: pipedream.com/docs** As part of shipping new SDKs for Connect, we also published new documentation to produce a first-class, interactive, and AI-native docs experience: * We now have a **first-class and fully interactive [API reference for Connect](https://pipedream.com/docs/connect/api-reference/introduction)**, along with code snippets for using the REST API or any of our SDKs * We published a [dedicated page](https://pipedream.com/docs/ai-tooling) that highlights how you can more effectively **use AI tooling when building on top of Connect**: provide Pipedream docs as context for your LLM, access our docs as [plain text](https://pipedream.com/docs/llms-full.txt) or [markdown](https://pipedream.com/docs/connect.md), or even add our docs [MCP server](https://pipedream.com/docs/mcp) to easily search across all of our docs from your IDE or coding agent We're continuing to improve the DX and capabilities of Pipedream Connect, and we'd love your feedback — please let us know what's working well and what you'd like to see! **September 2, 2025** ## Edit Existing Workflows with AI You can now edit your existing workflows using AI directly from the workflow builder. Click the **Edit with AI** button in any workflow header or code step to make changes with natural language instructions. Key features: * **Workflow-level editing**: Modify entire workflows with AI assistance * **Code step editing**: Update individual code steps using natural language * **Debug with AI**: Get AI-powered help when encountering errors in workflow execution * **Seamless integration**: Edit directly in [String.com](https://string.com/) and deploy back to Pipedream This works for most workflows, though some limitations apply for workflows with control flow, GitHub sync, Python steps, or Pipedream Connect features. [**Learn more about building with AI**](/docs/workflows/building-workflows/build-with-ai) **August 1, 2025** ## MCP Chat - Talk directly with all your tools ![MCP Chat](https://mintcdn.com/pipedream/nKh6d_6A4aXFb6xD/images/mcp-chat.png?fit=max\&auto=format\&n=nKh6d_6A4aXFb6xD\&q=85\&s=9e67f8b206da3f384b35391799edfadd) [MCP Chat](https://chat.pipedream.com) lets you talk directly with all of the tools that you use. * It's powered by Pipedream Connect and Vercel's AI SDK and works with a wide variety of LLMs * Direct access to >10k tools from >2800 APIs (with auth built-in of course) * We've open sourced MCP Chat (MIT license), so you can [fork it or use it as a reference implementation](https://github.com/PipedreamHQ/mcp-chat) for your own AI app In case you haven't tried it yet, you can send prompts like: > Summarize my recent emails > Draft a product release announcement based on my team's recent Linear tickets > Find the latest screenshot in my Google Drive and send it to my team on Slack > Help me prep for my next meeting — who am I meeting with and what are we discussing? All the integrations are developed by our team and battle-tested, with secure user auth built-in. **Try it now at [chat.pipedream.com](https://chat.pipedream.com)** **June 13, 2025** ## New Developer Playground for Pipedream Connect We released a new developer playground for Pipedream Connect that lets you explore the SDK and check out how implementation works using either the server API / SDK with your own front, or using Pipedream's connect-react package. As part of this update, we shipped a lot improvements: * **We added a Debug tab** so you can inspect all of the calls happening in realtime (with payloads and responses) * **Fixed bugs and expanded connect-react capabilities** (added support for `sql` and `object` prop types and improved the UX for `string[]` inputs) * **We gave it a big overall facelift** with a fresh new design throughout the playground * **The code is public** — check out the code for the playground and run it locally [here](https://github.com/PipedreamHQ/pipedream-connect-examples) **Check it out → [pipedream.com/connect/demo](https://pipedream.com/connect/demo)** **May 12, 2025** ## Remote MCP Server and OpenAI Support We're excited to share a couple big updates to our MCP product for developers — if you're working on exposing tools to your AI app or agent via MCP, it just got a lot easier to do this with Pipedream: **Remote MCP server for developers** * You no longer need to host and deploy Pipedream's MCP server in order to add it to your app (you still can if you prefer though) * You can now make authenticated requests to `https://remote.mcp.pipedream.net` * [Check out our docs for more info](https://pipedream.com/connect/mcp) **MCP support in OpenAI's Responses API** * OpenAI just released native support for using MCP servers in their Responses API * We're excited to have partnered with them to make sure Pipedream has a drop-in solution to use our MCP server with their SDK * [Check out the docs to get started](https://pipedream.com/connect/mcp/openai) **Code examples** First, initialize the Pipedream SDK and handle developer auth: ```javascript theme={null} // Import the Pipedream SDK import { createBackendClient } from "@pipedream/sdk/server"; // Initialize the Pipedream SDK client const pd = createBackendClient({ environment: PIPEDREAM_ENVIRONMENT, credentials: { clientId: PIPEDREAM_CLIENT_ID, clientSecret: PIPEDREAM_CLIENT_SECRET, }, projectId: PIPEDREAM_PROJECT_ID }); // Get access token for MCP server auth const accessToken = await pd.rawAccessToken(); ``` Then use either the official MCP SDK: ```javascript theme={null} import { StreamableHTTPClientTransport } from "@modelcontextprotocol/sdk/client/streamableHttp.js"; const serverUrl = MCP_SERVER_URL || `https://remote.mcp.pipedream.net/${externalUserId}/notion`; const transport = new StreamableHTTPClientTransport(new URL(serverUrl), { requestInit: { headers: { "Authorization": `Bearer ${accessToken}`, "x-pd-project-id": PIPEDREAM_PROJECT_ID, // proj_xxxxxxx "x-pd-environment": PIPEDREAM_ENVIRONMENT // development | production } } }); ``` Or use OpenAI's SDK: ```javascript theme={null} import OpenAI from 'openai'; // Initialize OpenAI client const client = new OpenAI(); // Make the OpenAI request with the MCP server const response = await client.responses.create({ model: 'gpt-4.1', tools: [ { type: 'mcp', server_label: 'Notion', server_url: `https://remote.mcp.pipedream.net/${externalUserId}/notion`, headers: { Authorization: `Bearer ${accessToken}`, "x-pd-project-id": PIPEDREAM_PROJECT_ID, "x-pd-environment": PIPEDREAM_ENVIRONMENT }, require_approval: 'never' } ], input: 'Summarize my most recently created Notion doc for me and help draft an email to our customers' }); console.log(response); ``` **May 7, 2025** ## Pipedream Connect Updates We've shipped *a lot* of improvements to [Pipedream Connect](https://pipedream.com/connect/docs) and wanted to share the latest with you all: **MCP** * ICYMI, [we published all 2600+ integrated apps as MCP servers](https://mcp.pipedream.com/) for individuals to use **for free** and for developers to deploy to their AI apps and agents * We published an update to the [MCP server reference in the public repo](https://github.com/PipedreamHQ/pipedream/tree/master/modelcontextprotocol) * We released support for the new streamable HTTP transport type (in addition to SSE and stdio) * We added a debug flag to make it easier for devs to see what API calls are happening from tool calls (`pd_sdk_debug=true`) * We added support for configuring dynamic props * [**Check out the code**](https://github.com/PipedreamHQ/pipedream/tree/master/modelcontextprotocol) **Pre-built tools** * `query` is [now a supported option](https://github.com/PipedreamHQ/pipedream/blob/master/packages/sdk/src/shared/index.ts#L410-L414) in `configureComponent`, so your end users can easily search across remote options for Google Spreadsheets, Notion docs, and more * Email, HTTP, and Schedule triggers are now supported in Connect ([docs](https://pipedream.com/connect/components/#native-triggers)) * Basic source logs are now available for deployed triggers that are owned by external users ([docs](https://pipedream.com/connect/components/#checking-source-logs-for-deployed-triggers)) * We published an API for updating deployed triggers ([docs](https://pipedream.com/connect/api/#update-deployed-trigger)) * [**Check out the docs**](https://pipedream.com/connect/components) **Connect Proxy** * The Connect proxy now supports nearly 100% of all integrated apps and we *significantly* improved the developer interface to remove a lot of the complexity: as a dev, you don't need to reference auth at all — the proxy will automatically inject the necessary headers or params where they need to go, based on the upstream API's requirements * We increased the timeout window from 2 to 30 seconds * [**Check out the docs**](https://pipedream.com/connect/api-proxy/) **Overall Connect API, SDK, and Docs** * Added an [interactive managed auth quickstart](https://pipedream.com/connect/managed-auth/quickstart/) to help you get started more easily * Improved type definitions * Added `featured_weight` to the `/apps` API ([docs](https://pipedream.com/rest-api/#list-apps)) * Shipped various bug fixes * **And we released a [much lower priced plan](https://pipedream.com/pricing?plan=Connect) to use Connect in production** Let us know what you think! **March 26, 2025** ## Connect your AI assistant to any API **We're very excited to ship [2500+ Pipedream MCP servers with 10k+ tools](https://mcp.pipedream.com/).** These servers all include built-in authentication and over 10k pre-built actions as distinct tools that you can use with any LLM or agent that supports MCP. You can use Cursor, Windsurf, Claude desktop, or any other MCP client. **Get started at [mcp.pipedream.com](https://mcp.pipedream.com/)** **LLMs + MCP == cheat mode** * Claude, Cursor, Windsurf, and many AI SDKs all have built-in support for MCP servers in their desktop apps, and OpenAI just announced they're rolling out support as well * Chatting with an LLM no longer has to be siloed from the rest of your work — add MCP servers for [Slack](https://mcp.pipedream.com/app/slack), [GitHub](https://mcp.pipedream.com/app/github), [Linear](https://mcp.pipedream.com/app/linear), [Gmail](https://mcp.pipedream.com/app/gmail), etc, and go wild! * Enable your AI assistant to [access your Notion workspace](https://mcp.pipedream.com/app/notion) so it can get up to speed on your internal processes and knowledge base, then use it to actually draft *and reply* to customer requests via [Front](https://mcp.pipedream.com/app/front) or [Intercom](https://mcp.pipedream.com/app/intercom) **Wait what's MCP?** * [MCP](https://modelcontextprotocol.io/) is a new standard that [Anthropic co-authored](https://www.anthropic.com/news/model-context-protocol) and is promoting within the AI industry, which provides a common interface for LLMs to communicate with APIs and other resources * The MCP spec is nascent but quickly evolving, and [there's a lot of excitement](https://huggingface.co/blog/Kseniase/mcp) from many developers within the AI community * Generally, the idea is that it makes it easier to provide LLMs and AI agents with specific tools to accomplish tasks We're really excited about what MCP enables for both end users and AI developers, and this is just the start of what we're rolling out — our app-based MCP servers are free to use, and it's all made possible thanks to [Pipedream Connect](https://pipedream.com/connect/)! **February 21, 2025** ## Send custom API requests for your users We're excited to announce another way to help you ship integrations more quickly with Pipedream Connect: the [**Connect API Proxy**](https://pipedream.com/connect/api-proxy). We recently announced that you can easily [add 10k+ actions and triggers to your app or agent](https://pipedream.com/connect/components), yet even with that many prebuilt tools, there are still instances where developers need full code level control to send custom requests to 3rd party APIs on behalf of your end users. The Connect proxy makes this easy with a few key features: 1. Avoid dealing with authorization grants or token storage and refresh with managed auth to let your customers connect to >2500 APIs 2. Get started more quickly by accessing hundreds of approved Pipedream OAuth clients in production 3. Send custom requests to any integrated API and Pipedream automatically inserts the required auth header or token for your end user [**Check out the docs to get started**](https://pipedream.com/connect/api-proxy) **February 7, 2025** ## Add 10k tools to your AI agent with Connect **Connect provides a developer toolkit that lets you easily add 2,500+ integrations to your app or AI agent.** Building integrations that can access all of your customer's apps is a core challenge for every company developing AI products. Today we're announcing our [Connect SDK and API](https://pipedream.com/connect/): * **Connect to every app:** Get immediate access to 10,000+ tools across 2,500+ apps so you can run any action and deploy any trigger directly from your AI agent. * **No more auth headaches:** Pipedream manages OAuth token storage and refresh so you don't have to worry about managing user credentials -- you can even use our pre-approved OAuth clients to avoid lengthy approval processes. * **Full UI Control:** Choose between our pre-built UI components (via the connect-react package) or build your own using our server-side SDK. Review the [SDK docs](https://pipedream.com/connect/api) and check out the [demo app](https://pdrm.co/connect) to see how it works. —— **What's possible with the Connect SDK and API?** Early customers are unlocking powerful use cases including: * **AI agents:** Seamlessly power your agent with the tools they need to get their tasks done. With over 2,500+ apps supported, we have you covered. * **Embedded workflow builders:** Creating an AI agent solution built around a workflow experience? Use the Connect SDK to power your integrated tools. You control the UI, we handle the integrations. * **Product integrations:** Not focused on AI agents but still looking to rapidly expand integration coverage for your SaaS app? The Connect SDK and API enables new integrations to be added in a few hours instead of days/weeks. —— **What's coming next** We're continuing to release major new features and improvements over the coming weeks, keep an eye out for our upcoming Connect API proxy, which gives you code-level control to send custom API requests on behalf of your users, while still avoiding dealing with auth management. **December 9, 2024** ## Run workflows for your end users With [Pipedream Connect](https://pipedream.com/connect), you can ship product integrations remarkably fast—saving time and reducing complexity compared to developing integrations in house. Today we're announcing that you can also **configure workflows in Pipedream to run on behalf of your end users.** **Getting started** 1. Use the Connect [frontend SDK](https://pipedream.com/connect/quickstart#use-the-pipedream-sdk-in-your-frontend) or [Connect Link](https://pipedream.com/connect/quickstart#use-connect-link) to let your users connect their account 2. Within any workflow, toggle **Use end user's auth via Connect** on any step to use your end user's auth instead of your own 3. [Invoke your workflow](https://pipedream.com/connect/workflows#invoke-the-workflow) via HTTP trigger or use Pipedream's SDK 4. [Learn more in our quickstart](https://pipedream.com/connect/workflows#how-to-run-workflows-for-your-end-users) Early customers have been building **AI agents** on top of Connect to execute actions on behalf of their end users, enabling **notifications** with various messaging platforms directly from their app, and generally [expanding the scope of what their customers can do](https://pipedream.com/connect/use-cases) in their application! **What's next** We're continuing to ship major new features and improvements over the coming weeks, including an API and SDK to embed any action or trigger directly in your application. [Let us know](https://pipedream.com/join-slack) what you think and if you have any questions! **November 21, 2024** ## Introducing Pipedream Connect [Connect](https://pipedream.com/connect) is a new product that enables app developers to embed the core functionality of Pipedream directly in your app or AI agent. Pipedream Connect provides managed authentication, approved client IDs, durable components, and infrastructure for running serverless functions. Build in-app messaging, CRM syncs, AI agents, and more in minutes. **One SDK, thousands of API integrations!** **Managed authentication** **Today, managed authentication is publicly available.** Developers have full, code-level control over how these integrations work in your application or AI agent. Pipedream simplifies the authentication process and enables you to: * Connect to all 2,400+ supported APIs, directly from your application * Retrieve end user credentials via API * Free on all plans up to 1,000 connected accounts * [Check out the docs](https://pipedream.com/connect/quickstart) Core functionality: * Use the [Pipedream SDK](https://github.com/PipedreamHQ/pipedream-sdk-typescript) or [Connect Link](https://pipedream.com/connect/connect-link) to handle authorization or accept API keys for any of Pipedream's [2,400+ supported APIs](https://pipedream.com/apps). * Securely retrieve OAuth access tokens, API keys, and other credentials for your end users with Pipedream's [REST API](https://pipedream.com/connect/api). **Test out the connection flow directly in the Pipedream UI:** 1. [Open an existing project or create a new one](https://pipedream.com/@/projects) 2. Click on the **Connect** tab on the left 3. Click on the **Users** tab at the top 4. Click **Connect account** **Coming next** We planning to release major features over the coming weeks, including the ability to, * Run Pipedream workflows on behalf of your end users * Embed any action or trigger directly in your application * [Join us on Slack](https://pipedream.com/join-slack) to learn more and request early access **November 18, 2024** ## Parallel branching now available in beta! We're excited to announce that Parallel branching is now available in beta! To get started, check out the [docs](https://pipedream.com/workflows/control-flow/parallel) and [build a workflow](https://pipedream.com/new)! By default, workflow steps are executed serially and in sequence — only one step can run at a time. **Parallel execution unlocks the ability to run steps concurrently.** For example, if you need to make multiple LLM queries that are not dependent on one another you can now make them in parallel and then reference the responses in the parent flow. You may also optionally apply filtering rules to control when each branch executes. If you need a single path branching operator check out the [If/Else](https://pipedream.com/workflows/control-flow/ifelse) and [Switch](https://pipedream.com/workflows/control-flow/switch) operators. Check out [the docs](https://pipedream.com/workflows/control-flow/parallel) to learn more and let us know if you have any feedback in the **#product-feedback** channel of our [Slack community](https://pipedream.com/join-slack). **October 4, 2024** ## More intuitive and powerful filtering **We deployed an updated Filter operator that uses the new rule builder.** It's easier than ever to configure basic filtering rules to continue or end a workflow. In addition, you can now define advanced rules using boolean operators, groups and nesting. To get started, simply add a Filter step to your workflow. Let us know if you have any feedback in the **#product-feedback** channel of our [Slack community](https://pipedream.com/join-slack). **October 3, 2024** ## New and improved test options **We added new options to test workflow segments and control flow blocks**. The full set of test scopes are now: * Test individual steps * Test entire workflow, segment or block * Test from the start of the workflow or segment * Test to the end of the workflow or segment **The steps that are in scope for a test are also now highlighted on the canvas** (so you know which steps will run before you click **Test**). **September 12, 2024** ## Switch operator for conditional branching now in beta! We're excited to announce that the **Switch** control flow operator is now available in beta! Switch is a single-path branching operator (similar to [If/Else](https://pipedream.com/workflows/control-flow/ifelse)). It's useful when you need to branch based on the value of a **single variable** (e.g., based on the path of an inbound request). If you need to branch based on the values of **multiple variables** use the **If/Else** operator. Switch and If/Else are just the first of many powerful control flow operators we're adding to the product to enable advanced workflow orchestration. Stay tuned for updates on more capabilities in the coming weeks including parallel, wait for callback, looping and more! Check out [the docs](https://pipedream.com/workflows/control-flow/switch) to learn more and let us know if you have any feedback in the **#product-feedback** channel of our [Slack community](https://pipedream.com/join-slack). # Installing the CLI Source: https://pipedream.com/docs/cli/install ## macOS ### Homebrew ```bash theme={null} brew tap pipedreamhq/pd-cli brew install pipedreamhq/pd-cli/pipedream ``` ### Install script Run the following command: ```bash theme={null} curl https://cli.pipedream.com/install | sh ``` This will download and install the latest `pd` CLI to your Mac. You can also download the macOS build for either [Apple silicon](https://cli.pipedream.com/darwin/arm64/latest/pd.zip) or [Intel](https://cli.pipedream.com/darwin/amd64/latest/pd.zip)-based Macs, `unzip` that archive, and place the `pd` binary somewhere in [your `PATH`](https://opensource.com/article/17/6/set-path-linux). If this returns a permissions error, you may need to run: ```bash theme={null} curl https://cli.pipedream.com/install | sudo sh ``` ## Linux Download the [CLI build](/docs/cli/install/#cli-builds) for your architecture below. Unzip that archive, and place the `pd` binary somewhere in [your `PATH`](https://opensource.com/article/17/6/set-path-linux). ## Windows (native) [Download the CLI build for Windows](https://cli.pipedream.com/windows/amd64/latest/pd.zip). Unzip that archive, save `pd.exe` in Program Files, and [add its file path to `Path` in your system environment variables](https://www.architectryan.com/2018/03/17/add-to-the-path-on-windows-10/). Use `pd.exe` in a terminal that supports ANSI colors, like the [Windows Terminal](https://github.com/microsoft/terminal). ## Windows (WSL) Download the appropriate [Linux CLI build](/docs/cli/install/#cli-builds) for your architecture. Unzip that archive, and place the `pd` binary somewhere in [your `PATH`](https://opensource.com/article/17/6/set-path-linux). ## CLI Builds Pipedream publishes the following builds of the CLI. If you need to use the CLI on another OS or architecture, [please reach out](https://pipedream.com/support/). | Operating System | Architecture | Link | | - | - | - | | Linux | amd64 | [download](https://cli.pipedream.com/linux/amd64/latest/pd.zip) | | Linux | arm64 | [download](https://cli.pipedream.com/linux/arm64/latest/pd.zip) | | macOS | Intel | [download](https://cli.pipedream.com/darwin/amd64/latest/pd.zip) | | macOS | Apple silicon | [download](https://cli.pipedream.com/darwin/arm64/latest/pd.zip) | | Windows | x64 | [download](https://cli.pipedream.com/windows/amd64/latest/pd.zip) | ## Community Libraries > [!WARNING] > > Please note that Pipedream does not verify the correctness or security of these community libraries. Use them at your own risk! ### Nix The `pd` binary is available via Nix flake [here](https://github.com/planet-a-ventures/pipedream-cli) ## Help Run `pd` to see a list of all commands, or `pd help ` to display help docs for a specific command. See the [CLI reference](/docs/cli/reference/) for detailed usage and examples for each command. # Logging into the CLI Source: https://pipedream.com/docs/cli/login To start using the Pipedream CLI, you’ll need to link it to your Pipedream account. If you don’t have a Pipedream account, you can sign up from the CLI. ## Existing Pipedream account If you already have a Pipedream account, run ``` pd login ``` This will open up a new window in your default browser. If you’re already logged into your Pipedream account in this browser, this will immediately link the CLI to your account, writing your API key for that account to your [`pd` config file](/docs/cli/reference/#cli-config-file). Otherwise, you’ll be asked to login. Once you’re done, go back to your shell and you should see confirmation that your account is linked: ``` > pd login Logged in as dylburger (dylan@pipedream.com) ``` Then [follow this guide](/docs/cli/reference/#creating-a-profile-for-a-workspace) to learn how to find your workspace ID and associate it with a `pd` profile. ## Signing up for Pipedream via the CLI If you haven’t signed up for a Pipedream account, you can create an account using the CLI: ``` pd signup ``` This will open up a new window in your default browser. You’ll be asked to sign up for Pipedream here. Once you do, your account will be linked to the CLI, writing your API key for that account to your [`pd` config file](/docs/cli/reference/#cli-config-file). Once you’re done, go back to your shell and you should see confirmation that your account is linked: ``` > pd signup Logged in as dylburger (dylan@pipedream.com) ``` ## Logging out of the CLI You can log out of the CLI by running: ``` pd logout ``` This will remove your API key from the [`pd` config file](/docs/cli/reference/#cli-config-file). ## Using the CLI to manage multiple accounts If you have multiple Pipedream accounts, you can use [profiles](/docs/cli/reference/#profiles) to ensure the CLI can manage resources for each. # CLI Reference Source: https://pipedream.com/docs/cli/reference ## Installing the CLI [See the CLI installation docs](/docs/cli/install/) to learn how to install the CLI for your OS / architecture. ## Command Reference Run `pd` to see a list of all commands with basic usage info, or run `pd help ` to display help docs for a specific command. We’ve also documented each command below, with usage examples for each. ### General Notes Everywhere you can refer to a specific component as an argument, you can use the component’s ID *or* its name slug. For example, to retrieve details about a specific source using `pd describe`, you can use either of the following commands: ``` > pd describe dc_abc123 id: dc_abc123 name: http endpoint: https://myendpoint.m.pipedream.net > pd describe http Searching for sources matching http id: dc_abc123 name: http endpoint: https://myendpoint.m.pipedream.net ``` ### `pd delete` Deletes an event source. Run: ``` pd delete ``` Run `pd list so` to display a list of your event sources. ### `pd deploy` Deploy an event source from local or remote code. Running `pd deploy`, without any arguments, brings up an interactive menu asking you select a source. This list of sources is retrieved from the registry of public sources [published to GitHub](https://github.com/PipedreamHQ/pipedream/tree/master/components). When you select a source, we’ll deploy it and start listening for new events. You can also deploy a specific source via the source’s `key` (defined in the component file for the source): ``` pd deploy http-new-requests ``` or author a component locally and deploy that local file: ``` pd deploy http.js ``` [Read more about authoring your own event sources](/docs/components/contributing/sources-quickstart/). ### `pd describe` Display the details for a source: its id, name, and other configuration details: ``` pd describe SOURCE_ID_OR_NAME ``` ### `pd dev` `pd dev` allows you to interactively develop a source from a local file.`pd dev` will link your local file with the deployed component and watch your local file for changes. When you save changes to your local file, your component will automatically be updated on Pipedream. ``` pd dev FILE_OR_NAME ``` If you quit `pd dev` and want to link the same deployed source to your local file, you can pass the deployed component ID using the `--dc` flag: ``` pd dev --dc SOURCE_ID FILE_OR_NAME ``` ### `pd events` Returns historical events sent to a source, and streams emitted events directly to the CLI. ``` pd events SOURCE_ID ``` By default, `pd events` prints (up to) the last 10 events sent to your source. ``` pd events -n 100 SOURCE_ID_OR_NAME ``` `pd events -n N` retrieves the last `N` events sent to your source. We store the last 100 events sent to a source, so you can retrieve a max of 100 events using this command. ``` pd events -f SOURCE_ID_OR_NAME ``` `pd events -f` connects to the event stream tied to your source and displays events as the source produces them. ``` pd events -n N -f SOURCE_ID_OR_NAME ``` You can combine the `-n` and `-f` options to list historical events *and* follow the source for new events. ### `pd help` Displays help for any command. Run `pd help events`, `pd help describe`, etc. ### `pd init` Generate new app and component files from templates. #### `pd init app` Creates a directory and [an app file](/docs/components/contributing/guidelines/#app-files) from a template ``` # Creates google_calendar/ directory and google_calendar.mjs file pd init app google_calendar ``` #### `pd init action` Creates a new directory and [a component action](/docs/components/contributing/#actions) from a template. ``` # Creates add-new-event/ directory and add-new-event.mjs file pd init action add-new-event ``` #### `pd init source` Creates a new directory and [an event source](/docs/connect/components/triggers) from a template. ``` # Creates cancelled-event/ directory and cancelled_event.mjs file pd init source cancelled-event ``` You can attach [database](/docs/components/contributing/api/#db), [HTTP](/docs/components/contributing/api/#http), or [Timer](/docs/components/contributing/api/#timer) props to your template using the following flags: | Prop type | Flag | | - | - | | Database | `--db` | | HTTP | `--http` | | Timer | `--timer` | For example, running: ``` pd init source cancelled-event --db --http --timer ``` will include the following props in your new event source: ```javascript theme={null} props: { db: "$.service.db", http: "$.interface.http", timer: "$.interface.timer", } ``` #### `pd init connect` Runs the [Connect quickstart](/docs/connect/quickstart/) to set up a new Connect project. This interactive command walks you through: * Creating a new project or selecting an existing one * Setting up a Pipedream OAuth client to authenticate requests to the Connect API * Choosing a demo app to get started (Next.js with managed auth, SDK playground, or MCP chat app) ``` pd init connect ``` The CLI automatically creates a `.env` file with your OAuth client credentials and project ID. ### `pd list` Lists Pipedream sources running in your account. Running `pd list` without any arguments prompts you to select the type of resource you’d like to list. You can also list specific resource types directly: ``` pd list components ``` ``` pd list streams ``` `sources` and `streams` have shorter aliases, too: ``` pd list so ``` ``` pd list st ``` ### `pd login` Log in to Pipedream CLI and persist API key locally. See [Logging into the CLI](/docs/cli/login/) for more information. ### `pd logout` Unsets the local API key tied to your account. Running `pd logout` without any arguments removes the default API key from your [config file](/docs/cli/reference/#cli-config-file). You can remove the API key for a specific profile by running: ``` pd logout -p PROFILE ``` ### `pd logs` Event sources produce logs that can be useful for troubleshooting issues with that source. `pd logs` displays logs for a source. Running `pd logs ` connects to the log stream tied to your source, displaying new logs as the source produces them. Any errors thrown by the source will also appear here. ### `pd oauth-client create` Create a new OAuth client for the [Pipedream API](/docs/rest-api/auth/#oauth) and return the client ID and secret. ``` pd oauth-client create [optional name] ``` If you don't pass a name, the CLI will prompt you for one. The command prints the new OAuth client's `client_id` and `client_secret`. Store the secret securely — it's only shown once. For example: ``` pd oauth-client create my-client ``` ### `pd publish` To publish an action, use the `pd publish` command. ``` pd publish ``` For example: ``` pd publish my-action.js ``` #### Iterating on a component with `--dev` Pass the `--dev` flag to automatically replace the `version` in the published component with `0.0.`. This lets you iterate on a component without manually bumping the version between publishes. ``` pd publish --dev ``` Without `--dev`, you'd need to rev the `version` field in your component, run `pd publish`, test, make a change, rev the version again, `pd publish`, and so on. With `--dev`, each publish gets a unique timestamp-based version automatically. #### Publishing custom tools for Connect To publish [custom tools](/docs/connect/components/custom-tools/) for use in the Connect API, use the `--connect-environment` flag: ``` pd publish --connect-environment {development | production} ``` The `--connect-environment` flag accepts two values: * **`development`**: makes the component available in your Connect development environment * **`production`**: makes the component available in your Connect production environment For example: ``` pd publish my-custom-action.mjs --connect-environment development ``` Once published, custom tools appear in Connect APIs with a `~/` prefix (e.g., `~/my-custom-action`). ### `pd project create` Create a new [project](/docs/projects/) and return its hashed ID (`proj_xxxxxxx`). ``` pd project create [optional name] ``` If you don't pass a name, the CLI will prompt you for one. The command prints the new project's `hid`, which you can use to reference the project in other CLI commands and API calls. For example: ``` pd project create my-project ``` ### `pd signup` Sign up for Pipedream via the CLI and persist your API key locally. See the docs on [Signing up for Pipedream via the CLI](/docs/cli/login/#signing-up-for-pipedream-via-the-cli) for more information. ### `pd unpublish` Unpublish a component you’ve published to your account. If you publish a source or action that you no longer need, you can unpublish it by component `key`: ``` pd unpublish component ``` ### `pd update` Updates the code, props, or metadata for an event source. If you deployed a source from GitHub, for example, someone might publish an update to that source, and you may want to run the updated code. ``` pd update SOURCE_ID_OR_NAME \ --code https://github.com/PipedreamHQ/pipedream/blob/master/components/http/sources/new-requests/new-requests.js ``` You can change the name of a source: ``` pd update SOURCE_ID_OR_NAME --name NEW_NAME ``` You can deactivate a source if you want to stop it from running: ``` pd update SOURCE_ID_OR_NAME --deactivate ``` or activate a source you previously deactivated: ``` pd update SOURCE_ID_OR_NAME --activate ``` ## Profiles Profiles allow you to work with multiple, named Pipedream accounts via the CLI. ### Creating a new profile When you [login to the CLI](/docs/cli/login/), the CLI writes the API key for that account to your config file, in the `api_key` field: ``` api_key = abc123 ``` You can set API keys for other, named profiles, too. Run ``` pd login -p ``` `` can be any string of shell-safe characters that you’d like to use to identify this new profile. The CLI opens up a browser asking you to login to your target Pipedream account, then writes the API key to a section of the config file under this profile: ``` [your_profile] api_key = def456 ``` You can also run `pd signup -p ` if you’d like to sign up for a new Pipedream account via the CLI and set a named profile for that account. ### Creating a profile for a workspace If you’re working with resources in an [workspace](/docs/workspaces/), you’ll need to add an `org_id` to your profile. 1. [Retrieve your workspaces’s ID](/docs/workspaces/#finding-your-workspaces-id) 2. Open up your [Pipedream config file](/docs/cli/reference/#cli-config-file) and create a new [profile](/docs/cli/reference/#profiles) with the following information: ``` [profile_name] api_key = org_id = ``` When using the CLI, pass `--profile ` when running any command. For example, if you named your profile `workspace`, you’d run this command to publish a component: ``` pd publish file.js --profile workspace ``` ### Using profiles You can set a profile on any `pd` command by setting the `-p` or `--profile` flag. For example, to list the sources in a specific account, run: ``` pd list sources --profile PROFILE ``` ## Version To get the current version of the `pd` CLI, run ``` pd --version ``` ## Auto-upgrade The CLI is configured to check for new versions automatically. This ensures you’re always running the most up-to-date version. ## CLI config file The `pd` config file contains your Pipedream API keys (tied to your default account, or other [profiles](/docs/cli/reference/#profiles)) and other configuration used by the CLI. If the `XDG_CONFIG_HOME` env var is set, the config file will be found in `$XDG_CONFIG_HOME/pipedream`. Otherwise, it will be found in `$HOME/.config/pipedream`. ## Analytics Pipedream tracks CLI usage data to report errors and usage stats. We use this data exclusively for the purpose of internal analytics (see [our privacy policy](https://pipedream.com/privacy) for more information). If you’d like to opt-out of CLI analytics, set the `PD_CLI_DO_NOT_TRACK` environment variable to `true` or `1`. # Overview Source: https://pipedream.com/docs/components ## What are Components? Components are [Node.js modules](/docs/components/contributing/api/#component-structure) that run on Pipedream's serverless infrastructure. They can use Pipedream managed auth for [3,000+ apps](https://pipedream.com/explore) (for both OAuth and key-based APIs) and [use most npm packages](/docs/components/contributing/api/#using-npm-packages) with no `npm install` or `package.json` required. Components are the actions and triggers you run through [Pipedream Connect](/docs/connect) and [MCP](/docs/connect/mcp). Explore curated components for popular apps in Pipedream's [Marketplace](https://pipedream.com/explore) and [GitHub repo](https://github.com/PipedreamHQ/pipedream/tree/master/components), or author and share your own. > [!NOTE] > > Our TypeScript component API is in **beta**. If you're interested in developing TypeScript components and providing feedback, [see our TypeScript docs](/docs/components/contributing/typescript/). ## Component Types Pipedream supports two types of components — [sources](#sources) and [actions](#actions). ### Sources [Sources](/docs/connect/components/triggers) (also called triggers) must be deployed, and they run as independent resources on Pipedream. They listen for events in a third-party app or on a schedule, then emit an event for you to consume. **Capabilities** * Accept user input on deploy via `props` * [Trigger](/docs/components/contributing/api/#interface-props) on HTTP requests, timers, cron schedules, or manually * Emit events that can be inspected and consumed in your own app by webhook or [API](/docs/rest-api/) * Store and retrieve state using the [built-in key-value store](/docs/components/contributing/api/#db) * Use any of Pipedream's built-in [deduping strategies](/docs/components/contributing/api/#dedupe-strategies) * Deploy via Pipedream's UI, CLI or API **Example** The [New Files (Instant)](https://github.com/PipedreamHQ/pipedream/blob/master/components/google_drive/sources/new-files-instant/new-files-instant.mjs) source for Google Drive is a prebuilt component in Pipedream's registry that can be deployed in seconds and emits an event every time a new file is added to the user's Google Drive, and can also be configured to watch for changes to a specific folder within that drive. Each new event that is emitted can be delivered to your app. ### Actions Actions are components you invoke on demand: you pass a configuration, Pipedream runs the action, and you get the result back. Unlike sources, actions don't run on their own. **Capabilities** * Accept user input via `props` * May `return` JSON serializable data **Example** The Add Single Row action for Google Sheets is a prebuilt component in Pipedream's registry. You can configure and run it in seconds to send data to Google Sheets, without having to learn the Google Sheets API. ## Using Components You run components through Connect: * **Actions**: [run an action](/docs/connect/components/actions) on behalf of one of your users with the Connect API or SDKs * **Triggers**: [deploy a source](/docs/connect/components/triggers) for one of your users and receive each event by webhook * **MCP**: expose components to your AI agent as tools with [Pipedream MCP](/docs/connect/mcp) * **CLI**: deploy and inspect sources in your own workspace with the [CLI](/docs/cli/reference/#pd-deploy) ### Using private components Private components published from the [CLI](/docs/cli/reference/#pd-publish) belong to your workspace and are available alongside the public registry components in every Connect API. To make a private action available in Connect, publish it with the `--connect-environment` flag and reference it with the `~/` prefix. See [Using custom tools](/docs/connect/components/custom-tools) for the full walkthrough. Private sources deployed from your workspace via the [CLI](/docs/cli/reference/#pd-deploy) create a new source with the prop configuration you specified. You can also deploy new instances of a source from the [Components dashboard](https://pipedream.com/components). To deploy a new instance of a source, click the menu on the right hand side and select **Create source**. ![Creating a source from the Component dashboard](https://mintcdn.com/pipedream/Acz4Z1ch6TM7-aI8/images/CleanShot_2022-10-18_at_11.22.02_ajjopm.gif?s=0192c285fdd3465a982f6e257a0fc046) ## Developing Components Develop components locally using your preferred code editor (and maintain your code in your own GitHub repo) and deploy or publish using Pipedream's [CLI](/docs/cli/reference/#pd-deploy). * Sources may be deployed directly from local code, or published to your account and instantiated via Pipedream's UI * Actions may only be published — published actions are available to run through Connect and MCP Published components are only available to your own account by default. If published to a team account, the component (source or action) may be discovered and selected by any member of the team. ### Prerequisites * A free [Pipedream](https://pipedream.com) account * A free [GitHub](https://github.com) account * Basic proficiency with Node.js or JavaScript * Pipedream [CLI](/docs/cli/reference/) Finally, the target app must be integrated with Pipedream. You can explore all apps supported by Pipedream in the [marketplace](https://pipedream.com/explore). If your app is not listed, please [create a GitHub issue](https://github.com/PipedreamHQ/pipedream/issues/new?assignees=\&labels=app%2C+enhancement\&template=app---service-integration.md\&title=%5BAPP%5D) to request it and [reach out](https://pipedream.com/community/c/dev/11) to our team to let us know that you're blocked on source or action development. ### Quickstart Guides * [Sources](/docs/components/contributing/sources-quickstart/) * [Actions](/docs/components/contributing/actions-quickstart/) ### Component API Reference After getting familiar with source/action development using the quickstart guides, check out [the Component API Reference](/docs/components/contributing/api/) and [examples on GitHub](https://github.com/PipedreamHQ/pipedream/tree/master/components) to learn more. ## Managing Privately Published Components Components published to your workspace are available in the [Components](https://pipedream.com/components) section of the dashboard. Your private components published from the CLI are listed here. ### Unpublishing Privately Published Components [Unpublishing Privately Published Components](https://www.youtube.com/embed/3wmnFi7thUg) To unpublish components belonging to your workspace, open the menu on the right hand side of the component details and select **Unpublish Component**. A prompt will open to confirm the action, click **Confirm** to unpublish your action. > [!WARNING] > > Unpublishing a component is a permanent action, please be careful to ensure you still have access to the source code. ## Sharing Components Contribute to the Pipedream community by publishing and sharing new components, and contributing to the maintenance of existing components. ### Verified Components Pipedream maintains a source-available registry of components (sources and actions) that have been curated for the community. Registered components are verified by Pipedream through the [GitHub PR process](/docs/components/contributing/#contribution-process) and: * Can be trusted by end users * Follow consistent patterns for usability * Are supported by Pipedream if issues arise Registered components also appear in the Pipedream marketplace and are available to run through Connect and MCP. ### Community Components Developers may create, deploy and share components that do not conform to these guidelines, but they will not be eligible to be listed in the curated registry (e.g., they may be hosted in a GitHub repo). If you develop a component that does not adhere to these guidelines, but you believe there is value to the broader community, please [reach out in our community forum](https://pipedream.com/community/c/dev/11). # Pipedream Registry Source: https://pipedream.com/docs/components/contributing When you run a prebuilt action or deploy a trigger in Pipedream, under the hood you’re using [components](/docs/components/contributing/) from the [Pipedream Registry GitHub repository](https://github.com/PipedreamHQ/pipedream). Components contributed to the [Pipedream Registry GitHub repository](https://github.com/PipedreamHQ/pipedream) are published to the [Pipedream marketplace](https://pipedream.com/apps) and are available to run through [Connect](/docs/connect) and [MCP](/docs/connect/mcp). > [!NOTE] > > What is a component? > > If you haven’t yet, we recommend starting with our Component Development Quickstart Guides for [sources](/docs/components/contributing/sources-quickstart/) and [actions](/docs/components/contributing/actions-quickstart/) to learn how to build components and privately publish them to your account. ## Registry Components Structure All Pipedream registry components live in [this GitHub repo](https://github.com/PipedreamHQ/pipedream) under the [`components`](https://github.com/PipedreamHQ/pipedream/tree/master/components) directory. Every integrated app on Pipedream has a corresponding directory that defines the actions and sources available for that app. Below is a simplified version of the [Airtable app directory](https://github.com/PipedreamHQ/pipedream/tree/master/components/airtable) within the registry: 🗁 airtable\   🗎 README.md\   🗎 airtable.app.mjs\   🗎 package.json\   🗁 actions\     🗁 get-record\       🗎 get-record.mjs\   🗁 node\_modules\     🗎 ...here be dragons\   🗁 sources\     🗁 new-records\       🗎 new-records.mjs\ In the example above, the `components/airtable/actions/get-record/get-record.mjs` component is published as the **Get Record** action under the **Airtable** app in Pipedream. > [!NOTE] > > The repository is missing the app directory I’d like to add components for > > You can request to have new apps integrated into Pipedream. > > Once the Pipedream team integrates the app, we’ll create a directory for the app in the [`components`](https://github.com/PipedreamHQ/pipedream/tree/master/components) directory of the GitHub repo. ## Contribution Process Anyone from the community can build [sources](/docs/connect/components/triggers) and [actions](/docs/components/contributing/#actions) for integrated apps. To submit new components or update existing components: 1. Fork the public [Pipedream Registry GitHub repository](https://github.com/PipedreamHQ/pipedream). 2. Create a new component within the corresponding app’s directory within the `components` directory (if applicable). 3. [Create a PR for the Pipedream team to review](https://github.com/PipedreamHQ/pipedream/compare). 4. Address any feedback provided by Pipedream based on the best practice [Component Guidelines & Patterns](/docs/components/contributing/guidelines/). 5. Once the review is complete and approved, Pipedream will merge the PR to the `master` branch 6. The component will be available to all Pipedream developers! 🎉 ### Component Development Discussion Join the discussion with other Pipedream component developers at the [#contribute channel](https://pipedream-users.slack.com/archives/C01E5KCTR16) in Slack or [on Discourse](https://pipedream.com/community/c/dev/11). > [!NOTE] > > Not sure what to build? > > Need inspiration? Check out [sources](https://github.com/PipedreamHQ/pipedream/issues?q=is%3Aissue+is%3Aopen+%5BSOURCE%5D+in%3Atitle) and [actions](https://github.com/PipedreamHQ/pipedream/issues?q=is%3Aissue+is%3Aopen+%5BACTION%5D+in%3Atitle+) requested by the community. ## Reference Components The following components are references for developing sources and actions for Pipedream’s registry. ### Reference Sources | Name | App | Type | | - | - | - | | [New Card](https://github.com/PipedreamHQ/pipedream/blob/master/components/trello/sources/new-card/new-card.mjs) | Trello | Webhook | | [New or Modified Files](https://github.com/PipedreamHQ/pipedream/blob/master/components/google_drive/sources/new-or-modified-files/new-or-modified-files.mjs) | Google Drive | Webhook + Polling | | [New Submission](https://github.com/PipedreamHQ/pipedream/blob/master/components/jotform/sources/new-submission/new-submission.mjs) | Jotform | Webhook (with no unique hook ID) | ### Reference Actions | Name | App | | - | - | | [Add Multiple Rows](https://github.com/PipedreamHQ/pipedream/blob/master/components/google_sheets/actions/add-multiple-rows/add-multiple-rows.mjs) | Google Sheets | | [Send Message](https://github.com/PipedreamHQ/pipedream/blob/master/components/discord_bot/actions/send-message/send-message.mjs) | Discord | | [Append Text](https://github.com/PipedreamHQ/pipedream/blob/master/components/google_docs/actions/append-text/append-text.mjs) | Google Docs | | [`GET` request](https://github.com/PipedreamHQ/pipedream/blob/master/components/http/actions/get-request/get-request.mjs) | HTTP | # Quickstart: Action Development Source: https://pipedream.com/docs/components/contributing/actions-quickstart ## Overview This document is intended for developers who want to author and edit [Pipedream Actions](/docs/components/contributing/#actions). After completing this quickstart, you’ll understand how to: * Develop Pipedream components * Publish private actions and run them through [Connect](/docs/connect) * Use props to capture user input * Update an action * Use npm packages * Use Pipedream managed auth for a 3rd party app ## Prerequisites * Create a free account at [https://pipedream.com](https://pipedream.com) * Download and install the [Pipedream CLI](/docs/cli/install/) * Once the CLI is installed, [link your Pipedream account](/docs/cli/login/#existing-pipedream-account) to the CLI by running `pd login` in your terminal > **NOTE:** See the [CLI reference](/docs/cli/reference/) for detailed usage and examples beyond those covered below. ## Walkthrough We recommend that you complete the examples below in order. **hello world! (\~5 minutes)** * Develop a `hello world!` action * Publish it (private to your account) using the Pipedream CLI * Run it through Connect **hello \[name]! (\~5 minutes)** * Capture user input using a `string` prop * Publish a new version of your action * Run the updated action **Use an npm Package (\~5 mins)** * Require the `axios` npm package * Make a simple API request * Export data returned by the API from your action **Use Managed Auth (\~10 mins)** * Use Pipedream managed OAuth for GitHub with the `octokit` npm package * Pass a connected GitHub account to the action * Retrieve details for a repo and return them from the action ### hello world! The following code represents a simple component that can be published as an action ([learn more](/docs/components/contributing/api/) about the component structure). When you run it, it returns `hello world!`. ```javascript theme={null} export default { name: "Action Demo", description: "This is a demo action", key: "action_demo", version: "0.0.1", type: "action", props: {}, async run() { return `hello world!`; }, }; ``` To get started, save the code to a local `.js` file (e.g., `action.js`) and run the following CLI command: ``` pd publish action.js ``` The CLI will publish the component as an action in your account with the key `action_demo`. **The key must be unique across all components in your account (sources and actions). If it’s not unique, the existing component with the matching key will be updated.** The CLI output should look similar to this: ``` sc_v4iaWB Action Demo 0.0.1 just now action_demo ``` To test the action, make it available to Connect and run it: 1. Publish the component to your development environment: ``` pd publish action.js --connect-environment development ``` 2. [Run the action](/docs/connect/components/actions) with the Connect API or SDKs. Reference your private component with the `~/` prefix — `~/action_demo` — as described in the [custom tools docs](/docs/connect/components/custom-tools). You should see `hello world!` in the `ret` field of the response. We’ll run the action the same way in the rest of the examples as we update it. ### hello \[name]! Next, let’s update the component to capture some user input. First, add a `string` [prop](/docs/components/contributing/api/#props) called `name` to the component. ```javascript theme={null} export default { name: "Action Demo", description: "This is a demo action", key: "action_demo", version: "0.0.1", type: "action", props: { name: { type: "string", label: "Name", } }, async run() { return `hello world!` }, } ``` Next, update the `run()` function to reference `this.name` in the return value. ```javascript theme={null} export default { name: "Action Demo", description: "This is a demo action", key: "action_demo", version: "0.0.1", type: "action", props: { name: { type: "string", label: "Name", }, }, async run() { return `hello ${this.name}!`; }, }; ``` Finally, update the component version to `0.0.2`. If you fail to update the version, the CLI will throw an error. ```javascript theme={null} export default { name: "Action Demo", description: "This is a demo action", key: "action_demo", version: "0.0.2", type: "action", props: { name: { type: "string", label: "Name", }, }, async run() { return `hello ${this.name}!`; }, }; ``` Save the file and run the `pd publish` command again to update the action in your account. ``` pd publish action.js ``` The CLI will update the component in your account with the key `action_demo`. You should see something like this: ``` sc_Egip04 Action Demo 0.0.2 just now action_demo ``` Next, let’s run the updated action. 1. Publish the new version with `pd publish action.js --connect-environment development` 2. [Run the action](/docs/connect/components/actions) again, passing a value for the new prop in `configuredProps` (for example, `{ "name": "foo" }`) You should see `hello foo!` (or the value you passed for `name`) in the `ret` field of the response. ### Use an npm Package Next, we’ll update the component to get data from the Star Wars API using the `axios` npm package. To use the `axios` package, just `import` it. ```javascript theme={null} import { axios } from "@pipedream/platform"; export default { name: "Action Demo", description: "This is a demo action", key: "action_demo", version: "0.0.2", type: "action", props: { name: { type: "string", label: "Name", }, }, async run() { return `hello ${this.name}!`; }, }; ``` > [!NOTE] > > To use most npm packages on Pipedream, just `import` or `require` them — there is no `package.json` or `npm install` required. Then, update the `run()` method to: * Make a request to the following endpoint for the Star Wars API: `https://swapi.dev/api/people/1/` * Reference the `name` field of the payload returned by the API ```javascript theme={null} import { axios } from "@pipedream/platform"; export default { name: "Action Demo", description: "This is a demo action", key: "action_demo", version: "0.0.2", type: "action", props: { name: { type: "string", label: "Name", }, }, async run({ $ }) { const data = await axios($, { url: "https://swapi.dev/api/people/1/", }); return `hello ${data.name}!`; }, }; ``` Next, remove the `name` prop since we’re no longer using it. ```javascript theme={null} import { axios } from "@pipedream/platform"; export default { name: "Action Demo", description: "This is a demo action", key: "action_demo", version: "0.0.2", type: "action", props: {}, async run({ $ }) { const data = await axios($, { url: "https://swapi.dev/api/people/1/", }); return `hello ${data.name}!`; }, }; ``` Finally, update the version to `0.0.3`. If you fail to update the version, the CLI will throw an error. ```javascript theme={null} import { axios } from "@pipedream/platform"; export default { name: "Action Demo", description: "This is a demo action", key: "action_demo", version: "0.0.3", type: "action", props: {}, async run({ $ }) { const data = await axios($, { url: "https://swapi.dev/api/people/1/", }); return `hello ${data.name}!`; }, }; ``` Save the file and run the `pd publish` command again to update the action in your account. ``` pd publish action.js ``` The CLI will update the component in your account with the key `action_demo`. You should see something like this: ``` sc_ZriKEn Action Demo 0.0.3 1 second ago action_demo ``` Follow the steps in the previous example to publish and run the action again. You should see `hello Luke Skywalker!` returned in `ret`. ### Use Managed Auth For the last example, we’ll use Pipedream managed auth to retrieve and emit data from the GitHub API (which uses OAuth for authentication). First, remove the line that imports `axios` and clear the `run()` function from the last example. Your code should look like this: ```javascript theme={null} export default { name: "Action Demo", description: "This is a demo action", key: "action_demo", version: "0.0.3", type: "action", async run() {}, }; ``` Next, import GitHub’s `octokit` npm package ```javascript theme={null} import { Octokit } from "@octokit/rest"; export default { name: "Action Demo", description: "This is a demo action", key: "action_demo", version: "0.0.3", type: "action", async run() {}, }; ``` Then add an [app prop](/docs/components/contributing/api/#app-props) to use Pipedream managed auth with this component. For this example, we’ll add an app prop for GitHub: ```javascript theme={null} import { Octokit } from "@octokit/rest"; export default { name: "Action Demo", description: "This is a demo action", key: "action_demo", version: "0.0.3", type: "action", props: { github: { type: "app", app: "github", }, }, async run() {}, }; ``` > [!NOTE] > > The value for the `app` property is the name slug for the app in Pipedream. This is not currently discoverable, but it will be in the near future on app pages in the [Pipedream Marketplace](https://pipedream.com/explore). For the time being, if you want to know how to reference an app, please [reach out](https://pipedream.com/community). Next, update the `run()` method to get a repo from GitHub and return it. For this example, we’ll pass static values to get the `pipedreamhq/pipedream` repo. Notice that we’re passing the `oauth_access_token` in the authorization header by referencing the `$auth` property of the app prop — `this.github.$auth.oauth_access_token`. You can discover how to reference auth tokens in the **Authentication Strategy** section for each app in the [Pipedream Marketplace](https://pipedream.com/explore). ```javascript theme={null} import { Octokit } from "@octokit/rest"; export default { name: "Action Demo", description: "This is a demo action", key: "action_demo", version: "0.0.3", type: "action", props: { github: { type: "app", app: "github", }, }, async run() { const octokit = new Octokit({ auth: this.github.$auth.oauth_access_token, }); return ( await octokit.rest.repos.get({ owner: `pipedreamhq`, repo: `pipedream`, }) ).data; }, }; ``` In order to help users understand what’s happening with each action step, we recommend surfacing a brief summary with `$summary` ([read more](/docs/components/contributing/api/#actions) about exporting data using `$.export`). ```javascript theme={null} import { Octokit } from "@octokit/rest"; export default { name: "Action Demo", description: "This is a demo action", key: "action_demo", version: "0.0.3", type: "action", props: { github: { type: "app", app: "github", }, }, async run({ $ }) { const octokit = new Octokit({ auth: this.github.$auth.oauth_access_token, }); const { data } = await octokit.rest.repos.get({ owner: `pipedreamhq`, repo: `pipedream`, }); $.export("$summary", `Successfully fetched info for \`${data.full_name}\``); return data; }, }; ``` Finally, update the version to `0.0.4`. If you fail to update the version, the CLI will throw an error. ```javascript theme={null} import { Octokit } from "@octokit/rest"; export default { name: "Action Demo", description: "This is a demo action", key: "action_demo", version: "0.0.4", type: "action", props: { github: { type: "app", app: "github", }, }, async run({ $ }) { const octokit = new Octokit({ auth: this.github.$auth.oauth_access_token, }); const { data } = await octokit.rest.repos.get({ owner: `pipedreamhq`, repo: `pipedream`, }); $.export("$summary", `Successfully fetched info for \`${data.full_name}\``); return data; }, }; ``` Save the file and run the `pd publish` command again to update the action in your account. ``` pd publish action.js ``` The CLI will update the component in your account with the key `action_demo`. You should see something like this: ``` sc_k3ia53 Action Demo 0.0.4 just now action_demo ``` Follow the steps in the earlier example to publish and run the action again. The action now requires a GitHub account, so pass the `authProvisionId` for a [connected GitHub account](/docs/connect/managed-auth/quickstart) in `configuredProps`: ```json theme={null} { "github": { "authProvisionId": "apn_xxxxxxx" } } ``` You should see the repo details returned in the `ret` field of the response. ## What’s Next? You’re ready to start authoring and publishing actions on Pipedream! You can also check out the [detailed component reference](/docs/components/contributing/api/#component-api) at any time! If you have any questions or feedback, please [reach out](https://pipedream.com/community)! # Component API Reference Source: https://pipedream.com/docs/components/contributing/api > [!NOTE] > > Our TypeScript component API is in **beta**. If you’re interested in developing TypeScript components and providing feedback, [see our TypeScript docs](/docs/components/contributing/typescript/). This document was created to help developers author and use [Pipedream components](/docs/components/contributing/). You can develop [sources](/docs/components/contributing/sources-quickstart/) (triggers) and [actions](/docs/components/contributing/actions-quickstart/) using the component API. You can publish components to your account for private use, or [contribute them to the Pipedream registry](/docs/components/contributing/) for anyone to run. While sources and actions share the same core component API, they differ in both how they’re used and written, so certain parts of the component API apply only to one or the other. [This section of the docs](/docs/components/contributing/api/#differences-between-sources-and-actions) explains the core differences. When this document uses the term “component”, the corresponding feature applies to both sources and actions. If a specific feature applies to only sources *or* actions, the correct term will be used. If you have any questions about component development, please reach out [in our community](https://pipedream.com/community/c/dev/11). ## Overview ### What is a component? Components are Node.js modules that run on Pipedream’s serverless infrastructure. * Trigger Node.js code on HTTP requests, timers, cron schedules, or manually * Emit data on each event to inspect it, deliver it to your app by webhook, or access it outside of Pipedream via API * Accept user input on deploy via [CLI](/docs/cli/reference/#pd-deploy), [API](/docs/rest-api/), or [UI](https://pipedream.com/sources) * Connect to [3,000+ apps](https://pipedream.com/apps) using Pipedream managed auth * Use most npm packages with no `npm install` or `package.json` required * Store and retrieve state using the [built-in key-value store](/docs/components/contributing/api/#db) ### Quickstarts To help you get started, we created a step-by-step walkthrough for developing both [sources](/docs/components/contributing/sources-quickstart/) and [actions](/docs/components/contributing/actions-quickstart/). We recommend starting with those docs and using the API reference below as you develop. ### Differences between sources and actions Sources and actions share the same component API. However, certain features of the API only apply to one or the other: * Actions are defined with `type: action` ([see the docs on the `type` property](/docs/components/contributing/api/#component-structure)). Sources require no `type` property be set. Components without a `type` are considered sources. * Sources emit events [using `this.$emit`](/docs/components/contributing/api/#emit), which trigger linked workflows. Any features associated with emitting events (e.g., [dedupe strategies](/docs/components/contributing/api/#dedupe-strategies)) can only be used with sources. Actions [return data using `return` or `$.export`](/docs/components/contributing/api/#returning-data-from-steps), which is made available to future steps of the associated workflow. * Sources have access to [lifecycle hooks](/docs/components/contributing/api/#lifecycle-hooks), which are often required to configure the source to listen for new events. Actions do not have access to these lifecycle hooks. * Actions have access to [a special `$` variable](/docs/components/contributing/api/#actions), passed as a parameter to the `run` method. This variable exposes functions that allow you to send data to destinations, export data from the action, return HTTP responses, and more. * Sources can be developed iteratively using `pd dev`. Actions currently cannot (please follow [this issue](https://github.com/PipedreamHQ/pipedream/issues/1437) to be notified of updates). * You use `pd deploy` to deploy sources to your account. You use `pd publish` to publish actions, making them available to run through Connect. * You can attach [interfaces](/docs/components/contributing/api/#interface-props) (like HTTP endpoints, or timers) to sources. This defines how the source is invoked. Actions do not have interfaces, since they’re run step-by-step as a part of the associated workflow. ### Getting Started with the CLI Several examples below use the Pipedream CLI. To install it, [follow the instructions for your OS / architecture](/docs/cli/install/). See the [CLI reference](/docs/cli/reference/) for detailed usage and examples beyond those covered below. ### Example Components You can find hundreds of example components in the `components/` directory of the [`PipedreamHQ/pipedream` repo](https://github.com/PipedreamHQ/pipedream). ## Component API ### Component Structure Pipedream components export an object with the following properties: ```javascript theme={null} export default { name: "", key: "", type: "", version: "", description: "", props: {}, methods: {}, hooks: { async activate() {}, async deactivate() {}, async deploy() {}, }, dedupe: "", async run(event) { this.$emit(event); }, }; ``` | Property | Type | Required? | Description | | - | - | - | - | | `name` | `string` | required | The name of the component, a string which identifies components deployed to users’ accounts. This name will show up in the Pipedream UI, in CLI output (for example, from `pd list` commands), etc. It will also be converted to a unique slug on deploy to reference a specific component instance (it will be auto-incremented if not unique within a user account). | | `key` | `string` | recommended | The `key` uniquely identifies a component within a namespace. The default namespace for components is your account. When publishing components to the Pipedream registry, the `key` must be unique across registry components and should follow the pattern: `app_name_slug`-`slugified-component-name` | | `type` | `string` | required | When publishing an action, `type: "action"` is required. When publishing a source, use `type: "source"`. | | `version` | `string` | required | The component version. There are no constraints on the version, but [semantic versioning](https://semver.org/) is required for any components published to the [Pipedream registry](/docs/components/contributing/guidelines/). | | `description` | `string` | recommended | The description will appear in the Pipedream UI to aid in discovery and to contextualize instantiated components | | `props` | `object` | optional | [Props](/docs/components/contributing/api/#props) are custom attributes you can register on a component. When a value is passed to a prop attribute, it becomes a property on that component instance. You can reference these properties in component code using `this` (e.g., `this.propName`). | | `methods` | `object` | optional | Define component methods for the component instance. They can be referenced via `this` (e.g., `this.methodName()`). | | `hooks` | `object` | optional (sources only) | [Hooks](/docs/components/contributing/api/#hooks) are functions that are executed when specific component lifecycle events occur. | | `dedupe` | `string` | optional (sources only) | You may specify a [dedupe strategy](/docs/components/contributing/api/#dedupe-strategies) to be applied to emitted events | | `run` | `method` | required | Each time a component is invoked (for example, via HTTP request), [its `run` method](/docs/components/contributing/api/#run) is called. The event that triggered the component is passed to `run`, so that you can access it within the method. Events are emitted using `this.$emit()`. | ### Props Props are custom attributes you can register on a component. When a value is passed to a prop attribute, it becomes a property on that component instance. You can reference these properties in component code using `this` (e.g., `this.propName`). | Prop Type | Description | | - | - | | [User Input](/docs/components/contributing/api/#user-input-props) | Enable components to accept input on deploy | | [Interface](/docs/components/contributing/api/#interface-props) | Attaches a Pipedream interface to your component (e.g., an HTTP interface or timer) | | [Service](/docs/components/contributing/api/#service-props) | Attaches a Pipedream service to your component (e.g., a key-value database to maintain state) | | [App](/docs/components/contributing/api/#app-props) | Enables managed auth for a component | | Data Store | Provides access to a Pipedream data store | | [HTTP Request](/docs/components/contributing/api/#http-request-prop) | Enables components to execute HTTP requests based on user input | | [Alert](/docs/components/contributing/api/#alert-prop) | Renders an informational alert in the prop form to help users configure the source or action | #### User Input Props User input props allow components to accept input on deploy. When deploying a component, users will be prompted to enter values for these props, setting the behavior of the component accordingly. ##### General **Definition** ```javascript theme={null} props: { myPropName: { type: "", label: "", description: "", options: [], // OR async options() {} to return dynamic options optional: true || false, propDefinition: [], default: "", secret: true || false, format: "", min: , max: , disabled: true || false, hidden: true || false }, }, ``` | Property | Type | Required? | Description | | - | - | - | - | | `type` | `string` | required | Value must be set to a valid `PropType` (see below). Suffix with `[]` (e.g. `string[]`) to denote array of that type (if supported). | | `label` | `string` | optional | A friendly label to show to user for this prop. If a label is not provided, the `propName` is displayed to the user. | | `description` | `string` | optional | Displayed near the prop input. Typically used to contextualize the prop or provide instructions to help users input the correct value. Markdown is supported. | | `options` | `string[]` or `object[]` or `method` | optional | Provide an array to display options to a user in a drop down menu. **`[]` Basic usage** Array of strings. E.g., `['option 1', 'option 2']` **`object[]` Define Label and Value** `[{ label: 'Label 1', value: 'label1'}, { label: 'Label 2', value: 'label2'}]` **`method` Dynamic Options** You can generate options dynamically (e.g., based on real-time API requests with pagination). See configuration details below. | | `useQuery` | `boolean` | optional | Use in conjunction with **Dynamic Options**. If set to `true`, the prop accepts a real-time query that can be used by the `options` method to obtain results according to that query. | | `optional` | `boolean` | optional | Set to `true` to make this prop optional. Defaults to `false`. | | `propDefinition` | `[]` | optional | Re-use a prop defined in an app file. When you include a prop definition, the prop will inherit values for all the properties listed here. However, you can override those values by redefining them for a given prop instance. See **propDefinitions** below for usage. | | `default` | `string` | optional | Define a default value if the field is not completed. Can only be defined for optional fields (required fields require explicit user input). | | `secret` | `boolean` | optional | If set to `true`, this field will hide your input in the browser like a password field, and its value will be encrypted in Pipedream’s database. The value will be decrypted when the component is run in [the execution environment](/docs/privacy-and-security/#execution-environment). Defaults to `false`. Only allowed for `string` props. | | `format` | `string` | optional | Specifies the format of a string prop’s value. Currently only supports `"file-ref"`, which indicates the prop accepts a URL of a file or a path to a file in `/tmp`. Only allowed for `string` props. | | `min` | `integer` | optional | Minimum allowed integer value. Only allowed for `integer` props.. | | `max` | `integer` | optional | Maximum allowed integer value . Only allowed for `integer` props. | | `disabled` | `boolean` | optional | Set to `true` to disable usage of this prop. Defaults to `false`. | | `hidden` | `boolean` | optional | Set to `true` to hide this field. Defaults to `false`. | **Prop Types** | Prop Type | Array Supported | Supported in Sources? | Supported in Actions? | Custom properties | | - | - | - | - | - | | `app` | | ✓ | ✓ | See [App Props](/docs/components/contributing/api/#app-props) below | | `boolean` | ✓ | ✓ | ✓ | | | `integer` | ✓ | ✓ | ✓ | - `min` (`integer`): Minimum allowed integer value. - `max` (`integer`): Maximum allowed integer value. | | `string` | ✓ | ✓ | ✓ | - `secret` (`boolean`): Whether to treat the value as a secret. - `format` (`string`): Set to `"file-ref"` to indicate the prop accepts a URL of a file or `/tmp` path. | | `object` | | ✓ | ✓ | | | `any` | | | ✓ | | | `$.interface.http` | | ✓ | | | | `$.interface.timer` | | ✓ | | | | `$.service.db` | | ✓ | | | | `data_store` | | | ✓ | | | `http_request` | | | ✓ | | | `alert` | | ✓ | ✓ | See [Alert Prop](/docs/components/contributing/api/#alert-prop) below | **Usage** | Code | Description | Read Scope | Write Scope | | - | - | - | - | | `this.myPropName` | Returns the configured value of the prop | `run()` `hooks` `methods` | n/a (input props may only be modified on component deploy or update via UI, CLI or API) | **Example** Following is an example source that demonstrates how to capture user input via a prop and emit it on each event: ```javascript theme={null} export default { name: "User Input Prop Example", version: "0.1", props: { msg: { type: "string", label: "Message", description: "Enter a message to `console.log()`", }, }, async run() { this.$emit(this.msg); }, }; ``` To see more examples, explore the [curated components in Pipedream’s GitHub repo](/docs/components/contributing/api/#example-components). ##### Advanced Configuration ##### Async Options (example) Async options allow users to select prop values that can be programmatically-generated (e.g., based on a real-time API response). ```javascript theme={null} async options({ page, prevContext, query, }) {}, ``` | Property | Type | Required? | Description | | - | - | - | - | | `options()` | `method` | optional | Typically returns an array of values matching the prop type (e.g., `string`) or an array of object that define the `label` and `value` for each option. The `page` and `prevContext` input parameter names are reserved for pagination (see below). When using `prevContext` for pagination, it must return an object with an `options` array and a `context` object with a `nextPageToken` key. E.g., `{ options, context: { nextPageToken }, }` | | `page` | `integer` | optional | Returns a `0` indexed page number. Use with APIs that accept a numeric page number for pagination. | | `prevContext` | `string` | optional | Returns a string representing the context for the previous `options` execution. Use with APIs that accept a token representing the last record for pagination. | | `query` | `string` | optional | Returns a string with the user input if the prop has the `useQuery` property set to `true`. Use with APIs that return items based on a query or search parameter. | Following is an example source demonstrating the usage of async options: ```javascript theme={null} export default { name: "Async Options Example", version: "0.1", props: { msg: { type: "string", label: "Message", description: "Select a message to `console.log()`", async options() { // write any node code that returns a string[] or object[] (with label/value keys) return ["This is option 1", "This is option 2"]; }, }, }, async run() { this.$emit(this.msg); }, }; ``` ##### Prop Definitions (example) Prop definitions enable you to reuse props that are defined in another object. A common use case is to enable re-use of props that are defined for a specific app. ```javascript theme={null} props: { myPropName: { propDefinition: [ app, "propDefinitionName", inputValues ] }, }, ``` | Property | Type | Required? | Description | | - | - | - | - | | `propDefinition` | `array` | optional | An array of options that define a reference to a `propDefinitions` within the `propDefinitions` for an `app` | | `app` | `object` | required | An app object | | `propDefinitionName` | `string` | required | The name of a specific `propDefinition` defined in the corresponding `app` object | | `inputValues` | `object` | optional | Values to pass into the prop definition. To reference values from previous props, use an arrow function. E.g.,: `c => ({ variableName: c.previousPropName })` [See these docs](/docs/components/contributing/api/#referencing-values-from-previous-props) for more information. | Following is an example source that demonstrates how to use `propDefinitions`. ```javascript theme={null} const rss = { type: "app", app: "rss", propDefinitions: { urlDef: { type: "string", label: "RSS URL", description: "Enter a URL for an RSS feed.", }, }, }; export default { name: "Prop Definition Example", description: `This component captures an RSS URL and logs it`, version: "0.1", props: { rss, url: { propDefinition: [rss, "urlDef"] }, }, async run() { console.log(this.url); }, }; ``` ##### Referencing values from previous props When you define a prop in an app file, and that prop depends on the value of another prop, you’ll need to pass the value of the previous props in a special way. Let’s review an example from [Trello](https://trello.com), a task manager. You create Trello *boards* for new projects. Boards contain *lists*. For example, this **Active** board contains two lists: ![](https://mintcdn.com/pipedream/NF77kliJSewMqg65/images/10839261-image.png?fit=max\&auto=format\&n=NF77kliJSewMqg65\&q=85\&s=5495a439543b9c211cc56635924e0933) Trello board example In Pipedream, users can choose from lists on a specific board: ![](https://mintcdn.com/pipedream/grEzwYhEB2vZSwGw/images/8470833b-image.png?fit=max\&auto=format\&n=grEzwYhEB2vZSwGw\&q=85\&s=a2d74c27464492ff4ea6a49caa7804e3) Trello board and lists props Both **Board** and **Lists** are defined in the Trello app file: ```javascript theme={null} board: { type: "string", label: "Board", async options(opts) { const boards = await this.getBoards(this.$auth.oauth_uid); const activeBoards = boards.filter((board) => board.closed === false); return activeBoards.map((board) => { return { label: board.name, value: board.id }; }); }, }, lists: { type: "string[]", label: "Lists", optional: true, async options(opts) { const lists = await this.getLists(opts.board); return lists.map((list) => { return { label: list.name, value: list.id }; }); }, } ``` In the `lists` prop, notice how `opts.board` references the board. You can pass `opts` to the prop’s `options` method when you reference `propDefinitions` in specific components: ```javascript theme={null} board: { propDefinition: [trello, "board"] }, lists: { propDefinition: [ trello, "lists", (configuredProps) => ({ board: configuredProps.board }), ], }, ``` `configuredProps` contains the props the user previously configured (the board). This allows the `lists` prop to use it in the `options` method. ##### Dynamic props Some prop definitions must be computed dynamically, after the user configures another prop. We call these **dynamic props**, since they are rendered on-the-fly. This technique is used in [the Google Sheets **Add Single Row** action](https://github.com/PipedreamHQ/pipedream/blob/master/components/google_sheets/actions/add-single-row/add-single-row.mjs), which we’ll use as an example below. First, determine the prop whose selection should render dynamic props. In the Google Sheets example, we ask the user whether their sheet contains a header row. If it does, we display header fields as individual props: ![](https://mintcdn.com/pipedream/nKh6d_6A4aXFb6xD/images/fbc9b5b2-additional-props_lx5jtv.gif?s=840267d57eaba560b4f171d2853053fc) Google Sheets Additional props example - header columns loading as props To load dynamic props, the header prop must have the `reloadProps` field set to `true`: ```javascript theme={null} hasHeaders: { type: "string", label: "Does the first row of the sheet have headers?", description: "If the first row of your document has headers we'll retrieve them to make it easy to enter the value for each column.", options: [ "Yes", "No", ], reloadProps: true, }, ``` When a user chooses a value for this prop, Pipedream runs the `additionalProps` component method to render props: ```javascript theme={null} async additionalProps() { const sheetId = this.sheetId?.value || this.sheetId; const props = {}; if (this.hasHeaders === "Yes") { const { values } = await this.googleSheets.getSpreadsheetValues(sheetId, `${this.sheetName}!1:1`); if (!values[0]?.length) { throw new ConfigurationError("Cound not find a header row. Please either add headers and click \"Refresh fields\" or adjust the action configuration to continue."); } for (let i = 0; i < values[0]?.length; i++) { props[`col_${i.toString().padStart(4, "0")}`] = { type: "string", label: values[0][i], optional: true, }; } } else if (this.hasHeaders === "No") { props.myColumnData = { type: "string[]", label: "Values", description: "Provide a value for each cell of the row. Google Sheets accepts strings, numbers and boolean values for each cell. To set a cell to an empty value, pass an empty string.", }; } return props; }, ``` The signature of this function is: ```javascript theme={null} async additionalProps(previousPropDefs) ``` where `previousPropDefs` are the full set of props (props merged with the previous `additionalProps`). When the function is executed, `this` is bound similar to when the `run` function is called, where you can access the values of the props as currently configured, and call any `methods`. The return value of `additionalProps` will replace any previous call, and that return value will be merged with props to define the final set of props. Following is an example that demonstrates how to use `additionalProps` to dynamically change a prop’s `disabled` and `hidden` properties: ```javascript theme={null} async additionalProps(previousPropDefs) { if (this.myCondition === "Yes") { previousPropDefs.myPropName.disabled = true; previousPropDefs.myPropName.hidden = true; } else { previousPropDefs.myPropName.disabled = false; previousPropDefs.myPropName.hidden = false; } return previousPropDefs; }, ``` Dynamic props can have any one of the following prop types: * `app` * `boolean` * `integer` * `string` * `object` * `any` * `$.interface.http` * `$.interface.timer` * `data_store` * `http_request` #### Interface Props Interface props are infrastructure abstractions provided by the Pipedream platform. They declare how a source is invoked — via HTTP request, run on a schedule, etc. — and therefore define the shape of the events it processes. | Interface Type | Description | | - | - | | [Timer](/docs/components/contributing/api/#timer) | Invoke your source on an interval or based on a cron expression | | [HTTP](/docs/components/contributing/api/#http) | Invoke your source on HTTP requests | #### Timer To use the timer interface, declare a prop whose value is the string `$.interface.timer`: **Definition** ```javascript theme={null} props: { myPropName: { type: "$.interface.timer", default: {}, }, } ``` | Property | Type | Required? | Description | | - | - | - | - | | `type` | `string` | required | Must be set to `$.interface.timer` | | `default` | `object` | optional | **Define a default interval** `{ intervalSeconds: 60, },` **Define a default cron expression** `{ cron: "0 0 * * *", },` | **Usage** | Code | Description | Read Scope | Write Scope | | - | - | - | - | | `this.myPropName` | Returns the type of interface configured (e.g., `{ type: '$.interface.timer' }`) | `run()` `hooks` `methods` | n/a (interface props may only be modified on component deploy or update via UI, CLI or API) | | `event` | Returns an object with the execution timestamp and interface configuration (e.g., `{ "timestamp": 1593937896, "interval_seconds": 3600 }`) | `run(event)` | n/a (interface props may only be modified on source deploy or update via UI, CLI or API) | **Example** Following is a basic example of a source that is triggered by a `$.interface.timer` and has default defined as a cron expression. ```javascript theme={null} export default { name: "Cron Example", version: "0.1", props: { timer: { type: "$.interface.timer", default: { cron: "0 0 * * *", // Run job once a day }, }, }, async run() { console.log("hello world!"); }, }; ``` Following is an example source that’s triggered by a `$.interface.timer` and has a `default` interval defined. ```javascript theme={null} export default { name: "Interval Example", version: "0.1", props: { timer: { type: "$.interface.timer", default: { intervalSeconds: 60 * 60 * 24, // Run job once a day }, }, }, async run() { console.log("hello world!"); }, }; ``` ##### HTTP To use the HTTP interface, declare a prop whose value is the string `$.interface.http`: ```javascript theme={null} props: { myPropName: { type: "$.interface.http", customResponse: true, // optional: defaults to false }, } ``` **Definition** | Property | Type | Required? | Description | | - | - | - | - | | `type` | `string` | required | Must be set to `$.interface.http` | | `respond` | `method` | required | The HTTP interface exposes a `respond()` method that lets your component issue HTTP responses to the client. | **Usage** | Code | Description | Read Scope | Write Scope | | - | - | - | - | | `this.myPropName` | Returns an object with the unique endpoint URL generated by Pipedream (e.g., `{ endpoint: 'https://abcde.m.pipedream.net' }`) | `run()` `hooks` `methods` | n/a (interface props may only be modified on source deploy or update via UI, CLI or API) | | `event` | Returns an object representing the HTTP request (e.g., `{ method: 'POST', path: '/', query: {}, headers: {}, bodyRaw: '', body: {}, }`) | `run(event)` | The shape of `event` corresponds with the HTTP request you make to the endpoint generated by Pipedream for this interface | | `this.myPropName.respond()` | Returns an HTTP response to the client (e.g., `this.http.respond({status: 200})`). | n/a | `run()` | ###### Responding to HTTP requests The HTTP interface exposes a `respond()` method that lets your source issue HTTP responses. You may run `this.http.respond()` to respond to the client from the `run()` method of a source. In this case you should also pass the `customResponse: true` parameter to the prop. | Property | Type | Required? | Description | | - | - | - | - | | `status` | `integer` | required | An integer representing the HTTP status code. Return `200` to indicate success. Standard status codes range from `100` - `599` | | `headers` | `object` | optional | Return custom key-value pairs in the HTTP response | | `body` | `string` `object` `buffer` | optional | Return a custom body in the HTTP response. This can be any string, object, or Buffer. | ###### HTTP Event Shape Following is the shape of the event passed to the `run()` method of your source: ```javascript theme={null} { method: 'POST', path: '/', query: {}, headers: {}, bodyRaw: '', body: } ``` **Example** Following is an example source that’s triggered by `$.interface.http` and returns `{ 'msg': 'hello world!' }` in the HTTP response. On deploy, Pipedream will generate a unique URL for this source: ```javascript theme={null} export default { name: "HTTP Example", version: "0.0.1", props: { http: { type: "$.interface.http", customResponse: true, }, }, async run(event) { this.http.respond({ status: 200, body: { msg: "hello world!", }, headers: { "content-type": "application/json", }, }); console.log(event); }, }; ``` #### Service Props | Service | Description | | - | - | | *DB* | Provides access to a simple, component-specific key-value store to maintain state across executions. | ##### DB **Definition** ```javascript theme={null} props: { myPropName: "$.service.db", } ``` **Usage** | Code | Description | Read Scope | Write Scope | | - | - | - | - | | `this.myPropName.get('key')` | Method to get a previously set value for a key. Returns `undefined` if a key does not exist. | `run()` `hooks` `methods` | Use the `set()` method to write values | | `this.myPropName.set('key', value)` | Method to set a value for a key. Values must be JSON-serializable data. | Use the `get()` method to read values | `run()` `hooks` `methods` | #### App Props App props are normally defined in an [app file](/docs/components/contributing/guidelines/#app-files), separate from individual components. See [the `components/` directory of the pipedream GitHub repo](https://github.com/PipedreamHQ/pipedream/tree/master/components) for example app files. **Definition** ```javascript theme={null} props: { myPropName: { type: "app", app: "", propDefinitions: {} methods: {}, }, }, ``` | Property | Type | Required? | Description | | - | - | - | - | | `type` | `string` | required | Value must be `app` | | `app` | `string` | required | Value must be set to the name slug for an app registered on Pipedream. [App files](/docs/components/contributing/guidelines/#app-files) are programmatically generated for all integrated apps on Pipedream. To find your app’s slug, visit the `components` directory of [the Pipedream GitHub repo](https://github.com/PipedreamHQ/pipedream/tree/master/components), find the app file (the file that ends with `.app.mjs`), and find the `app` property at the root of that module. If you don’t see an app listed, please [open an issue here](https://github.com/PipedreamHQ/pipedream/issues/new?assignees=\&labels=app%2C+enhancement\&template=app---service-integration.md\&title=%5BAPP%5D). | | `propDefinitions` | `object` | optional | An object that contains objects with predefined user input props. See the section on User Input Props above to learn about the shapes that can be defined and how to reference in components using the `propDefinition` property | | `methods` | `object` | optional | Define app-specific methods. Methods can be referenced within the app object context via `this` (e.g., `this.methodName()`) and within a component via `this.myAppPropName` (e.g., `this.myAppPropName.methodName()`). | **Usage** | Code | Description | Read Scope | Write Scope | | - | - | - | - | | `this.$auth` | Provides access to OAuth tokens and API keys for Pipedream managed auth | **App Object:** `methods` | n/a | | `this.myAppPropName.$auth` | Provides access to OAuth tokens and API keys for Pipedream managed auth | **Parent Component:** `run()` `hooks` `methods` | n/a | | `this.methodName()` | Execute a common method defined for an app within the app definition (e.g., from another method) | **App Object:** `methods` | n/a | | `this.myAppPropName.methodName()` | Execute a common method defined for an app from a component that includes the app as a prop | **Parent Component:** `run()` `hooks` `methods` | n/a | > [!NOTE] > > **Note:** The specific `$auth` keys supported for each app will be published in the near future. #### HTTP Request Prop **Usage** | Code | Description | Read Scope | Write Scope | | - | - | - | - | | `this.myPropName.execute()` | Execute an HTTP request as configured | n/a | `run()` `methods` | **Example** Following is an example action that demonstrates how to accept an HTTP request configuration as input and execute the request when the component is run: ```javascript theme={null} export default { name: "HTTP Request Example", version: "0.0.1", props: { httpRequest: { type: "http_request", label: "API Request", default: { method: "GET", url: "https://jsonplaceholder.typicode.com/posts", } }, }, async run() { const { data } = await this.httpRequest.execute(); return data; }, }; ``` #### Alert Prop Sometimes you may need to surface contextual information to users within the prop form. This might be information that’s not directly related to a specific prop, so it doesn’t make sense to include in a prop description, but rather, it may be related to the overall configuration of the prop form. **Usage** | Property | Type | Required? | Description | | - | - | - | - | | `type` | `string` | required | Set to `alert` | | `alertType` | `string` | required | Determines the color and UI presentation of the alert prop. Can be one of `info`, `neutral`, `warning`, `error`. | | `content` | `string` | required | Determines the text that is rendered in the alert. Both plain text and markdown are supported. | ```javascript theme={null} export default defineComponent({ props: { alert: { type: "alert", alertType: "info", content: "Admin rights on the repo are required in order to register webhooks. In order to continue setting up your source, configure a polling interval below to check for new events.", } }, }) ``` Refer to GitHub’s component sources in the `pipedream` repo for an [example implementation](https://github.com/PipedreamHQ/pipedream/blob/b447d71f658d10d6a7432e8f5153bbda56ba9810/components/github/sources/common/common-flex.mjs#L27). ![](https://mintcdn.com/pipedream/nKh6d_6A4aXFb6xD/images/f77777cd-image.png?fit=max\&auto=format\&n=nKh6d_6A4aXFb6xD\&q=85\&s=239fca31b9a36b186961e3ba4c0a0531) Info alert prop in GitHub source #### Limits on props When a user configures a prop with a value, it can hold at most 64KB data. Consider this when accepting large input in these fields (such as a base64 string). The 64KB limit applies only to static values entered as raw text. ### Methods You can define helper functions within the `methods` property of your component. You have access to these functions within the [`run` method](/docs/components/contributing/api/#run), or within other methods. Methods can be accessed using `this.`. For example, a `random` method: ```javascript theme={null} methods: { random() { return Math.random() }, } ``` can be run like so: ```javascript theme={null} const randomNum = this.random(); ``` ### Hooks ```javascript theme={null} hooks: { async deploy() {}, async activate() {}, async deactivate() {}, }, ``` | Property | Type | Required? | Description | | - | - | - | - | | `deploy` | `method` | optional | Executed each time a component is deployed | | `activate` | `method` | optional | Executed each time a component is deployed or updated | | `deactivate` | `method` | optional | Executed each time a component is deactivated | ### Dedupe Strategies > **IMPORTANT:** To use a dedupe strategy, you must emit an `id` as part of the event metadata (dedupe strategies are applied to the submitted `id`) | Strategy | Description | | - | - | | `unique` | Pipedream maintains a cache of 100 emitted `id` values. Events with `id` values that are not in the cache are emitted, and the `id` value is added to the cache. After 100 events, `id` values are purged from the cache based on the order received (first in, first out). A common use case for this strategy is an RSS feed which typically does not exceed 100 items | | `greatest` | Pipedream caches the largest `id` value (must be numeric). Only events with larger `id` values are emitted, and the cache is updated to match the new, largest value.. | | `last` | Pipedream caches the ID associated with the last emitted event. When new events are emitted, only events after the matching `id` value will be emitted as events. If no `id` values match, then all events will be emitted. | ### Run Each time a component is invoked, its `run` method is called. Sources are invoked by their [interface](/docs/components/contributing/api/#interface-props) (for example, via HTTP request). Actions are run when Pipedream invokes them. You can reference `this` within the `run` method. `this` refers to the component, and provides access to [props](/docs/components/contributing/api/#props), [methods](/docs/components/contributing/api/#methods), and more. #### Sources When a source is invoked, the event that triggered the source is passed to `run`, so that you can access it within the method: ```javascript theme={null} async run(event) { console.log(event) } ``` ##### \$emit `this.$emit()` is a method in scope for the `run` method of a source ```javascript theme={null} this.$emit(event, { id, name, summary, ts, }); ``` | Property | Type | Required? | Description | | - | - | - | - | | `event` | JSON serializable data | optional | The data to emit as the event | | `id` | `string` or `number` | Required if a dedupe strategy is applied | A value to uniquely identify this event. Common `id` values may be a 3rd party ID, a timestamp, or a data hash | | `name` | `string` | optional | The name of the “channel” you’d like to emit the event to. By default, events are emitted to the `default` channel. If you set a different channel here, listening sources or workflows can subscribe to events on this channel, running the source or workflow only on events emitted to that channel. | | `summary` | `string` | optional | Define a summary to customize the data displayed in the events list to help differentiate events at a glance | | `ts` | `integer` | optional | Accepts an epoch timestamp in **milliseconds**. If you submit a timestamp, events will automatically be ordered and emitted from oldest to newest. If using the `last` dedupe strategy, the value cached as the `last` event for an execution will correspond to the event with the newest timestamp. | Following is a basic example that emits an event on each component execution. ```javascript theme={null} export default { name: "this.$emit() example", description: "Deploy and run this component manually via the Pipedream UI", async run() { this.$emit({ message: "hello world!" }); }, }; ``` ##### Logs You can view logs produced by a source’s `run` method in the **Logs** section of the [Pipedream source UI](https://pipedream.com/sources), or using the `pd logs` CLI command: ``` pd logs ``` ##### Events If the `run` method emits events using `this.$emit`, you can access the events in the **EVENTS** section of the Pipedream UI for the component, or using the `pd events` CLI command: ``` pd events ``` #### Actions When Pipedream runs an action, it passes an object with a `$` variable that gives you access to special functions, outlined below: ```javascript theme={null} async run({ $ }) { // You have access to $ within your action } ``` ##### Returning data from steps By default, variables declared within an action are scoped to that action. To return data from a step, you have two options: 1) use the `return` keyword, or 2) use `$.export` to return a named export from a step. **`return`** Use `return` to return data from an action: ```javascript theme={null} async run({ $ }) { return "data" } ``` When you use return, the exported data will appear at `steps.[STEP NAME].$return_value`. For example, if you ran the code above in a step named `nodejs`, you’d reference the returned data using `steps.nodejs.$return_value`. **`$.export`** You can also use `$.export` to return named exports from an action. `$.export` takes the name of the export as the first argument, and the value to export as the second argument: ```javascript theme={null} async run({ $ }) { $.export("name", "value") } ``` When your workflow runs, you’ll see the named exports appear below your step, with the data you exported. You can reference these exports in other steps using `steps.[STEP NAME].[EXPORT NAME]`. ##### Returning HTTP responses with `$.respond` `$.respond` lets you issue an HTTP response to the request that triggered the component. ```javascript theme={null} async run({ $ }) { $.respond({ status: 200, body: "hello, world" }) } ``` ##### Ending steps early with `return $.flow.exit` `return $.flow.exit` terminates the entire workflow. It accepts a single argument: a string that tells the workflow why the workflow terminated, which is displayed in the Pipedream UI. ```javascript theme={null} async run({ $ }) { return $.flow.exit("reason") } ``` ##### `$.summary` `$.summary` is used to surface brief, user-friendly summaries about what happened when an action step succeeds. For example, when [adding items to a Spotify playlist](https://github.com/PipedreamHQ/pipedream/blob/master/components/spotify/actions/add-items-to-playlist/add-items-to-playlist.mjs#L51): ![](https://mintcdn.com/pipedream/grEzwYhEB2vZSwGw/images/821cf312-image.png?fit=max\&auto=format\&n=grEzwYhEB2vZSwGw\&q=85\&s=ee537e8cd89aa3a5939f22ca212f497c) Spotify example with \$summary Example implementation: ```javascript theme={null} const data = [1, 2]; const playlistName = "Cool jams"; $.export( "$summary", `Successfully added ${data.length} ${ data.length == 1 ? "item" : "items" } to "${playlistName}"` ); ``` ##### `$.send` `$.send` allows you to send data to Pipedream destinations. Destinations are delivered asynchronously, after the component finishes running. **`$.send.http`** Sends data to an HTTP endpoint outside of Pipedream. **`$.send.email`** Sends an email to the address tied to your Pipedream account. **`$.send.s3`** Sends data to an Amazon S3 bucket. **`$.send.emit`** Emits an event that can be consumed using Pipedream's [REST API](/docs/rest-api/). **`$.send.sse`** Sends data to a client subscribed to a server-sent events (SSE) stream. ##### `$.context` `$.context` exposes properties that describe the execution. Action authors can use it to get context about the caller and the current run. All properties from the trigger context are exposed, as well as: | Property | Description | | - | - | | `deadline` | An epoch millisecond timestamp marking the point when the execution is configured to time out. | | `JIT` | Stands for “just in time” (environment). `true` if the user is testing the step, `false` if the step is running in production. | | `run` | An object containing metadata about the current run number, which is incremented each time `$.flow.rerun` restarts the execution. | ### Environment variables Environment variables are not accessible within sources or actions directly. Since components can be used by anyone, you cannot guarantee that a user will have a specific variable set in their environment. Use [`secret` props](/docs/components/contributing/api/#props) to reference sensitive data instead. ### Using npm packages To use an npm package in a component, just require it. There is no `package.json` or `npm install` required. ```javascript theme={null} import axios from "axios"; ``` When you deploy a component, Pipedream downloads the latest versions of these packages and bundles them with your deployment. Some packages that rely on large dependencies or on unbundled binaries — may not work on Pipedream. Please [reach out](https://pipedream.com/support) if you encounter a specific issue. #### Referencing a specific version of a package *This currently applies only to sources*. If you’d like to use a *specific* version of a package in a source, you can add that version in the `require` string, for example: `require("axios@0.19.2")`. Moreover, you can pass the same version specifiers that npm and other tools allow to specify allowed [semantic version](https://semver.org/) upgrades. For example: * To allow for future patch version upgrades, use `require("axios@~0.20.0")` * To allow for patch and minor version upgrades, use `require("axios@^0.20.0")` ## Managing Components Sources and actions are developed and deployed in different ways, given the different functions they serve in the product. * [Managing Sources](/docs/components/contributing/api/#managing-sources) * [Managing Actions](/docs/components/contributing/api/#managing-actions) ### Managing Sources #### CLI - Development Mode *** The easiest way to develop and test sources is with the `pd dev` command. `pd dev` deploys a local file, attaches it to a component, and automatically updates the component on each local save. To deploy a new component with `pd dev`, run: ``` pd dev ``` To attach to an existing deployed component, run: ``` pd dev --dc ``` #### CLI - Deploy ##### From Local Code To deploy a source via CLI, use the `pd deploy` command. ``` pd deploy ``` E.g., ``` pd deploy my-source.js ``` ##### From Pipedream GitHub Repo You can explore the components available to deploy in [Pipedream’s GitHub repo](https://github.com/PipedreamHQ/pipedream/tree/master/components). ``` pd deploy ``` E.g., ```javascript theme={null} pd deploy http-new-requests ``` ##### From Any URL ``` pd deploy ``` E.g., ```bash theme={null} pd deploy https://raw.githubusercontent.com/PipedreamHQ/pipedream/master/components/http/sources/new-requests/new-requests.js ``` #### CLI - Update View the [CLI command reference](/docs/cli/reference/#command-reference). #### CLI - Delete View the [CLI command reference](/docs/cli/reference/#command-reference). #### UI - Deploy You can find and deploy curated components at [https://pipedream.com/sources/new](https://pipedream.com/sources/new), or you can deploy code via the UI using following URL patterns. ##### From Pipedream GitHub Repo ```javascript theme={null} https://pipedream.com/sources?action=create&key= ``` E.g., ```javascript theme={null} https://pipedream.com/sources?action=create&key=http-new-requests ``` ##### From Any URL ```javascript theme={null} https://pipedream.com/sources?action=create&url= ``` E.g., ```javascript theme={null} https://pipedream.com/sources?action=create&url=https%3A%2F%2Fraw.githubusercontent.com%2FPipedreamHQ%2Fpipedream%2Fmaster%2Fcomponents%2Fhttp%2Fhttp.js ``` #### UI - Update You can update the code and props for a component from the **Configuration** tab for a source in the Pipedream UI. #### UI - Delete You can delete a component via the UI at [https://pipedream.com/sources](https://pipedream.com/sources). #### API See the [REST API docs](/docs/rest-api/). ### Managing Actions #### CLI - Publish To publish an action, use the `pd publish` command. ``` pd publish FILENAME ``` E.g., ``` pd publish my-action.js ``` ## Source Lifecycle ### Lifecycle hooks Pipedream sources support the following hooks. The code for these hooks are defined within the component. Learn more about the [component structure](/docs/components/contributing/api/#component-structure) and [hook usage](/docs/components/contributing/api/#hooks). #### `deploy` The `deploy()` hook is automatically invoked by Pipedream when a source is deployed. A common use case for the deploy hook is to create webhook subscriptions when the source is deployed, but you can run any Node.js code within the `deploy` hook. To learn more about the `deploy()` hook, refer to the [API documentation](/docs/components/contributing/api/#hooks). #### `activate` The `activate()` hook is automatically invoked by Pipedream when a source is deployed or updated. For example, this hook will be run when users update component props, so you can run code here that handles those changes. To learn more about defining a custom `activate()` hook, refer to the [API documentation](/docs/components/contributing/api/#hooks). #### `deactivate` The `deactivate()` hook is automatically invoked by Pipedream when a source is updated or deleted. A common use case for the deactivate hook is to automatically delete a webhook subscription when a component is deleted, but you can run any Node.js code within the `deactivate` hook. To learn more about the `deactivate()` hook, refer to the [API documentation](/docs/components/contributing/api/#hooks). ### States #### Saved Component A saved component is non-instantiated component code that has previously been deployed to Pipedream. Each saved component has a unique saved component ID. Saved components cannot be invoked directly —they must first be deployed. #### Deployed Component A deployed component is an instance of a saved component that can be invoked. Deployed components can be active or inactive. On deploy, Pipedream instantiates a saved component and invokes the `activate()` hook. #### Deleted Component On delete, Pipedream invokes the `deactivate()` hook and then deletes the deployed component instance. ### Operations #### Deploy On deploy, Pipedream creates an instance of a saved component and invokes the optional `deploy()` and `activate()` hooks. A unique deployed component ID is generated for the component. You can deploy a component via the CLI, UI or API. #### Update On update, Pipedream, invokes the optional `deactivate()` hook, updates the code and props for a deployed component, and then invokes the optional `activate()` hook. The deployed component ID is not changed by an update operation. #### Delete On delete, Pipedream invokes the optional `deactivate()` hook and deletes the component instance. ## Source Event Lifecycle The event lifecycle applies to deployed sources. Learn about the [source lifecycle](/docs/components/contributing/api/#source-lifecycle). ### Diagram ![](https://mintcdn.com/pipedream/Acz4Z1ch6TM7-aI8/images/ae31f42f-d0iiggokfkwnmt4kckb5.png?fit=max\&auto=format\&n=Acz4Z1ch6TM7-aI8\&q=85\&s=3298cebdd4e8bd550d03b3d72911d714) Pipedream Components Event Lifecycle Diagram ### Triggering Sources Sources are triggered when you manually run them (e.g., via the **RUN NOW** button in the UI) or when one of their [interfaces](/docs/components/contributing/api/#interface-props) is triggered. Pipedream sources currently support **HTTP** and **Timer** interfaces. When a source is triggered, the `run()` method of the component is executed. Standard output and errors are surfaced in the **Logs** tab. ### Emitting Events from Sources Sources can emit events via `this.$emit()`. If you define a [dedupe strategy](/docs/components/contributing/api/#dedupe-strategies) for a source, Pipedream automatically dedupes the events you emit. > **TIP:** if you want to use a dedupe strategy, be sure to pass an `id` for each event. Pipedream uses this value for deduping purposes. ### Consuming Events from Sources Pipedream makes it easy to consume events via: * The UI * Connect * APIs * CLI #### UI When you navigate to your source [in the UI](https://pipedream.com/sources), you’ll be able to select and inspect the most recent 100 events (i.e., an event bin). For example, if you send requests to a simple HTTP source, you will be able to inspect the events (i.e., a request bin). #### Connect [Deploy the source as a trigger](/docs/connect/components/triggers) for one of your users and receive each event by webhook. Integrate with 3,000+ apps including Google Sheets, Discord, Slack, AWS, and more! #### API Events can be retrieved using the [REST API](/docs/rest-api/) or the SSE stream tied to your component. This makes it easy to retrieve data processed by your component from another app. Typically, you’ll want to use the [REST API](/docs/rest-api/) to retrieve events in batch, and connect to the SSE stream to process them in real time. #### CLI Use the `pd events` command to retrieve the last 10 events via the CLI: ``` pd events -n 10 ``` # Components Guidelines and Patterns Source: https://pipedream.com/docs/components/contributing/guidelines For a component to be accepted into the Pipedream registry, it should follow these guidelines below. These guidelines help ensure components are high quality, are intuitive for both Pipedream users and component developers to use and extend. > [!NOTE] > > Questions about best practices? > > Join the discussion with fellow Pipedream component developers at the [#contribute channel](https://pipedream-users.slack.com/archives/C01E5KCTR16) in Slack or [on Discourse](https://pipedream.com/community/c/dev/11). ## Local Checks When submitting pull requests, the new code will run through a series of automated checks like linting the code. If you want to run those checks locally for quicker feedback you must have [pnpm](https://pnpm.io/) installed and run the following commands at the root of the project: 1. To install all the project’s dependencies (only needed once): ``` pnpm install ``` 2. To install all required dependencies: ``` npx pnpm install -r ``` 3. To run the linter checks against your code (assuming that your changes are located at `components/foo` for example): ```bash theme={null} npx eslint components/foo ``` 4. Optionally, you can automatically fix any linter issues by running the following command: ```bash theme={null} npx eslint --fix components/foo ``` Keep in mind that not all issues can be automatically fixed by the linter since they could alter the behaviour of the code. ## General ### Components Should Be ES Modules The Node.js community has started publishing [ESM-only](https://flaviocopes.com/es-modules/) packages that do not work with [CommonJS modules](https://nodejs.org/latest/api/modules.html#modules_modules_commonjs_modules). This means you must `import` the package. You can’t use `require`. You also cannot mix ESM with CJS. This will **not** work: ```javascript theme={null} // ESM import axios from "axios"; // CommonJS - this should be `export default` module.exports = { // ... } ``` Therefore, all components should be written as ES modules: ```javascript theme={null} import axios from "axios"; export default { //... } ``` **You’ll need to use [the `.mjs` file extension](https://developer.mozilla.org/en-US/Web/JavaScript/Guide/Modules#aside_%E2%80%94_.mjs_versus_.js) for any components written as ES modules**. You’ll notice that many of the existing components are written as CommonJS modules. Please fix these and submit a pull request as you refactor related code. For example, if you’re developing new Spotify actions, and you notice the existing event sources use CommonJS, change them to ESM: 1. Rename the file extension from `.js` to `.mjs` using `git mv` (e.g. `git mv source.js source.mjs`). 2. Change all `require` statements to `import`s. 3. Change instances of `module.exports` to `export default`. ### Component Scope Create components to address specific use cases whenever possible. For example, when a user subscribes to a GitHub webhook to listen for “star” activity, events can be generated when users star or unstar a repository. The “New Star” source filters events for only new star activity so the user doesn’t have to. There may be cases where it’s valuable to create a generic component that provides users with broad latitude (e.g., see the [custom webhook](https://github.com/PipedreamHQ/pipedream/blob/master/components/github/sources/custom-webhook-events) event source for GitHub). However, as a general heuristic, we found that tightly scoped components are easier for users to understand and use. ### Required Metadata Registry [components](/docs/components/contributing/api/#component-structure) require a unique `key` and `version`, and a friendly `name` and `description`. Action components require a `type` field to be set to `action` (sources will require a type to be set in the future). Action components require the description to include a link to the relevant documentation in the following format: ```javascript theme={null} export default { key: "google_drive-new-shared-drive", name: "New Shared Drive", description: "Emits a new event any time a shared drive is created.", version: "0.0.1", }; ``` ### Annotations All registry components should include an `annotations` object that describes the component's capabilities. These annotations follow the [Model Context Protocol specification for tool annotations](https://modelcontextprotocol.io/specification/2025-06-18/schema#toolannotations) and help AI systems understand how to use components safely and effectively. The annotations object should include three boolean fields: ```javascript theme={null} export default { key: "slack-send-message-to-channel", name: "Send Message to Channel", description: "Send a message to a public or private channel. [See the documentation](https://api.slack.com/methods/chat.postMessage)", version: "0.0.5", type: "action", annotations: { destructiveHint: false, openWorldHint: true, readOnlyHint: false, }, // ... rest of component code }; ``` **Annotation fields:** * **`destructiveHint`**: Set to `true` if the action permanently deletes data or performs other irreversible operations. Examples: deleting files, removing users, canceling orders. * **`openWorldHint`**: Set to `true` if the action sends data to external parties or makes information publicly accessible. Examples: sending emails, posting to social media, publishing content. * **`readOnlyHint`**: Set to `true` if the action only reads data without making any modifications. Examples: fetching records, listing items, searching content. Choose annotations that accurately reflect the component's behavior. ### Component Key Pattern When publishing components to the Pipedream registry, the `key` must be unique across registry components and should follow the pattern: `app_name_slug`-`slugified-component-name` **Source** keys should use past tense verbs that describe the event that occurred (e.g., `linear_app-issue-created-instant`). For **action** keys, use active verbs to describe the action that will occur, (e.g., `linear_app-create-issue`). ### Versioning When you first publish a component to the registry, set its version to `0.0.1`. Pipedream registry components try to follow [semantic versioning](https://semver.org/). From their site: Given a version number `MAJOR.MINOR.PATCH`, increment the: 1. `MAJOR` version when you make incompatible API changes, 2. `MINOR` version when you add functionality in a backwards compatible manner, and 3. `PATCH` version when you make backwards compatible bug fixes. When you’re developing actions locally, and you’ve incremented the version in your account multiple times, make sure to set it to the version it should be at in the registry prior to submitting your PR. For example, when you add an action to the registry, the version should be `0.0.1`. If the action was at version `0.1.0` and you’ve fixed a bug, change it to `0.1.1` when committing your final code. If you update a file, you must increment the versions of all components that import or are affected by the updated file. ### Folder Structure Registry components are organized by app in the `components` directory of the `pipedreamhq/pipedream` repo. ``` /components /[app-name-slug] /[app-name-slug].app.mjs /actions /[action-name-slug] /[action-name-slug].mjs /sources /[source-name-slug] /[source-name-slug].mjs ``` * The name of each app folder corresponds with the name slug for each app * The app file should be in the root of the app folder (e.g., `/components/[app_slug]/[app_slug].app.mjs`) * Components for each app are organized into `/sources` and `/actions` subfolders * Each component should be placed in its own subfolder (with the name of the folder and the name of the `js` file equivalent to the slugified component name). For example, the path for the “Search Mentions” source for Twitter is `/components/twitter/sources/search-mentions/search-mentions.mjs`. * Aside from `app_slug`, words in folder and file names are separated by dashes (-) (i.e., in kebab case) * Common files (e.g., `common.mjs`, `utils.mjs`) must be placed within a common folder: `/common/common.mjs`. You can explore examples in the [components directory](https://github.com/PipedreamHQ/pipedream/tree/master/components). #### Using APIs vs Client Libraries If the app has a well-supported [Node.js client library](/docs/components/contributing/api/#using-npm-packages), feel free to use that instead of manually constructing API requests. ### `package.json` Each app should have a `package.json` in its root folder. If one doesn’t exist, run `npm init` in the app’s root folder and customize the file using [this `package.json`](https://github.com/PipedreamHQ/pipedream/blob/55236b3aa993cbcb545e245803d8654c6358b0a2/components/stripe/package.json) as a template. Each time you change the code for an app file, or change the dependencies for any app component, modify the package `version`. Save any dependencies in the component app directory: ```bash theme={null} npm i --save package npm i --save-dev package ``` #### Error-Handling and Input Validation When you use the SDK of a popular API, the SDK might raise clear errors to the user. For example, if the user is asked to pass an email address, and that email address doesn’t validate, the library might raise that in the error message. But other libraries will *not* raise clear errors. In these cases, you may need to `throw` your own custom error that wraps the error from the API / lib. [See the Airtable components](https://github.com/PipedreamHQ/pipedream/blob/9e4e400cda62335dfabfae384d9224e04a585beb/components/airtable/airtable.app.js#L70) for an example of custom error-handling and input validation. In general, **imagine you are a user troubleshooting an issue. Is the error easy-to-understand? If not, `throw` a better error**. ### `README` files New actions and sources should include `README.md` files within the same directory to describe how to use the action or source to users. Here’s an example `README.md` structure: ```md theme={null} # Overview # Example Use Cases # Getting Started # Troubleshooting ``` These sections will appear within the corresponding app, source and action page, along with any subheadings and content. Here’s an example of an [app `README.md` within the `discord` component on the Pipedream registry](https://github.com/PipedreamHQ/pipedream/blob/master/components/discord/README.md). That same content is rendered within the [Pipedream integration page for the Discord app](https://pipedream.com/apps/discord). You can add additional subheadings to each of the top level `Overview`, `Example Use Cases`, `Getting Started` and `Troubleshooting` headings: ```md theme={null} # Overview ## Limitations Perhaps there are some limitations about the API that users should know about. # Example Use Cases 1. Sync data in real time 2. Automate tedious actions 3. Introduce A.I. into the workflow # Getting Started ## Generating an API Key Instructions on how to generate an API key from within the service's dashboard. # Troubleshooting ## Required OAuth Scopes Please take note, you'll need to have sufficient privileges in order to complete authentication. ``` > [!NOTE] > > Only these three top level headings `Overview`, `Getting Starting` and `Troubleshooting` will appear within the corresponding App Marketplace page. All other headings will be ignored. #### Pagination When making API requests, handle pagination to ensure all data/events are processed. Moreover, if the underlying account experiences and/or generates too much data paginating through the entire collection of records, it might cause out-of-memory or timeout issues (or both!), so as a rule of thumb the pagination logic should: * Be encapsulated as a [generator](https://mzl.la/37z6Sh6) so that the component can start processing records after the very first API call. As an example, you can check the [Microsoft OneDrive methods](https://github.com/PipedreamHQ/pipedream/tree/master/components/microsoft_onedrive/microsoft_onedrive.app.mjs) to list files. * Accept a “next token/page/ID” whenever possible, so that API calls do not retrieve the entire collection of records during every execution but rather from a recent point in time. The `scanDeltaItems` generator method in the example above follows this pattern. * Persist the last page number, token or record ID right after processing, so that following executions of the component process new records to minimize the amount of duplicate events, execution time and delayed events. Following the same Microsoft OneDrive example, check the `processEvent` method [in this component](https://github.com/PipedreamHQ/pipedream/tree/master/components/microsoft_onedrive/sources/new-file/new-file.mjs) for an example. #### Capturing Sensitive Data If users are required to enter sensitive data, always use [secret](/docs/components/contributing/api/#general) props. ### Promoting Reusability #### App Files App files contain components that declare the app and include prop definitions and methods that may be reused across components. App files should adhere to the following naming convention: `[app_name_slug].app.mjs`. If an app file does not exist for your app, please [reach out](https://pipedream.com/community/c/dev/11). ##### Prop Definitions Whenever possible, reuse existing [prop definitions](/docs/components/contributing/api/#prop-definitions-example). If a prop definition does not exist and you are adding an app-specific prop that may be reused in future components, add it as a prop definition to the app file. Prop definitions will also be surfaced for apps the Pipedream marketplace. ##### Methods Whenever possible, reuse [methods](/docs/components/contributing/api/#methods) defined in the app file. If you need to use an API for which a method is not defined and it may be used in future components, define a new method in the app file. Use the [JS Docs](https://jsdoc.app/about-getting-started.html) pattern for lightweight documentation of each method in the app file. Provide a description and define @params and @returns block tags (with default values if applicable — e.g., `[foo=bar]`). This data will both help with reusability and will be surfaced in documentation for apps in the Pipedream marketplace. For example: ```javascript theme={null} export default { methods: { /** * Get the most recently liked Tweets for a user * * @params {Object} opts - An object representing the configuration options * for this method * @params {String} opts.screenName - The user's Twitter screen name (e.g., * `pipedream`) * @params {String} [opts.count=200] - The maximum number of Tweets to * return * @params {String} [opts.tweetMode=extended] - Use the default of * `extended` to return non-truncated Tweets * @returns {Array} Array of most recent Tweets liked by the specified user */ async getLikedTweets(opts = {}) { const { screenName, count = 200, tweetMode = "extended" } = opts; const { data } = await this._makeRequest({ url: "https://api.twitter.com/1.1/favorites/list.json", params: { screen_name: screenName, count, tweet_mode: tweetMode, }, }); return data; }, }, }; ``` #### Testing Pipedream does not currently support unit tests to validate that changes to app files are backwards compatible with existing components. Therefore, if you make changes to an app file that may impact other sources, you must currently test potentially impacted components to confirm their functionality is not negatively affected. We expect to support a testing framework in the future. ### Common Files (Optional) An optional pattern to improve reusability is to use a `common` module to abstract elements that are used across to multiple components. The trade-off with this approach is that it increases complexity for end-users who have the option of customizing the code for components within Pipedream. When using this approach, the general pattern is: * The `.app.mjs` module contains the logic related to making the actual API calls (e.g. calling `axios.get`, encapsulate the API URL and token, etc). * The `common.mjs` module contains logic and structure that is not specific to any single component. Its structure is equivalent to a component, except that it doesn’t define attributes such as `version`, `dedupe`, `key`, `name`, etc (those are specific to each component). It defines the main logic/flow and relies on calling its methods (which might not be implemented by this component) to get any necessary data that it needs. In OOP terms, it would be the equivalent of a base abstract class. * The component module of each action would inherit/extend the `common.mjs` component by setting additional attributes (e.g. `name`, `description`, `key`, etc) and potentially redefining any inherited methods. * Common files (e.g., `common.mjs`, `utils.mjs`) must be placed within a common folder: `/common/common.mjs`. See [Google Drive](https://github.com/PipedreamHQ/pipedream/tree/master/components/google_drive) for an example of this pattern. When using this approach, prop definitions should still be maintained in the app file. Please note that the name `common` is just a convention and depending on each case it might make sense to name any common module differently. For example, the [AWS sources](https://github.com/PipedreamHQ/pipedream/tree/master/components/aws) contains a `common` directory instead of a `common.mjs` file, and the directory contains several modules that are shared between different event sources. ## Props As a general rule of thumb, we should strive to incorporate all relevant options from a given API as props. ### Labels Use [prop](/docs/components/contributing/api/#user-input-props) labels to customize the name of a prop or propDefinition (independent of the variable name in the code). The label should mirror the name users of an app are familiar with; i.e., it should mirror the equivalent label in the app’s UI. This applies to usage in labels, descriptions, etc. E.g., the Twitter API property for search keywords is “q”, but its label is set to “Search Term”. ### Descriptions Include a description for [props](/docs/components/contributing/api/#user-input-props) to help the user understand what they need to do. Use Markdown as appropriate to improve the clarity of the description or instructions. When using Markdown: * Enclose sample input values in backticks (`` ` ``) * Refer to other props using **bold** by surrounding with double asterisks (\*) * Use Markdown links with descriptive text rather than displaying a full URL. * If the description isn’t self-explanatory, link to the API docs of the relevant method to further clarify how the prop works. When the value of the prop is complex (for example, an object with many properties), link to the section of the API docs that include details on this format. Users may pass values from previous steps using expressions, so they’ll need to know how to structure the input data. Examples: * The async option to select an Airtable Base is self-explanatory so includes no description: ![](https://mintcdn.com/pipedream/NF77kliJSewMqg65/images/0e3488a5-ixb3aozdijmz0zfqxmvy.png?fit=max\&auto=format\&n=NF77kliJSewMqg65\&q=85\&s=2403555b853cc5981dbe4d42b2162611) image-20210326151557417 * The “Search Term” prop for Twitter includes a description that helps the user understand what values they can enter, with specific values highlighted using backticks and links to external content. ![](https://mintcdn.com/pipedream/h8oodpUDiyR1Ssvt/images/3a242a9e-image.png?fit=max\&auto=format\&n=h8oodpUDiyR1Ssvt\&q=85\&s=aff6ec64c38639a46ff89dfac0663019) image-20210326151706682 ### Optional vs Required Props Use optional [props](/docs/components/contributing/api/#user-input-props) whenever possible to minimize the input fields required to use a component. For example, the Twitter search mentions source only requires that a user connect their account and enter a search term. The remaining fields are optional for users who want to filter the results, but they do not require any action to activate the source: ![](https://mintcdn.com/pipedream/Acz4Z1ch6TM7-aI8/images/b07aacd1-image.png?fit=max\&auto=format\&n=Acz4Z1ch6TM7-aI8\&q=85\&s=2c0e23fe42403e3fe348b35641efa4c2) image-20210326151930885 ### Default Values Provide [default values](/docs/components/contributing/api/#user-input-props) whenever possible. NOTE: the best default for a source doesn’t always map to the default recommended by the app. For example, Twitter defaults search results to an algorithm that balances recency and popularity. However, the best default for the use case on Pipedream is recency. ### Async Options Avoid asking users to enter ID values. Use [async options](/docs/components/contributing/api/#async-options-example) (with label/value definitions) so users can make selections from a drop down menu. For example, Todoist identifies projects by numeric IDs (e.g., 12345). The async option to select a project displays the name of the project as the label, so that’s the value the user sees when interacting with the source (e.g., “My Project”). The code referencing the selection receives the numeric ID (12345). Async options should also support [pagination](/docs/components/contributing/api/#async-options-example) (so users can navigate across multiple pages of options for long lists). See [HubSpot](https://github.com/PipedreamHQ/pipedream/blob/a9b45d8be3b84504dc22bb2748d925f0d5c1541f/components/hubspot/hubspot.app.mjs#L136) for an example of offset-based pagination. See [Twitter](https://github.com/PipedreamHQ/pipedream/blob/d240752028e2a17f7cca1a512b40725566ea97bd/components/twitter/twitter.app.mjs#L200) for an example of cursor-based pagination. ### Dynamic Props [Dynamic props](/docs/components/contributing/api/#dynamic-props) can improve the user experience for components. They let you render props in Pipedream dynamically, based on the value of other props, and can be used to collect more specific information that can make it easier to use the component. See the Google Sheets example in the linked component API docs. ### Interface & Service Props In the interest of consistency, use the following naming patterns when defining [interface](/docs/components/contributing/api/#interface-props) and [service](/docs/components/contributing/api/#service-props) props in source components: | Prop | **Recommended Prop Variable Name** | | - | - | | `$.interface.http` | `http` | | `$.interface.timer` | `timer` | | `$.service.db` | `db` | Use getters and setters when dealing with `$.service.db` to avoid potential typos and leverage encapsulation (e.g., see the [Search Mentions](https://github.com/PipedreamHQ/pipedream/blob/master/components/twitter/sources/search-mentions/search-mentions.mjs#L83-L88) event source for Twitter). ## Source Guidelines These guidelines are specific to [source](/docs/connect/components/triggers) development. ### Webhook vs Polling Sources Create subscription webhooks sources (vs polling sources) whenever possible. Webhook sources receive/emit events in real-time and typically use less compute time from the user’s account. Note: In some cases, it may be appropriate to support webhook and polling sources for the same event. For example, Calendly supports subscription webhooks for their premium users, but non-premium users are limited to the REST API. A webhook source can be created to emit new Calendly events for premium users, and a polling source can be created to support similar functionality for non-premium users. ### Source Name Source name should be a singular, title-cased name and should start with “New” (unless emits are not limited to new items). Name should not be slugified and should not include the app name. NOTE: Pipedream does not currently distinguish real-time event sources for end-users automatically. The current pattern to identify a real-time event source is to include “(Instant)” in the source name. E.g., “New Search Mention” or “New Submission (Instant)”. ### Source Description Enter a short description that provides more detail than the name alone. Typically starts with “Emit new”. E.g., “Emit new Tweets that matches your search criteria”. ### Emit a Summary Always [emit a summary](/docs/components/contributing/api/#emit) for each event. For example, the summary for each new Tweet emitted by the Search Mentions source is the content of the Tweet itself. If no sensible summary can be identified, submit the event payload in string format as the summary. ### Deduping Use built-in [deduping strategies](/docs/components/contributing/api/#dedupe-strategies) whenever possible (`unique`, `greatest`, `last`) vs developing custom deduping code. Develop custom deduping code if the existing strategies do not support the requirements for a source. ### Surfacing Test Events In order to provide users with source events that they can immediately reference when building their workflow, we should implement 2 strategies whenever possible: #### Emit Events on First Run * Polling sources should always emit events on the first run (see the [Spotify: New Playlist](https://github.com/PipedreamHQ/pipedream/blob/master/components/spotify/sources/new-playlist/new-playlist.mjs) source as an example) * Webhook-based sources should attempt to fetch existing events in the `deploy()` hook during source creation (see the [Jotform: New Submission](https://github.com/PipedreamHQ/pipedream/blob/master/components/jotform/sources/new-submission/new-submission.mjs) source) *Note – make sure to emit the most recent events (considering pagination), and limit the count to no more than 50 events.* #### Include a Static Sample Event There are times where there may not be any historical events available (think about sources that emit less frequently, like “New Customer” or “New Order”, etc). In these cases, we should include a static sample event so users can see the event shape and reference it while building their workflow, even if it’s using fake data. To achieve this, follow these steps: 1. Copy the JSON output from the source’s emit (what you get from `steps.trigger.event`) and **make sure to remove or scrub any sensitive or personal data** (you can also copy this from the app’s API docs) 2. Add a new file called `test-event.mjs` in the same directory as the component source and export the JSON event via `export default` ([example](https://github.com/PipedreamHQ/pipedream/blob/master/components/jotform/sources/new-submission/test-event.mjs)) 3. In the source component code, make sure to import that file as `sampleEmit` ([example](https://github.com/PipedreamHQ/pipedream/blob/master/components/jotform/sources/new-submission/new-submission.mjs#L2)) 4. And finally, export the `sampleEmit` object ([example](https://github.com/PipedreamHQ/pipedream/blob/master/components/jotform/sources/new-submission/new-submission.mjs#L96)) This will render a “Generate Test Event” button in the UI for users to emit that sample event: ![](https://mintcdn.com/pipedream/anb6FA0wpd8jtdUB/images/65ee3c5e-generate-test-event_drjykm.gif?s=938ab35117bffc4f68876d3a19d92dab) generate-sample-event ### Polling Sources #### Default Timer Interval As a general heuristic, set the default timer interval to 15 minutes. However, you may set a custom interval (greater or less than 15 minutes) if appropriate for the specific source. Users may also override the default value at any time. For polling sources in the Pipedream registry, the default polling interval is set as a global config. Individual sources can access that default within the props definition: ```javascript theme={null} import { DEFAULT_POLLING_SOURCE_TIMER_INTERVAL } from "@pipedream/platform"; export default { props: { timer: { type: "$.interface.timer", default: { intervalSeconds: DEFAULT_POLLING_SOURCE_TIMER_INTERVAL, }, }, }, // rest of component... } ``` #### Rate Limit Optimization When building a polling source, cache the most recently processed ID or timestamp using `$.service.db` whenever the API accepts a `since_id` or “since timestamp” (or equivalent). Some apps (e.g., GitHub) do not count requests that do not return new results against a user’s API quota. If the service has a well-supported Node.js client library, it’ll often build in retries for issues like rate limits, so using the client lib (when available) should be preferred. In the absence of that, [Bottleneck](https://www.npmjs.com/package/bottleneck) can be useful for managing rate limits. 429s should be handled with exponential backoff (instead of just letting the error bubble up). ### Webhook Sources #### Hooks [Hooks](/docs/components/contributing/api/#hooks) are methods that are automatically invoked by Pipedream at different stages of the [component lifecycle](/docs/components/contributing/api/#source-lifecycle). Webhook subscriptions are typically created when components are instantiated or activated via the `activate()` hook, and deleted when components are deactivated or deleted via the `deactivate()` hook. #### Helper Methods Whenever possible, create methods in the app file to manage [creating and deleting webhook subscriptions](/docs/components/contributing/api/#hooks). | **Description** | **Method Name** | | - | - | | Method to create a webhook subscription | `createHook()` | | Method to delete a webhook subscription | `deleteHook()` | #### Storing the 3rd Party Webhook ID After subscribing to a webhook, save the ID for the hook returned by the 3rd party service to the `$.service.db` for a source using the key `hookId`. This ID will be referenced when managing or deleting the webhook. Note: some apps may not return a unique ID for the registered webhook (e.g., Jotform). #### Signature Validation Subscription webhook components should always validate the incoming event signature if the source app supports it. #### Shared Secrets If the source app supports shared secrets, implement support transparent to the end user. Generate and use a GUID for the shared secret value, save it to a `$.service.db` key, and use the saved value to validate incoming events. ### File-related Sources Sources that emit events for new or updated files should include a temporary file download link in the emitted event payload whenever possible. This improves the user experience by allowing consumers of the event to access the file contents without needing to make an additional authenticated request to the 3rd party service. If the 3rd party API does not provide temporary file download links, use a `dir` prop to upload files to [File Stash](/docs/connect/components/files) and generate presigned GET URLs: * Add a `dir` prop with `accessMode` set to `write`. The `dir` prop's interface mirrors the Pipedream File Stores API, but files are uploaded to a File Stash folder scoped to the source. * Stream files directly to File Stash using `dir.open(filepath).fromReadableStream(stream, ?contentType, ?contentLength)` to avoid exhausting `/tmp` when processing multiple or large files. * Add a boolean prop to control whether to include file upload details and pre-signed GET URL in emitted events. This should default to `false`. * When polling sources are updated or re-enabled, continue polling from the current time instead of catching up on all missed history. See the [Box: New File](https://github.com/PipedreamHQ/pipedream/blob/master/components/box/sources/new-file/new-file.mjs) source for an example implementation. ## Action Guidelines ### Action Name Like [source name](/docs/components/contributing/guidelines/#source-name), action name should be a singular, title-cased name, should not be slugified, and should not include the app name. As a general pattern, articles are not included in the action name. For example, instead of “Create a Post”, use “Create Post”. #### Use `@pipedream/platform` axios for all HTTP Requests By default, the standard `axios` package doesn’t return useful debugging data to the user when it `throw`s errors on HTTP 4XX and 5XX status codes. This makes it hard for the user to troubleshoot the issue. Instead, use the `axios` export from [`@pipedream/platform`](https://github.com/PipedreamHQ/pipedream/tree/master/platform). #### Return JavaScript Objects When you `return` data from an action, it’s returned to the caller — for example, in the response when you [run the action](/docs/connect/components/actions). Return JavaScript objects in all cases, unless there’s a specific reason not to. For example, some APIs return XML responses. If you return XML, it’s harder for users to parse and reference the data. Convert the XML to a JavaScript object, and return that, instead. ### ”List” Actions #### Return an Array of Objects To simplify consuming results from “list”/“search” actions, return an array of the items being listed rather than an object with a nested array. [See this example for Airtable](https://github.com/PipedreamHQ/pipedream/blob/cb4b830d93e1495d8622b0c7dbd80cd3664e4eb3/components/airtable/actions/common-list.js#L48-L63). #### Handle Pagination For actions that return a list of items, the common use case is to retrieve all items. Handle pagination within the action to remove the complexity of needing to paginate from users. We may revisit this in the future and expose the pagination / offset params directly to the user. In some cases, it may be appropriate to limit the number of API requests made or records returned in an action. For example, some Twitter actions optionally limit the number of API requests that are made per execution (using a [`maxRequests` prop](https://github.com/PipedreamHQ/pipedream/blob/cb4b830d93e1495d8622b0c7dbd80cd3664e4eb3/components/twitter/twitter.app.mjs#L52)) to avoid exceeding Twitter’s rate limits. [See the Airtable components](https://github.com/PipedreamHQ/pipedream/blob/e2bb7b7bea2fdf5869f18e84644f5dc61d9c22f0/components/airtable/airtable.app.js#L14) for an example of using a `maxRecords` prop to optionally limit the maximum number of records to return. ### Use `$.summary` to Summarize What Happened [Describe what happened](/docs/components/contributing/api/#returning-data-from-steps) when an action succeeds by following these guidelines: * Use plain language and provide helpful and contextually relevant information (especially the count of items) * Whenever possible, use names and titles instead of IDs * Basic structure: *Successfully \[action performed (like added, removed, updated)] “\[relevant destination]”* ### Don’t Export Data You Know Will Be Large Browsers can crash when users load large exports (many MBs of data). When you know the content being returned is likely to be large –e.g. files —don’t export the full content. Consider writing the data to the `/tmp` directory and exporting a reference to the file. ### File-related Actions Actions that accept a file as input should have a single `string` prop (e.g. called `file`) that accepts both a URL of a file and a path to a file in `/tmp`. This prop should include `format: "file-ref"` so that clients can identify it as a file input. Only props that accept **both** a URL and a `/tmp` path should have `format: "file-ref"`. Props that accept only one or the other should not include this property. ```javascript theme={null} export default { props: { file: { type: "string", label: "File", description: "The URL of a file or the path to a file in the `/tmp` directory", format: "file-ref", }, }, // rest of component... } ``` Actions that work with files should also declare a `dir` prop to indicate that the `/tmp` directory should be synced with [File Stash](/docs/connect/components/files/) when executed via Connect: ```javascript theme={null} export default { props: { dir: { type: "dir", accessMode: "read", // or "write" or "read-write" sync: true, optional: true, // if the action can work without files in /tmp }, }, // rest of component... } ``` Set `accessMode` to one of the following values to enable automatic syncing before and/or after execution based on how the action interacts with files in `/tmp`: * **`read`** - if the action accepts `/tmp` file paths as input, to sync files before execution * **`write`** - if the action writes files to `/tmp` as output, to sync files after execution * **`read-write`** - if the action both reads and writes files, to sync files before and after execution See the [Gmail: Download Attachment](https://github.com/PipedreamHQ/pipedream/blob/master/components/gmail/actions/download-attachment/download-attachment.mjs) action for an example. > [!NOTE] > > Only files whose paths are explicitly returned by the action (e.g., via `return { filePath: "/tmp/filename.ext" }` or `return "/tmp/filename.ext"`) or files written to `process.env.STASH_DIR` are synced with File Stash. This prevents syncing unnecessary temporary files created during execution. ## Miscellaneous * Use camelCase for all props, method names, and variables. ## Database Components Pipedream supports a special category of apps called “databases”, such as [MySQL](https://github.com/PipedreamHQ/pipedream/tree/master/components/mysql), [PostgreSQL](https://github.com/PipedreamHQ/pipedream/tree/master/components/postgresql), [Snowflake](https://github.com/PipedreamHQ/pipedream/tree/master/components/snowflake), etc. Components tied to these apps offer unique features *as long as* they comply with some requirements. The most important features are: 1. A built-in SQL editor that allows users to input a SQL query to be run against their DB 2. Proxied execution of commands against a DB, which guarantees that such requests are always being made from the same range of static IPs When dealing with database components, the Pipedream runtime performs certain actions internally to make these features work. For this reason, these components must implement specific interfaces that allows the runtime to properly interact with their code. These interfaces are usually defined in the [`@pipedream/platform`](https://github.com/PipedreamHQ/pipedream/tree/master/platform) package. ### SQL Editor This code editor is rendered specifically for props of type `sql`, and it uses (whenever possible) the underlying’s database schema information to provide auto-complete suggestions. Each database engine not only has its own SQL dialect, but also its own way of inspecting the schemas and table information it stores. For this reason, each app file must implement the logic that’s applicable to the target engine. To support the schema retrieval, the app file must implement a method called `getSchema` that takes no parameters, and returns a data structure with a format like this: ```javascript theme={null} { users: { // The entries at the root correspond to table names metadata: { rowCount: 100, }, schema: { id: { // The entries under `schema` correspond to column names columnDefault: null, dataType: "number", isNullable: false, tableSchema: "public", }, email: { columnDefault: null, dataType: "varchar", isNullable: false, tableSchema: "public", }, dateOfBirth: { columnDefault: null, dataType: "varchar", isNullable: true, tableSchema: "public", }, }, }, } ``` The [`lib/sql-prop.ts`](https://github.com/PipedreamHQ/pipedream/blob/master/platform/lib/sql-prop.ts) file in the `@pipedream/platform` package define the schema format and the signature of the `getSchema` method. You can also check out existing examples in the [MySQL](https://github.com/PipedreamHQ/pipedream/blob/master/components/mysql/mysql.app.mjs), [PostgreSQL](https://github.com/PipedreamHQ/pipedream/blob/master/components/postgresql/postgresql.app.mjs) and [Snowflake](https://github.com/PipedreamHQ/pipedream/blob/master/components/snowflake/snowflake.app.mjs) components. ### Shared Static IPs When a user runs a SQL query against a database, the request is proxied through a separate internal service that’s guaranteed to always use the same range of static IPs when making outbound requests. This is important for users that have their databases protected behind a firewall, as they can whitelist these IPs to allow Pipedream components to access their databases. To make this work, the app file must implement the interface defined in the [`lib/sql-proxy.ts`](https://github.com/PipedreamHQ/pipedream/blob/master/platform/lib/sql-proxy.ts) file in the `@pipedream/platform` package. This interface defines the following methods: 1. **`getClientConfiguration`**: This method takes no parameters and returns an object that can be fed directly to the database’s client library to initialize/establish a connection to the database. This guarantees that both the component and the proxy service use the same connection settings, **so make sure the component uses this method when initializing the client**. 2. **`executeQuery`**: This method takes a query object and returns the result of executing the query against the database. The Pipedream runtime will replace this method with a call to the proxy service, so **every component must make use of this method in order to support this feature**. 3. **`proxyAdapter`**: This method allows the proxy service to take the arguments passed to the `executeQuery` method and transform them into a “generic” query object that the service can then use. The expected format looks something like this: ```javascript theme={null} { query: "SELECT * FROM users WHERE id = ?", params: [42], } ``` You can check out these example pull requests that allowed components to support this proxy feature: * [#11201 (MySQL)](https://github.com/PipedreamHQ/pipedream/pull/11201) * [#11202 (PostgreSQL)](https://github.com/PipedreamHQ/pipedream/pull/11202) * [#12511 (Snowflake)](https://github.com/PipedreamHQ/pipedream/pull/12511) # Quickstart: Source Development Source: https://pipedream.com/docs/components/contributing/sources-quickstart This document is intended for a technical audience (including those interested in learning how to author and edit components). After completing this quickstart, you will understand how to: * Deploy components to Pipedream using the CLI * Invoke a component manually, or on a schedule or HTTP request * Maintain state across component executions * Emit deduped events using the `unique` and `greatest` strategies * Use Pipedream managed OAuth for an app * Use npm packages in components We recommend that you execute the examples in order — each one builds on the concepts and practices of earlier examples. ## Quickstart Examples **Hello World! (\~10 minutes)** * Deploy a `hello world!` component using the Pipedream CLI and invoke it manually * Use `$.service.db` to maintain state across executions * Use `$.interface.timer` to invoke a component on a schedule * Use `$.interface.http` to invoke code on HTTP requests **Emit new RSS items on a schedule (\~10 mins)** * Use the `rss-parser` npm package to retrieve an RSS feed and emit each item * Display a custom summary for each emitted item in the event list * Use the `unique` deduping strategy so we only emit new items from the RSS feed * Add a timer interface to run the component on a schedule **Poll for new GitHub issues (\~10 mins)** * Use Pipedream managed OAuth with GitHub’s API to retrieve issues for a repo * Use the `greatest` deduping strategy to only emit new issues ## Prerequisites **Step 1.** Create a free account at [https://pipedream.com](https://pipedream.com). Just sign in with your Google or GitHub account. **Step 2.** [Download and install the Pipedream CLI](/docs/cli/install/). **Step 3.** Once the CLI is installed, [link your Pipedream account to the CLI](/docs/cli/login/#existing-pipedream-account): ``` pd login ``` See the [CLI reference](/docs/cli/reference/) for detailed usage and examples beyond those covered below. ## CLI Development Mode The examples in this guide use the `pd dev` command. This command will deploy your code in “development mode”. What that means is that the CLI will attach to the deployed component and watch your local file for changes —when you save changes to your local file, your component will automatically be updated on Pipedream (the alternative is to `pd deploy` and run `pd update` for each change). If your `pd dev` session is terminated and you need to re-attach to a deployed component, run the following command. ``` pd dev [--dc ] ``` For example, if you’re building a new source at `components/sources/my-source.mjs`, then pass the fully qualified path to `pd dev`: ``` pd dev components/sources/my-source.mjs ``` If you need to update a deployed instance of a source, pass it’s ID to the `dc` argument to update it with new source code: ``` pd dev --dc dc_123456 components/sources/my-source.mjs ``` See the [CLI reference](/docs/cli/reference/) for detailed usage and examples beyond those covered below. ## Hello World! Here is a simple component that will emit an event with a payload of `{ message: "hello world!" }` on each execution. ```javascript theme={null} export default { name: "Source Demo", description: "This is a demo source", async run() { this.$emit({ message: "hello world!" }); }, }; ``` To deploy and run it, save the code to a local `.js` file (e.g., `source.js`) and run the following CLI command: ``` pd dev source.js ``` The CLI will deploy your code in development mode (the CLI will attach to the deployed component and watch your local file for changes —when you save changes to your local file, your component will automatically be updated on Pipedream). You should see the following output: ``` $ pd dev source.js watch:add | source.js Configuring props... Deploying... Attached to deployed component: https://pipedream.com/sources/dc_v3uXKz/configuration Ready for updates! ``` Open the URL returned by the CLI (`https://pipedream.com/sources/dc_v3uXKz` in the sample output above) to view your source in Pipedream’s UI. Then click **RUN NOW** to invoke your source. Your event will appear in real-time, and you can select it to inspect the emitted data. ![](https://mintcdn.com/pipedream/nKh6d_6A4aXFb6xD/images/fecb9617-image.gif?s=14e87017018d666e79678dd82e40f1ce) source ### Maintain state across executions Next, we’ll use Pipedream’s `db` service to track the number of times the component is invoked. First, we’ll assign `$.service.db` to a prop so we can reference it in our code via `this`. ```javascript theme={null} props: { db: "$.service.db", }, ``` Then we’ll update the `run()` method to: * Retrieve the value for the `count` key (using the `get()` method of `$.service.db`) * Display the count in the event summary (event summaries are displayed in the event list next to the event time) * Increment `count` and save the updated value to `$.service.db` using the `set()` method ```javascript theme={null} let count = this.db.get("count") || 1; this.$emit( { message: "hello world!" }, { summary: `Execution #${count}`, } ); this.db.set("count", ++count); ``` Here’s the updated code: ```javascript theme={null} export default { name: "Source Demo", description: "This is a demo source", props: { db: "$.service.db", }, async run() { let count = this.db.get("count") || 1; this.$emit( { message: "hello world!" }, { summary: `Execution #${count}`, } ); this.db.set("count", ++count); }, }; ``` Save the changes to your local file. Your component on Pipedream should automatically update. Return to the Pipedream UI and press **RUN NOW** —you should see the execution count appear in the event list. ![](https://mintcdn.com/pipedream/Acz4Z1ch6TM7-aI8/images/b5df5e15-image.gif?s=192c3b4f5d35aba6c4fabacfe748434e) source ### Invoke your code on a schedule Next, we’ll update our component so it runs on a schedule. To do that, we’ll use Pipedream’s `timer` interface and we’ll set the default execution interval to 15 minutes by adding the following code to `props`: ```javascript theme={null} timer: { type: "$.interface.timer", default: { intervalSeconds: 15 * 60, }, }, ``` Here’s the updated code: ```javascript theme={null} export default { name: "Source Demo", description: "This is a demo source", props: { db: "$.service.db", timer: { type: "$.interface.timer", default: { intervalSeconds: 15 * 60, }, }, }, async run() { let count = this.db.get("count") || 1; this.$emit( { message: "hello world!" }, { summary: `Execution #${count}`, } ); this.db.set("count", ++count); }, }; ``` Save the changes to your file (your component on Pipedream should automatically update). and then, return to the Pipedream UI and **reload the page**. You should now see the timer settings in the summary and a countdown to the next execution (you can still run your component manually). Your component will now run every 15 minutes. ![](https://mintcdn.com/pipedream/anb6FA0wpd8jtdUB/images/71726831-image.gif?s=9f67c15b5a275ba43538ead69ad74004) source **Note**: if you’d like to change the schedule of your deployed component, visit the **Configuration** tab in the Pipedream UI and change the schedule accordingly. Changing the value of `intervalSeconds` within the component’s code will not change the schedule of the running instance of the component. You can also set one value as the default `intervalSeconds` in the component’s code, but run ``` pd dev --prompt-all ``` to set a different schedule than the default specified in the code. ### Invoke your code on HTTP requests Next, we’ll update our component to run on HTTP requests instead of a timer. To do that, we’ll just replace the `timer` interface with an `http` interface. ```javascript theme={null} http: { type: "$.interface.http", customResponse: true }, ``` In addition, we’ll update the function signature to pass in the HTTP event so we can reference it in our code: ```javascript theme={null} async run(event) { } ``` Finally, let’s update the `run()` method to use `event` to both echo back the request body in the HTTP response and emit it as the event payload. ```javascript theme={null} this.http.respond({ status: 200, body: event.body, headers: { "Content-Type": event.headers["Content-Type"], }, }); this.$emit(event.body, { summary: `Execution #${count}`, }); ``` Here’s the updated code: ```javascript theme={null} export default { name: "Source Demo", description: "This is a demo source", props: { db: "$.service.db", http: { type: "$.interface.http", customResponse: true, }, }, async run(event) { let count = this.db.get("count") || 1; this.http.respond({ status: 200, body: event.body, headers: { "Content-Type": event.headers["Content-Type"], }, }); this.$emit(event.body, { summary: `Execution #${count}`, }); this.db.set("count", ++count); }, }; ``` Save the changes to your file and your component on Pipedream should automatically update. Return to the Pipedream UI and refresh the page. Instead of the countdown timer, you will now see a unique URL generated by Pipedream. Copy the URL and update and execute the CURL command below to invoke your component. This command passes `{ message: "hello world!" }` as the request body. `{ message: "hello world!" }` will be emitted as the event similar to the earlier examples, and it will also be echoed back in the HTTP response. ```sh theme={null} curl -d '{ "message": "hello world!" }' \ -H "Content-Type: application/json" \ "INSERT-YOUR-ENDPOINT-URL-HERE" ``` ![](https://mintcdn.com/pipedream/h8oodpUDiyR1Ssvt/images/2f9cad05-image.gif?s=8c5228c00a28121552516a79fa7fd806) source ## Emit new RSS items on a schedule (\~10 mins) Next, let’s cover some real-world examples starting with RSS. Continue editing the same file, but start with the following scaffolding for this example. ```javascript theme={null} export default { name: "Source Demo", description: "This is a demo source", async run() {}, }; ``` ### Emit items in an RSS Feed > [!NOTE] > > **Note:** The code for the examples below was adapted from the samples provided in the readme for the `rss-parser` package at [https://www.npmjs.com/package/rss-parser](https://www.npmjs.com/package/rss-parser). To use most npm packages on Pipedream, just `import` them — there is no `package.json` or `npm install` required. To parse the RSS feed, we’ll use the `rss-parser` npm package. ```javascript theme={null} import Parser from "rss-parser"; let parser = new Parser(); ``` Then, update the `run()` method to: * Parse the feed at `https://lorem-rss.herokuapp.com/feed` (it’s important you use this feed — a new item is added every minute, so it will help us test deduplication) * Loop through the array of returned RSS items and emit each one ```javascript theme={null} let feed = await parser.parseURL("https://lorem-rss.herokuapp.com/feed"); feed.items.forEach((item) => { this.$emit(item); }); ``` Here’s the updated code: ```javascript theme={null} import Parser from "rss-parser"; let parser = new Parser(); export default { name: "Source Demo", description: "This is a demo source", async run() { let feed = await parser.parseURL("https://lorem-rss.herokuapp.com/feed"); feed.items.forEach((item) => { this.$emit(item); }); }, }; ``` Save the changes to your file, and then refresh your source in the Pipedream UI and click **RUN NOW**. You should see 10 events emitted. Each event corresponds with an RSS item. You can select each event to inspect it. ### Add an optional summary for each emitted event Next, we’ll add a summary for each event. The summary is displayed in the event list and makes it easy to differentiate events at a glance in the list. For this example, let’s emit the `title` as the summary for each RSS item. To do that, we add a metadata object to `this.$emit()`. Add summary to emit metadata… ```javascript theme={null} this.$emit(item, { summary: item.title, }); ``` Here’s the updated code: ```javascript theme={null} import Parser from "rss-parser"; let parser = new Parser(); export default { name: "Source Demo", description: "This is a demo source", async run() { let feed = await parser.parseURL("https://lorem-rss.herokuapp.com/feed"); feed.items.forEach((item) => { this.$emit(item, { summary: item.title, }); }); }, }; ``` Save the changes to your file and then click **RUN NOW** in the Pipedream UI. You should again see 10 events emitted, but this time each event should have a corresponding summary in the event list. ### Only emit new items in the RSS Feed In the previous examples, we always emit any data that is returned. However, we are emitting duplicate events — e.g., if you run invoke the component twice, you will see the same events emitted twice. Pipedream provides built-in deduplication strategies to make it easy to emit new events only. For this example, we’ll use the `unique` strategy. This strategy caches the last 100 event `id` values, and only emits events with `id` values that are not contained in that cache. To dedupe with the `unique` strategy, we need to first declare it: ```javascript theme={null} dedupe: "unique", ``` And then we need to pass an `id` value in the metadata for `this.$emit()` for Pipedream to use for deduping: ```bash theme={null} this.$emit(item, { summary: item.title, id: item.guid, }); ``` Here’s the updated code: ```javascript theme={null} import Parser from "rss-parser"; let parser = new Parser(); export default { name: "Source Demo", description: "This is a demo source", dedupe: "unique", async run() { let feed = await parser.parseURL("https://lorem-rss.herokuapp.com/feed"); feed.items.forEach((item) => { this.$emit(item, { summary: item.title, id: item.guid, }); }); }, }; ``` Save the changes to your file and then click **RUN NOW** in the Pipedream UI. Similar to previous executions, you should see 10 events emitted. Now, run the component **again**. You should see a maximum of **one, if any** events emitted (the reason one event may be emitted is if a new item was added to the RSS feed). If no new events were emitted, wait for \~1 minute and try again. ### Add a timer interface to invoke the component on a schedule Now we’re ready to add a timer to our component to check for new RSS items automatically. Similar to the **hello world!** example above, we’ll add a timer prop, and we’ll set the default interval to 5 minutes: ```javascript theme={null} props: { timer: { type: "$.interface.timer", default: { intervalSeconds: 60 * 5, }, }, }, ``` Here’s the updated code: ```javascript theme={null} import Parser from "rss-parser"; let parser = new Parser(); export default { name: "Source Demo", description: "This is a demo source", props: { timer: { type: "$.interface.timer", default: { intervalSeconds: 60 * 5, }, }, }, dedupe: "unique", async run() { let feed = await parser.parseURL("https://lorem-rss.herokuapp.com/feed"); feed.items.forEach((item) => { this.$emit(item, { id: item.guid, summary: item.title, }); }); }, }; ``` **Save** your component then return to the UI and reload the page. You should see the updated configuration on your summary card and a countdown to the next execution. You can still click **RUN NOW** to execute your source manually. ## Use managed auth to pull data from GitHub (\~10 mins) In the last example, we were able to retrieve data to emit without any authentication. Now we’ll use Pipedream managed auth to retrieve and emit data from the GitHub API (which uses OAuth for authentication). Similar to the last example, continue editing the same file, but start with the following scaffolding: ```javascript theme={null} export default { name: "Source Demo", description: "This is a demo source", async run() {}, }; ``` ### Get issues for a repo First, import `axios` so we can make a request to the GitHub REST API: ```javascript theme={null} import { axios } from "@pipedream/platform"; ``` Next, let’s add an **app prop**, which will enable us to use Pipedream managed auth with this component. For this example, we’ll add GitHub: ```javascript theme={null} props: { github: { type: "app", app: "github", }, }, ``` **IMPORTANT: The CLI will prompt you to select a connected account (or connect a new one) when you deploy (or update) this component.** > [!NOTE] > > **Note:** The value for the `app` property is the name slug for the app in Pipedream. This is not currently discoverable, but it will be in the near future. For the time being, if you want to know how to reference an app, please reach out on our public Slack. Finally, we’ll update the `run()` method to fetch issues from GitHub using `axios` and emit them. Notice that we’re passing the `oauth_access_token` in the authorization header by referencing the app prop `this.github.$auth.oauth_access_token`. Again, it’s important that you stick with the `pddemo/demo` repo shown in the below example so you can test the next dedupe strategy. ```javascript theme={null} async run() { const data = await axios(this, { method: 'get', headers: { Authorization: `Bearer ${this.github.$auth.oauth_access_token}`, }, url: `https://api.github.com/repos/pddemo/demo/issues` }) data.forEach(issue => { this.$emit(issue) }) } ``` Here’s the updated code. ```javascript theme={null} import { axios } from "@pipedream/platform"; export default { name: "Source Demo", description: "This is a demo source", props: { github: { type: "app", app: "github", }, }, async run() { const data = await axios(this, { method: "get", headers: { Authorization: `Bearer ${this.github.$auth.oauth_access_token}`, }, url: `https://api.github.com/repos/pddemo/demo/issues`, }); data.forEach((issue) => { this.$emit(issue); }); }, }; ``` Next save your changes and go to the terminal where you ran `pd dev` **—follow the CLI prompts to select a connected account for GitHub (or connect a new one)**. Then load the Pipedream UI, and click **RUN NOW**. Your component should emit 30 issues. ### Dedupe the events In the RSS example, we deduped the emitted events based on the `unique` strategy. The limitation of the unique strategy is that it will only maintain uniqueness for 100 items. Since GitHub issues have increasing numeric IDs, we can use the `greatest` strategy to filter for new issues. To use this strategy, we first have to declare it. ```javascript theme={null} dedupe: "greatest". ``` Then, we need to pass the numeric ID for each issue to `this.$emit()`. We can also add a summary and a timestamp (based on the date/time when the issue was created). Note: when you add a timestamp, Pipedream will automatically emit events from oldest to newest. ```javascript theme={null} response.data.forEach((issue) => { this.$emit(issue, { id: issue.id, summary: `ISSUE ${issue.number}: ${issue.title}`, ts: issue.created_at && +new Date(issue.created_at), }); }); ``` Here is the updated code. ```javascript theme={null} import { axios } from "@pipedream/platform"; export default { name: "Source Demo", description: "This is a demo source", props: { github: { type: "app", app: "github", }, }, dedupe: "greatest", async run() { const data = await axios(this, { method: "get", headers: { Authorization: `Bearer ${this.github.$auth.oauth_access_token}`, }, url: `https://api.github.com/repos/pddemo/demo/issues`, }); data.forEach((issue) => { this.$emit(issue, { id: issue.id, summary: `ISSUE ${issue.number}: ${issue.title}`, ts: issue.created_at && +new Date(issue.created_at), }); }); }, }; ``` Save, load the Pipedream UI, and click **RUN NOW**. You should see 30 issues emitted, now with summaries. When you click **RUN NOW** again, only new issues will be emitted (if there are any). ### Add a timer to run on a schedule As the final step of this walk-through, we’ll update our component to check for new issues every 15 minutes. To do that, we’ll add a timer prop. ```javascript theme={null} timer: { type: "$.interface.timer", default: { intervalSeconds: 15 * 60, }, }, ``` Here’s the updated code. ```javascript theme={null} import { axios } from "@pipedream/platform"; export default { name: "Source Demo", description: "This is a demo source", props: { github: { type: "app", app: "github", }, timer: { type: "$.interface.timer", default: { intervalSeconds: 15 * 60, }, }, }, dedupe: "greatest", async run() { const data = await axios(this, { method: "get", headers: { Authorization: `Bearer ${this.github.$auth.oauth_access_token}`, }, url: `https://api.github.com/repos/pddemo/demo/issues`, }); data.forEach((issue) => { this.$emit(issue, { id: issue.id, summary: `ISSUE ${issue.number}: ${issue.title}`, ts: issue.created_at && +new Date(issue.created_at), }); }); }, }; ``` Save and reload your source in the Pipedream UI. You should now see a countdown timer to the next execution. ## What’s Next? You’re ready to start authoring and deploying components on Pipedream! You can also check out the [detailed component reference](/docs/components/contributing/api/) at any time! If you have any questions or feedback, please join our [public Slack](https://pipedream.com/support). # TypeScript Components Source: https://pipedream.com/docs/components/contributing/typescript > [!NOTE] > > 🎉 Calling all TypeScript developers 🎉 > > TypeScript components are in **beta**, and we’re looking for feedback. Please see our list of [known issues](/docs/components/contributing/typescript/#known-issues), start writing TypeScript components, and give us feedback in [our community](https://pipedream.com/support). > > During the beta, the `@pipedream/types` package and other TypeScript configuration in the `pipedream` repo is subject to change. ## Why TypeScript? Most Pipedream components in [the registry](https://github.com/PipedreamHQ/pipedream) are written in Node.js. Writing components in TypeScript can reduce bugs and speed up development, with very few changes to your code. If you haven’t written TypeScript, start with [this tutorial](https://www.typescriptlang.org/handbook/typescript-from-scratch.html). ## Quickstart > [!NOTE] > > If you’ve never developed Pipedream components before, [start here](/docs/components/contributing/). ### Developing TypeScript components in the `PipedreamHQ/pipedream` registry 1. [Fork and clone the repo](https://github.com/PipedreamHQ/pipedream). 2. Run `pnpm install` to install dependencies. 3. See [the RSS sources and actions](https://github.com/PipedreamHQ/pipedream/tree/master/components/rss) for example `tsconfig.json` configuration and TypeScript components. If the app you’re working with doesn’t yet have a `tsconfig.json` file, copy the file from the RSS component directory and modify accordingly. 4. In the RSS examples, you’ll see how we use the `defineApp`, `defineAction`, and `defineSource` methods from the `@pipedream/types` package. This lets us strictly-type `this` in apps and components. See [the TypeScript docs on `ThisType`](https://www.typescriptlang.org/handbook/utility-types.html#thistypetype) for more detail on this pattern. 5. Before you publish components to Pipedream, you’ll need to compile your TypeScript to JavaScript. Run: ```bash theme={null} npm run build ``` The build process should print the compiled JS files to your console and produce them at the `/dist` directory. For example, if you compile a TypeScript file at `pipedream/components/rss/sources/new-item-in-feed/new-item-in-feed.ts`, the corresponding JS file will be produced at `pipedream/components/rss/dist/sources/new-item-in-feed/new-item-in-feed.js`. 6. Use [the Pipedream CLI](/docs/cli/reference/) to `pd publish` or `pd dev` the JavaScript components emitted by step 5 by the full path to the file. ```bash theme={null} pd publish pipedream/components/rss/dist/sources/new-item-in-feed/new-item-in-feed.js ``` > [!NOTE] > > Don’t forget to use the dist directory > > If you attempt to deploy the TypeScript component directly, you’ll receive a 500 error from the publish endpoint. Instead deploy the JavaScript file produced within the `/dist` directory as described in step 5. 7. If it doesn’t exist in the app directory, add a `.gitignore` file that ignores the following files. Commit only `ts` files to Git, not compiled `*js` files. ``` *.js *.mjs dist ``` ### Developing TypeScript components in your own application First, install the `@pipedream/types` package: ```bash theme={null} # npm npm i --save-dev @pipedream/types # yarn yarn add --dev @pipedream/types ``` You’ll need a minimal configuration to compile TypeScript components in your application. In the Pipedream registry, we use this setup: * The `tsconfig.json` in the root of the repo contains [references](https://www.typescriptlang.org/handbook/project-references.html) to component app directories. For example, the root config provides a reference to the `components/rss` directory, which contains its own `tsconfig.json` file. * `npm run build` compiles the TypeScript in all directories in `references`. * The `tsconfig.json` in each component app directory contains the app-specific TypeScript configuration. * The GitHub actions in `.github/workflows` compile and publish our components. See [the RSS sources and actions](https://github.com/PipedreamHQ/pipedream/tree/master/components/rss) for an example app configuration. ## Known issues We welcome PRs in [the `PipedreamHQ/pipedream` repo](https://github.com/PipedreamHQ/pipedream), where we store all sources and actions, the `@pipedream/types` package, these docs, and other Pipedream code. Here are a few known issues during the **beta**: * `this` is strictly-typed within `methods`, `run`, `hooks`, and everywhere you have access to `this` in [the component API](/docs/components/contributing/api/). But this typing can be improved. For example, we don’t yet map props to their appropriate TypeScript type (everything is typed with `any`). * The compile -> publish lifecycle hasn’t been fully-automated when you’re developing in the `pipedream` repo. Currently, you have to run `npm run build` from the repo root, then use the `pd` CLI to publish components after compilation. It would be nice to run `tsc-watch` and have that compile and publish the new version of the component using the `--onSuccess` flag, publishing any sources or actions accordingly. * We should add a linter (like `dtslint`) to all TypeScript components). Currently, `dtslint` is configured only for the `@pipedream/types` package. ## `@pipedream/types` See the `types` directory of [the `PipedreamHQ/pipedream` repo](https://github.com/PipedreamHQ/pipedream) for Pipedream types. We welcome PRs! ## Giving feedback during the beta We welcome any feedback, bug reports, or improvements. Please reach out or submit PRs [in our Slack, Discourse and GitHub communities](https://pipedream.com/support). # Changelog Source: https://pipedream.com/docs/conduit/changelog What changed in each Conduit release, newest first, and what to do when upgrading. **v0.16.3** 2026-10-26 *conduit mcp exits on SIGTERM even when its MCP client has stopped reading, which also ends an intermittent Go test failure in source builds.* ## Upgrade notes None. ## Fixed * `conduit mcp` exits promptly on SIGTERM even when its MCP client has stopped reading its output but kept the connection open; before, once the output pipe filled, it kept running until killed. * Building the image from source no longer fails intermittently in the Go tests on a busy builder, with `TestLocalMCPServer_ForwardsListChanged` reporting "ServeStdio did not exit on cancel". [Compare v0.16.2...v0.16.3](https://github.com/PipedreamHQ/conduit/compare/v0.16.2...v0.16.3) **v0.16.2** 2026-10-23 *The docs build's Artifactory mirrors can now require credentials, read from a netrc file passed as a BuildKit secret.* ## Upgrade notes * If you build the image with `DOCS_ICONS_BASE` and the icon mirror refuses the build's requests, redirects, or can't be reached, the build now fails with the mirror's error instead of finishing with blank icons; fix the mirror or its credentials (see [If your registry needs credentials](/docs/conduit/deploy/build-from-source#if-your-registry-needs-credentials)). ## Added * The docs build's mirrors (`MINT_RELEASES_BASE` and `DOCS_ICONS_BASE`) can require credentials: pass a netrc file as the BuildKit secret `--secret id=netrc`, which is mounted only for the steps that download from the mirrors and never kept in the image or its history, and whose entries are sent only to the host each one names, over https (see [If your registry needs credentials](/docs/conduit/deploy/build-from-source#if-your-registry-needs-credentials)). [Compare v0.16.1...v0.16.2](https://github.com/PipedreamHQ/conduit/compare/v0.16.1...v0.16.2) **v0.16.1** 2026-10-23 *The embedded docs now run on Mintlify's own export, with offline search and links that don't reload the page; source builds pin the docs renderer and can take its downloads from an artifact proxy.* ## Upgrade notes * If you build the image from source behind a firewall, check your allowlist against [Build from source](/docs/conduit/deploy/build-from-source#what-the-build-downloads): the docs build no longer contacts `d4tuoctqmanu0.cloudfront.net`, downloads the pinned Mintlify client (about 68 MB) from `releases.mintlify.com` on every build, and runs the Mintlify CLI's internet check (`captive.apple.com`, `icanhazip.com`, `api.ipify.org`, and DNS queries to OpenDNS and Google name servers). Behind an artifact proxy, the new `MINT_RELEASES_BASE` and `DOCS_ICONS_BASE` build args point the client and icon downloads at your mirrors, and the internet check stops mattering. * A reverse proxy that routes the embedded docs to Conduit needs to route `/docs/` only: the docs no longer load anything from `/_next/`, `/images/` or `/_vendor/` at the root. ## Added * The `MINT_RELEASES_BASE` and `DOCS_ICONS_BASE` build args let the image build behind an artifact proxy, pulling the Mintlify client that renders the embedded docs (checked against a pinned SHA-256) and the docs icons from your registry's pull-through mirrors (see [Mirror the docs downloads](/docs/conduit/deploy/build-from-source#mirror-the-docs-downloads)). ## Changed * Search in the embedded docs uses Mintlify's own search box (⌘K) over an index built into the image, replacing Pagefind, and each edition's index holds only its own pages; the docs' Content-Security-Policy no longer allows WebAssembly. * Links in the embedded docs open without a full page load, and the browser console no longer shows a failed request for each link on the page. * Your instance's embedded docs no longer include the Conduit Cloud page: `/docs/cloud` and links to it open the public docs. * On Home, the button a workspace admin sees on a connector is a cog that opens the connector's **Manage** dialog, whose **Access** tab is the "Who can use" editor. * Building from source pins the Mintlify client that renders the embedded docs, installs the Mintlify CLI and its dependencies from a lockfile, and turns off the CLI's usage telemetry, so a commit renders the same docs wherever it's built. * A docs build that can't reach Mintlify's icon or font CDNs completes and lists what it left out, instead of failing: those icons show blank, and no docs page uses the fonts. ## Fixed * The embedded docs home page keeps its sidebar highlight and its next-page link after it loads. * The API reference's request-sample language menu in the embedded docs shows each language's icon instead of a blank. * An embedded docs page a browser had cached no longer fails to run its scripts when it revalidates against a different version of Conduit, as during a rolling upgrade or after a rollback. [Compare v0.16.0...v0.16.1](https://github.com/PipedreamHQ/conduit/compare/v0.16.0...v0.16.1) **v0.16.0** 2026-10-22 *Workspace roles from groups replace provisioning rules, and MCP clients that never refresh their tool list can still reach newly enabled tools; upgrading deletes provisioning rules, so read the upgrade notes first.* ## Upgrade notes * Provisioning rules are removed. Upgrading deletes every rule and the group memberships rules placed, and a member whose role a rule raised becomes a member (unless that would leave their workspace with no owner or admin). Sign-in no longer reads a groups claim from your identity provider; to keep granting roles from your directory, push the directory group with SCIM and give it a role in **Settings → Groups & Policies** (see [Roles from groups](/docs/conduit/configure/access-control#roles-from-groups)), otherwise set roles in **Settings → Members**. * The `ListProvisioningRules` RPC (`provisioning:read`) is removed from the API with no replacement, along with the built-in admin tools for provisioning rules; API clients that call it must stop. `ListProvisionedUsers` and `ListProvisionedGroups` are unchanged. * The `conduit.config.assignment_rule.{created,updated,deleted}` events (`config.assignment_rule.*` in the audit log) and the sign-in event's `rule.matched_ids` attribute (`matched_rules` in its audit details) are no longer emitted. Alerts, dashboards or SIEM rules that match them stop firing; earlier audit rows stay. * Every MCP client now lists three extra tools, `list_available_tools`, `describe_tools` and `call_tool`, and a client's per-tool approval rules see `call_tool`, not the tool it runs: approving `call_tool` once, or "always", approves whatever it runs next. There is no setting to turn them off. ## Added * **Roles from groups:** a workspace admin can give a group a workspace role (Admin, Member or Viewer) in **Settings → Groups & Policies**, and its direct members then hold the highest role their groups grant, set as soon as a SCIM push or membership edit lands rather than at the next sign-in; such roles show as coming from the group and are read-only on **Settings → Members** (see [Roles from groups](/docs/conduit/configure/access-control#roles-from-groups)). * MCP clients that never refresh their tool list (such as Codex, or Claude Code's deferred tool search) can still find and run a tool enabled mid-conversation through the always-listed `list_available_tools`, `describe_tools` and `call_tool`, which read your current access on every call and apply the same policy, connect flow, usage and audit as calling the tool directly; `conduit mcp` serves them for local connectors too (see [MCP reference](/docs/conduit/use/mcp-reference)). ## Changed * Provisioning rules and the **Settings → User Provisioning** page are gone: sign-in, invites and join offers no longer place anyone in a group or raise their role, and roles come from role-granting groups or are set by hand (see the upgrade notes). * Opening a connector on Home shows it in a modal over the catalog at the same `/connectors/` address, with its description rendered as markdown and clamped to two lines until expanded, and its own tool filter. * A selected category on Home appears in a band above the catalog with **Show all** to clear it, and the empty state names the category. [Compare v0.15.2...v0.16.0](https://github.com/PipedreamHQ/conduit/compare/v0.15.2...v0.16.0) **v0.15.2** 2026-10-20 *Agents beta for registering agents you already run, MCP clients that stay signed in through a missed or concurrent token refresh, and clearer connector registration errors.* ## Upgrade notes * During a rolling upgrade, while old and new versions run side by side, an MCP client that retries an already-used refresh token against an old-version replica can end up holding two valid refresh tokens for one sign-in. No action is needed; revoking the client or the user's sessions revokes both. ## Added * **Agents (beta):** workspace admins can register an agent they already run, giving it a Conduit profile with a stable client ID, up to two rotating secrets or public keys, and optional maintainers who can edit it, rotate its credentials and disable it; agents start disabled with no permissions, their credentials can't obtain tokens yet, changes are audited, and the UI appears only to browsers given access (see [Agents](/docs/conduit/use/agents)). ## Changed * A just-replaced MCP refresh token stays redeemable for 30 seconds and returns the same successor, so a client that missed a refresh response, or copies of an assistant sharing one sign-in that refresh together, stay connected instead of being asked to sign in again; such replays are marked `refresh_replay` on the `auth.oauth.token_issued` audit record. * A connector whose authorization server refuses dynamic client registration now shows the server's error and description beside the status (for example `status 400: invalid_client_metadata: …`), not a bare `status 400`. * The Pipedream setup form on **Settings → Connectors** links to the Pipedream Connect dashboard (`connect.pipedream.com/settings/api`) for OAuth client credentials. ## Fixed * An MCP refresh that fails partway through on the server no longer uses up the client's refresh token. * On a multi-replica deployment, a connector whose upstream rotates refresh tokens no longer asks the member to reconnect when another replica refreshed the grant at the same moment. [Compare v0.15.1...v0.15.2](https://github.com/PipedreamHQ/conduit/compare/v0.15.1...v0.15.2) **v0.15.1** 2026-10-09 *Logs and traces every SCIM request once, with why it was refused or failed, and names the SCIM token behind each provisioning change; update SCIM log searches and telemetry queries that use the old names.* ## Upgrade notes * SCIM telemetry names an identity provider the way every other event does: `conduit.scim.*` provisioning events carry `idp.id` and `idp.name` in place of `scim.idp_id` and `scim.idp_name`, and `conduit.config.scim_token.*` events carry `idp.id` in place of `scim_token.idp_id`. Update queries that filter on the old keys. * The `scim: request failed` and `scim: token resolve failed` log lines are gone: a failed SCIM request logs one `scim request` line at `error`, with its cause under `err`. Update log searches and alerts that match the old messages. ## Added * Every SCIM request is logged once as a `scim request` line, with the same facts as `scim.*` attributes on its span: the token and identity provider that sent it, the operation, the changes it made, and why it was refused — including the attribute at fault when the provider's attribute mapping is wrong, the shape of each PATCH operation, the attributes Conduit ignored, and a lookup's filter and match count. It logs at `debug` when served, `info` when refused for something the provider can correct, `warn` when refused for something a person has to resolve, and `error` when Conduit failed; a failure is a tracked issue of type `conduit.scim.request_failed` carrying its cause. See [Troubleshooting a sync](/docs/conduit/configure/scim#troubleshooting-a-sync). * SCIM provisioning audit records and events name the SCIM token that pushed the change (`scim_token_id` in the record's details, `scim_token.id` on the event), so a provider with more than one token shows which one sent it. * A refused SCIM bearer token emits `conduit.scim.auth.failed` (OTel-only) with the reason (`missing_token`, `unknown_token`, `token_disabled`, `idp_disabled`, `idp_unavailable`) and, for a token Conduit knows, its id. ## Changed * A SCIM create, replace or search whose body is over the 10 MiB request limit is answered `413`, as a PATCH already was, rather than `400` (`500` for a search). [Compare v0.15.0...v0.15.1](https://github.com/PipedreamHQ/conduit/compare/v0.15.0...v0.15.1) **v0.15.0** 2026-10-09 *Closes identity-provider and connector OAuth mix-up attacks with per-provider and per-connector callback URLs, makes Home the connectors page, and stops SCIM from creating duplicate accounts; read the upgrade notes before pulling.* ## Upgrade notes * Home now reads Pipedream's public app catalog from `api.pipedream.com` in every workspace, including those that never set up Pipedream; an instance that filters egress should allow that host (see [Network access](/docs/conduit/deploy/network)) or accept Home showing the catalog as unavailable. * Automation that changes a connector's URL, an OAuth client's client ID or token endpoint, an identity provider's client ID, issuer or token URL, or the SMTP host or port must now send the secret again in the same request; an update that leaves it blank while a secret is stored is refused with `invalid_argument` (see Security below). * On a deployment with more than one replica, finish rolling out this version before adding or editing an identity provider or OAuth connector: an older replica doesn't serve the new sign-in, connector callback and connect-page addresses, and sends the shared callback for providers and connectors that have their own. For the same reason, a provider or connector added or changed on this version doesn't sign in or connect after rolling back to an older one. * The `oauth_redirect_uri` that `ListIdentityProviders` and `ListConnectors` return is now only the callback that providers and connectors added before this version are registered with. Register each provider's `redirect_uri` or each connector's `oauth_redirect_uri` instead. * The Conduit CLI's local-connector endpoints (`AuthorizeLocalTool`, `ReportLocalEvent`, `ListEnabledLocalConnectors`) now refuse every OAuth client other than the Conduit CLI. * **Gateway metrics now label connectors by `connector_kind` and `connector_id`.** `conduit_mcp_tool_calls_total`, `conduit_mcp_prompt_gets_total` and `conduit_mcp_resource_reads_total` carry `connector_kind` (`builtin`, `pipedream`, `custom`, `local`, `unknown`) and `connector_id` (a custom or local connector's id); `conduit_mcp_tool_call_duration_seconds` carries `connector_kind`. A single-workspace deployment (the default) keeps the `connector` name label on all four, and gets `connector_id` on the histogram too — except for a call to a connector that is disabled or failed to load, which now counts under `connector_kind="unknown"` with an empty `connector`. **A multi-workspace deployment loses the `connector` label**: update dashboards and alerts that group or filter by it to use `connector_kind, connector_id`. * **In a multi-workspace deployment, instance telemetry exporters no longer receive the names a workspace gave its connectors**, or the tool and prompt names under them. Spans, events and logs identify such a connector by `connector.id` (`connector_id` in logs); a workspace's own exporters still get the names, and builtin and Pipedream connector and tool names still go to every exporter. In a single-workspace deployment (the default) the workspace is the instance, so its instance exporters keep receiving these names on spans and events — and now also the names of its policies, groups, identity providers, SCIM tokens and API clients, which they had stopped receiving in v0.13. * **Application logs and error text name a workspace's connector by id in every deployment**, single-workspace included: log lines carry `connector_id` where they carried the connector's name, a failed upstream call's exception message reads `HTTP from upstream` (which may regroup existing APM issues), and an upstream error no longer begins with the connector and tool (`tools/call: …`, not `tools/call acme.lookup: …`) — in the member's error and on the **Usage** page too, where the tool is shown beside it. Update log searches and alerts that match a connector's name. An `mcp.upstream.send` span's `resource.name` is the JSON-RPC method alone on instance exporters (`tools/call`) and keeps the connector on the workspace's (`github tools/call`). * Provisioning rule changes are now recorded in the workspace's audit log instead of the instance audit log, and their events carry the editor's real role. * **SCIM now takes a provisioned person's email address from `emails`, not from `userName`.** A person provisioned before this version whose `userName` differs from their address — commonly a Microsoft Entra tenant that maps `userName` to a `userPrincipalName` other than `mail` — keeps the `userName` as their Conduit email until your IdP next pushes them, and their first sign-in until then still creates a second account. After upgrading, have your IdP push every assigned user again (in Entra, **Restart provisioning**; in Okta, push profile updates to every assigned user) so each person's address is corrected before they sign in. A person who already has two accounts from the duplication fixed below keeps both; an instance admin deletes the extra one (**Settings → Instance → Users**). * **A SCIM push that names no email address is now refused with `400`**: one with no `emails` and a `userName` that isn't an address. Such a push was accepted before, storing the `userName` as the person's email; configure your IdP to send the address in `emails`. ## Security * **A workspace's identity provider could take over accounts that sign in through another provider.** Every provider shared one sign-in redirect URI, and the callback trusted the sign-in state to say which provider a response came from. An identity provider run by a workspace admin could start a victim's sign-in, send them on to an honest provider (Google, or another workspace's provider), and receive the honest provider's code for their account — an IdP mix-up — which it could use to sign in as them, instance admins included. Each provider now has a redirect URI of its own (`/api/auth/callback/`, shown on the provider screen), a response is accepted only on the URI of the provider its sign-in started with, and a response that names its issuer must name that provider. * **A connector's authorization server could capture a member's grant for another connector.** Every connector shared one OAuth callback URL, so a connector whose authorization server a workspace admin runs could pass a member's connect flow on to another connector's authorization server and receive the resulting code. Each connector now has a callback URL of its own (`/upstream/callback/`, shown on the connector's form), a connect response is accepted only on the URL of the connector it was started for, and one that names a different authorization server than the connector's is refused. * **Outbound requests could reach internal IPv4 addresses through IPv6 translation.** A connector, identity provider or telemetry endpoint whose hostname resolved to a NAT64 or 6to4 address (such as `64:ff9b::a9fe:a9fe`) passed the internal-address check, and on a network with NAT64 — common on IPv6 cloud subnets — reached the IPv4 address inside it, including the cloud metadata service. Conduit now checks the IPv4 address such an IPv6 address carries, and refuses the deprecated and local-use IPv4-embedding ranges outright. * **A workspace identity provider's discovery document could run script on the Conduit origin.** The authorization endpoint a provider's issuer published was used as the sign-in redirect without being checked, so an issuer run by a workspace admin could answer with a `javascript:` URL that anyone opening that workspace's login page would execute (the default content security policy blocked it; `CONDUIT_CSP=report-only` or `off` did not). Discovered authorization and token endpoints are now held to the same rule as ones an admin types in — `https`, not an internal address — and a provider that publishes anything else fails sign-in with "Couldn't reach the identity provider". * **A workspace's MCP client rules could be bypassed from another workspace.** "Who can connect", per-app rules and client revocations held only at the workspace's own MCP URL, so a client it refused could still use workspace tools against it through a connection to another workspace, and any MCP client — not just the Conduit CLI — could fetch the member's local (stdio) connector definitions, environment secrets included. The rules now apply wherever a client acts in the workspace (and such a client shows up on its MCP Clients page), and only the Conduit CLI can call the local-connector endpoints. * **A connect link could connect your account to a different workspace.** The link an assistant gives you to connect an account (an OAuth sign-in, an API token, or a Pipedream app) used whichever workspace your browser was last switched to — which another site could change — rather than the workspace the assistant was using. A member of more than one workspace could have their account land in another workspace's connector or Pipedream project. Connect links now name their workspace, every connect step acts in that workspace, and the connect page shows which workspace you're connecting to. A link for a workspace you aren't a member of connects nothing. * **An admin could redirect a stored secret they can't read.** Changing where a secret is sent — a connector's URL, an OAuth client's client ID or token endpoint, an identity provider's client ID, issuer or token URL, or the SMTP host or port — kept the stored secret when its field was left blank, so a co-admin or an API client with `connectors:write` could have Conduit send it to a host they control; these edits now require the secret to be re-entered. An instance telemetry exporter moved to a new endpoint or protocol now drops its stored headers, as a workspace exporter already did. Repointing a connector also discovers an MCP connector's OAuth provider again for the new URL and cancels connect flows already in progress. ## Added * `GetConnectorAccess` and `SetConnectorAccess` read and write one connector's access across a workspace's subjects (the workspace, each group, each member with a policy of their own) and its other allow policies, applying a write in one transaction and giving a subject its own policy on its first grant. * `GetConnectorAudiences` (workspace admin) lists who every connector is allowed for, with each grant's subject or policy name and how many tools it grants. * `Policy.owner` names the workspace, group or member whose own allow policy it is, `CreatePolicy` takes an `owner` to create one, on upgrade each subject owns the oldest allow policy that links it alone, and deleting a group deletes the group's own policy. * `GetMyConnectors` reports `needs_connection` per connector, plus `all_apps_offered` and `offered_app_slugs` for the Pipedream apps the caller may add. * `GetWorkspaceClientGuidance` reports `client_connected`: whether any of the caller's MCP clients has reached the workspace. * `ListPipedreamAppTools` lists a Pipedream app's tools from Pipedream's public registry, with no Pipedream setup needed. * `ListPipedreamAppCategories` and the new `category_id` on `ListPipedreamApps` power a category menu on Home in workspaces with Pipedream set up. * Policy links carry the `name` of the group or member they link, left empty for a member when the caller is an API client. ## Changed * Home is now the connectors page — your toolkit on the left, the catalog on the right, and an opened connector at `/connectors/` — replacing the **Connectors** sidebar item, while usage moves to the **Usage** page and client setup to **Connect a client**. * The search on Home covers your toolkit, the catalog, and the tools of the connectors you've enabled. * Home lists Pipedream's public app catalog in every workspace, with apps the workspace doesn't offer under **Not offered in your workspace yet** and a **Request** action for members. * Workspace admins grant a connector to everyone, groups or members from Home, through one access dialog per connector reached from **Edit** beside **Allowed for** or **Allow** on an app the workspace doesn't offer. * A member's own allow policy is named `Member: ` rather than by their name or email, and an owned policy's name is numbered when taken rather than refused. * `UpdatePolicy` refuses to change the links of a subject's own policy. * `GetMyConnectors.enable_entries` reports the default selection (every builtin connector, all tools) before the caller first customizes it, where it was empty. * Telemetry carries less of a workspace's data to instance exporters, which in Conduit Cloud are the operator's backend. Names a workspace gave its connectors and provisioning rules, the tool and prompt names under its connectors, and domains it hasn't verified now go only to that workspace's exporters; a denied resource read no longer carries the resource's URI; SCIM rejections carry a fixed reason code (the full reason stays in the audit log); email send failures redact every address in the provider's error, not only the recipient's; request paths stay out of panic reports, and span names and the `http.route` label never take a path the server doesn't serve. A local connector's crash report no longer carries the connector's environment values (its credentials) in the stderr it sends to the audit log. * The workspace menu shows **Switch Workspace** only when you belong to another workspace, and **Create Workspace** only when you're allowed to create one. * The login, invite and join pages use full-width buttons, and provider buttons read **Continue with** the provider. * On a browser that hasn't signed in before, the login page says **Sign up to continue** when it offers a sign-in provider, since a provider's first sign-in creates the account. * When Pipedream refuses a sign-in through a Pipedream identity provider because the account uses a personal email address or hasn't verified its email, the sign-in error page now says why and what to do, instead of only "Sign in failed". ## Fixed * **SCIM provisioning no longer creates a second account when an IdP's `userName` isn't the person's email address.** Okta's app username, for example, is often not a mailbox: the provisioned account was keyed to it, so the person's first sign-in — which asserts their real address — made a new account beside it, and a person who had signed in first could have their email replaced by the username. Conduit now keeps `userName` as the IdP's identifier for the person (returned exactly as sent and matched case-insensitively), takes their address from `emails` (the primary entry, else the work one, else the first), and links a provisioned person's first sign-in by the `externalId` the IdP pushed when the IdP uses its user id as both (as Okta does). A `userName` change moves the address only while the two are the same. * Dialogs in the web UI are back to a comfortable width, consistent across the app, and a dialog taller than the window scrolls instead of running its buttons off the bottom of the screen. * SCIM's `/ServiceProviderConfig` publishes the bearer authentication scheme's `specUri` and `documentationUri`, which were empty strings and failed strict SCIM clients' validation. * SCIM's discovery endpoints (`/ServiceProviderConfig`, `/Schemas`, `/ResourceTypes`) answer `405` to any method but `GET` and `HEAD`; `/ServiceProviderConfig` answered every method with its document. * A SCIM query across resource types (`GET /scim/v2/` or `POST /scim/v2/.search`) answers `501 Not Implemented`; it answered `400 tooMany`, as if the filter had matched too much. * SCIM honors `attributes` and `excludedAttributes` on every attribute, sub-attributes included, and every response that returns a resource, mutations included; only `excludedAttributes=members` on groups was applied. A request that sends both is refused with `400 invalidSyntax`, as they are mutually exclusive. * A SCIM user carries the person's name as `displayName` as well as `name`; it was accepted on writes but never returned. * A SCIM `PATCH` that names attributes Conduit doesn't keep — an enterprise-extension attribute such as `department`, one outside the User schema, or the server-assigned `id` and `meta` — applies the rest and ignores those; it was refused with `400`, failing the whole update. `/scim/v2/Schemas` now lists only the User attributes Conduit keeps (see [SCIM provisioning](/docs/conduit/configure/scim#attributes-conduit-keeps)). * A SCIM group's members carry their `$ref` and `type` (`User`), and the published Group schema marks a member's `display` read-only: it is the member's email address, whatever the IdP sends. * A SCIM `PATCH` without a `path` applies every attribute its value names, whatever the form of the name — `name.givenName`, a schema-URN-prefixed name, a filter such as `emails[type eq "work"].value`, or a name in another case; only plain, exactly-cased names were applied, and the rest were accepted and dropped. * A SCIM user's `name` (`formatted`, `givenName`, `familyName`) comes back exactly as the IdP sent it. It was rebuilt from the display name by splitting it at the first space, so a two-word given name came back split and a missing family name came back as `""`. A `PUT` replaces the whole `name`, so a part the IdP no longer sends is no longer returned. A `displayName` sent beside a single name half is the display name, and a write that sets both halves to `""` leaves the display name as it was rather than blanking it. A user provisioned before this version reads back without `name` — its `displayName` carries the name — until the IdP next pushes the name; the database migration that keeps the name runs automatically on boot. [Compare v0.14.0...v0.15.0](https://github.com/PipedreamHQ/conduit/compare/v0.14.0...v0.15.0) **v0.14.0** 2026-10-01 *The docs move to Mintlify and gain a cloud edition, API client settings are redesigned, and the CONDUIT\_DOCS\_URL default changes.* ## Upgrade notes * The default `CONDUIT_DOCS_URL` is now `https://pipedream.com/docs/conduit`, and in redirect mode `/docs/` no longer adds a version to the path. If you relied on the old default, `https://conduit.pipedream.com/docs`, set `CONDUIT_DOCS_URL` explicitly. ## Added * `CONDUIT_DOCS_EDITION` selects which edition of the embedded docs `/docs/` serves: `self-hosted` (the default, the full docs) or `cloud`. ## Changed * The docs are rendered with Mintlify and published at `pipedream.com/docs/conduit`. * The image is about 70 MB larger. * Docs URLs no longer end in a slash. An old URL with a trailing slash redirects to the new one. * The changelog is one page, with an anchor for each release (for example, `/docs/changelog#v0-13-4`). Old per-release changelog URLs, `/docs/deploy/load-tests` and the old API operation pages redirect to their new location. * **Settings → API Clients** lists clients in a table and manages each client's scopes and credentials from its row menu. A client's credentials dialog shows its client ID and token endpoint together, and revoking a credential asks for confirmation first. * A newly created client secret or SCIM token is hidden until you choose to show it, and can be copied without revealing it. * The Admin API is now called the API in the web app and the docs, and its pages moved to `/docs/use/api` and `/docs/use/api-reference`. The old addresses redirect to the new ones. [Compare v0.13.4...v0.14.0](https://github.com/PipedreamHQ/conduit/compare/v0.13.4...v0.14.0) **v0.13.4** 2026-09-30 *Instance-wide help instructions, display names from your identity provider and editable by members and admins, workspace slugs removed, and OAuth endpoint error fixes.* ## Upgrade notes * Workspaces no longer have a slug. The `slug` fields are gone from the Admin API (`UpdateWorkspace`) and from every workspace in RPC and MCP tool responses. An RPC client that still sends one has it ignored; an MCP tool call that passes one is refused as an unknown argument. No migration runs, so upgrading and rolling back are unaffected. * Help instructions are now set once for the whole instance, not per workspace. A database migration, run automatically on boot, keeps the existing text when the instance has exactly one workspace (every single-workspace instance). An instance with more than one workspace starts with none, even if only one workspace had instructions, so one workspace's text is never shown to everyone: an instance admin sets them again from **?** → **Edit**. Help edited while an upgrade is rolling out, or before a rollback, may be lost. `GetSession` reports `helpSet` in place of `activeWorkspaceHelpSet`, in RPC and MCP tool responses. ## Changed * Only instance admins can edit the help instructions (**?** → **Edit**), and every signed-in user sees the same instructions, in every workspace or none. Workspace owners and admins who aren't instance admins can no longer edit them. * A new account's display name comes from the identity provider's `name` claim, or its `given_name` and `family_name` claims when `name` is absent. With none of them, or when accepting an invite without a name, the name is the part of the email address before the `@`, as before, and a later SSO sign-in that asserts a name replaces it. Names set in Conduit are never replaced. A database migration, run automatically on boot, records where each name came from; existing names are treated as set in Conduit. * Anyone can change their own name from the account menu (**Edit profile**), or with the `UpdateMyProfile` RPC, except someone SCIM provisions: their directory owns their name. * Workspace admins can rename members in **Settings → Members**, or with the `UpdateWorkspaceMemberName` RPC and its builtin MCP tool, when the member signs in through one of the workspace's own identity providers, isn't provisioned by SCIM, and doesn't outrank them. The members list shows why a rename isn't available, and `ListWorkspaceMembers` reports it per member (`name_edit`; unset for API clients, which can't rename). The member actions now sit in a menu next to **Review access**. * A personal workspace, created for a new account at its first SSO sign-in in multi-workspace mode, is now named "Personal". * Workspaces are identified by name alone in the web app: the slug field is gone from workspace settings, **Create Workspace** and the instance admin's workspace editor. **Settings → Workspaces** (instance admin) shows each workspace's owner under its name, and its search matches owner emails as well as names. * The unauthenticated `GetSetupStatus` RPC is gone; `GetAuthMethods` reports whether first-run setup is still needed (`needsSetup`). * Refreshed the web UI's components: confirmation dialogs can't be dismissed by a backdrop click or while their action is running and open as a bottom sheet on small screens, the audit log's filters form a single toolbar, and IDs in an audit event's details copy with a click. ## Fixed * OAuth error responses from the token, device authorization and client registration endpoints carry `Cache-Control: no-store`, as client-credentials errors already did. An internal failure at these endpoints is a 500 `server_error` rather than a 400; a database failure while looking up a device code or the user behind a grant was reported as `invalid_grant`. A client registration refused because the instance has reached its registered-client limit is a 503 `temporarily_unavailable` rather than a 400 `invalid_client_metadata`. [Compare v0.13.3...v0.13.4](https://github.com/PipedreamHQ/conduit/compare/v0.13.3...v0.13.4) **v0.13.3** 2026-09-29 *Tidier traces: API and SQL spans are renamed for easier monitoring, background jobs and auth checks nest inside the requests that cause them, and first-run setup is atomic.* ## Upgrade notes * API request spans are named for the RPC — `conduit.v1.ConduitService/GetUserUsage` rather than `GET /conduit.v1.ConduitService/GetUserUsage` — with the bare method (`GetUserUsage`) as their `resource.name`. APM monitors, dashboards or saved views that match the old span or resource names need updating; `http.route` and the `http_server_request_duration_seconds` metric's `http_route` label are unchanged. * Database statement spans from generated queries are named with a `sql.` prefix — `sql.GetUser` rather than `GetUser` — so they are easy to tell apart from API request spans. Monitors or dashboards matching the old names need updating. ## Changed * API request spans carry `rpc.system` (`connect_rpc`), `rpc.service` and `rpc.method` on every call, not only on failures. * The instance liveness heartbeat, written every 30 seconds, no longer exports a trace for each of its database statements to instance telemetry exporters. * The session check that runs on every signed-in request now appears inside that request's trace, instead of exporting as a separate one-span trace per request. * Opening a new Postgres connection, including building an RDS IAM token, is its own `postgresql.connect` span in the trace of the request that needed it, instead of counting toward that request's first query. * With Postgres, an unused database connection now stays open for 30 minutes (previously 5) before Conduit closes it, so the first page load after a quiet stretch no longer waits on new connections. * Issuing an OAuth access token (authorization code, refresh, device and client-credentials grants) records its database work inside the token request's trace, instead of as several separate one-span traces per token. * With Postgres, counting a failed sign-in, MCP, SCIM or API-client authentication attempt toward its cluster-wide throttle is recorded inside that request's trace, and the counters' periodic cleanup no longer exports a trace each time it runs. * When an access or connector change notifies connected MCP clients, each recheck of their access is one `mcp.notify.access_changed` or `mcp.notify.lists_changed` trace, linked to the change that caused it, instead of separate one-span traces for every connected member's database reads. Log-level lookups for forwarded connector log messages, and recording which MCP clients reach a workspace, are traced inside the request that caused them. * The hourly sweep of expired OAuth codes, tokens and sessions is exported as one `oauth.cleanup` trace with its database statements beneath it, instead of a separate trace for each statement. * With several replicas on Postgres, what each other replica does in response to a change (clearing caches, notifying its connected MCP clients) appears in the trace of the request that made the change, under a `cluster.dispatch` span. The cache rebuild after a replica's event listener reconnects is one `cluster.resync` trace. * Completing first-run setup creates the admin account, its password and the default workspace in one transaction, so an interrupted setup leaves nothing behind and can be retried. Setup, password rotation and break-glass sign-in record their database work inside the request's trace. [Compare v0.13.2...v0.13.3](https://github.com/PipedreamHQ/conduit/compare/v0.13.2...v0.13.3) **v0.13.2** 2026-09-28 *Email sender settings save on their own, gRPC exporters with https endpoints use TLS for logs and metrics, and signing in returns you to the page you opened.* ## Upgrade notes In a multi-replica deployment, saving only the email sender through a replica still on the previous version turns email off. After the rollout, check **Settings → Instance → Email** and save the provider again if it's off. ## Changed * The email settings page shows the from address and name once, above the providers, instead of in every provider's section, and they can be saved on their own with **Save sender**. * Updating email settings through the `UpdateEmailConfig` RPC or its builtin MCP tool keeps the active provider when a request omits `provider`, so a request can change just the sender or a provider's settings; `enabled: false` turns email off, and a request that names a provider alongside it, sets `enabled: true` with no provider, names an unknown provider, or gives a from address that isn't one bare address (with email off too) is refused. The `enabled` a response reports always agrees with its provider. * Instance telemetry settings refuse an exporter endpoint that isn't an `http://` or `https://` URL with a host, since the scheme is what picks plaintext or TLS. ## Fixed * Logs and metrics sent to an instance gRPC exporter with an `https` endpoint now use TLS instead of plaintext, which the collector refused. * Opening a Conduit page while signed out, such as a connect link from an MCP client, returns to that page after signing in instead of the home page. [Compare v0.13.1...v0.13.2](https://github.com/PipedreamHQ/conduit/compare/v0.13.1...v0.13.2) **v0.13.1** 2026-09-28 *Email settings are validated so they can't be saved in a state that fails to send, multi-replica deployments deliver config changes, cancellations and prompt answers reliably, and concurrent first SSO sign-ins no longer fail.* ## Upgrade notes None. ## Changed * Email settings have their own entry in the admin sidebar and a [docs page](/docs/conduit/configure/email). * Each email provider's settings are shown inline in their own section, with the active one outlined and marked **Active**, so another provider can be checked or filled in while the active one keeps sending, and saving that provider's form switches all email to it. * Turning email off asks for confirmation and keeps every provider's saved settings, so switching back doesn't mean entering them again. * The Amazon SES region is chosen from a list of SES regions, or typed in as a region code under **Other region…**. * Recording usage no longer sends your telemetry backend a separate one-span trace for each statement it writes (at least one per MCP tool call, prompt or resource read), and each usage rollup or retention pass is now one trace with its statements beneath it instead of a trace per statement. A rollup check that finds nothing new sends no trace, and a failed rollup or retention pass is reported to error tracking as a `conduit.usage.maintenance_failed` issue. * MCP tool listings and Pipedream tool calls no longer read and decrypt the workspace's Pipedream settings on every request, including in workspaces that never set Pipedream up. ## Fixed * Email settings that can't send are now refused instead of saving and then failing every send (invites included), including an edit to saved settings that already can't send: a from address that isn't one bare address, SMTP without a host or a port from 1 to 65535, Resend without an API key, or SES without a valid region code or access key. * The email settings page now warns when the active provider's saved settings are missing something they need to send, such as the SES region whose absence made sends fail with a DNS error for `email..amazonaws.com`. * Saving email settings while the stored settings can't be read now fails with an error instead of clearing every field the save didn't include, saved SMTP, Resend and SES credentials among them. * Two first sign-ins through the same identity provider at the same moment (for example, in two tabs) now both land on one account, instead of the second failing with an error and leaving a stray, unusable user behind. * In multi-replica deployments, a change saved just as its client disconnected is no longer dropped before reaching the other replicas, which then kept serving stale connector lists and telemetry exporters until the next change, and stale access for up to 30 seconds. * In multi-replica deployments, an MCP cancellation now reaches the replica running the request, and a prompt answer reaches it at once rather than up to 15 seconds late, even when the client exits right after sending it. * In multi-replica deployments, saves no longer stall when a replica's event connection to Postgres hangs; each waits at most 5 seconds for it. * Finishing a connector sign-in now completes the MCP client's pending prompt even when the browser leaves the page right away. * On Postgres, the audit log lists events recorded in the same second newest first, in one fixed order, so paging through a log that isn't changing no longer shows them out of order or repeats or skips them. * The MCP endpoint and the API now accept a bearer token whose scheme is written in any case (the token endpoints answer `token_type: "bearer"`, which some clients echo into their `Authorization` header) or that has extra spaces before it, as SCIM already did, instead of refusing it as unauthenticated. * A member's Pipedream connection no longer keeps using a workspace's old Pipedream settings after they change while the member's request is in flight, and in multi-replica deployments a replica that missed the change picks it up within 30 seconds. * Log records from background work that isn't traced no longer carry a trace id that no trace in your backend matches. [Compare v0.13.0...v0.13.1](https://github.com/PipedreamHQ/conduit/compare/v0.13.0...v0.13.1) **v0.13.0** 2026-09-27 *The first big release in preparation for Conduit Cloud: workspaces own their email domains, sign-in methods and login pages, invites replace the join policy, and telemetry keeps member content and identity out — read the upgrade notes before pulling.* ## Upgrade notes Creating or updating a workspace through the Admin API or the MCP workspace tools refuses a slug that isn't lowercase letters, numbers, and single hyphens; existing slugs are kept until changed. A connector tool with invalid `x-mcp-header` annotations stops being listed after the upgrade (it was previously offered with the annotations removed). The server log names each such tool and why; the connector's provider needs to fix the tool definition for it to return. Email domains move from each workspace identity provider to the workspace. The migration carries every domain over with its verification and the provider it signs in through. While a rolling upgrade runs, a domain change made through a replica still on the previous version is lost, and replicas still on the previous version keep routing domains as they were before the upgrade. Rolling back to the previous version shows domains as they were before the upgrade until you upgrade again. In a multi-workspace deployment, the login page sends an email at a domain a workspace has verified to that workspace's provider, and offers the password field for it only when that provider can't be reached. If `CONDUIT_ADMIN_EMAIL` (the break-glass login) is at such a domain, change it to an address no workspace verifies, such as the default `admin@localhost`, so break-glass sign-in doesn't depend on that provider being down. The same holds for any password account at a verified domain. The workspace join policy is removed. People become members of a workspace through its own identity provider at its domains, an invite, or SCIM, so a workspace set to let anyone signed in join, to admit a join link, or to admit people at an email domain no longer does. Members are unaffected. An invite reaches only a domain the workspace has verified or the inviting admin's own, and needs email set up; people elsewhere, such as contractors at another company or at a public email service, join through SCIM. A domain the workspace held only to admit joins (unverified, signing in with no provider) is removed from its **Domains**. While a rolling upgrade runs, replicas still on the previous version keep admitting joins by the join policy; rolling back restores it, though not `settings:read` on API clients. A session signed in through an identity provider stops working when the provider is disabled or deleted, and one signed in by password stops working when password sign-in is turned off (an instance admin's excepted), in the web app and in MCP clients. Every workspace otherwise accepts every sign-in method until an admin changes that. Sessions and MCP tokens from before the upgrade recorded no sign-in method, so turning off a provider or password sign-in doesn't end them: they last until they expire (an MCP client's refresh token renews for up to 90 days at a time). To end them sooner, for instance when turning off a compromised provider, set a re-authentication age on each workspace (**Settings → Sign-in → Sign-in methods**), which asks every holder of such a session to sign in again; so does a workspace narrowing its methods. Instance admins aren't subject to a workspace's sign-in methods. Admin API clients: some identity provider and workspace fields change incompatibly. `IdentityProvider.domain_status` is removed; read a domain's verification from `ListWorkspaceDomains` (`sso:read`). `VerifyIdentityProviderDomain` and its `verify_workspace_idp_domain` tool are removed in favor of `VerifyWorkspaceDomain`. `CreateIdentityProvider` refuses a workspace provider with no `domains`. `GetAuthPolicy` answers only instance admins; anonymous callers read the login page's methods from `GetAuthMethods`. `SetActiveWorkspace` takes `workspace_id` in place of `organization_id`; a caller still sending `organization_id` sends no workspace and is refused. `GetWorkspaceJoinPolicy` is removed, and with it the `settings:read` scope, which is taken off every API client that held it; a token request that still names it is refused with `invalid_scope`. Building from source needs Go 1.27.1 or later. If you set `GOLANG_IMAGE` for the Docker build, point it at a `golang:1.27.1` image or later. Signing in through a workspace's own identity provider now makes someone a member only with an email the provider confirms at one of its domains. A workspace provider with no domains lets no one new join after the upgrade; members who have signed in through it before, or that SCIM provisioned, still sign in. Add the domains your members' emails are at in the provider's dialog, under **Domains**; they don't need to be verified for this, unless the provider doesn't send `email_verified` (Microsoft Entra ID doesn't): then verify them. Contractors at domains you don't list join through SCIM. If your workspace verified an email domain and later removed its `conduit-domain-verification` TXT record, publish it again: another workspace that publishes its own record on the domain can now take the verification over while yours is missing. Telemetry no longer carries tool content or upstream error text from member calls. Tool-call, prompt-fetch and resource-read events report failures as `error.type` (with `audit.reason` set to the same value) instead of the error message, resource reads carry `mcp.resource.scheme` instead of `mcp.resource.uri`, and the `mcp.upstream.request_body`, `mcp.upstream.response_body` and `mcp.upstream.error_message` span attributes and the entry span's `url.path` are gone (`http.route` remains). Dashboards or alerts built on those attributes need updating. Spans and events no longer carry `user.email` (or email under `enduser.id`). Use `user.id`; the audit log keeps the emails, and its entries now carry `actor_user_id` to join them (see Added). A SIEM that keyed on `user.email` should key on `user.id`. The names of a workspace's own settings (`policy.name`, `group.name`, `idp.name`, `scim_token.label`, `api_client.name`, `rule.name`, `scim.idp_name`) are no longer sent to instance exporters, which get the ids already on each event; the workspace's own exporters still receive them. ## Added * **Workspace invites.** Workspace admins invite people by email from **Settings → Members** (**Invite**), where pending invites are listed to resend or cancel; the API is `CreateWorkspaceInvite`, `ListWorkspaceInvites` (with the domains the caller may invite at, `invitable_domains`), `ResendWorkspaceInvite` and `CancelWorkspaceInvite`. An invite goes to an address at the admin's own verified domain or one the workspace verified, with a role up to admin and the admin's own. Its link goes only into the email, so invites need email configured. The link opens the workspace's login page, and the invitee joins with the invite's role by signing in with that address (`JoinWorkspace` takes an `invite_token`); someone with no account, invited to a workspace that accepts email and password, creates a password account from the invite (`GetWorkspaceInvite`, `AcceptWorkspaceInvite`). An invite grants no more than the admin who last sent it could grant when it's accepted. While password sign-in is on (the default), this means password accounts can now be created by anyone a workspace admin invites, with the invitee's consent through the emailed link, not only by first-run setup; turn password sign-in off to prevent it. A migration adds the `workspace_invites` table. See [Access control](/docs/conduit/configure/access-control#invites). * **Workspaces own their email domains.** The workspace **Settings → SSO** page is now **Settings → Sign-in**, with the workspace's identity providers and a **Domains** list below them: add a domain and verify it with a DNS TXT record; each provider's dialog sets which domains sign in with it. The API has `ListWorkspaceDomains`, `AddWorkspaceDomain`, `DeleteWorkspaceDomain` and `VerifyWorkspaceDomain`, with matching built-in admin tools; API clients with `sso:read` can list domains, without their DNS challenge. See [SSO](/docs/conduit/configure/sso). * **The multi-workspace login page asks for your email first**, sending an address at a workspace's verified domain straight to that workspace's provider, and leads with the method the browser last signed in with. See [SSO](/docs/conduit/configure/sso#the-main-login-page). * **A workspace chooses which sign-in methods it accepts** under **Settings → Sign-in → Sign-in methods**: its own providers (accepted while enabled), each of the instance's providers, and password. Its login page offers exactly the methods it accepts. It can: * admit an instance provider, such as Google, only for accounts at its own domains, and send those domains' sign-ins straight to it; * ask members to sign in again after a day, a week or a month. A session the workspace doesn't accept is asked to sign in again, and an MCP client is sent to authorize again, where the consent screen says which workspace needs a fresh sign-in. Disabling or deleting a provider signs out everyone who signed in through it, and turning password sign-in off for the instance signs out everyone who signed in by password, except instance admins. Conduit refuses a change that would leave a workspace with no sign-in method, or lock out the admin making it. The API has `GetWorkspaceSignInPolicy`, `UpdateWorkspaceSignInPolicy` and `UpdateWorkspaceInstanceProvider`. See [SSO](/docs/conduit/configure/sso#which-sign-in-methods-a-workspace-accepts). * **Every workspace has a login page** at `/login/` (the id in its MCP URL), offering its sign-in methods and starting members' sessions in that workspace. See [SSO](/docs/conduit/configure/sso#the-workspace-login-page). * **Conduit speaks the stateless MCP protocol revision `2026-07-28`** alongside the handshake revisions `2025-03-26`, `2025-06-18`, and `2025-11-25`, selected per request. `server/discover` now lists `2026-07-28`, so clients on that revision use it directly instead of falling back to the `initialize` handshake. On it, clients learn about tool, prompt, and resource list changes over a `subscriptions/listen` stream; per-resource update subscriptions are not offered. Clients on the handshake revisions are unaffected. See the [MCP client reference](/docs/conduit/use/mcp-reference). * **The load-testing harness measures either protocol revision.** `conduit-bench -era stateless` (or `ERA=stateless` for k6) drives every scenario over MCP `2026-07-28`, holding `subscriptions/listen` streams. See [Load Tests](/docs/conduit/load-tests#protocol-revisions) for the comparison with the handshake revisions. * **Connector progress reaches your client.** When a client connected over HTTP asks for progress on a tool call (a `progressToken`) and accepts a streamed response, the connector's progress notifications are relayed to it as the call runs, on every protocol revision. Connectors that don't report progress are unaffected. * Audit log entries carry `actor_user_id`, `trace_id` and `span_id`, so an audited action joins to telemetry by user id and trace. Returned by `ListAuditLog`, `ListOrgAuditLog` and the `audit:read` API. Existing rows leave them empty. The migration runs automatically on boot. * `ListRecentToolCalls` and `ListOrgRecentToolCalls` accept a `trace_id` filter: from a span in your telemetry backend to the call's stored error text. A usage-store migration adds the index automatically on boot. ## Changed * **Workspace slugs are lowercase letters, numbers, and single hyphens, at most 63 characters**, and a workspace created without one gets a short random suffix instead of failing when another workspace holds the slug its name derives. * **The settings sidebar groups pages the same way in multi-workspace deployments as in single-workspace ones**: Access Control, Authentication & API, and Observability, with an **Instance Admin** section below for instance admins. A workspace's name is edited from **Workspace Settings** in the workspace menu. * **`SetActiveWorkspace` takes `workspace_id`** in place of `organization_id`. Switching into a workspace that doesn't accept how you signed in now succeeds, and the web app then asks you to sign in to it again. * **A verified domain can move to the workspace that now controls its DNS**: one that publishes its own TXT record while the current holder's is gone takes the verification over. Keep your record published to keep the domain. See [SSO](/docs/conduit/configure/sso#instance-sign-in-vs-workspace-sso). * **Joining a workspace is through its own provider, an invite, or SCIM.** The join policy (anyone signed in may join, listing, the join link, and join domains) is removed, along with `GetWorkspaceJoinPolicy`, `UpdateWorkspaceJoinPolicy`, `GetWorkspaceJoinLink` and their built-in tools, `JoinWorkspace`'s `link_token`, and the `settings:read` API-client scope. `DiscoverWorkspaces` lists the workspaces a sign-in offered you. See [Access control](/docs/conduit/configure/access-control). * **Single-workspace deployments get a workspace's sign-in settings on Settings → Sign-in**: each provider's **Domains** action, which can limit it to accounts from your domains, the **Domains** list, and **Ask members to sign in again**. See [SSO](/docs/conduit/configure/sso#instance-sign-in-vs-workspace-sso). * A connector tool whose `x-mcp-header` annotations are invalid (empty, not a header name, duplicated, on a parameter that isn't a string, integer or boolean, or placed outside the schema's properties) is no longer offered, matching how MCP `2026-07-28` clients treat such a tool. The connector's other tools are unaffected, and a warning names the tool and the reason. * OAuth connectors also request any scope an MCP upstream's `401` challenge names, alongside the scopes it advertises. * **The auth policy is readable only by instance admins.** `GetAuthPolicy` no longer answers anonymous callers. The login page gets its identity providers from `GetAuthMethods`, and whether the caller may create a workspace is `can_create_workspace` on `GetSession`. Instance admins can read the policy with the new `get_auth_policy` built-in admin tool. * **The auth policy's `signup` and `idp_required` fields are removed.** Neither was ever enforced: setting them changed nothing about who could sign in. Clients that send them have them ignored. * **Only your domains' people join through a workspace provider.** Signing in through a workspace's own provider makes someone a member only when the provider confirms their email at one of its domains, verified or not (a provider that doesn't send `email_verified`, such as Microsoft Entra ID, only at a verified one); anyone else it authenticates needs an account it already signs in, and the rest are refused before an account is created. At a verified domain they join as they sign in; at one the workspace hasn't verified, the sign-in ends on a **Join Acme?** page and they join only if they choose to (`JoinWorkspace`, which `DiscoverWorkspaces` now lists as joinable). A workspace provider needs at least one domain (`domains` on `CreateIdentityProvider` and `UpdateIdentityProvider`). The provider dialog reads the provider's published claims (`GetIssuerClaims`) to warn when it doesn't confirm email addresses, which joining relies on. See [SSO](/docs/conduit/configure/sso#who-joins-through-a-workspace-provider). * **A provider's domains are workspace domains.** An identity provider's `domains` (on create, update, and read) are the workspace domains that sign in with it; one named on the provider that the workspace doesn't hold yet is added, unverified. `domain_status` is removed in favor of `ListWorkspaceDomains`. `VerifyWorkspaceDomain` replaces `VerifyIdentityProviderDomain` (and the `verify_workspace_idp_domain` tool). A verified domain belongs to one workspace, signs in with at most one of its providers, and stays verified when that provider is removed. Public email services such as gmail.com can no longer be added as a domain. * **Sessions record how the person signed in.** Browser sessions and MCP access tokens now store the sign-in method, the identity provider, and the time of the sign-in behind them; a refreshed token keeps the original sign-in's time; a workspace's sign-in methods judge a session by them. A migration adds the columns to the sessions table and the OAuth code, refresh-token and device-code tables; existing rows record an unknown sign-in. * **Tool, prompt and resource change notifications cost Conduit no upstream calls.** A policy, group or role change notifies only the MCP clients whose access it moved, and a connector change notifies the clients that may use that connector, without Conduit listing any connector to check. Each notification now covers tools, prompts and resources together, so a client may re-list a list that didn't change. A tool a connector adds on its own side shows up the next time the client re-lists. * Conduit is built with Go 1.27.1. The standard library's faster JSON implementation cuts the gateway's per-request encoding cost, most for large tool results. * Telemetry is stricter about what it contains: no tool arguments, results or upstream bodies, no recipient addresses in email delivery errors, connector URLs reduced to `scheme://host` (with a new `connector.id` attribute), and capped, valid-UTF-8 text everywhere. A failed MCP call's event carries an `error.type` in place of the error text. Names of a workspace's policies, groups, identity providers, SCIM tokens and API clients reach only that workspace's exporters; instance exporters get their ids. Connector names still reach every exporter. See [What telemetry contains](/docs/conduit/configure/telemetry#what-telemetry-contains). * Failed sign-in audit rows record the actor as `anonymous` and keep the typed identifier only when it is shaped like an email address; sign-in audit rows now include the (capped) user agent. * Connector URLs in audit log details no longer include credentials or query strings. * **Reading a connector's answer costs less.** Conduit parses each tool result, listing, prompt, and resource a connector returns once instead of three times: a 1 MiB tool result takes about a third of the CPU and 40% of the memory it did, and a large tool listing 30–40% less of each. * **One member's connector token refresh no longer holds up everyone else's calls.** Conduit gets connector tokens for each member (and for a workspace-wide grant) independently, so a slow or unreachable token endpoint delays only the calls waiting on that token, and a call whose token is already cached never waits. ## Fixed * Email sent over SMTP carries a plain-text part alongside its HTML, and a subject or sender name with non-ASCII characters (such as a workspace name) is encoded, so mail servers that require it no longer reject or garble the message. * Signing in through an identity provider from a page that sent you to the login page, such as the device authorization page for the Conduit CLI, returns you to that page instead of the home page. * The home page's tool-calls card and top connectors and tools cover the active workspace, like the cards beside them, and the tool-calls headline counts the last 30 days its label names. It counted every workspace's calls of all time. * Someone signing in for the first time gets a personal workspace even when another person with the same name already has one. * Instance admins can create a workspace from the workspace switcher while workspace creation is limited to instance admins. The option was disabled for everyone in that mode. * A JSON-RPC message without an `id` that names a request method (anything but a `notifications/…` method) is refused with HTTP 400 instead of being run with its result discarded, and a notification that carries an `id` is refused as an invalid request, as is a request whose `id` isn't a number or a string of at most 256 bytes. The Conduit CLI's local server applies the same rule to id-less requests, dropping one instead of running it. * A connector's result metadata (`_meta`) on a rendered prompt now reaches the client, as it already did for tool results. * A single malformed byte in a logged value — reachable without signing in — could make an OpenTelemetry collector reject a whole batch of logs and events. Every exported string is now valid UTF-8 and bounded. * Upstream response bodies, including one-time Pipedream connect links, were recorded on spans; they no longer are. * The docs claimed tool calls are recorded in the audit log without error text. Tool calls are recorded in usage (denied calls also in the audit log), and the access-control, connector and Pipedream pages now say so. * Large integers in a URL connector's `structuredContent`, result `_meta`, and content-block fields reach an MCP client connected to Conduit directly exactly as the connector sent them. They were rounded to about 16 significant digits. * Connecting your own account or token for an instance-wide connector now refreshes your MCP clients' tool lists, as it already did for a workspace's connectors. ## Security * The login page looks up where an email signs in (`ResolveSignIn`) with a POST, not a GET, so the address someone types no longer lands in the query string that proxies and access logs record. * A SCIM rename decides afresh whether the account's new email counts as verified, as account creation does: for a workspace's own identity provider, only at a domain the workspace verified and bound to it. The address kept the old one's verification before, so a workspace could rename an account into another organization's domain and have it count as verified there. * A sign-in through an identity provider Conduit can't reach no longer shows the signed-out visitor the provider's address and the network error. * Responses from identity providers during sign-in (OIDC discovery, signing keys, user info) are capped at 1 MiB, like the other control-plane responses Conduit reads, so a hostile or compromised provider can't stream an unbounded body into server memory. * Creating an MCP OAuth connector now fails, with "metadata at … names issuer …, not …", when the authorization server's metadata names a different issuer than the server the upstream points to (RFC 8414 §3.3), which is how an authorization-server mix-up is staged. Existing connectors are unaffected; an upstream that serves mismatched metadata needs its provider to fix it. [Compare v0.12.0...v0.13.0](https://github.com/PipedreamHQ/conduit/compare/v0.12.0...v0.13.0) **v0.12.0** 2026-09-23 *Workspaces decide which MCP clients may connect and which connect tabs their home page offers, replacing CONDUIT\_CIMD\_ALLOWED\_DOMAINS — read the upgrade notes before pulling.* ## Upgrade notes `CONDUIT_CIMD_ALLOWED_DOMAINS` is removed, and an instance that still sets it refuses to boot until it is unset. Which clients may connect is now each workspace's decision, and every workspace starts open to any client: before upgrading an instance that relied on the variable, plan the equivalent in Settings → MCP Clients for each workspace — set **Who can connect** to *Only allowed clients* (the clients Conduit recognizes connect when they prove who they are, and anything self-registered needs an explicit Allow), block any recognized vendor you do not accept, and **Add a client** for a vendor Conduit does not know, by the URL of its client ID metadata document. See [Governing connected clients](/docs/conduit/use/mcp-authorization#governing-connected-clients). The instance-level MCP Clients page is removed. Every client decision — who may connect, per-client allow and block, revocation — is made on each workspace's MCP Clients page (instance admins can act in any workspace), and the Dynamic Client Registration switch now lives in **Settings → Sign-in**. The instance-wide client list and its wholesale revocation have no replacement: to stop a client everywhere, block it in each workspace, which refuses every member's use of it at once. A database migration creates the workspace client tables and seeds each single-workspace member's clients into that workspace's list; it runs automatically on boot, and the list fills further as clients make their next request. The new provider setting is added by a database migration on startup. Existing Okta, Microsoft, and Custom OIDC providers continue to request fresh sign-in until an admin changes the setting. Google and GitHub presets omit `prompt` after the upgrade regardless of the stored setting; no configuration change is needed. ## Added * **Workspace MCP Clients.** Workspace administrators get an MCP Clients page (Settings → MCP Clients, in both deployment shapes) that decides which clients may connect to the workspace and lists every client it knows or has seen; see [Governing connected clients](/docs/conduit/use/mcp-authorization#governing-connected-clients). * **Who can connect** is one choice among three — any client, verified clients only (URL-based client IDs and the Conduit CLI), or only allowed clients (the clients Conduit recognizes when they prove who they are, plus whatever the workspace allows) — with the workspace's own message to blocked members, shown in the client's error, on the consent screen, and on the home page. * The consent screen lists the workspaces that will refuse the client before the member approves it. * The **Clients** table is one row per client the workspace knows or has seen — the ones Conduit recognizes (Claude Code, Claude Desktop, Cursor, Codex, ChatGPT, VS Code, MCP Inspector, the Conduit CLI), the ones the workspace adds, and anything that has connected, admitted or refused — each with its access and the reason, its home page tab, how many members use it, their live sessions, and when it was last active there; facets select what is allowed, blocked or connected. * A recognized client's installs that prove they are it and the installs that only claim to be it are separate rows, each allowed or blocked on its own. * Any client can be allowed or blocked from its row, a block with its own message. * **Add a client** names a client Conduit does not know by the URL of its client ID metadata document, which only its vendor can host; the workspace decides about that client on its own, even when the document sits under a vendor Conduit recognizes (one connector among ChatGPT's, say). * A workspace can revoke a member's client for that workspace alone: the member's token keeps working at their other workspaces, its next refresh is refused so the client returns to the consent screen, and access returns once they approve it again. * The client list starts with the clients already authorized by members who belong to just that workspace (every member on a single-workspace instance); a member of several workspaces appears as their clients connect after the upgrade. * Conduit recognizes the shipped clients from the client ID metadata documents their vendors publish (verified when they connect with one) or, for clients that register themselves (Cursor, MCP Inspector), from what they present, which any client can imitate, so those stay unverified; repeat registrations of one client are grouped by an identity the server computes from the client's `software_id`, else its redirect URIs, else its client id. * Rejected MCP requests are counted under the new `client_revoked` and `client_not_allowed` reasons. * **The home page's connect tabs are the workspace's.** The tabs under *How to use Conduit* are the clients the workspace offers — the ones Conduit has setup steps for, now including **VS Code**, and any client the workspace added — in the workspace's order, the first shown, allowed tab opening by default. * **Edit home page tab** gives a client its own icon and Markdown steps with a live preview; `{{server_url}}` and `{{client_name}}` are filled in when shown, fenced code becomes copyable commands, the steps can't be saved blank, and a menu action restores Conduit's. * The workspace arranges the tabs by dragging rows in the Clients table and hides a tab with its house toggle without changing whether the client may connect; a blocked client has no tab, and when the posture itself blocks, Home says so above the tabs in the workspace's words. * Okta, Microsoft, and Custom OIDC providers have a **Request fresh sign-in** setting. Turn it off to allow the provider to reuse an existing session when signing in to Conduit. ## Changed * **MCP client governance is the workspace's alone.** The instance-level MCP Clients page — the roll-up of every authorization across workspaces, with wholesale revocation — is removed, and its two RPCs (`AdminListOAuthClients`, `AdminRevokeOAuthClient`) with it. Which clients may connect, per-client decisions and revocation are made on each workspace's MCP Clients page; the Dynamic Client Registration switch moves to **Settings → Sign-in**, since accepting registrations is the authorization server's setting, not a workspace's. What crosses workspaces — registrations, consents, use — stays visible in the instance audit log and usage pages. ## Fixed * **`server/discover` declaring an unsupported protocol version is refused per the MCP spec.** A probe that names a stateless-era revision Conduit does not serve (such as `2026-07-28`) now gets HTTP 400 with `UnsupportedProtocolVersionError`, whose `supported` list names the revisions Conduit does serve, like every other request declaring that version. Clients retry with a listed version; a probe that declares no version is still answered with the list. * Google and GitHub presets now omit `prompt`, since neither provider documents support for `prompt=login`. * **An upstream that keeps rejecting freshly issued credentials no longer costs a token mint or refresh per request.** A credential obtained in the last 30 seconds that the upstream rejects is kept rather than replaced, so such an upstream costs at most one mint or refresh per half minute per credential however many requests arrive; the requests fail with the same reconnect prompt as before. A per-user OAuth token an upstream rejects before its stated expiry is now refreshed and the call repeated with the new token, instead of being presented again. A connector with a fixed token, or none, no longer re-handshakes and repeats a call the upstream answered 401: the call fails as an authentication failure and the next one opens a fresh session. [Compare v0.11.1...v0.12.0](https://github.com/PipedreamHQ/conduit/compare/v0.11.1...v0.12.0) **v0.11.1** 2026-09-18 *Traces group by operation and no longer report abandoned requests, oversized results or stalled upstreams as separate issues, repeated exporter errors are logged once a minute, membership and client listings are faster, and a token an upstream rejects is replaced at once.* ## Upgrade notes None. ## Changed * **Membership lookups by user are indexed** (a migration runs on upgrade), so listing a user's workspaces and resolving which workspace an MCP session belongs to no longer scan the membership table. * **Spans are grouped by operation in your tracing backend**: database spans carry the key APM backends read to name them `sqlite.query` or `postgresql.query`, internal spans name their domain as the operation instead of collapsing into one "Internal" bucket, and upstream MCP calls and outbound HTTP calls list the connector and method, or the peer, as their resource. * **A tool result over the gateway's response size cap is no longer a tracked issue**: the call still fails and tells the caller to request less, and the failed span stays visible in traces. * **A request the caller abandons is no longer a server error.** When a browser reload or a closed MCP stream cancels a request mid-flight, Conduit answers Canceled (HTTP 499) instead of a 5xx, so the failure it interrupted records no tracked exception in your tracing backend, writes no error-level log line, does not count against request error metrics, and sends no in-band MCP log message about it to the caller's other sessions. * **A dependency's failure now records its cause.** When Pipedream or an upstream connector refuses or fails a request — a rejected credential, a 5xx, a timeout — the tracked exception in your tracing backend and the warning in the log carry what the dependency said, under an issue type of its own (`conduit.rpc.dependency_failed`) kept apart from Conduit's own faults, instead of only the status code and route. * **A failing telemetry exporter no longer floods the console log.** An export error that recurs on every batch — a collector that is unreachable, or one that does not accept a signal Conduit sends — is logged once, then once a minute with the number of repeats, instead of on every attempt. * **A collector that does not serve a signal is no longer sent it batch after batch.** When a gRPC collector answers `Unimplemented` for traces, logs, or metrics — a traces-only backend given Conduit's logs, say — Conduit reports it once, naming the exporter and the signal, stops sending that signal to that exporter, and probes with one batch every five minutes until the collector serves it, then reports that it is resuming. The exporter's other signals continue unaffected. ## Fixed * **Open MCP streams no longer flood the tracing backend with single-span traces**: a request's session check now appears inside that request's trace, and the periodic keepalive check on each open stream records none. * **The admin list of OAuth and MCP clients no longer slows down as clients accumulate**: it issued two database queries per registered client, over a second with a few hundred of them. * **A workspace's Pipedream access token is minted once and shared by every member's MCP session**, instead of once per member, removing a slow step from each member's first request. * **A Pipedream access token that Pipedream rejects is replaced at once.** When Pipedream answers a member's MCP request or a Connect API call with 401 for a token Conduit still held as valid, Conduit drops that token, mints a fresh one and retries the request, instead of presenting the rejected token until its stated expiry and showing members a reconnect prompt for a credential that was never theirs. * **GraphQL and OpenAPI connectors recover from a rejected token the way MCP connectors do.** When such a connector's upstream answers 401 for a client-credentials or per-user OAuth token Conduit still held as valid, the token is dropped and the call repeated once with a fresh one, instead of failing with a reconnect prompt until the token's stated expiry. * **Tool calls by connector-qualified name from MCP Apps-capable clients no longer fan a tool listing out to every connector first**, which slowed those calls and put listing load on every upstream. * **An upstream that stalls past Conduit's request timeout now appears as one issue in your tracing backend**, instead of two to four issues for the same failure under differing messages. * **A credential Conduit cannot obtain is no longer reported as your session having expired.** When Conduit itself failed to get the token it uses for an upstream — the Pipedream token mint refused or unreachable, a connector's client-credentials grant failing, a token endpoint down — MCP clients were told their session had expired and re-authenticated for nothing, tool calls failed with "session expired", and the failure left no tracked issue. It is now reported as an unavailable upstream credential: the tool call says so and that reconnecting will not help, the connector catalog shows the connector as unavailable rather than as needing a credential, and the failure is tracked under its own issue type. A grant the upstream itself refuses, because it was revoked or expired, still asks the caller to reconnect. * **Non-ASCII text in a tool result or upstream error no longer makes the collector reject traces and events.** Text Conduit shortens before putting it on a span, an event, or a stored record — an upstream response body, an error message, a client name — was cut at a fixed byte count, which could split a multi-byte character and leave invalid UTF-8; the collector then refused the whole batch it arrived in. Shortened text now ends on a character boundary and is marked with an ellipsis, and text an upstream sends that is not UTF-8 is repaired before export. [Compare v0.11.0...v0.11.1](https://github.com/PipedreamHQ/conduit/compare/v0.11.0...v0.11.1) **v0.11.0** 2026-09-14 *Workspace RPCs and MCP admin tools now name the workspace they act on, identity providers are one surface for instance and workspace scopes, and workspace admins can publish help instructions.* ## Upgrade notes The database migration for workspace help runs automatically at startup. **Admin API: `ListWorkspaceIdentityProviders` is replaced by `ListIdentityProviders`.** The identity-provider RPCs now serve both scopes from one family, so the workspace-only method is gone. API clients holding `sso:read` call `ListIdentityProviders` instead; as on every workspace method, `organizationId` is optional for an API client and means its own workspace. In responses, the provider's `owner_scope` field is now `organization_id` (empty for an instance provider). This breaks the scoped-method freeze deliberately, while the Admin API is days old and the project is pre-1.0; the OpenAPI reference is regenerated. **MCP builtin workspace-admin tools take an `organizationId` argument.** Omit it and the tool acts on the workspace the MCP session is bound to; name another workspace you administer to act there instead. ## Added * Workspace admins can write Markdown help instructions from the question-mark icon in the header (**?** → **Edit**). Members see the icon once instructions are saved. * `GetSession` returns `activeWorkspaceHelpSet`: whether the active workspace has help instructions. ## Changed * **Admin API: every workspace method takes `organizationId`.** The 20 workspace methods that had no such field — policies, groups, access inspection, workspace connectors, Pipedream, SCIM tokens and provisioning — gain it. For an API client the field is optional on every workspace method and means the client's own workspace; naming any other workspace is refused. Nothing an existing client sends stops working; the OpenAPI reference is regenerated. * **Workspace RPCs act on the workspace the request names.** Every workspace-level RPC requires `organization_id`, and a signed-in user's active workspace is never substituted for it — not by the authorization gate, the handler, the audit row, or the telemetry scope. A settings page left open after switching workspaces in another tab now changes the workspace it shows, not the one switched to. A refused call is audited in the workspace the request named; a member's refused instance-admin call, which names none, now lands in the instance audit log rather than the member's active workspace's. A workspace call that names no workspace is refused as malformed (`invalid_argument`) before any role check, and is not audited as a denial. An instance admin naming a workspace that does not exist gets `not_found`. In the app, the workspace settings pages need a workspace to address, so an instance admin who belongs to no workspace no longer sees them in the navigation. * **One identity-provider surface for instance and workspace.** The login-page providers (instance admins, **Settings → Sign-in**) and each workspace's SSO providers (workspace admins, **Settings → SSO**) were two RPC families and two settings pages over one table. They are now one family — `ListIdentityProviders`, `CreateIdentityProvider`, `UpdateIdentityProvider`, `DeleteIdentityProvider`, `VerifyIdentityProviderDomain` — addressed by scope: `organization_id` names a workspace, and leaving it unset names the instance, which only instance admins may do. Both settings pages render the same provider list, so the workspace SSO page gains the standard row-actions menu and the copyable redirect URI field the instance page already had. Over MCP the two scopes stay two sets of tools, named as in the previous release: `list_idps`, `create_idp`, `update_idp` and `delete_idp` in the instance-admin connector take no workspace, and `list_workspace_idps`, `create_workspace_idp`, `update_workspace_idp`, `delete_workspace_idp` and `verify_workspace_idp_domain` in the workspace-admin connector default to the session's workspace like every other workspace tool. A workspace admin's tool list never advertises the instance's providers. * **Identity-provider changes made in a workspace now appear in that workspace's audit log.** Creating, updating, deleting, or verifying a domain of a workspace SSO provider is recorded against the workspace; instance provider changes stay instance-level. Domain verification also joins the audit event catalog, so the filter can select it. * **Workspace telemetry exporters receive an instance admin's workspace-filtered usage reads.** On the instance usage dashboard, a read filtered to one workspace is now scoped to that workspace, so the workspace's exporter receives it, as it already does an instance admin's read of the workspace's audit log. Unfiltered, instance-wide reads still reach instance exporters only. * **The instance usage dashboard's workspace filter must name an existing workspace.** A usage read filtered to a workspace that has since been deleted is refused as not found, like every request that names a missing workspace. The filter menu offers live workspaces only, so this reaches only a saved URL. * User docs start with short setup and connector guides, link directly to Conduit pages, and include a short [explanation of MCP](/docs/conduit/use/what-is-mcp). * User guides cover remote setup without the feature-flagged Conduit CLI and direct help and connector requests to Conduit admins. * The Connectors page links to the connector-request guide beside its description. * The book icon moved from the sidebar footer to the header and opens [Start here](/docs/conduit/use/start). The GitHub links in the app and docs are gone. * Home's Claude and ChatGPT setup steps follow the providers' current menus. ## Fixed * **Editing an instance identity provider now reports what went wrong.** A rejected issuer or token URL (plain `http`, a special-use address) or a scope list without `openid` returns an invalid-argument error with the reason, where the instance path previously answered "identity provider not found". [Compare v0.10.3...v0.11.0](https://github.com/PipedreamHQ/conduit/compare/v0.10.3...v0.11.0) **v0.10.3** 2026-09-10 *Adds two repository-built images for load-testing a throwaway Conduit deployment on your own infrastructure, and stops a connection's menu from offering Replace token when there is nothing to type.* ## Upgrade notes None. ## Added * **Load tests on your own infrastructure.** Two new images built from the repository — `loadtest-conduit`, the Conduit image with a load-test seeder that runs at boot, and `loadtest-mcp-server`, the mock upstream the seeded connectors call — let you load-test a throwaway deployment wherever you run Conduit and its upstreams, with every result recording the pod shape it was measured on; see [Load Tests](/docs/conduit/load-tests). ## Fixed * A connection's menu no longer offers **Replace token** when there is nothing the member could type. A connector whose stored auth method is outside the `none` / `token` / `oauth` vocabulary now reads as unauthenticated everywhere (which is how the gateway already ran it), so a stale per-user token for it no longer lists it on **Accounts** as a live connection; and a member whose own token has been displaced by a workspace credential they may not override sees only **Disconnect**. Before, either case opened an update dialog with no inputs and a disabled Save. [Compare v0.10.2...v0.10.3](https://github.com/PipedreamHQ/conduit/compare/v0.10.2...v0.10.3) **v0.10.2** 2026-09-07 *Workspace administrators can send their workspace's traces and events to their own OpenTelemetry collectors, MCP clients that support MCP Apps can render connector UI templates through the gateway, and each non-admin user may own one workspace.* ## Upgrade notes None. ## Added * **Workspace telemetry exporters.** Workspace administrators can send their workspace's traces and events to their own OpenTelemetry collectors from Settings → Telemetry. A workspace exporter receives only activity within that workspace — its members' MCP traffic, its settings changes, its SCIM provisioning — never other workspaces or instance administration, and never metrics. Endpoints must be `https` and use an HTTP protocol; they are reached through the same hardened outbound client as connectors. Signals sent to a workspace's exporters carry the resource attributes the workspace configures (`service.name` defaults to `conduit`); the deployment's `OTEL_RESOURCE_ATTRIBUTES` reach instance exporters only. Instance exporters continue to receive everything. A workspace may configure one exporter. See [Telemetry Export](/docs/conduit/configure/telemetry). * Every workspace-scoped span and event now carries a `conduit.workspace.id` attribute, so an instance backend can be filtered by workspace. ## Changed * The MCP gateway now preserves standard tool output schemas, structured tool results, and tool, result, and resource metadata from upstream connectors. * MCP clients that support MCP Apps can now discover and render UI templates from remote connectors. Conduit preserves the required `ui://` scheme while namespacing template URIs, forwards the Apps declaration through the local CLI, keeps app-only tools out of clients that cannot render them, and lets app views call uniquely named tools and load uniquely declared templates by the local names and URIs they were authored with. Undeclared secondary UI resources are resolved across every accessible connector currently advertising an app template, without a fixed connector limit and with explicit errors for ambiguous or incomplete results. * Telemetry exporter settings now reject an exporter with a missing name or endpoint, or an unknown protocol, instead of saving it and silently exporting nothing. * Workspace telemetry pipelines are now created on first use, with each replica retaining the 64 most recently used pipelines and recycling older ones. This bounds exporter queues and background workers without limiting how many workspaces may configure telemetry. * Each user may own one workspace. Membership in other users' workspaces is unaffected, and instance administrators are not limited. ## Fixed * Changing a workspace telemetry exporter's protocol or endpoint now clears its write-only headers instead of forwarding the stored credentials to the new collector. * An OTLP/HTTP telemetry exporter whose endpoint was entered with a trailing slash or with a signal path (such as `/v1/logs`) now sends traces to `/v1/traces`; before, they went to the path as entered. * The usage dashboards no longer drop the current hour's calls and auth failures (and, at midnight UTC, the current day's active users) when read during the first second of the hour. [Compare v0.10.1...v0.10.2](https://github.com/PipedreamHQ/conduit/compare/v0.10.1...v0.10.2) **v0.10.1** 2026-09-03 *Active-active replicas no longer need session-sticky load balancing, so any L7 balancer works with its defaults; the Admin API can inspect a group's combined access, and MCP resource-read errors name the failing URI.* ## Upgrade notes * Sticky-session rules configured on a load balancer for Conduit's active-active tier can stay or go; neither choice affects correctness. ## Added * The Admin API can inspect the combined connector and tool access granted through a group, its parent-group hierarchy, and workspace-wide policies. * The MCP gateway's stateless-era (2026-07-28) surface now relays mid-call client interactions — form elicitation, sampling, and roots requests — as SEP-2322 `input_required` retries: round one returns the requests plus a sealed `requestState`, and a retry echoing the state with the matching `inputResponses` completes the original call. Multi-round chains work without re-sending earlier answers (they replay from the sealed state), and a call needing a capability the request's `_meta` didn't declare is refused with the spec's `-32021 MissingRequiredClientCapabilityError` naming the capability. The era remains served only when explicitly enabled, until its full semantics land. ## Changed * Active-active deployments no longer need session-sticky load balancing. A client's answer to an in-band MCP prompt (elicitation or sampling), and a request cancellation (`notifications/cancelled`), may reach any replica: the receiving replica hands it to the one holding the call, through the database and the cluster notification channel. Any load balancer that round-robins across replicas — an AWS ALB included — works with no affinity configuration, and the startup warning about sticky routing is gone. A client's answer to an in-band prompt is now capped at 1 MiB on every replica (a larger answer is refused and the prompt times out). Includes a database migration (runs automatically on boot). * The Admin API reference now presents read-only operations as HTTP `GET` without duplicate `POST` entries for the same methods. * MCP `resources/read` errors now echo the requested URI in `error.data.uri` (SEP-2164), in both protocol eras, so clients can attribute a failed read without parsing the error message. * The load-test documentation is one sizing-focused page (headline capacity, deployment sizing guidance, and a history table) instead of a page per test pass, and the published numbers are re-measured under a workload model calibrated to real production traffic: bursty agent calls, a small always-on bot cohort, heavy-tailed upstream latency, routine tool errors, and mixed response sizes. [Compare v0.10.0...v0.10.1](https://github.com/PipedreamHQ/conduit/compare/v0.10.0...v0.10.1) **v0.10.0** 2026-08-27 *Adds a workspace Admin API with machine-to-machine API clients, modernizes MCP protocol support, and hardens upstream connector OAuth against token mix-up and confused-deputy attacks.* ## Upgrade notes A new database migration adds the API-client tables and a `kind` column to users; it applies automatically on boot (SQLite and Postgres). Optional: set `CONDUIT_DISABLE_API_CLIENTS=true` and restart Conduit to stop API-client token minting and reject existing machine tokens instance-wide (a break-glass kill switch; per-client controls are in workspace settings). ## Added * **Admin API with machine-to-machine auth.** Workspace admins can create **API clients** — machine principals that call Conduit's workspace-admin operations (connectors, policies, groups, audit-log reads) from scripts and CI with no user in the flow. Clients authenticate via OAuth 2.0 client credentials (`client_secret_basic` or, stronger, `private_key_jwt`) at `/oauth/token`, receive a short-lived bearer token, and call the same Connect RPC API the UI uses. Access is governed by area `read`/`write` **scopes**. API clients are RPC-only: they are not workspace members, hold no connector policies, and cannot connect to `/mcp` (headless MCP access is a planned follow-up). Managed in **Settings → API Clients**. See [Admin API](/docs/conduit/use/api). * **Admin API reference** — a generated, always-current reference for the public admin API (every method, its request/response fields, and an example), covering exactly the scoped surface an API client can reach. See [Admin API Reference](/docs/conduit/use/api). * **Connector lookup in the Admin API.** Connector list responses now include their canonical IDs, which automation can pass to `GetConnector` to retrieve one connector's non-secret configuration with `connectors:read`. * **Admin inventory and access-debugging APIs.** API clients can retrieve live connector tool catalogs with explicit resolution status, summarize configured policy grants, and inspect allow, enable, and effective access for one or many members. Sanitized SSO and provisioning inventory is available through the new `sso:read` and `provisioning:read` scopes; identity-changing operations remain machine-unreachable. * Upstream OAuth clients now authenticate at token endpoints with HTTP Basic (`client_secret_basic`, RFC 6749 §2.3.1) when that is the method the authorization server's metadata advertises for presenting a secret; the body shape (`client_secret_post`) remains the choice whenever it is advertised or the metadata is silent. The method is recorded when the connector's OAuth client is provisioned, so both the code exchange and token refreshes use it; connectors provisioned earlier keep the body shape until their next edit re-provisions the client. ## Changed * API-client create and manage dialogs now keep a stable size while scope details expand, continue directly into credential setup after creation, and show the client ID as a copyable value in the credentials panel — previously it was only visible when creating a client secret, leaving key-only (`private_key_jwt`) clients no way to see the ID their assertions must name. * The gateway's client to upstream MCP connectors now requests protocol revision `2025-11-25` at `initialize` (previously `2025-03-26`), accepts whichever supported revision the upstream negotiates, and echoes the negotiated revision on every later request's `MCP-Protocol-Version` header, as the spec requires of clients from `2025-06-18`. An upstream that negotiates a revision Conduit doesn't speak keeps working exactly as before: no header is sent, which the spec reads as `2025-03-26`. * Dynamic client registration for an upstream MCP connector's OAuth flow now declares the RFC 7591 `application_type` (`web` — or `native` when the instance's callback URL is a loopback address, the local-development shape), which authorization servers implementing MCP's SEP-837 require. * The MCP `initialize` response now assigns an `Mcp-Session-Id`, which stateful-transport clients echo on their later requests per the MCP spec. The id is advisory: Conduit authenticates every request by its bearer token and keeps MCP session state in the database, so requests are served identically with or without it — but clients that treat a missing assignment as "no session" (some strict SSE consumers) now get one. * MCP listings (`tools/list`, `prompts/list`, `resources/list`, `resources/templates/list`) are served in a deterministic sorted order, so an unchanged set always serializes identically — letting clients cache listings and improving LLM prompt-cache hit rates, per the MCP spec recommendation. * An MCP request that declares a stateless protocol revision (`2026-07-28` or later, via the `MCP-Protocol-Version` header or request `_meta`) is now answered with the spec's `UnsupportedProtocolVersionError` listing the supported versions — instead of a handshake-era-shaped response a modern client could misread. `server/discover` keeps answering for any declared version, so version discovery stays one round trip. Dual-era clients (the official MCP SDKs) fall back to the `initialize` handshake automatically. * MCP SSE responses now carry `X-Accel-Buffering: no`, telling buffering reverse proxies (such as nginx) to deliver event frames immediately. * `x-mcp-header` annotations in a connector's advertised tool schemas are stripped before the tools reach clients: Conduit does not support the custom-header feature (MCP 2026-07-28), so advertising the annotation would solicit `Mcp-Param-*` headers nothing consumes — and a malformed annotation would make conforming clients reject the whole tool. Everything else in the schema passes through untouched. ## Fixed * Resource references in a connector's prompt and tool results — `resource_link` blocks, embedded resources, and mentions of those same URIs in the result's text — are now rewritten to the gateway's `conduit:///` form, matching the resource listing. Previously they relayed the connector's own raw URIs, which a `resources/read` through Conduit could not resolve (so a prompt telling the model to load a resource pointed at a URI the gateway answered as not found). A read of a URI outside the wrapped form also now returns an error spelling out that form, so a model holding a raw URI quoted in prose alone can construct the routable form and retry. ## Security * The workspace join policy no longer returns the invite-link token. Reading the policy (`GetWorkspaceJoinPolicy`, including the `settings:read` API scope and the workspace-admin MCP tool) now reports only whether a link exists (`link_token_set`); the token itself — a live credential that admits any signed-in user to the workspace while link joining is enabled — moves to a new `GetWorkspaceJoinLink` call gated at `settings:write`, the same authority that can mint the link. Automation that read `link_token` from the policy must call `GetWorkspaceJoinLink` instead. * Upstream OAuth discovery now validates the `resource` identifier a connector's protected-resource metadata advertises (RFC 9728 §3.3): it must name the MCP server itself — the same origin, at the endpoint's path or a parent of it. Metadata naming a foreign resource fails the connect flow with a clear error instead of requesting tokens audienced for that other resource (a confused-deputy defense). Connectors whose metadata advertises a mismatched identifier will fail to connect until the upstream fixes it. * The MCP endpoint now validates the `Origin` header (DNS-rebinding defense, an MCP transport requirement): a browser-sent `http(s)` origin that isn't the instance's own external origin (`CONDUIT_BASE_URL`) is refused with 403\. Requests without an `Origin` header — every non-browser MCP client — are unaffected. * The connector OAuth callback now validates the RFC 9207 `iss` parameter on authorization responses (mix-up defense): a present `iss` must match the issuer recorded when the connector's authorization server was discovered, and an authorization server whose metadata advertises `authorization_response_iss_parameter_supported` must send it. Authorization servers that predate RFC 9207 are unaffected, as are manually-configured OAuth clients (no discovered issuer to compare against). Includes a migration (runs automatically on boot); connectors configured before this release record their issuer on the next connector edit. [Compare v0.9.6...v0.10.0](https://github.com/PipedreamHQ/conduit/compare/v0.9.6...v0.10.0) **v0.9.6** 2026-08-26 *Enforces the Content Security Policy by default, requires consented OAuth capability scopes, adds a per-workspace usage dashboard, and hardens sessions, CSRF, and request throttling.* ## Upgrade notes The new Content Security Policy is enforced by default. Deployments diagnosing a custom browser integration can temporarily set `CONDUIT_CSP=report-only`. OAuth scope storage is added automatically on startup. Existing client grants retain connector and personal tools only; users must reconnect and explicitly approve an administrative scope before an OAuth client can use admin tools. ## Added * The MCP endpoint and the `conduit` CLI's stdio server answer `server/discover`, the pre-negotiation probe clients on MCP protocol revision `2026-07-28` and later send before anything else. The response lists the supported protocol versions (the initialize-handshake revisions — Conduit does not yet implement the stateless `2026-07-28` semantics), capabilities, and server identity in one round trip, so a probing client selects a supported version and proceeds with the `initialize` handshake instead of inferring the fallback from a method-not-found error. * Workspace usage dashboard: workspace admins get **Settings → Usage**, showing their workspace's tool-call volume, active members, top users/tools/clients, and recent calls — the dashboard instance admins already had, scoped to one workspace. Backed by new workspace-admin RPCs (`GetOrgUsageOverview`, `ListOrgUsageBreakdown`, `ListOrgRecentToolCalls`) that never read outside the workspace: the per-member drill-down shows only calls made in that workspace, never a member's activity elsewhere. In single-workspace mode the instance and workspace dashboards fold into one page, as the audit log already does. ## Changed * CSP violation reports that say nothing about the deployment are no longer logged or emitted as telemetry events: content a browser extension injected into the page (which no policy can govern, and which browsers report anyway) and reports naming a page outside `CONDUIT_BASE_URL`, which anyone could submit to the unauthenticated report endpoint. A report that survives the filter is a real policy regression. * The **Groups & Policies** dialogs edit as a draft: the grant editor and the group-members dialog collect changes behind **Cancel**/**Save** and write them in one atomic call on Save, instead of persisting every toggle immediately — so an accidental click is discardable and a half-finished edit is never live policy. The grant editor's **Allow all connectors** switch still applies immediately. Saving membership sends only the explicit adds and removals, so a member added while the dialog was open — by a SCIM sync, a provisioning rule, or another admin — is never evicted by a save that didn't touch them. Backing this, the `update_group` admin tool (`UpdateGroup`) accepts a batch of membership changes alongside its now-optional rename, and the single-member `add_group_member` / `remove_group_member` tools (`AddGroupMember` / `RemoveGroupMember`) are removed — `update_group` covers both, and workspace-admin clients get a shorter tool list. * The usage dashboards' per-user drill-down is headed by who it is about — the user's avatar, name, and email — instead of a generic "User usage" title. On the workspace dashboard the identity comes from the member roster (`ListWorkspaceMembers` gains an exact `user_id` filter), so an ex-member's remaining history falls back to the generic heading. ## Fixed * The built-in docs site prefetches pages again. Its Content-Security-Policy blocked every link prefetch, so in-site navigation lost the head start the docs are built to have. ## Security * OAuth clients now receive explicit, consented capability scopes enforced on listings and direct calls in addition to the caller's live role and workspace policy; ordinary connector and personal-tool scopes are required, while admin scopes are opt-in and hidden from ineligible users. * Stateful MCP upstream sessions are isolated per member even when a connector uses shared or no authentication, preventing one member from receiving another member's upstream session state. * OpenAPI connector path parameters can no longer traverse outside the operation declared in the connector's specification. * Compressed Connect RPC requests are rejected before decompression and the RPC surface is throttled per client IP, preventing unauthenticated gzip bombs from exhausting server CPU. * The web UI now enforces its Content Security Policy by default, denies all framing even when CSP is disabled, and briefly holds OAuth approval input to prevent clickjacking. * MCP tool calls now reject nonsensically oversized names before tracing, routing, or recording them. High-volume call activity remains in bounded usage data and OpenTelemetry; policy denials remain in the audit log. * HTTPS deployments now use a `__Host-` browser-session cookie (with automatic migration of existing sessions) and send a one-year, host-only HSTS policy. * Cookie-authenticated Connect GETs now require the exact application origin; sibling subdomains and CORS-allowed origins no longer satisfy CSRF checks. * PostgreSQL deployments now atomically consume shared password-attempt counters across replicas, keyed separately by account and IP, so concurrent requests cannot race past the shared limit. * Connector create and update requests with a missing connector payload now return `InvalidArgument` instead of panicking. * MCP tool-list change detection now hashes complete advertised definitions, including behavior hints, plus a non-secret connector-source fingerprint, so clients are notified when a trusted name's definition or destination changes. [Compare v0.9.5...v0.9.6](https://github.com/PipedreamHQ/conduit/compare/v0.9.5...v0.9.6) **v0.9.5** 2026-08-24 *The MCP gateway gains prompts, upstream resources, argument completion, client logging, and request cancellation, and reports connector failures as spec-compliant tool results.* ## Upgrade notes None. ## Added * MCP prompts: the gateway now aggregates prompts from connectors that serve them (`prompts/list` / `prompts/get`), named `__` and gated by the same connector access policies as tools; connected clients get `notifications/prompts/list_changed` when their prompt set changes. The Conduit CLI proxies prompts through. Prompt fetches and resource reads are recorded in the usage store and metrics (`conduit_mcp_prompt_gets_total`, `conduit_mcp_resource_reads_total`), and denied fetches are audited like denied tool calls. Includes a usage-store migration (runs automatically on boot). * MCP resources from remote connectors: `resources/list`, `resources/read`, and `resources/templates/list` now aggregate what upstream MCP servers expose, under the same connector access policies as tools. An upstream resource is advertised as `conduit:///` so reads route to the owning connector by name; resource templates expand inside that form and round-trip. The Conduit CLI proxies resources through. New connector names are restricted to letters, digits, and `. _ ~ -` (they are the routing segment of resource URIs); a pre-existing name outside that set keeps working but serves no resources until renamed. * MCP argument completion: `completion/complete` for a prompt or resource template routes to the connector that owns it, under the referent's own access policy; connectors that offer no completion answer an empty suggestion list. * MCP logging: clients can opt into gateway log messages with `logging/setLevel` (persisted per session, honored by every replica). Conduit sends a warning when one of the caller's connectors fails during a listing — previously visible only in server logs — and forwards the log messages a connector itself emits while answering the caller's requests (`connector:` logger prefix), which were previously dropped. Includes a database migration (runs automatically on boot). * MCP request cancellation: the standard `notifications/cancelled` notification now aborts the in-flight request it names, including the upstream connector call behind it. Behind multiple replicas this relies on the same sticky routing already required for in-band prompts. ## Changed * Published binaries (the server in the Docker image and the `conduit` CLI downloads it serves) are built stripped of debug info and without build-machine paths, making each roughly a third smaller. Panic stack traces and runtime profiling are unaffected. * The MCP endpoint reports the instance's real build version (and a display title) in the `initialize` response instead of a fixed placeholder, and identifies itself with that version to upstream connectors. * MCP list requests that carry a pagination cursor are rejected with an invalid-params error. Conduit returns every list in one page and never issues cursors, so a cursor can only be one this server did not mint; re-serving the full list would masquerade as pagination. ## Fixed * The workspace member roster no longer discloses each member's instance-level role to workspace admins who are not instance admins — who holds instance admin is instance-scoped information. Instance admins still see and manage it as before; the Members page shows the instance-role column only to them. * The login page now shows the email and password fields whenever the server would accept a password sign-in — including break-glass recovery (`CONDUIT_ADMIN_EMAIL` + `CONDUIT_ADMIN_PASSWORD`) on instances that have disabled password sign-in by policy. Previously the fields were hidden with password sign-in disabled, leaving the accepted break-glass credential with no form to be entered into. In that state the instance Sign-in settings now also show a warning that break-glass is keeping password sign-in active, recommending a restart without the variables as soon as possible. * Upstream MCP servers that answer a request over SSE with notification frames ahead of the result (progress or log messages) are now parsed correctly — the response frame is selected instead of the first frame. * Tool calls that fail in the connector behind them (an unreachable server, an HTTP error, a response over the gateway's 8 MiB cap, a timeout) are now reported as tool results with `isError: true`, as the MCP spec requires, instead of JSON-RPC protocol errors. The failure text reaches the model, and when one of the gateway's own limits stopped the call it now explains how to adjust (request less data, or less work per call) — previously these failures looked transient to clients, inviting identical retries that could never succeed. [Compare v0.9.4...v0.9.5](https://github.com/PipedreamHQ/conduit/compare/v0.9.4...v0.9.5) **v0.9.4** 2026-08-20 *Reconnecting an app account now updates it in place, and each user keeps a single connected account per app — accumulated duplicates clean themselves up on the next connect.* ## Upgrade notes None. ## Fixed * **Reconnecting an app account no longer creates a duplicate, and each app now keeps a single connected account per user.** Reconnect updates the existing account's credentials in place, and completing a connect flow removes any other accounts you had for that app, keeping the one just connected — tool calls don't yet offer a way to choose between multiple accounts for the same app, so keeping one removes the ambiguity about which account a call uses. Duplicates that accumulated earlier are cleaned up the next time the affected user connects or reconnects that app; each removal is recorded in the audit log. [Compare v0.9.3...v0.9.4](https://github.com/PipedreamHQ/conduit/compare/v0.9.3...v0.9.4) **v0.9.3** 2026-08-19 *A personal Usage page for every user, plus a security fix preventing cross-tenant workspace joins via a workspace-scoped identity provider.* ## Upgrade notes No action required. A usage-database migration builds three new `tool_calls` indexes on first boot; on an instance with a long call history that adds a one-time startup delay. ## Added * **A personal Usage page.** Every user now has a Usage page (`/usage`) showing their own tool-call activity — time range, workspace filter, daily chart, top connectors/tools, connected clients, and recent calls. The home-page summary cards link to it. * New documentation: Single Sign-On, Access Control (roles, groups, and policies), Connectors, the Pipedream Connector, How MCP Authorization Works, and Security Hardening — plus a deployment validation checklist on the Kubernetes page. ## Fixed * **Recreating a group, or re-inviting a removed member, with the same name could fail with "policy already exists."** Deleting a group or removing a member left its connector-access policy behind with no effect, and that leftover permanently squatted on the name; it's now cleaned up along with the group or membership, and any such leftovers from earlier deletions are cleaned up automatically on upgrade. ## Security * **A workspace's own identity provider could open the door to another workspace.** On a multi-workspace instance, an email address asserted by a workspace-scoped IdP was treated as verified for any domain — so a tenant's IdP could mint a verified address in a domain another tenant owns and join that workspace through its allowed-domain join policy. An address from a workspace-scoped IdP now counts as verified only for a domain the IdP has proven via the DNS TXT challenge (instance-scoped IdPs are unaffected), and a migration on first boot clears the verified flag on accounts whose only basis was an unproven workspace IdP. [Compare v0.9.2...v0.9.3](https://github.com/PipedreamHQ/conduit/compare/v0.9.2...v0.9.3) **v0.9.2** 2026-08-14 *Identity provider sign-in scopes are now editable, sign-in audit events record provisioning-rule results, and workspace provisioning rules now apply on a user's first SSO sign-in in single-workspace mode.* ## Upgrade notes None. ## Added * **Editable scopes on identity providers.** The scopes requested from an identity provider at sign-in are now editable in both the instance sign-in settings and workspace SSO settings, prefilled with the defaults (previously they were fixed at `openid email profile`). Add whatever scope your IdP requires to include extra claims in the ID token — for example Okta requires the `groups` scope for a groups claim, which user provisioning rules can then match on. * **Sign-in events now record provisioning-rule results.** Each successful sign-in's audit event lists which user provisioning rules matched and, for SSO sign-ins, the names of the claims the identity provider asserted (names only, never values). When a rule doesn't fire, the audit log now shows whether the claim it depends on ever arrived. For deeper troubleshooting, running the server at debug log level also logs each SSO sign-in's full verified ID-token claims. ## Fixed * **Workspace provisioning rules now apply on the first sign-in in single-workspace mode.** A workspace-scoped user provisioning rule (for example "SSO claim `groups` contains X → add to group Y") used to be skipped on a user's very first SSO sign-in when the instance runs in single-workspace mode with a deployment-wide identity provider — the rule only took effect from their second sign-in. The user's imminent membership in the sole workspace now counts during rule evaluation, matching how password sign-in already behaved. [Compare v0.9.1...v0.9.2](https://github.com/PipedreamHQ/conduit/compare/v0.9.1...v0.9.2) **v0.9.1** 2026-08-13 *Connectors backed by stateful MCP servers — including servers hosted on AWS Bedrock AgentCore — now work: the gateway keeps the server's MCP session across requests instead of being rejected after the handshake.* ## Upgrade notes None. ## Fixed * **Stateful MCP servers now work as connectors.** The gateway keeps the session a connector's MCP server establishes during the initialize handshake (its `Mcp-Session-Id`) and presents it on every subsequent request, starting a fresh session automatically if the server expires it. Servers that require this — including those built on the official MCP TypeScript SDK's default stateful mode, and MCP servers hosted on AWS Bedrock AgentCore, which uses the session id to route requests — previously rejected every request after the handshake with a "session not found" error. Servers that don't use sessions are unaffected. For connectors authenticated per user, each user gets their own upstream session. [Compare v0.9.0...v0.9.1](https://github.com/PipedreamHQ/conduit/compare/v0.9.0...v0.9.1) **v0.9.0** 2026-08-13 *Every instance now distributes the conduit CLI — device-code login, auto-configured AI clients, and local MCP connectors governed by your workspace policies — plus IAM authentication to AWS RDS; stop the old container before starting this version.* ## Upgrade notes **Stop the old container before starting the new one.** This release's migrations rename a connector column and drop another, so a replica running the previous version against the same database will fail its connector reads and writes until it is replaced. A normal stop/start (or a Kubernetes `Recreate` rollout) is unaffected; a rolling upgrade that runs both versions at once is not supported for this release. No multi-replica deployment configuration is affected today, since Postgres multi-replica mode is not yet in use. Otherwise no operator action: the migrations run automatically on boot, and the Docker image now also carries the `conduit` CLI binaries it serves. ## Added * **The `conduit` CLI: your instance's tools, from a laptop.** Every Conduit instance now distributes its own command-line client at `/cli/` — users install it with one `curl | sh` from the home page, sign in with `conduit login` (a device code approved in the browser, no copy-pasting credentials), and are done. The install script, the binaries, and their checksums all come from your instance, so air-gapped deployments need nothing external and the client always matches the server it talks to. * **`conduit setup`: your AI clients wired up for you.** The install script ends by detecting the AI clients on the machine — Claude Code, Claude Desktop, Cursor, Windsurf, VS Code, Codex CLI, and Gemini CLI — and offering to register Conduit's MCP server with each one: a picker with everything preselected, and idempotent config edits that leave other servers and unrelated settings untouched (one caveat: an edit to Codex's `config.toml` re-encodes it, so comments there don't survive — a file that's already current is never rewritten). A client already pointing at the remote `/mcp` URL under the `conduit` name is switched to the CLI — it proxies the same remote tools, so keeping both entries would duplicate them. Run `conduit setup` again any time (say, after installing a new client), or `conduit setup --all` where there is no terminal to ask on. * **Local connectors: MCP servers that run on the user's own machine, under your policies.** Admins can define a connector by launch command (**Add connector → MCP Server by command**) instead of by URL. Users enable it on their Connectors page like any other, and the CLI runs it locally: every tool call is authorized by your instance first, counts in usage, and lands in the audit trail exactly like a remote call — but a successful tool's results stay on the user's machine and never transit the server (only the outcome, and a failed call's error message, are reported back). Access is governed by the same allow/enable policies as everything else, including as a class (`local:*`). Launch commands are found using the PATH the user's login shell sets up, so a runtime installed with Homebrew or nvm works even when the MCP client wasn't started from a terminal. * **Environment variables for local connectors, secret-safe.** A local connector's env vars are declared the same way a remote connector's custom headers are — the field editor labels the key as an environment variable or a header depending on the connector. A value can be a shared workspace secret or one each member supplies on their connect page; either way it is encrypted at rest and never shown back to you in the UI or API after you save it. One thing to know when choosing the scope: a local connector runs on the member's own machine, so its environment has to be sent there. A **workspace** value is therefore readable by every member who can use that connector — treat it as shared with them — while a **per-member** value stays that member's own and is never handed to anyone else's machine. The field editor says so where you enter the value. This applies only to local connectors; a remote connector's workspace values are used server-side and never leave the instance. * **`conduit mcp`: one local endpoint for everything.** Pointing an MCP client (Claude Code, Claude Desktop, Cursor, Codex) at `conduit mcp` gives it the instance's remote tools *and* the machine's local connectors in a single tool list. The home page's connect card now leads with this path, with per-client setup instructions and an npx quick-add. * **Live updates reach CLI sessions.** When an admin changes a policy or a connector — or a user changes their own enabled set — connected `conduit mcp` sessions pick it up immediately: the tool list refreshes in the client, and local connectors start or stop mid-session to match. That includes editing a local connector's launch command, arguments or environment variables: running sessions retire the old process and use the new definition on the next call, so a fix reaches every machine without asking anyone to restart their MCP client. No restarts. * **`conduit upgrade`: the fleet converges on your server's version.** The CLI compares its own binary against what the server distributes (by content digest, so a rebuilt image with the same tag still converges — and a server rollback rolls the fleet back the same way), verifies the download's checksum, and swaps itself atomically. `conduit login` and `conduit mcp` print a notice when out of sync; `conduit upgrade --check` exits non-zero for scripts. A running `conduit mcp` session adopts the new binary in place — same process, same client connection, no restart of the MCP client — and a failed upgrade can never take a session down. * **Fleet visibility for the CLI, in the audit log and telemetry.** New audit events record each CLI connection (with the user, workspace, and CLI version) and every local connector that fails to start or crashes — with a machine-readable error class (for example, "the runtime isn't installed") and the failing process's own error output, so you can see whether a rollout works on real machines without asking anyone. Denied local tool calls are audited exactly like denied remote ones, successful starts and binary downloads flow to telemetry, and every CLI request carries its version, so stale clients are identifiable. When a failure has a known fix, the server's guidance is shown to the user in their MCP client, and the connector fails fast until the definition changes — no retry storms, no repeated log spam. * **`conduit --version` and `conduit --help`** (with `-v`/`-h` shorthands) report the build and usage; `conduit login -h` and friends exit cleanly. * **IAM authentication to AWS RDS and Aurora.** Set `CONDUIT_DATABASE_AUTH=rds-iam` and Conduit authenticates to its PostgreSQL with short-lived IAM tokens minted from the AWS identity it runs as (an EKS service-account role, Pod Identity, or an instance profile) instead of a password in `CONDUIT_DATABASE_URL` — no database credential stored anywhere, nothing to rotate. Setup steps are on the Deployment Tiers page; the Kubernetes page shows the EKS wiring. To support mounting the RDS CA bundle (IAM auth requires TLS), the Helm chart gained `extraVolumes` / `extraVolumeMounts`. ## Changed * **Connectors can no longer be created or edited through the builtin MCP tools.** The `create_connector` and `update_connector` tools are gone from the `conduit_workspace_admin` builtin connector: their inputs carry upstream credentials (tokens, auth headers, client secrets), which don't belong in tool-call transcripts. Use the Connectors settings page instead; listing and deleting connectors remain available as builtin tools. * **The home page's "How to use Conduit" card offers two paths.** "All tools" (recommended) walks through installing the CLI and pointing clients at it; "Remote tools only" keeps the zero-install hosted URL flow for clients that can't run local processes (like ChatGPT). * **Connector "header fields" are "config fields" in the API.** The declared field list on a connector covers two transports — an HTTP header on a remote connector, an environment variable on a local one — so the API now names it for the concept: `header_fields` on connector reads/writes is `config_fields` (message `ConnectorConfigField`), and the connect page's `user_header_fields` / `user_header_keys_set` are `user_config_fields` / `user_config_keys_set`. Scripts that call the connectors API with the old field names need updating; stored declarations and values are preserved (the database migrates automatically on boot) and the UI is unchanged. * **`stdio.env` is gone from the connector API.** A local connector's environment is declared as config fields now, so the values are encrypted at rest and write-only instead of stored in the clear. A script still sending `stdio.env` has it ignored rather than rejected — move those entries to `config_fields` (scope `workspace` or `user`) and supply the values the same way you would a custom header's. * **A CLI login is only issued to the Conduit CLI.** The device-authorization endpoint now accepts only the first-party `conduit-cli` client. The approval screen names the client asking for access, and that name is what tells you whether a login is one you started — so it has to be a name the server vouches for rather than whatever a caller sent. * **The CLI requires HTTPS.** `conduit login`, `conduit upgrade`, and `conduit mcp` refuse a plain-`http` instance URL unless it is localhost. `conduit upgrade` replaces the running binary with one downloaded from your instance and checks it against a checksum from that same instance, so the TLS connection is what makes the check meaningful. [Compare v0.8.1...v0.9.0](https://github.com/PipedreamHQ/conduit/compare/v0.8.1...v0.9.0) **v0.8.1** 2026-08-10 *Custom MCP servers gain the OAuth client-credentials grant, and OAuth discovery now follows the metadata URL a server advertises in its 401 challenge.* ## Upgrade notes None. ## Added * Custom MCP servers can now authenticate upstream with the **OAuth client credentials grant**, matching OpenAPI and GraphQL connectors. Pick "Client credentials" as the grant type when adding or editing an MCP connector and supply the provider's client ID, client secret, and token endpoint (plus optional scopes and audience) — Conduit mints a workspace-wide token itself and refreshes it before expiry, so members never connect their own accounts. Switching an existing MCP connector between grants revokes credentials issued by the client being replaced, and the editor warns before saving. ## Changed * Adding an OAuth MCP connector now discovers the server's OAuth configuration from the metadata URL the server itself advertises when it rejects an unauthenticated request, so servers that don't publish metadata at the standard well-known paths — such as agents hosted on Amazon Bedrock AgentCore — can now be added. [Compare v0.8.0...v0.8.1](https://github.com/PipedreamHQ/conduit/compare/v0.8.0...v0.8.1) **v0.8.0** 2026-08-06 *Connectors are now opt-in per member, workspace deletion removes everything it owned, and the container runs as a non-root user — read the upgrade notes before pulling.* ## Upgrade notes * **The container now runs as a non-root user** (UID 65532). Kubernetes installs using the Helm chart need no action — the chart's new default security context re-owns the data volume on mount. Raw-manifest installs should add the `securityContext` blocks now shown on the [Kubernetes page](/docs/conduit/deploy/kubernetes). Docker installs upgrading an existing data volume must re-own it once before starting the new version (a fresh install needs nothing): ```sh theme={null} docker run --rm -v conduit-data:/data alpine chown -R 65532:65532 /data ``` * The database is migrated automatically on boot, on both SQLite and Postgres. Rows stranded by deletions made under earlier versions — access policies, groups, provisioning rules, connectors and their stored credentials belonging to workspaces or users that no longer exist — are removed by the migration. They were unreachable, but if you want a record of them, take your usual pre-upgrade backup first. * Sign-ins already in progress complete normally when you restart into this version. Rolling back afterwards is the case to know about: a sign-in started by this version and finished by the previous one is rejected by your identity provider, because the challenge it was started with can no longer be proved. Nothing to do — the pending records expire within five minutes, and a retry succeeds. * If you had switched off any built-in Conduit tool connector with the `update_builtin_tools` admin tool, that switch no longer exists: after this upgrade, built-in tools follow workspace access policies. Withhold them in each workspace's policies to keep them off. * **Members who never chose their connectors now start with built-in tools only.** Previously a member who had never touched the **Connectors** page was served everything their workspace allowed them — every connector that authenticates at the workspace level, and every Pipedream app named in their policies. After this upgrade those are switched off until the member switches them on, one connector at a time, on the Connectors page. Members who have already made a selection are unaffected, and nothing changes about what a policy allows: this is only the starting point of a member's own selection. Tell affected members to visit Connectors after the upgrade — or let their agent do it, since Conduit's own `get_my_connectors` and `set_connector_enabled` tools stay available and can enable a connector from the client. ## Changed * **A connector is off until the person using it turns it on.** A member's selection on the **Connectors** page starts as Conduit's built-in tools and nothing else; every other connector their workspace allows them — an MCP server, an OpenAPI or GraphQL connector, a Pipedream app — waits there for them to switch on. Allowing a connector in a policy is what makes it available to a member, not what puts it in their client, so a workspace-wide grant no longer lands dozens of tools in everyone's client on its own. See the Upgrade notes for what this means for existing members. * **A connection blocked by outbound network protection now explains the fix.** Saving Pipedream credentials, saving an OAuth connector, or opening a connector's tools when the upstream's hostname resolves to a private address — reached through a private endpoint or gateway such as AWS PrivateLink, or on your own network — used to fail with only `blocked: connection to special-use address …`. The error now says to list the hostname in `CONDUIT_SAFEHTTP_ALLOWED_PRIVATE_HOSTS` and points to the [Network Access](/docs/conduit/deploy/network) page, which gains worked examples for Pipedream behind a private endpoint and for MCP servers on a private network. * **Deleting a workspace now deletes everything it owns.** Its groups, access policies, provisioning rules, identity providers and their SCIM tokens, its connectors — including stored credentials and connected accounts — and its Pipedream and telemetry settings are all removed with it. Previously these were left behind: invisible and unusable, but present, which for connector credentials meant secrets outliving the workspace they belonged to. Deleting a user account likewise now removes their remaining group memberships and OAuth consent records along with their sessions and connected accounts. These relationships are now enforced by the database itself, so nothing can strand them again. * **Built-in tool availability is decided by roles and access policies alone.** The instance-wide switches that could hide the built-in Conduit tool connectors — reachable only through the `update_builtin_tools` admin tool, never the UI — are removed, along with that tool. A built-in connector you want to withhold from a workspace comes out of its access policies, like any other connector. The stored switch state is dropped by a migration that runs automatically on boot. * **The Connectors page opens on an overview.** Bare `/connectors` no longer auto-selects a connector; the pane summarizes what you have enabled — tool counts ("4 of 27 tools"), connected state, and an inline Connect button for Pipedream apps. Clicking the page background (or pressing Escape) returns to it. * **The Connectors overview costs one request, not one per connector.** It used to fetch each enabled connector's tool list separately, so opening the page with 30 connectors enabled meant 30 concurrent upstream `tools/list` handshakes. Conduit now gathers them in a single call, fans out to the upstreams itself a few at a time, and skips connectors it knows you haven't connected yet — so a connector that can't be reached costs its own row rather than the whole summary, and the header total says what it covers ("120 tools enabled across 4 of 5 connectors") instead of disappearing. A connector that never answers costs the summary a few seconds rather than the request: the page comes back with that row uncounted. * **Connectors page polish.** The rail's sections collapse (Built-in starts folded; searching reveals everything), the connect-account control leads the tools panel header, and the search and tool-filter boxes carry an inline ✕ to clear them. * **Connector setup shows the redirect URI to register with your OAuth provider.** Adding or editing a connector that authenticates with an OAuth client you supply yourself — an MCP server that doesn't support dynamic client registration, or a GraphQL/OpenAPI connector — now displays Conduit's callback URL next to the client ID and secret, with a copy button. Previously admins had to assemble it from the instance's host and found out they had it wrong when a member's connection attempt came back as a `redirect_uri_mismatch`. * **Connector auth setup no longer offers "let members use their own credential instead" for OAuth.** OAuth members already connect their own accounts, so the setting was misleading. Existing connector behavior is unchanged, and API updates that omit `allow_user_override` preserve its stored value. * **Connector wizard polish.** The name is editable when importing a server.json (prefill, not a lock), and the details step's name field explains what the name is for (it prefixes the connector's tools). Correcting the pasted source re-derives what the later steps prefilled from it (anything you edited sticks), a step that outgrows the screen scrolls instead of pushing the buttons off it, and a header field's example label now comes from its header name. * **Single-workspace deployments no longer show a workspace filter on the Usage page.** * **1Password's inline suggestions stay out of non-credential fields.** Search boxes, filters, and config/secret fields no longer get the overlay; sign-in and setup keep it — those hold a user's own credential. ## Security * **The server runs as a non-root user.** The container image now runs as a fixed unprivileged user (UID 65532), and the Helm chart's default security contexts pin that for admission policies to verify: `runAsNonRoot`, the runtime's default seccomp profile, no privilege escalation, and every Linux capability dropped. The server never needed any of them. See the upgrade note above for existing Docker data volumes. * **Dependency security updates.** The server now builds with Go 1.26.5 and gRPC v1.82.1, picking up upstream fixes for a standard-library symlink-following issue and a vulnerability reachable through telemetry export (GO-2026-6061). The docs-site build tooling moves past vulnerable sharp, postcss and nanoid releases. Nothing to configure. * **Sign-in through an identity provider uses PKCE.** The authorization request now carries a one-time challenge that Conduit proves when it redeems the code, so a sign-in code captured on its way back — from browser history, a proxy log, a referrer — can no longer be redeemed at all. Conduit already rejected a sign-in built on an injected code, by checking the nonce in the identity token against the one it issued, so nobody could take over an account this way before. What changes is *where* the injected code dies: at your provider, instead of at Conduit after the exchange has already happened. That matters because the exchange is the step that hands Conduit the victim's tokens from your provider — today they are discarded, and this removes the possibility of ever obtaining them. It also brings the sign-in leg in line with OAuth 2.1 and with connecting a connector, which has always used PKCE. Nothing to configure, and no compatibility risk either way. A provider that does not implement PKCE ignores the extra parameters, as the OAuth spec requires. A provider that implements it and says so, but supports only the older `plain` transformation, is detected during discovery and is sent no challenge at all — sending one would make it refuse the sign-in. A provider whose app registration *requires* PKCE now works where it previously could not. ## Fixed * **Copy buttons draw their icon at full size.** The copy control beside a copyable value — the SCIM base URL, a new SCIM token, a connector's redirect URI — rendered at two-thirds scale inside its button. * **Connector tool counts refresh after access and connection changes.** The Connectors overview and individual tool panels could keep their previous results for up to five minutes after an access-policy edit, a Pipedream configuration change, or disconnecting a personal MCP credential. * **The workspace Provisioning page requires an active workspace.** An instance admin whose session had no active workspace saw every workspace's provisioning rules there, and a rule created in that state was reachable from no workspace at all afterwards. Both are now refused with an error naming the problem. * **Opening a connector that isn't serving tools says so.** Selecting one in a policy's connector list — which shows every connector in the workspace, including disabled ones, because a policy can grant any of them — reported a generic server error. It now explains that the connector is disabled or its configuration didn't load, and points to connector settings. * **A failed request logs what went wrong.** An operation that fails with an internal error now records the failure — which operation, and the error itself — in the server log and in the trace it exports. That covers both an API request and one of Conduit's own tools called over MCP, whose failures were previously reported only to the calling client. Nothing to configure; this changes what is recorded when a request fails, not when one fails. * **A server error now says which operation failed.** Where the UI used to show a bare "internal" on a failed save or list, it names the operation — "create connector failed", "list groups failed". The underlying cause goes to the server log and the trace, where an operator can see it, and stays out of the response: error text from the database or an upstream describes Conduit's internals, not anything the person clicking can act on. * **A momentary database failure no longer empties a workspace's connectors.** If the read that loads a workspace's connectors failed, the empty result was cached: for as long as the cache held, that workspace's tools were missing from `tools/list` and its connector pages showed errors. The failure is now logged and the next request retries. [Compare v0.7.0...v0.8.0](https://github.com/PipedreamHQ/conduit/compare/v0.7.0...v0.8.0) **v0.7.0** 2026-08-03 *Connectors can require custom HTTP headers, with each value supplied once for the workspace or by each member on their own connect page.* ## Upgrade notes * **`search` and `fetch` are no longer offered to every client.** They are now served only to the clients that require them — ChatGPT connectors — and are hidden from everything else. If you were using them from another client to find a tool without reading the whole list, use the client's own tool list instead: it already contains every tool `search` could return. * **A spec whose server is plain `http` on a non-loopback host is now refused** when saving an OpenAPI connector that has no URL of its own — the same rule a typed URL has always followed. Existing connectors keep working until someone edits them; re-saving one records its destination and restores the two protections named under Fixed. `http://localhost` still works for local development with `CONDUIT_SAFEHTTP_ALLOW_LOCALHOST=1`. ## Added * **Custom header fields on connectors.** A custom MCP, GraphQL, or OpenAPI connector can now declare the extra HTTP headers its upstream requires — each with a human-friendly label, a description, and a required/secret flag — alongside whatever authentication it already uses. Every field is either **workspace-scoped** (the admin enters one shared value in the connector editor) or **member-scoped** (each member enters their own on the connector's connect page, exactly where per-user API tokens are entered today). This covers internal MCP servers that expect a per-user credential in a non-standard header (say `X-Jira-Token`) instead of `Authorization: Bearer`. Adding a connector from a pasted config picks the headers up for you. The wizard now accepts both the registry `server.json` (whose `remotes[].headers` carry a description and required/secret flags) and a client `mcpServers` entry — the shape an internal server's setup instructions usually show — and turns declared headers into fields, preselecting the **Custom** authentication method. Each field's value source stays unset until you pick it, since nothing in a config file says whether a value is shared or personal, and pasted values are never imported: a manifest's is a placeholder, and a real token belongs to the member who owns it. The `none` authentication method is now labelled **Custom** rather than "No authentication" — a server reached with admin-declared headers *is* authenticated, by those headers. A member-facing field description accepts a restricted subset of markdown — emphasis, inline code, lists and line breaks — so setup steps read as instructions rather than one long line, and the connector editor previews exactly what members will see. Links are allowed but can never hide where they go: the target host is displayed beside the link text, and only absolute `https` links are linked at all. Images are not rendered, and headings, quotes and tables are flattened to plain text, so admin-authored copy on a credential page cannot impersonate Conduit's own interface. Values are write-only in the API and encrypted at rest, responses only ever name the stored keys, and the connect page shows the exact host a value is sent to before the member types it. Changing a connector's URL revokes stored header values in both scopes — like every other stored upstream credential, a value is bound to the destination it was supplied for. A tool call that lacks a required member value answers with the connector's connect link, the same flow OAuth and token connectors use. ## Changed * **`search` and `fetch` are scoped to the clients that need them.** The two tools exist because a ChatGPT connector outside developer mode accepts nothing else: a server that exposes them is declaring itself a searchable document corpus, and Conduit answered with its own tool catalog. Advertised to every client, that misled the capable ones. A model reads a tool named `search` as a knowledge source to ground an answer in, so it would spend a turn searching — and get back tool schemas rather than an answer — then treat the returned schemas as an instruction to start calling those tools. It also read as evidence of tools the client could not see, when there were none: every tool `search` can return is already in the client's tool list. Conduit now identifies the client from the name it reports when it connects and offers the pair only to ChatGPT, which needs it. Every other client gets the plain tool list. ChatGPT connectors are unaffected. ## Fixed * **An OpenAPI connector's destination is now recorded where the rest of Conduit looks for it.** Such a connector can be registered with a spec and no URL, in which case requests went to the base URL declared inside the spec. Two protections read the URL field instead: the host shown to a member before they enter a credential, and the rule that revokes stored credentials when a connector is pointed somewhere new. For those connectors the first showed nothing and the second never fired, so editing only the spec could redirect every member's stored credential to another host silently. The base declared by a spec is now resolved into the connector's URL when it is saved, which also means it passes the same https and address checks a URL you type has always passed. A connector that asks each member for a value is refused without a URL, since there would be no destination to show them. [Compare v0.6.1...v0.7.0](https://github.com/PipedreamHQ/conduit/compare/v0.6.1...v0.7.0) **v0.6.1** 2026-07-31 *Tool search finds a tool from a plain phrase again, and the identity-provider sign-in state token is stored hashed.* ## Upgrade notes * A sign-in already in progress when you restart into this version fails once and succeeds on retry: the pending flow was recorded in the previous format and cannot be completed by the new one. Nothing to do — the stale records expire within five minutes and are cleaned up on their own. ## Security * **The sign-in state token is stored hashed.** The short-lived token that ties an identity-provider redirect to its callback was the last opaque credential Conduit wrote to the database in readable form. It is now hashed like every other one — sessions, refresh tokens, authorization codes — so a copy of the database cannot be used to claim a sign-in that is still in flight. ## Fixed * **Tool search understands a phrase.** The `search` tool that ChatGPT connectors use — and that any client can use to find a tool without reading the whole list — required every word of the query to appear in a tool's text, so a natural request like "list my google calendar events" returned nothing at all because no tool's text contains "my". It now ranks tools by how much of the query they match and answers with the closest first, so a word that matches nothing is ignored instead of excluding everything. Searching by app or connector name works again too: the shorter tool names introduced in v0.6.0 left search matching only the abbreviated form, so `google_sheets` found nothing where the wire name says `pd__gsheets-`. `google_sheets`, `google calendar` and `google-calendar` all find their tools now. [Compare v0.6.0...v0.6.1](https://github.com/PipedreamHQ/conduit/compare/v0.6.0...v0.6.1) **v0.6.0** 2026-07-31 *Prometheus metrics, traces for every outbound call and SQL statement, shorter MCP tool names, and a Helm chart for Kubernetes.* ## Upgrade notes * Built-in and Pipedream tools are advertised under new, shorter names. A client that reads the tool list each session picks them up on its own, and the previous longer names are still accepted on a tool call — so a saved agent configuration keeps working. * The exception is the nine identity-provider tools, which were also **renamed** (`create_workspace_identity_provider` → `create_workspace_idp`, and likewise for create/update/delete/list at both the instance and workspace level, plus `verify_workspace_identity_provider_domain` → `verify_workspace_idp_domain`). A configuration naming one of those by hand needs updating. * Access policies need no change — they are written against the stored name, which has not moved. ## Added * **Prometheus metrics.** Set `CONDUIT_METRICS_ADDR` (Helm: `metrics.enabled`) to expose a `/metrics` endpoint on a dedicated port — tool-call rates and latencies per connector, MCP auth failures, connected SSE sessions, HTTP request durations, database pool health, and Go runtime metrics. The same metrics are pushed over OTLP to the OpenTelemetry exporters configured in Settings → Telemetry, next to the existing traces and events. See [Monitoring](/docs/conduit/deploy/monitoring). * **Telemetry for over-long tool names.** A new OTel event, `conduit.mcp.tool_name.over_budget`, tells you when Conduit advertised a tool name long enough that a client may reject or truncate it. It fires once per `tools/list` carrying a name of 50 bytes or more — 64 (the limit the strictest AI clients enforce) minus the 14 a client spends prefixing the name itself as `mcp__conduit__` — and reports how many names were over, how many tools were listed, and the longest one, which identifies the connector responsible. Look for it in your OTLP backend, alongside the other `conduit.mcp.*` events. The most effective fix is usually on the client side: registering this endpoint under a short name (`conduit`) leaves far more room for the tool name than a long one does. * **Helm chart.** Conduit now ships a Helm chart for Kubernetes: `helm install conduit oci://ghcr.io/pipedreamhq/charts/conduit --version X.Y.Z`. One chart covers both deployment tiers — configuring PostgreSQL (`database.secretKey`) switches from embedded SQLite on a persistent volume to stateless rolling updates with `replicas > 1` — and the chart enforces the tier rules (single replica on the embedded tier, an existing Secret for the encryption key, `baseURL` derived from the ingress host). Each chart release pins its matching image. See [Deploy on Kubernetes](/docs/conduit/deploy/kubernetes). * **Private registries and source builds.** The Kubernetes guide covers mirroring the image and chart into your own registry, and the Docker build now accepts build args (`GOPROXY`, `NPM_CONFIG_REGISTRY`, `ALPINE_MIRROR`, and base-image overrides) so the image can be built entirely against a private package registry — see [Build from Source](/docs/conduit/deploy/build-from-source). ## Changed * **Traces now cover every outbound call, and an unreachable service raises an alert.** Conduit traced the requests it makes to your MCP connectors, but calls to other services showed up as an unexplained gap in the trace — the token exchange with your identity provider during a sign-in, requests to the Pipedream API, sending an email. Each of those is now its own timed span in your OTLP backend (`POST api.pipedream.com`, and so on), recording the method, the host it called, and the response status. So a slow sign-in or a connector list that won't load can be traced to the service responsible instead of inferred. A service Conduit cannot reach — DNS failure, connection refused, TLS failure, a timeout — is now also reported as an error to your tracing backend, grouped by what failed (`conduit.pipedream.api_failed`, `conduit.auth.idp_request_failed`, `conduit.email.send_failed`, and so on), so it can raise an alert rather than sitting unnoticed in a trace nobody opens. Requests that Conduit's own SSRF hardening refused are deliberately excluded: that is the guard working as intended, not an outage. Request paths and query strings are deliberately **not** recorded, because for an OpenAPI connector they carry the arguments of the tool call — the same reason Conduit already redacts tool call parameters from traces. * **Database queries appear in traces.** Every SQL statement Conduit runs is now a span inside the operation that ran it, named after the query (`GetAuthPolicySettings`, `InsertAuditLog`), so you can see whether a slow request is waiting on the database or on something else — previously that time was an unexplained gap. Query *values* are never recorded, only the statement itself: the parameters are what hold email addresses, tokens and tool arguments. This adds one span per statement, so traces are more detailed and larger. If the volume is more than you want, reduce it with trace sampling in your collector rather than expecting a per-signal switch — a trace missing some of its spans is harder to read than a trace you kept fewer of. Conduit also now sends trace context (the standard W3C `traceparent` header) with every outbound request. If you run Conduit alongside your own connectors, internal APIs or identity provider and they report to the same tracing backend, their spans join Conduit's trace automatically — one trace from the AI client's tool call through to your service, with nothing to configure. The header carries only randomly generated trace and span ids: no hostnames, user or workspace identifiers, or anything about your deployment. Application-level tracing "baggage" is deliberately never sent. * **Shorter tool names.** AI clients prefix every tool name with a namespace of their own, and the strictest reject anything past 64 characters — so a Conduit tool could arrive at the model truncated or dropped. Conduit's built-in tools are now advertised with no connector prefix (`conduit_workspace_admin__update_workspace` → `update_workspace`), Pipedream tools use `pd__`, with a shorter slug for a curated set of well-known apps (`pipedream__google_sheets-add-single-row` → `pd__gsheets-add-single-row`) — an app outside that set keeps its full slug rather than being abbreviated into something unreadable. The identity-provider tools drop their redundant wording (`verify_workspace_identity_provider_domain` → `verify_workspace_idp_domain`), and tools from your own MCP connectors are unchanged. Access policies, usage and audit records are unaffected — they record the full name either way — and a new connector's name is now capped at 24 characters, since it is spent from every one of that connector's tool names. * **Faster tool and resource listings.** When a client asks what tools are available, Conduit now queries your connectors at the same time instead of one after another, so a listing takes about as long as your slowest connector rather than the sum of all of them — the more connectors a workspace has, the larger the difference. A slow or unreachable connector no longer holds up the healthy ones, and nothing else changes: the same tools are listed, in the same order, and a connector that can't be reached still either contributes nothing or offers its `authenticate` tool so the user can reconnect it. * **Outbound connections are pooled and reused.** Conduit kept a separate connection pool per user and per connector, so the first tool call each person made to a given upstream paid a fresh TCP and TLS handshake even though hundreds of other calls to that same host were already in flight. All callers now share one pool per upstream, and connections stay warm across configuration changes instead of being dropped whenever a policy or connector is edited. Tool calls and connector listings lose a round trip or two of setup latency, and a busy instance holds far fewer outbound connections — which is the number your firewall's per-source connection limits and your upstreams' rate limits actually see. Nothing changes about *which* hosts Conduit reaches or the SSRF protections applied to them: hosts you exempt with `CONDUIT_SAFEHTTP_ALLOWED_PRIVATE_HOSTS` are still pooled separately from hosts you don't, so an exemption is never shared with a request that wasn't granted it. [Compare v0.5.1...v0.6.0](https://github.com/PipedreamHQ/conduit/compare/v0.5.1...v0.6.0) **v0.5.1** 2026-07-27 *One tracked issue per real failure in error tracking, migrations that apply out of order, connector credentials retired with their user, and a faster web UI after upgrades.* ## Upgrade notes None. ## Changed * **Telemetry reports cleaner error signals.** A tool call the client abandons mid-flight no longer records a tracked exception in your tracing backend (the span still shows as errored), and a failure that crosses several spans on its way up records one exception instead of a matched pair — so error tracking counts one issue per real failure. * Database migrations now apply even when an earlier-numbered migration arrives after a later one has already run (e.g. upgrading across a hotfix), instead of refusing to start. * **The web UI loads faster after an upgrade.** Shared library code is cached across releases now, so only the app's own code re-downloads when you pull a new version. ## Fixed * MCP clients that probe `resources/templates/list` now receive an empty list instead of a JSON-RPC method-not-found error. * Deleting a user now also removes their stored connector credentials; grants orphaned by earlier deletions are cleaned up automatically on upgrade. [Compare v0.5.0...v0.5.1](https://github.com/PipedreamHQ/conduit/compare/v0.5.0...v0.5.1) **v0.5.0** 2026-07-26 *Stored credentials are encrypted at rest, auth tables are named after the product, and workspace and account management reach MCP clients. Read the upgrade notes before pulling.* ## Upgrade notes * **If you run Conduit on PostgreSQL, check who is allowed to create workspaces.** A fresh PostgreSQL instance set that policy to "anyone" while a fresh instance on the embedded database set it to "instance admins only" — the two backends disagreed, and PostgreSQL got the permissive one. New instances now start restricted on both. An instance created before this release keeps whatever value it has, which for PostgreSQL may be "anyone" through no choice of yours, so it is worth confirming: **Settings → Access → workspace creation**. We deliberately do not change it for you, because we cannot tell a value you chose from one you inherited. * **Take a database backup before upgrading, and make sure your encryption key is backed up too.** This release encrypts several kinds of stored credential that were previously kept as readable text, converting existing rows on the first start. That step is automatic and needs nothing from you. What it does mean is that **downgrading to an earlier version afterwards will not work on the same database.** The values stay encrypted, while an older build expects to read them directly — so identity-provider sign-in, email sending, and upstream connectors would fail on the older version. If you need to go back, restore the backup you took before upgrading. Your encryption key also covers more than it did before — see the entries below for what, and [`CONDUIT_ENCRYPTION_KEY`](/docs/conduit/configure/reference#security) for where it lives. The same backup covers a second change with the same shape: several database tables were renamed, so an older build would not find them either. Nothing reads those tables but Conduit itself, so this is invisible unless you query the database directly or have built reporting on top of it — see below. ## Added * **Workspace settings and members can be managed from an MCP client.** Workspace admins get built-in tools to rename a workspace, change its URL slug or logo, set a member's role, and remove a member — the same actions the workspace settings pages offer, under the same rules: you cannot grant a role above your own, change your own role, or leave a workspace without an administrator. * **You can see who you are signed in as, and which workspaces you belong to, from an MCP client.** Any user gets built-in tools to read their own account and the workspace they are working in, to list the workspaces they are a member of, and to create one — the last subject to the same rules as the web app, so it is refused if your instance runs in single-workspace mode or reserves workspace creation for instance administrators. Only your own memberships are listed: being an instance administrator does not put every workspace in that list. ## Changed * **Connectors can no longer be saved with the unimplemented `token-exchange` auth type.** It was accepted at save time and could never work: exchanging a token on a member's behalf needs the token their identity provider issued, and Conduit does not retain one, so such a connector looked configured and served no tools. It was never offered in the connector UI or by any catalog entry, so reaching it required calling the API directly. That call now returns an explanatory error instead of appearing to succeed. * **Database tables are named after what the product calls them.** The tables behind users, workspaces and provisioning carried a `ba_` prefix, left over from the library this instance's auth layer was first ported from. It described where the code came from rather than what the data is, so anyone reading the database had to know a piece of Conduit's history to find the users table. `ba_user` is now `users`, `ba_organization` is `workspaces`, `ba_member` is `workspace_members`, `ba_assignment_rule` is `provisioning_rules`, and so on through sixteen tables. This is internal plumbing: no API, RPC, or UI field changes, and the upgrade renames existing tables in place without touching a row of data. It matters only if you query the database directly — a reporting tool or a support script pointed at `ba_*` needs the new names. ## Fixed * **Revoking a user's sessions now tells you if it didn't work — and always takes their refresh tokens too.** Revoking sessions from the admin pages reported success whatever happened, so a failed revoke looked identical to a successful one and was recorded in the audit log as having happened. For a control you reach for when you believe an account is compromised, that is the worst possible failure: you move on believing access is cut. The two halves of the revoke — the sessions themselves and the OAuth refresh tokens that can mint new ones — now also succeed or fail together, so a partial failure can no longer leave a token behind that quietly restores access. * **Deleting an identity provider now reports failure, and never leaves its claimed domains behind.** A failed delete answered with success, so an administrator could believe a sign-in route was closed while it still worked. The provider and the domains it claims for sign-in routing are now removed together; previously a failure between the two could leave a domain pointing at a provider that no longer existed. * **Saving instance sign-in settings now reports failure instead of showing you your old values as if they saved.** The page answered from a fresh read, so a write that didn't land came back looking successful with the previous settings displayed — and the audit log recorded a change that never happened. These settings are also now saved together: a partial failure could previously leave the instance in a combination of sign-in options nobody chose, such as requiring SSO while re-permitting passwords. * **A GraphQL or OpenAPI connector whose credential stopped working now offers you a reconnect link.** When an upstream rejected a saved credential — an account disconnected on their side, a token revoked or expired — an MCP connector answered with the prompt to reconnect, but a GraphQL or OpenAPI one answered with the raw rejection text, which reads as a broken tool rather than as something you can fix. All three now offer the same prompt. As before, this applies only where you are the one who connected the credential: an upstream rejecting a workspace-wide credential set by an admin still reports the upstream's own explanation, since reconnecting is not yours to do. * **An upstream credential is no longer used so close to its expiry that it can lapse mid-request.** Conduit refreshes a cached upstream token shortly before it expires. For connectors using SSO token exchange, and for connected accounts, that safety window was shorter than the time a single upstream call is allowed to take — so a token could pass the check, then expire while the request carrying it was still in flight, and the call came back rejected even though the credential had been valid when it was chosen. The window is now wider than the longest a call can run, for every kind of connector. Also fixed in the same place: a token exchange whose result was valid for under thirty seconds was cached as though it had already expired, so a fresh exchange ran on every request instead of once. * **A Pipedream access token is no longer re-fetched on every single request.** Conduit caches the token it mints for Pipedream until shortly before it expires. When Pipedream's reply omitted how long the token was good for — which the OAuth specification permits — Conduit read that as "already expired" and minted a fresh one for every upstream call, adding a round trip to each and burning through token requests. A reply with no stated lifetime is now treated as good for an hour. * **A stalled token endpoint no longer holds up the requests behind it.** When Conduit fetched a credential from an identity provider, a connector's token endpoint, or Pipedream, the fetch ignored the fact that the request that needed it had been abandoned — so a slow endpoint was waited out in full even though nobody was left to receive the answer, and in Pipedream's case every other caller queued behind it. These fetches now stop as soon as the work is no longer wanted. * **A failing token endpoint now says what went wrong.** If a token endpoint answered with something other than the expected JSON — typically a proxy's HTML error page during an outage — the error recorded was a complaint about invalid JSON syntax, with no mention of the status code that would have identified it as an outage. The status is now included. Relatedly, a reply too large to accept is reported as such rather than as malformed. * **Renaming a workspace to a slug that is already taken no longer changes its name anyway.** The name, URL slug and logo were saved one after another. If you edited more than one and the slug collided with another workspace, the earlier fields had already been written by the time the collision was reported — so the error said the slug was taken while the workspace had quietly been renamed. All three are now saved together, and a rejected slug leaves the workspace exactly as it was. * **Switching workspace now tells you if it failed.** The write that records which workspace you are working in was made with its error discarded: a failed switch was logged on the server and answered as a success, so the app showed you the workspace you had picked while the next page load put you back in the old one. It now surfaces the failure. * **A new workspace and its owner are created together.** The workspace row and the membership that makes you its owner were written one after the other. If the second failed, the workspace existed with no members at all — invisible in your workspace list, and removable only by an instance administrator. Both now land in one step, so a failure leaves nothing behind. * **A workspace can no longer be created with a blank name.** A name of only spaces was accepted, producing a workspace with no readable name and a URL slug of dashes. * **An SSO sign-in's state token is now spent exactly once.** The identity provider's callback carries a one-time state value that Conduit checks and then discards. It was checked and discarded in two steps, so two callbacks arriving together with the same value could both pass the check before either cleared it. The exchange that follows would still fail for the second one, since the provider only honours its authorization code once, but the guard that is supposed to be single-use was not. It is now consumed in a single step. Relatedly, if Conduit cannot store that state at the start of a sign-in, the sign-in now fails at that point rather than sending you to your provider for a round trip that could only come back rejected. * **Editing a user or a workspace from the admin pages now reports a failure instead of claiming success.** Both saves wrote their fields with the error discarded, so a write that did not land still answered with a success. Renaming a workspace additionally hid every failure except a duplicate slug, which is the one it did report. Both now surface what went wrong. * **Saving a workspace's join settings now tells you if it failed.** A failed write was logged on the server and otherwise ignored: the page answered with the settings as they were re-read afterwards, so an admin saw a success and their old values, with no indication the change had not been stored. It was also recorded in the audit log as a change that happened. Discovering workspaces to join had the same shape, reporting a failed lookup as "no workspaces available". Both now surface the error. * **A database hiccup no longer crashes the workspace, members and access pages, and no list can quietly come back short.** Several screens loaded their rows in a way that mishandled a failed query: instead of reporting the failure, the request crashed outright. Others could return a partially-read list — a members roster missing members, a workspace's identity providers missing providers — with nothing to indicate anything was missing, which is worse than an error, because an admin reasonably reads the page as the truth. Reads now either return the complete result or report a failure you can see and retry. * **Identity-provider tokens are now encrypted at rest.** When a member signs in through SSO, Conduit keeps the tokens the identity provider issued so it can exchange them for upstream access on that member's behalf. Those were stored as readable text: anyone with a copy of the database or a backup could read them and act as your members against the identity provider. They are now encrypted with the same instance key as every other stored credential, and existing rows are encrypted in place on the first start after upgrading. * **Connected-account credentials and workspace join links are now encrypted at rest.** The access and refresh tokens Conduit holds on your behalf for an upstream connector — the ones minted when a member connects their account, or when an admin connects one credential for the whole workspace — were stored in the database as readable text, as were per-member API tokens and the secret in a workspace's join link. Anyone holding a copy of the database file or a backup could read them and call those upstream services as your members. They are now encrypted with the same instance key that already protected identity-provider and email credentials, and existing rows are encrypted in place the first time the upgraded instance starts, so there is nothing to run by hand. This makes the encryption key load-bearing for connected accounts: if `/conduit.key` (or `CONDUIT_ENCRYPTION_KEY`) is lost, members have to reconnect their accounts and admins have to regenerate join links. Back the key up. * **Changing a member's workspace role now reaches their connected AI clients.** A role change updated the workspace immediately, but announced nothing: a user already connected over MCP kept being offered the admin tools of the role they no longer held, and someone newly promoted saw none of their new tools, until they reconnected. Calling a tool they had lost was always refused — permission is re-checked on every call, so this was never a way to keep access — but the list an assistant chooses from could be out of date for as long as the connection stayed open. Role changes made through provisioning rules, and the automatic owner promotion that follows demoting the last one, were affected the same way and are fixed too. Connections now resolve who you are each time they recompute your tools rather than remembering it from when you connected, so a change made anywhere — by another instance in a multi-replica deployment, or directly in the database — is picked up as well. [Compare v0.4.1...v0.5.0](https://github.com/PipedreamHQ/conduit/compare/v0.4.1...v0.5.0) **v0.4.1** 2026-07-25 *Failures now surface as issues in APM error tracking, with service-entry spans for every request and W3C trace propagation from MCP clients.* ## Upgrade notes None. ## Changed * **Errors in traces now surface in APM error tracking.** Every HTTP request (RPCs, MCP calls, OAuth, SCIM) gets a service-entry span named after its route, and failures the operator should act on — upstream transport errors, credential refresh/exchange failures, handler panics, unhandled 500s — carry a full exception (stable `exception.type`, message, stack trace), which is what backends like Datadog require to open an issue. Expected failures (a tool result reporting an error, a credential the user hasn't connected yet) stay visible in traces but deliberately never become issues, and exception types/messages are kept stable so one failure mode groups into one issue. Conduit also honors an inbound W3C `traceparent`, so a client that traces its own agent loop sees Conduit's spans in the same trace; health probes, static assets, and idle MCP event streams are not traced. [Compare v0.4.0...v0.4.1](https://github.com/PipedreamHQ/conduit/compare/v0.4.0...v0.4.1) **v0.4.0** 2026-07-25 *Refused requests and upstream-credential writes in the audit log, server-wide request body caps, SSRF hardening on every outbound call, forwarded client IPs trusted only from proxies you declare, and connector repointing that revokes stale credentials.* ## Upgrade notes * **If a reverse proxy fronts your instance, set `CONDUIT_TRUSTED_PROXIES` to its address range.** Conduit no longer trusts forwarded client-IP headers from private-range addresses by default; it now trusts loopback only. This affects any deployment whose proxy reaches Conduit over the network rather than over loopback — a Kubernetes ingress controller (`CONDUIT_TRUSTED_PROXIES=10.42.0.0/16`, your pod CIDR), or `docker run -p`, where traffic arrives from the bridge gateway (`172.17.0.0/16`). Sidecar proxies talking to Conduit over loopback need no change. Left unset, such an instance still works, but every audit entry and per-IP rate limit resolves to the proxy's own address, and Conduit logs a warning once per process naming the peer it saw — that address is the one to trust. See [client IP attribution](/docs/conduit/configure/reference#client-ip-attribution). * **If your instance reaches the Pipedream API, Resend, or Amazon SES through an egress proxy on a private address, list that proxy's hostname in `CONDUIT_SAFEHTTP_ALLOWED_PRIVATE_HOSTS`.** Those three calls now go through the same SSRF-hardened client as every other outbound request, which refuses to connect to private addresses. Instances that reach the internet directly need no change. A blocked call fails with `blocked connection to special-use address` naming the host. See [Network Access](/docs/conduit/deploy/network). * Database migrations apply automatically on boot; nothing else to do. ## Changed * **Repointing a connector revokes the credentials members stored for it.** Editing a connector's URL, or its OAuth client id, authorization endpoint, or token endpoint, now drops every credential held for the old destination — each member's connected account and the shared workspace credential — and members reconnect to re-consent. A credential is only valid for the upstream it is sent to and the authorization server that issued it, so carrying it to a new destination would have handed those tokens (and, on the next refresh, the connector's client secret) to whoever now sits behind the new address. Every such edit is recorded in the audit log as `config.connector.repointed`, with the field that changed, its previous value, and how many credentials were dropped. ## Security * **Every request body and every upstream response is bounded.** Conduit capped bodies at each endpoint that read one, which meant the cap was something a new endpoint had to remember. Request bodies are now capped for the whole server before any route sees them — 1 MiB on pre-auth surfaces, 10 MiB where a large payload is legitimate (the API, `/mcp`, SCIM) — so a route cannot be added without one. In the other direction, replies from services Conduit calls out to are now capped as well: an identity provider's token or discovery response, an upstream's OAuth metadata, or a vendor API's JSON was read without limit, so a compromised or hostile peer answering with an endless body could exhaust the gateway's memory. Oversized replies are refused rather than truncated, so a short read can never be mistaken for a complete one. * **All outbound requests go through the SSRF-hardened client.** Identity providers, upstream MCP servers, connectors, and OAuth metadata documents already did. The Pipedream API and the Resend and Amazon SES email providers now do too, so the protection is what a newly added outbound call inherits rather than something each one opts into. The new [Network Access](/docs/conduit/deploy/network) page is now the single list of every host Conduit connects to, what each is for, and when it is contacted. * **Forwarded client-IP headers are only trusted from proxies you declare.** Conduit attributes audit entries and keys its per-IP rate limits (sign-in, sign-up, OAuth, failed MCP auth) on the client IP. It previously accepted `X-Forwarded-For` from any private-range peer, so on a shared network — a Kubernetes cluster without NetworkPolicies, a Docker bridge, or the LAN of an on-prem install — a caller could choose the value. That let them give every request a fresh rate-limit bucket, which defeats the per-IP throttles for password spraying across many accounts, and write an arbitrary string into the audit log, which breaks attribution and could implicate a real address. The default trusted set is now loopback only — every other proxy is listed explicitly as an IP or CIDR in `CONDUIT_TRUSTED_PROXIES` — and a forwarded value must parse as an IP address to be used at all. * **Refused requests are recorded in the audit log.** Permission checks used to be silent: an authenticated member could call every instance-admin and workspace-admin RPC, and name every builtin MCP tool, collecting hundreds of refusals without producing a single audit entry — so the reconnaissance that precedes an attack left no trace, and only the operations that succeeded were ever visible to an admin reviewing the log afterward. Refusals now appear as `authz.role.denied` (the caller's role doesn't reach that method or builtin tool) and `authz.policy.denied` (their access policy doesn't grant that connector tool), each naming the actor, the target, and the workspace, and each recording whether the call arrived over HTTP or MCP. The two are separate events because they call for different responses — the first says someone is reaching above their role, the second may just mean a policy needs widening — and filtering the `authz` group shows both. They are deliberately not sampled: a burst of denials from one account is the signal, and dropping its tail would drop the evidence. Denied tool calls also count in the Usage dashboards, where they previously went uncounted. * **Upstream connector credentials are recorded when set or cleared.** Storing a static token, completing an OAuth connect flow, and disconnecting all now write `connect.upstream_credential.set` / `.cleared`, naming the connector, whether the credential is the caller's own or the shared workspace one, and — for a workspace credential, which every member uses — the admin who connected it. The credential plane was the one place a write left no record, which made it the cheapest place to establish persistence. This adds a database migration that runs automatically on boot; no operator action is needed. Connect flows already in progress across the upgrade are unaffected. * **A removed member's open MCP stream stops receiving a workspace's change signals.** On the bare `/mcp` endpoint, where the client names no workspace, a stream held open across a membership change kept delivering that workspace's `list_changed` notifications — which connectors and tools changed there, and when — to someone who had since been removed from it. Such a stream now closes as soon as its token resolves to a different workspace, and the client reconnects against its current access. * **Failed MCP authentication is reported even while the throttle is active.** Repeated bad-token requests to `/mcp` are rate-limited per IP; the throttled attempts were previously dropped before their telemetry was recorded, so a brute-force burst registered as a trickle. Every attempt is now counted and reported. * **Every pre-auth request body is size-capped.** The OAuth consent callback decoded its JSON body, and the token endpoint parsed its form, before either checked the caller's session — so an unauthenticated client could stream oversized bodies into memory in parallel, degrading the instance for all workspaces. Both now reject anything past the 1 MiB pre-auth cap that the rest of the unauthenticated surface already enforced. The [install guide](/docs/conduit/deploy/install#what-the-fronting-proxy-is-responsible-for) now states which abuse Conduit handles itself and which it expects a fronting proxy to absorb. * **A failed audit-log write is no longer silent.** If the audit insert itself fails, Conduit logs an error and emits `conduit.audit.write_failed` to your OTLP backend, rather than discarding the failure — a broken audit pipeline used to be indistinguishable from a quiet system. [Compare v0.3.0...v0.4.0](https://github.com/PipedreamHQ/conduit/compare/v0.3.0...v0.4.0) **v0.3.0** 2026-07-24 *SCIM 2.0 provisioning, a guarantee that every signed-into workspace keeps an owner and an admin, canonical emails and unique memberships, and a linkable Connectors page.* ## Upgrade notes Migrations apply automatically on boot. Three of them rewrite existing rows, and one wants a follow-up from an admin: * **Group names that collide only by case are made unique.** Collisions already in the database are kept rather than merged: the later group gains a `[]` suffix, visible in **Settings → Policies** for an admin to rename to whatever it should be. * **Stored email addresses are normalized** (lowercased, trimmed), and **duplicate workspace and group memberships** left by earlier races are collapsed, keeping the highest-privilege one. Nothing to do. * **Pending MCP authorization codes are cleared.** A client that was mid-flow at the moment of the upgrade re-authorizes on its own. ## Added * **SCIM 2.0 provisioning.** An identity provider (Okta, Microsoft Entra, or any SCIM 2.0 IdP) can push users, groups, and group memberships into a workspace, so joiners, movers, and leavers in your directory reach Conduit without anyone signing in first. Workspace admins generate bearer tokens in **Settings → SCIM**, each bound to one of the workspace's SSO providers so provisioned users and sign-ins resolve to the same person. Deprovisioning removes the user from the workspace, revokes their sessions, and ends the group memberships and policy grants they held there; reactivating them restores the memberships the IdP still asserts, since an IdP pushes group changes as deltas and never re-sends one its own directory didn't change. Grants that came from anywhere else are not resurrected — a membership an admin added by hand stays that admin's to re-make. Pushed groups become Conduit groups usable in access policies, marked **SCIM** in **Settings → Policies** because their name and their IdP-pushed members are reconciled to the directory on every sync; memberships added by an admin or an assignment rule are never touched by a sync. See [SCIM Provisioning](/docs/conduit/configure/scim) for connecting an IdP. A token carries the authority of the workspace admin who generated it and no more. It cannot deprovision the workspace's owner, change the name or email of someone a different identity provider established, or rename or deprovision an instance administrator — each of those reaches past the workspace the token belongs to. Two provisioned people in one workspace also cannot share a `userName`: an address can legitimately belong to several federated identities, while SCIM requires `userName` to identify exactly one user, so the second push is refused rather than leaving an IdP's match-before-provision lookup with two answers. Every provisioning change is recorded in the workspace audit log, attributed to the connection's SSO provider — and so is every push Conduit refuses, with the reason, since a refusal repeats on every sync until a human resolves it and belongs where the workspace's admins will see it rather than only in the IdP's own logs. Conduit refuses rather than guesses: a membership push it cannot interpret exactly, or a `remove` of an attribute it cannot unset, is answered with an error instead of a `200` the IdP would read as applied, because the nearest guess at "which members?" is an empty group. ## Changed * **A workspace people can sign into always keeps at least one administrator — and an owner.** Removing or demoting a member is refused — on every path: the members UI, the instance admin API, SCIM deprovisioning, and deleting the user's account outright — when it would leave the workspace's remaining members with no owner or admin. Removing the *only* member is allowed (nobody is left to be locked out), which is what keeps a user's own workspace from making their account undeletable; the workspace stays in place for an operator to keep or delete. An owner can be removed or demoted while another admin remains, and when that leaves the workspace owner-less the longest-standing admin is promoted to owner automatically, so owner-only actions (like deleting the workspace) stay reachable. Removals honor the same rank ceiling as role changes — you cannot remove a member who outranks you, so an admin cannot evict the owner and inherit ownership — and an instance administrator can only be removed or renamed by another instance admin, never by anything scoped to a single workspace. Deleting a member revokes the group memberships and policy grants they held in one step with the removal, so a partial failure cannot leave grants behind. * **Memberships are enforced unique in the database.** A person's workspace membership and a group's member entries are backed by unique indexes, so concurrent joins (invite acceptance, sign-in auto-join, SCIM sync, assignment rules) can no longer create duplicate rows on Postgres. Group membership rows are also foreign-keyed to their group, so deleting a group removes them in the database itself and a membership can never outlive its group. Group member counts include only people who still have an account, so a deleted user can no longer show up in a group an admin cannot remove them from. * **Group names are unique per workspace without regard to case.** They were already *compared* that way, so "Engineering" and "engineering" could both exist while a lookup for either matched both — which left an identity provider's group sync picking one arbitrarily. * **Emails are stored in one canonical form.** Addresses are normalized (lowercased, trimmed) on the way in, so sign-in, SSO, and provisioning always resolve the same person regardless of the casing an identity provider or a sign-up form sent. * **OAuth clients receive sessions for exactly the user who authorized them.** Authorization codes carry the user's id rather than their email address. An address can legitimately belong to more than one identity, so resolving by email could mint a session for the wrong account. * **Unchecking a connector's last tool disables the connector.** On the Connectors page, tool checkboxes and the enable switch now follow each other in both directions: checking a tool enables the connector (as before), and unchecking the last one turns it off instead of leaving it enabled with nothing selected. * **The Connectors page is linkable.** Selecting a connector navigates to `/connectors/` (e.g. `/connectors/app:linear`), and the two search boxes persist as `?q=` (connector search) and `?tools=` (tool filter) — so a specific connector's tool view can be bookmarked or shared, and reloading or navigating back restores what you were looking at. Opening `/connectors` bare lands on the first connector's URL, and a link to a connector that no longer exists falls back there too. ## Fixed * **Searching connectors no longer drops keyboard focus.** In the policy grant editor and on the Connectors page, the search box could lose focus mid-word whenever a search crossed between "no matches" and "matches"; typing now stays uninterrupted, and the no-matches message appears in place of the connector list. * **The Connectors page no longer flashes a built-in connector while loading.** The detail pane (on the Connectors page and in the policy grant editor) now shows a loading placeholder until the real connector list arrives, instead of briefly showing a built-in connector and then switching. * The home dashboard's Top connectors and Top tools lists now show the Conduit logo for built-in Conduit tools instead of a generic plug icon. [Compare v0.2.7...v0.3.0](https://github.com/PipedreamHQ/conduit/compare/v0.2.7...v0.3.0) **v0.2.7** 2026-07-23 *Search-engine exclusion, instant hover-preloaded navigation, a real error page, and resilience fixes for crashes and upgrades.* ## Upgrade notes None. ## Added * **Search engines are told to stay out.** Every response carries an `X-Robots-Tag: noindex` header and the instance serves a disallow-all `robots.txt`, so a Conduit dashboard reachable from the internet is neither crawled nor indexed. ## Changed * **Navigation feels faster.** Hovering a link preloads the destination page's code and data, so most navigations render instantly. * **Unexpected page errors get a real error page.** If a page fails to load or render, the app shows a styled "Something went wrong" page with the error and a retry button, instead of an unstyled developer message. ## Fixed * **Deploying no longer breaks already-open tabs.** A tab opened before an upgrade could fail on its next page navigation (the old page code it asks for is gone); the app now reloads itself once to pick up the new version. * **A crashing request is a logged 500, not a vanished connection.** If a request handler hits an unexpected internal error, the client now gets a clean HTTP 500 and the crash is recorded in the server log and as a `conduit.server.panic` telemetry event, instead of the connection simply dropping with nothing written anywhere. [Compare v0.2.6...v0.2.7](https://github.com/PipedreamHQ/conduit/compare/v0.2.6...v0.2.7) **v0.2.6** 2026-07-23 *Per-page browser tab titles, instant app connect links, and big database-efficiency gains for session validation and connection pooling.* ## Upgrade notes None. ## Changed * **Browser tabs show the page name.** Every page in the dashboard sets its own tab title (Members, Usage, Connect Slack, …) instead of every tab reading "Conduit", so multiple open tabs are distinguishable. * **App connect links go straight into the connect flow.** Opening `/connectors/app:/connect` (the link Conduit hands to MCP clients) launches the account-connect flow immediately instead of showing a page with a Connect button — and shows a "connected" confirmation right away when the account already exists. The page also warms the connection to the connect service while loading, so the flow appears sooner. * **Session validation costs one database query instead of three.** Every API request, MCP request, and SSE keepalive validates its session with a single joined lookup (session + user + membership) rather than three sequential round-trips. Not a cache — revocation still takes effect immediately. PostgreSQL tool-call throughput +11%, dashboard API +30% at the standard pod shape; idle SSE streams cost a third of the database reads. See the [load tests](/docs/conduit/load-tests). ## Fixed * **Database connection pools no longer churn under load.** The pools kept only Go's default 2 idle connections, so heavy traffic closed and re-dialed connections constantly — on PostgreSQL this could exhaust the pod's ephemeral ports and fail requests (measured at \~1,000 concurrent tool calls). Idle capacity now matches pool capacity, with a 5-minute idle shed so a quiet instance releases its connections back to a shared database server. PostgreSQL tool-call throughput at the standard pod shape rose from 850/s (with errors) to 3,600/s (clean) — see the [load tests](/docs/conduit/load-tests). [Compare v0.2.5...v0.2.6](https://github.com/PipedreamHQ/conduit/compare/v0.2.5...v0.2.6) **v0.2.5** 2026-07-22 *Full-screen split view with mobile fixes, faster SSE connects, container-aware memory limits, load-test docs, and an optional debug endpoint.* ## Upgrade notes None. ## Added * **Published capacity test results.** A new [Load tests](/docs/conduit/load-tests) docs section records dated capacity passes — sustained per-pod ceilings per deployment tier, with full environment provenance so numbers stay comparable across versions. The measuring harness ships in the repo (`loadtest/`). * **Debug endpoint for profiling and load analysis.** Setting `CONDUIT_DEBUG_ADDR` (e.g. `localhost:6060`) starts a second listener serving Go pprof profiles and runtime/DB-pool statistics. Off by default; bind it to localhost or a private interface only. See the [configuration reference](/docs/conduit/configure/reference). ## Changed * **The runtime respects the container memory limit.** Conduit derives the Go garbage collector's soft memory limit (`GOMEMLIMIT`) from the container's cgroup ceiling automatically (90% of it; setting `GOMEMLIMIT` yourself still wins). Memory-dense workloads — many held SSE streams — now degrade gracefully under GC pressure instead of being OOM-killed, and fit \~50% more connected users per pod. See the [load tests](/docs/conduit/load-tests). ## Fixed * **SSE connections are no longer serialized at connect.** Registering an MCP SSE stream previously performed upstream work while holding a global lock, so a reconnect burst (for example after a deploy) could delay — or under a slow upstream, freeze — all new SSE connections on the instance. Connecting is now instant regardless of upstream latency or burst size; clients may receive one extra `list_changed` notification after connecting (they re-list, which is always safe). See the [load tests](/docs/conduit/load-tests) for measurements. * Split-view polish on the Connectors page and the policy grant editor: the Connectors page no longer scrolls as a whole — the connector list and tool pane fill the screen and scroll independently — headers and the checkbox column align, and connector descriptions truncate to one line with a "more" toggle. * Expanding a tool row no longer shifts its description text, and documentation links inside a row open without collapsing the row. * On phones, tool rows stack the name above the description instead of squeezing the description into a sliver, and the tool filter box spans the full width. * On cramped screens — phones in either orientation, or any short window — the workspace-admin "Manage connectors" banner on the Connectors page collapses to a one-line link, so the connector list keeps the screen space (the page header is pinned and no longer scrolls away). * The Groups & Policies page fits phone screens: its dialogs no longer overflow the viewport, and the connector icon strip shows fewer icons (with a higher +N count) instead of running off the edge. * The policy grant dialog makes better use of cramped screens: on narrow phones and short windows it hides its helper sentences and goes full-height, so the connector list keeps several rows visible instead of two. When "Allow all connectors" is on, the dialog now shrinks to fit the summary instead of showing a mostly-empty full-height box. * On a fresh load of the Connectors page (and the policy grant editor), the split view no longer defaults its selection to a built-in connector while the app catalog is still loading — the selection lands on the first real connector once the list fills in. [Compare v0.2.4...v0.2.5](https://github.com/PipedreamHQ/conduit/compare/v0.2.4...v0.2.5) **v0.2.4** 2026-07-22 *Split-view browsing and configuration for connectors and tools, plus a wider audit log layout.* ## Upgrade notes None. ## Changed * The audit log pages use a wider layout on large screens, giving the event table and the detail panel more room. * Browsing and configuring connectors and tools — on the Connectors page and in the policy grant editor — now uses a split view: the connector list sits on the left and the selected connector's tools on the right. Each tool shows as a compact one-line row that expands for its full description, and connectors with many tools gain a filter box to narrow the list. The connector list loads more automatically as you scroll — no more Previous/Next paging through the Pipedream app catalog. Tool checkboxes work even while a connector is toggled off — checking a tool enables the connector with just that tool selected. In the policy grant editor, workspace admins now see a connector's full tool catalog, including connectors that haven't been granted to anyone yet. [Compare v0.2.3...v0.2.4](https://github.com/PipedreamHQ/conduit/compare/v0.2.3...v0.2.4) **v0.2.3** 2026-07-21 *Fixes the Connectors page showing no apps in workspaces whose allow policies name specific apps.* ## Upgrade notes None. ## Fixed * The Connectors page again lists apps in workspaces whose allow policies name specific apps (rather than granting all apps): the Pipedream lookup that resolves those app slugs sent a query the API rejected, and the page rendered no apps at all — leaving members nothing to enable. Failures of that lookup now surface as an error instead of an empty app list. [Compare v0.2.2...v0.2.3](https://github.com/PipedreamHQ/conduit/compare/v0.2.2...v0.2.3) **v0.2.2** 2026-07-21 *In-client connector auth — connect prompts, URL elicitation, a focused connect page — plus the client-credentials grant and a unified reconnect UX.* ## Upgrade notes * All schema migrations in this release apply automatically on boot; no manual steps. * **Active-active deployments**: configure session-sticky load balancing (by bearer token or `Mcp-Session-Id`) so in-band MCP prompts work — see the entry under **Changed** and [Deployment Tiers](/docs/conduit/deploy/availability). ## Added * OpenAPI and GraphQL connectors can now authenticate upstream with the **OAuth client credentials grant**. Pick "Client credentials" as the grant type in the connector's authentication settings and supply the client ID, client secret, and token endpoint (plus optional scopes and audience) — no authorization URL is needed. Conduit exchanges the credentials for a workspace-wide token itself and refreshes it before expiry, so members never connect their own accounts. * Tool lists now show the HTTP method and path under each OpenAPI-derived tool (e.g. `GET /v1/apps`), on the connectors page and in policy grant editing — specs can declare several operations with identical summaries, and the operation is what tells them apart. * The connector wizard now reads the security schemes an OpenAPI spec declares and preselects the matching authentication method — prefilling the authorization and token endpoints for OAuth authorization-code flows, the token endpoint for client-credentials flows, and choosing the API token method for API-key and bearer schemes. Detection is a prefill only: everything stays editable, and specs without a recognizable scheme leave the wizard unchanged. * Identity providers can now carry an **access denied help message**, shown to users when the provider refuses a sign-in with `access_denied` — for example, when a user isn't assigned to the app in Okta or Microsoft Entra. Admins configure it per provider (instance sign-in providers and workspace SSO providers both), as plain text where pasted URLs and `[label](https://url)` spans render as links — useful for pointing users at a docs portal or an access-request form. The message also appears on the login page as an info popover next to that provider's sign-in button. The error page now names the provider in its fixed copy ("Sign in failed for Okta. Reach out to your admin for assistance.") when the sign-in flow is known. The backing schema migration runs automatically on upgrade. * Connectors that need a personal credential are now discoverable from MCP clients: instead of silently hiding an unconnected connector's tools, the gateway lists a `__authenticate` tool that returns a link to connect your account, and calls to a not-yet-connected connector's tools return the same link instead of a raw authentication error. Once you connect, tool lists refresh automatically. * A focused **connect page** (`/connectors//connect`) is the landing target of those links: one connector, one action — authorize (OAuth), paste a key (token), or connect an app account (Pipedream) — then return to your assistant. * App tool calls (via Pipedream) for an app without a connected account get the same connect prompt as every other connector, instead of passing Pipedream's raw connect-link text through. * **In-client connect prompts via URL elicitation.** When your MCP client supports URL-mode elicitation (MCP 2025-11-25), connecting an account is offered natively in the client: the `__authenticate` tool asks for consent to open Conduit's connect page, and calling a tool whose credential is missing or no longer works returns the standard `URLElicitationRequiredError` so capable clients can open the page and retry automatically once you've connected. Credentials are always entered on Conduit's session-gated connect page — never in the MCP client — per the MCP spec's requirement that sensitive values not pass through clients. Clients without URL elicitation get the connect link as text, as before. * The MCP protocol version is now negotiated per session: Conduit echoes the client's requested version when supported (2025-03-26 through 2025-11-25) instead of always answering 2025-03-26. ## Changed * The built-in `conduit__get_connectors` tool is now `conduit__get_my_connectors` — the name now says whose connectors it lists (the caller's own, filtered by their access policies). MCP clients calling it by the old name must switch to the new one. * The built-in `get_workspace_connectors` tool moved from the everyone-visible `conduit` connector to `conduit_workspace_admin`, and the RPC behind it is now workspace-admin only. It returns the workspace's full connector catalog for policy management — every connector including disabled ones, with an `enabled` field carrying the real state — rather than the caller's view of what is currently live. Members keep `get_my_connectors` for that. * The **Connectors** and **Accounts** pages now manage every connection the same way, first-time or not: a connected connector shows its credential type with an inline **Reconnect** / **Disconnect** menu instead of a bare "Connected" label. Applies to OAuth, per-user token, and Pipedream app connectors alike. * **Active-active deployments now need session-sticky load balancing** for in-band MCP prompts (elicitation/sampling): the gateway holds such a tool call open on one replica and waits for the client's answer on a separate request, which must return to the same replica. Route each MCP connection to a consistent replica (by bearer token or `Mcp-Session-Id`) — everything else remains replica-independent. Conduit warns at startup in this mode. See [Deployment Tiers](/docs/conduit/deploy/availability). ## Fixed * Connecting, reconnecting, or disconnecting a connector now refreshes its tool list right away — in the web UI (the connector's tools re-fetch, so a reconnect clears a stale error instead of leaving it cached) and for connected MCP clients (connect/disconnect now emits `notifications/tools/list_changed`). * A connector whose saved credential the upstream rejects (expired or revoked) no longer disappears silently from the tool list: it surfaces the same `__authenticate` tool worded as a reconnect, and calling any of its tools returns a reconnect link — so a stale credential is recoverable from the client. * The Groups & Policies page now shows the correct name and icon for grants on disabled connectors and on admin built-in tools, and the grant editor lists them, so a grant no longer becomes anonymous or uneditable when its connector is switched off or the viewing admin lacks the instance-admin role. [Compare v0.2.1...v0.2.2](https://github.com/PipedreamHQ/conduit/compare/v0.2.1...v0.2.2) **v0.2.1** 2026-07-20 *Pipedream connector tools fix, MCP tool metadata, faster restarts.* ## Upgrade notes None. ## Changed * Built-in Conduit tools now declare MCP behavior-hint annotations (`readOnlyHint`, `destructiveHint`, `idempotentHint`), so clients can auto-approve read-only calls like `list_connectors` and warn before destructive ones like `admin_delete_workspace`. Annotations from upstream MCP servers pass through to clients unchanged. * Built-in Conduit tools now carry a human-readable display title (e.g. "Join Workspace"), which MCP clients that support tool titles show in place of the wire name. Tool titles from upstream MCP servers are now passed through to clients as well. * Shutdown now ends open MCP SSE streams immediately instead of waiting out the 10-second drain timeout on connections that never finish on their own, so a stop or redeploy completes in under a second once in-flight requests drain. MCP clients reconnect automatically. ## Fixed * Pipedream app tools now appear on `/mcp` in workspaces whose access policy grants all connectors with a wildcard (including the default policy every workspace starts with). The gateway told Pipedream which apps to serve only when the policy listed them explicitly, so a wildcard grant surfaced no app tools at all — enabling an app on the Connectors page had no visible effect. It now always names the user's enabled apps to Pipedream. * MCP clients that sat idle long enough for all their tokens to expire no longer lose their OAuth client registration to the cleanup sweep — a returning client (e.g. Claude Code reusing its cached `client_id`) failed every authorization with "invalid client\_id" and had to be manually re-registered. Only abandoned registrations that never completed an authorization are reclaimed now. * Failed `/oauth/authorize` requests (unknown `client_id`, unregistered `redirect_uri`) are now logged server-side; previously the only signal was the error page in the end user's browser. * On the embedded database, restarting or redeploying an instance no longer trips the single-instance guard. The guard treated the previous process's last heartbeat (up to 90 seconds old) as a live second instance, so a normal stop-then-start deploy crash-looped for a few minutes before coming up. It now flags only instances that write a heartbeat after the current process started — a real concurrent writer is still detected within one 30-second beat. [Compare v0.2.0...v0.2.1](https://github.com/PipedreamHQ/conduit/compare/v0.2.0...v0.2.1) **v0.2.0** 2026-07-19 *PostgreSQL support and active-active high availability.* ## Upgrade notes None — database migrations apply automatically on boot. The new PostgreSQL/high-availability features are opt-in via `CONDUIT_DATABASE_URL`; embedded deployments are unchanged. ## Added * PostgreSQL support: set `CONDUIT_DATABASE_URL` to run Conduit on an operator-supplied PostgreSQL (14+) instead of the embedded database. The embedded zero-dependency default is unchanged. Requires `CONDUIT_ENCRYPTION_KEY` (and `CONDUIT_ADMIN_PASSWORD` until setup completes); usage metrics live in the same database. * High availability: on PostgreSQL, Conduit runs active-active with any number of replicas behind a load balancer — zero-downtime rolling upgrades, live cache invalidation between replicas, cluster-wide authentication-failure throttling, and a `/healthz/ready` readiness endpoint that checks database connectivity. See the High Availability deployment guide. * Conduit now refuses to start when another live instance is using the same embedded database file — a misconfigured multi-instance deployment fails loudly instead of corrupting data. * Deployment guides for Kubernetes, high availability and backups, and other platforms (Compose, VMs, Fly.io). ## Fixed * The first-run setup wizard survives a server restart between signing in with the bootstrap credential and completing setup. * Connecting a connector account via OAuth survives a server restart mid-flow (between opening the provider's consent page and returning). [Compare v0.1.0...v0.2.0](https://github.com/PipedreamHQ/conduit/compare/v0.1.0...v0.2.0) **v0.1.0** 2026-07-19 *The first tagged release of Conduit.* ## Upgrade notes None — this is the first release. ## Added * **MCP gateway**: tools from MCP servers, GraphQL and OpenAPI connectors, and the Pipedream connector catalog, aggregated behind a single governed MCP endpoint with OAuth 2.1 and dynamic client registration. * **Access policies**: allow policies and groups decide who can use which connectors and tools, enforced on every tool listing and call; users refine their own enabled set. Connected clients refresh live when access changes. * **Workspaces**: single-workspace self-host mode and multi-workspace (tenant) mode, with per-workspace connector configuration, join policies, and provisioning rules. * **Authentication**: email + password and identity providers (social presets and custom OIDC), workspace SSO, and an instance auth policy. * **Observability**: audit log of admin changes and sign-ins, OpenTelemetry traces and events, and usage dashboards. * **Built-in documentation**: this docs site ships inside the Conduit image, served at `/docs/` and always matching the running version; the app sidebar links to the docs and to the running version's changelog. [Full commit history](https://github.com/PipedreamHQ/conduit/commits/v0.1.0) # Conduit Cloud Source: https://pipedream.com/docs/conduit/cloud The hosted version of Conduit — pricing, IP addresses, self-hosting, support, and account deletion. ## What is Conduit Cloud? Conduit Cloud is a hosted version of Conduit, run by Pipedream at [conduit.pipedream.com](https://conduit.pipedream.com). There's nothing to install or operate. Sign in, create a workspace, and invite your team. It's a good fit if you want to try Conduit before [running it yourself](#self-hosting). ## Pricing Conduit Cloud is free for up to 100 users. To run Conduit for larger teams, email [conduit@pipedream.com](mailto:conduit@pipedream.com). ## IP addresses Requests from Conduit Cloud to the apps and MCP servers your connectors use come from the IP range `44.223.89.56/29` (`44.223.89.56` through `44.223.89.63`). If a service only accepts requests from an allowlist of IP addresses, add this whole range. Each request can come from any address in it. ## Self-hosting You can also self-host Conduit on your own infrastructure. This is the best way to run Conduit across an enterprise. Email [conduit@pipedream.com](mailto:conduit@pipedream.com) to learn more. ## Support Start with these docs. For anything else, email [conduit@pipedream.com](mailto:conduit@pipedream.com). ## Deleting your account or workspace Email [conduit@pipedream.com](mailto:conduit@pipedream.com) from the address you sign in with, and tell us which account or workspace to delete. # Access Control Source: https://pipedream.com/docs/conduit/configure/access-control Roles govern who administers Conduit; groups and policies govern which tools each person's AI client can use. Conduit has two separate permission systems, and keeping them apart answers most access questions before they're asked: 1. **Roles** decide who may *administer* Conduit — configure providers, manage people, create connectors, read audit logs. 2. **Access policies** decide which connectors and tools each person's AI client may *use*. The two never overlap. A group named "Admins" on the policies page is just a group — putting someone in it grants tools, not console access — and holding an admin role grants no tools beyond what policy allows. When someone says "I was made an admin but I still can't call this tool" (or the reverse), this distinction is the answer. ## Roles ### Instance roles Every user is either a **user** or an **instance admin**. Instance admins operate the deployment: sign-in policy and identity providers, email and telemetry configuration, MCP client management, user and workspace administration, instance-wide usage and audit. Instance admins pass every workspace-level check in every workspace. ### Workspace roles Within a workspace, every person holds one of four fixed roles, in rank order — there are no custom roles: | Role | What it adds | | - | - | | **Viewer** | The lowest rank: can sign in and use whatever tools policy grants, without the Member role's workspace rights. | | **Member** | The default. Uses connectors, enables tools for themselves, connects their own accounts. | | **Admin** | Manages the workspace: people, groups and policies, connectors, [agents](/docs/conduit/use/agents), workspace SSO, SCIM, the workspace usage dashboard and audit log. | | **Owner** | Admin, plus the role that can never be removed out from under a workspace. | Rank is enforced on every role change and removal, by whoever makes it — the UI, the API, a built-in admin tool, or a SCIM push: * An admin cannot change the role of, or remove, someone who **outranks** them, and cannot grant a role above their own. * Nobody changes their **own** role. * A change that would leave the workspace with **no admin or owner** is refused. * **Instance admins cannot be renamed or removed from inside a workspace** — not by an owner, not by a SCIM push. Offboarding someone who operates the instance means removing their instance role first. ### Where roles are managed Workspace admins manage people and roles in **Settings → People**, or through [groups that grant a role](#roles-from-groups). People can also arrive and depart automatically — see [how people join a workspace](#how-people-join-a-workspace) below and [SCIM provisioning](/docs/conduit/configure/scim). (The API calls the people in a workspace its *members*: `ListWorkspaceMembers`, the `members:read` scope.) ### How people join a workspace Joining follows from authentication: in a single-workspace deployment every signed-in user belongs to the workspace. In a multi-workspace deployment people join a workspace in three ways: by signing in through its [SSO provider](/docs/conduit/configure/sso#who-joins-through-a-workspace-provider) with an address at one of its domains, by accepting an [invite](#invites), or through [SCIM](/docs/conduit/configure/scim). An invite reaches only an address at a domain the workspace has verified or at the inviting admin's own, and needs an instance admin to have [set up email](/docs/conduit/configure/email); people elsewhere, such as contractors at another company, join through SCIM. Someone new joins with the **Member** role, unless an invite gives another role or a [group grants one](#roles-from-groups). ### Roles from groups A group can grant the people in it a workspace role — **Admin**, **Member** or **Viewer** — chosen next to the group's name in **Settings → Groups & Policies**. While someone is in at least one role-granting group, the groups decide their role: * They hold the highest role any of their groups grants. Joining a group that grants Admin makes them an admin; leaving it drops them to the next-highest role their other groups grant, or back to **Member** when none does. * **Settings → People** shows the role as coming from the group, and it can't be changed there: remove them from the group (or add them to another) instead. * Owners are never affected, and no group can grant the owner role. An owner in a role-granting group can be demoted only to the role their groups grant, which the groups then manage. * Group memberships your directory keeps for someone it has deactivated don't count (they count again when it reactivates them). This is how a directory sets roles: with [SCIM](/docs/conduit/configure/scim), push your IdP's admins group and give it the Admin role here, and people your directory adds to that group are admins on the next sync — before their first sign-in. Sign-in never sets a role: without SCIM, admins set roles in **Settings → People**, or by adding people to a role-granting group by hand. The usual rules for role changes hold, whoever makes the change. Nobody can change their own role this way (by leaving the group that makes them an admin, say), and a change that would leave the workspace with **no owner or admin** is refused with nothing applied — including a SCIM push, which surfaces as a sync error. Only workspace admins can set a group's role; API clients can't, and can't change who is in a group in a way that changes anyone's role. An invite never raises a role a group decides. Every role a group change moves is recorded in the audit log. Instance admins manage users, instance roles, and workspace rosters under **Settings → Users** and **Settings → Workspaces**, and can revoke any user's sessions there. ### Display names Anyone can change their own name from the account menu (**Edit profile**), except someone SCIM provisions: their directory owns their name, so they change it there. A person's name is shared by every workspace they belong to, so a workspace admin can rename someone in **Settings → People** only when the workspace owns their account: the person signs in through one of the workspace's own identity providers, isn't provisioned by SCIM (the directory owns their name; change it there), and doesn't outrank the admin. Instance admins are out of reach, as above. The person's row menu says why a rename isn't available, and every rename is recorded in the audit log. A name set by the person or an admin is never replaced by a later SSO sign-in. ### Invites A workspace admin can invite people by email from **Settings → People** (**Invite**), with a role of admin, member or viewer, no higher than their own; pending invites are listed below the people in the workspace. The address must be at the admin's own email domain (when their address is confirmed and the domain isn't a public service such as gmail.com) or at a domain the workspace has verified. The invite's link goes only into the email Conduit sends, so invites need an instance admin to have [set up email](/docs/conduit/configure/email); nobody else ever sees the link, and holding it proves the invitee controls the address. The link works for 7 days; resending an invite sends a new link and stops the old one working, and admins can cancel an invite. Each resend of the same invite waits longer after the last send (1 minute, then 5 and 30 minutes, 2 hours, and a day from then on), so one invite can't flood an inbox. A workspace holds at most 200 invites, and sends are capped per admin and per workspace. The link opens the workspace's login page. The invitee signs in with the address the invite was sent to, one of the ways the workspace accepts, and confirms joining, signed in a way the workspace accepts. The account must be theirs: its address has to be confirmed (by a password account, a provider the instance trusts, or a workspace's own provider at a domain it verified), or the sign-in has to come through this workspace's own provider; a different or unconfirmed address is refused. Someone with no such account, invited to a workspace that accepts email and password, creates their account there with a password instead, confirmed by the invite, and joins as they do. Joining by invite gives the invite's role, but never more than the admin who last sent it could grant when it's accepted: an invite from an admin since demoted gives at most their new role, and one from an admin since removed no longer works until another admin resends it. Someone already in the workspace is raised to the invite's role when it is higher, unless a [group decides their role](#roles-from-groups). Removing someone, or changing their role, ends any invite they still hold to the workspace. Invites are for multi-workspace deployments: in a single-workspace one everyone who signs in joins. Every invite, resend, cancellation, redemption and failed send is in the audit log. An invited password account has no self-service password reset. ## Groups Groups are the unit policies attach to. In **Settings → Groups & Policies**, select a group's membership count to add or remove people and [agents](/docs/conduit/use/agent-access) in one list. Human membership comes from two sources that coexist: * created by hand in **Settings → Groups & Policies**, * pushed from your directory by [SCIM](/docs/conduit/configure/scim) — marked **SCIM** in the UI, and reconciled back to the directory on every sync. Agents are in beta. Only workspace admins add agents to groups or remove them; directory syncs manage people only. Adding an agent grants tools through the group's policies; choose whom it may act on behalf of separately in **Delegation**. ## Access policies Which tools a person's AI client sees — and may call — is the intersection of two things: ``` effective access = (union of allow policies that apply to the user) ∩ the user's own enabled selection ``` ### Allow policies (admin-managed) An **allow policy** (**Settings → Groups & Policies**) grants connector entries to subjects: **Everyone** (the whole workspace: all people in it, including people who join later), a **group**, or an individual **person**. A person's allow set is the union of every policy that applies to them; a person no policy applies to has **no access**. Each entry names a connector and grants either: * **All tools** — including tools the upstream adds later, automatically. * **An explicit tool list** — new upstream tools stay unavailable until an admin adds them. Pick this for connectors where new tools should be reviewed, the "all tools" form for connectors you trust wholesale. Every kind of connector is governed the same way, at the same granularity — MCP servers (including local ones), OpenAPI and GraphQL connectors, Pipedream apps, and Conduit's own built-in tools. There is no connector type that bypasses policy. Every new workspace starts with a **Default** allow-all policy linked to the whole workspace, so a fresh deployment works before anyone designs a policy model. Deleting it is an intentional lockdown — Conduit will not quietly recreate it — after which access is exactly what your remaining policies grant. ### The user's own selection Each person chooses which of their *allowed* connectors and tools are actually on, from the **Connectors** page. Until they make a selection, only Conduit's built-in tools are active — an allowed connector or app waits for the person to switch it on. This keeps tool lists small by default (which agents handle better) and makes a new connector's appearance in a client a deliberate act. An admin allowing a connector and a person enabling it are therefore both required before a tool reaches a client. "Allowed but not enabled" shows up in the person's Connectors page as available to switch on. A connector counts as available to someone only when at least one of its tools is both allowed and turned on; until then its prompts and resources aren't offered either. ### Agents Agents are in beta and aren't available in every workspace. An [agent](/docs/conduit/use/agents) gets tools only from policies linked to groups it's in, and only for apps and MCP servers. Policies for **Everyone** or for individual people never apply to it. Acting on behalf of someone, it's also limited to what that person has and has turned on. Groups an agent is in, or whose people it may act on behalf of, are marked in **Groups & Policies**, and API clients can't widen them. See [Agent access](/docs/conduit/use/agent-access). ### How enforcement works * Policy is enforced on **every tool listing and every tool call**. A tool absent from the list cannot be invoked by name — listing and calling consult the same resolution. * Changes take effect **immediately**: policy edits, group changes, membership changes, and a person's own toggles all notify connected AI clients over the live MCP connection, and their tool lists refresh without a reconnect. * Denied calls are recorded — in the audit log, in usage metrics (`denied` outcome), and in traces — so a policy that cut off something real is visible as a step change rather than silent breakage. ### Inspecting a person's access **Why does this person have this tool?** — or not have it — is answered without reconstructing policy in your head: the People page's effective-access view runs the real evaluator for anyone in the workspace and shows their groups, the allow policies that apply, and the resulting connector and tool grants. The same evaluation is exposed as a built-in admin tool (`get_effective_access`), so it can be asked from an AI client too. ### Patterns worth knowing * **One connector per app.** An app's id, `app:`, names it whatever backs it: Pipedream, or a custom server the workspace chose ([Choose what backs an app](/docs/conduit/use/app-backend)). Grants of all its tools carry over a switch; grants naming specific tools apply only while the backend whose tools they name backs the app. A custom connector and the Pipedream app for the same service, left unlinked, are two connectors: allowing both to the same person means their client sees both tool sets. * **OAuth scopes are a separate client ceiling.** A grant can narrow a client to connectors, personal tools, workspace-admin tools, or instance-admin tools. It never widens access: server-side policy and the caller's live role must still allow each listing and direct call. * **Built-in tools are role-gated *and* policy-governed.** Conduit's own tools come in three sets — for any user, for workspace admins, for instance admins — and a caller only ever sees the sets their role permits, subject to policy like everything else. Agents never get them. ## What gets recorded Every change described on this page — role changes, group and policy edits, denied calls — lands in the audit log with the actor who made it. Successful and failed tool calls are recorded in [usage](/docs/conduit/use/usage) instead, where each row identifies both the user and the OAuth client holding the token. Usage stores no tool arguments or results; a failed call keeps up to 512 bytes of its error message, visible to administrators. # Connectors Source: https://pipedream.com/docs/conduit/configure/connectors Every kind of tool source Conduit can aggregate, how each authenticates upstream, and where credentials live. A **connector** is a source of tools: an MCP server, an OpenAPI or GraphQL API, or a Pipedream app. Workspace admins add connectors on Home with **Add connector**, beside the search, and manage each one from its cog: the **Connection** tab holds its settings, and **Access** decides who may *use* it through [access policies](/docs/conduit/configure/access-control). Creating and editing connectors is deliberately a web-UI action rather than one of Conduit's built-in admin tools, because those requests carry upstream credentials — which don't belong in an LLM's tool-call transcript. ## Connector kinds | Kind | What it is | What clients see | | - | - | - | | **MCP (remote)** | An MCP server reached over HTTP or SSE | The server's tools, proxied 1:1 | | **MCP (local, feature-flagged)** | An MCP server defined by launch command, run on each user's machine by the Conduit CLI | The server's tools; results stay on the user's machine, except the error text of a failed call, which is reported to usage | | **OpenAPI** | An HTTP API described by an OpenAPI spec | One tool per operation | | **GraphQL** | A GraphQL endpoint | An `execute` tool, plus the schema as an MCP resource | | **Pipedream apps** | Thousands of SaaS apps via the [Pipedream connector](/docs/conduit/configure/pipedream), or a custom server the workspace chose to [back an app](/docs/conduit/use/app-backend) | Per-app tools with managed authentication, or the custom server's tools under its own prefix | Local connectors and CLI setup are hidden behind a browser-level rollout flag. The flag controls UI visibility, not server access. Remote MCP connectors are added by URL or from a standard MCP `server.json` manifest. OpenAPI and GraphQL connectors take the API base URL plus a spec — pasted in or fetched from a URL, with introspection doing the work for GraphQL; the stored spec's freshness is shown on the connector and can be refetched on demand. Tools are namespaced by connector — a connector named `github` contributes `github__create_issue` — so two connectors can expose same-named tools without collision. What a client is shown is a shortened form of that name; see [Connect AI Clients](/docs/conduit/use/mcp-reference#what-a-client-sees). Details that matter in production: * **Stateful MCP servers work.** Conduit maintains the upstream's session across calls and transparently re-handshakes when the upstream expires it. * **Live updates.** Adding, changing, or removing a connector updates the tool lists of connected AI clients immediately, over the live MCP connection. * **Adding a connector** turns it on, allowed for no one: **Manage** opens on **Access** to choose who can use it. * **Turning a connector off**, with the switch at the top of its **Connection** tab, stops it for everyone whatever its grants say, and keeps its settings and grants for when it's turned back on. Through the API, an `UpdateConnector` call that omits `enabled` leaves it as it was. * **Deleting a connector** (**Remove connector**, in its **Connection** tab) also deletes the credentials stored for it, including the grants each person connected. **Upstreams on private networks** (a VPC-internal MCP server, a vendor API behind a private endpoint) need their hostname listed in `CONDUIT_SAFEHTTP_ALLOWED_PRIVATE_HOSTS` — see [Network Access](/docs/conduit/deploy/network#private-endpoints-and-gateways). ## Authentication to the upstream Each connector declares how Conduit authenticates to it. Independently of the method, the *scope* of the credential can be **workspace** (one shared credential an admin configures) or **per-user** (each user supplies or connects their own) — and that choice is what determines whose identity the upstream sees. | Method | How it works | Credential scope | | - | - | - | | **None** | No credential | — | | **Token / header** | A static bearer token or custom header value | Workspace, per-user, or both | | **OAuth (authorization code)** | Conduit acts as an OAuth client against the upstream's authorization server; users click through a consent flow | Workspace grant, per-user grants, or both | | **OAuth (client credentials)** | Conduit exchanges an admin-supplied client ID and secret at the upstream's token endpoint for a workspace-wide machine token — no user interaction, no per-user connect | Workspace only | ### OAuth connectors For MCP upstreams, Conduit discovers the upstream's authorization server the standard MCP way and **registers itself dynamically** when the upstream supports it — zero configuration. The connector's **OAuth client** choice is **Conduit's** (registered this way) or **Bring your own**: when the upstream requires a pre-registered client, or you want people to approve your own app, supply its client ID and secret and register this callback URL with the upstream: ``` https:///upstream/callback/ ``` Each connector has its **own** callback URL, shown on its form — the form for a new connector shows it before you save, so it can be registered with the upstream first. Conduit registers it itself for a client it registers dynamically. Changing an existing connector's client, either way, revokes people's connected accounts: they were issued to the old client, so each person reconnects. By default, Conduit requests every OAuth scope the upstream advertises, plus any scope the upstream's first `401` response asks for that isn't among them. Discovery refuses an authorization server whose metadata names a different issuer than the one the upstream points to. A sign-in response is refused before its code is used when it arrives on another connector's callback URL, when it names another authorization server, or when it names none although the server advertised that it would (RFC 9207). For OpenAPI, GraphQL, and other non-MCP APIs there is no discovery document, so the admin also supplies the provider's authorization and token endpoints. The client-credentials variant needs only the token endpoint — it has no authorization leg. Per-user OAuth grants (access and refresh tokens) are stored per user and refreshed automatically; users connect once and don't re-authorize when a token expires. Each user can see and disconnect their own connections on the **Accounts** page. ### Shared credential or their own: `allow user override` When a workspace credential exists (a stored token, or a workspace OAuth grant), the connector's `allow_user_override` setting (set through the API, `UpdateConnector`) controls whether that's the *only* option: * **Off** — everyone's calls use the workspace credential. One upstream identity, centrally rotated. * **On** — users may connect their own account or store their own token, which then takes precedence for their calls. The setting exists because some services have no client an admin can register once on everyone's behalf — each user or tenant instance must create their own (Salesforce and ServiceNow are the classic shapes). It's meaningless for the client-credentials grant, which has no per-user form. With no workspace credential at all, the connector is per-user by definition: each user connects or supplies a token before the tools work for them. An AI client whose user hasn't connected yet is guided through it in-band — see [connecting accounts from the client](/docs/conduit/use/mcp-reference#connecting-your-accounts-from-the-client). ## Config fields: headers and environment variables Beyond the credential, a connector can declare **config fields** — named values the connector injects on every use. On a remote connector each field is sent as an HTTP request header; on a local connector, as an environment variable for the spawned process. Each field declares: * a **label and description** for the form that collects it, * whether it is **required**, * whether it is **secret** (masked in the UI; values are write-only in the API regardless), * its **scope**: *workspace* (the admin stores one shared value) or *user* (each user supplies their own on the connect page, which shows exactly which host the value will be sent to before they type it). Header names that could interfere with the protocol or impersonate the gateway's own identity headers are rejected — a connector cannot override the headers Conduit itself sets (see the [Pipedream identity headers](/docs/conduit/configure/pipedream#how-tool-calls-carry-identity) for why that matters). One caveat specific to **local** connectors: a *workspace*-scoped value is, by design, delivered to the machine of every user who can use the connector — that is where the process runs. Anything that shouldn't be shared that widely belongs in a *user*-scoped field. The admin UI states this on the form. ## Where credentials live, and who can see them * **Encrypted at rest.** Every stored secret — tokens, header values, client secrets, OAuth grants — is encrypted (AES-256-GCM) with the instance encryption key. There is no external vault dependency. * **Write-only in the API.** No API response, admin tool, or export ever returns a stored secret — responses carry only "a value is set". Editing a connector never requires re-entering values that aren't changing. * **Bound to where they are sent.** A stored secret is kept on an edit only while its destination stays the same. Changing a connector's URL needs the workspace token or auth headers re-entered, and changing an OAuth client's client ID or token endpoint (or the URL, for client credentials) needs its client secret re-entered — otherwise the save is refused, so nobody can redirect a secret they can't read. The exception is your own client in place of one Conduit registered: its secret was never shown, so a blank secret there means a public client. Changing the URL of an MCP connector that uses OAuth discovers its authorization server again for the new URL. * **Clients never see upstream credentials.** An AI client holds only its Conduit-issued token. Conduit attaches the upstream credential server-side on each call and never forwards the client's bearer upstream — so a prompt, a transcript, or a compromised client can't exfiltrate an upstream secret it never had. The one structural exception is local connectors, whose resolved values must reach the user's own machine to start the process there. You control the [instance encryption key](/docs/conduit/configure/reference#security): supply your own via `CONDUIT_ENCRYPTION_KEY`, or let Conduit generate one in the data directory. The database plus your key is the vault. Credential *use* is observable even though credential *values* are not: every tool call is recorded in [usage](/docs/conduit/use/usage) and the per-connector [metrics](/docs/conduit/deploy/monitoring), denied calls land in the audit log, and upstream failures surface in traces. # Email Source: https://pipedream.com/docs/conduit/configure/email Set up the provider Conduit sends invitations and admin notices through. Conduit sends email for two things: workspace [invites](/docs/conduit/configure/access-control#invites), whose link only ever travels in the email, and a notice to a workspace's owners and admins when another workspace takes over verification of one of its domains. Until email is set up, admins can't invite anyone. Email is one setting for the whole instance, so an instance administrator sets it up in **Settings → Instance → Email**. ## Set up a provider Conduit sends through one of three providers: **SMTP** (any mail server), **Resend**, or **AWS SES**. 1. Open **Settings → Instance → Email**. At the top, enter the **From address** email is sent from, and optionally a **From name**. Every provider sends as this sender. 2. Expand the provider you want. 3. Fill in the provider's settings: * **SMTP**: the server's **Host**, **Port** and **Encryption**, and a **Username** and **Password** if the server requires them. * **Resend**: an **API Key**. * **AWS SES**: the **Region** your sending identity is verified in, and an IAM **Access Key ID** and **Secret Access Key** allowed to send through SES. A region missing from the list can be entered under **Other region…**. Only the standard AWS partition is supported. 4. Select **Save and use** the provider. This saves the sender too. Conduit refuses settings that can't send, such as SES without a region, and says what's missing. The active provider is outlined and marked **Active**. Secrets are never shown again after saving; leave a secret field empty to keep the saved one. The SMTP password is kept only for the server it was entered for: changing the SMTP host or port needs the password re-entered. Conduit reaches the provider from your network, so allow its host: see [Network access](/docs/conduit/deploy/network). ## Switch or turn off Every provider's settings are kept, so you can fill in or check another provider while the active one keeps sending. Saving that provider's form switches all email to it. To change only the sender, edit it and select **Save sender**. **Turn off email** stops all sending, invites included, and keeps every provider's settings for when you turn it back on. ## When sends fail A send that fails leaves the invite saved; the admin who sent it is told the email didn't go out and can resend it once email works. The reason is in the server log. If the active provider's saved settings are missing something they need, **Settings → Instance → Email** says what. # Help Source: https://pipedream.com/docs/conduit/configure/help Tell everyone who uses Conduit where to go for help. Select **?** at the top right of Conduit, then select **Edit**. Add instructions for contacting your support team. Use Markdown for formatting and links, check the preview, and select **Save**. Instance admins always see **?**; everyone else sees it only after you save instructions. Until then, the panel prompts you to add them. Clear the instructions and save to hide it from everyone else again. The book icon always opens the docs. Instructions apply to the whole instance: every signed-in user sees the same text, in every workspace. You must be an instance admin to edit them. Text, lists, headings, and web or email links are supported; HTML and images are not. A web link shows its host after the link text. # The Pipedream Connectors Source: https://pipedream.com/docs/conduit/configure/pipedream Thousands of app integrations with managed OAuth, configured once per workspace. The Pipedream connector gives a workspace tools for thousands of SaaS apps — Slack, Google Workspace, Notion, GitHub, and the rest of the [Pipedream catalog](https://pipedream.com/apps) — with authentication to each app managed by [Pipedream Connect](https://pipedream.com/docs/connect). Users connect their own accounts through a consent flow; Pipedream stores those credentials in its vault and executes each app's API; Conduit decides who may use which app and tool, and records every call. A workspace admin connects Pipedream once per workspace, from any Pipedream app's **Manage** dialog on Home. ## Setup You need a Pipedream workspace with Connect and a project in it. From its [API settings](https://connect.pipedream.com/settings/api), create **OAuth client credentials** — one pair per Conduit workspace. Then, on Home, open any app — choose **Allow** on one the workspace doesn't offer, or its cog — and go to the **Connection** tab, which offers **Connect Pipedream** until it's connected. Enter: * **Client ID and secret** — the secret is write-only and stored encrypted, like every credential Conduit holds. * **Project ID** and **environment** (development or production). That's the whole registration — there is nothing else to register on the Pipedream side. Saving runs a connectivity check and reports the result, and distinguishes bad client credentials from a project the credentials can't use. Once connected, the cog on the **Pipedream** choice of every app's **Connection** tab opens the workspace's Pipedream settings, to replace the credentials or turn Pipedream off for the workspace. Turning it off keeps the credentials and who each app is allowed for; nobody can use a Pipedream app until it's connected again. Individual apps become available to people through [access policies](/docs/conduit/configure/access-control): an app's **Access** tab grants it to everyone, a group or a person, the way you'd grant any connector. You can also grant all apps on **Groups & Policies** and let people enable what they need. ## How Conduit authenticates to Pipedream Conduit exchanges the workspace's client credentials at Pipedream's token endpoint for a short-lived, workspace-scoped access token, caches it, and re-mints it as needed — the standard OAuth client-credentials grant. This token authenticates Conduit itself (tool listing and calls, the app catalog, account management); it is never handed to browsers or AI clients. ## How users connect their app accounts Each person connects their own app accounts, from **Home** — or [directly from their AI client](/docs/conduit/use/mcp-reference#connecting-your-accounts-from-the-client), which guides them to the same place: 1. Conduit mints a short-lived, single-use **Connect token** scoped to the user and hands it to the browser. 2. The browser opens Pipedream's connect flow, where the user authorizes the app on the app's own consent screen (standard OAuth between Pipedream and the app). 3. Pipedream stores the resulting credential in its vault, keyed to the user's Conduit identity. Conduit then verifies with Pipedream that the account actually exists — the browser's word is not trusted — and refreshes the user's tool lists. App credentials therefore live in Pipedream's vault, not in Conduit's database, and never pass through the AI client. Users see their connected accounts — with health status — on the **Accounts** page and can disconnect them there; disconnecting revokes the stored credential. ## Setting how people connect an app As a workspace admin, open an app's cog on Home and choose **Connection**. It shows what people are asked when they connect the app: how they sign in (OAuth, or credentials they enter) and each field Pipedream's connect window asks for, such as an instance name. From there you can decide some of it for them: * **Set for everyone** (or **Choose for everyone**, for a choice) fills a field in once, so people aren't asked for it. A secret field can't be filled in: each person enters their own. A text field named like a credential warns that filling it in shares one credential with everyone. * **OAuth client**: **Pipedream's**, or **Bring your own**. To bring your own, select **Get the redirect URI** and register it when you create the OAuth app with the provider, then enter the client ID, the secret and, optionally, scopes; left blank, Conduit copies in the scopes Pipedream's own client asks for when you save (later changes to Pipedream's defaults don't follow; an app Pipedream has no client for has none, so the provider applies its own). The secret is write-only. A new client ID registers a new OAuth client, so it needs its secret too. If the app doesn't take your own OAuth client, Conduit says so and keeps Pipedream's. Where Pipedream has no OAuth client for an app, people can't connect it until you bring your own, so allowing the app opens **Connection** first. * **Reset to Pipedream's defaults** removes both. Conduit saves these in your Pipedream project, as an [app override](https://pipedream.com/docs/connect/managed-auth/app-overrides) and an [OAuth client](https://pipedream.com/docs/connect/managed-auth/oauth-clients), and keeps only their ids: field values and the client secret are stored in Pipedream, not in Conduit. Every connect and reconnect applies them: Conduit asks Pipedream for connect tokens pinned to your OAuth client, and Conduit's connect window applies the client and the field values. Pipedream doesn't check a connect token's app or OAuth client: a token Conduit issues for your client can still open the connect window for another app or client. So don't rely on either to restrict what people connect to. People already connected keep their connection until they reconnect. If someone deletes the override or the client in Pipedream, people connect with Pipedream's defaults again. ## How tool calls carry identity When a user's client calls an app tool, Conduit forwards the call to Pipedream's MCP endpoint with headers identifying the workspace's project and environment, **the calling user**, and the apps the caller's policy resolution permits. Pipedream uses the user identity to fetch that user's credential from its vault — so every call executes as the person who made it, and one user's Slack tools can never post as another's. These headers are set by Conduit from workspace configuration and the authenticated session, on every call. They cannot be overridden: connector configuration rejects header names in the gateway-identity namespace, so neither an admin nor anyone else can supply a different user or project by configuration. ## Network path Conduit reaches exactly two Pipedream hosts — the API (token minting, Connect tokens, account management, the app catalog) and the MCP endpoint (tool listing and calls) — and each user's browser loads the connect flow from `pipedream.com`. [Network Access](/docs/conduit/deploy/network#fixed-hosts) lists all of them precisely, and the [private-endpoints guide](/docs/conduit/deploy/network#example-pipedream-through-a-private-endpoint) covers consuming both hosts over a private endpoint such as AWS PrivateLink — supported at the application level with one environment variable. ## Observability Pipedream app calls are first-class citizens of Conduit's governance: each call is policy-checked before it leaves, recorded in usage dashboards under its full tool name (a denied call also lands in the audit log), traced end to end, and counted in the per-connector metrics. Nothing about the managed-auth path bypasses the gateway's controls. # Configuration Reference Source: https://pipedream.com/docs/conduit/configure/reference Every Conduit environment variable. All configuration beyond these environment variables — identity providers, connectors, email, telemetry exporters, access policies — is managed in the admin UI and stored in Conduit's database. ## Core | Variable | Default | Description | | - | - | - | | `CONDUIT_BASE_URL` | `http://localhost:7272` | Externally reachable URL of the instance. Used for OAuth callbacks and MCP discovery — set it to the address users and AI clients actually reach. | | `CONDUIT_ADDR` | `:7272` | Listen address. | | `CONDUIT_DATA_DIR` | `/data` (Docker) | Directory for the embedded database and generated encryption key. Mount a volume here. | | `CONDUIT_DATABASE_URL` | unset | Storage backend selector. Unset runs the embedded database in the data directory (the default). A `postgres://` URL runs Conduit on an operator-supplied PostgreSQL (14 or newer) instead — required for multi-replica deployments, and requires `CONDUIT_ENCRYPTION_KEY` (plus `CONDUIT_ADMIN_PASSWORD` until setup completes). | | `CONDUIT_DATABASE_MAX_CONNS` | CPU-derived | Maximum PostgreSQL connections per instance. | | `CONDUIT_DATABASE_AUTH` | unset | How Conduit authenticates to `CONDUIT_DATABASE_URL`. Unset uses the credentials in the URL. `rds-iam` authenticates to AWS RDS or Aurora with IAM: each new connection uses a short-lived token minted from the AWS identity the instance runs as, and the URL carries no password — see [Deployment Tiers](/docs/conduit/deploy/availability#iam-authentication-on-aws). With `rds-iam` the URL's `sslmode` must leave no plaintext path (`verify-full` recommended; `prefer`, the default, is refused). An invalid value, or a URL that could connect unencrypted, refuses to boot. | | `CONDUIT_WORKSPACE_MODE` | `single` | `single` (one workspace — the self-host default) or `multi` (many workspaces/tenants). Fixed per deployment; an invalid value refuses to boot. | ## Bootstrap admin | Variable | Default | Description | | - | - | - | | `CONDUIT_ADMIN_EMAIL` | `admin@localhost` | Email for the first-run bootstrap sign-in. After setup, when set together with the password, also acts as a break-glass recovery login for the bootstrap admin. In a multi-workspace deployment, keep it at a domain no workspace verifies: the login page sends an email at a verified domain to that workspace's provider, and offers the password field only when that provider can't be reached. | | `CONDUIT_ADMIN_PASSWORD` | random, printed to logs | Password for the first-run bootstrap sign-in. Leave both unset after setup for normal operation. | ## Security | Variable | Default | Description | | - | - | - | | `CONDUIT_ENCRYPTION_KEY` | unset | 32-byte key (base64 or hex) for encrypting stored secrets. When unset, a key is auto-generated at `/conduit.key` on first boot — back it up; secrets are unrecoverable without it. Setting the variable keeps the key out of the data volume and its backups. | | `CONDUIT_TLS_CERT_FILE` | unset | TLS certificate for native TLS termination. Must be set together with the key file; otherwise run behind a TLS-terminating proxy. | | `CONDUIT_TLS_KEY_FILE` | unset | TLS private key, paired with the certificate file. | | `CONDUIT_TRUSTED_PROXIES` | loopback only | Comma-separated reverse-proxy IPs and CIDRs whose `X-Forwarded-For` / `X-Real-Ip` headers are trusted for client-IP attribution and per-IP rate limiting. **Set this if a reverse proxy fronts your instance** — see [Client IP attribution](#client-ip-attribution). Set to an empty value to trust no proxy. | | `CONDUIT_CSP` | `enforce` | Content-Security-Policy delivery for the web UI: `enforce`, `report-only`, or `off`. An invalid value refuses to boot. | | `CORS_ALLOWED_ORIGINS` | unset | Comma-separated origins allowed to call the API cross-origin. Leave unset unless you serve the UI from a different origin. | | `CONDUIT_DISABLE_API_CLIENTS` | `false` | Instance-wide kill switch for workspace API clients: after restart, no client can mint a token and existing machine tokens are rejected instance-wide. Break-glass control for a suspected compromise; per-client disable (in workspace settings) is the everyday control. | | `CONDUIT_SAFEHTTP_ALLOWED_PRIVATE_HOSTS` | unset | Exact hostnames of trusted services that resolve to private addresses — a private endpoint or gateway such as AWS PrivateLink, an enterprise egress proxy, or an MCP server on your own network — exempted from outbound SSRF protection. HTTPS is still required. See [Outbound requests](#outbound-requests). | | `CONDUIT_SAFEHTTP_ALLOW_LOCALHOST` | `false` | Development only: allows plain-HTTP loopback for outbound connections (e.g. a local identity provider). Never enable in production. See [Outbound requests](#outbound-requests). | Which MCP clients may connect is not an instance setting: each workspace decides it in Settings → MCP Clients (see [Governing connected clients](/docs/conduit/use/mcp-authorization#governing-connected-clients)). An instance that sets `CONDUIT_CIMD_ALLOWED_DOMAINS` refuses to boot until the variable is unset, since it would otherwise admit every URL-based client the operator meant to restrict. ### Client IP attribution Conduit records a client IP on audit-log entries and keys its per-IP rate limits (sign-in, sign-up, OAuth, failed MCP auth) on it. `X-Forwarded-For` and `X-Real-Ip` are set by whoever sends the request, so Conduit honors them **only when the connection's peer address is a proxy you have declared** in `CONDUIT_TRUSTED_PROXIES`. Otherwise it uses the peer address and logs a warning once per process. By default Conduit trusts loopback only (`127.0.0.0/8` and `::1`). Because Conduit runs in a container, a loopback peer is by definition inside its own network namespace: Conduit itself, or a sidecar sharing the pod — the service-mesh topology, where the mesh proxy forwards over loopback. A pod-mate can already read Conduit's environment and service account, so trusting its forwarded header grants nothing extra; the pod is the unit of trust. If you run the Conduit binary directly on a host with other users or processes, that no longer holds — any local process could forge the header. Set `CONDUIT_TRUSTED_PROXIES=` (empty) there to trust nothing. **Every other proxy needs configuring, including in-cluster ones.** A Kubernetes ingress controller and a `docker run -p` bridge gateway both arrive from a private-range address, which Conduit does not trust by default because an attacker's pod or another host on the same network is indistinguishable from them. The value is a comma-separated list of IPv4/IPv6 addresses and CIDR ranges. It **replaces** the loopback default rather than adding to it, so list `127.0.0.0/8` and `::1/128` too if you need both. Unparseable entries are ignored. ### What to set | Your deployment | Value | | - | - | | No proxy — direct, or [native TLS](#security) | leave unset | | A proxy sidecar in the same pod | leave unset (it arrives over loopback) | | Kubernetes ingress controller | your pod CIDR, e.g. `10.42.0.0/16` | | `docker run -p` behind a proxy on the host | the Docker bridge subnet, e.g. `172.17.0.0/16` | | docker-compose with a proxy service | the compose network subnet, e.g. `172.18.0.0/16` | | Behind a CDN or WAF | the provider's published egress ranges | | The binary on a host shared with other users | empty (`CONDUIT_TRUSTED_PROXIES=`) | There is deliberately no shorthand for "all private ranges" or "everything". Trusting a whole private range is the misconfiguration this setting exists to prevent — on a Kubernetes cluster without NetworkPolicies, a Docker bridge, or an office LAN, it trusts every peer that shares the network, including one an attacker controls. Trusting everything is worse still: it would leave only the attacker-controlled end of the forwarded chain to read. ### Finding your proxy's address You don't have to guess. Start Conduit, send a request through your proxy, and read the warning it logs: ``` WARN ignoring forwarded client-IP header from an untrusted peer; if a reverse proxy fronts this instance, list its address in CONDUIT_TRUSTED_PROXIES peer=10.42.3.17 ``` That `peer=` value is your proxy. Trust the range it belongs to — proxy pods and containers get new addresses when they restart, so use the CIDR rather than the single address you happened to see: ```bash theme={null} # Kubernetes: the cluster's pod CIDR kubectl cluster-info dump | grep -m1 cluster-cidr # Docker: the subnet of the network Conduit is attached to docker network inspect bridge --format '{{range .IPAM.Config}}{{.Subnet}}{{end}}' ``` If you never see that warning, nothing is sending forwarded headers and there is nothing to configure. ### Two consequences worth knowing * **If a proxy fronts your instance and you don't configure it,** every request resolves to that proxy's address. Audit entries all show one IP, and each per-IP rate limit becomes a single instance-wide bucket — enough to throttle legitimate sign-ins during a login spike. * **List your proxy chain, and nothing beyond it.** Conduit walks the forwarded chain right to left and returns the first address that is *not* trusted. So every intermediary must be listed for the walk to reach the real client — with a load balancer in front of your ingress controller, list both — while an address that *is* listed can never be reported as a client. Trusting a range that contains real users silently attributes their requests to the proxy. ### Outbound requests Every request Conduit makes to another service goes through one hardened HTTP client that blocks private and other special-use addresses, refuses redirects, and requires `https`. The two variables above are its only exemptions. [Network Access](/docs/conduit/deploy/network) is the full picture: every host Conduit connects to, what each is used for, and when it is contacted. ## Documentation | Variable | Default | Description | | - | - | - | | `CONDUIT_DOCS_DIR` | `/srv/docs` (Docker) | Directory of the embedded docs site, served at `/docs/`. The Docker image ships the docs matching its version. | | `CONDUIT_DOCS_URL` | `https://pipedream.com/docs/conduit` | Where `/docs/` requests redirect when no embedded docs directory is present. In the `cloud` edition, pages only the self-hosted edition has also redirect here. | | `CONDUIT_DOCS_EDITION` | `self-hosted` | Which edition of the embedded docs `/docs/` serves: `self-hosted` (the full docs) or `cloud` (without the pages about running the instance). Any other value refuses to boot. | ## Observability | Variable | Default | Description | | - | - | - | | `CONDUIT_LOG_LEVEL` | `info` | Console log level: `debug`, `info`, `warn`, or `error`. | | `CONDUIT_LOG_FORMAT` | `text` | Console log format: `text` or `json`. | | `CONDUIT_OTEL_EXPORTER_NAME` | `Environment` | Display name for an OpenTelemetry exporter configured via the standard `OTEL_EXPORTER_OTLP_*` variables (which Conduit honors alongside exporters configured in the admin UI). | | `CONDUIT_OTEL_LOG` | unset | Set to `1` to echo traces and events to stderr for local debugging. | | `CONDUIT_DEBUG_ADDR` | unset | Starts a second listener serving Go pprof profiles and runtime/DB-pool stats (`/debug/pprof/`, `/debug/vars`) for profiling and load analysis. Unauthenticated — bind it to localhost or a private interface only (e.g. `localhost:6060`), never a public address. | | `CONDUIT_METRICS_ADDR` | unset | Starts a dedicated listener serving Prometheus metrics at `/metrics` (e.g. `0.0.0.0:9464`). Unauthenticated — restrict access by network position and never expose it publicly. See [Monitoring](/docs/conduit/deploy/monitoring). | ## Data retention | Variable | Default | Description | | - | - | - | | `CONDUIT_USAGE_RAW_RETENTION_DAYS` | `30` | How long raw tool-call usage rows are kept (the recompute window for aggregates). | | `CONDUIT_USAGE_AGG_RETENTION_DAYS` | `365` | How long usage aggregates — what the dashboards read — are kept. | ## Conduit CLI The CLI setup UI is feature-flagged and hidden by default. Read by the `conduit` CLI on users' machines, not by the server. | Variable | Default | Description | | - | - | - | | `CONDUIT_TOKEN` | unset | Bearer token override for the CLI. Set together with `CONDUIT_BASE_URL` in CI/headless contexts to skip the `conduit login` step; otherwise the CLI uses its stored credentials. | | `CONDUIT_NO_BROWSER` | unset | Set to `1` to stop `conduit login` from opening a browser (headless/SSH hosts); the verification URL and code are still printed. | | `CONDUIT_MCP_RESUME` | unset | Internal handshake between a running `conduit mcp` and the upgraded binary it re-execs into (the MCP session resumes without a client restart). Never set it yourself. | ## Internal | Variable | Default | Description | | - | - | - | | `CONDUIT_WEB_DIR` | `/srv/web` (Docker) | Directory of the built web UI. Only relevant when running the binary outside the Docker image. | | `CONDUIT_CLI_DIR` | `/srv/cli` (Docker) | Directory of the prebuilt `conduit` CLI binaries served under `/cli/` with the install script. Absent (e.g. a source checkout) the CLI install path on the home page reports itself unavailable. | # SCIM Provisioning Source: https://pipedream.com/docs/conduit/configure/scim Let an identity provider push users and groups into a workspace. SCIM 2.0 provisioning lets an identity provider (Okta, Microsoft Entra, or any SCIM 2.0-capable IdP) push users, groups, and group memberships into a workspace — so joiners, movers, and leavers in your directory are reflected in Conduit without anyone signing in first or an admin editing rosters by hand. ## Prerequisites SCIM is tied to single sign-on: every SCIM connection is bound to one of the workspace's SSO providers, and every user it pushes is keyed to that provider's identities. That keying is what makes provisioning and sign-in resolve to the same person — and what prevents one provider from claiming users that belong to another. Configure an SSO provider for the workspace first. In single-workspace deployments the instance's sign-in providers can be used directly. A token bound to an instance sign-in provider only works while the deployment runs in single-workspace mode *and* the workspace is the instance's original one — switching to multi-workspace mode stops it, as does a deployment that still holds workspaces from an earlier multi-workspace configuration. In those cases the workspace needs a token bound to its own SSO provider instead. ## Connecting your IdP In **Settings → SCIM** (workspace admins): 1. **Generate a token**, choosing the SSO provider the IdP will push identities for. The secret is shown exactly once — copy it immediately. 2. In your IdP's SCIM (provisioning) settings, set the connector's base URL to the **SCIM base URL** shown on the page (`https:///scim/v2`) and authenticate with the token as an OAuth Bearer token. 3. Enable provisioning in the IdP and assign the users and groups to push. To rotate a credential without an outage, generate a new token, update the IdP, then disable or delete the old one — a workspace can hold several tokens at once. Disabling a token stops its IdP immediately. Disabling or deleting the SSO provider a token is bound to also stops the token: an identity provider that has been switched off or removed can no longer provision, just as it can no longer sign anyone in. ## Usernames and email addresses Conduit reads two attributes of a pushed user differently: * **`userName`** is your IdP's identifier for the person — Okta's application username, Entra's `userPrincipalName`. It doesn't have to be an email address. Conduit returns it exactly as your IdP sent it, matches it without regard to case, and requires it to be unique within the workspace. * **`emails`** carries the person's address: the entry marked primary, else the `work` one, else the first. This is the address their single sign-on asserts, so it is what joins a provisioned person to their sign-ins. When a push carries no `emails`, a `userName` that is an email address stands in for it; a push with neither is refused. Map the same address to `emails` that your SSO provider sends as the person's `email` claim — Okta and Entra both do by default. If your IdP also sends its own user id as `externalId` and as the sign-in subject (Okta does), a provisioned person's first sign-in finds their account by that id even when the addresses differ. ## Attributes Conduit keeps Conduit keeps a user's `userName`, `name` (`formatted`, `givenName`, `familyName`), `displayName`, `active`, `emails` and `externalId`, and a group's `displayName`, `members` and `externalId`. A user's `name` comes back as your IdP last sent it: a `PUT` replaces it whole, and a `PATCH` replaces the parts it names. The name Conduit displays, which it returns as `displayName`, is set by each write that names one — its `name.formatted`, else its `givenName` and `familyName` together, else its `displayName`, else the one half it sends. A `PATCH` that changes only `givenName` or only `familyName` keeps the other half; a `PUT` with only one half has only that half as the name. A user has one email address, chosen from `emails` as described above. A group's `members` are users; Conduit returns each with its `$ref`, and with that user's email address as its `display`. Anything else your IdP pushes — phone numbers, addresses, a title, enterprise-extension attributes such as `department` or `manager` — is accepted and ignored, so there's no need to remove those from your IdP's attribute mapping. So are `id` and `meta`, which Conduit assigns. Conduit's `/scim/v2/Schemas` endpoint describes the attributes it keeps. ## What provisioning does * **Users** pushed by the IdP join the workspace. A person who already signed in through the same SSO provider is recognized, not duplicated — and someone provisioned before their first sign-in lands on the same account when they do sign in. Display-name and email changes pushed by the IdP update the person's profile, and sign-in follows the new email. An email that was recycled to a different person in the directory is refused (it surfaces as a sync error in the IdP and in the audit log) rather than handing over the previous holder's account — and for the same reason, an update that tries to move a provisioned user's directory identifier (`externalId`) to a different identity is refused; remove and re-provision the user instead. Removing the previous holder in the IdP does **not** clear this by itself — not even deleting their SCIM resource, after which the record still blocks the address while reading as `404` to your IdP. The deprovisioned person is still on record in the workspace, so a new hire on their old address keeps being refused. An instance admin resolves it by deleting the previous holder's account outright (**Settings → Instance → Users**), after which the next sync provisions the new person cleanly; the sync error and the audit record both say so. This is the one case where a recycled address needs a human — the alternative is quietly giving one person's history and access to another. * **Deactivating or removing a user** in the IdP removes them from the workspace, revokes their active sessions, and ends the group memberships and policy grants they held there. They stay in their other workspaces, though the session revocation is instance-wide (a session spans workspaces) — they sign in again to keep using the others. If the person leaving was the workspace's last owner, the longest-standing admin is promoted to owner automatically. Reactivating them later restores the group memberships your IdP still asserts, without waiting for a group sync — an IdP pushes group changes as deltas, so it never re-sends a membership its own directory didn't change. Grants that came from somewhere else do not come back: a group membership an admin added by hand was that admin's decision to re-make, and someone returning gets it again the same way they got it the first time. A deprovision that would leave the **people remaining in the workspace with no owner or admin** is refused instead, and surfaces as a sync error in the IdP. The departing person's sessions are still revoked — their live access ends the moment the directory says they're gone — so they cannot resolve this themselves, and their IdP has stopped signing them in anyway. An instance admin clears it by promoting someone else in that workspace to admin (**Settings → People**), after which the IdP's next sync completes the removal. Give a workspace a second administrator before its first one leaves and the situation never arises. Deprovisioning the *only* person in the workspace is not refused — there is nobody left to be locked out — and leaves the workspace itself in place for an instance admin to keep or delete. * **Removing someone from the workspace in Conduit** (admin UI or API) also marks them inactive for the IdP, so a later group sync alone doesn't quietly re-add them — the IdP re-provisions the person only by pushing them as active again, which restores their IdP-pushed group memberships along with their place in the workspace. * **Groups** pushed by the IdP become Conduit groups, usable in [access policies](/docs/conduit/configure/access-control) like any other group. SCIM manages only the memberships it created: people added to a group by hand in the admin UI are never removed by an IdP sync. A pushed group whose name collides with an existing group is rejected rather than adopted — including a group an admin created by hand, so if a sync reports a name conflict, rename or remove one of the two and the next sync succeeds. Names are compared without regard to case, so "Engineering" and "engineering" are the same group name. The audit log records every rejection with the reason, so a wedged group sync is diagnosable from Conduit without reading the IdP's logs. A pushed group can also set the **workspace role** of the people in it: give it a role in **Settings → Groups & Policies** (see [Roles from groups](/docs/conduit/configure/access-control#roles-from-groups)), and the people your directory adds to it hold that role as soon as the push lands, without waiting for them to sign in; removing them from the group takes it away. A push that would leave the workspace with no owner or admin is refused whole, and surfaces as a sync error in the IdP and in the audit log. Provisioned groups are marked **SCIM** in **Settings → Groups & Policies**. Renaming one there, or changing the people the IdP pushed into it, lasts only until the next sync reconciles it back — the directory is the source of truth for what it asserts. ## What provisioning cannot do A SCIM token is generated by a workspace admin, so it carries a workspace admin's authority and no more. The limits that follow from that all surface to the IdP as a sync error rather than silently doing less than was asked: * **It cannot deprovision the workspace's owner.** An admin cannot remove the owner by hand either, and removing them would pass ownership to another admin automatically — so a provisioning token must not be a way around that. Transfer ownership to someone else first (**Settings → People**), and the next sync completes the removal. Unlike the last-administrator refusal above, nothing at all is applied here: the owner's sessions stay live. * **It cannot change the name or email of someone another provider established.** A workspace with several SSO providers shares one SCIM surface — any of its tokens can read the workspace's resources, manage groups, and deprovision people whichever provider pushed them — but a person's profile is owned by the provider their identity came from. Those two fields are instance-wide, so a token that could move them would reach into workspaces it has nothing to do with. * **It cannot rename or deprovision an instance administrator.** Instance admins operate the whole deployment and pass every workspace check by that role, so nothing scoped to a workspace — an owner acting by hand, or a token one of them generated — may move their profile or end their access. This matters most in single-workspace deployments, where a token can be bound to the instance's own sign-in provider: the one the operators themselves sign in through. Pushing an instance admin as a *new* user is still fine (they join the workspace like anyone else); only the pushes that would change them are refused. If your directory legitimately needs to offboard someone who administers the instance, drop their instance admin role first (**Settings → Instance → Users**) and the next sync completes. Two provisioned people in one workspace also cannot share a `userName`. An address can legitimately belong to more than one federated identity, but SCIM requires `userName` to identify exactly one user, so the second push is refused rather than leaving your IdP's match-before-provision lookup with two answers. Every provisioning change — users provisioned or deprovisioned, groups created, renamed, or deleted, memberships changed — is recorded in the workspace audit log, attributed to the SCIM connection's SSO provider. So is every push Conduit **refuses**, with the reason: a refusal repeats on every sync until someone resolves it, so it belongs where the workspace's admins will see it rather than only in the IdP's own error log. ## Troubleshooting a sync Every SCIM request is described on its trace span, which a workspace's own OpenTelemetry exporter receives (see [Telemetry](/docs/conduit/configure/telemetry)): the token (`scim_token.id`) and SSO provider (`idp.id`) that sent it, its `scim.operation` and `scim.resource_type`, what it changed (`scim.changes`, the audit records it wrote, which share its trace), and, when it was refused, the `scim.reason` — the same one its audit record carries, such as `email_conflict` — and the SCIM error type (`scim.error_type`). A push your IdP's attribute mapping got wrong also says which part of it: `scim.attribute` names the attribute a create or replace was refused for, `scim.patch_operations` lists each PATCH operation and the attribute it targets, `scim.ignored_attributes` the ones Conduit doesn't keep and skipped, and a lookup carries its `scim.filter` and how many `scim.results` it matched. Each provisioning event names the token and provider too. Values your directory sends — addresses, names, what a filter compares against — never appear in any of them. The instance logs the same facts as one `scim request` line per request, under the same names without the `scim.` prefix (`scim.error_type` is `error_type`, `scim_token.id` is `scim_token_id`): at `debug` when it serves one (set `CONDUIT_LOG_LEVEL=debug` to see a whole sync), at `info` when it refuses one your IdP can correct, at `warn` when it refuses a push someone has to resolve in Conduit (the push's audit record says what), and at `error` when it fails one. A request whose bearer token is refused never reaches a workspace — its span and its `conduit.scim.auth.failed` event go to the instance's exporters only, with the reason (`token_disabled`, `idp_disabled`, …). # Single Sign-On Source: https://pipedream.com/docs/conduit/configure/sso Connect your identity provider, understand what Conduit reads from it, and control how people sign in. Conduit signs users in through any OIDC-compliant identity provider — Okta, Microsoft Entra, Google, or a custom issuer. SSO covers every surface: the web UI, the MCP endpoint's OAuth flow (an AI client's browser window lands on the same login page), and the CLI's device login flow. ## Registering Conduit with your provider Create a **web application** OIDC client in your provider with a client secret. Each Conduit provider has its own redirect URI: ``` https:///api/auth/callback/ ``` You can copy it from the new provider screen before you save. The host comes from `CONDUIT_BASE_URL`, which must be the address users actually reach — the provider redirects the browser there, so a mismatch breaks sign-in. Then add the provider in Conduit under **Settings → Sign-in**: instance admins add instance providers there, and workspace admins add their workspace's providers (see [Instance sign-in vs. workspace SSO](#instance-sign-in-vs-workspace-sso)). Presets for Google, GitHub, Microsoft, and Okta prefill the issuer and scopes; **Custom OIDC** covers any other compliant provider. You supply: * **Issuer URL** — Conduit discovers the authorization, token, and JWKS endpoints from `/.well-known/openid-configuration`. Providers without discovery can be configured with explicit authorization and token URLs instead. * **Client ID and secret** — the secret is write-only: no API response ever returns it, and it is stored encrypted. Editing a provider keeps the stored secret unless you change the client ID, issuer URL, or token URL; those changes need the secret re-entered. * **Scopes** — editable per provider; the default is `openid email profile`. * **Request fresh sign-in** — available for Okta, Microsoft, and Custom OIDC; on by default. Asks the provider to authenticate users again each time Conduit starts a sign-in. Turn it off to let the provider reuse an existing session. The provider can still require sign-in or MFA according to its own policy. For these provider types, the setting is available at both instance and workspace scope. When on, Conduit sends the [OIDC `prompt=login` parameter](https://openid.net/specs/openid-connect-core-1_0.html#AuthRequest); when off, it omits `prompt`. Turning it off does not request silent sign-in (`prompt=none`). It is useful when a provider cannot satisfy a fresh-authentication request through every sign-in method it supports. The Google and GitHub presets always omit `prompt`, including for existing configurations. They do not expose this setting because neither documents support for `prompt=login`. Each provider also carries an optional **access-denied message**: admin-written help shown to a user whose sign-in the *provider* refused (typically someone not assigned to the app in the IdP). Write it for the person staring at the error — "Request access to Conduit in the IT portal", with a link. It's public: the login page (and a workspace provider's workspace login page) shows it next to the provider's button before anyone signs in. When Pipedream is the provider, it also tells Conduit why it refused a sign-in, and the error page says so: a Pipedream account with a personal email address, such as Gmail, is asked to sign in with a work email, and an account with an unverified email is asked to verify it first. ## What Conduit reads from your provider Conduit reads identity claims from the **ID token** — never from the provider's access token. This has practical consequences worth knowing before you file a ticket with your identity team: * **No custom authorization server or access-token audience is needed.** Your provider's default/organization authorization server works as-is, because Conduit never inspects the access token or calls it against your APIs. * **`sub` is stored exactly as your provider asserts it.** Identities are keyed by (provider, subject) — never by email — so an email change in the directory follows the same person rather than creating a new one, and no claim-mapping logic is required on the provider side. * **`email` and `email_verified`** name the account. Sign-in follows the directory when the address changes. * **`name`**, or **`given_name`** and **`family_name`** when `name` is absent, is the person's display name. With neither, Conduit uses the part of the email address before the `@` (`dylan.sather@company.com` becomes "dylan.sather") and replaces it the first time a sign-in asserts a name. A name set in Conduit or asserted earlier by a provider is kept. * **Groups and role claims aren't used.** A sign-in doesn't place anyone in a group or set their role. To manage group membership and roles from your directory, push them with [SCIM](/docs/conduit/configure/scim) and give a group a [role](/docs/conduit/configure/access-control#roles-from-groups). The ID token's nonce is verified against the flow state (replay protection), and raw tokens are never logged. To see exactly which claims your provider asserted, set `CONDUIT_LOG_LEVEL=debug` and sign in; the verified claims are logged at debug level. Signing in through SSO is what provisions an account: the first sign-in creates the user, later sign-ins follow email changes from the directory. To provision users *before* they sign in — and deprovision them when they leave — pair SSO with [SCIM](/docs/conduit/configure/scim). ## Instance sign-in vs. workspace SSO Providers exist at two scopes, and the difference is who manages them and how users reach them: * **Instance providers** (**Settings → Sign-in**, instance admins) appear as buttons on the login page. In a single-workspace deployment they are the only providers, and the same page carries the workspace settings that apply there: each provider's **Domains** action (below), the **Domains** list, and **Ask people to sign in again**. * **Workspace providers** (**Settings → Sign-in**, workspace admins) belong to one workspace and never appear as buttons on the main login page. People reach them through the workspace's own login page, or by **home-realm discovery**: a user types their email address, and its domain routes them to their workspace's provider. Signing in through a workspace provider also adds people to that workspace automatically. Disabling or deleting any identity provider, the workspace's own or the instance's, signs out everyone who signed in through it, in the web app and in MCP clients alike, people in other workspaces included, so turning off a compromised provider takes effect at once. Turning it back on revives none of those sign-ins. Nobody can disable or delete the provider they're signed in through; sign in another way first. ### The main login page In a multi-workspace deployment the main login page shows the instance providers' buttons, then an email field with **Continue with email**. An email at a domain a workspace has verified, with a provider chosen for it, goes straight to that provider with the address already filled in, and the session starts in that workspace. Any other email reveals the password field. With password sign-in off, the page says so and points at the provider buttons instead. A routed email is offered the password field only when its provider can't be reached. The lookup behind **Continue with email** only says whether a domain routes, never whether an account exists, and it's throttled per IP. A single-workspace deployment's login page asks for the email and password together. Because a routed email gets no password field while its provider works, keep the break-glass account (`CONDUIT_ADMIN_EMAIL`) at an address no workspace verifies, such as the default `admin@localhost`. Once **Continue with email** reveals the password field, the page shows only the email and password, with **Sign in another way** at the top right of the sign-in box to bring back everything else. The login page also leads with the method a browser last signed in with: the email and password fields, that one provider's button, or the email step for a workspace's provider. **Sign in another way** shows the full page and forgets the choice. The browser remembers only the method, never the email address or the workspace, since anyone at the machine can see the login page. ### The workspace login page In a multi-workspace deployment, a workspace has a login page at `/login/`, where `` is the same id as in the workspace's MCP URL (`/mcp/`). It shows the workspace's name, logo and the sign-in methods it accepts (see below): its own providers, the instance providers it accepts, then email and password fields when it accepts them. It doesn't ask for the email first, since it already knows the workspace. **Sign in another way** at the top right of the sign-in box leads to the main login page. When the workspace has exactly one provider of its own, the page goes straight to it; its other methods are there when the person comes back. A workspace with no provider of its own does the same for an instance provider when that is the only method it accepts. It does this once per browser tab: signing out, or coming back after the provider refused the sign-in, shows the page in that tab instead of starting the provider again, and a new tab starts it again. A refused sign-in's error page links back to the workspace login page. A workspace left with nothing to offer says so, and its owners sign in another way to fix it. Its address is under **Login page** on **Settings → Sign-in**. Share it with your team: it works before any domain is verified. A sign-in from it starts the session in that workspace for anyone who belongs to it, and someone already signed in who opens it goes on in that workspace. The page is public: anyone with the workspace's id, which is in its MCP URL, can see the workspace's name, logo and the sign-in methods it accepts. The id can't be guessed, and an unknown one answers as if no such workspace existed. When an MCP client or the CLI asks you to approve it, the approval screen names any workspace that doesn't accept how your browser signed in, since the client would be refused there too, and offers to sign in to it again first. Home-realm discovery runs on the workspace's **email domains**, under **Domains** on the same page. Add a domain, then prove your organization owns it: Conduit issues a DNS challenge, you publish it as a TXT record — ``` conduit-domain-verification= ``` — and check it with the domain's **Verify** button. Which provider a domain signs in with is set in the provider's dialog, under **Domains**; each provider lists its domains, marked verified or not, and clicking an unverified one opens its verification. A new domain starts with the workspace's provider when it has exactly one. A domain sends sign-ins to its provider once it is verified and the provider is enabled. Verification is what stops one workspace from capturing another organization's sign-ins by claiming a domain it doesn't own: a verified domain belongs to one workspace across the instance. Public email services such as gmail.com can't be added. Removing a provider keeps its domains, verified, in the workspace. Keep the TXT record published after verifying. Verification doesn't expire, and deleting the record changes nothing on its own, but the record is what keeps the domain yours: if another workspace later publishes its own record on the domain while yours is gone, verifying moves the domain to that workspace. Control of the domain's DNS is what verification rests on, so whoever controls it decides. Your workspace keeps the domain, unverified; the audit log records the change, and its owners and admins are emailed when email is configured. ### Who joins through a workspace provider Signing in through a workspace provider adds someone to the workspace only when the provider confirms their email (`email_verified`) and it is at one of the provider's **Domains**, the domains that sign in with that provider (one added there joins the workspace's Domains, unverified). The domains don't need to be verified for this, so joining works as soon as you add them, without a DNS record, and you can list a partner's domain you don't own. Public email services such as gmail.com can't be listed, so a provider like Google lets in only the accounts at your domains, not anyone with a Google account. At a domain you've verified, the person joins as they sign in. At one you haven't, they're asked first: the sign-in ends on a **Join Acme?** page, and they join only if they choose to. Any workspace can list a domain without proving it owns it, so this keeps a workspace from adding someone without their knowing; verifying the domain skips the question. The question stays open for 7 days, and a later sign-in asks again. A provider that doesn't send `email_verified` at all, such as Microsoft Entra ID, is trusted only for the domains you've verified: its people join once their domain is verified. Anyone else the provider authenticates gets in only with an account it already signs in: one SCIM provisioned, or one that signed in through it before. Everyone else is refused before Conduit creates an account for them, and the refusal appears in the workspace's audit log as a failed sign-in with the reason: an address outside the provider's domains, or one the provider didn't confirm. Someone outside those domains, such as a contractor, joins through SCIM or through their domain listed on the provider. Removing a domain changes who joins from then on; people who joined through it stay until you remove them. A workspace provider needs at least one domain, when you add it and after: Conduit refuses a change that would leave it with none. The provider dialog checks what the provider publishes about itself (the `claims_supported` list in its OIDC discovery document). If the provider lists its claims without `email_verified`, it never confirms addresses, and the dialog warns that only people at a domain you've verified join through it. If it publishes no list, the dialog notes the same may apply. ### Which sign-in methods a workspace accepts **Settings → Sign-in → Sign-in methods** lists every way to sign in to the workspace, each with a switch (the API is `GetWorkspaceSignInPolicy`, `UpdateWorkspaceSignInPolicy`, and `UpdateWorkspaceInstanceProvider` for one instance provider): * **The workspace's own providers** are accepted while they're enabled. * **The instance's providers and email and password** are switched on or off for the workspace. A workspace with all of them on accepts an instance provider added later too; once any is off, a new instance provider starts off there. Email and password can only be on while the instance offers password sign-in. * **Ask people to sign in again** makes a sign-in older than 1, 7 or 30 days stop letting people into the workspace. The workspace login page offers exactly the methods that are on. While a workspace accepts every method (password and every instance provider, none restricted to its domains), it also admits a sign-in through another workspace's provider, and a session that recorded no sign-in method. Once it narrows anything, those are refused, and the person signs in again one of the ways it accepts. An instance provider's menu opens its **Domains** and an **Only allow accounts from these domains** setting: with the setting on, someone signing in through it gets into this workspace only if their Conduit account's email is confirmed and at one of its domains. The instance provider still signs them in to Conduit; the workspace just doesn't admit them. The email and whether it's confirmed are the account's, as recorded when the account was created (a directory sync can update the email): confirmed when the provider said so, or said nothing about it, since an instance provider is the instance's to trust. The domain matches the email as it's written, so an internationalized domain written in Unicode doesn't match the same domain listed in its ASCII (punycode) form. Owners are exempt, so the setting can't lock them out, and instance admins are never refused. Those domains join the workspace's **Domains**, and once one is verified, people who enter an address at it on the main login page go straight to that instance provider and land in this workspace. This doesn't add anyone to the workspace: people still join through invites, SCIM, or signing in through one of the workspace's own providers at its domains. A person whose session doesn't meet the workspace's policy is refused there: the web app shows **Sign in to Acme again**, which leads to the workspace login page, and an MCP client is sent to authorize again (a 401), where the approval screen offers the fresh sign-in. It applies to sessions already open. A session that recorded no sign-in method is admitted only while the workspace accepts every method. Owners can always sign in with a password or an instance provider, so a broken provider can't lock the workspace out, and instance admins are never refused. A workspace always keeps a way in. Conduit refuses a change that would leave it accepting no sign-in method, leave a provider that admits only its domains with none, or refuse the admin making it. That covers switching off or removing the workspace's own providers and removing domains as well as the switches on this page. A stricter **Ask people to sign in again** is always allowed; it may ask you to sign in again too. Only the instance can take away the last method, by no longer offering the ones the workspace accepts. Then the workspace login page says the workspace has no sign-in methods set up, and **Settings → Sign-in** warns that only owners and instance admins can sign in until an admin switches another one on. An instance provider the instance turns off stays in the list, marked as such, while the workspace has a choice about it; its switch still changes that choice. ## The sign-in policy Alongside the providers sits the instance-wide sign-in policy — which methods exist at all. Instance admins manage it through the API or the `get_auth_policy` and `update_auth_policy` built-in admin tools: * **Password sign-in** can be disabled entirely once SSO works, leaving your identity provider as the only way in. There is deliberately no open self-service sign-up, email verification, or password-reset flow to disable alongside it: accounts come from the first-run wizard, SSO, SCIM, or an [invite](/docs/conduit/configure/access-control#invites) (which creates a password account only while password sign-in is on), and password recovery for the operator is the break-glass credential below. Turning password sign-in off signs out everyone who signed in by password, in the web app and in MCP clients, except instance admins (the break-glass credential is a password sign-in); turning it back on revives none of those sign-ins. * **Workspace creation** can be limited to instance admins, and **personal workspaces** (a workspace of one's own for each new user, in multi-workspace deployments) can be switched off. ### Break-glass access If SSO misconfiguration ever locks everyone out, the bootstrap credential is the recovery path: with both `CONDUIT_ADMIN_EMAIL` and `CONDUIT_ADMIN_PASSWORD` set in the environment, the bootstrap admin can always sign in with them, without touching the stored password. The login page keeps its email and password fields visible while the credential is configured, even with password sign-in disabled by policy, so there is always somewhere to type it — and the instance Sign-in settings show a warning in that state, reminding you to restart without the variables once recovery is done. See the [configuration reference](/docs/conduit/configure/reference#bootstrap-admin). Leave both unset in normal operation. Each user can own one workspace. Workspaces they join without owning them do not count toward that limit, and instance admins are not limited. ## How SSO threads through MCP and the CLI Nothing extra to configure — but useful to understand when reviewing the flows: * An **AI client** connecting to `/mcp` goes through Conduit's own [OAuth flow](/docs/conduit/use/mcp-authorization): the browser window it opens is the same login page, SSO included. Your provider authenticates the human mid-flow; the token the client ends up holding is issued by Conduit, and your provider's tokens are never given to the client. * The **Conduit CLI**'s `conduit login` shows a short code to approve in the browser — again the same login page and providers. The CLI setup UI is feature-flagged and hidden by default. Every sign-in — and every failure, with its reason — is recorded in the audit log and exported through the configured telemetry exporters. # Telemetry Export Source: https://pipedream.com/docs/conduit/configure/telemetry Send Conduit's traces, events, and metrics to OpenTelemetry collectors — for the whole instance, and per workspace. Conduit emits OpenTelemetry signals for everything it does: a **trace** for every request and tool call, an **event** (an OTel log record) for every sign-in, configuration change, provisioning action and tool call, the application's own **logs**, and aggregate **metrics**. Exporters deliver them over OTLP to any backend that ingests it — an OpenTelemetry Collector, Datadog, Honeycomb, Grafana, HyperDX, and the rest. Exporters exist at two levels, and they answer different questions. | | Instance exporters | Workspace exporters | | - | - | - | | Who configures them | Instance administrators, in **Settings → Instance → Telemetry** | Workspace administrators, in **Settings → Telemetry** | | What they receive | Everything: every workspace's activity, instance administration, application logs, and metrics | The traces and events of activity **within that workspace** only | | Protocols | gRPC, HTTP/Protobuf, HTTP/JSON | HTTP/Protobuf, HTTP/JSON | | Endpoints | An `http` or `https` URL; the scheme picks plaintext or TLS for every protocol, gRPC included, so plaintext in-cluster collectors work | `https` endpoints only, reached through the hardened outbound client | Exporters hot-reload: saving takes effect on every replica within moments, no restart needed. ## What telemetry contains Telemetry describes what Conduit did, not what anyone's tools said. * **People are identified by id.** Spans and events carry `user.id`, never an email address or a display name. The audit log is where the actor's email lives, and each audit entry carries `actor_user_id`, `trace_id` and `span_id` to join it to telemetry. Client IP (`client.address`) and user agent (`user_agent.original`, capped at 256 bytes) remain, as the source signal for security events. * **Names a workspace gives its own settings** — its connectors, policies, groups, identity providers, SCIM tokens, API clients and provisioning rules — are sent only to that workspace's exporters. So are tool and prompt names, which begin with their connector's name. Instance exporters get ids instead (`connector.id`, `policy.id`, ...), since they are the operator's backend, and metrics label a connector by its kind and row id (`connector_kind`, `connector_id`). Builtin and Pipedream connector and tool names are not a workspace's, and go to every exporter. Names of instance-level settings (instance identity providers) go to instance exporters. * **Verified domains go to every exporter**, instance exporters included: the event recording that a workspace verified a domain (or lost its verification) carries the domain. Any other domain change — adding a domain not yet verified, binding or removing one — carries it only to the workspace's exporters. Connector hosts (`server.address` on outbound spans) also go to every exporter. * **Never included:** tool call arguments and results, prompt arguments, completion input, resource URIs (a resource read carries only the URI's scheme), the bodies of upstream requests and responses, and credentials. Connector URLs appear as `scheme://host` only, since a URL can carry a key in its path or query. * **Errors from users' calls** — a tool call, prompt fetch, resource read or completion that failed — carry a stable `error.type` (listed below) plus the HTTP status and JSON-RPC code, never the upstream's message, which can repeat what the user sent. The user who made the call always sees the full message in their client. For a failed tool call, the message is also kept in Conduit's own database, and administrators see it among the recent tool calls on the **Usage** page. For a failed prompt fetch or resource read, the first 512 bytes of the message are also kept in Conduit's database (a resource read's URI too), though no page shows them yet. A failed completion's message isn't kept. * **Errors from connection-level requests** — listing a connector's tools, the MCP handshake, token exchanges — keep the first 256 bytes of the upstream's message in application logs and span status, because that text describes the integration (a revoked credential, a wrong URL) and is what an operator needs to fix it. Workspace exporters never receive it. * **Bounded text:** every string attribute is valid UTF-8 and capped — 1 KiB on events and application logs, 16 KiB for stack traces, and 16,384 characters for any span attribute — so a single malformed or oversized value can never cause a collector to reject a whole batch. In a single-workspace deployment the one workspace is the instance, so the names that would go only to a workspace's exporters go to the instance exporters, which are its own, and the gateway metrics also carry the connector's name in a `connector` label. These rules are the same for every deployment, whether you run Conduit yourself or use Conduit Cloud; there is no setting that loosens them. The one difference is where a workspace's names are delivered, and it follows from the deployment's shape, not a choice: in a single-workspace deployment the instance exporters are the workspace's own, so they receive its names. To strip more before data reaches your backend (for example, hashing IP addresses), use the OpenTelemetry Collector's redaction processor. ### Where each kind of data lives | Data | Telemetry export | Audit log | Usage | | - | - | - | - | | Who acted | `user.id` | Email, plus `actor_user_id` | User id (email shown at read time) | | Client IP and user agent | Yes (user agent capped at 256 bytes) | IP on every entry; user agent on sign-ins | No | | Names of a workspace's connectors, policies, groups, identity providers, and its tool and prompt names | Ids on instance exporters; names too on the workspace's own | Yes, in each entry's details | Connector and tool names, visible to admins | | Tool arguments and results | No | No | No | | Error message of a failed tool call | No — an error class and codes | No | Up to 512 bytes, visible to admins | | Error message of a failed prompt fetch or resource read | No — an error class and codes | No | Up to 512 bytes, not shown yet | | Error message of a failed completion | No — an error class and codes | No | No | | Credentials | No | No | No | | Kept for | Your backend's retention | Indefinitely | Raw rows 30 days, aggregates 365 days (see [reference](/docs/conduit/configure/reference)) | ### Error types on MCP events The `conduit.mcp.tool.called`, `conduit.mcp.prompt.fetched` and `conduit.mcp.resource.read` events carry `error.type` when the call failed: | `error.type` | Meaning | | - | - | | `auth_required` | The user hasn't connected their account to the connector, or the connector rejected the saved one; they were sent a link to connect | | `connect_placeholder` | The user called a connector's `authenticate` tool, which answers with that link | | `upstream_unauthorized` | The connector refused the credential and the user can't replace it themselves | | `credential_unavailable` | Conduit couldn't obtain a credential it's responsible for (for example, a token endpoint was unreachable) | | `upstream_http_4xx`, `upstream_http_5xx` | The connector answered with an HTTP error | | `upstream_rpc_error` | The connector answered with a JSON-RPC error | | `upstream_session_not_found` | The connector no longer knew the MCP session | | `tool_error` | The tool ran and reported a failure in its result | | `denied_policy` | Access policy doesn't allow the call | | `denied_oauth_scope` | The OAuth grant of the client the user called through doesn't cover the call | | `unknown_connector`, `unknown_tool`, `ambiguous_tool` | The name called doesn't route to exactly one tool | | `builtin_unavailable` | Conduit's own tools weren't available to answer the call | | `not_found`, `ambiguous_resource`, `resource_resolution_incomplete` | Conduit couldn't resolve the resource to exactly one connector | | `blocked` | Conduit's outbound guard refused the address (for example, a private network address) | | `response_too_large` | The connector's answer exceeded Conduit's size limit | | `timeout`, `canceled` | The call ran out of time, or the client abandoned it | | `transport` | The connection to the connector failed (DNS, TCP, TLS) | | `gateway_error` | Any other failure inside Conduit | Every audit entry carries `actor_user_id`, `trace_id` and `span_id`, so a span or event in your backend leads to the audit entry behind it without the telemetry itself holding an email address. ## Instance exporters An instance exporter is the operator's view of the deployment. It receives every signal the process produces — less the names that belong to a workspace (see [What telemetry contains](#what-telemetry-contains)), which it gets as ids — so it is the right place for the backend your platform team watches. Add one in **Settings → Instance → Telemetry** with a name, a protocol, an endpoint, and optional headers (typically an API key for a hosted backend). Header values are write-only: once saved they are never shown again, and editing an exporter without re-entering a value keeps the stored one — unless the edit changes the exporter's endpoint or protocol, which drops the stored headers, so re-enter them for the new collector. The **service name** field sets the `service.name` resource attribute on everything sent to instance exporters (default `conduit`); the rest of the deployment's resource comes from the standard `OTEL_RESOURCE_ATTRIBUTES` variable. Exporters can also come from the environment. When the standard `OTEL_EXPORTER_OTLP_*` variables are set, Conduit configures an exporter from them at startup and shows it, read-only, alongside the ones configured in the UI. This is the recommended way to reach a node-local agent or sidecar, whose address belongs to the deployment rather than to the database: | Deployment | `OTEL_EXPORTER_OTLP_ENDPOINT` | Notes | | - | - | - | | Kubernetes node-local agent | `http://$(HOST_IP):4317` | `HOST_IP` from the downward API (`status.hostIP`); set `OTEL_EXPORTER_OTLP_PROTOCOL=grpc` | | Sidecar or host agent | `http://localhost:4317` | loopback, plaintext | | In-cluster gateway | `http://otel-collector:4318` | stable DNS | | Hosted OTLP (SaaS) | `https://otlp.vendor.example` | TLS via `https`; auth via `OTEL_EXPORTER_OTLP_HEADERS` from a secret | Conduit honors the standard variables directly: the generic and per-signal endpoint variables, `OTEL_EXPORTER_OTLP_PROTOCOL` (default `http/protobuf`), `OTEL_EXPORTER_OTLP_HEADERS`, and the TLS, timeout, and compression variables. See the [OTLP exporter specification](https://opentelemetry.io/docs/specs/otel/protocol/exporter/). The exporter's display name comes from `CONDUIT_OTEL_EXPORTER_NAME`. ## Workspace exporters A workspace exporter is a tenant's view of their own activity. In a multi-workspace deployment it lets each workspace's team send their telemetry to their own backend without the operator forwarding and filtering it for them. A workspace's exporters receive: * **Traces** of every request made within the workspace: the MCP traffic and tool calls of its users (including the upstream calls those make), its administrators' settings changes, and SCIM provisioning pushed by its identity provider. * **Events** produced by those requests — the same records that appear in the workspace's audit log, plus the tool-call and policy-denial events that don't. They never receive activity from another workspace, or instance administration — a change an instance administrator makes from the instance console (a rename, someone removed there) is the operator's activity, not the workspace's, and an instance administration tool invoked over the workspace's MCP endpoint sends only the tool call itself, not what the tool did. Metrics are aggregates over the whole instance with no per-workspace dimension, and Conduit's own application logs are the operator's diagnostics; both go to instance exporters only. A span's failure detail is redacted for a workspace: the error status and the stable error type stay, while the error message and stack trace — which can name internal hosts and paths — are dropped. In the other direction, events about the workspace's own settings carry their names (`policy.name`, `group.name`, `idp.name`, `scim_token.label`, `api_client.name`) on the workspace's copy only. **Resource attributes.** Everything sent to a workspace's exporters carries the OpenTelemetry resource attributes the workspace sets in **Settings → Telemetry** — for example `service.name` or `deployment.environment` — and `service.name` defaults to `conduit` when the workspace sets none. The deployment's own resource, including anything in `OTEL_RESOURCE_ATTRIBUTES`, describes the operator's installation and goes to instance exporters only. Every span and log record a workspace exporter receives carries the attribute `conduit.workspace.id` naming the workspace. Instance exporters see the same attribute on workspace-scoped signals, which makes it the key to filter an instance backend by tenant. Workspace administrators add exporters in **Settings → Telemetry** (workspace settings), with the same name, protocol, endpoint, and write-only headers as instance exporters. Renaming keeps stored headers, while changing the protocol or endpoint clears them so credentials are never carried to a different collector. Workspace exporters have two restrictions that follow from the endpoint being configured by a tenant rather than the operator: * The endpoint must be an `https` URL (no plaintext, no private or internal address), using HTTP/Protobuf or HTTP/JSON. Traces are sent to `/v1/traces` and events to `/v1/logs` under the endpoint you give, so either the base URL or a signal path works. A workspace may have one exporter. * Export requests go through the same hardened outbound client as connectors: a hostname that resolves to a private or internal address is refused unless the operator has listed it in `CONDUIT_SAFEHTTP_ALLOWED_PRIVATE_HOSTS`. An operator who wants workspaces to share an in-cluster collector lists its hostname there; see [Network Access](/docs/conduit/deploy/network). A workspace exporter that cannot be reached backs up only its own queue: it never delays a tool call, and never affects the instance's exporters or another workspace's. Conduit creates a workspace's export pipeline when that workspace first produces telemetry. Each replica keeps the 64 most recently used workspace pipelines active; activating another flushes and recycles the least recently used pipeline without removing its configuration. Sustained cache churn produces a warning in the instance log, while occasional eviction of a cold pipeline is silent. In a single-workspace deployment the one workspace is the instance, so this page is not shown; configure telemetry on the instance page, where the deployment's resource attributes apply. ## Where each signal lands | Signal | Instance exporters | Workspace exporters | | - | - | - | | Traces | All | Requests within the workspace | | Events | All | Requests within the workspace | | Application logs | All | — | | Metrics | All (also on the [Prometheus endpoint](/docs/conduit/deploy/monitoring)) | — | Traces go to `/v1/traces`, logs and events to `/v1/logs`, and metrics to `/v1/metrics`. Configure the endpoint as the base URL or with any of those paths; all work. ## When an export fails A failed export is reported in Conduit's console log on a line starting with `otel:`, carrying what the collector said (a timeout, a refused connection, an unknown service). A failure that recurs on every batch — a collector that is down — is reported once, then once a minute with the number of repeats since the previous line, for as long as it lasts. A collector that does not serve one of the signals is handled separately. Some backends accept traces but have no receiver for logs or metrics; over gRPC such a collector answers `Unimplemented`, and the batch cannot be delivered by retrying. Conduit reports that once, naming the exporter and the signal, then stops sending that signal to that exporter and probes it with one batch every five minutes. When the collector starts serving the signal — after you add the receiver and restart it — Conduit reports that it is resuming and sends normally again. The exporter's other signals are unaffected throughout. Over HTTP a collector reports a missing receiver as a plain error, which is logged like any other failure. # Architecture Source: https://pipedream.com/docs/conduit/deploy/architecture What's inside the container, what talks to what, and where the trust boundaries sit. Everything in the diagram below ships in one container image — there are no sidecars, agents, or required external services. The same image runs as a single container or as N replicas behind a load balancer; see [Deployment Tiers](/docs/conduit/deploy/availability) for how to move between those shapes. ![Conduit architecture: untrusted clients reach Conduit through your TLS edge; inside the container an OAuth 2.1 authorization server, a management API, an MCP gateway, and SCIM provisioning share one storage backend; every outbound request leaves through a hardened HTTP client.](https://mintcdn.com/pipedream/XBhBE5eqEzt43-J2/conduit/images/conduit/architecture-light.svg?fit=max\&auto=format\&n=XBhBE5eqEzt43-J2\&q=85\&s=5301cf65b0e63a8f2e27adad534d01bb) ## Clients are untrusted Three kinds of clients reach Conduit, and none of them is trusted: AI clients speaking MCP, browsers using the web UI, and your directory pushing SCIM changes. Every request is authenticated — there is no ambient trust in a connection. On the MCP path the bearer token is re-validated on **every** request, the workspace is resolved from the URL path, and whether the caller is still in it is checked live, so removing someone takes effect immediately rather than when a session expires. The MCP channel runs in both directions: over the same connection, Conduit can send the client a prompt (for example, a link to connect an account) and live tool-list updates when an administrator changes what's available. ## TLS terminates at your edge Conduit requires HTTPS. Most deployments terminate TLS at a reverse proxy or load balancer in front; a single-box install can use Conduit's [built-in TLS](/docs/conduit/deploy/install#tls) instead. If a proxy fronts your instance, tell Conduit which addresses to trust for [client IP attribution](/docs/conduit/configure/reference#client-ip-attribution). Replicas need no session affinity: a server-to-client prompt's answer that reaches another instance is handed to the one that asked. ## Authorization is checked at every layer Inside the container, the surfaces enforce their own checks rather than trusting each other: * The **OAuth 2.1 authorization server** issues tokens bound to their audience, so a token minted for an MCP client cannot drive the management API, and a web session cannot be replayed as an MCP bearer. It is the *only* token issuer: externally issued tokens (your identity provider's JWTs included) are not accepted at the MCP endpoint — the identity provider authenticates the human during sign-in, and Conduit mints what clients hold. See [How MCP Authorization Works](/docs/conduit/use/mcp-authorization). * Every **management API** call is checked against the caller's role and workspace. * The **policy engine** computes each user's effective tool set (allow policies ∩ the user's enabled connectors) and enforces it on every tool listing *and* every call — a tool hidden from the list cannot be invoked by name. See [Access Control](/docs/conduit/configure/access-control). * **SCIM provisioning** writes are capped at workspace-admin authority: a directory credential can never evict a workspace owner or touch an instance administrator. See [SCIM provisioning](/docs/conduit/configure/scim). Every tool call, sign-in, and admin change lands in the audit log, with OpenTelemetry traces and usage dashboards built in. ## One way out Every HTTP request Conduit makes — tool calls, identity-provider fetches, email via API — leaves through a single hardened client that blocks requests to private and internal addresses, never follows redirects, and requires HTTPS. [Network Access](/docs/conduit/deploy/network) lists every host Conduit connects to and how that client is hardened. Upstream calls use Conduit's own credentials for each connector — the client's bearer token is never forwarded to an upstream service. Where those credentials come from, and when the upstream sees the calling user's identity instead of a shared one, is covered in [Connectors](/docs/conduit/configure/connectors#authentication-to-the-upstream). ## State State lives in one place: the embedded database on a volume (the default), or your PostgreSQL 14+ when you point `CONDUIT_DATABASE_URL` at it. Sessions and tokens are stored as one-way hashes, and credentials Conduit must present upstream are encrypted at rest. Restarts are cheap by design — nothing a restart loses is needed to keep sessions or connections alive. When running multiple replicas, they coordinate through the database and a cluster event bus (PostgreSQL `NOTIFY`) that propagates policy and configuration changes, so a change made on one replica takes effect on all of them within moments. # Deployment Tiers Source: https://pipedream.com/docs/conduit/deploy/availability From a single container to active-active high availability — and how to move between them. Conduit deployments come in three tiers. Each is a strict upgrade you can adopt when you need it — start simple, and the path up never requires re-architecting what you have. | Tier | Storage | Instances | Availability | | - | - | - | - | | **Embedded** | Built-in database on a volume | Exactly 1 | Recovery in seconds (restart) to minutes (reschedule) | | **PostgreSQL** | Operator-supplied PostgreSQL 14+ | 1 | Same, plus your database's own HA/backup story | | **Active-active** | Operator-supplied PostgreSQL 14+ | N behind a load balancer | Zero-downtime upgrades; instance loss is invisible | ## Embedded (the default) One container, one volume, no external services — the right choice until you have a reason otherwise. The rule that comes with it: **exactly one instance per data directory.** The embedded database is single-writer, and Conduit enforces the rule — an instance that detects another live instance using the same database file stops immediately rather than risk corruption. Never put the data directory on a network filesystem (NFS, EFS, Azure Files). Availability at this tier is fast recovery of the single instance, and it's better than it sounds because restarts are cheap by design: sessions, tokens, and all state live in the database, so a restart signs nobody out, MCP clients reconnect on their own, and migrations apply at boot. In Kubernetes terms: liveness-probe restarts recover in seconds; node failure reschedules in a minute or two (bounded by volume reattach). What it can't give you is zero-downtime upgrades or surviving an AZ outage without a restore — for that, move up a tier. Back up the volume on a schedule and keep the [encryption key](/docs/conduit/deploy/install) separate from those backups; snapshots alone can't decrypt stored secrets. ## PostgreSQL (single replica) Set `CONDUIT_DATABASE_URL` to a `postgres://` URL and Conduit — usage metrics included — runs on your PostgreSQL instead of the embedded database. Requirements: PostgreSQL 14+, `CONDUIT_ENCRYPTION_KEY` set in the environment (there is no data-directory key file to fall back on), and `CONDUIT_ADMIN_PASSWORD` until first-run setup completes. Run this tier when your organization already has managed PostgreSQL (RDS, Cloud SQL, …) and wants Conduit's data under that backup, replication, and point-in-time-recovery regime — or as the stepping stone to active-active. The instance itself is now stateless: no volume, nothing to snapshot except the database and the key you already hold. ### IAM authentication on AWS On RDS or Aurora, Conduit can authenticate with IAM instead of a stored password: set `CONDUIT_DATABASE_AUTH=rds-iam` and leave the password out of the database URL. Each new connection authenticates with a short-lived token minted from the AWS identity the instance runs as — an EKS service-account role (IRSA or Pod Identity), an EC2 instance profile, or AWS credentials in the environment — so there is no database credential to store or rotate. Anything the AWS SDK's default credential chain resolves works, including a cross-account role assumed via the shared AWS config file. The AWS region comes from the same source (set `AWS_REGION` if nothing else provides it). On the AWS side: 1. [Enable IAM database authentication](https://docs.aws.amazon.com/AmazonRDS/latest/UserGuide/UsingWithRDS.IAMDBAuth.Enabling.html) on the RDS instance or Aurora cluster. 2. Create the database user and delegate its authentication to IAM: ```sql theme={null} CREATE USER conduit WITH LOGIN; GRANT rds_iam TO conduit; ``` Granting `rds_iam` makes the user IAM-only — its password (if it has one) stops working. Use a dedicated user rather than granting it to one that anything else logs into with a password. `rds_iam` covers **authentication only** — the user is created with no privileges on any data, so a sign-in that succeeds is still followed by `permission denied for table …` on every query. Conduit creates and migrates its own tables, so the user needs ownership-level access, not just `SELECT`. For a fresh install, make it the owner of Conduit's database (RDS creates the initial database owned by the master user, so run this as that user; if the database doesn't exist yet, `CREATE DATABASE conduit OWNER conduit;` does both steps): ```sql theme={null} ALTER DATABASE conduit OWNER TO conduit; ``` When switching an existing Conduit deployment over from a password user, grant that user's role instead, so the IAM user can read and migrate the tables the old role owns: ```sql theme={null} GRANT old_role TO conduit; ``` Ownership, rather than piecemeal grants, is also what keeps this working on PostgreSQL 15+, where the `public` schema is no longer writable by every user. 3. Allow Conduit's AWS role to connect. The policy resource names the **resource ID** (from the RDS console's Configuration tab), not the database's name or ARN — using the wrong identifier is the most common setup mistake. Which ID depends on what the URL connects to: an RDS instance's `db-…`, an Aurora **cluster's** `cluster-…`, or an RDS Proxy's `prx-…` ([AWS's policy reference](https://docs.aws.amazon.com/AmazonRDS/latest/UserGuide/UsingWithRDS.IAMDBAuth.IAMPolicy.html) has the details and wildcard forms): ```json theme={null} { "Effect": "Allow", "Action": "rds-db:connect", "Resource": "arn:aws:rds-db:us-east-1:123456789012:dbuser:db-ABCDEFGHIJKL/conduit" } ``` 4. Point Conduit at the database with TLS and no password — RDS refuses IAM logins over unencrypted connections, and while `rds-iam` is set any password in the URL is ignored. RDS server certificates chain to AWS-private CAs that no system trust store carries, so `sslmode=verify-full` also needs `sslrootcert` pointing at the [AWS certificate bundle](https://docs.aws.amazon.com/AmazonRDS/latest/UserGuide/UsingWithRDS.SSL.html) (`https://truststore.pki.rds.amazonaws.com/global/global-bundle.pem`), downloaded to somewhere the server can read: ```sh theme={null} CONDUIT_DATABASE_URL='postgres://conduit@mydb.abc123.us-east-1.rds.amazonaws.com:5432/conduit?sslmode=verify-full&sslrootcert=/etc/rds-ca/global-bundle.pem' CONDUIT_DATABASE_AUTH=rds-iam ``` Conduit enforces the TLS half of this at startup: with `rds-iam` set, a URL whose `sslmode` permits an unencrypted connection — `disable`, `allow`, or `prefer`, which is the default when `sslmode` is absent — refuses to boot. The token is a live credential sent as the connection password, and RDS rejects unencrypted IAM logins only after the token has already crossed the wire. `sslmode=require` is accepted but logs a warning, since it encrypts without verifying the server's certificate. On Kubernetes the Helm chart wires all of this — IRSA annotation, env, and the bundle mount; see [IAM authentication to RDS](/docs/conduit/deploy/kubernetes#iam-authentication-to-rds). If sign-in to the database fails with `PAM authentication failed`, check the `rds_iam` grant, the resource ID in the policy, and that the database user in the URL exactly matches the one in the policy (it is case-sensitive). A `no pg_hba.conf entry … SSL off` error is different: the connection isn't using TLS — fix `sslmode` in the URL. A `certificate signed by unknown authority` error means `sslrootcert` is missing or doesn't hold the AWS bundle. Tokens are signed for the exact host and port in the URL, and RDS only accepts tokens signed for its own endpoint names — so the URL must name the real RDS, Aurora, or proxy endpoint. A custom DNS alias (a Route 53 CNAME in front of the database) breaks IAM auth even though it resolves to the same host. RDS Proxy works: the token is minted for the proxy's endpoint, and the policy names the proxy's `prx-…` resource ID. Note that IAM then authenticates the Conduit-to-proxy hop; the proxy signs in to the database behind it with its own Secrets Manager credential unless the proxy is configured for end-to-end IAM authentication. ## Active-active (N replicas) Scale the same PostgreSQL deployment to multiple replicas behind a load balancer. This is a supported, first-class mode — not replicas bolted onto a single-instance design: * **Every instance is equal.** No leader, and no session affinity. Sign-ins, OAuth flows, the setup wizard, and MCP tool calls all survive landing on different replicas mid-flow — including a tool call that asks the user a question in-band (MCP **elicitation** or **sampling**) and a request **cancellation**: the client's answer or cancel may reach any replica, and it is handed to the one holding the call. * **Policy changes propagate live.** When an admin changes access policies, groups, or connectors on one replica, the others invalidate their caches within milliseconds over the database's notification channel — and even if that channel drops, every replica independently re-checks authorization within a few seconds. Stale access is bounded by construction. * **Abuse throttles hold cluster-wide.** The MCP authentication-failure limiter counts in the shared database, so adding replicas doesn't multiply what an attacker gets to try. * **Maintenance runs once.** Rollups, retention sweeps, and upgrade migrations coordinate through database locks; N replicas don't duplicate or race the work. * **Upgrades are zero-downtime.** Rolling-update the deployment; draining instances finish their requests while new ones pass readiness (`/healthz/ready`, which verifies database connectivity) before taking traffic. Point your load balancer's health check at `/healthz/ready` so an instance that loses the database is ejected; keep container liveness on `/healthz` so a database blip doesn't restart-loop the fleet. See [Deploy on Kubernetes](/docs/conduit/deploy/kubernetes) for the manifest changes — they amount to: more replicas, no volume, three secrets. > [!NOTE] > > **What stays per-replica** > > Gateway log messages (`notifications/message`) that a client receives on its > standing notification stream are pushed by the replica that handled the > call. If that stream is open on a different replica, the client misses those > frames for that call. They are informational only. Nothing else depends on > which replica serves a request, so a plain round-robin load balancer — an > AWS ALB, ingress-nginx, a cloud load balancer — needs no sticky-session > configuration. Conduit's availability ceiling at this tier is your PostgreSQL's: pair it with your provider's HA database offering and the failure of any single Conduit instance, node, or zone is absorbed without operator action. # Build from Source Source: https://pipedream.com/docs/conduit/deploy/build-from-source Build the Conduit images yourself — the product image and the two load-test images — including behind a private package registry or artifact proxy. If your environment can't pull from `ghcr.io` — registry policy, a source-audit requirement, or a build network that only reaches your own Artifactory or Nexus — build the same image CI builds. The entire build runs inside Docker: code generation, the frontend, the docs, the Go binary, and the full test suite, so a build that succeeds is a tested build. Git and Docker (with BuildKit) are the only host requirements. ```sh theme={null} git clone --branch vX.Y.Z https://github.com/PipedreamHQ/conduit.git cd conduit docker build -t registry.example.com/conduit/conduit:vX.Y.Z \ --build-arg VERSION=vX.Y.Z . docker push registry.example.com/conduit/conduit:vX.Y.Z ``` Build from a release tag, and pass that tag as `VERSION` — it becomes the version the instance reports (in the app footer, logs, and telemetry), which upgrade tooling and support will ask for. ## Every image the repository builds The command above builds the product image, the Dockerfile's default target and the only image published to `ghcr.io`. The same checkout builds two more for the load-testing harness described in [Load Tests](/docs/conduit/load-tests#run-it-on-your-own-infrastructure). Those are not published: building them here and pushing them to your own registry is how you get them. | Image | What it is | Build | | - | - | - | | `conduit` | The product image. | `docker build --build-arg VERSION=vX.Y.Z .` | | `loadtest-conduit` | The product image plus the load-test CLI as its entrypoint, which seeds the instance at boot — same server binary, same layers. Deploy it in place of `conduit` for a load test ([step 2](/docs/conduit/load-tests#2-deploy-conduit-from-the-load-test-image)). | `docker build --target loadtest-conduit --build-arg VERSION=vX.Y.Z .` | | `loadtest-mcp-server` | The mock MCP upstream the seeded connectors call ([step 1](/docs/conduit/load-tests#1-deploy-the-mock-upstream)). A small Go module of its own under `loadtest/mock-upstream/`. | `docker build loadtest/mock-upstream` | To build and push the load-test images next to the product image: ```sh theme={null} docker build -t registry.example.com/conduit/loadtest-conduit:vX.Y.Z \ --target loadtest-conduit --build-arg VERSION=vX.Y.Z . docker build -t registry.example.com/conduit/loadtest-mcp-server:vX.Y.Z \ loadtest/mock-upstream docker push registry.example.com/conduit/loadtest-conduit:vX.Y.Z docker push registry.example.com/conduit/loadtest-mcp-server:vX.Y.Z ``` Build them from the same tag as the product image you are measuring. ## What the build downloads Every host the build downloads from, and the build arg that points it at your own registry instead: | Download | Default host | Build arg | | - | - | - | | Base images (`golang`, `node`, `alpine`) | Docker Hub | `GOLANG_IMAGE`, `NODE_IMAGE`, `ALPINE_IMAGE` — full image references | | Go modules | `proxy.golang.org` | `GOPROXY` | | npm packages | `registry.npmjs.org` | `NPM_CONFIG_REGISTRY` | | Alpine packages (`apk`) | `dl-cdn.alpinelinux.org` | `ALPINE_MIRROR` — must serve the standard path layout (`/alpine/v3.24/main`), which a pull-through remote of dl-cdn does | | The Mintlify client that renders the embedded docs: one archive, about 70 MB, at the version the repository pins (`scripts/mint/client-version`) | `releases.mintlify.com` | `MINT_RELEASES_BASE` — see [Mirror the docs downloads](#mirror-the-docs-downloads) | | The icons the docs pages use, copied into the image | `d3gk2c5xim1je2.cloudfront.net` | `DOCS_ICONS_BASE` — see [Mirror the docs downloads](#mirror-the-docs-downloads) | The mock upstream's Dockerfile honors the same `GOLANG_IMAGE`, `ALPINE_IMAGE` and `GOPROXY` args; it installs no npm or apk packages, so the others don't apply to it. The docs build makes a few more requests that no build arg repoints: | Request | Host | If the build can't reach it | | - | - | - | | The Mintlify CLI's own download of the pinned client. Its address is built in, so it ignores `MINT_RELEASES_BASE` | `releases.mintlify.com` | With `MINT_RELEASES_BASE` set, nothing: the CLI renders with the client the build installed from your mirror. Without it, the build fails. Refuse these connections rather than drop them, or the CLI waits for each one to time out | | The Mintlify CLI's internet check | `captive.apple.com`, `icanhazip.com`, `api.ipify.org`, and DNS queries sent directly to OpenDNS (`208.67.222.222`, `208.67.220.220`, `208.67.222.220`, `208.67.220.222`) and Google (`216.239.32.10`) name servers | With `MINT_RELEASES_BASE` set, nothing. Without it, the build fails if no client is cached yet, as on a fresh builder | | Web fonts Mintlify's CSS declares | `cdn.jsdelivr.net`, `fonts.cdnfonts.com` | The build leaves them out and notes it in its log. No docs page uses them | Because the assets are copied into the image, the docs a running instance serves load nothing from these hosts or any other external host. The Mintlify CLI's usage telemetry is turned off in the build (`DO_NOT_TRACK=1`), so the build doesn't contact Mintlify's analytics service. Nothing else is contacted. Code generation runs locally inside the build, and dependency integrity comes from the hashes committed in `go.sum` and the npm lockfiles — no external checksum service is consulted, and a mirror can't substitute a package unnoticed. npm re-points lockfile URLs from the default registry to the one you configure. The Mintlify client archive from `MINT_RELEASES_BASE` is checked against the SHA-256 the repository pins (`scripts/mint/client-sha256`). A fully repointed build looks like: ```sh theme={null} docker build -t registry.example.com/conduit/conduit:vX.Y.Z \ --build-arg VERSION=vX.Y.Z \ --build-arg GOLANG_IMAGE=registry.example.com/docker-remote/golang:1.27-alpine \ --build-arg NODE_IMAGE=registry.example.com/docker-remote/node:24-alpine \ --build-arg ALPINE_IMAGE=registry.example.com/docker-remote/alpine:3.24 \ --build-arg GOPROXY=https://artifactory.example.com/api/go/go-remote \ --build-arg NPM_CONFIG_REGISTRY=https://artifactory.example.com/api/npm/npm-remote/ \ --build-arg ALPINE_MIRROR=https://artifactory.example.com/artifactory/alpine-remote \ --build-arg MINT_RELEASES_BASE=https://artifactory.example.com/artifactory/mintlify-releases-remote \ --build-arg DOCS_ICONS_BASE=https://artifactory.example.com/artifactory/mintlify-icons-remote \ . ``` Match the base image versions to the ones in the repository's `Dockerfile` for the tag you're building — they're part of the tested build. If your network uses a forward proxy rather than registry mirrors, Docker's predefined `http_proxy` / `https_proxy` / `no_proxy` build args cover the Go, npm and Alpine package downloads with no per-ecosystem configuration. The docs build's downloads and the Mintlify CLI's requests go directly, not through the proxy: mirror the client and icons (below), or allow their hosts through your firewall. ### Mirror the docs downloads Create a generic remote repository in your registry for each of the two Mintlify hosts, over `https`, with default settings, and pass each remote's URL as its build arg. The build appends the host's own path to the base: | Build arg | A remote of | What the build fetches | | - | - | - | | `MINT_RELEASES_BASE` | `https://releases.mintlify.com` | `/mint-.tar.gz`, the version in `scripts/mint/client-version` | | `DOCS_ICONS_BASE` | `https://d3gk2c5xim1je2.cloudfront.net` | `/` for each icon the docs use, such as `/fontawesome/v7.2.0/regular/rocket.svg` | Both hosts are public S3 buckets behind CloudFront: anonymous `GET`, immutable paths. A path that doesn't exist answers **403**, not 404 — that's how a public S3 bucket reports a missing key, not an authentication problem. The mirrors must: * **Be named by hostname, not an IP address** (`DOCS_ICONS_BASE`). The icon download reaches a private address only for a named host. * **Serve the icons directly** (`DOCS_ICONS_BASE`). The icon download doesn't follow redirects, so a repository that redirects to cloud storage (in Artifactory, direct cloud storage download) can't serve them. The client download follows redirects. A build using the mirrors logs `seed-client: installed client `, and for each docs edition a line naming the client it rendered with. A mirror that refuses the build's credentials, redirects, or can't be reached fails the build with its error. An icon the mirror doesn't have is a warning that lists it; the build continues, and that icon shows blank. #### If your registry needs credentials Don't put credentials in `MINT_RELEASES_BASE` or `DOCS_ICONS_BASE`: build args are recorded in the image's history, so the build refuses a base URL that carries them. Put them in a [netrc](https://everything.curl.dev/usingcurl/netrc.html) file instead, and pass it as a BuildKit secret, which is mounted only for the two steps that download from the mirrors and never written to a layer or the build cache: ```text artifactory.netrc theme={null} machine artifactory.example.com login build-user password ``` ```sh theme={null} docker build --secret id=netrc,src=artifactory.netrc … ``` Only `machine` entries are read, and each is sent only to the host it names, only over `https`, and not along a redirect to another host; a `default` entry is ignored, so credentials never reach Mintlify's public hosts. A mirror that answers **401** means the credentials are missing or refused. In Artifactory, a **403** can also mean credentials without read access to the repository. `make docs` reads the same file from the `NETRC` environment variable. ## Running your build Point your deployment at the pushed image: `image.repository` / `image.tag` with the Helm chart (see [Private registries](/docs/conduit/deploy/kubernetes#private-registries-and-air-gapped-installs)), the `image:` line in raw manifests, or the image in your `docker run` command. Upgrades are the same loop — check out the new tag, build, push, roll — reading the [changelog](/docs/conduit/changelog)'s **Upgrade notes** first, as with any upgrade. The load-test images go wherever [Load Tests](/docs/conduit/load-tests#run-it-on-your-own-infrastructure) says to deploy them, by the names you pushed them under. What the running instance downloads is a separate, deliberately short list — see [Network Access](/docs/conduit/deploy/network). # Security Hardening Source: https://pipedream.com/docs/conduit/deploy/hardening Exposure model, built-in rate limits and request caps, and what belongs at your edge. This page is written for the security review of a Conduit deployment: what the gateway enforces itself, the exact limits it ships with, and the short list of protections that belong in front of it. The [architecture page](/docs/conduit/deploy/architecture) covers the trust boundaries; [Network Access](/docs/conduit/deploy/network) covers the outbound side. ## Exposure model Nothing in Conduit requires public reachability. It needs to be reachable by exactly three parties — its users' browsers, their AI clients, and (if used) the identity provider pushing [SCIM](/docs/conduit/configure/scim) changes — so a deployment on a private network or behind a VPN is fully supported, and for an internal tool it is the right default. Identity-provider sign-in works from a private network too: the OIDC flow is browser redirects, so only the user's browser needs to reach the provider. Where Conduit is exposed further, put it behind your normal edge — the TLS-terminating load balancer you already run, with a WAF if your policy calls for one. Conduit requires HTTPS in any case, and when a proxy fronts it, set `CONDUIT_TRUSTED_PROXIES` so audit records and per-IP limits attribute requests to real clients rather than the proxy — see [client IP attribution](/docs/conduit/configure/reference#client-ip-attribution). ## What Conduit rate-limits itself Every surface where an unauthenticated caller could guess, flood, or probe is throttled per client IP, with no configuration: * **Sign-in** and the identity-provider redirect routes. Password failures are counted per account and per IP; on the PostgreSQL tier those counters are shared across replicas, while successful sign-ins do not write a counter. * **Every OAuth endpoint** — registration, authorize, consent, token, and the device-approval flow. * **Failed MCP authentication** and **failed SCIM authentication** — requests presenting invalid bearers. Valid traffic is unaffected; a guesser is slowed to a crawl. On the PostgreSQL tier these two counters are shared across replicas, so running N replicas does not multiply the rate a credential-guesser gets. * **CSP violation reports** and the **CLI download** routes. The other limiters are per-replica by design (≈N× the single-instance rate cluster-wide). Throttled MCP auth failures are visible as the `rate_limited` reason in the [auth-failure metrics](/docs/conduit/deploy/monitoring#gateway). Conduit does **not** impose sustained throughput quotas on authenticated tool calls — a burst of legitimate agent traffic is business, not abuse, and distinguishing the two is a policy decision. If your deployment needs volumetric caps (requests per second per source, geo rules), enforce them at the edge in front; every call is still individually authorized, audited, and measured inside. ## Request and response size limits Nothing reads an unbounded body, in either direction: * Requests on **pre-authentication surfaces** are capped at **1 MiB**. * Requests on **authenticated surfaces** — the MCP endpoint, the API, SCIM — are capped at **10 MiB**. * **Responses from upstreams** (connectors, identity providers) are capped when read. A body over its cap is an **error, never a truncation** — a short read cannot pass for a complete one anywhere in the gateway. ## Session and token handling * Browser sessions live in an `HttpOnly`, `Secure`, host-only cookie on HTTPS deployments; no session token ever appears in a response body where script, HAR captures, or proxy logs would see it. Existing sessions using the legacy cookie name are migrated on their next authenticated response. * Every bearer credential — sessions, MCP access tokens, refresh tokens, authorization codes, SCIM tokens — is a 256-bit random value stored only as a one-way hash. MCP tokens are additionally audience-bound; the full token model is on [How MCP Authorization Works](/docs/conduit/use/mcp-authorization). * Stored secrets (connector credentials, client secrets, provider keys) are encrypted at rest with a key you control, and are write-only in the API — see [where credentials live](/docs/conduit/configure/connectors#where-credentials-live-and-who-can-see-them). ## Browser-facing hardening Every response carries `X-Content-Type-Options: nosniff`, `X-Frame-Options: DENY`, and `X-Robots-Tag: noindex` (an instance is a private gateway; `robots.txt` disallows crawling too), plus a Content-Security-Policy pinned to the application's own assets — external origins are enumerated per directive, with images the one deliberate exception since connector icons are admin-chosen URLs. `CONDUIT_CSP` selects delivery: `enforce` (the default), `report-only`, or `off`; the frame denial remains active in every mode. In both active CSP modes, browsers POST violations to a rate-limited report endpoint, and each report is logged and emitted as a telemetry event so regressions stay observable. Reports that say nothing about the deployment are dropped rather than recorded: content a browser extension injected into the page (which no policy can govern), and reports naming a page outside `CONDUIT_BASE_URL`, which the endpoint being unauthenticated otherwise lets anyone submit. Cookie-authenticated Connect GET requests require the exact Conduit origin; sibling subdomains and merely CORS-allowed origins are not trusted. When `CONDUIT_BASE_URL` uses `https://`, Conduit also sends `Strict-Transport-Security: max-age=31536000`. The policy is host-only: Conduit does not opt unrelated subdomains into HSTS and does not request browser preload. No HSTS header is sent for a plain-HTTP development URL. ## The checklist For a deployment review, the shape of the answer is: | Concern | Where it's handled | | - | - | | Inbound authentication | Conduit's OAuth 2.1 server; every request re-validated — [details](/docs/conduit/use/mcp-authorization) | | Authorization | Per-user policy on every listing and call — [details](/docs/conduit/configure/access-control) | | Brute force / credential guessing | Built-in per-IP throttles (above) | | Volumetric abuse, DDoS | Your edge (LB/WAF) — Conduit assumes one is in front when exposed | | TLS | Terminate at your edge, or [natively](/docs/conduit/deploy/install#tls) | | Oversized payloads | Built-in caps (above) | | Outbound traffic (SSRF, redirects, private addresses) | One hardened client — [Network Access](/docs/conduit/deploy/network#how-outbound-requests-are-hardened) | | Secrets at rest | Encrypted, write-only, key under your control | | Audit | Every sign-in, admin change, and tool call — exportable via OpenTelemetry, see [Monitoring](/docs/conduit/deploy/monitoring) | # Install & Run Source: https://pipedream.com/docs/conduit/deploy/install Run Conduit with Docker in minutes. Conduit ships as a single Docker image with embedded storage — no external database or services required. Mount one volume for persistence and you're running. This page covers the plain `docker run` path; for clusters and other hosts see [Kubernetes](/docs/conduit/deploy/kubernetes) (Helm chart or raw manifests) and [Other platforms](/docs/conduit/deploy/other-platforms), and pick a shape on [Deployment Tiers](/docs/conduit/deploy/availability). **1. Start the container** ```sh theme={null} docker run -d --name conduit \ -p 7272:7272 \ -v conduit-data:/data \ -e CONDUIT_BASE_URL=https://conduit.example.com \ ghcr.io/pipedreamhq/conduit:stable ``` `CONDUIT_BASE_URL` is the externally reachable URL of your instance — it's used for OAuth callbacks and MCP discovery, so set it to the address your users and AI clients will actually reach. **2. Sign in and finish setup** On first boot, Conduit prints first-run admin credentials to the container logs (`docker logs conduit`). Open `/login`, sign in with them, and the setup wizard walks you through creating your admin account. To choose your own bootstrap credentials instead, set `CONDUIT_ADMIN_EMAIL` and `CONDUIT_ADMIN_PASSWORD` (nothing is printed then). **3. Back up your encryption key** Conduit encrypts stored secrets (IdP client secrets, SMTP credentials, connector tokens) with a key auto-generated at `/data/conduit.key` on first boot. **Back this file up** — without it, stored secrets are unrecoverable. To manage the key yourself and keep it out of data-volume backups, set `CONDUIT_ENCRYPTION_KEY` instead. ## Choosing an image tag * **`vX.Y.Z`** — a specific release. Pin this in production and upgrade deliberately. * **`stable`** — the newest release. Convenient for evaluation. * Avoid **`latest`** — it tracks unreleased development, not the newest release. If your environment can't pull from `ghcr.io`, mirror the image into your own registry (see [private registries](/docs/conduit/deploy/kubernetes#private-registries-and-air-gapped-installs)) or [build it from source](/docs/conduit/deploy/build-from-source). ## Upgrading Pull the new tag and recreate the container; the data volume carries everything over. Database migrations run automatically on boot. Before upgrading, read the [changelog](/docs/conduit/changelog) for the releases you're jumping across — the **Upgrade notes** section of each release lists anything that needs operator action. ## TLS The default deployment runs plain HTTP behind a TLS-terminating reverse proxy, with `CONDUIT_BASE_URL` set to the `https://` address. To have Conduit terminate TLS natively instead, set `CONDUIT_TLS_CERT_FILE` and `CONDUIT_TLS_KEY_FILE`. AI clients require HTTPS for OAuth, so one or the other is effectively mandatory for real use. ## What the fronting proxy is responsible for Conduit defends itself against the abuse it can see per request: every request body is size-capped, headers and request reads are on timeouts (`ReadHeaderTimeout`, `ReadTimeout`, `IdleTimeout`), and expensive pre-auth work sits behind per-IP rate limits. It does **not** bound response writes. `WriteTimeout` is deliberately unset, because a response deadline would sever the long-lived `/mcp` SSE streams that AI clients hold open for the duration of a session. A client that requests responses and then drains them a byte at a time therefore holds connection state for as long as it likes. Volumetric abuse — connection floods, slow-read clients, request rates far above what per-IP limits are meant for — is the fronting proxy's job. If you expose Conduit's port directly to untrusted networks, you are giving up that layer. Behind a proxy, also set [`CONDUIT_TRUSTED_PROXIES`](/docs/conduit/configure/reference#client-ip-attribution) so per-IP rate limiting sees real client addresses instead of the proxy's. See the [configuration reference](/docs/conduit/configure/reference) for every setting. # Deploy on Kubernetes Source: https://pipedream.com/docs/conduit/deploy/kubernetes Run Conduit on Kubernetes with the Helm chart or raw manifests. Conduit ships a Helm chart that covers both deployment tiers — embedded (a single replica owning a persistent volume) and active-active PostgreSQL — from one set of values. This page covers the chart first, then [complete raw manifests](#raw-manifests-without-helm) for clusters that don't use Helm. If you haven't picked a tier, start with [Deployment Tiers](/docs/conduit/deploy/availability). ## Before you start * Helm 3.8+ (OCI registry support) — or skip to the [raw manifests](#raw-manifests-without-helm). * A `ReadWriteOnce` **block-storage** StorageClass (EBS, GCE PD, Azure Disk, Ceph RBD, local-path). Never network filesystems (NFS, EFS, Azure Files) — Conduit's embedded database is not safe on them. * An Ingress controller or LoadBalancer terminating TLS. AI clients require HTTPS for OAuth. ## Secrets first Conduit encrypts stored secrets with a key you provide. Create it as a Kubernetes Secret before installing, and keep a copy somewhere safe (a password manager or secret manager) — stored secrets are unrecoverable without it: ```sh theme={null} kubectl create secret generic conduit \ --from-literal=encryption-key="$(openssl rand -base64 32)" ``` The chart **requires** this Secret (`existingSecret.name`) and never generates one itself: a template-generated key would silently regenerate under GitOps tooling that renders without cluster access, losing every stored secret. A Secret also keeps the key out of data-volume snapshots, so a leaked backup alone can't decrypt anything. ## Install with Helm ```sh theme={null} helm install conduit oci://ghcr.io/pipedreamhq/charts/conduit \ --version X.Y.Z \ # match a release from the changelog -f values.yaml ``` A minimal `values.yaml` for the embedded tier: ```yaml theme={null} existingSecret: name: conduit ingress: enabled: true host: conduit.example.com tls: secretName: conduit-tls annotations: {} # your controller / cert-manager annotations ``` That renders the same shape as the [raw manifests below](#embedded-tier): a PVC, a single-replica Deployment with the `Recreate` strategy (the data volume is `ReadWriteOnce`, so the old pod must release it before the new one starts), a Service, and the Ingress. `CONDUIT_BASE_URL` defaults to `https://`; set `baseURL` if you terminate TLS somewhere the chart can't see. Each chart release pins its matching `vX.Y.Z` image, so `--version` is also how you choose the Conduit version. ### Active-active on PostgreSQL With an operator-supplied PostgreSQL 14+ (see [Deployment Tiers](/docs/conduit/deploy/availability)), add the connection URL to your Secret and point the chart at its key: ```sh theme={null} kubectl create secret generic conduit \ --from-literal=encryption-key="$(openssl rand -base64 32)" \ --from-literal=database-url="postgres://conduit:...@db.example.com:5432/conduit" \ --from-literal=admin-password="..." # first install only; remove after setup ``` ```yaml theme={null} replicas: 3 existingSecret: name: conduit adminPasswordKey: admin-password # remove once first-run setup completes database: secretKey: database-url ingress: enabled: true host: conduit.example.com tls: secretName: conduit-tls ``` Configuring the database is the tier switch — the chart derives the rest: | | Embedded (no `database.secretKey`) | PostgreSQL | | - | - | - | | Storage | PVC mounted at `/data` | none — stateless pods | | Update strategy | `Recreate` | `RollingUpdate` (zero-downtime) | | `replicas` | must be 1 (the chart refuses more) | free | | PodDisruptionBudget | — | rendered when `replicas > 1` | The chart's Service and Ingress carry no sticky-session settings, and none are needed: any replica serves any request. On a fresh PostgreSQL database Conduit refuses to start without a bootstrap password, so set `existingSecret.adminPasswordKey` on first install and remove it (with a `helm upgrade`) once setup completes. Concurrent boots are safe: migrations and startup sweeps coordinate through database locks. If your database URL lives in a Secret managed elsewhere (e.g. written by a PostgreSQL operator), set `database.secretName` too — it defaults to `existingSecret.name`. ### IAM authentication to RDS On EKS with RDS or Aurora, `CONDUIT_DATABASE_AUTH=rds-iam` replaces the password in the database URL with per-connection IAM tokens. The AWS side — enabling IAM auth, the `rds_iam` grant, the connect policy — is on [Deployment Tiers](/docs/conduit/deploy/availability#iam-authentication-on-aws); the chart wires the Kubernetes half. Mount the RDS CA bundle so `verify-full` can validate the server certificate: ```sh theme={null} curl -O https://truststore.pki.rds.amazonaws.com/global/global-bundle.pem kubectl create configmap rds-ca --from-file=global-bundle.pem ``` ```yaml theme={null} serviceAccount: annotations: # IRSA: the role holding rds-db:connect. EKS Pod Identity works too — # associate the role with the service account and drop the annotation. eks.amazonaws.com/role-arn: arn:aws:iam::123456789012:role/conduit extraEnv: - name: CONDUIT_DATABASE_AUTH value: rds-iam - name: AWS_REGION value: us-east-1 extraVolumes: - name: rds-ca configMap: name: rds-ca extraVolumeMounts: - name: rds-ca mountPath: /etc/rds-ca readOnly: true ``` with the database URL in the Secret carrying no password and naming the mounted bundle: ``` postgres://conduit@mydb.abc123.us-east-1.rds.amazonaws.com:5432/conduit?sslmode=verify-full&sslrootcert=/etc/rds-ca/global-bundle.pem ``` ### Values reference The chart deliberately models only what these manifests need. Every other `CONDUIT_*` variable in the [configuration reference](/docs/conduit/configure/reference) goes through `extraEnv` / `extraEnvFrom`, which also fit External Secrets or Vault workflows: ```yaml theme={null} extraEnv: - name: CONDUIT_TRUSTED_PROXIES value: 10.0.0.0/8 ``` | Value | Default | Notes | | - | - | - | | `existingSecret.name` | — | **Required.** Secret holding the encryption key | | `existingSecret.encryptionKeyKey` | `encryption-key` | Key for `CONDUIT_ENCRYPTION_KEY` | | `existingSecret.adminPasswordKey` | `""` | Key for `CONDUIT_ADMIN_PASSWORD` (first-run setup; remove after) | | `adminEmail` | `""` | `CONDUIT_ADMIN_EMAIL` (bootstrap admin) | | `baseURL` | derived from `ingress.host` | `CONDUIT_BASE_URL` | | `database.secretKey` | `""` | Secret key holding a `postgres://` URL; setting it selects the PostgreSQL tier | | `database.secretName` | `existingSecret.name` | Secret holding the database URL | | `replicas` | `1` | `> 1` requires PostgreSQL | | `image.repository` / `image.tag` | `ghcr.io/pipedreamhq/conduit` / the chart's release | See [private registries](#private-registries-and-air-gapped-installs) | | `logFormat` | `json` | `CONDUIT_LOG_FORMAT`; `""` for plain text | | `workspaceMode` | `""` (single) | `CONDUIT_WORKSPACE_MODE` | | `persistence.size` / `.storageClassName` / `.existingClaim` | `2Gi` / cluster default / `""` | Embedded tier only | | `ingress.enabled` / `.host` / `.className` / `.annotations` / `.tls.secretName` | disabled | The chart's Ingress | | `service.type` / `.port` / `.annotations` | `ClusterIP` / `7272` / `{}` | Service annotations fit shared-LB setups (e.g. ALB target-group settings) with `ingress.enabled: false` | | `metrics.enabled` | `false` | Prometheus metrics on a dedicated `metrics` container port (9464), scraped at the pod IP — never part of the Service or Ingress. See [Monitoring](/docs/conduit/deploy/monitoring) | | `resources` | 256Mi/100m requests, 512Mi limit | Same as the manifests below | | `extraEnv` / `extraEnvFrom` | `[]` | Any other configuration | | `extraVolumes` / `extraVolumeMounts` | `[]` | Files the server needs on disk — e.g. the RDS CA bundle for [IAM auth](#iam-authentication-to-rds) | Run `helm show values oci://ghcr.io/pipedreamhq/charts/conduit` for the full annotated list (pod placement, security contexts, service account, PDB). Uninstalling the release **keeps the data PVC** (`helm.sh/resource-policy: keep`) — the volume is the database, so deleting it is a deliberate `kubectl` action, never a side effect of `helm uninstall`. ## Private registries and air-gapped installs A release is exactly two artifacts — the image and the chart, with no sidecars, init containers, or subcharts pulling images of their own — so copying both into your registry is a complete mirror: ```sh theme={null} VERSION=X.Y.Z # match a release from the changelog # The image (or docker pull / tag / push, or your registry's import UI) skopeo copy --all \ docker://ghcr.io/pipedreamhq/conduit:v$VERSION \ docker://registry.example.com/conduit/conduit:v$VERSION # The chart helm pull oci://ghcr.io/pipedreamhq/charts/conduit --version $VERSION helm push conduit-$VERSION.tgz oci://registry.example.com/helm ``` Keep the image tag unchanged: a released chart defaults to the `vX.Y.Z` image tag matching its own version, so a mirror that preserves tags needs no `image.tag` override. If your registry re-tags, set `image.tag`. Then install from your registry. `image.repository` carries the registry host, so pointing at the mirrored image is the only values change — plus pull credentials if your registry requires them: ```yaml theme={null} image: repository: registry.example.com/conduit/conduit imagePullSecrets: - name: your-pull-secret ``` ```sh theme={null} helm install conduit oci://registry.example.com/helm/conduit \ --version X.Y.Z \ -f values.yaml ``` * A registry that proxies `ghcr.io` as a pull-through cache works the same way with no copy step — set `image.repository` to the proxied path. * If your network can't reach `ghcr.io` at all, [build the image from source](/docs/conduit/deploy/build-from-source) and push it to your registry; everything else here applies unchanged. * With the [raw manifests](#raw-manifests-without-helm) there is no chart to mirror: copy the image and edit the pinned `image:` line to match. Once running, Conduit makes outbound requests only for the features you configure — there is no phone-home, license check, or update poll — so a fully air-gapped instance works as long as its connectors and identity providers point at hosts it can reach. [Network Access](/docs/conduit/deploy/network) lists every host and when it is contacted. ## Raw manifests (without Helm) Complete, working manifest sets for both tiers — the same shapes the chart renders. ### Embedded tier ```yaml theme={null} apiVersion: v1 kind: PersistentVolumeClaim metadata: name: conduit-data spec: accessModes: [ReadWriteOnce] # storageClassName: resources: requests: storage: 2Gi --- apiVersion: apps/v1 kind: Deployment metadata: name: conduit spec: replicas: 1 selector: matchLabels: app: conduit # Recreate, not RollingUpdate: the data volume is ReadWriteOnce and Conduit # is single-writer, so the old pod must release the volume before the new # one starts. A rolling update would deadlock waiting for the mount. strategy: type: Recreate template: metadata: labels: app: conduit spec: # The image runs as a fixed non-root user; fsGroup re-owns the data # volume on mount. securityContext: runAsNonRoot: true runAsUser: 65532 runAsGroup: 65532 fsGroup: 65532 seccompProfile: type: RuntimeDefault volumes: - name: data persistentVolumeClaim: claimName: conduit-data containers: - name: conduit image: ghcr.io/pipedreamhq/conduit:v0.2.0 # pin a release securityContext: allowPrivilegeEscalation: false capabilities: drop: [ALL] ports: - containerPort: 7272 env: - name: CONDUIT_BASE_URL value: https://conduit.example.com - name: CONDUIT_LOG_FORMAT value: json - name: CONDUIT_ENCRYPTION_KEY valueFrom: secretKeyRef: name: conduit key: encryption-key volumeMounts: - name: data mountPath: /data resources: requests: memory: 256Mi cpu: 100m limits: memory: 512Mi readinessProbe: httpGet: path: /healthz/ready # verifies database connectivity port: 7272 # Probe fast: the server listens well within a second of start, # and with Recreate every second before Ready is downtime. periodSeconds: 2 livenessProbe: httpGet: path: /healthz port: 7272 --- apiVersion: v1 kind: Service metadata: name: conduit spec: selector: app: conduit ports: - port: 7272 targetPort: 7272 --- apiVersion: networking.k8s.io/v1 kind: Ingress metadata: name: conduit # Add your controller/cert-manager annotations here. spec: tls: - hosts: [conduit.example.com] secretName: conduit-tls rules: - host: conduit.example.com http: paths: - path: / pathType: Prefix backend: service: name: conduit port: number: 7272 ``` ### Active-active on PostgreSQL Relative to the manifests above, the Deployment becomes stateless and scales horizontally: ```yaml theme={null} apiVersion: apps/v1 kind: Deployment metadata: name: conduit spec: replicas: 3 strategy: type: RollingUpdate # stateless now — no volume to hand over selector: matchLabels: app: conduit template: metadata: labels: app: conduit spec: securityContext: runAsNonRoot: true runAsUser: 65532 runAsGroup: 65532 fsGroup: 65532 seccompProfile: type: RuntimeDefault containers: - name: conduit image: ghcr.io/pipedreamhq/conduit:v0.2.0 # pin a release securityContext: allowPrivilegeEscalation: false capabilities: drop: [ALL] ports: - containerPort: 7272 env: - name: CONDUIT_BASE_URL value: https://conduit.example.com - name: CONDUIT_LOG_FORMAT value: json - name: CONDUIT_DATABASE_URL valueFrom: secretKeyRef: { name: conduit, key: database-url } - name: CONDUIT_ENCRYPTION_KEY valueFrom: secretKeyRef: { name: conduit, key: encryption-key } # Required until first-run setup completes; remove afterwards. - name: CONDUIT_ADMIN_PASSWORD valueFrom: secretKeyRef: { name: conduit, key: admin-password } resources: requests: memory: 256Mi cpu: 100m limits: memory: 512Mi readinessProbe: httpGet: path: /healthz/ready port: 7272 periodSeconds: 2 livenessProbe: httpGet: path: /healthz port: 7272 ``` What changed and why: * **No PVC, no volume mount, `RollingUpdate`** — all state lives in PostgreSQL, so updates are zero-downtime. * **`CONDUIT_DATABASE_URL`, `CONDUIT_ENCRYPTION_KEY`, and (pre-setup) `CONDUIT_ADMIN_PASSWORD`** come from Secrets. Conduit refuses to start without the key, and without the password on a fresh database — the failure messages say why. * **Readiness (`/healthz/ready`) verifies database connectivity**, so the Service ejects an instance that lost PostgreSQL; liveness stays process-local. Concurrent boots are safe — migrations and startup sweeps coordinate through database locks. * **No session affinity.** Any replica serves any request — including the answer to an in-band MCP prompt or a request cancellation, which Conduit hands to the replica holding the call — so the Service and Ingress need no sticky-session settings. ## Notes (both paths) * **`CONDUIT_BASE_URL` must match the Ingress host** — it's what OAuth callbacks and MCP discovery hand to clients. * **Set `CONDUIT_TRUSTED_PROXIES` to your pod CIDR** (`kubectl cluster-info dump | grep -m1 cluster-cidr`). Conduit only honors `X-Forwarded-For` from proxies you declare, and an in-cluster ingress controller is not trusted by default; without it, audit entries and per-IP rate limits collapse onto the ingress address. With the chart, set it via `extraEnv` (the example above). See [client IP attribution](/docs/conduit/configure/reference#client-ip-attribution). * **MCP clients hold long-lived SSE connections.** If your ingress enforces a short proxy read timeout, raise it for this host — e.g. ingress-nginx: `nginx.ingress.kubernetes.io/proxy-read-timeout: "3600"`. * **Any L7 load balancer works with its defaults.** Replicas need no session affinity (see [Deployment Tiers](/docs/conduit/deploy/availability#active-active-n-replicas)). An AWS ALB can stay on round-robin with stickiness off; Conduit writes a keep-alive frame on every idle MCP stream at least every 30 seconds, inside the ALB's default 60-second idle timeout. * On AZ-bound storage (EBS and friends), use a StorageClass with `volumeBindingMode: WaitForFirstConsumer` so the volume is created in the AZ the pod actually schedules to. * **Prometheus metrics** are opt-in: `metrics.enabled: true` with the chart, or (raw manifests) `CONDUIT_METRICS_ADDR=0.0.0.0:9464` plus a matching `metrics` container port. Scrape at the pod IP; keep the port out of the Service and Ingress. See [Monitoring](/docs/conduit/deploy/monitoring). * **A load balancer with its own target health checks** (an AWS ALB, a cloud LB) is usually the slowest link in an embedded-tier upgrade: point its check at `/healthz/ready`, tighten the interval, and shorten any deregistration/draining delay — the old target is already dead when it deregisters, so draining buys nothing. ## Validate the deployment A green readiness probe means the pod serves traffic and can reach its database. To confirm the deployment end to end, walk the same path a user will — each step exercises a different piece of configuration: 1. **Probes** — `/healthz` (process) and `/healthz/ready` (database connectivity) return 200 through your Service. 2. **Sign in** — open `https://` in a browser and complete first-run setup (or sign in). This proves TLS, the Ingress, and session cookies. 3. **Connect an AI client** — add `https:///mcp` to any MCP client and complete the sign-in it opens. This is the sharpest test of `CONDUIT_BASE_URL`: the OAuth flow round-trips through the externally reachable address, so a mismatch fails here and nowhere earlier. The client should list Conduit's built-in tools. 4. **Call a tool** — any built-in tool (ask the client "what session am I using?"), then confirm the call appears in the audit log and usage dashboard. That proves the whole loop: authorization, execution, recording. 5. **Check IP attribution** — if the audit entries show your ingress or load-balancer address as the client IP, set `CONDUIT_TRUSTED_PROXIES` (see [Notes](#notes-both-paths)). Adding an identity provider and a first connector after that follows [Single Sign-On](/docs/conduit/configure/sso) and [Connectors](/docs/conduit/configure/connectors). ## Upgrades Read the release's **Upgrade notes** in the [changelog](/docs/conduit/changelog) first, then upgrade deliberately: `helm upgrade --version X.Y.Z` with the chart (which moves the image in lockstep), or bump the pinned image tag with raw manifests. On the embedded tier the `Recreate` strategy means an upgrade takes the seconds between pod stop and ready — sessions and tokens live in the database, so nobody is signed out and MCP clients reconnect on their own. To track releases automatically, run your rollout from CI: watch the `:stable` tag (or GitHub releases) and apply the new pinned version when one appears, recording it in your deploy annotations so rollout history maps to releases. # Monitoring Source: https://pipedream.com/docs/conduit/deploy/monitoring The Prometheus metrics endpoint — how to enable and scrape it, and a reference for every metric Conduit exposes. Conduit exposes operational metrics in the Prometheus exposition format — the de-facto standard scraped natively by Prometheus, Grafana Alloy, the OpenTelemetry Collector, Datadog, VictoriaMetrics, Telegraf, and the managed Prometheus services of the major clouds. The same metrics are also **pushed over OTLP** to every instance-level OpenTelemetry exporter configured in **Settings → Instance → Telemetry** (and to one configured via the standard `OTEL_EXPORTER_OTLP_*` environment variables), alongside the traces and events Conduit already sends — see [Telemetry Export](/docs/conduit/configure/telemetry). If your observability backend ingests OTLP, you get these metrics with no extra configuration; the scrape endpoint below is for Prometheus-style pull pipelines. Metrics are aggregates over the whole instance, so they are not part of what a workspace's own exporters receive. ## Enabling the endpoint Set `CONDUIT_METRICS_ADDR` to start a dedicated listener serving `/metrics`: ```bash theme={null} docker run -p 7272:7272 \ -e CONDUIT_METRICS_ADDR=0.0.0.0:9464 \ ghcr.io/pipedreamhq/conduit ``` Unset (the default), no listener starts and nothing is exposed. On Kubernetes with the [Helm chart](/docs/conduit/deploy/kubernetes), set `metrics.enabled: true` — it sets the variable and adds a `metrics` container port (9464). The port is deliberately **not** part of the chart's Service or Ingress: scraping happens at the pod IP, and the endpoint can never be exposed through the public entry point by accident. ### Security posture The endpoint is unauthenticated by design — the standard posture for scrape endpoints across self-hosted software (scrapers are robots; access control is network position). It reveals operational shape (connector kinds and ids, and in a single-workspace deployment connector names; request rates, session counts) but never payloads, secrets, or per-user data. Treat it accordingly: * Bind a private interface, or rely on network segmentation (on Kubernetes, a NetworkPolicy restricting the port to your monitoring namespace). * Never route it through a public ingress or load balancer. * If your network is flat and you need transport auth, front the port with an authenticating proxy — Prometheus supports bearer tokens, basic auth, OAuth2, and mutual TLS in `scrape_config`. ## Scraping A minimal Prometheus `scrape_config`: ```yaml theme={null} scrape_configs: - job_name: conduit static_configs: - targets: ["conduit.internal:9464"] ``` On Kubernetes, any pod-scraping mechanism works. With annotation-based discovery, add to the chart's `podAnnotations`: ```yaml theme={null} podAnnotations: prometheus.io/scrape: "true" prometheus.io/port: "9464" ``` With the Prometheus operator, a `PodMonitor` selecting the release's pod labels and the `metrics` port does the same job. Each replica is scraped individually and reports its own counters — that is the Prometheus model, not a limitation. Aggregate across replicas in queries: `sum by (connector_kind, connector_id) (rate(conduit_mcp_tool_calls_total[5m]))`. ### Restarts and counter resets Metrics are aggregated in memory and reset to zero when the process restarts. Consumers are built for this: `rate()` and `increase()` detect and splice across resets, and at most the few seconds since the last scrape are lost. Durable history lives in your monitoring backend, not in Conduit — anything Conduit must count exactly (usage dashboards, the audit log) is stored in its database independently of these metrics. ## Metric reference Conventions: counters end in `_total`, durations are histograms in seconds (exposed as `_bucket`, `_sum`, and `_count` series), and every label has a small, bounded value set — metrics never carry user, client, or per-request identifiers. ### Gateway | Metric | Description | | - | - | | `conduit_mcp_tool_calls_total` | Counter of tool calls served by the MCP gateway, by `connector_kind`, `connector_id` and `outcome`. Outcomes: `ok`, `error` (the call ran and failed), and `denied` (blocked by access policy before running). | | `conduit_mcp_tool_call_duration_seconds` | Histogram of executed tool-call duration, by `connector_kind` (plus `connector_id` and `connector` in a single-workspace deployment), including the upstream round trip. Denied calls never run, so they record no duration. | | `conduit_mcp_prompt_gets_total` | Counter of prompt fetches (`prompts/get`) served by the MCP gateway, by `connector_kind`, `connector_id` and `outcome` (`ok`, `error`, `denied`). | | `conduit_mcp_resource_reads_total` | Counter of resource reads (`resources/read`) served by the MCP gateway, by `connector_kind`, `connector_id` and `outcome` (`ok`, `error`, `denied`). | | `conduit_mcp_auth_failures_total` | Counter of rejected MCP requests, by `reason`: `missing_token`, `invalid_token`, `session_expired`, `org_ambiguous`, `client_revoked`, `client_not_allowed`, `sign_in_not_accepted`, `sign_in_too_old`, `sign_in_provider_gone`, `sign_in_password_off`, or `rate_limited`. A burst of the credential reasons is the signature of a client with a broken credential — or of someone guessing; `client_revoked` and `client_not_allowed` are a workspace refusing a valid token's client (a workspace revoke, or its policy against dynamically registered clients); the `sign_in_*` reasons are a workspace's sign-in policy refusing how the token's holder signed in, or the way they signed in being turned off (a provider disabled or deleted, or password sign-in turned off). | | `conduit_mcp_sse_sessions` | Gauge of currently connected MCP SSE sessions on this replica. A sudden drop to zero while the process is up usually means a load balancer or proxy severed the streams. | A connector is labeled by its kind and id. `connector_kind` is `builtin` (Conduit's own tools), `pipedream`, `custom` (a connector a workspace configured), `local` (a stdio connector the Conduit CLI runs), or `unknown` (no single connector resolved: a call naming a connector that doesn't exist, or one that is disabled or failed to load, or a local connector the CLI reported that matches no stdio connector). `connector_id` is a custom or local connector's id — `connector.id` on traces and events, and `id` in the `connectors` table — and empty otherwise. In a single-workspace deployment, where the one workspace is the instance, every gateway metric also carries the connector's name in a `connector` label. In a multi-workspace deployment the name belongs to the workspace that chose it and is never a label, and the duration histogram leaves out `connector_id` too, to bound its series: break latency down per connector with traces (`connector.id` on `mcp.upstream.send`) instead. ### HTTP | Metric | Description | | - | - | | `http_server_request_duration_seconds` | Histogram of API, OAuth, and SCIM request duration, by `http_route` (the matched route pattern, never the raw URL), `http_request_method`, and `http_response_status_code`. Health probes, static assets, and the long-lived MCP streams are excluded — they would only skew a request-duration distribution. | ### Database Each database metric is reported per database (`db` is `main` or `usage`) and per connection pool (`pool` is `read` or `write`): | Metric | Description | | - | - | | `conduit_db_connections_open` | Gauge of open connections. | | `conduit_db_connections_in_use` | Gauge of connections currently executing a query. | | `conduit_db_connections_waits_total` | Counter of times a request had to wait for a free connection — the pool-saturation signal. | | `conduit_db_connections_wait_duration_seconds_total` | Counter of total time spent waiting for connections. Growing wait time with flat traffic means the pool is undersized for the workload. | ### Process | Metric | Description | | - | - | | `conduit_build_info` | Gauge with constant value `1`, labeled with the running `version`. Join other metrics against it to see which version each replica runs — most useful mid-rollout. | | `conduit_usage_recorder_dropped_total` | Counter of usage events dropped because the internal buffer was full. Sustained growth means the usage pipeline (the durable store behind the in-product dashboards) is shedding load. | Standard Go runtime and process metrics (`go_*` — goroutines, memory, GC — and `process_*` — CPU, RSS, file descriptors, start time) are exposed alongside the application metrics. ## Useful starting queries Paste these into the Prometheus Graph tab or a Grafana panel. Most of them also make sensible first alert rules — thresholds depend on your traffic, so chart them for a while before alerting. ### Tool-call error rate The fraction of executed tool calls that failed, per connector. A single connector spiking usually means an upstream outage or an expired credential; everything spiking at once points at the gateway or its network. ``` sum by (connector_kind, connector_id) (rate(conduit_mcp_tool_calls_total{outcome="error"}[5m])) / sum by (connector_kind, connector_id) (rate(conduit_mcp_tool_calls_total[5m])) ``` ### Tool-call latency The 99th-percentile duration of executed tool calls. Aggregating `_bucket` series with `sum by (le)` makes this correct across replicas; add `connector_kind` (and, in a single-workspace deployment, `connector`) to the `by` clause to break it down. ``` histogram_quantile(0.99, sum by (le) (rate(conduit_mcp_tool_call_duration_seconds_bucket[5m]))) ``` ### Policy denials Calls blocked by access policy. A steady trickle is normal (clients probe tools they can't see); a step change after a policy edit means the edit cut off something real, and a sustained stream is a client misconfigured or probing. ``` sum by (connector_kind, connector_id) (rate(conduit_mcp_tool_calls_total{outcome="denied"}[5m])) ``` ### Authentication failures Rejected MCP requests by reason. Alert on sustained `invalid_token` volume — that's either a fleet of clients with stale credentials or someone guessing bearer tokens. ``` sum by (reason) (rate(conduit_mcp_auth_failures_total[5m])) ``` ### Replica health Prometheus synthesizes an `up` series per scrape target — no Conduit metric needed. This is the first alert to configure. ``` up == 0 ``` ### Database pool saturation Time spent waiting for a database connection, per second. Zero is the healthy steady state; any sustained non-zero value means requests are queuing for the pool and latency is following. ``` rate(conduit_db_connections_wait_duration_seconds_total[5m]) ``` ### Usage pipeline drops Usage events dropped because the recorder's buffer was full. Anything above zero means the in-product usage dashboards are undercounting under load. ``` rate(conduit_usage_recorder_dropped_total[5m]) > 0 ``` # Network Access Source: https://pipedream.com/docs/conduit/deploy/network Every host Conduit connects to, when it connects, and how outbound requests are hardened. Conduit needs no inbound access beyond the port it listens on. This page is the outbound picture — what to allow if egress from the Conduit container is filtered, and what each host is actually used for. Beyond reading Pipedream's public app catalog when someone opens Home, a Conduit instance with no connectors, no email provider, and no IAM database authentication configured makes no outbound requests. There is no phone-home, license check, or update poll. (What the image *build* downloads is separate and also enumerated — see [Build from Source](/docs/conduit/deploy/build-from-source).) ## Fixed hosts These are the only hostnames compiled into Conduit. Each is contacted **only** when the feature next to it is in use, so an instance that doesn't use the feature never resolves the host. | Host | Used for | Contacted when | | - | - | - | | `api.pipedream.com` | Minting the workspace's Pipedream OAuth token (`/v1/oauth/token`), reading and revoking a user's connected accounts and issuing Connect tokens (`/v1/connect/…`), and Pipedream's public app catalog and each app's tools (`/graphql`) | The catalog: when someone opens Home, which lists the catalog in every workspace — apps a workspace doesn't offer are shown as available on request, with their tools. Each instance keeps catalog answers for a few minutes. Everything else: a workspace has the Pipedream connector configured and connected | | `remote.mcp.pipedream.net` | Listing and calling Pipedream tools — the Pipedream MCP endpoint | A workspace has the Pipedream connector configured and connected. Overridable per workspace, so a self-hosted Pipedream MCP endpoint replaces this host | | `api.resend.com` | Sending invitation and notification email | The email provider is set to Resend | | `email..amazonaws.com` | Sending invitation and notification email | The email provider is set to Amazon SES. The region comes from the SES configuration, so allow the one region you configured | | `sts..amazonaws.com` | Exchanging the instance's Kubernetes service-account token for the AWS credentials that sign database auth tokens | `CONDUIT_DATABASE_AUTH=rds-iam` is set and credentials come from an EKS service-account role (IRSA). Instance-profile and Pod Identity credentials come from node-local metadata endpoints instead, which no egress filter sees | ## Hosts you configure There is no fixed list for these — they are whatever an administrator enters, and each is contacted only by the feature that owns it: * **Identity providers** — issuer discovery, token, and JWKS endpoints for each identity provider you add, contacted during sign-in. * **Upstream MCP servers** — every connector of type URL or SSE, contacted on `tools/list` and `tools/call`. Conduit's built-in catalog offers `mcp.linear.app`, `mcp.supabase.com`, and `mcp.atlassian.com` as one-click suggestions; they are contacted only once an administrator actually adds one. * **OpenAPI and GraphQL connectors** — the API base URL you configure, plus the spec or schema URL if you point at one rather than pasting it. * **SMTP server** — your mail host, when the email provider is SMTP. This is a direct SMTP connection, not HTTP, and is not subject to the hardening below. * **Instance telemetry exporters** — the OTLP collectors instance administrators configure in Settings → Instance → Telemetry, or via the standard `OTEL_EXPORTER_OTLP_*` variables. Deliberately exempt from the hardening below, because a collector normally *is* on a private in-cluster address. * **Workspace telemetry exporters** — the `https` OTLP endpoints workspace administrators configure in their workspace's Settings → Telemetry. These are tenant-supplied, so they are **not** exempt: they go through the hardened client like connectors, and a hostname that resolves to a private address is refused unless listed in `CONDUIT_SAFEHTTP_ALLOWED_PRIVATE_HOSTS`. See [Telemetry Export](/docs/conduit/configure/telemetry). * **OAuth client metadata documents** — an `https` URL supplied by a connecting MCP client, fetched when it asks to authorize so Conduit can identify it. The host is the client vendor's own, so it is not a fixed host; which clients may then connect is decided per workspace under Settings → MCP Clients (see [Governing connected clients](/docs/conduit/use/mcp-authorization#governing-connected-clients)). ## Hosts the browser reaches These are loaded by the browser of someone using the web UI, not by the Conduit container, so they belong in a user-network policy rather than a container egress rule: * `pipedream.com` — the connect-account flow runs in an iframe from this origin. * Connector icons — `www.google.com/s2/favicons` and `assets.pipedream.net` for catalog entries, plus any `https` URL an administrator sets as a connector's icon. The Content-Security-Policy allows images from any `https` origin for this reason; every other directive is pinned. * `pipedream.com/docs/conduit` — only if `/docs/` is configured to redirect to the public documentation site instead of serving the copy embedded in the image. The embedded copy loads nothing from outside the instance. ## How outbound requests are hardened Every HTTP request Conduit makes — to a fixed host above or one you configured — goes through a single hardened client. It refuses to connect to private, loopback, link-local, and other special-use addresses, checked **after DNS resolution** so a hostname that resolves to an internal address is caught too. For a well-known NAT64 (`64:ff9b::/96`) or 6to4 (`2002::/16`) address, Conduit checks the IPv4 address it carries. Local-use NAT64, IPv4-compatible, IPv4-translated and Teredo addresses are blocked whatever IPv4 address they carry. It never follows redirects, and it requires `https`. Response sizes are capped, and a reply over the cap is refused rather than truncated. Two settings adjust this, and both are exceptions rather than modes: * `CONDUIT_SAFEHTTP_ALLOWED_PRIVATE_HOSTS` lists exact hostnames that may resolve to a private address — see [Private endpoints and gateways](#private-endpoints-and-gateways) below for the rules and worked examples. `https` is still required. * `CONDUIT_SAFEHTTP_ALLOW_LOCALHOST` is for development only: it permits plain `http` to loopback, so a local identity provider or upstream on `http://localhost:PORT` is reachable. Never enable it in production. Three exemptions bypass this client: the SMTP connection, the OTLP collector (both noted above), and the AWS credential lookups made when `CONDUIT_DATABASE_AUTH=rds-iam` is set — those go through the AWS SDK, whose endpoints are fixed AWS infrastructure rather than configurable URLs. The database connection itself is PostgreSQL wire protocol, not HTTP, like the SMTP case. ## Private endpoints and gateways Sometimes a host you trust resolves to a private address *on purpose*: a vendor's API consumed through a private endpoint or gateway (e.g. AWS PrivateLink), a service behind an enterprise egress proxy, or an MCP server on your own network — including one deployed into an isolated VPC or private subnet that only Conduit can reach. The hardened client cannot tell that from an SSRF attempt, so the request is refused with an error like: ``` blocked: connection to special-use address 10.91.37.177 ``` `CONDUIT_SAFEHTTP_ALLOWED_PRIVATE_HOSTS` lifts the block for hosts you name: a comma-separated list of exact hostnames that are allowed to resolve to private addresses. * **Hostnames only.** No URLs, ports, IP addresses, CIDR ranges, or wildcards — an invalid entry refuses to boot rather than silently weakening the protection. Matching is exact, so list every hostname; subdomains are not covered. * **`https` is still required**, and the certificate must be valid for the hostname. A private endpoint that preserves the service's public DNS name (as PrivateLink does) satisfies this as-is. * **Read at boot.** Set it in the container's environment and restart — re-saving the connector is not enough. ### Example: Pipedream through a private endpoint The Pipedream connector reaches two hosts (see [Fixed hosts](#fixed-hosts)): `api.pipedream.com` and `remote.mcp.pipedream.net`. If they resolve to private addresses in your network, allow both: ```sh theme={null} docker run -d --name conduit \ -p 7272:7272 \ -v conduit-data:/data \ -e CONDUIT_BASE_URL=https://conduit.example.com \ -e CONDUIT_SAFEHTTP_ALLOWED_PRIVATE_HOSTS=api.pipedream.com,remote.mcp.pipedream.net \ ghcr.io/pipedreamhq/conduit:stable ``` If a workspace overrides the Pipedream MCP server URL, list that URL's hostname in place of `remote.mcp.pipedream.net`. ### Example: an MCP server on your own network List the hostname from the connector's URL — for a connector pointing at `https://mcp.internal.example.com/mcp`: ```sh theme={null} CONDUIT_SAFEHTTP_ALLOWED_PRIVATE_HOSTS=mcp.internal.example.com ``` On Kubernetes the variable goes through the Helm chart's `extraEnv` (see [Kubernetes](/docs/conduit/deploy/kubernetes)): ```yaml theme={null} extraEnv: - name: CONDUIT_SAFEHTTP_ALLOWED_PRIVATE_HOSTS value: mcp.internal.example.com ``` The same recipe covers every other host you configure that lives on a private network — an on-premises identity provider, an internal OpenAPI or GraphQL endpoint. # Other Platforms Source: https://pipedream.com/docs/conduit/deploy/other-platforms Running Conduit anywhere that can host one container and one disk. On the embedded (default) tier, Conduit runs anywhere that can provide three things: 1. **One container instance** — never more than one against the same data directory. (Multiple instances are the PostgreSQL active-active tier — see [Deployment Tiers](/docs/conduit/deploy/availability).) 2. **Persistent block storage** mounted at `/data`. Local disks and network *block* devices (EBS, GCE PD, Azure Disk) are fine; network *filesystems* (NFS, EFS, Azure Files, GCS/S3 mounts) are not safe for the embedded database. 3. **An HTTPS URL** reaching port 7272, set as `CONDUIT_BASE_URL` — either a TLS-terminating proxy in front, or native TLS via `CONDUIT_TLS_CERT_FILE`/`CONDUIT_TLS_KEY_FILE`. With `CONDUIT_DATABASE_URL` set, requirements 1 and 2 disappear (state lives in PostgreSQL), which also makes the scale-to-zero platforms below viable — as long as exactly-one-at-a-time isn't assumed anywhere else in your setup. Plus, in every case: back up the data volume, and keep the [encryption key](/docs/conduit/deploy/install) stored separately from those backups. ## Docker Compose ```yaml theme={null} services: conduit: image: ghcr.io/pipedreamhq/conduit:v0.2.0 # pin a release restart: unless-stopped ports: - "7272:7272" environment: CONDUIT_BASE_URL: https://conduit.example.com CONDUIT_ENCRYPTION_KEY: ${CONDUIT_ENCRYPTION_KEY} volumes: - conduit-data:/data volumes: conduit-data: ``` Put a TLS-terminating reverse proxy (Caddy, Traefik, nginx) in front, or add the native-TLS env vars and mount the certificate. ## A plain VM Run the container under the init system so it survives reboots — e.g. `podman generate systemd`, or a systemd unit wrapping `docker run` with `--restart unless-stopped` and a named volume. Snapshot the VM disk (or the volume) for backups. ## Fly.io A good fit: Fly volumes are single-attach block storage, matching Conduit's model exactly. ```toml theme={null} # fly.toml (abridged) [build] image = "ghcr.io/pipedreamhq/conduit:v0.2.0" [env] CONDUIT_BASE_URL = "https://conduit-example.fly.dev" [mounts] source = "conduit_data" destination = "/data" [http_service] internal_port = 7272 force_https = true auto_stop_machines = "off" # MCP clients hold long-lived connections min_machines_running = 1 ``` Keep exactly one machine (`fly scale count 1`) and set the encryption key with `fly secrets set CONDUIT_ENCRYPTION_KEY=...`. ## Platforms that don't fit Serverless container platforms that scale to zero, run concurrent instances, or offer only network-filesystem/object storage (Cloud Run, App Runner, Azure Container Apps in consumption mode, ECS on Fargate with EFS) violate requirements 1 or 2 — Conduit will appear to work and then corrupt data or enforce stale policy under exactly the conditions those platforms create. On ECS, use the EC2 launch type with an EBS-backed volume and a service capped at one task; on anything else, prefer a VM or Kubernetes. # Conduit Source: https://pipedream.com/docs/conduit/index Connect your AI assistant to the apps and tools you use at work. Connect your AI assistant to the apps and tools you use at work. Your organization chooses what's available in Conduit. You choose which connectors to enable for your assistant. > **[Start using Conduit](/docs/conduit/use/start)** > > What Conduit does and how to start using it. > **[Find a supported AI assistant](/docs/conduit/use/assistants)** > > Setup instructions for Claude, ChatGPT, Cursor, and more. > **[Browse and enable connectors](/docs/conduit/use/connectors)** > > Choose the apps and tools your assistant can use. > **[Get help](/docs/conduit/use/help)** > > Resolve common setup problems and know who to ask for help. ## Set up Conduit for your organization > **[Install & Run](/docs/conduit/deploy/install)** > > Run Conduit with Docker, then pick a deployment shape for your team. # Load Tests Source: https://pipedream.com/docs/conduit/load-tests How many users one Conduit pod supports, what workload that number assumes, and how to size your deployment. This page answers one question: **how much hardware does Conduit need for your team?** The numbers are measured, not estimated — a load-testing harness ships in the repository, every result below states the exact command that produced it, and the [history](#history) table at the bottom tracks how capacity has changed across versions. > [!NOTE] > > **The short answer** > > One Conduit pod — **1 CPU / 512 MiB**, the shape the > [Kubernetes guide](/docs/conduit/deploy/kubernetes) recommends — sustains > **8,859 modeled active users**. Most teams fit in one pod; add replicas > for headroom or high availability, not raw capacity. ## What "a user" means here A capacity number is only useful if the modeled user resembles yours. The workload model is calibrated against measured traffic from a production Conduit deployment serving agentic MCP clients (Claude Code, Cursor, and similar), and it reproduces the patterns that actually stress a gateway: * **Each user holds one open connection** (the SSE stream MCP clients keep for server notifications) for the whole test. * **Calls arrive in bursts, not on a timer.** An agent fires several calls seconds apart, then goes quiet for minutes — matching measured inter-call gaps (median 6 s inside a burst, \~90 s on average overall). * **A few users are bots.** 1% of modeled users are unattended scripts calling continuously — in production a cohort that small produced almost half of all traffic. * **Upstream tools are slow, with a long tail.** Each call's duration is drawn from the measured distribution: median 1.2 s, 5% over 12 s, capped at 50 s. Slow calls are held open by the upstream, so the gateway carries the same in-flight state a slow real tool imposes. * **Some calls fail.** 8% of calls return a tool error, as measured in production (upstream timeouts, oversized responses, disconnected accounts). * **Responses vary in size** — mostly a few KB, 2% around 1 MB. * **Clients churn.** Users periodically reconnect (handshake + tool listing) and re-list tools between calls; 5% of calls come with a dashboard page view. If your users are chattier than this, divide accordingly — the harness knobs (call rate, bot share, latency, error rate) are all adjustable, and you can [run the same tests](#run-it-on-your-own-infrastructure) against your own numbers. ## Sizing your deployment Conduit ships in two storage shapes: the default **embedded database** (one pod, zero external dependencies) and **PostgreSQL** (required to run more than one replica). Per-pod throughput is within \~15% between the two — choose PostgreSQL for replicas and operational preference, not speed. | Your situation | Recommended shape | | - | - | | Up to \~8,000 active users | 1 pod, embedded database | | More users, or zero-downtime upgrades | PostgreSQL + 2–3 pods behind a load balancer | | Growing beyond that | Add pods — capacity is expected to scale roughly linearly with replicas (checked periodically, not every pass) | Two resources set the ceiling, in this order: 1. **Memory per connection.** Every connected user holds an SSE stream (\~40 KB each); the 512 MiB pod runs out of memory before it runs out of CPU under the modeled workload. More users per pod = more memory. 2. **CPU per request.** Raw request throughput (thousands of calls per second per pod — see the table below) is far above what realistic user counts generate; it matters only for unusually hot, bot-heavy workloads. Real-world latency depends on your upstream tools far more than on Conduit: the gateway adds single-digit milliseconds; production tool calls measure a 1.2 s median on their own. ## The measured numbers Measured 2026-08-31 on an Apple M4 Max (Docker VM: 8 CPUs / 32 GiB, all components on one host — treat results as lower bounds and validate on your own infrastructure for sizing decisions). Every Conduit pod is pinned to 1 CPU / 512 MiB. Ceilings are sustained maxima under the pass/fail bar below, found by ramping until it breaks and binary-searching to ±10%. **The pass/fail bar** (every run must hold all of these): p95 tool call under 15 s (the modeled upstream latency alone has a \~12 s p95), transport error rate under 0.5%, tool-error rate under 15% (8% is modeled), no shed load, healthy connection keepalives. ### Users per pod (the headline) ```sh theme={null} make loadtest-tier1 go run ./cmd/conduit-bench knee -compose loadtest/compose/tier1.yml \ -scenario mixed -ramp-var USERS -sse-per-user -start 3000 -factor 1.5 \ -slo-call-p95-ms 15000 -env DURATION=150s ``` | Modeled users | Result | Server CPU | Server memory | | - | - | - | - | | 3,000 | pass — 100% checks, call p95 11.1 s | 22% | 272 MiB | | 6,750 | pass — 100% checks, call p95 11.6 s | 46% | 482 MiB | | **8,859** | **pass** — all streams held, call p95 11.3 s, tool errors 8.0% (exactly as modeled) | 76% | 507 MiB | | 9,281 | breach — memory limit reached, streams dropped, 8.3% transport errors | 103% | 496 MiB | The ceiling is the pod's 512 MiB of memory, not CPU: the last passing step runs 5 MiB under the limit with a quarter of the CPU idle. ### Request-rate ceilings (synthetic) Constant-rate probes of one request type at a time, under the standard fixed upstream latency (calls 1 s ± 0.5, listings 250 ms ± 100). These measure per-request cost, not realistic traffic — useful for spotting regressions and for bot-heavy sizing. ```sh theme={null} go run ./cmd/conduit-bench knee -compose loadtest/compose/tier1.yml \ -scenario tools-call -ramp-var RATE -start 400 -factor 2 -max 6400 -env DURATION=30s,USERS=4000 go run ./cmd/conduit-bench knee -compose loadtest/compose/tier1.yml \ -scenario tools-list -ramp-var RATE -start 100 -factor 2 -max 3200 -env DURATION=30s,USERS=3000 go run ./cmd/conduit-bench knee -compose loadtest/compose/tier1.yml \ -scenario dashboard -ramp-var RATE -start 1600 -factor 2 -max 25600 -env DURATION=30s,USERS=1600 ``` | Request type | Embedded DB (1 pod) | PostgreSQL (1 pod) | | - | - | - | | Tool calls /s | 3,000 | 4,000 | | Tool listings /s (5 connectors) | 750 | 800 | | Dashboard views /s | 3,600 | 3,000 | The dashboard probe runs against a usage store holding \~500k recorded tool calls (about a month of busy traffic), so its queries do realistic work. PostgreSQL figures are from the 2026-07-22 pass series (see [history](#history)); per-pod differences between the backends have stayed within \~15%. ### Idle connections An idle connected user costs \~2.5 goroutines and \~40 KB of server memory (measured holding 500–5,000 streams) — roughly 10–12k held streams fit in a 512 MiB pod, which is why memory, not CPU, sets the users-per-pod ceiling. ### Protocol revisions Conduit serves clients on the stateless MCP revision `2026-07-28` and on the handshake revisions (see the [MCP client reference](/docs/conduit/use/mcp-reference)). Every scenario runs in either: `-era stateless` has the generators send 2026-07-28 requests (per-request metadata, `server/discover` in place of the handshake) and hold `subscriptions/listen` streams in place of the handshake era's stream, with the workload otherwise identical. Measured 2026-09-23 on a smaller host than the numbers above (Docker VM: 4 CPUs), both revisions back to back with identical parameters on a freshly seeded pod each — compare within this table, not with the headline: | | Handshake revisions | `2026-07-28` | | - | - | - | | Modeled users per pod | 8,437 | 8,015 | | Tool calls /s | 1,300 | 1,600 | | Tool listings /s (5 connectors) | 750 | 750 | A held `subscriptions/listen` stream costs slightly more memory than the handshake era's stream (its request carries more headers, which the server holds for the stream's life), so users per pod lands one measurement step lower; per request, 2026-07-28 costs the same or less. The stateless run replays the handshake era's request mix, including its re-listing and reconnects — a 2026-07-28 client that honors the caching hints on listings and on `server/discover` sends fewer requests, so its numbers are a conservative bound. ```sh theme={null} go run ./cmd/conduit-bench knee -compose loadtest/compose/tier1.yml -era stateless \ -scenario mixed -ramp-var USERS -sse-per-user -start 3000 -factor 1.5 \ -slo-call-p95-ms 15000 -env DURATION=150s ``` ## Run it on your own infrastructure Two images and a URL. Deploy them however you deploy anything; Conduit and the mock upstream may live in different clusters or clouds. Neither image is published: [build both from the repository](/docs/conduit/deploy/build-from-source#every-image-the-repository-builds) at the Conduit release you are measuring and push them to a registry your environments pull from. Below, `/loadtest-conduit:` and `/loadtest-mcp-server:` are those pushes, and the example hostnames are yours to replace. ### 1. Deploy the mock upstream Image `/loadtest-mcp-server:`, wherever your upstream MCP servers run. Port 8765, `GET /healthz` for probes, stateless (run as many replicas as you like). Conduit must reach it over `https` on a hostname: give it a certificate with `TLS_CERT_FILE` / `TLS_KEY_FILE`, or run it plain behind whatever terminates TLS for you. Environment, the connector envelope behind the published numbers: ```sh theme={null} AUTH_MODE=none LOG_REQUESTS=0 TOOL_COUNT=20 LIST_LATENCY_MS=250 LIST_JITTER_MS=100 CALL_LATENCY_MS=1000 CALL_JITTER_MS=500 RESPONSE_BYTES=1024 ``` ### 2. Deploy Conduit from the load-test image Image `/loadtest-conduit:`, wherever you deploy Conduit, exactly as you would deploy `conduit:` — with the [Helm chart](/docs/conduit/deploy/kubernetes) set `image.repository` and `image.tag`; with your own manifests swap the image. It is the product image plus the load-test CLI as entrypoint: same server binary, same layers. Keep your normal `CONDUIT_*` configuration and add: ```sh theme={null} LOADTEST_SEED_SECRET= # every seeded token derives from it; you need it again in step 3 LOADTEST_USERS=5000 # virtual users to seed; at least the largest population you will model LOADTEST_CONNECTOR_URLS=https://mock.internal.example.com:8765,https://mock.internal.example.com:8765,https://mock.internal.example.com:8765,https://mock.internal.example.com:8765,https://mock.internal.example.com:8765 # one connector per entry, as reachable FROM Conduit; the published numbers use five on one mock CONDUIT_SAFEHTTP_ALLOWED_PRIVATE_HOSTS=mock.internal.example.com # only if the mock resolves to a private address CONDUIT_TRUSTED_PROXIES=10.0.0.0/8 # the hop your load generator's traffic arrives through ``` Then: * **Pin the pod shape** you want to quote, requests equal to limits (the published numbers are 1 CPU / 512 MiB). * **If the mock's certificate isn't from a public authority**, mount the CA and point `SSL_CERT_FILE` at it. * **Treat the instance as a throwaway.** Whoever holds the seed secret holds every seeded user's credentials, including an instance admin's. The instance seeds itself once the server is ready. Its log prints `auto-seed complete`, and `/tmp/loadtest.seeded` exists in the container. A restart re-runs the pass and changes nothing. A `401` from the generators in step 3 means seeding hasn't finished, or the secret or user count differs between the two sides. ### 3. Run the load From any machine that reaches Conduit's URL, with [k6](https://k6.io) installed and this repository checked out, the same two values the deployment has: ```sh theme={null} export LOADTEST_SEED_SECRET= export SEEDED_USERS=5000 ``` The headline measurement, ramping modeled users until the pass/fail bar breaks (one held connection per user, \~10 minutes at these settings): ```sh theme={null} go run ./cmd/conduit-bench knee -url https://conduit.loadtest.example.com \ -scenario mixed -ramp-var USERS -sse-per-user -start 500 -factor 1.5 \ -slo-call-p95-ms 15000 -env DURATION=150s ``` One scenario at a fixed load, with stock k6: ```sh theme={null} k6 run -e BASE_URL=https://conduit.loadtest.example.com \ -e LOADTEST_SEED_SECRET=$LOADTEST_SEED_SECRET -e SEEDED_USERS=$SEEDED_USERS \ -e USERS=2000 -e DURATION=150s loadtest/k6/mixed.js ``` Add `-era stateless` to `conduit-bench` (or `-e ERA=stateless` to stock k6) to drive the same workload over MCP `2026-07-28`; each result records the revision it measured. Results land in `loadtest/results/` as JSON and Markdown. Every scenario first verifies that the server honors the generator's client IPs and stops with instructions if it doesn't. For a `-url` run, server CPU and memory come from your own monitoring, and the result states that the server's shape is unknown. Run the generator close to Conduit: a laptop over a WAN link adds its own latency and connection limits to the numbers. ### 4. Tear down Delete both deployments. To remove the seeded workspace, users and connectors from a database you keep, run `conduit-bench unseed -from-env` inside the Conduit container (it is on the image's PATH), or from anywhere with `conduit-bench unseed -database-url … -base-url …`. ### Variants **One Docker host, end to end.** `loadtest/e2e-docker.sh` in the repository runs steps 1 to 4 above literally, with `docker run` as the deployment mechanism: it builds both images from the checkout, runs the mock and Conduit as two containers on one network, waits for seeding, drives the mixed scenario and the SSE holder from containers on the same network, removes the seeded population, and tears everything down. Read it as the template for your own environment's script, with `docker run` swapped for however you deploy: ```sh theme={null} USERS=200 DURATION_S=60 loadtest/e2e-docker.sh # KEEP=1 leaves the containers running ``` **Kubernetes, with the chart and `kubectl` access.** The repository's `loadtest/k8s/` holds a complete rig: values pinning the pod shape and wiring the variables above, a chart for the mock, an optional in-cluster PostgreSQL, and make targets that install everything into a fresh namespace and wait for seeding. With this target the harness also runs the generators as pods next to the server and collects CPU, memory and runtime signals: ```sh theme={null} make loadtest-k8s-images LT_REGISTRY=registry.example.com/conduit # build both images here, push them make loadtest-k8s-up LT_REGISTRY=registry.example.com/conduit # LT_DB=postgres LT_REPLICAS=3 for the PostgreSQL tier LOADTEST_SEED_SECRET=$(make -s loadtest-k8s-secret) \ go run ./cmd/conduit-bench knee -k8s conduit-loadtest/conduit \ -scenario mixed -ramp-var USERS -sse-per-user -start 3000 -factor 1.5 \ -slo-call-p95-ms 15000 -env DURATION=150s make loadtest-k8s-down ``` **Locally.** The numbers above come from pinned Docker Compose environments in the repository: ```sh theme={null} make loadtest-tier1 # build + start; the pod seeds itself go run ./cmd/conduit-bench knee -compose loadtest/compose/tier1.yml -scenario mixed ... make loadtest-down ``` Workload knobs (`USERS`, `BOT_FRACTION`, `CALL_P50_MS`, `CALL_ERROR_FRACTION`, …) are environment variables documented in `loadtest/k6/mixed.js`; set them to match your own traffic before quoting numbers to yourself. ## History One row per test pass, newest first. Passes before 2026-08-31 modeled a lighter, uniform workload (a call every 30–60 s, 1 s fixed upstream latency, no bots, no errors), so their user counts are not directly comparable with today's model — the row notes what changed. | Date | Users per pod | What changed | | - | - | - | | 2026-08-31 | **8,859** | Workload model rebuilt from measured production traffic (bursts, bots, heavy-tailed latency, errors, response sizes, reconnect churn) — new baseline, not comparable with earlier rows | | 2026-07-22 (6) | 10,125 | Session validation collapsed to one database query; PostgreSQL tool calls +11% (4,000/s), dashboard +30% (5,200/s) | | 2026-07-22 (5) | 10,125 | Database pools keep idle connections; PostgreSQL tool calls 850 → 3,600/s with zero failures | | 2026-07-22 (4) | 10,125 | Upstream latency model raised to 1 s calls / 250 ms listings (earlier rows used 100 ms); surfaced a PostgreSQL concurrency limit, fixed in the next row | | 2026-07-22 (3) | 10,687 | Runtime memory limit derived from the container ceiling; the previous out-of-memory failure mode became clean GC pressure (+53%) | | 2026-07-22 (2) | 7,000 | Connecting a stream no longer performs upstream work, fixing stalls under reconnect bursts; first measurable headline | | 2026-07-22 (1) | — | First baseline: rate ceilings (2,600 calls/s embedded) and per-connection cost measured; headline blocked on the stream-connect stall | # Manage your accounts Source: https://pipedream.com/docs/conduit/use/accounts See and disconnect the app accounts you've connected. Open **Accounts** to see the accounts you've connected. If an account needs attention, follow its reconnect instructions. To add an account for an app, open that app on **Connectors** and select **Connect account** when available. Disconnect an account when you no longer want Conduit to use that connection. Tools that need it may stop working until you reconnect. If your organization provides a shared account, ask your admin about changes to that connection. To stop your assistant using a connector while keeping your account connected, turn it off on **Connectors** instead. [Get help](/docs/conduit/use/help) # Agent access Source: https://pipedream.com/docs/conduit/use/agent-access Choose which tools an agent can use and which people it may act on behalf of, and see who can change either. > [!WARNING] > > **Beta:** Agents is in beta and isn't available in every workspace. To try it, > [contact the Pipedream team](/docs/conduit/cloud#support). Agents can't obtain tokens yet; > these settings decide what an agent will be allowed once it can. Two settings decide what an [agent](/docs/conduit/use/agents) can do: **Tool access** and **Delegation**. Both start empty, so a new agent can do nothing. ## Tool access Acting on behalf of someone, an agent can use only tools allowed by both: * **The person's own access**: their policies and what they've turned on. If they turn Slack off, no agent can use Slack on their behalf. * **The agent's groups**: policies linked to groups you add it to. Policies for **Everyone** or for individual people never apply. Add an agent to groups from its page or from a group's membership count in **Groups & Policies**. **Review access** on the agent's page shows what its groups allow. Agents use apps and MCP servers only (`*` covers both). **Conduit's own tools** never reach an agent: they manage a person's account and workspace, so an agent could turn back on a tool the person turned off. Nor do **local tools**, which run on a person's computer that a backend agent isn't connected to. ## Delegation **Delegation** decides which people the agent may act on behalf of: **Nobody** (the default), **Everyone** (all people in the workspace, including people who join later), or **Selected** groups and people. It grants no tools. **Check access** shows what the agent could do for one person, and why. A **Selected** change takes effect only when you choose **Save selection**; until then the current setting stays active. ## Who can change what Workspace admins and owners view agents, manage credentials, change **Tool access** or **Delegation**, and use **Check access**. Other people and API clients can't manage agents. * API clients can't add people to a group an agent's **Delegation** selects or grant an agent more tools, but can narrow either. SCIM keeps adding people, since they come from your directory. * **Everyone** grows with whatever adds people to the workspace: invites, SCIM, or sign-in. * Removing someone from the workspace stops agents from acting on their behalf and removes them as an individually selected person; adding them back doesn't restore that selection. See also [what no API client can do](/docs/conduit/use/api/scopes#what-no-api-client-can-do). ## Audit **Delegation** changes are recorded under **Config → Agent** (`config.agent.delegation_group_added` and similar), and group changes as group membership (`config.group_membership.*`). Refused API-client changes are `authz.agent.denied`. # Agents Source: https://pipedream.com/docs/conduit/use/agents Register agents you already run, so Conduit can recognize them, manage their credentials and access. > [!WARNING] > > **Beta:** Agents is in beta and isn't available in every workspace. To try it, > [contact the Pipedream team](/docs/conduit/cloud#support). Agent credentials can't obtain > tokens or access apps and tools yet. Adding an agent doesn't create or run one in Conduit. It gives an agent you already operate, such as a backend service or hosted assistant, a profile in your workspace, so Conduit knows which application is calling. The agent's code, model and hosting stay where they are. The profile holds a client ID, credentials and access settings. Workspace admins and owners view and manage agents, including their credentials and access settings; other people can't. API clients can't manage agents or add people to groups an agent's **Delegation** selects; see [who can change agent access](/docs/conduit/use/agent-access#who-can-change-what). ## Add an agent 1. As a workspace admin, open **Agents** and select **Create agent**. 2. Enter a name and optional description. 3. Open the agent to add credentials and configure its access. Agents start disabled, with no tools and nobody they may act on behalf of. Set those in [Agent access](/docs/conduit/use/agent-access). ## Credentials An agent holds **two credentials at a time**, secrets and public keys together, so one stays in use while you deploy its replacement. A secret is shown once; a public key keeps its private key with you. Create a key pair with EC P-256 (recommended) or RSA 2048+, and keep `private.pem` in your secrets manager: ```bash theme={null} # EC P-256 (signs with ES256) openssl ecparam -name prime256v1 -genkey -noout | openssl pkcs8 -topk8 -nocrypt -out private.pem openssl ec -in private.pem -pubout -out public.pem # Or RSA 2048 (signs with RS256) openssl genpkey -algorithm RSA -pkeyopt rsa_keygen_bits:2048 -out private.pem openssl rsa -in private.pem -pubout -out public.pem ``` Paste `public.pem` or a JWK into **Add public key**. A pasted private key is rejected; treat it as exposed. The key ID shown under its label is the JWK's `kid` or the key's thumbprint. To rotate, add a replacement, deploy it, then revoke the old credential. ## Administration Agent management is admin-only. People with the Member or Viewer role cannot view agents, create credentials, change access, or enable or disable them. API clients cannot manage agents. Credentials belong to the agent. If an admin leaves or loses their admin role, the credentials stay active until revoked or the agent is deleted. Rotate any credential they should no longer hold. ## Disable, delete and audit Use an agent's switch to disable it. Deleting an agent removes its credentials. The audit log records every change under **Config → Agent**. # API Source: https://pipedream.com/docs/conduit/use/api Call Conduit's workspace-admin operations from scripts and CI using machine-to-machine OAuth, with no user in the flow. The API lets scripts, CI jobs, and background services run a workspace's admin operations — managing connectors, policies, groups, and reading the audit log — with no signed-in user. It is the same Connect RPC API the web UI uses, authenticated by a workspace **API client** (a machine principal) via OAuth 2.0 client credentials. API clients are distinct from **MCP Clients** (the interactive OAuth apps that connect to `/mcp` on a user's behalf). An API client is created by a workspace admin, scoped to that one workspace, and acts as itself. 1. [Create an API client](#create-an-api-client) and choose its [scopes](/docs/conduit/use/api/scopes). 2. [Get a token](/docs/conduit/use/api/authentication) with a client secret or, preferably, a private-key JWT. 3. [Call the API](#call-the-api) with the token. ## Create an API client In **Settings → API Clients**, create a client and choose its [scopes](/docs/conduit/use/api/scopes); its credentials dialog opens next, to add a credential. Both are edited later from the client's row menu (**Edit scopes**, **Manage credentials**). A credential is either: * **Client secret** — shown once at creation; store it in a secrets manager. * **Public key** — paste an RSA (≥ 2048-bit) or EC P-256 **public** key, as a PEM (`-----BEGIN PUBLIC KEY-----`) or a JWK, for `private_key_jwt` authentication. The private key never leaves your side. See [Private-key JWT authentication](/docs/conduit/use/api/authentication#private-key-jwt-authentication) for how to generate one. A client can hold several credentials at once, so you rotate make-before-break: add the new one, deploy it, then revoke the old one. ## Call the API Every operation is a Connect RPC: `POST` to `https://conduit.example.com/conduit.v1.ConduitService/` with a JSON body and a bearer token. Every workspace method takes `organizationId`, the workspace the call acts on. An API client belongs to one workspace, so the field is optional: omit it and the call acts on that workspace. Naming any other workspace is refused. ```bash theme={null} curl -X POST \ -H "Authorization: Bearer $TOKEN" \ -H "Content-Type: application/json" \ -d "{\"organizationId\": \"$ORG\"}" \ https://conduit.example.com/conduit.v1.ConduitService/ListConnectors ``` Connector list responses include each connector's canonical `id`. Pass that value unchanged to `GetConnector` to retrieve one connector's configuration; pass it to `ListConnectorCatalogTools` for the connector's full tool metadata and a resolution status. All three operations require `connectors:read`. To inspect the access granted through one group, call `GetGroupAccess` with its `groupId`. The response identifies the policies attached to the group and the workspace-wide policies that also apply. `allowedEntries` is their combined connector and tool grant—the access a hypothetical person in the group would receive if they enabled every allowed tool. It deliberately excludes grants attached directly to individual users and each user's personal enable selection. This operation requires `policies:read`. Read-only methods are also servable over `GET`. Errors use the Connect envelope: a stable machine-readable `code` (`invalid_argument`, `not_found`, `permission_denied`, `failed_precondition`, `already_exists`, `resource_exhausted`, …), a human `message`, and the matching HTTP status. Parse the `code`, never the `message`. The **[API reference](/docs/conduit/use/api-reference/connectors/list-connectors)** lists every method, its request and response fields, and an example — generated from the API definition, so it's always current. It covers exactly the methods reachable with an API client (see [Scopes](/docs/conduit/use/api/scopes)). ### Retries Reads and updates are safe to retry. A retried **create** may duplicate, so make creates idempotent in your own tooling (or check for the resource first). A retried delete returning `not_found` means the delete already succeeded — treat it as success. # Get audit event catalog Source: https://pipedream.com/docs/conduit/use/api-reference/audit-log/get-audit-event-catalog /conduit/openapi/api.yaml get /conduit.v1.ConduitService/GetAuditEventCatalog Audit event namespace catalog for filter UIs Requires the `audit:read` scope. # List org audit log Source: https://pipedream.com/docs/conduit/use/api-reference/audit-log/list-org-audit-log /conduit/openapi/api.yaml get /conduit.v1.ConduitService/ListOrgAuditLog List audit log entries for a workspace Requires the `audit:read` scope. # Create connector Source: https://pipedream.com/docs/conduit/use/api-reference/connectors/create-connector /conduit/openapi/api.yaml post /conduit.v1.ConduitService/CreateConnector Add a connector Requires the `connectors:write` scope. # Delete connector Source: https://pipedream.com/docs/conduit/use/api-reference/connectors/delete-connector /conduit/openapi/api.yaml post /conduit.v1.ConduitService/DeleteConnector Delete a connector Requires the `connectors:write` scope. # Get connector Source: https://pipedream.com/docs/conduit/use/api-reference/connectors/get-connector /conduit/openapi/api.yaml get /conduit.v1.ConduitService/GetConnector Get a configured connector by its canonical id Requires the `connectors:read` scope. # Get workspace connectors Source: https://pipedream.com/docs/conduit/use/api-reference/connectors/get-workspace-connectors /conduit/openapi/api.yaml get /conduit.v1.ConduitService/GetWorkspaceConnectors List every connector in the workspace with its metadata and enabled state, for managing access policies Requires the `connectors:read` scope. # Get workspace Pipedream Source: https://pipedream.com/docs/conduit/use/api-reference/connectors/get-workspace-pipedream /conduit/openapi/api.yaml get /conduit.v1.ConduitService/GetWorkspacePipedream Get workspace Pipedream configuration; the client secret is never returned, only whether one is set Requires the `connectors:read` scope. # List connector catalog Source: https://pipedream.com/docs/conduit/use/api-reference/connectors/list-connector-catalog /conduit/openapi/api.yaml get /conduit.v1.ConduitService/ListConnectorCatalog List the static catalog of known MCP servers that can be enabled for the workspace Requires the `connectors:read` scope. # List connector catalog tools Source: https://pipedream.com/docs/conduit/use/api-reference/connectors/list-connector-catalog-tools /conduit/openapi/api.yaml get /conduit.v1.ConduitService/ListConnectorCatalogTools List the live tool catalog for one configured connector Requires the `connectors:read` scope. # List connectors Source: https://pipedream.com/docs/conduit/use/api-reference/connectors/list-connectors /conduit/openapi/api.yaml get /conduit.v1.ConduitService/ListConnectors List configured connectors and built-in tool toggles Requires the `connectors:read` scope. # Update connector Source: https://pipedream.com/docs/conduit/use/api-reference/connectors/update-connector /conduit/openapi/api.yaml post /conduit.v1.ConduitService/UpdateConnector Update a connector Requires the `connectors:write` scope. # Update workspace Pipedream Source: https://pipedream.com/docs/conduit/use/api-reference/connectors/update-workspace-pipedream /conduit/openapi/api.yaml post /conduit.v1.ConduitService/UpdateWorkspacePipedream Update workspace Pipedream credentials; omit client_secret to keep the stored one Requires the `connectors:write` scope. # List workspace members Source: https://pipedream.com/docs/conduit/use/api-reference/members/list-workspace-members /conduit/openapi/api.yaml get /conduit.v1.ConduitService/ListWorkspaceMembers List the people in a workspace, paginated and searchable by name or email Requires the `members:read` scope. # Create group Source: https://pipedream.com/docs/conduit/use/api-reference/policies-and-groups/create-group /conduit/openapi/api.yaml post /conduit.v1.ConduitService/CreateGroup Create a workspace group Requires the `policies:write` scope. # Create policy Source: https://pipedream.com/docs/conduit/use/api-reference/policies-and-groups/create-policy /conduit/openapi/api.yaml post /conduit.v1.ConduitService/CreatePolicy Create an allow policy Requires the `policies:write` scope. # Delete group Source: https://pipedream.com/docs/conduit/use/api-reference/policies-and-groups/delete-group /conduit/openapi/api.yaml post /conduit.v1.ConduitService/DeleteGroup Delete a workspace group (its policy links and memberships are removed) Requires the `policies:write` scope. # Delete policy Source: https://pipedream.com/docs/conduit/use/api-reference/policies-and-groups/delete-policy /conduit/openapi/api.yaml post /conduit.v1.ConduitService/DeletePolicy Delete an allow policy Requires the `policies:write` scope. # Get effective access Source: https://pipedream.com/docs/conduit/use/api-reference/policies-and-groups/get-effective-access /conduit/openapi/api.yaml get /conduit.v1.ConduitService/GetEffectiveAccess Inspect a person's resolved groups, applicable policies, and effective connector/tool access Requires the `policies:read` scope. # Get group access Source: https://pipedream.com/docs/conduit/use/api-reference/policies-and-groups/get-group-access /conduit/openapi/api.yaml get /conduit.v1.ConduitService/GetGroupAccess Inspect the tool access granted through a group and workspace-wide policies Requires the `policies:read` scope. # List connector grant summaries Source: https://pipedream.com/docs/conduit/use/api-reference/policies-and-groups/list-connector-grant-summaries /conduit/openapi/api.yaml get /conduit.v1.ConduitService/ListConnectorGrantSummaries List the configured union of tool grants and contributing policies for each connector selector Requires the `policies:read` scope. # List effective access Source: https://pipedream.com/docs/conduit/use/api-reference/policies-and-groups/list-effective-access /conduit/openapi/api.yaml get /conduit.v1.ConduitService/ListEffectiveAccess List resolved allow, enable, and effective access for people in the workspace Requires the `policies:read` scope. # List groups Source: https://pipedream.com/docs/conduit/use/api-reference/policies-and-groups/list-groups /conduit/openapi/api.yaml get /conduit.v1.ConduitService/ListGroups List workspace groups and the people in them Requires the `policies:read` scope. # List policies Source: https://pipedream.com/docs/conduit/use/api-reference/policies-and-groups/list-policies /conduit/openapi/api.yaml get /conduit.v1.ConduitService/ListPolicies List workspace allow policies with their subjects and connector entries Requires the `policies:read` scope. # Set policy entry Source: https://pipedream.com/docs/conduit/use/api-reference/policies-and-groups/set-policy-entry /conduit/openapi/api.yaml post /conduit.v1.ConduitService/SetPolicyEntry Add, update, or remove a single connector entry of an allow policy Requires the `policies:write` scope. # Update group Source: https://pipedream.com/docs/conduit/use/api-reference/policies-and-groups/update-group /conduit/openapi/api.yaml post /conduit.v1.ConduitService/UpdateGroup Rename a workspace group and/or add and remove people in it (in a group that grants a workspace role, this changes their roles) Requires the `policies:write` scope. # Update policy Source: https://pipedream.com/docs/conduit/use/api-reference/policies-and-groups/update-policy /conduit/openapi/api.yaml post /conduit.v1.ConduitService/UpdatePolicy Replace an allow policy's name, subjects, and connector entries Requires the `policies:write` scope. # List provisioned groups Source: https://pipedream.com/docs/conduit/use/api-reference/provisioning/list-provisioned-groups /conduit/openapi/api.yaml get /conduit.v1.ConduitService/ListProvisionedGroups List SCIM group identifiers mapped to Conduit groups Requires the `provisioning:read` scope. # List provisioned users Source: https://pipedream.com/docs/conduit/use/api-reference/provisioning/list-provisioned-users /conduit/openapi/api.yaml get /conduit.v1.ConduitService/ListProvisionedUsers List SCIM user identifiers mapped to Conduit users Requires the `provisioning:read` scope. # List SCIM tokens Source: https://pipedream.com/docs/conduit/use/api-reference/provisioning/list-scim-tokens /conduit/openapi/api.yaml get /conduit.v1.ConduitService/ListSCIMTokens List the workspace's SCIM provisioning token metadata; bearer secrets are never returned Requires the `provisioning:read` scope. # List identity providers Source: https://pipedream.com/docs/conduit/use/api-reference/single-sign-on/list-identity-providers /conduit/openapi/api.yaml get /conduit.v1.ConduitService/ListIdentityProviders List a workspace's SSO providers; client secrets are never returned Requires the `sso:read` scope. # List workspace domains Source: https://pipedream.com/docs/conduit/use/api-reference/single-sign-on/list-workspace-domains /conduit/openapi/api.yaml get /conduit.v1.ConduitService/ListWorkspaceDomains List the workspace's email domains, their verification state, and the provider each signs in through Requires the `sso:read` scope. # Update workspace Source: https://pipedream.com/docs/conduit/use/api-reference/workspace-settings/update-workspace /conduit/openapi/api.yaml post /conduit.v1.ConduitService/UpdateWorkspace Rename a workspace or set its logo; omitted fields are left unchanged Requires the `settings:write` scope. # Authentication Source: https://pipedream.com/docs/conduit/use/api/authentication Exchange an API client's credential for a bearer token, use private-key JWTs, and revoke access. API clients authenticate with the OAuth 2.0 client-credentials grant. Create the client and its credential in **Settings → API Clients** first (see [Create an API client](/docs/conduit/use/api#create-an-api-client)). ## Get a token Exchange the credential for a short-lived (1 hour) bearer token at the token endpoint, `https://conduit.example.com/oauth/token` (your instance's exact URL is shown in the client's **Manage credentials** dialog). Conduit publishes it, with the rest of its OAuth configuration, in the standard [authorization server metadata](https://www.rfc-editor.org/rfc/rfc8414) document at `https://conduit.example.com/.well-known/oauth-authorization-server`: `token_endpoint`, the client authentication methods it accepts (`token_endpoint_auth_methods_supported` — for API clients, `client_secret_basic` and `private_key_jwt`; `none` is for MCP clients), and the algorithms it accepts for a signed assertion (`token_endpoint_auth_signing_alg_values_supported`: `RS256`, `ES256`). OAuth client libraries that support discovery read it given just the instance's base URL, the document's `issuer`. ```bash theme={null} # client_secret_basic curl -u "$CLIENT_ID:$CLIENT_SECRET" \ -d grant_type=client_credentials \ -d scope="connectors:read connectors:write" \ https://conduit.example.com/oauth/token ``` `private_key_jwt` is the same grant with a signed client assertion (`client_assertion_type=urn:ietf:params:oauth:client-assertion-type:jwt-bearer`), which is the stronger option because no shared secret is transmitted. Standard OAuth client libraries implement both and refresh the token for you. Requesting `scope` down-selects from what the client was granted; omit it to get all granted scopes. The response is a standard OAuth token: ```json theme={null} { "access_token": "…", "token_type": "bearer", "expires_in": 3600, "scope": "connectors:read connectors:write" } ``` There is no refresh token — re-run the grant when the token expires. ## Private-key JWT authentication `private_key_jwt` (RFC 7523) is the recommended credential for unattended use. Instead of sending a shared secret, your client signs a short-lived JWT assertion with a private key that never leaves your infrastructure. You register only the matching **public** key with Conduit, so no reusable secret is ever transmitted to the token endpoint or stored in Conduit's database — a leaked request log or a database dump can't be replayed to mint tokens. A client secret, by contrast, is a bearer value: anyone who reads it once can use it until you rotate it. Prefer `private_key_jwt` for CI and production. ### Generate a key pair Conduit accepts an RSA (≥ 2048-bit) or EC P-256 public key, as a PEM or a JWK. PEM is the simplest — two `openssl` commands, nothing else to install: ```bash theme={null} # private key — keep this in your secrets manager; your client signs with it openssl genpkey -algorithm RSA -pkeyopt rsa_keygen_bits:2048 -out priv.pem # …or EC P-256: openssl genpkey -algorithm EC -pkeyopt ec_paramgen_curve:P-256 -out priv.pem # public key — this is what you register with Conduit openssl pkey -in priv.pem -pubout -out pub.pem ``` Paste the contents of `pub.pem` (the `-----BEGIN PUBLIC KEY-----` block) into **Settings → API Clients → Add credential → Public key**. Conduit derives a `kid` for it (the RFC 7638 thumbprint) and shows it next to the credential. Already have a JWK? Paste that instead — the same field takes either form. ### Request a token Standard OAuth libraries build and sign the assertion for you. The raw exchange is the same client-credentials grant, with a signed assertion in place of Basic auth — the assertion's `iss` and `sub` are the client ID (copy it from the API clients table or the client's **Manage credentials** dialog), `aud` is the token endpoint URL (shown in the same dialog), and `exp` is a few minutes out with a unique `jti`: ```bash theme={null} curl -d grant_type=client_credentials \ -d client_assertion_type=urn:ietf:params:oauth:client-assertion-type:jwt-bearer \ -d client_assertion="$SIGNED_JWT" \ -d scope="connectors:read" \ https://conduit.example.com/oauth/token ``` The `aud` must **exactly** match your instance — either its base URL or that URL plus `/oauth/token` (the metadata document's `token_endpoint`). This binds the assertion to one instance so it can't be replayed against another, and a mismatch is the most common setup error: the token endpoint returns `invalid_client` (deliberately without saying why). Set `aud` to the token endpoint you're POSTing to and they always agree. ## Revoking access * **Disable or delete a client**, or **revoke a single credential**, in Settings → API Clients — it takes effect on the next request. Revoking one credential leaves the client's other credentials working, so it is the clean way to retire a leaked secret mid-rotation. **Instance-wide kill switch:** an operator can set `CONDUIT_DISABLE_API_CLIENTS=true` and restart Conduit to refuse token minting and reject every existing API-client token instance-wide (break-glass for a suspected compromise). Machine actions are attributed to `api-client:`, and every audit detail includes the immutable client ID plus the credential ID that minted the token. Known-client authentication failures are included in the workspace's `audit:read` export, coalesced to one row per client/source-IP/minute; repeats and unknown client IDs remain available through telemetry without amplifying audit-log writes. Each audit entry also carries `actor_user_id` (the acting user's id, or the API client's backing service user), `trace_id` and `span_id`. Telemetry identifies people by `user.id`, never by email, so these are how a SIEM joins an event from your telemetry backend to the audit entry, and its email, behind it. See [What telemetry contains](/docs/conduit/configure/telemetry#what-telemetry-contains). # Scopes Source: https://pipedream.com/docs/conduit/use/api/scopes The scopes an API client can hold, what each grants, and what no API client can do. Each scope pairs a resource area with an access level, like `connectors:read` or `settings:write` (the full list is below). Grant a client the least it needs. These are not the `conduit:*` permissions an interactive MCP client requests when a person [authorizes it](/docs/conduit/use/mcp-authorization#scopes-limit-each-client) — those attenuate a signed-in user's own access, while an API client's scopes *are* its entire access. Each scope maps to one area of workspace settings. `read` grants viewing it; `write` grants changing it. | Scope | Grants | | - | - | | `connectors:read` / `connectors:write` | View connector configuration and live tool catalogs / manage connectors and Pipedream configuration | | `policies:read` / `policies:write` | View policies, configured connector grants, groups, group access, and per-user effective access / manage policies, groups, and group membership | | `members:read` | List the people in the workspace | | `sso:read` | View the workspace's identity-provider configuration (`ListIdentityProviders`); client secrets and DNS domain-verification challenges are never returned | | `provisioning:read` | View SCIM token metadata and SCIM-to-Conduit user/group mappings; bearer secrets are never returned | | `settings:write` | Change general workspace settings — the workspace's name and logo | | `audit:read` | Read the workspace audit log — the supported way to pull events into a SIEM using time-range filters and pagination | > [!WARNING] > > **`connectors:write` can run code on users' machines** > > A `stdio` connector launches a command on **each user's own > machine** in the workspace (through the `conduit` CLI), not on the server. Because > `connectors:write` lets a client create or re-point any connector, granting it > is effectively granting the ability to run code on their machines — so > grant it only to automation you trust to that degree, and grant `connectors:read` > alone where a client only needs to inspect connectors. This is the same trust > boundary that makes connector management a workspace-admin operation. Identity inventory is read-only: `sso:read` and `provisioning:read` can inspect sanitized settings and mappings, but no API-client scope can create or modify identity providers or SCIM tokens. Those writes govern who can sign in or be provisioned as a human. Invites, API-client management itself, changing people's roles, and workspace telemetry configuration are likewise not on the API-client surface in this release. ## What no API client can do The rule behind these limits: an API client can keep your workspace's state in sync, but it can never change who someone is or how they sign in, and never widen an agent's own tool grants or whom it may act on behalf of. No scope grants any of the following: * Change who can sign in or how: identity providers, SCIM tokens, the workspace sign-in policy. * Manage people's standing: invites, roles, API clients themselves. * Manage [agents](/docs/conduit/use/agents) in any way: creating them, their credentials, the groups they belong to, or whom they may act on behalf of (Delegation). * Widen what an agent can reach through a shared setting. With `policies:write`, an API client can't: * use `UpdateGroup` to add someone new to a group that an agent's **Delegation** selects; * link a policy to a group an agent is in, or grant more tools through a policy linked to one. The API answers these with `permission_denied`. Narrowing changes still work: removing people, unlinking, renaming, removing or narrowing a policy's entries, deleting the policy or group, and re-sending people the API or an admin already added. Make the widening change in Conduit as a workspace admin, or, for group membership, through your identity provider. The refusal doesn't say which agent or how the group or policy reaches one, but it does show that the change affects an agent. An API client's token works only for the API described here. It cannot connect to the `/mcp` endpoint or call connector tools — a machine token is bound to the API audience and is rejected at `/mcp`. Headless MCP access for API clients is a planned follow-up. # Choose what backs an app Source: https://pipedream.com/docs/conduit/use/app-backend Serve an app through Pipedream or through a custom MCP server, as one connector. Each app in your workspace is one connector, whatever provides its tools. By default Pipedream does: it signs people in and serves the app's tools. A workspace admin can have a custom server back the app instead, such as Linear's own MCP server, and switch back later. ## Switch to a custom server 1. On **Home**, select the cog on the app, then the **Connection** tab. 2. Under **Backed by**, select **Custom server**. 3. Choose the server: * the app's server from the catalog, such as **Linear's MCP server**; * a connector your workspace already added, under **Your connectors**; * or **Another server**: enter its URL, a tool prefix, and how people sign in (**OAuth**, **Token** or **None**). 4. Read **What switching does**, then select **Switch to …**. ## What a switch changes * **Who can use the app stays the same.** Grants of all its tools carry over. * **Grants that name specific tools pause**, because the two servers' tools differ. They apply again if you switch back. * **People connect again.** Their other accounts are kept. * **Tool names change**: `pd__linear-create-issue` becomes `linear__create_issue`, for example. Update prompts and saved tools that use the old names. Choosing a connector your workspace already added moves its grants and people's tool picks to the app. A grant of all its tools moves as the tools it lists now (connect to it first), so switching back never grants all of Pipedream's tools. The preview says what can't be kept, and who newly reaches the server. Switching back to Pipedream keeps the custom server. Choosing a different one removes it, disconnecting people. ## Manage the server While a custom server backs the app, the **Connection** tab shows its settings: address, sign-in, workspace token and how it looks. It has no on/off switch. **Remove server** hands the app back to Pipedream, and lists the grants that then give people Pipedream's tools. [Find and enable connectors](/docs/conduit/use/connectors) · [Access control](/docs/conduit/configure/access-control) # Supported AI assistants Source: https://pipedream.com/docs/conduit/use/assistants Find setup instructions for your AI assistant. Conduit includes setup instructions for these assistants: | Assistant | Setup | | - | - | | Claude | [Connect Claude](/docs/conduit/use/assistants/claude) | | ChatGPT | [Connect ChatGPT](/docs/conduit/use/assistants/chatgpt) | | Cursor | [Connect Cursor](/docs/conduit/use/assistants/cursor) | | Claude Code | [Connect Claude Code](/docs/conduit/use/assistants/claude-code) | | Codex | [Connect Codex](/docs/conduit/use/assistants/codex) | | VS Code | [Connect VS Code](/docs/conduit/use/assistants/vscode) | Your workspace may not allow every assistant, and arranges the tabs under **Connect a client** on Conduit's **Home** page: the first opens by default, and an assistant your workspace blocks has no tab there. Your assistant's plan and your organization's settings may affect whether you can add Conduit. If the connection option is missing, [get help](/docs/conduit/use/help). ## Using something else? Other assistants can connect if they support remote [MCP](/docs/conduit/use/what-is-mcp) connections with OAuth sign-in. Use the server URL shown under **Connect a client** on Conduit's **Home** page with your assistant's MCP setup instructions. Compatibility and available features vary by assistant. # Connect ChatGPT Source: https://pipedream.com/docs/conduit/use/assistants/chatgpt Add Conduit as an app in ChatGPT. Your ChatGPT account and organization must allow custom apps. Your admin may have already added Conduit; check your available apps first. 1. Open Conduit and copy your server URL from **Connect a client** on **Home**. 2. In ChatGPT on the web, enable **Developer mode** under **Settings → Security and login**. 3. Open **Plugins**, select **+**, and create an app named **Conduit** using your server URL and OAuth authentication. 4. Complete the Conduit sign-in and approval. 5. In a conversation, select Conduit from the **Developer mode** tool in the **+** menu. Enable an app on Conduit's **Connectors** page, then ask ChatGPT to use it. Review any requested action before approving it. Missing these options? Ask your company admin. [OpenAI's developer mode guide](https://developers.openai.com/api/docs/guides/developer-mode) covers availability and setup. [Get help](/docs/conduit/use/help) # Connect Claude Source: https://pipedream.com/docs/conduit/use/assistants/claude Add Conduit to Claude and use it in a conversation. You need access to custom connectors in Claude. Your organization's owner may need to add Conduit first. 1. Open Conduit and copy your server URL from **Connect a client** on **Home**. 2. In Claude, open **Customize → Connectors**. If Conduit is already listed, connect it. Otherwise, select **+ → Add custom connector**. 3. Enter the name **Conduit** and paste your server URL. 4. Add the connector and sign in to Conduit when prompted. 5. In a conversation, open **+ → Connectors** and enable Conduit. Enable an app on Conduit's **Connectors** page, then ask Claude to use it. You should see a tool call and a result. If adding a connector isn't available, contact your company admin. [Claude's connector guide](https://support.claude.com/en/articles/11175166-getting-started-with-custom-connectors-using-remote-mcp) explains account and organization requirements. [Get help](/docs/conduit/use/help) # Connect Claude Code Source: https://pipedream.com/docs/conduit/use/assistants/claude-code Register Conduit with Claude Code and sign in. These instructions use a terminal with Claude Code already installed. 1. Open Conduit and select **Connect a client** on **Home**, then **Claude Code**. 2. Copy and run the command shown there. It includes your workspace's URL. 3. Open Claude Code and run `/mcp`. Select Conduit and complete authentication if requested. 4. Approve the connection in your browser. Enable an app on Conduit's **Connectors** page, then ask Claude Code to use it. Use `/mcp` to check the connection if no tools appear. [Claude Code's MCP guide](https://code.claude.com/docs/en/mcp) covers manual configuration and troubleshooting. [Get help](/docs/conduit/use/help) # Connect Codex Source: https://pipedream.com/docs/conduit/use/assistants/codex Connect the Codex CLI to your Conduit workspace. These instructions use the Codex CLI on your computer. 1. Open Conduit and select **Connect a client** on **Home**, then **Codex**. 2. Add the configuration shown there to `~/.codex/config.toml`, then run `codex mcp login conduit` in your terminal. 3. Complete the Conduit sign-in and approval in your browser. 4. Open Codex and use `/mcp` to check the connection. Enable an app on Conduit's **Connectors** page, then ask Codex to use it. Using the Codex app or IDE extension? [OpenAI's MCP guide](https://developers.openai.com/codex/mcp/) covers their setup options. [Get help](/docs/conduit/use/help) # Connect Cursor Source: https://pipedream.com/docs/conduit/use/assistants/cursor Add Conduit to Cursor from Connect a client on your Conduit home page. 1. Open Conduit and sign in. 2. Select **Connect a client** on **Home**, then **Cursor**. 3. Select **Add to Cursor** and approve opening Cursor. 4. Confirm the installation and complete the Conduit sign-in when prompted. In Conduit, enable an app on **Connectors** and connect your account if needed. Ask Cursor's agent to use that app. You should see a Conduit tool call and a result. If the installation button doesn't work, the same steps also show the configuration you can add manually. [Cursor's MCP guide](https://cursor.com/docs/context/mcp) explains that option. [Get help](/docs/conduit/use/help) # Connect VS Code Source: https://pipedream.com/docs/conduit/use/assistants/vscode Add Conduit to VS Code and sign in. These instructions use a terminal with VS Code's `code` command available. 1. Open Conduit and select **Connect a client** on **Home**, then **VS Code**. 2. Copy and run the command shown there. It includes your workspace's URL. 3. In VS Code, run **MCP: List Servers** from the Command Palette, select Conduit, and start it. Sign in when VS Code prompts you. 4. Approve the connection in your browser. Enable an app on Conduit's **Connectors** page, then ask Copilot's agent mode to use it. You should see a Conduit tool call and a result. The same steps also show the `mcp.json` entry to add by hand. [VS Code's MCP guide](https://code.visualstudio.com/docs/copilot/chat/mcp-servers) covers manual configuration and troubleshooting. [Get help](/docs/conduit/use/help) # Connect your AI assistant Source: https://pipedream.com/docs/conduit/use/connect-clients Choose your assistant and connect it to your Conduit workspace. Connect your assistant once, then choose the connectors you want it to use. Your assistant may call this an [MCP server](/docs/conduit/use/what-is-mcp) or connector. ## Connect 1. Open Conduit and sign in. 2. On **Home**, select **Connect a client**, choose your AI assistant and follow its setup instructions. Your workspace arranges the tabs, and it may have written its own steps in place of Conduit's. Copy the server URL shown there when asked. 3. Sign in to Conduit when your assistant opens the browser, then approve the connection. Need instructions for a particular assistant? Choose from [the supported assistants](/docs/conduit/use/assistants). If you belong to several workspaces, select the one you want before copying the URL. Each workspace can offer different connectors. ## Try it Open **Connectors**, enable an app you want to use, and connect your account if prompted. Start a conversation with your assistant and ask it to use that app—for example, to find a document by name. Your assistant should show a Conduit tool call and return a result. Connecting your assistant alone doesn't enable your work apps. [Find and enable connectors](/docs/conduit/use/connectors) · [Get help](/docs/conduit/use/help) # Find and enable connectors Source: https://pipedream.com/docs/conduit/use/connectors Choose the apps and tools your assistant can use. Open **Home** to see the apps and tools available to you. **Your toolkit**, on the left, lists the connectors you've added and how many of their tools are on. The catalog on the right lists the rest. ## Enable a connector 1. Search for the app or tool you need. The search covers your toolkit and the catalog. The category menu narrows the catalog; **Show all** clears it. 2. Select **+** on the connector in the catalog, or open it and select **Add**. It moves to your toolkit with all of its tools on. 3. Select **Connect account** if prompted and follow the sign-in steps. 4. Turn off the tools you don't want your assistant to use. Some connectors use an account your admin has already connected. Others ask you to sign in with your own account or enter connection details. A connector that's waiting for your account is listed first in your toolkit, with a warning. Select a connector in your toolkit to change its tools. If the tools don't appear in your assistant, start a new conversation. To stop your assistant using a connector, open it in your toolkit and select **Remove**; it goes back to the catalog. Removing it doesn't disconnect its account; manage accounts on **Accounts**. ## Connectors your workspace doesn't offer Apps under **Not offered in your workspace yet** need your admins' approval. Open one to see its tools, and select **Request** to learn how to ask for it. [Request a connector](/docs/conduit/use/request-connector) ## For workspace admins Controls only workspace admins see are marked in orange. **Add connector** adds an MCP server, OpenAPI or GraphQL API. **Allow**, a connector's cog and **Edit** open **Manage**: * **Connection**: how it connects: [what backs an app](/docs/conduit/use/app-backend), **Connect Pipedream** (once for every app), or your own connector's settings and on switch. * **Access**: who can use it, from **Everyone** to one person, and which tools. [Manage your accounts](/docs/conduit/use/accounts) · [Get help](/docs/conduit/use/help) # Get help Source: https://pipedream.com/docs/conduit/use/help Resolve common setup problems and know who to ask for help. Open **?** at the top right of Conduit for your Conduit admin's help instructions. If you don't see it, contact your Conduit admin. The **book** icon opens these docs. ## I can't connect my assistant Check that you copied the URL from **Connect a client** on Conduit's **Home** page for the workspace you want. Complete the browser sign-in and approval. If your assistant has no option to add a connection, your plan or company settings may restrict it. [Check your assistant's setup guide](/docs/conduit/use/assistants). ## My assistant can't see an app Open **Connectors**, check that the connector and the tools you need are enabled, and connect your account if prompted. Then start a new conversation with your assistant. If the connector isn't listed, [request access or a new connector](/docs/conduit/use/request-connector). ## A tool failed Try asking for a smaller task or less data. If the failure continues, contact your Conduit admin with the assistant name, connector name, time, and error message. Your **Usage** page may help you find the failed call. Don't include passwords, API keys, or private document contents in your request. # How MCP Authorization Works Source: https://pipedream.com/docs/conduit/use/mcp-authorization Conduit is its own OAuth 2.1 authorization server — how clients register, what the tokens are, and how admins govern them. Connecting a client is one URL and a browser sign-in — see [Connect AI Clients](/docs/conduit/use/connect-clients). This page is the layer underneath, for the people who review it: how clients register, where the tokens come from, what they can and cannot reach, and the controls an administrator has over the fleet of connected clients. ## Conduit is the authorization server Conduit implements the MCP specification's authorization model directly: it is a full **OAuth 2.1 authorization server**, not a proxy or a pass-through to your identity provider. * An unauthenticated request to `/mcp` returns `401` with protected-resource metadata, which leads the client to Conduit's authorization-server metadata at the standard `.well-known` locations. Clients discover everything; nothing is configured client-side but the URL. * The client walks the authorization-code flow with PKCE: authorization request → the person signs in to Conduit — the normal login page, [single sign-on](/docs/conduit/configure/sso) included — → an explicit consent screen naming the client → code → token. The consent screen cannot be embedded by another site, and its Approve action activates only after the screen has been visible briefly. * Every token a client holds is **issued by Conduit**. Your identity provider's role is to authenticate the human in the middle of that flow; its tokens are never given to MCP clients, and **externally issued tokens are not accepted at `/mcp`**. Equivalent controls to a JWT-validating gateway are enforced behind the endpoint instead: every request re-validates the bearer and that the caller is still in the workspace, and every auth event is audited. ## How clients register There are no API keys to create. Clients establish an identity in one of three ways: * **Dynamic Client Registration** (RFC 7591) — what most MCP clients do (Claude, Cursor, VS Code, and others): the client registers itself at `/oauth/register`, unauthenticated, and each registration is a distinct client identity per user. Everything such a client says about itself is unverified. Whether such clients may connect is each workspace's decision (below). Instance admins can additionally **stop accepting new registrations** (Settings → Sign-in) once the clients you expect are connected, or on instances that want only URL-based client IDs; clients already registered keep working. * **URL-based client IDs** (Client ID Metadata Documents) — the client identifies itself by an `https` URL it controls, where its metadata is published. One shared identity across all users of that app, and the only registration form with a domain-control proof behind it. Conduit accepts any `https` client ID; each workspace decides which of these clients may reach it (below). * **The device grant** — the Conduit CLI's `conduit login` shows a short code to approve in a browser, on any device. The CLI setup UI is feature-flagged and hidden by default. ## The tokens * **Opaque, not JWTs.** A Conduit token carries no claims to inspect or mis-validate; it is a random 256-bit value that Conduit resolves on every request. Nothing about a caller's access is decided client-side. * **Stored hashed.** Like every bearer credential Conduit issues (session tokens, refresh tokens, authorization codes), only a one-way hash is stored, so a database dump contains nothing replayable. * **Audience-bound.** A token minted for MCP (RFC 8707 resource binding) is valid at `/mcp` and nowhere else — it cannot drive the management API or the web UI, and a web session cannot be replayed as an MCP bearer. * **Short-lived, with rotating refresh.** Access tokens last 24 hours; clients refresh silently with refresh tokens that are rotated on every use (OAuth 2.1) and expire after 90 days of disuse. A replaced refresh token keeps working for 30 seconds and returns the same replacement, so a client that missed a refresh response stays connected instead of being asked to sign in again. Copies of an assistant that share one sign-in and refresh at about the same time likewise stay connected. Authorization codes are single-use and expire in 10 minutes; the device grant's codes likewise, though the credential it mints for the CLI lasts 90 days. * **Revocable immediately.** Revoking a client or a user's sessions takes effect on the next request, because every request resolves the token — see below. Removing a user from a workspace ends their access on that workspace's endpoint the same way, mid-session. ### Scopes limit each client The consent screen shows a coarse ceiling for the client. The two ordinary permissions are required; administrative permissions are optional and only appear when your current role can grant them. | Scope | What it lets the client use | | - | - | | `conduit:connectors` | Tools, prompts, and resources from connectors your workspace policy allows and you have enabled | | `conduit:user-tools` | Conduit tools for your own account, connections, workspaces, and tool preferences | | `conduit:workspace-admin` | Workspace administration tools, while you remain an admin of the workspace | | `conduit:instance-admin` | Instance administration tools, while you remain an instance admin | Scopes are only a limit on the application. Conduit still checks your live role and [access policies](/docs/conduit/configure/access-control) on every listing and direct call, so selecting a scope cannot grant a connector or admin action you could not otherwise use. A `scopes` entry in client configuration may limit the optional administrative permissions requested, but the ordinary permissions remain part of the grant. Workspace [API clients](/docs/conduit/use/api/scopes) — machine credentials with no person in the flow — use a separate, finer-grained scope set granted by a workspace admin at registration; the permissions on this page apply only to clients a person authorizes interactively. ## Governing connected clients A token authenticates a person and works at every workspace they belong to (the URL picks the workspace), so each **workspace** decides which clients may reach *it* — and which clients it knows. The instance holds only the one setting that cannot be per workspace: whether the authorization server accepts new self-registrations at all ([below](#instance-accepting-registrations)). ### Workspace: MCP Clients **Settings → MCP Clients** (workspace admins, in both deployment shapes) is two things: who can connect, and one table of clients. **Who can connect** is one choice among three cards: * *Any client* (the default). Users connect with whatever they like; you can still block a client in the table. * *Verified clients only*. Clients that prove who they are — URL-based client IDs and the Conduit CLI. A self-registered client has no verified identity and is blocked unless you allow it. * *Only allowed clients*. Only the clients you allow connect. A client Conduit recognizes starts allowed when it proves who it is — Claude Code, Claude Desktop, Codex, ChatGPT and VS Code identify with a published document, and Conduit's own CLI is its own — while a client that only registers itself (Cursor, MCP Inspector, an install that merely claims to be one of the above) is blocked until you allow it in the table's Access column, which is also where you take one off. **Message to blocked users** sits under the cards: the workspace's own words for a user whose client it blocks — how to get access, whom to ask. Links work as `[label](https://url)`. Left empty, a blocked user sees only the posture's own sentence, which the field shows as its placeholder. **Clients** is the one table, one row per client the workspace has any relationship with: the clients Conduit recognizes, the ones you added, and anything that has connected — admitted or refused. A client appears once it has made a request to *this* workspace (a user's authorization lets a client reach every workspace they belong to, so only a request says which), or because Conduit knows it, or because you added it. Facets above the table select from the same rows: **All**, **Allowed**, **Blocked**, **Connected**. **Add a client** takes a name and the https URL of the client's client ID metadata document; only the vendor can host that URL, which is what makes an install that identifies with it verified, and it is the whole of how Conduit recognizes the client — a site or a path is refused. A client you add is decided about on its own, even when its document sits under a vendor Conduit recognizes: one connector of ChatGPT's, added by its own document URL, is that row's client rather than ChatGPT's, so it can be blocked while ChatGPT is allowed, or the reverse. The dialog also sets up the client's tab under **Connect a client** on Home: whether it is shown, its icon, and its steps, prefilled with Conduit's generic ones for you to edit. A client users have already tried needs no adding: it is a row, and its Access cell lets it in. Each row shows: * The client, with its icon, and **Identity**: a blue check when it proves who it is (a URL-based client ID, a metadata document only its vendor can host, which Conduit fetched and validated — or Conduit's own CLI), a grey question mark when it only registered itself and presented signals any client could imitate. Claude, Claude Code, ChatGPT, Codex, and VS Code publish such documents; Cursor and MCP Inspector connect by registering themselves. A recognized client whose users also run installs that merely claim to be it gets a second row, *unverified installs*, so each row's mark and Access hold for every install behind it. * **Access** — one word: Allowed; Blocked, for your own decision; or, when "Who can connect" is what refuses, the reason itself — Unverified, Not allowed. It is a control with three choices: **Workspace default**, shown with what "Who can connect" currently gives the client; **Allow**; and **Block**, which asks for an optional message that overrides the workspace's for this client, shown beside the word as a speech-bubble icon you hover to read. Choosing the default drops the client's own decision rather than pinning it, so only clients that differ from the posture carry one — and keep it when the posture changes. A decision on a client Conduit recognizes covers every install recognized as it; on an unknown client it covers clients with exactly that identity — which is the client's own claim, so a block on one holds only until it registers again under another. To keep self-registering clients out for good, use *Verified clients only* or *Only allowed clients*, which refuse anything unproven that you have not allowed. * The leading column — for a client that can be a tab under **Connect a client** on **Home**, a drag handle and a house: solid while the tab is shown, faint while you have hidden it; click to switch. A blocked client has no tab while it is blocked, whatever the house says, and gets it back when allowed again; hiding an allowed one says nothing about access. The clients with tabs are the top rows, in the order users see them; drag a row by its handle (or use **Move up** / **Move down** in its menu) to rearrange them. The first shown, allowed tab is the one **Connect a client** opens with. A client with no tab (MCP Inspector, the CLI, an unknown client) has neither handle nor house. * **Users**, **Sessions** and **Last active**: who has connected with the client here, their live sessions, and when it was last used in this workspace. **Edit home page tab** in a row's menu opens the tab as users see it: an icon (an https image URL; empty for the built-in mark) and the steps, as the Markdown the page renders, prefilled with what the tab shows today — Conduit's steps, until you change them — with a live preview. What you save is exactly what users read, so you can reword a step, point at a managed install, or replace the steps entirely. Fenced code blocks become copyable commands and config; `{{server_url}}` stands for the workspace's server URL and `{{client_name}}` for the client's name, filled in when shown, so the text never carries a URL that changes per workspace. The steps can't be saved blank; **Use Conduit's instructions** in the menu brings the shipped steps back. None of this changes who may connect. **View users** in a row's menu lists the users of the client, with when they authorized it, when they were last active here, and their live sessions, and offers **Revoke** per user or for everyone: the client stops reaching this workspace on that user's behalf at once, and access here returns once they authorize the client again. Nothing is deleted: the user's token keeps working at their other workspaces until its next refresh, which is refused while any workspace holds a revocation, so the client returns to the consent screen — and that approval, which the user gives on their own, lifts the revocation everywhere. A revocation makes a user re-approve a client; to keep a client out, block it. **Remove client** takes a client you added out of the workspace's knowledge, with its tab and any decision on it. Users see a block in the client's error and on the consent screen before they approve (which lists each of their workspaces that will refuse the client, and offers nothing to approve when none would admit it). **Connect a client** on the home page offers setup steps only for the clients the workspace admits: a blocked client has no tab there, and when "Who can connect" itself refuses clients the page says so above the tabs, in the posture's sentence and your message. ### Instance: accepting registrations **Settings → Sign-in** (instance admins) carries the one client setting that cannot be per workspace: whether clients may register themselves at `/oauth/register` at all. Registration happens before anyone signs in and names no workspace, so it is the authorization server's own switch. Turning it off keeps the registry from filling with unknown clients — new clients must then identify with a URL-based client ID, and clients already registered keep working. It does not decide who may connect; each workspace does, and a workspace that wants no self-registered clients sets *Verified clients only*. Each user's own sessions can be revoked from **Settings → Users**. Sign-ins, consents, token grants, and revocations are all audit-logged (a workspace revoke lands in that workspace's audit log), and rejected MCP requests are counted by reason in the [metrics](/docs/conduit/deploy/monitoring#gateway) — a burst of `invalid_token` is either a fleet with stale credentials or someone guessing. ## Protocol versions Conduit speaks the stateless MCP revision `2026-07-28` and the handshake revisions `2025-03-26`, `2025-06-18`, and `2025-11-25`, selected per request; the [MCP client reference](/docs/conduit/use/mcp-reference) describes how each is negotiated. Newer-version features — like URL elicitation, which powers the in-client [account-connection prompts](/docs/conduit/use/mcp-reference#connecting-your-accounts-from-the-client) — degrade gracefully for clients that predate them. # MCP client reference Source: https://pipedream.com/docs/conduit/use/mcp-reference Protocol behavior and compatibility details for administrators and client developers. This reference covers the connection behavior administrators and client developers may need to inspect. For setup steps, see [Connect your AI assistant](/docs/conduit/use/connect-clients). Conduit speaks both families of MCP protocol versions and selects one per request. On the stateless revision `2026-07-28`, a client declares the version and its capabilities on every request (in the `MCP-Protocol-Version` header and the request's `_meta`), with no `initialize` handshake or session. On the handshake revisions `2025-03-26`, `2025-06-18`, and `2025-11-25`, a client negotiates with `initialize`: requesting a newer handshake revision gets the latest one, and an older or unrecognized version is served as `2025-03-26`. `server/discover` returns every supported version, the server's capabilities, and its identity in one round trip. A request that declares a stateless revision Conduit does not serve is answered with the spec's `UnsupportedProtocolVersionError` listing the supported versions, so the client can retry with one of them. Besides tools, Conduit serves the prompts, resources, and resource templates your connectors expose, under the same access policies: a prompt appears as `__` in prompt-aware clients (slash commands, prompt pickers), a connector's resource appears under a `conduit:///` URI (templates expand inside that form), and your client is notified when your tool, prompt, or resource set changes through Conduit — an admin's policy or connector edit, a change to your role, or a connection of your own — on the stateless revision, over the `subscriptions/listen` stream it opens for the change types it wants. A tool a connector adds on its own side shows up the next time your client re-lists. Subscriptions to updates of an individual resource are not offered. Resource references inside a prompt or tool result — resource links, embedded resources, and mentions of those same URIs in the result's text — are served in that form too, so a URI a connector hands your model is one the gateway can read back; reading a URI outside the form returns an error naming the expected shape. Argument completion (`completion/complete`) for a prompt or template routes to the connector that owns it. Connectors that don't offer a surface simply contribute nothing to it. Clients that opt in receive gateway log messages — on a handshake revision by calling `logging/setLevel`, and on the stateless revision by setting a log level on a request, whose messages then arrive with its response: a warning when one of your connectors fails while its tools, prompts, or resources are being listed (a failure that otherwise degrades silently — the other connectors still serve), and the log messages a connector itself emits while answering one of your requests, forwarded with a `connector:` logger prefix. Tool, prompt, and resource listings are returned in a single page: Conduit never issues pagination cursors, and a request that carries one is answered with an invalid-params error rather than a silent restart of the list. A client can abort a long-running request (a slow tool call, for example) with the standard `notifications/cancelled` notification — on the stateless revision, by closing the request's connection — which also aborts the connector call behind it. A tool call that asks for progress (a `progressToken` in its `_meta`), from a client connected to Conduit over HTTP that accepts a streamed response, receives the connector's `notifications/progress` reports on that call's response as the connector sends them, if the connector reports progress. Progress does not extend the gateway's time limit on a connector call. A tool call that fails in the connector behind it — an unreachable server, an HTTP error, a response over the gateway's size limit, a timeout — comes back as a tool result with `isError: true` whose text describes the failure, so the model sees what went wrong and can adjust. When the gateway's own limits are what stopped the call, the text says so and how to work within them (request less data, or less work per call). Protocol-level errors are reserved for malformed requests and the gateway itself. Standard MCP metadata also passes through the gateway: tool output schemas and metadata, structured tool results and result metadata, and resource metadata reach the client without connector-specific fields being discarded. Clients that declare the MCP Apps UI extension can render interactive HTML templates exposed by remote MCP connectors. Conduit keeps each template under its connector's namespace while preserving the `ui://` scheme Apps hosts use, and relays the template metadata, structured result, and result metadata the view consumes. If a view requests the exact local template URI it was authored with, Conduit resolves it when a single accessible app declared that URI; conflicting declarations produce an explicit ambiguity instead of selecting an unrelated app. For secondary local resources that were not declared in tool metadata, Conduit checks every accessible app connector concurrently, with no fixed connector limit, among connectors currently advertising an app template. It accepts the content only when exactly one connector serves it and every other connector reports a definite miss; multiple matches or an unavailable candidate produce an explicit error rather than potentially routing the view to the wrong app. Clients that do not declare Apps support do not receive tools that are scoped only to an app view. An app view can call its connector's tools by their original, unprefixed names when that name belongs to only one accessible app connector; ambiguous names are not advertised and the call response identifies the connector-qualified alternatives. These aliases are visible only to app views, while the connector-qualified tools remain available to the model. The Conduit CLI forwards a connected client's Apps declaration and app-local calls for remote connectors; local stdio connectors do not yet expose their UI templates through the gateway. ## Connection methods Remote clients use the workspace URL under **Connect a client** on Conduit's Home page. For clients that run local processes, the Conduit CLI also serves local connectors. The CLI setup UI and local connectors are behind a browser-level rollout flag and hidden by default. This flag controls UI visibility, not server access. ## What a client sees * **Tools** are aggregated from every connector you have access to, prefixed by connector name (for example `github__create_issue`). Which tools you see is decided by your workspace's [access policies](/docs/conduit/configure/access-control) and your own enabled selection on the **Connectors** page. Until you make a selection there, a client sees Conduit's own built-in tools only: a connector or app your workspace allows you is available to switch on, and appears in your client once you do. OAuth consent adds a client-specific ceiling on top: connector and personal-tool permissions are always included, while administrative permissions require an eligible admin to opt in. * **Names are kept short**, because your client adds a prefix of its own and some clients reject a tool name past 64 characters. Conduit's own tools are advertised with no prefix at all (`get_session`), and Pipedream app tools use `pd__`, with a shorter slug for the best-known apps (`pd__gsheets-add-single-row`). Usage and audit records show the full name. * **The name you give the MCP server matters more than anything Conduit can do**, because your client spends it on every tool: registering this endpoint as `conduit` rather than something long leaves far more room for the tool name itself. * **`search` and `fetch`** are offered to ChatGPT only. A ChatGPT connector outside developer mode accepts a server only if it exposes those two names, so Conduit serves them the tools you have access to as searchable documents. Every other client gets the plain tool list instead, which already contains everything `search` could return — offered the pair as well, a capable client reads it as a sign there are tools it cannot see and wastes a step looking. * Tool lists update live: when an admin changes a policy or you enable a connector, connected clients are notified and refresh automatically. Through the CLI, that also starts or stops local connectors mid-session. * **Not every client refreshes**, so three more tools are always listed alongside yours: `list_available_tools` (the tools you can use right now, grouped by app), `describe_tools` (a tool's inputs) and `call_tool` (run a tool by name). They always reflect your current access, so an assistant can still find and use a tool you turned on mid-conversation, even when your client never updates its list. If you turned something on and your assistant doesn't see it, tell it — it checks `list_available_tools` again. Your client's per-tool approval settings see `call_tool`, not the tool it runs: approving `call_tool` once, or "always", approves whatever it runs next. * **Connectors are managed in the web UI, not by a tool.** Conduit's built-in admin tools can list and delete connectors, but creating or editing one is a UI action: those requests carry upstream credentials, which don't belong in an LLM's tool-call transcript. ## Connecting your accounts from the client Some connectors need a personal credential — an OAuth sign-in to the upstream service or your own API token — before their tools work for you. You don't have to leave your AI client to find that out: * A connector whose tools are hidden until you connect shows a single `__authenticate` tool instead. Calling it leads to a focused connect page (signing you in first if your browser has no session yet). The page connects the account in the workspace your client is using, shown at the top of the page, regardless of which workspace the web app has switched to. An app connector opens its connect flow right away; an OAuth connector asks for one click to authorize, and a token connector for your API key. If the link is for a workspace other than the one switched to in the web app, an app connector also waits for a click. Clients that support MCP URL elicitation get a native "open this page?" prompt; other clients get the link as text. * Calling any tool of a connector you haven't connected yet gets the same treatment instead of a raw authentication error. This covers app tools too: calling an app's tool without a connected account leads to the connect flow for that app. * After you finish connecting in the browser, your client's tool list refreshes automatically (in clients that refresh; others reach the tools through `call_tool`) and the connector's real tools appear. Clients that support URL elicitation are also notified the connection completed, so they can retry your original request on their own — no retry or "continue" message needed. On the stateless revision, the client's retry of the original call returns the tool's result once you finish connecting; if you haven't finished yet, it gets the prompt again. ## Multiple workspaces On instances with multiple workspaces, the bare `/mcp` endpoint works when you belong to exactly one workspace. Otherwise, address a workspace directly: ``` https://conduit.example.com/mcp/{workspace-id} ``` The error returned by the bare endpoint lists the workspace-scoped URLs available to you. # Request a connector Source: https://pipedream.com/docs/conduit/use/request-connector Ask for an app or tool that isn't available in your workspace. Can't find an app on **Home**? It may need access approval, or your admin may need to add a connection. Ask your Conduit admin about adding it. Include: * The app or tool's name. * What you want your assistant to do with it. * A link to the service, if you have one. Your admin can check whether an existing integration fits or another connection is possible. A request doesn't guarantee that an integration is available or approved. You don't need to find an API specification or configure a server yourself. # Start here Source: https://pipedream.com/docs/conduit/use/start What Conduit does and how to start using it. Conduit connects your AI assistant to the apps and tools you use at work. Your organization chooses what's available, and you choose which connectors to enable. A **connector** lets your assistant work with a particular app. For example, you could ask your assistant to find a document in Google Drive or create a ticket in Jira by summarizing a thread in Slack. ## Get started 1. [Connect your AI assistant](/docs/conduit/use/connect-clients) to Conduit. 2. [Enable a connector](/docs/conduit/use/connectors) and connect your account if prompted. 3. Ask your assistant to do something with that app. You need a work account with access to Conduit. If you can't sign in, contact your Conduit admin. ## Find what you need * [Supported AI assistants](/docs/conduit/use/assistants) * [Request a connector](/docs/conduit/use/request-connector) * [Get help](/docs/conduit/use/help) * [What is MCP?](/docs/conduit/use/what-is-mcp) # Your activity Source: https://pipedream.com/docs/conduit/use/usage Review the tools your assistant has used through Conduit. Open **Usage** to see your recent tool calls, the connectors you've used, and any failed calls. Choose a time range to explore your activity. If you belong to several workspaces, you can filter by workspace. Some cards show all-time information; their labels explain the range. Check a failed call's error message. When asking for help, include the connector, assistant, time, and error. ## Who can see this? You see your own activity. Workspace admins can review activity in their workspace, and instance admins can review activity across the instance. Conduit doesn't store what you asked a tool or what it returned. For a failed call, it keeps the first part of the error message, so an admin can help you with it. Your organization controls how long activity is kept. Older details may no longer be available. [Get help](/docs/conduit/use/help) # What is MCP? Source: https://pipedream.com/docs/conduit/use/what-is-mcp How MCP connects your AI assistant to tools, and where Conduit fits. **MCP** stands for **Model Context Protocol**. It's a shared way for AI assistants to use tools from other apps. A tool might search for a document, look up a customer, or create a task. Conduit uses MCP to connect your assistant to the apps and tools your organization makes available. Connect your assistant to Conduit once, then choose which connectors to enable. ## What does this mean during setup? Your assistant may ask you to **add an MCP server**. In these guides, that server is Conduit: copy the server URL from **Connect a client** on Conduit's **Home** page and follow your assistant's setup instructions. You don't need to install something called "MCP" or understand how the protocol works. Start with [Connect your AI assistant](/docs/conduit/use/connect-clients). For more background, see the [official MCP introduction](https://modelcontextprotocol.io/docs/getting-started/intro). # Overview Source: https://pipedream.com/docs/connect **Connect provides a developer toolkit that lets you add 3,000+ integrations to your app or AI agent.** You can build AI agents, chatbots, workflow builders, [and much more](/docs/connect/use-cases/), all in a few minutes. You have full, code-level control over how these integrations work in your app. You handle your product, Pipedream simplifies the integration. ![](https://mintcdn.com/pipedream/uuaA_7yP_98-foh5/images/connect-diagram-3k-apps.png?fit=max\&auto=format\&n=uuaA_7yP_98-foh5\&q=85\&s=f41feb70f904bfdd794372fbe4fc9caa) ## Demos Pipedream provides a few demos to help you explore and get started with Connect. > **[SDK Playground](https://pipedream.com/connect/demo)** > > Explore the Connect SDK in our playground > **[MCP Chat Demo](https://chat.pipedream.com)** > > See Pipedream MCP in action > [!NOTE] > > Run these demo apps locally in the [Connect quickstart](/docs/connect/quickstart/) ## Managed auth * Handle authorization or accept API keys on behalf of your users, for any of Pipedream’s [3,000+ APIs](https://pipedream.com/apps) * Use the [Client SDK](https://github.com/PipedreamHQ/pipedream-sdk-typescript) or [Connect Link](/docs/connect/managed-auth/quickstart/#or-use-connect-link) to accept auth in minutes * Ship new integrations quickly with Pipedream’s approved OAuth clients, or use your own ## Make requests on behalf of your users * Use [Pipedream’s MCP server](/docs/connect/mcp/developers/) to provide your AI agent 10,000+ tools from 3,000+ APIs * Add our [entire registry](https://github.com/PipedreamHQ/pipedream/tree/master/components) of [pre-built tools and triggers](/docs/connect/components/) from 3,000+ APIs to your SaaS app or workflow builder * Send custom API requests while still avoiding dealing with customer credentials with the [Connect proxy](/docs/connect/api-proxy/) * Develop and deploy complex multi-step [workflows](/docs/connect/workflows/) in our best-in-class [visual builder](/docs/workflows/building-workflows/) ## Use cases Pipedream Connect lets you build any API integration into your product in minutes. Our customers build: * **AI products**: Talk to any AI API or LLM, interacting with your users or running AI-driven asynchronous tasks * **In-app messaging**: Send messages to Slack, Discord, Microsoft Teams, or any app directly from your product. * **CRM syncs**: Sync data between your app and Salesforce, HubSpot, or any CRM * **Spreadsheet integrations**: Sync data between your app and Google Sheets, Airtable, or any spreadsheet [and much more](/docs/connect/use-cases/). ## Getting started Visit [the Connect quickstart](/docs/connect/quickstart/) to build your first integration. ## Plans and pricing **Connect is entirely free to get started and use in development mode**. Once you're ready to ship to production, check out our [pricing page](https://pipedream.com/pricing?plan=Connect) for the latest info. You can track your usage programmatically via the [List usage records API](/docs/connect/api-reference/list-usage-records). ## Security Pipedream takes the security of our products seriously. See [details on Connect security](/docs/privacy-and-security/#pipedream-connect) and [our general security docs](/docs/privacy-and-security/). Please send us any questions or [suspected vulnerabilities](/docs/privacy-and-security/#reporting-a-vulnerability). You can also get a copy of our [SOC 2 Type 2 report](/docs/privacy-and-security/#soc-2), [sign HIPAA BAAs](/docs/privacy-and-security/#hipaa), and get information on other practices and controls. ### Data storage and privacy Pipedream does not store API request payloads or response bodies when you use Connect. [Learn more about how Connect handles your data](/docs/privacy-and-security/#data-storage-and-logging). ### Storing user credentials, token refresh All credentials and tokens are sent to Pipedream securely over HTTPS, and encrypted at rest. [See our security docs on credentials](/docs/privacy-and-security/#third-party-oauth-grants-api-keys-and-environment-variables) for more information. ### How to secure your Connect apps * **Secure all secrets** — Secure your Pipedream OAuth client credentials, and especially any user credentials. Never expose secrets in your client-side code. Make all requests to Pipedream’s API and third-party APIs from your server-side code. * **Use HTTPS** — Always use HTTPS to secure your connections between your client and server. Requests to Pipedream’s API will be automatically redirected to HTTPS. * **Use secure, session-based auth between your client and server** — authorize all requests from your client to your server using a secure, session-based auth mechanism. Use well-known identity providers with services like [Clerk](https://clerk.com/), [Firebase](https://firebase.google.com/), or [Auth0](https://auth0.com/) to securely generate and validate authentication tokens. The same follows for Pipedream workflows — if you trigger Pipedream workflows from your client or server, validate all requests in the workflow before executing workflow code. * **Secure your workflows** — See our [standard security practices](/docs/privacy-and-security/best-practices/) for recommendations on securing your Pipedream workflows. ## Glossary of terms * **App**: GitHub, Notion, Slack, Google Sheets, and more. The app is the API you want your users to connect to in your product. See the [full list here](https://pipedream.com/apps). * **Developer**: This is probably you, the Pipedream customer who’s developing an app and wants to use Connect to make API requests on behalf of your end users. * **End User**: Your customer or user, whose data you want to access on their behalf. End users are identified via the `external_user_id` param in the Connect SDK and API. * **Connected Account**: The account your end user connects. [Read more about connected accounts](/docs/apps/connected-accounts/). * **OAuth Client**: This is admittedly a bit of an overloaded term and refers both to [custom OAuth clients](/docs/connect/managed-auth/oauth-clients/) you create in Pipedream to use when your end users authorize access to their account, as well as [OAuth clients to authenticate to Pipedream’s API](/docs/rest-api/auth/#oauth). # Connect API Proxy Source: https://pipedream.com/docs/connect/api-proxy Pipedream Connect provides a proxy API that you can use to send authenticated requests to any integrated API on behalf of your users. This is useful in a few scenarios: 1. You need code-level control and you want to use [Pipedream’s OAuth](/docs/connect/managed-auth/oauth-clients/#using-pipedream-oauth) instead of [your own OAuth client](/docs/connect/managed-auth/oauth-clients/#using-a-custom-oauth-client) 2. There isn’t a [pre-built tool](/docs/connect/components/) (action) for the app, or you need to modify the request 3. You want to avoid storing end user credentials in your app ## Overview The Connect proxy enables you to interface with any integrated API and make authenticated requests on behalf of your users, without dealing with OAuth or storing end user credentials. 1. You send a request to the proxy and identify the end user you want to act on behalf of 2. The proxy sends the request to the upstream API and dynamically inserts your end user’s auth credentials 3. The proxy returns the response from the upstream API back to you ![](https://mintcdn.com/pipedream/xnRKrRxEtt3vxd6I/images/connect-proxy-python.png?fit=max\&auto=format\&n=xnRKrRxEtt3vxd6I\&q=85\&s=9a8f6a064c8399fe0b3d3e7d8f5aca10) > [!NOTE] > > Before getting started with the Connect proxy, make sure you’ve already gone through the [managed auth quickstart](/docs/connect/managed-auth/quickstart/) for Pipedream Connect. ## Getting started You can send requests to the Connect proxy using one of the [Pipedream SDKs](/docs/connect/api-reference/introduction#sdks) or directly with the Pipedream REST API. ### Prerequisites * A [Pipedream OAuth client](/docs/connect/api-reference/authentication) to make authenticated requests to Pipedream’s API * Connect [environment](/docs/connect/managed-auth/environments/) (ex, `production` or `development`) * The [external user ID](/docs/connect/api-reference/introduction) for your end user (ex, `abc-123`) * The [account ID](/docs/connect/api-reference/list-accounts) for your end user’s connected account (ex, `apn_1234567`) Refer to the full Connect API [here](/docs/connect/api-reference/). ### Authenticating on behalf of your users One of the core benefits of using the Connect API Proxy is not having to deal with storing or retrieving sensitive credentials for your end users. Since Pipedream has 3,000+ integrated apps, we know how the upstream APIs are expecting to receive access tokens or API keys. When you send a request to the proxy, Pipedream will look up the corresponding connected account for the relevant user, and **automatically insert the authorization credentials in the appropriate header or URL param**. ### Sending requests When making requests to the Connect Proxy, you must provide the following parameters: **URL** * The URL of the API you want to call (ex, `https://slack.com/api/chat.postMessage`) * If using the REST API directly, this should be a URL-safe Base64 encoded string (ex, `aHR0cHM6Ly9zbGFjay5jb20vYXBpL2NoYXQucG9zdE1lc3NhZ2U`) > [!NOTE] > > **For apps with dynamic domains** (like Zendesk, Zoho, GitLab), you should use relative paths in your proxy requests. Pipedream automatically resolves the correct domain based on the user’s connected account. See [When to use relative vs full URLs](/docs/connect/api-proxy/#when-to-use-relative-vs-full-urls) for details. **HTTP method** * Use the HTTP method required by the upstream API **Body** * Optionally include a body to send to the upstream API **Headers** * If using the REST API, include the `Authorization` header with your Pipedream OAuth access token (`Bearer {access_token}`) * Headers that contain the prefix `x-pd-proxy-` will get forwarded to the upstream API ## Examples ```typescript TypeScript theme={null} import { PipedreamClient } from "@pipedream/sdk"; const client = new PipedreamClient({ projectEnvironment: {development | production}, projectId: {your_pipedream_project_id}, clientId: {your_oauth_client_id}, clientSecret: {your_oauth_client_secret} }); const resp = await client.proxy.post( { externalUserId: "{external_user_id}", // The external user ID for your end user accountId: "{account_id}", // The account ID for your end user (ex, apn_1234567) url: "https://slack.com/api/chat.postMessage", // Include any query params you need; no need to Base64 encode the URL if using the SDK headers: { "x-pd-proxy-hello": "world!" // Include any headers you need to send to the upstream API }, body: { text: "hello, world", channel: "C03NA8B4VA9" }, } ) // Parse and return the data you need console.log(resp); ``` ```python Python theme={null} from pipedream import Pipedream pd = Pipedream( project_environment="{development | production}", project_id="{your_pipedream_project_id}", client_id="{your_oauth_client_id}", client_secret="{your_oauth_client_secret}" ) response = pd.proxy.post( "https://slack.com/api/chat.postMessage", external_user_id="{external_user_id}", # The external user ID for your end user account_id="{account_id}", # The account ID for your end user (ex, apn_1234567) body={ "text": "hello, world", "channel": "C03NA8B4VA9", }, headers={ "x-pd-proxy-hello": "world!" # Include any headers you need to send to the upstream API } ) # Parse and return the data you need print(response) ``` ```java Java theme={null} import com.pipedream.api.PipedreamClient; import com.pipedream.api.requests.ProxyPostRequest; import com.pipedream.api.requests.RequestOptions; import java.util.Map; PipedreamClient client = PipedreamClient.builder() .projectEnvironment("{development | production}") .projectId("{your_pipedream_project_id}") .clientId("{your_oauth_client_id}") .clientSecret("{your_oauth_client_secret}") .build(); Map body = Map.of( "text", "hello, world", "channel", "C03NA8B4VA9" ); ProxyPostRequest request = ProxyPostRequest.builder() .externalUserId("{external_user_id}") // The external user ID for your end user .accountId("{account_id}") // The account ID for your end user (ex, apn_1234567) .body(body) .build(); RequestOptions options = RequestOptions.builder() .addHeader("x-pd-proxy-hello", "world!") // Include any headers you need to send to the upstream API .build(); Object response = client.proxy().post("https://slack.com/api/chat.postMessage", request, options); // Parse and return the data you need System.out.println(response); ``` ```sh cURL theme={null} # First, obtain an OAuth access token to authenticate to the Pipedream API curl -X POST https://api.pipedream.com/v1/oauth/token \ -H "Content-Type: application/json" \ -d '{ "grant_type": "client_credentials", "client_id": "{your_oauth_client_id}", "client_secret": "{your_oauth_client_secret}" }' # The response will include an access_token. Use it in the Authorization header below. curl -X POST "https://api.pipedream.com/v1/connect/{your_project_id}/proxy/{url_safe_base64_encoded_url}?external_user_id={external_user_id}&account_id={apn_xxxxxxx}" \ -H "Authorization: Bearer {access_token}" \ -H "x-pd-environment: {development | production}" \ -H "x-pd-proxy-hello: world" \ -d '{ "text": "hello, world", "channel": "C03NA8B4VA9" }' # Parse and return the data you need ``` ## Allowed domains The vast majority of apps in Pipedream work with the Connect Proxy. To check if an app is supported and what domains are allowed, use `pd.getApps()` or the [`/apps` REST API](/docs/rest-api/api-reference/apps/list-apps). ### Understanding the Connect object Each app in the `/apps` API response includes a `connect` object: ```json Slack app info highlight={6-12} theme={null} { "id": "app_OkrhR1", "name_slug": "slack", "name": "Slack", // ...other fields... "connect": { "allowed_domains": [ "slack.com" ], "base_proxy_target_url": "https://slack.com", "proxy_enabled": true } } ``` ```json GitLab app info highlight={6-12} theme={null} { "id": "app_1Z2hw1", "name_slug": "gitlab", "name": "GitLab", // ...other fields... "connect": { "allowed_domains": [ "gitlab.com" ], "base_proxy_target_url": "https://{{custom_fields.base_api_url}}", "proxy_enabled": true } } ``` | Field | Description | | - | - | | `proxy_enabled` | Whether the app supports the Connect Proxy | | `allowed_domains` | Domains you can send requests to when using full URLs | | `base_proxy_target_url` | The base URL for proxy requests, may contain placeholders for account-specific values | ### When to use relative vs full URLs The format of `base_proxy_target_url` determines whether you should use a relative path or full URL: #### Apps with static domains If `base_proxy_target_url` is a standard URL (e.g., `https://slack.com`), you can use either: * **Full URL**: `https://slack.com/api/chat.postMessage` * **Relative path**: `/api/chat.postMessage` #### Apps with dynamic domains If `base_proxy_target_url` contains placeholders like `{{custom_fields.base_api_url}}`, you **must** use relative paths. This applies to: * Self-hosted instances (GitLab) * Apps with account-specific subdomains (Zendesk, Zoho) For these apps, Pipedream resolves the actual domain from the user’s connected account at runtime. ### Examples ```typescript Slack (static domain) theme={null} // Both work await client.proxy.post({ externalUserId: "user-123", accountId: "apn_1234567", url: "https://slack.com/api/chat.postMessage", body: {...} }) await client.proxy.post({ accountId: "apn_1234567", externalUserId: "user-123", url: "/api/chat.postMessage", body: {...} }) ``` ```typescript GitLab (dynamic domain) theme={null} // Must use relative path await client.proxy.get({ accountId: "apn_1234567", externalUserId: "user-123", url: "/api/v4/projects", // Pipedream resolves to the end user's GitLab instance }) ``` ### Discovering app support programmatically ```typescript TypeScript theme={null} const apps = await client.apps.list() // Filter for apps that support the proxy const proxyEnabledApps = apps.filter(app => app.connect?.proxy_enabled) ``` ```bash cURL theme={null} curl https://api.pipedream.com/v1/apps \ -H "Authorization: Bearer " ``` Refer to the Connect API Reference to learn more about [listing apps](/docs/connect/api-reference/list-apps). ## Limits * The maximum timeout for a request is 30 seconds. Requests that take longer than 30 seconds will be terminated, and Pipedream will return a `504` error to the caller. ## Restricted headers The following headers are not allowed when making requests through the Connect API Proxy. Requests that include these headers will be rejected with a `400` error: * `Accept-Encoding` * `Access-Control-Request-Headers` * `Access-Control-Request-Method` * `Connection` * `Content-Length` * `Cookie` * `Date` * `DNT` * `Expect` * `Host` * `Keep-Alive` * `Origin` * `Permissions-Policy` * `Referer` * `TE` * `Trailer` * `Transfer-Encoding` * `Upgrade` * `Via` * Headers starting with `Proxy-` * Headers starting with `Sec-` # Authentication Source: https://pipedream.com/docs/connect/api-reference/authentication The Pipedream Connect API supports two authentication methods: 1. **OAuth access tokens**: Server-side authentication using client credentials 2. **Connect tokens**: Client-side authentication using short-lived tokens scoped to individual end users Both approaches support scopes to limit access to specific operations. ## OAuth Access Tokens OAuth access tokens are used for server-side API requests. They're generated using the client credentials flow and expire after 1 hour. **Why OAuth?** ✅ OAuth clients are tied to the Pipedream workspace and administered by workspace admins \ ✅ Tokens are short-lived \ ✅ OAuth access tokens support scopes, limiting access to specific operations > [!NOTE] > > Since API requests are meant to be made server-side, and since grants are not tied to individual end users, all OAuth clients are [**Client Credentials** applications](https://www.oauth.com/oauth2-servers/access-tokens/client-credentials/). ### Creating an OAuth client Each OAuth client authenticates one of two ways, chosen when you create it in the Pipedream UI: * **Client secret**: Pipedream generates a secret that your server sends to get access tokens. The steps below create this kind of client. * **Public key**: your server signs short-lived JWTs with a private key that never leaves your infrastructure, and no shared secret exists. See [Private key JWT](#private-key-jwt). 1. Visit the [API settings](https://connect.pipedream.com/settings/api) for your Pipedream workspace 2. Click the **New OAuth Client** button 3. Name your client and click **Create** 4. Copy the client ID and secret (the secret will not be accessible again) ### How to get an access token In the client credentials model, you exchange your OAuth client ID and secret for an access token. Then you use the access token to make API requests. Pipedream offers [TypeScript](https://www.npmjs.com/package/@pipedream/sdk), [Python](https://pypi.org/project/pipedream), and [Java](https://central.sonatype.com/artifact/com.pipedream/pipedream) SDKs, which abstract the process of generating and refreshing fresh access tokens. ```typescript TypeScript theme={null} import { PipedreamClient } from "@pipedream/sdk"; const client = new PipedreamClient({ clientId: "YOUR_CLIENT_ID", clientSecret: "YOUR_CLIENT_SECRET", projectEnvironment: "YOUR_PROJECT_ENVIRONMENT", projectId: "YOUR_PROJECT_ID", // Optional: specify scopes (defaults to "*") scope: "connect:accounts:read connect:accounts:write" }); await client.accounts.retrieve("account_id"); ``` ```python Python theme={null} from pipedream import Pipedream pd = Pipedream( client_id="YOUR_CLIENT_ID", client_secret="YOUR_CLIENT_SECRET", project_id="YOUR_PROJECT_ID", project_environment="YOUR_PROJECT_ENVIRONMENT", # Optional: specify scopes (defaults to "*") scope="connect:accounts:read connect:accounts:write" ) await pd.accounts.retrieve("account_id") ``` ```java Java theme={null} import com.pipedream.api.BaseClient; BaseClient client = BaseClient .builder() .clientId("YOUR_CLIENT_ID") .clientSecret("YOUR_CLIENT_SECRET") .projectId("YOUR_PROJECT_ID") .projectEnvironment("YOUR_PROJECT_ENVIRONMENT") // Optional: specify scopes (defaults to "*") .scope("connect:accounts:read connect:accounts:write") .build(); ``` You can also manage this token refresh process yourself, using the `/oauth/token` API endpoint: ```bash theme={null} curl https://api.pipedream.com/v1/oauth/token \ -H 'Content-Type: application/json' \ -d '{ "grant_type": "client_credentials", "client_id": "", "client_secret": "", "scope": "connect:accounts:read connect:accounts:write" }' ``` The `scope` parameter is optional and accepts a space-separated list of scopes. If omitted, the token defaults to `*` (full access). Access tokens expire after 1 hour. Store access tokens securely in your server. ### Private key JWT Instead of a client secret, an OAuth client can authenticate with a **public key**. You register the public key with Pipedream and keep the private key. To get an access token, your server signs a short-lived JWT (a *client assertion*) with the private key and sends it to the token endpoint. Pipedream verifies the signature against the registered public key and returns the same access token as for a client secret. This is the `private_key_jwt` client authentication method defined in [RFC 7523](https://www.rfc-editor.org/rfc/rfc7523), so most OAuth libraries support it. **Why use a public key?** ✅ No shared secret exists, so nothing reusable is stored by Pipedream or sent over the network \ ✅ The private key can stay in a key management service or HSM \ ✅ Keys can be rotated without downtime > [!NOTE] > > A client's authentication method is fixed when you create it. To move an integration from a client secret to a public key, create a new public-key client and switch your app to its client ID. #### Create a public-key client **1. Generate a key pair** Generate an EC P-256 key pair (recommended) or an RSA key pair. Keep `private.pem` secret, for example in your secrets manager. ```bash theme={null} # EC P-256 (signs with ES256) openssl ecparam -name prime256v1 -genkey -noout | openssl pkcs8 -topk8 -nocrypt -out private.pem openssl ec -in private.pem -pubout -out public.pem # Or RSA 2048 (signs with RS256) openssl genpkey -algorithm RSA -pkeyopt rsa_keygen_bits:2048 -out private.pem openssl rsa -in private.pem -pubout -out public.pem ``` **2. Create the client** In the [Pipedream UI](https://connect.pipedream.com), open **Settings → API** (or a project's **Configuration → API**) and click **New API client**. Name the client, choose **Public key**, paste the contents of `public.pem` (or the public key as a JWK), and click **Create**. **3. Copy the client ID** Copy the **Client ID**. There is no client secret. **Supported keys** | Key type | Signing algorithm (`alg`) | Requirements | | - | - | - | | EC | `ES256` | Curve P-256 | | RSA | `RS256` | 2048–4096 bits, public exponent 65537 | Upload the key as a PEM public key (`-----BEGIN PUBLIC KEY-----`) or as a single public JWK. Pipedream rejects private keys. If you paste one by mistake, treat it as exposed and generate a new key pair. Each key is assigned a **key ID** (`kid`), shown in **Manage keys**. If you upload a JWK with a `kid`, Pipedream keeps it; otherwise the key ID is the key's [RFC 7638](https://www.rfc-editor.org/rfc/rfc7638) thumbprint. #### Authenticate with the SDKs The [TypeScript](https://www.npmjs.com/package/@pipedream/sdk) (3.2.0 and later), [Python](https://pypi.org/project/pipedream) (2.2.0 and later), and [Java](https://central.sonatype.com/artifact/com.pipedream/pipedream) (2.2.0 and later) SDKs sign client assertions for you. Pass your private key instead of a client secret, and the SDK handles the rest: * it signs a short-lived assertion for every token request * it sets the claims, including the audience * it requests, caches, and refreshes the access token, the same way it does for client secrets ```typescript TypeScript theme={null} import { PipedreamClient } from "@pipedream/sdk"; const client = new PipedreamClient({ clientId: "YOUR_CLIENT_ID", privateKey: process.env.PIPEDREAM_PRIVATE_KEY, // instead of clientSecret projectId: "YOUR_PROJECT_ID", projectEnvironment: "YOUR_PROJECT_ENVIRONMENT", }); await client.accounts.retrieve("account_id"); ``` ```python Python theme={null} # pip install "pipedream[private-key]" import os from pipedream import Pipedream pd = Pipedream( client_id="YOUR_CLIENT_ID", private_key=os.environ["PIPEDREAM_PRIVATE_KEY"], # instead of client_secret project_id="YOUR_PROJECT_ID", project_environment="YOUR_PROJECT_ENVIRONMENT", ) pd.accounts.retrieve("account_id") ``` ```java Java theme={null} import com.pipedream.api.PipedreamClient; PipedreamClient client = PipedreamClient.builder() .clientId("YOUR_CLIENT_ID") .privateKey(System.getenv("PIPEDREAM_PRIVATE_KEY")) // instead of clientSecret .projectId("YOUR_PROJECT_ID") .projectEnvironment("YOUR_PROJECT_ENVIRONMENT") .build(); ``` * **The private key:** pass the contents of `private.pem`, or the private key as a JWK. The SDK picks `ES256` or `RS256` from the key type. The Java SDK needs an unencrypted PKCS#8 PEM (`-----BEGIN PRIVATE KEY-----`), which the `openssl` commands above produce, or a JWK. * **Python:** install the `private-key` extra, which adds the libraries used for signing. * **Environment variables:** each SDK also reads the key from `PIPEDREAM_PRIVATE_KEY`, alongside `PIPEDREAM_CLIENT_ID`. * **Optional key ID:** set `keyId` (`key_id` in Python) or `PIPEDREAM_KEY_ID` to send the key ID from **Manage keys** as the assertion's `kid`. It's useful during [key rotation](#rotate-keys) and for debugging, but not required. * **One credential at a time:** a client uses either a client secret or a private key. Passing both is an error. #### Sign a client assertion yourself If you're not using an SDK, sign the client assertion yourself. You need these values: | | | | - | - | | Token URL | `https://api.pipedream.com/v1/oauth/token` | | Assertion audience (`aud`) | `https://api.pipedream.com` | | Client ID (`iss` and `sub`) | Shown when you create the client, and in the Pipedream UI's list of API clients | The client assertion is a JWT signed with your private key: | Header | Value | | - | - | | `alg` | `ES256` for an EC key, `RS256` for an RSA key. Must match the registered key. | | `kid` | Optional. The key ID from **Manage keys**. Without it, Pipedream tries each of the client's keys. | | `typ` | Optional. `client-authentication+jwt` is recommended. | | Claim | Value | | - | - | | `iss` | Your client ID | | `sub` | Your client ID | | `aud` | `https://api.pipedream.com`, as a string. This is Pipedream's issuer identifier. **The token endpoint URL is not accepted.** | | `exp` | Expiration time, at most 1 hour in the future. A short lifetime such as 60 seconds is recommended. | | `jti` | A unique ID for this assertion, such as a random UUID. Each assertion can be used only once. | | `iat`, `nbf` | Optional. Must not be in the future. | Pipedream allows 30 seconds of clock skew. > [!WARNING] > > Sign a new assertion for **every** token request, including retries. An assertion is rejected if its `jti` has already been used. #### Request an access token Send the assertion to the token endpoint with `client_assertion_type` set to `urn:ietf:params:oauth:client-assertion-type:jwt-bearer`. Don't send a `client_secret` or an `Authorization` header with it. ```bash theme={null} curl https://api.pipedream.com/v1/oauth/token \ -d grant_type=client_credentials \ -d client_id= \ -d client_assertion_type=urn:ietf:params:oauth:client-assertion-type:jwt-bearer \ -d client_assertion= \ -d 'scope=connect:accounts:read connect:accounts:write' ``` The endpoint accepts form-encoded or JSON bodies. The response, the `scope` parameter, and the resulting access token work exactly as they do for a client secret. These examples sign an assertion and request an access token without an SDK: ```typescript TypeScript theme={null} // npm install jose import { randomUUID } from "node:crypto"; import { readFileSync } from "node:fs"; import { importPKCS8, SignJWT } from "jose"; const CLIENT_ID = process.env.PIPEDREAM_CLIENT_ID!; const privateKey = await importPKCS8(readFileSync("private.pem", "utf8"), "ES256"); async function getAccessToken(): Promise { const assertion = await new SignJWT({}) .setProtectedHeader({ alg: "ES256", typ: "client-authentication+jwt" }) .setIssuer(CLIENT_ID) .setSubject(CLIENT_ID) .setAudience("https://api.pipedream.com") .setIssuedAt() .setExpirationTime("60s") .setJti(randomUUID()) .sign(privateKey); const res = await fetch("https://api.pipedream.com/v1/oauth/token", { method: "POST", headers: { "Content-Type": "application/x-www-form-urlencoded" }, body: new URLSearchParams({ grant_type: "client_credentials", client_id: CLIENT_ID, client_assertion_type: "urn:ietf:params:oauth:client-assertion-type:jwt-bearer", client_assertion: assertion, }), }); if (!res.ok) throw new Error(`Token request failed: ${res.status} ${await res.text()}`); const { access_token } = await res.json(); return access_token; } ``` ```python Python theme={null} # pip install "pyjwt[crypto]" requests import os import time import uuid import jwt import requests CLIENT_ID = os.environ["PIPEDREAM_CLIENT_ID"] with open("private.pem") as f: PRIVATE_KEY = f.read() def get_access_token() -> str: now = int(time.time()) assertion = jwt.encode( { "iss": CLIENT_ID, "sub": CLIENT_ID, "aud": "https://api.pipedream.com", "iat": now, "exp": now + 60, "jti": str(uuid.uuid4()), }, PRIVATE_KEY, algorithm="ES256", headers={"typ": "client-authentication+jwt"}, ) res = requests.post( "https://api.pipedream.com/v1/oauth/token", data={ "grant_type": "client_credentials", "client_id": CLIENT_ID, "client_assertion_type": "urn:ietf:params:oauth:client-assertion-type:jwt-bearer", "client_assertion": assertion, }, ) res.raise_for_status() return res.json()["access_token"] ``` Access tokens expire after 1 hour, so cache the token and request a new one before it expires. **Configuring OAuth libraries** Libraries that support `private_key_jwt` work with Pipedream, but some default the `aud` claim to the token endpoint URL, which Pipedream rejects. Set the audience to `https://api.pipedream.com`: * **Authlib (Python)**: `PrivateKeyJWT` uses its first argument as `aud`, so register `PrivateKeyJWT("https://api.pipedream.com")` and still call `fetch_token("https://api.pipedream.com/v1/oauth/token")`. For an EC key, pass `alg="ES256"` and give the session a `joserfc.jwk.ECKey` as its `client_secret`. A PEM string works only for RSA keys. Authlib's default assertion lifetime of 1 hour is accepted. * **Spring Security**: use a `jwtClientAssertionCustomizer` to set the `aud` claim. #### Rotate keys A client can have up to two public keys at once, so you can rotate without downtime: 1. Generate a new key pair. 2. In the client's **…** menu, click **Manage keys**, paste the new public key, and click **Add key**. 3. Deploy your app with the new private key. Set `kid` in the assertion header to the new key's ID. 4. Once **Last used** for the old key stops updating, remove the old key. A client always keeps at least one key. **Last used** is updated at most every 10 minutes. #### Errors | Status | `error` | Meaning | | - | - | - | | `400` | `invalid_request` | The request is malformed: a wrong `client_assertion_type`, a parameter sent more than once, client credentials in the query string, or a `client_secret` or `Authorization` header sent along with an assertion. | | `401` | `invalid_client` | The assertion was rejected. Check the signing key and `alg`, `kid`, `iss` and `sub` (both your client ID), `aud` (exactly `https://api.pipedream.com`), and `exp`, and make sure the `jti` wasn't used before. This is also returned when a public-key client sends a client secret. | | `503` | `temporarily_unavailable` | Pipedream couldn't check the assertion. Retry after the `Retry-After` interval, with a newly signed assertion. | ### OAuth scopes OAuth access tokens support scopes to limit access to specific operations. When creating an access token, you can optionally specify a space-separated list of scopes. If no scope is specified, the token defaults to `*` (full access). **Available scopes:** | Scope | Description | | - | - | | `*` | Full access to every OAuth-protected endpoint | | `connect:*` | Full access to all Connect API endpoints (apps, components, projects, triggers, accounts, etc.) | | `connect:accounts:read` | List and fetch Connect accounts for an external user | | `connect:accounts:write` | Create or remove Connect accounts | | `connect:actions:*` | Full access to Connect actions | | `connect:apps:*` | List and fetch apps and app categories in the Pipedream registry | | `connect:deployed_triggers:read` | Read deployed triggers and related data like events, pipelines and webhooks | | `connect:deployed_triggers:write` | Modify or delete deployed triggers | | `connect:projects:read` | List and fetch projects, and read project environment webhooks | | `connect:projects:write` | Create, update, and delete projects, and manage project environment webhooks | | `connect:proxy` | Invoke the Connect proxy | | `connect:tokens:create` | Create Connect tokens | | `connect:triggers:*` | Full access to Connect triggers | | `connect:usage:read` | List Connect usage records for a time window | | `connect:users:read` | List and fetch external users | | `connect:users:write` | Delete external users | | `connect:workflow:invoke` | Invoke Connect workflows on behalf of a user | > [!NOTE] > > The table above is the complete list of scopes, and each scope must be requested exactly as written. There are no other `:read` / `:write` variants — for example, `connect:apps:read` is **not** a valid scope, so use `connect:apps:*` to grant access to the [List apps](/docs/connect/api-reference/list-apps) and [List app categories](/docs/connect/api-reference/list-app-categories) endpoints. > > Requesting an unrecognized scope fails with an `invalid_scope` error when you request the access token, not when you call the endpoint. ### Revoking a client secret Public-key clients have no secret. To replace a public key, see [Rotate keys](#rotate-keys). 1. Visit your workspace's [API settings](https://pipedream.com/settings/api) 2. Click the **…** button to the right of the OAuth client whose secret you want to revoke, then click **Rotate client secret** 3. Copy the new client secret (it will not be accessible again) ### OAuth security See [the OAuth section of the security docs](/docs/privacy-and-security/#pipedream-rest-api-security-oauth-clients) for more information on how Pipedream secures OAuth credentials. ## Connect Tokens Connect tokens are short-lived tokens that enable you to securely make client-side requests on behalf of end users. They're created server-side and passed to your frontend to authenticate requests. ### Creating a Connect token Use the [Create Connect token](/docs/connect/api-reference/create-connect-token) endpoint to generate a token for an external user: ```typescript TypeScript theme={null} import { PipedreamClient } from "@pipedream/sdk"; const client = new PipedreamClient({ clientId: "YOUR_CLIENT_ID", clientSecret: "YOUR_CLIENT_SECRET", projectEnvironment: "YOUR_PROJECT_ENVIRONMENT", projectId: "YOUR_PROJECT_ID" }); const { token, expires_at } = await client.createConnectToken({ externalUserId: "user-123", // Optional: customize TTL (defaults to 4 hours) expiresIn: 3600, // 1 hour // Optional: restrict scopes (defaults to "connect:*") scope: "connect:accounts:read connect:accounts:write" }); ``` ```python Python theme={null} from pipedream import Pipedream pd = Pipedream( client_id="YOUR_CLIENT_ID", client_secret="YOUR_CLIENT_SECRET", project_id="YOUR_PROJECT_ID", project_environment="YOUR_PROJECT_ENVIRONMENT" ) result = pd.create_connect_token( external_user_id="user-123", # Optional: customize TTL (defaults to 4 hours) expires_in=3600, # 1 hour # Optional: restrict scopes (defaults to "connect:*") scope="connect:accounts:read connect:accounts:write" ) token = result.token expires_at = result.expires_at ``` ```bash cURL theme={null} curl -X POST https://api.pipedream.com/v1/connect/{project_id}/tokens \ -H 'Authorization: Bearer ' \ -H 'Content-Type: application/json' \ -d '{ "external_user_id": "user-123", "expires_in": 3600, "scope": "connect:accounts:read connect:accounts:write" }' ``` ### Connect token TTL Connect tokens have a customizable time-to-live (TTL): * **Minimum:** 1 second * **Maximum:** 14,400 seconds (4 hours) * **Default:** 14,400 seconds (4 hours) Specify the TTL using the `expires_in` parameter (in seconds) when creating a token. ### Connect token scopes Connect tokens support a **subset** of the OAuth scopes. Because Connect tokens are used client-side, they can only be granted scopes for the endpoints your end users call directly from the browser. When creating a Connect token, you can optionally specify a space-separated list of scopes. If no scope is specified, the token defaults to `connect:*` (full access to all Connect API endpoints available to Connect tokens). **Available scopes:** | Scope | Description | | - | - | | `connect:*` | Full access to all Connect API endpoints available to Connect tokens | | `connect:accounts:read` | List and fetch Connect accounts for an external user | | `connect:accounts:write` | Create or remove Connect accounts | | `connect:actions:*` | Full access to Connect actions | | `connect:apps:*` | List and fetch apps and app categories in the Pipedream registry | | `connect:deployed_triggers:read` | Read deployed triggers and related data like events, pipelines and webhooks | | `connect:deployed_triggers:write` | Modify or delete deployed triggers | | `connect:proxy` | Invoke the Connect proxy | | `connect:triggers:*` | Full access to Connect triggers | > [!NOTE] > > Connect tokens cannot be granted the `*` scope. The maximum scope available is `connect:*`. > > The following scopes are available to **OAuth access tokens only**, and requesting any of them when creating a Connect token returns a `400` error: `connect:projects:read`, `connect:projects:write`, `connect:tokens:create`, `connect:usage:read`, `connect:users:read`, `connect:users:write`, and `connect:workflow:invoke`. # Configure action prop Source: https://pipedream.com/docs/connect/api-reference/configure-action-prop post /v1/connect/{project_id}/actions/configure Retrieve remote options for a given prop for a action # Configure component prop Source: https://pipedream.com/docs/connect/api-reference/configure-component-prop post /v1/connect/{project_id}/components/configure Retrieve remote options for a given prop for a component # Configure trigger prop Source: https://pipedream.com/docs/connect/api-reference/configure-trigger-prop post /v1/connect/{project_id}/triggers/configure Retrieve remote options for a given prop for a trigger # Create app override Source: https://pipedream.com/docs/connect/api-reference/create-app-override post /v1/connect/{project_id}/app_overrides Create an app override with pre-defined custom field values # Create Connect token Source: https://pipedream.com/docs/connect/api-reference/create-connect-token post /v1/connect/{project_id}/tokens Create a Connect token for a user Your app will initiate the account connection flow for your end users in your frontend. To securely scope connection to a specific end user, on your server, **you retrieve a short-lived token for that user**, and return that token to your frontend. See [the Connect tokens docs](/docs/connect/managed-auth/tokens/) for more information. When using the Connect API to make requests from a client environment like a browser, you must specify the **allowed origins** for the token. Otherwise, this field is optional. This is a list of URLs that are allowed to make requests with the token. For example: ```json theme={null} { "allowed_origins": ["https://myapp.com"] } ``` # Create OAuth client Source: https://pipedream.com/docs/connect/api-reference/create-oauth-client post /v1/connect/{project_id}/oauth_apps Register a custom OAuth client for an app # Generate OAuth Token Source: https://pipedream.com/docs/connect/api-reference/create-oauth-token post /v1/oauth/token Learn how to generate an OAuth access token to authenticate requests to the Pipedream API > [!NOTE] > > If using [one of the available SDKs](/docs/connect/api-reference/introduction#available-sdks) in TypeScript, Python, or Java, the OAuth access token is automatically generated (and refreshed) for you when you initialize the client. **Create an OAuth client to get your client ID and secret:** 1. Visit the [API settings](https://pipedream.com/settings/api) for your Pipedream workspace. 2. Click the **New OAuth Client** button. 3. Name your client and click **Create**. 4. Copy the client secret. **It will not be accessible again**. Click **Close**. 5. Copy the client ID from the list. > [!NOTE] > > Read more in the [Authentication](/docs/connect/api-reference/authentication) section. ## Authenticating with a public key Clients that authenticate with a public key don't send `client_secret`. Instead, they send a JWT signed with their private key as `client_assertion`, with `client_assertion_type` set to `urn:ietf:params:oauth:client-assertion-type:jwt-bearer`: ```bash theme={null} curl -X POST https://api.pipedream.com/v1/oauth/token \ -d grant_type=client_credentials \ -d client_id=YOUR_CLIENT_ID \ -d client_assertion_type=urn:ietf:params:oauth:client-assertion-type:jwt-bearer \ -d client_assertion=YOUR_SIGNED_JWT ``` See [Private key JWT](/docs/connect/api-reference/authentication#private-key-jwt) for how to create a public-key client and sign the assertion. ## OAuth scopes You can optionally specify a `scope` parameter in the request body to limit the access token to specific operations. The `scope` parameter accepts a space-separated list of scopes. If no scope is specified, the token defaults to `*` (full access). **Example request with scopes:** ```bash theme={null} curl -X POST https://api.pipedream.com/v1/oauth/token \ -H 'Content-Type: application/json' \ -d '{ "grant_type": "client_credentials", "client_id": "YOUR_CLIENT_ID", "client_secret": "YOUR_CLIENT_SECRET", "scope": "connect:accounts:read connect:accounts:write" }' ``` > [!NOTE] > > View the full list of available scopes in the [Authentication](/docs/connect/api-reference/authentication#oauth-scopes) section. # Create project Source: https://pipedream.com/docs/connect/api-reference/create-project post /v1/connect/projects Create a new project for the authenticated workspace # Delete account Source: https://pipedream.com/docs/connect/api-reference/delete-account delete /v1/connect/{project_id}/accounts/{account_id} Remove a connected account and its associated credentials # Delete accounts by app Source: https://pipedream.com/docs/connect/api-reference/delete-accounts-by-app delete /v1/connect/{project_id}/apps/{app_id}/accounts Remove all connected accounts for a specific app # Delete app override Source: https://pipedream.com/docs/connect/api-reference/delete-app-override delete /v1/connect/{project_id}/app_overrides/{id} Delete an app override without affecting accounts already connected with it # Delete deployed trigger Source: https://pipedream.com/docs/connect/api-reference/delete-deployed-trigger delete /v1/connect/{project_id}/deployed-triggers/{trigger_id} Remove a deployed trigger and stop receiving events # Delete external user Source: https://pipedream.com/docs/connect/api-reference/delete-external-user delete /v1/connect/{project_id}/users/{external_user_id} Remove an external user and all their associated accounts and resources # Delete OAuth client Source: https://pipedream.com/docs/connect/api-reference/delete-oauth-client delete /v1/connect/{project_id}/oauth_apps/{id} Remove a custom OAuth client that is no longer in use # Delete project Source: https://pipedream.com/docs/connect/api-reference/delete-project delete /v1/connect/projects/{project_id} Delete a project owned by the authenticated workspace # Delete project environment webhook Source: https://pipedream.com/docs/connect/api-reference/delete-project-environment-webhook delete /v1/connect/{project_id}/webhook Remove the webhook configured for a project environment > [!NOTE] > > Pipedream signs webhook emits for deployed triggers using HMAC-SHA256. See [Validating signatures](/docs/connect/webhooks#validating-signatures) for details on how to verify webhook payloads. # Deploy trigger Source: https://pipedream.com/docs/connect/api-reference/deploy-trigger post /v1/connect/{project_id}/triggers/deploy Deploy a trigger to listen for and emit events > [!NOTE] > > See [Setting the polling interval](/docs/connect/components/triggers#setting-the-polling-interval) for details on defining the schedule for polling-based triggers. > [!NOTE] > > When you pass a `webhook_url`, Pipedream returns a signing key you can use to [verify webhook signatures](/docs/connect/webhooks#webhook-signatures) on incoming event deliveries. # Download file Source: https://pipedream.com/docs/connect/api-reference/download-file get /v1/connect/{project_id}/file_stash/download Download a file from File Stash # Get deployed trigger Source: https://pipedream.com/docs/connect/api-reference/get-deployed-trigger get /v1/connect/{project_id}/deployed-triggers/{trigger_id} Get details of a specific deployed trigger by its ID # Get project environment webhook Source: https://pipedream.com/docs/connect/api-reference/get-project-environment-webhook get /v1/connect/{project_id}/webhook Retrieve the webhook configured for a project environment > [!NOTE] > > Pipedream signs webhook emits for deployed triggers using HMAC-SHA256. See [Validating signatures](/docs/connect/webhooks#validating-signatures) for details on how to verify webhook payloads. # Get project info Source: https://pipedream.com/docs/connect/api-reference/get-project-info get /v1/connect/{project_id}/projects/info Retrieve project configuration and environment details # Get trigger webhook Source: https://pipedream.com/docs/connect/api-reference/get-trigger-webhook get /v1/connect/{project_id}/deployed-triggers/{trigger_id}/webhooks/{webhook_id} Retrieve a specific webhook for a deployed trigger, including its signing key # Introduction Source: https://pipedream.com/docs/connect/api-reference/introduction Pipedream provides TypeScript, Python, and Java SDKs along with a REST API to interact with the Connect service. You'll find examples using the SDKs and the REST API in multiple languages below. ## REST API base URL Pipedream Connect resources are scoped to [projects](/docs/projects/), so you'll need to pass the project's ID as a part of the base URL or when initializing the SDK client. Visit your project's **Settings** to find the project ID. ```curl HTTP (cURL) theme={null} https://api.pipedream.com/v1/connect/{project_id} ``` ```typescript TypeScript theme={null} import { PipedreamClient } from "@pipedream/sdk"; const client = new PipedreamClient({ clientId: "YOUR_CLIENT_ID", clientSecret: "YOUR_CLIENT_SECRET", projectEnvironment: "YOUR_PROJECT_ENVIRONMENT", projectId: "YOUR_PROJECT_ID" }); ``` ```python Python theme={null} from pipedream import Pipedream pd = Pipedream( client_id="YOUR_CLIENT_ID", client_secret="YOUR_CLIENT_SECRET", project_id="YOUR_PROJECT_ID", project_environment="YOUR_PROJECT_ENVIRONMENT" ) ``` ```java Java theme={null} import com.pipedream.api.BaseClient; BaseClient client = BaseClient .builder() .clientId("YOUR_CLIENT_ID") .clientSecret("YOUR_CLIENT_SECRET") .projectId("YOUR_PROJECT_ID") .projectEnvironment("YOUR_PROJECT_ENVIRONMENT") .build(); ``` ## External users When you use the Connect API, you'll pass an `external_user_id` parameter when initiating account connections and retrieving account info. This is your user's ID, in your system — whatever you use to uniquely identify them. Pipedream associates this ID with user accounts, so you can retrieve account info for a specific user, and invoke actions on their behalf. External User IDs are limited to 250 characters. Read more about [external users](/docs/connect/managed-auth/users/). ## Environment Most API endpoints require an [environment](/docs/connect/managed-auth/environments/) parameter. This lets you specify the environment (`production` or `development`) where resources will live in your project. Always set the environment when you create the SDK client: ```javascript theme={null} import { PipedreamClient } from "@pipedream/sdk"; const client = new PipedreamClient({ clientId: "your-oauth-client-id", clientSecret: "your-oauth-client-secret", projectId: "your-project-id", projectEnvironment: "development" // change to "production" for production environment }); ``` or pass the `X-PD-Environment` header in HTTP requests: ```sh theme={null} curl -X POST https://api.pipedream.com/v1/connect/{project_id}/tokens \ -H "Content-Type: application/json" \ -H "X-PD-Environment: development" \ -H "Authorization: Bearer {access_token}" \ -d '{ "external_user_id": "your-external-user-id" }' ``` > [!NOTE] > > Pipedream’s SDKs make it easier to access the REST APIs. Check out installation instructions and more info in our [SDKs](/docs/connect/api-reference/sdks) guide. # List user accounts Source: https://pipedream.com/docs/connect/api-reference/list-accounts-for-external-user get /v1/connect/{project_id}/users/{external_user_id}/accounts List all connected accounts for a specific external user. Equivalent to GET /accounts with external_user_id filter but uses path-based routing. > [!NOTE] > > To retrieve credentials for OAuth apps (Slack, Google Sheets, etc), **the connected account must be using [your own OAuth client](/docs/connect/managed-auth/oauth-clients/#using-a-custom-oauth-client)**. > [!WARNING] > > Never return user credentials to the client # List actions Source: https://pipedream.com/docs/connect/api-reference/list-actions get /v1/connect/{project_id}/actions Retrieve available actions with optional search and app filtering # List app categories Source: https://pipedream.com/docs/connect/api-reference/list-app-categories get /v1/connect/app_categories Retrieve all available categories for integrated apps # List app overrides Source: https://pipedream.com/docs/connect/api-reference/list-app-overrides get /v1/connect/{project_id}/app_overrides List the app overrides available to the project, including the parent workspace's # List apps Source: https://pipedream.com/docs/connect/api-reference/list-apps get /v1/connect/apps Retrieve all available apps with optional filtering and sorting # List components Source: https://pipedream.com/docs/connect/api-reference/list-components get /v1/connect/{project_id}/components Retrieve available components with optional search and app filtering # List deployed triggers Source: https://pipedream.com/docs/connect/api-reference/list-deployed-triggers get /v1/connect/{project_id}/deployed-triggers Retrieve all deployed triggers for a specific external user # List OAuth clients Source: https://pipedream.com/docs/connect/api-reference/list-oauth-clients get /v1/connect/{project_id}/oauth_apps List the custom OAuth clients available to the project, including the parent workspace's # List projects Source: https://pipedream.com/docs/connect/api-reference/list-projects get /v1/connect/projects List the projects that are available to the authenticated Connect client # List trigger events Source: https://pipedream.com/docs/connect/api-reference/list-trigger-events get /v1/connect/{project_id}/deployed-triggers/{trigger_id}/events Retrieve recent events emitted by a deployed trigger > [!NOTE] > > The limit on the number of events returned is 100. # List trigger webhooks Source: https://pipedream.com/docs/connect/api-reference/list-trigger-webhooks get /v1/connect/{project_id}/deployed-triggers/{trigger_id}/webhooks Get webhook URLs configured to receive trigger events # List triggers Source: https://pipedream.com/docs/connect/api-reference/list-triggers get /v1/connect/{project_id}/triggers Retrieve available triggers with optional search and app filtering # List usage records Source: https://pipedream.com/docs/connect/api-reference/list-usage-records get /v1/connect/usage Retrieve Connect usage records for a time window # List external users Source: https://pipedream.com/docs/connect/api-reference/list-users get /v1/connect/{project_id}/users Retrieve all external users for the project # Rate Limits Source: https://pipedream.com/docs/connect/api-reference/rate-limits ## Pipedream rate limits The following rate limits apply to the Connect API: | Name | Endpoint | Request Limit | Scope | | - | - | - | - | | [Create OAuth Token](/docs/connect/api-reference/create-oauth-token) | `POST /v1/oauth/token` | 3,500 per 5 minutes | Per OAuth client | | [List and Retrieve Accounts](/docs/connect/api-reference/list-accounts) | `GET /accounts`, `GET /accounts/{account_id}`, `GET /apps/{app_id}/accounts` | 2,000 per 5 minutes | Per project | | [List and Retrieve Components](/docs/connect/api-reference/list-components) | `GET /components/*`, `GET /actions/*`, `GET /triggers/*`, `GET /deployed-triggers/*` | 3,000 per 5 minutes | Per project | | [Reload Props](/docs/connect/api-reference/reload-component-props), [Deploy Trigger](/docs/connect/api-reference/deploy-trigger), and [Manage Deployed Triggers](/docs/connect/api-reference/list-deployed-triggers) | `POST /{components,actions,triggers}/props`, `POST /triggers/deploy`, `PUT \| POST \| DELETE /deployed-triggers/*` | 2,000 per 5 minutes | Per project | | Project management | All of the endpoints above, plus project management endpoints such as users, accounts, deployed triggers, OAuth clients, app overrides, and webhooks | 5,000 per 5 minutes, combined | Per project | To get the connected accounts for one user, use [List user accounts](/docs/connect/api-reference/list-accounts-for-external-user) (`GET /users/{external_user_id}/accounts`). It is the fastest way to retrieve account details and credentials. Access tokens from `POST /v1/oauth/token` are valid for multiple requests. Reuse a token until it expires. Do not request a new token for each API call. Pipedream also applies per-IP rate limits to all traffic to protect the platform. **Need higher limits?** [Contact our support team](https://pipedream.com/support) to discuss your requirements. ### Rate limit responses When you exceed a limit, the API returns HTTP `429 Too Many Requests`. Responses from the per-project and per-client limits above include these headers: | Header | Description | | - | - | | `Retry-After` | Seconds until the current window resets | | `X-RateLimit-Limit` | Maximum requests allowed in the window | | `X-RateLimit-Remaining` | Requests remaining in the window (always `0` on a `429`) | | `X-RateLimit-Reset` | Unix timestamp, in seconds, when the window resets | Wait until the window resets before you retry. Use exponential backoff for retries. ## Custom rate limits You can set custom rate limits for your users to control their usage of the Connect API and prevent runaway requests or abuse. ### Create rate limit Create a rate limit by specifying a time window and maximum requests allowed within that window. The API returns a `rate_limit_token` that you include in subsequent Connect API requests. ```http theme={null} POST /rate_limits ``` #### Parameters | Parameter | Type | Description | | - | - | - | | `window_size_seconds` | integer | Time window duration in seconds | | `requests_per_window` | integer | Maximum requests allowed per window | #### Example request ```bash theme={null} # First, obtain an OAuth access token curl -X POST https://api.pipedream.com/v1/oauth/token \ -H "Content-Type: application/json" \ -d '{ "grant_type": "client_credentials", "client_id": "{oauth_client_id}", "client_secret": "{oauth_client_secret}" }' # Create the rate limit curl -X POST https://api.pipedream.com/v1/connect/rate_limits \ -H "Content-Type: application/json" \ -H "Authorization: Bearer {access_token}" \ -d '{ "window_size_seconds": 10, "requests_per_window": 1000 }' ``` #### Response ```json theme={null} { "token": "CiKpqRdTmNwLfhzSvYxBjAkMnVbXuQrWeZyHgPtJsDcEvFpLnE" } ``` ### Using rate limit tokens Include the `rate_limit_token` in the `x-pd-rate-limit` header for all Connect API requests: ```bash theme={null} curl -X POST "https://api.pipedream.com/v1/connect/{project_id}/actions/run" \ -H "Authorization: Bearer {access_token}" \ -H "Content-Type: application/json" \ -H "x-pd-rate-limit: {rate_limit_token}" \ -d '{ "external_user_id": "user123", "id": "gitlab-list-commits", "configured_props": { "gitlab": { "authProvisionId": "apn_kVh9AoD" }, "projectId": 45672541, "refName": "main" } }' ``` All requests that send the same `rate_limit_token` share one limit. To give each of your users a separate limit, create a token for each user. When a request exceeds a custom rate limit, the API returns HTTP `429 Too Many Requests` with an `x-pd-rate-limit-reset-in` header. The header gives the number of seconds until the window resets. # Regenerate trigger webhook signing key Source: https://pipedream.com/docs/connect/api-reference/regenerate-trigger-webhook-signing-key post /v1/connect/{project_id}/deployed-triggers/{trigger_id}/webhooks/{webhook_id}/regenerate_signing_key Regenerate the signing key for a specific webhook on a deployed trigger # Regenerate webhook signing key Source: https://pipedream.com/docs/connect/api-reference/regenerate-webhook-signing-key post /v1/connect/{project_id}/webhook/regenerate_signing_key Regenerate the signing key for the project environment webhook > [!NOTE] > > Pipedream signs webhook emits for deployed triggers using HMAC-SHA256. See [Validating signatures](/docs/connect/webhooks#validating-signatures) for details on how to verify webhook payloads. # Reload action props Source: https://pipedream.com/docs/connect/api-reference/reload-action-props post /v1/connect/{project_id}/actions/props Reload the prop definition based on the currently configured props # Reload component props Source: https://pipedream.com/docs/connect/api-reference/reload-component-props post /v1/connect/{project_id}/components/props Reload the prop definition based on the currently configured props # Reload trigger props Source: https://pipedream.com/docs/connect/api-reference/reload-trigger-props post /v1/connect/{project_id}/triggers/props Reload the prop definition based on the currently configured props # Reset trigger webhook delivery state Source: https://pipedream.com/docs/connect/api-reference/reset-trigger-webhook-delivery-state post /v1/connect/{project_id}/deployed-triggers/{trigger_id}/webhooks/{webhook_id}/reset_delivery_state Reactivate a disabled webhook and clear its delivery failure evidence # Retrieve account Source: https://pipedream.com/docs/connect/api-reference/retrieve-account get /v1/connect/{project_id}/accounts/{account_id} Get the details for a specific connected account > [!TIP] > > To get a user's connected accounts, use [List user accounts](/docs/connect/api-reference/list-accounts-for-external-user). It is the fastest way to retrieve account details and credentials for one user. It returns up to 100 accounts, and you can filter by app. > [!NOTE] > > To retrieve credentials for OAuth apps (Slack, Google Sheets, etc), **the connected account must be using [your own OAuth client](/docs/connect/managed-auth/oauth-clients/#using-a-custom-oauth-client)**. > [!WARNING] > > Never return user credentials to the client # Retrieve action Source: https://pipedream.com/docs/connect/api-reference/retrieve-action get /v1/connect/{project_id}/actions/{component_id} Get detailed configuration for a specific action by its key # Retrieve app Source: https://pipedream.com/docs/connect/api-reference/retrieve-app get /v1/connect/apps/{app_id} Get detailed information about a specific app by ID or name slug # Retrieve app override Source: https://pipedream.com/docs/connect/api-reference/retrieve-app-override get /v1/connect/{project_id}/app_overrides/{id} Get the configuration of a specific app override # Retrieve component Source: https://pipedream.com/docs/connect/api-reference/retrieve-component get /v1/connect/{project_id}/components/{component_id} Get detailed configuration for a specific component by its key # Retrieve OAuth client Source: https://pipedream.com/docs/connect/api-reference/retrieve-oauth-client get /v1/connect/{project_id}/oauth_apps/{id} Get the configuration of a specific OAuth client: one of your custom clients, or a Pipedream official client (see an app's `oauth_app_id`) # Retrieve project Source: https://pipedream.com/docs/connect/api-reference/retrieve-project get /v1/connect/projects/{project_id} Get the project details for a specific project # Retrieve trigger Source: https://pipedream.com/docs/connect/api-reference/retrieve-trigger get /v1/connect/{project_id}/triggers/{component_id} Get detailed configuration for a specific trigger by its key # Run action Source: https://pipedream.com/docs/connect/api-reference/run-action post /v1/connect/{project_id}/actions/run Execute an action with the provided configuration and return results ### Error handling When an action fails, the response includes an error object with an attribution field that classifies where the error originated. See the docs on [error responses](/docs/connect/components/actions#error-responses) for the full list of attribution origins and details on how attribution works. # SDK Migration Guide Source: https://pipedream.com/docs/connect/api-reference/sdk-migration Safely migrate from Pipedream's TypeScript SDK v1.x to v2.x > [!NOTE] > > **The Pipedream SDK v2.x is now available with significant improvements.** While v1.x continues to be supported, we recommend upgrading to v2.x for new projects to take advantage of improved TypeScript support, new features, and ongoing updates. ## Overview The Pipedream SDK v2.x introduces significant improvements including: * **Full TypeScript support** with comprehensive type definitions * **Namespaced methods** for better organization (e.g., `client.actions.run()`) * **Improved pagination support** for large data sets ## Migration Resources For detailed migration instructions and examples, refer to the migration guide: > **[Detailed migration guide](https://github.com/PipedreamHQ/pipedream-sdk-typescript/blob/main/MIGRATE.md)** > > Step-by-step instructions, code examples, and migration strategies for upgrading from v1.x to v2.x ## Key Breaking Changes The migration guide covers these major breaking changes: * **Client initialization**: New `PipedreamClient` class * **Method namespacing**: Actions, accounts, and other methods are now namespaced ## Migration Support If you encounter issues during migration: 1. Consult the [migration guide](https://github.com/PipedreamHQ/pipedream-sdk-typescript/blob/main/MIGRATE.md) for detailed examples 2. Check the [API / SDK documentation](/docs/connect/api-reference/introduction) for v2.x usage patterns 3. Join our [community](https://pipedream.com/join-slack) for additional support > [!TIP] > > The migration guide includes options for incremental migration, allowing you to upgrade your codebase gradually rather than all at once. # SDKs Source: https://pipedream.com/docs/connect/api-reference/sdks Pipedream provides SDKs for a variety of languages to help you build integrations more easily. Pipedream's SDKs make it easier to access the Connect API. Check out installation instructions for the [TypeScript](#typescript-sdk), [Python](#python-sdk), and [Java](#java-sdk) SDKs below. ## Official SDKs > **[TypeScript](https://github.com/PipedreamHQ/pipedream-sdk-typescript)** > > Server-side and browser SDK clients > **[Python](https://github.com/PipedreamHQ/pipedream-sdk-python)** > > Server-side SDK for backend integrations > **[Java](https://github.com/PipedreamHQ/pipedream-sdk-java)** > > Server-side SDK for JVM-based applications ### TypeScript SDK The TypeScript SDK can be used in both browser and server environments, enabling you to build full-stack applications with Pipedream Connect. #### Installation To install [the SDK](https://www.npmjs.com/package/@pipedream/sdk) from npm, run: ```sh theme={null} npm i --save @pipedream/sdk ``` You can also load the client-side SDK via ` ``` or a specific version: ```html theme={null} ``` #### Server Usage Most of your interactions with the Connect API will likely happen on the server, to protect API requests and user credentials. You'll use the SDK in [your frontend](#browser-usage) to let users connect accounts. Once connected, you'll use the SDK on the server to retrieve account info, invoke workflows on their behalf, and more. ```js theme={null} import { PipedreamClient } from "@pipedream/sdk"; const client = new PipedreamClient({ clientId: process.env.PIPEDREAM_CLIENT_ID, clientSecret: process.env.PIPEDREAM_CLIENT_SECRET, projectId: process.env.PIPEDREAM_PROJECT_ID, projectEnvironment: "development", // or "production" }); // Create a connect token for a user async function createConnectToken(externalUserId) { const token = await client.tokens.create({ externalUserId }); return token; } // The client provides methods to interact with the Connect API // Use with any Node.js framework: Express, Next.js, Fastify, Hono, etc. ``` #### Browser Usage You'll primarily use the browser client to let your users securely connect apps from your frontend. When making calls from the browser, you'll use short-lived Connect tokens to authenticate requests. Tokens expire after 4 hours, so you should provide a `tokenCallback`. The callback calls your backend to fetch a fresh token whenever the SDK needs one, so you don't have to manage expiry yourself. 1. [Create a short-lived Connect token on your server](/docs/connect/api-reference/create-connect-token) 2. Configure `tokenCallback` in the browser to call that server endpoint and return the token string 3. Connect the user's account or make whatever calls you need — the SDK will invoke `tokenCallback` whenever it needs to refresh the token ```js theme={null} import { PipedreamClient } from "@pipedream/sdk"; const externalUserId = "user_123"; const client = new PipedreamClient({ projectEnvironment: "development", externalUserId, tokenCallback: async () => { const res = await fetch("/api/connect-token", { method: "POST", headers: { "Content-Type": "application/json" }, body: JSON.stringify({ external_user_id: externalUserId }), }); return res.json(); }, }); // Connect an account client.connectAccount({ app: "slack", onSuccess: ({ id }) => console.log(`Connected: ${id}`), }); ``` With `tokenCallback` configured, `client.connectAccount` (and other browser calls) no longer needs a `token` argument — the SDK fetches and refreshes tokens on demand. ### Python SDK The Python SDK is for server-side use. Install it to build backend services and APIs that interact with Pipedream Connect as part of your full-stack application. #### Installation To install [the SDK](https://pypi.org/project/pipedream/) from pip, run: ```sh theme={null} pip install pipedream ``` #### Usage ```python theme={null} from pipedream import Pipedream # These secrets should be saved securely and passed to your environment pd = Pipedream( client_id="{oauth_client_id}", client_secret="{oauth_client_secret}", project_id="{project_id}", project_environment="development" # or "production" ) # The client provides methods to interact with the Connect API ``` ### Java SDK The Java SDK is for server-side use in JVM-based applications. Use it to build Java backends, Spring Boot applications, and other JVM services that integrate with Pipedream Connect. #### Installation To install [the SDK](https://central.sonatype.com/artifact/com.pipedream/pipedream) with Maven, add this dependency to your `pom.xml`: ```xml theme={null} com.pipedream pipedream-java 1.0.0 ``` For Gradle, add this to your `build.gradle`: ```gradle theme={null} implementation 'com.pipedream:pipedream-java:1.0.0' ``` #### Usage Like the Python SDK, the Java SDK is designed for server-side applications. Use it to securely manage user connections, retrieve account info, and interact with the Connect API from your Java backend. ```java theme={null} import com.pipedream.api.BaseClient; // These secrets should be saved securely and passed to your environment BaseClient client = BaseClient .builder() .clientId("{oauth_client_id}") .clientSecret("{oauth_client_secret}") .projectId("{project_id}") .projectEnvironment("development") // or "production" .build(); // The client provides methods to interact with the Connect API ``` ## Postman Collection [![Run in Postman](https://run.pstmn.io/button.svg)](https://god.gw.postman.com/run-collection/46826413-1fa53a7e-e873-4ef0-810e-c0b00bd462e0?action=collection%2Ffork\&source=rip_markdown\&collection-url=entityId%3D46826413-1fa53a7e-e873-4ef0-810e-c0b00bd462e0%26entityType%3Dcollection%26workspaceId%3D3f583119-232b-46c4-86f4-29d646dd0699) > **[Postman Collection](https://www.postman.com/pipedreamhq/pipedream-connect-api/overview)** > > Use Pipedream's Postman Collection to explore and test the Connect API ## OpenAPI Specification > **[OpenAPI Specification](https://api.pipedream.com/api-docs/swagger.json)** > > Explore Pipedream's OpenAPI specification to see the full list of endpoints and parameters # Set project environment webhook Source: https://pipedream.com/docs/connect/api-reference/set-project-environment-webhook put /v1/connect/{project_id}/webhook Create or update the webhook URL for a project environment. Creating a webhook returns `signing_key`; updating an existing webhook does not. > [!NOTE] > > Pipedream signs webhook emits for deployed triggers using HMAC-SHA256. See [Validating signatures](/docs/connect/webhooks#validating-signatures) for details on how to verify webhook payloads. # Update app override Source: https://pipedream.com/docs/connect/api-reference/update-app-override put /v1/connect/{project_id}/app_overrides/{id} Update an app override's name, custom field values, or OAuth client selection # Update deployed trigger Source: https://pipedream.com/docs/connect/api-reference/update-deployed-trigger put /v1/connect/{project_id}/deployed-triggers/{trigger_id} Modify the configuration of a deployed trigger, including active status > [!WARNING] > > Configured props you define when updating a deployed trigger will overwrite previously configured props. # Update OAuth client Source: https://pipedream.com/docs/connect/api-reference/update-oauth-client put /v1/connect/{project_id}/oauth_apps/{id} Update a custom OAuth client's credentials or configuration # Update project Source: https://pipedream.com/docs/connect/api-reference/update-project patch /v1/connect/projects/{project_id} Update project details or application information # Update project logo Source: https://pipedream.com/docs/connect/api-reference/update-project-logo post /v1/connect/projects/{project_id}/logo Upload or replace the project logo # Update trigger webhooks Source: https://pipedream.com/docs/connect/api-reference/update-trigger-webhooks put /v1/connect/{project_id}/deployed-triggers/{trigger_id}/webhooks Configure webhook URLs to receive trigger events. `signing_key` is only returned for OAuth-authenticated requests. # App Discovery Source: https://pipedream.com/docs/connect/app-discovery Search and list available apps and integrations programmatically. Pipedream provides access to 3,000+ APIs. Use the SDK or REST API to search and list available apps and integrations. ## Discovering apps ### Search for available apps ```typescript TypeScript theme={null} import { PipedreamClient } from "@pipedream/sdk"; // Initialize the Pipedream SDK client const client = new PipedreamClient({ projectEnvironment: PIPEDREAM_ENVIRONMENT, clientId: PIPEDREAM_CLIENT_ID, clientSecret: PIPEDREAM_CLIENT_SECRET, projectId: PIPEDREAM_PROJECT_ID }); // Search for Google Sheets apps, sorted by featured weight const apps = await client.apps.list({ q: "google sheets", sortKey: "featured_weight", sortDirection: "desc" }); ``` ```python Python theme={null} from pipedream import Pipedream # Initialize the Pipedream SDK client pd = Pipedream( project_id=PIPEDREAM_PROJECT_ID, project_environment=PIPEDREAM_ENVIRONMENT, client_id=PIPEDREAM_CLIENT_ID, client_secret=PIPEDREAM_CLIENT_SECRET, ) # Search for Google Sheets apps, sorted by featured weight apps = pd.apps.list( q="google sheets", sort_key="featured_weight", sort_direction="desc" ) ``` > [!NOTE] > > Check out the full API reference for [listing apps](/docs/connect/api-reference/list-apps) # Pre Built Tools for Your App or Agent Source: https://pipedream.com/docs/connect/components Pipedream Connect provides APIs to embed pre-built tools ([triggers and actions](/docs/components/contributing/)) directly in your application or AI agent, enabling access to 10,000+ built-in API operations. Enable [your end users](/docs/connect/api-reference/introduction) to configure, deploy, and invoke Pipedream triggers and actions for more than 3,000+ APIs. ## What are triggers and actions? In Pipedream, we call triggers and actions [components](/docs/components/contributing/), which are self-contained executable units of code. Your end users configure the inputs and these components produce a result that's exported as output. These components are developed and maintained by Pipedream and our community and their source code is available in our [public GitHub repo](https://github.com/PipedreamHQ/pipedream/tree/master/components). > [!NOTE] > > Check out the [SDK playground](https://pipedream.com/connect/demo) to see the SDK in action. You can also [run it locally and explore the code](https://github.com/PipedreamHQ/pipedream-connect-examples/tree/master/connect-react-demo). ## Implementation You have two options for implementing Connect components in your application: 1. Use the `pipedream` [backend SDK](#backend-sdk) with your own frontend 2. Use the `connect-react` [frontend SDK](#connect-react-sdk) with Pipedream's pre-built frontend components ### Backend SDK Use the Pipedream server SDK to handle all Connect operations on your backend, then build your own frontend UI. This gives you full control over the user experience. ```typescript Backend theme={null} import { PipedreamClient } from '@pipedream/sdk'; // Initialize with OAuth credentials const client = new PipedreamClient({ projectEnvironment: "development", clientId: process.env.PIPEDREAM_CLIENT_ID, clientSecret: process.env.PIPEDREAM_CLIENT_SECRET, projectId: process.env.PIPEDREAM_PROJECT_ID, }); // Run a pre-built action on behalf of your user const result = await client.actions.run({ id: "slack-send-message-to-channel", externalUserId: "user-123", configuredProps: { slack: { authProvisionId: "apn_abc123", // User's connected account }, channel: "#general", text: "Hello from my app!", }, }); ``` ```javascript Your frontend theme={null} // Your frontend makes requests to your backend API async function sendSlackMessage() { const response = await fetch('/api/pipedream/run-action', { method: 'POST', body: JSON.stringify({ actionId: 'slack-send-message-to-channel', configuredProps: { channel: '#general', text: 'Hello from my app!', } }) }); return response.json(); } ``` ### Connect React SDK Use Pipedream's pre-built React components to abstract the complexity of building a frontend form interface. ```typescript Backend (actions.ts) theme={null} "use server"; import { PipedreamClient } from "@pipedream/sdk"; const client = new PipedreamClient({ projectEnvironment: "development", // or "production" projectId: process.env.PIPEDREAM_PROJECT_ID, clientId: process.env.PIPEDREAM_CLIENT_ID, clientSecret: process.env.PIPEDREAM_CLIENT_SECRET, }); // Generate connect tokens for frontend requests export async function fetchToken(opts: { externalUserId: string }) { return await client.tokens.create({ externalUserId: opts.externalUserId, allowedOrigins: JSON.parse(process.env.PIPEDREAM_ALLOWED_ORIGINS || "[]"), }); } ``` ```tsx Frontend (page.tsx) theme={null} import { PipedreamClient } from '@pipedream/sdk'; import { FrontendClientProvider, ComponentFormContainer } from '@pipedream/connect-react'; import { fetchToken } from './actions'; function App() { const userId = "user-123"; const client = new PipedreamClient({ projectEnvironment: "development", externalUserId: userId, tokenCallback: fetchToken, // Backend function to generate connect tokens }); return ( ); } ``` ## Getting started The following guide walks through using the **backend SDK or REST API** to manually discover apps, list components, and configure them. If you're using the **Connect React SDK**, the `ComponentFormContainer` handles these steps automatically. > [!NOTE] > > Refer to the [Connect API docs](/docs/connect/api-reference/) for the full API reference. Below is a quickstart with a few specific examples. > > You can skip steps 1 and 2 if you already know the component you want to use or if you'd prefer to [pass a natural language prompt to Pipedream's component search API](/docs/rest-api/#search-for-registry-components). **1. Authenticate to the Pipedream API** Before sending requests to the API, make sure to [authenticate using a Pipedream OAuth client](/docs/connect/api-reference/authentication): ```typescript TypeScript theme={null} // Initialize the Pipedream SDK client import { PipedreamClient } from "@pipedream/sdk"; const client = new PipedreamClient({ projectEnvironment: "development | production", clientId: "{oauth_client_id}", clientSecret: "{oauth_client_secret}", projectId: "{your_project_id}" }); ``` ```sh HTTP (cURL) theme={null} # Get an access token for the REST API curl -X POST https://api.pipedream.com/v1/oauth/token \ -H "Content-Type: application/json" \ -d '{ "grant_type": "client_credentials", "client_id": "{your_oauth_client_id}", "client_secret": "{your_oauth_client_secret}" }' ``` > [!NOTE] > > All subsequent examples assume that you've either initialized the SDK client or have a valid access token. **2. Find the app you want to use** To find the right trigger or action to configure and run, first find the app. In this example, we'll search for `gitlab`. ```typescript TypeScript theme={null} const apps = await client.apps.list({ q: "gitlab" }); // Parse and return the data you need ``` ```sh HTTP (cURL) theme={null} curl 'https://api.pipedream.com/v1/connect/apps?q=gitlab' \ -H "Content-Type: application/json" \ -H "Authorization: Bearer {access_token}" # Parse and return the data you need ``` Here's the response: ```json theme={null} { "page_info": { "total_count": 1, "count": 1, "start_cursor": "Z2l0bGFi", "end_cursor": "Z2l0bGFi" }, "data": [ { "id": "app_1Z2hw1", "name_slug": "gitlab", "name": "GitLab", "auth_type": "oauth", "description": "GitLab is the most comprehensive AI-powered DevSecOps Platform.", "img_src": "https://assets.pipedream.net/s.v0/app_1Z2hw1/logo/orig", "custom_fields_json": "[{\"name\":\"base_api_url\",\"label\":\"Base API URL\",\"description\":\"The Base API URL defaults to `gitlab.com`. If you are using self-hosted Gitlab, enter your base url here, e.g. `gitlab.example.com`\",\"default\":\"gitlab.com\",\"optional\":null}]", "categories": [ "Developer Tools" ], "featured_weight": 5000, "connect": { "proxy_enabled": true, "allowed_domains": ["gitlab.com"], "base_proxy_target_url": "https://{{custom_fields.base_api_url}}" } } ] } ``` **3. List the available components for the app** Once you have the app you want to use, now you can list the triggers and/or actions for that app. We'll list the actions for GitLab and we'll pass the `name_slug` `gitlab` as the `app`. ```typescript TypeScript theme={null} const components = await client.components.list({ q: "gitlab" }); // Parse and return the data you need ``` ```bash HTTP (cURL) theme={null} curl -X 'https://api.pipedream.com/v1/connect/{project_id}/actions?app=gitlab' \ -H "Content-Type: application/json" \ -H "X-PD-Environment: {environment}" \ -H "Authorization: Bearer {access_token}" # Parse and return the data you need ``` Here's the response: ```json theme={null} { "page_info": { "total_count": 20, "count": 10, "start_cursor": "c2NfbHlpRThkQQ", "end_cursor": "c2NfQjVpTkJBTA" }, "data": [ { "name": "List Commits", "version": "0.0.2", "key": "gitlab_developer_app-list-commits" }, { "name": "Update Issue", "version": "0.0.1", "key": "gitlab_developer_app-update-issue" }, { "name": "Update Epic", "version": "0.0.1", "key": "gitlab_developer_app-update-epic" }, { "name": "Search Issues", "version": "0.0.1", "key": "gitlab_developer_app-search-issues" }, { "name": "List Repo Branches", "version": "0.0.1", "key": "gitlab_developer_app-list-repo-branches" }, { "name": "Get Repo Branch", "version": "0.0.1", "key": "gitlab_developer_app-get-repo-branch" }, { "name": "Get Issue", "version": "0.0.1", "key": "gitlab_developer_app-get-issue" }, { "name": "Create issue", "version": "0.0.1", "key": "gitlab_developer_app-create-issue" }, { "name": "Create Epic", "version": "0.0.1", "key": "gitlab_developer_app-create-epic" }, { "name": "Create Branch", "version": "0.0.1", "key": "gitlab_developer_app-create-branch" } ] } ``` **4. Next steps** Now that you've found the components you want to use, you can proceed to configure and execute them: * **For actions**: See the [Actions guide](/docs/connect/components/actions) to learn how to configure props, handle dynamic props, and invoke actions * **For triggers**: See the [Triggers guide](/docs/connect/components/triggers) to learn how to deploy event sources and native triggers * **Need help?**: Check the [Troubleshooting guide](/docs/connect/components/troubleshooting) for common issues and solutions # Executing Actions Source: https://pipedream.com/docs/connect/components/actions Actions are components that perform a task by taking input parameters and producing a result. They can be invoked on-demand to interact with third-party APIs on behalf of your users. ## Retrieving a component's definition To configure and run a component for your end users, you need to understand the component's definition. Now that you have the component's key from the previous step, you can retrieve its structure from the Pipedream API. See the [component structure](/docs/components/contributing/api/#component-structure) section in our docs for more details. As an example, the following API call will return the structure of the **List Commits** action for GitLab: ```typescript TypeScript theme={null} const component = await client.components.retrieve("gitlab-list-commits"); // Parse and return the data you need ``` ```bash HTTP (cURL) theme={null} curl -X https://api.pipedream.com/v1/connect/{project_id}/components/gitlab-list-commits \ -H "Content-Type: application/json" \ -H "X-PD-Environment: {environment}" \ -H "Authorization: Bearer {access_token}" # Parse and return the data you need ``` The response will contain the component's structure, including its user-friendly name, version, and most importantly, the configuration options the component accepts (also known as [props](/docs/components/contributing/api/#props) or "properties"). Here's an example of the response for the component in the example above: ```json theme={null} { "data": { "name": "List Commits", "version": "0.0.3", "key": "gitlab-list-commits", "configurable_props": [ { "name": "gitlab", "type": "app", "app": "gitlab" }, { "name": "projectId", "type": "integer", "label": "Project ID", "description": "The project ID, as displayed in the main project page", "remoteOptions": true }, { "name": "refName", "type": "string", "label": "Branch Name", "description": "The name of the branch", "remoteOptions": true, "optional": true }, { "name": "max", "type": "integer", "label": "Max Results", "description": "Max number of results to return. Default value is `100`", "optional": true, "default": 100 } ] } } ``` Using this information, you can now drive the configuration of the component for your end users, as described in the next section. ## Configuring action props Component execution on behalf of your end users requires a few preliminary steps, focused on getting the right input parameters (aka [props](/docs/workflows/building-workflows/using-props/)) to the component. Configuring each prop for a component often involves an API call to retrieve the possible values, unless the values that a prop can take are static or free-form. The endpoint is accessible at: ```bash theme={null} POST /v1/connect/{project_id}/components/configure ``` Typically, the options for a prop are linked to a specific user's account. Each of these props implements an `options` method that retrieves the necessary options from the third-party API, formats them, and sends them back in the response for the end user to select. Examples are listing Slack channels, Google Sheets, etc. The payload for the configuration API call must contain the following fields: 1. `external_user_id`: the ID of your user on your end 2. `id`: the component's unique ID (aka **key**) 3. `prop_name`: the name of the prop you want to configure 4. `configured_props`: an object containing the props that have already been configured. The initial configuration call must contain the ID of the account (aka `authProvisionId`) that your user has connected to the target app (see [this section](/docs/connect/managed-auth/quickstart/) for more details on how to create these accounts). We'll use the [**List Commits** component for GitLab](https://github.com/PipedreamHQ/pipedream/blob/master/components/gitlab/actions/list-commits/list-commits.mjs#L4) as an example, to illustrate a call that retrieves the options for the `projectId` prop of that component: ```typescript TypeScript theme={null} const resp = await client.components.configureProps({ externalUserId: "abc-123", id: "gitlab-list-commits", propName: "projectId", configuredProps: { gitlab: { authProvisionId: "apn_kVh9AoD", } } }); ``` ```sh HTTP (cURL) theme={null} curl -X POST https://api.pipedream.com/v1/connect/{project_id}/components/configure \ -H "Content-Type: application/json" \ -H "X-PD-Environment: {environment}" \ -H "Authorization: Bearer {access_token}" \ -d '{ "external_user_id": "abc-123", "id": "gitlab-list-commits", "prop_name": "projectId", "configured_props": { "gitlab": { "authProvisionId": "apn_kVh9AoD" } } }' # Parse and return the data you need ``` The response contains the possible values (and their human-readable labels when applicable) for the prop, as well as any possible errors that might have occurred. The response for the request above would look like this: ```json theme={null} { "observations": [], "context": null, "options": [ { "label": "jverce/foo-massive-10231-1", "value": 45672541 }, { "label": "jverce/foo-massive-10231", "value": 45672514 }, { "label": "jverce/foo-massive-14999-2", "value": 45672407 }, { "label": "jverce/foo-massive-14999-1", "value": 45672382 }, { "label": "jverce/foo-massive-14999", "value": 45672215 }, { "label": "jverce/gitlab-development-kit", "value": 21220953 }, { "label": "jverce/gitlab", "value": 21208123 } ], "errors": [], "timings": { "api_to_sidekiq": 1734043172355.1042, "sidekiq_received": 1734043172357.867, "sidekiq_to_lambda": 1734043172363.6812, "sidekiq_done": 1734043173461.6406, "lambda_configure_prop_called": 1734043172462, "lambda_done": 1734043173455 }, "stringOptions": null } ``` > [!NOTE] > > Fields inside `configuredProps` are written in camel case since they refer to the names of props as they appear in the component's code, they are not attributes that the API itself consumes. You configure props one-by-one, making a call to the component configuration API for each new prop. Subsequent prop configuration calls will be identical to the one above: 1. Add the prop you currently want to configure as the `prop_name` 2. Include the names and values of all previously-configured props in the `configured_props` object. Keep this object in your app's local state, add a prop once you or the end user selects a value, and pass it to the `configured_props` API param. For example, to retrieve the configuration options for the `refName` prop: ```json theme={null} { "async_handle": "IyvFeE5oNpYd", "external_user_id": "demo-34c13d13-a31e-4a3d-8b63-0ac954671095", "id": "gitlab-list-commits", "prop_name": "refName", "configured_props": { "gitlab": { "authProvisionId": "apn_oOhaBlD" }, "projectId": 21208123 } } ``` ## Configuring dynamic props The set of props that a component can accept might not be static, and may change depending on the values of prior props. Props that behave this way are called [dynamic props](/docs/components/contributing/api/#dynamic-props), and they need to be configured in a different way. Props that are dynamic will have a `reloadProps` attribute set to `true` in the component's definition. After configuring a dynamic prop, the set of subsequent props must be recomputed (or reloaded), which is possible using the following API call: ```sh theme={null} POST /v1/connect/components/props ``` The payload is similar to the one used for the configuration API, but it excludes the `prop_name` field since the goal of this call is to reload and retrieve the new set of props, not to configure a specific one. Using the [Add Single Row action for Google Sheets](https://pipedream.com/apps/google-sheets/actions/add-single-row) as an example, the request payload would look like this: ```json theme={null} { "async_handle": "PL41Yf3PuX61", "external_user_id": "demo-25092fa8-86c0-4d46-86c9-9dc9bde3b964", "id": "google_sheets-add-single-row", "configured_props": { "googleSheets": { "authProvisionId": "apn_V1hMoE7" }, "sheetId": "1BfWjFF2dTW_YDiLISj5N9nKCUErShgugPS434liyytg" } } ``` In this case, the `sheetId` prop is dynamic, and so after configuring it, the set of props must be reloaded. The response will contain the new set of props and their definition, similar to when the [component information was first retrieved](/docs/connect/components/#retrieving-a-components-definition). The response will also contain an ID that can be used to reference the new set of props in subsequent configuration calls. If this is ID is not provided, the set of props will be based on the definition of the component that was retrieved initially. To illustrate, the response for the request above would look like this: ```json theme={null} { "observations": [], "errors": [], "dynamicProps": { "id": "dyp_6xUyVgQ", "configurableProps": [ { "name": "googleSheets", "type": "app", "app": "google_sheets" }, { "name": "drive", "type": "string", "label": "Drive", "description": "Defaults to `My Drive`. To select a [Shared Drive](https://support.google.com/a/users/answer/9310351) instead, select it from this list.", "optional": true, "default": "My Drive", "remoteOptions": true }, { "name": "sheetId", "type": "string", "label": "Spreadsheet", "description": "The Spreadsheet ID", "useQuery": true, "remoteOptions": true, "reloadProps": true }, { "name": "worksheetId", "type": "string[]", "label": "Worksheet(s)", "description": "Select a worksheet or enter a custom expression. When referencing a spreadsheet dynamically, you must provide a custom expression for the worksheet.", "remoteOptions": true, "reloadProps": true }, { "name": "hasHeaders", "type": "boolean", "label": "Does the first row of the sheet have headers?", "description": "If the first row of your document has headers, we'll retrieve them to make it easy to enter the value for each column. Note: When using a dynamic reference for the worksheet ID (e.g. `{{steps.foo.$return_value}}`), this setting is ignored.", "reloadProps": true }, { "name": "myColumnData", "type": "string[]", "label": "Values", "description": "Provide a value for each cell of the row. Google Sheets accepts strings, numbers and boolean values for each cell. To set a cell to an empty value, pass an empty string." } ] } } ``` ## Invoking an action At the end of the configuration process for an action, you'll end up with a payload that you can use to invoke the action. The payload is similar to the one used for configuring a prop, with the exception of the `prop_name` attribute (because we're not configuring any props at this point): ```json theme={null} { "async_handle": "xFfBakdTGTkI", "external_user_id": "abc-123", "id": "gitlab-list-commits", "configured_props": { "gitlab": { "authProvisionId": "apn_kVh9AoD" }, "projectId": 45672541, "refName": "main" } } ``` To run the action with this configuration, simply send it as the request payload to the following endpoint: ```typescript TypeScript theme={null} const resp = await client.actions.run({ externalUserId: "abc-123", id: "gitlab-list-commits", configuredProps: { gitlab: { authProvisionId: "apn_kVh9AoD", }, projectId: 45672541, refName: "main" } }); // Parse and return the data you need ``` ```sh HTTP (cURL) theme={null} curl -X POST https://api.pipedream.com/v1/connect/{project_id}/actions/run \ -H "Content-Type: application/json" \ -H "X-PD-Environment: {environment}" \ -H "Authorization: Bearer {access_token}" \ -d '{ "external_user_id": "abc-123", "id": "gitlab-list-commits", "configured_props": { "gitlab": { "authProvisionId": "apn_kVh9AoD" }, "projectId": 45672541, } }' # Parse and return the data you need ``` The output of executing the action will be a JSON object containing the following fields: 1. `exports`: all the named exports produced by the action, like when calling [`$.export` in a Node.js](/docs/workflows/building-workflows/code/nodejs/#using-export) component. 2. `os`: a list of observations produced by the action (e.g. logs, errors, etc). 3. `ret`: the return value of the action, if any. 4. When using [File Stash](/docs/connect/components/files/) to sync local files, the response will also include a `stash` property with file information. The following (abbreviated) example shows the output of running the action above: ```json theme={null} { "exports": { "$summary": "Retrieved 1 commit" }, "os": [], "ret": [ { "id": "387262aea5d4a6920ac76c1e202bc9fd0841fea5", "short_id": "387262ae", "created_at": "2023-05-03T03:03:25.000+00:00", "parent_ids": [], "title": "Initial commit", "message": "Initial commit", "author_name": "Jay Vercellone", "author_email": "nope@pipedream.com", "authored_date": "2023-05-03T03:03:25.000+00:00", "committer_name": "Jay Vercellone", "committer_email": "nope@pipedream.com", "committed_date": "2023-05-03T03:03:25.000+00:00", "trailers": {}, "extended_trailers": {}, "web_url": "https://gitlab.com/jverce/foo-massive-10231-1/-/commit/387262aea5d4a6920ac76c1e202bc9fd0841fea5" } ] } ``` ## Error responses When an action fails, the response includes an `error` object with an `attribution` field that classifies where the error originated: ```json theme={null} { "error": { "name": "AxiosError", "message": "Request failed with status code 500", "attribution": { "origin": "upstream_api", "network_calls_count": 1, "last_call": { "client": "http", "method": "GET", "host": "api.example.com", "status": 500, "duration_ms": 150 } } } } ``` The `origin` field indicates where the error occurred: | Origin | What it means | Retryable? | | - | - | - | | **`component_code`** | Error in the underlying Pipedream component (action or tool) code itself, before any network call was made (e.g., invalid parameters, logic errors). | No, typically requires a fix to the component code or the prop inputs. | | **`upstream_api`** | The third-party API (ie, Google, Slack, Notion, etc.) returned an error status (4xx/5xx). | Sometimes: a `5xx` is often transient and may succeed on retry. A `4xx` usually points to a problem with the prop inputs or request (e.g., a `404` is unlikely to be fixable by retrying). | | **`network_io`** | Network-level failure (DNS errors, connection refused, timeouts). | Most likely, these are potentially transient and may succeed if retried. | | **`response_parsing`** | API returned success (2xx) but parsing the response failed. | No. | > [!NOTE] > > Error attribution is best-effort. Pipedream observes HTTP calls made during action execution and correlates them with the thrown error, but the classification may be incorrect in some cases, such as when the upstream provider's SDK makes telemetry or logging calls after the actual failure, or when multiple calls are made to the same host. ## Special Prop Types ### SQL Prop The `sql` prop is a specialized prop type used for interacting with SQL databases. It enables developers to build applications that can: * Execute custom SQL queries * Introspect database schemas * Support prepared statements This prop type is used by these database actions: * `postgresql-execute-custom-query` * `snowflake-execute-sql-query` * `mysql-execute-raw-query` * `microsoft_sql_server-execute-raw-query` * `azure_sql-execute-raw-query` * `turso-execute-query` #### Configuration When configuring these actions, you'll need to provide: 1. Database app type and auth (e.g., `postgresql` in this example) 2. A `sql` prop with the following structure: ```js theme={null} const configuredProps = { postgresql: { authProvisionId: "apn_xxxxxxx" }, sql: { auth: { app: "postgresql" // Database type -- must match the app prop name }, query: "select * from products limit 1", params: [] // Optional array of parameters for prepared statements } } ``` #### Using prepared statements You can use prepared statements by including placeholders in your query and providing the parameter values in the `params` array. Different database systems use different placeholder syntax: * **PostgreSQL** uses `$1`, `$2`, `$3`, etc. for numbered parameters * **Snowflake**, **MySQL, Azure SQL, Microsoft SQL Server, and Turso** use `?` for positional parameters ```js PostgreSQL example theme={null} const configuredProps = { postgresql: { authProvisionId: "apn_xxxxxxx" }, sql: { auth: { app: "postgresql" }, query: "select * from products where name = $1 and price > $2 limit 1", params: ["foo", 10.99] // Values to replace $1 and $2 placeholders } } ``` ```js MySQL example theme={null} const configuredProps = { mysql: { authProvisionId: "apn_xxxxxxx" }, sql: { auth: { app: "mysql" }, query: "select * from products where name = ? and price > ? limit 1", params: ["foo", 10.99] // Values to replace the ? placeholders } } ``` > [!NOTE] > > Using prepared statements helps prevent SQL injection attacks by separating the SQL command structure from the data values being used, and is strongly recommended. #### Retrieving database schema information By retrieving the database schema, developers can: * Provide database structure to AI agents for accurate SQL generation * Build native SQL editors with autocomplete for tables and columns * Validate queries against the actual database schema before execution You can call `configureComponent` on the `sql` prop to retrieve database schema information: ```typescript TypeScript theme={null} const resp = await client.components.configureProps({ external_user_id: externalUserId, prop_name: "sql", id: "postgresql-execute-custom-query", configuredProps: { postgresql: { authProvisionId: accountId }, }, }); ``` The response includes a `context.dbInfo` object containing detailed schema information for all tables in the database: ```json theme={null} { "context": { "dbInfo": { "products": { "metadata": {}, "schema": { "id": { "tableName": "products", "columnName": "id", "isNullable": "NO", "dataType": "integer", "columnDefault": "nextval('products_id_seq'::regclass)" }, "name": { "tableName": "products", "columnName": "name", "isNullable": "NO", "dataType": "character varying", "columnDefault": null }, "description": { "tableName": "products", "columnName": "description", "isNullable": "YES", "dataType": "text", "columnDefault": null }, "price": { "tableName": "products", "columnName": "price", "isNullable": "NO", "dataType": "numeric", "columnDefault": null }, "created_at": { "tableName": "products", "columnName": "created_at", "isNullable": "YES", "dataType": "timestamp with time zone", "columnDefault": "CURRENT_TIMESTAMP" } } } } } } ``` # Using Custom Tools Source: https://pipedream.com/docs/connect/components/custom-tools You can write and publish your own components to your Pipedream workspace to use with Connect. This complements the public actions available in Pipedream’s global registry. ## Overview Custom tools are Node.js modules that you develop using the [Pipedream Components API](/docs/components/contributing/api/) and publish to your Pipedream workspace. Once published, they become available across [all Connect APIs](/docs/connect/api-reference/list-components), including the list, retrieve, run endpoints, etc. > [!NOTE] > > Publishing custom tools is available to Pipedream customers on the [Business plan](https://pipedream.com/pricing?plan=Enterprise). ## Creating custom tools Custom tools use the same development workflow as standard Pipedream components: 1. **Write your component** using the [Pipedream Components API](/docs/components/contributing/api/) 2. **Follow component guidelines** outlined in the [component development docs](/docs/components/contributing/guidelines/) 3. **Use the Pipedream CLI** to publish your component with a Connect-specific flag > [!NOTE] > > Custom tools are [actions](/docs/components/contributing/actions-quickstart/). Check out the actions quickstart guide for step-by-step development instructions. Support for custom sources (triggers) is coming soon. ## Publishing for Connect To make your custom components available in Connect, use the [`pd publish` command](/docs/cli/reference/#publishing-custom-tools-for-connect) with the `--connect-environment` flag: ```sh theme={null} pd publish my-custom-action.mjs --connect-environment development ``` ### Environments The `--connect-environment` flag accepts two values: * **`development`**: makes the component available to your Pipedream workspace in Connect in development * **`production`**: makes the component available to your Pipedream workspace in Connect in production > [!WARNING] > > Components published to `development` will only be available in the development environment, and vice versa for `production`. ## Using custom tools Once published, your custom tools appear alongside public components in Connect APIs: * **List endpoints**: Custom tools are included in component listing responses * **Retrieve endpoints**: You can fetch details about your custom components * **Run endpoints**: Execute your custom tools with the same API calls used for public components ### Referencing custom tools Custom tools are identified with a `~/` prefix in their component ID. For example, if you publish a component with the key `google_sheets-update-file`, it will appear in Connect APIs as `~/google_sheets-update-file`. When making API calls to list, retrieve, or run custom tools, use the prefixed ID: ```bash theme={null} # List all components (includes custom tools with ~/ prefix) GET /v1/components # Retrieve a specific custom tool GET /v1/components/~/google_sheets-update-file # Run a custom tool POST /v1/components/~/google_sheets-update-file/run ``` The Connect API treats custom tools identically to public components, ensuring a consistent integration experience. ### Custom tools in MCP Custom actions that you publish are automatically exposed as tools in the [Pipedream MCP server](/docs/connect/mcp/developers/) for the relevant app. ## Example workflow Here’s a typical workflow for creating and using a custom tool: 1. **Develop locally** using your preferred editor 2. **Test your component** using local testing for actions 3. **Publish to Connect** with the appropriate environment flag 4. **Integrate via Connect APIs** in your application > [!NOTE] > > Test your custom tools in your application directly or [run Pipedream’s SDK playground](https://github.com/PipedreamHQ/pipedream-connect-examples/tree/master/connect-react-demo#pipedream-components-demo-react) locally with your Pipedream credentials. ## Best practices * **Follow naming conventions**: Use clear, descriptive names for your tools * **Include proper documentation**: Add helpful descriptions and prop labels for easier configuration * **Test thoroughly**: Validate your components work as expected before publishing to production * **Version management**: Update [component versions](/docs/components/contributing/guidelines/#versioning) when making changes * **Environment separation**: Use development environment for testing, production for live integrations ## Getting help For component development questions, visit the [Pipedream Support](https://pipedream.com/support). For Connect-specific integration help, refer to the [Connect docs](/docs/connect/api-reference/). # Working with Files Source: https://pipedream.com/docs/connect/components/files Pipedream provides a file storage system, File Stash, that allows you to store and retrieve files from tool executions via Connect. When a trigger or action downloads files to the `/tmp` directory in Pipedream’s execution environment, you can sync these files with File Stash, making them accessible outside of Pipedream. If you have any feedback on File Stash, please let us know in our [community](https://pipedream.com/support). ## File Stash When you execute an action via Connect that downloads files to the `/tmp` directory, those files normally only exist within Pipedream’s execution environment. With File Stash syncing, you can now make these files available via presigned URLs that can be accessed from anywhere. ### How it works 1. Files created in `/tmp` during execution are synced with File Stash when you pass `stashId` in the action execution payload 2. Each file is assigned a presigned URL that remains valid for 30 minutes 3. These URLs allow anyone with the link to download the file directly ## Identifying file props Props with `format` set to `”file-ref”` accept both a URL of a file and a path to a file in `/tmp`. You can use this property to reliably identify file-related props. > [!NOTE] > > Some file-related props may not have `format: “file-ref”` set. These props may accept a file URL or a `/tmp` path (but not necessarily both). When `format` is not present, you can fall back to the heuristics in the [When to use stashId](#when-to-use-stashid) section below. The `format` field is returned in the prop definition from the [Retrieve component](/docs/connect/api-reference/retrieve-component) or [List components](/docs/connect/api-reference/list-components) endpoint: ```json theme={null} { "name": "file", "type": "string", "label": "File", "description": "The URL of a file or the path to a file in the `/tmp` directory", "format": "file-ref" } ``` ## When to use stashId You should pass the `stashId` parameter when the component’s `stash` attribute indicates that a `stashId` is `"required"` or `"optional"`. You can find the `stash` indicator in the response from the [Retrieve component](/docs/connect/api-reference/retrieve-component) or [List components](/docs/connect/api-reference/list-components) endpoint. > [!NOTE] > > Typically, if `stash` is `"required"`, then the component outputs a file to `/tmp`. If `stash` is `"optional"`, then the component may accept as input either a local file path, in which case `stashId` is required, or a remote file URL, in which case `stashId` can be omitted. You can also use these heuristics to determine when to use `stashId`: 1. You’re working with actions that download or generate files in `/tmp`, such as actions with “file”, “upload”, or “download” in their name 2. You’re working with actions that have a prop with `format` set to `"file-ref"`, or a `filePath`, `filename`, or `file` prop 3. You want to make files accessible outside of Pipedream’s execution environment To generate a new stash ID, you can pass: * An empty string (`""`) * The string `"NEW"` * Boolean `true` To reuse an existing stash ID (valid for 24 hours), pass the previously returned `stashId` value. This allows you to reference multiple files from the same stash. > [!NOTE] > > Avoid passing `stashId` unnecessarily as it will slightly increase response time. ## API Reference ### Running actions with File Stash To enable File Stash when running an action, use the `stash_id` parameter in your request: | Parameter | Type | Description | | - | - | - | | `stash_id` | string | (Optional) The key that identifies the external user-specific File Stash. If set to `""` (or `"NEW"` or `true`), Pipedream will generate a stash ID for you. If omitted, Pipedream will not sync files in `/tmp` with File Stash. | ```js Node.js theme={null} const resp = await client.actionRun({ externalUserId: "abc-123", actionId: "google_drive-download-file", configuredProps: { googleDrive: { authProvisionId: "apn_gyhLaz3" }, fileId: { "__lv": { "label": "important files > mcp-hot.jpg", "value": "16nlbFcgtgZkxLLMT2DcnBrEeQXQSriLs" } }, filePath: "/tmp/mcp-hot.jpg" }, stashId: "" // An empty string will generate a new stash ID }); // The response contains file URLs in $filestash_uploads console.log(resp.exports.$filestash_uploads); ``` ```sh HTTP (cURL) theme={null} curl -X POST https://api.pipedream.com/v1/connect/{project_id}/actions/run \ -H "Content-Type: application/json" \ -H "X-PD-Environment: {environment}" \ -H "Authorization: Bearer {access_token}" \ -d '{ "external_user_id": "abc-123", "id": "google_drive-download-file", "configured_props": { "googleDrive": { "authProvisionId": "apn_jyhKbx4" }, "fileId": { "__lv": { "label": "important files > mcp-hot.jpg", "value": "16nlbFcgtgZkxLLMT2DcnBrEeQXQSriLw" } }, "filePath": "/tmp/mcp.png" }, "stash_id": "" }' ``` ### Response The response includes a `stashId` and a `$filestash_uploads` export with information about the files that were downloaded to `/tmp` and then synced to File Stash: ```json theme={null} { "exports": { "$summary": "Successfully downloaded the file, \"mcp.png\"", "$filestash_uploads": [ { "localPath": "/tmp/mcp.png", "s3Key": "1day/proj_lgsqAAJ/exu_x1iK86/d4ffb5b1081d3aacd2929f23f270268c/u/mcp.png", "get_url": "https://pipedream-file-stash-production.s3.us-east-1.amazonaws.com/1day/proj_lgsqAAJ/exu_x1iK86/d4ffb5b1081d3aacd2929f23f270267d/u/mcp.png?X-Amz-Algorithm=AWS4-HMAC-SHA256&X-Amz-Credential=ASIA7H7CJKGDWMN4VXXZ%2F20250606%2Fus-east-1%2Fs3%2Faws4_request&X-Amz-Date=20250606T204541Z&X-Amz-Expires=1800&X-Amz-SignedHeaders=host&X-Amz-Security-Token=IQoJb3JpZ2luX2VjEK4%2F%2F%2F%2F%2F%2F%2F%2F%2F%2FwEaCXVzLWVhc3QtMiJIMEYCIQE3PJZwefZb%2Gp6tWNV8JJtZXG4%2FE%2BOQrFzcdkbPtk6iDwIhBPyFmL9yztlGE0Ub4QFMJzLf2ln2%2C3CYu4r%2FlHsnikmiKsAEDHaQBxoNOTA2MDM3MTgyNzIxIhyHFEjyyQ4ssQm4e5JqoATBID6Ipfe91co6nOiB18cTsrrCi4GyxWW6seujHJ0UmvSrsagD%2FJzyoirNNYdX1pwk9anJkCFEGUSz61DPgZfYGsjIC6jMWD6es%2Gvn3z%2FKFJxIaCVlDJTSkmzOOZcyzFwzGNgqKarSD1P63vySsH7LfsocM4GQKfH1KbHYKkX4GIIEAcL9T9JYU7j3zQcOE2uNpF%2BZ1fVQ8Yg0stYhMIUzSy1fLNS1CRHvejU793PSgJoKrZq8zICQFz3yL5ZxWqfrT%2BxGSZKsSH0iEOKVKq7MK0cdxrVJJsgyzl6ixiIsDKhwgmA0PhT6kvZOof0XyozdJjPAN33v2XSx%2F4BD3MrDonk4d%2F8vweQubfrOwangOPG8USZo31PXvdf8AXnx5rqVmFUL3etUsdPO2NzF6K%2B8bXNHfwgROMVG54tVGhxAX80OuflLN9lhPq%2B0%2BKS0cIC%2BpG9RNk4iToz1IFP9OWQaJPgOjOf90cPQgYfOV%2F%2FqIR9133NtKBzksB%2F%2F%2Bu1M6HS8MAfhF%2BAf9vpT%2FjvTlJhcvtiqyCzGz4TqJzxzIlFRv1dSyS08U82C7rVgOKpNWwDDqB1IjqeAZFap6tFP3s5apixPvipUERd8c8%2F9izz4%2Bz%2BD0f3Gn%2BQIRuToKQpPp%2FKfJZ15g4Mu6H4s7s7Nsr4znzdT2SOlWGi%2Bw%2FrIKi47vJfA4MKwTlW9K8e%2FsmhzHkB9LEqU7Km%2Fk36Qw8KaNwgY6nAFw%2BP4e8vTHE2MyMAZ2GiwvdlE4%2BNPtJAX4L%2BrabrgxnAHgqR0xB%2B3rNI5b62zaMrUZCm7T28Fec%2BA2x16PFLw4yUUv8UksV3r0H3J9dO6%2FrORTxYz0UYq8aiARGvg8kcjOGJ72Q5wv%2B48Up8r39coHlyACOQdd6Lg4HsohStWgeDJV0LKXru6RkNmM3FJWcWUqOy8oZxgaWe%2F%2BBAo%3D&X-Amz-Signature=c9hd88df7hfg40dh5060e47gcde639h5c3615gf77f60e9bgc90d44dh095636f" } ] }, "os": [], "ret": { "fileMetadata": { "name": "mcp.png", "mimeType": "image/png" }, "filePath": "/tmp/mcp.png" }, "stashId": "d4ffb5b1081d3aacd2929f23f270237d" } ``` Each file in the `$filestash_uploads` array includes: * `localPath`: The path to the file in the `/tmp` directory where it was downloaded or created * `s3Key`: The unique key for the file in the Pipedream File Stash after being synced from `/tmp` * `get_url`: A presigned URL that allows downloading the file for 30 minutes ## Usage Examples ### Reusing a stash ID You can reuse a stash ID across multiple action runs to maintain a reference to previously downloaded files. This is particularly useful when you need to: * Process multiple files across different actions in a sequence * Keep a reference to files for later use in your app or agent * Build a collection of files over time * Ensure files downloaded in one action are accessible in subsequent actions To reuse a stash ID, simply pass the same `stashId` value to subsequent action runs: ```js Node.js theme={null} // First action run - download a file from Google Drive const firstResponse = await client.actionRun({ externalUserId: "abc-123", actionId: "google_drive-download-file", configuredProps: { googleDrive: { authProvisionId: "apn_gyhLaz3" }, fileId: "1xyz123", filePath: "/tmp/report1.pdf" }, stashId: "" // Generate a new stash ID }); const stashId = firstResponse.stashId; // Second action run - use the same file in another action (e.g., upload to Dropbox) const secondResponse = await client.actionRun({ externalUserId: "abc-123", actionId: "dropbox-upload-file", configuredProps: { dropbox: { authProvisionId: "apn_mmhHPgj" }, path: "/", name: "uploaded-report.pdf", filePath: "/tmp/report1.pdf" // Same file path as in the first action }, stashId: stashId // Reuse the stash ID to maintain access to the file }); // The file downloaded in the first action is available to the second action ``` ```sh HTTP (cURL) theme={null} # First request with new stash curl -X POST https://api.pipedream.com/v1/connect/{project_id}/actions/run \ -H "Content-Type: application/json" \ -H "Authorization: Bearer {access_token}" \ -d '{ "external_user_id": "abc-123", "id": "google_drive-download-file", "configured_props": { "googleDrive": { "authProvisionId": "apn_gyhLaz3" }, "fileId": "1W6ZssXLvVE-YN8rRbQlqggCpdIF-gdh1", "filePath": "/tmp/myfile.txt" }, "stash_id": "NEW" }' # Get the stash_id from the response (e.g., "abcd1234") # Second request using the same stash curl -X POST https://api.pipedream.com/v1/connect/{project_id}/actions/run \ -H "Content-Type: application/json" \ -H "Authorization: Bearer {access_token}" \ -d '{ "external_user_id": "abc-123", "id": "dropbox-upload-file", "configured_props": { "dropbox": { "authProvisionId": "apn_mmhHPgj" }, "path": "/", "name": "my-upload.txt", "filePath": "/tmp/myfile.txt" }, "stash_id": "abcd1234" }' ``` ### Common multi-action file workflows A typical workflow involving files across multiple actions might look like: 1. Download a file from an external service to `/tmp` 2. Process or transform the file 3. Upload the file to another service For this to work reliably, you need to use the same `stashId` across all actions to ensure that files downloaded or created in one action remain accessible to subsequent actions, even though each action runs in its own isolated environment. ## File Size Limits Each file must be 2GB or smaller. This is the size of the `/tmp` directory in Pipedream's execution environment, which holds the file before File Stash syncs it. > [!NOTE] > > The 2GB limit applies to the total contents of `/tmp` for a single execution. If an action writes more than one file, all of the files together must stay below the limit. ## File Storage Duration Files in File Stash are automatically deleted after 24 hours. The presigned URLs remain valid for 30 minutes from the time they are generated. # Deploying Triggers Source: https://pipedream.com/docs/connect/components/triggers Triggers (also called sources) are different from actions - they are not invoked directly by end users, but rather by events that happen on a third-party service. For example, the "New File" source for Google Drive will be triggered every time a new file is created in a specific folder in Google Drive, then will emit an event for you to consume. All this means is that actions can be invoked manually on demand, while sources are instead deployed and run automatically when the event they are listening for occurs. ## Categories of triggers These are 2 categories of triggers you can deploy on behalf of your end users: * [App-based event sources](/docs/connect/components/triggers/#app-based-event-sources) * [Native triggers](/docs/connect/components/triggers/#native-triggers) > [!NOTE] > > Refer to the [full Connect API reference](/docs/connect/api-reference/deploy-trigger) to list, retrieve, delete, and manage triggers for your user. ### App-based event sources * Listen for events that occur in other systems: for example, when [a new file is added to Google Drive](https://pipedream.com/apps/google-drive/triggers/new-files-instant) or when [a new contact is created in HubSpot](https://pipedream.com/apps/hubspot/triggers/new-or-updated-contact) * Deploying these triggers requires that your customers first connect their account using [Pipedream Connect Managed Auth](/docs/connect/managed-auth/quickstart/), since the triggers are deployed on their behalf using account * Refer to the [quickstart above](/docs/connect/components/triggers/#deploying-a-source) to get started #### Setting the polling interval Some app-based triggers poll for new events rather than using webhooks. For these polling-based triggers, you can configure how frequently the trigger checks for new events by setting the `intervalSeconds` property in the `timer` configuration. The polling interval is defined in the `configuredProps` when deploying a trigger: ```typescript TypeScript focus={8-10} theme={null} const deployedTrigger = await client.triggers.deploy({ externalUserId: "abc-123", id: "notion-page-or-subpage-updated", configuredProps: { notion: { authProvisionId: "apn_xxxxxxx" }, timer: { intervalSeconds: 60 // Poll every 60 seconds } }, webhookUrl: "https://events.example.com/webhook" }); ``` #### Handling test events * Many event sources attempt to retrieve a small set of historical events on deploy to provide visibility into the event shape for end users and developers * Exposing real test events make it easier to consume the event in downstream systems without requiring users to trigger real events ([more info](/docs/components/contributing/guidelines/#surfacing-test-events)) * However, this results in emitting those events to the listening webhook immediately, which may not always be ideal, depending on your use case > [!NOTE] > > To avoid emitting historical events on deploy, set [`emit_on_deploy`](/docs/connect/api-reference/deploy-trigger#body-emit-on-deploy) to `false` when deploying the trigger ### Native triggers * You can also deploy native triggers, which don't require any authentication from your end users, so **you should skip the account connection process when configuring these triggers** * Because these triggers don't use a connected account from your end users, APIs to deploy and manage them are slightly different (see below) ## Deploying a source Because sources are exercised by events that happen on a third-party service, their semantics are different from actions. Once a source is configured, it must be deployed to start listening for events. When deploying a source, you can define either a webhook URL or a Pipedream workflow ID to consume those events. Deploying a source is done by sending a payload similar to the one used for running an action, with the addition of the webhook URL or workflow ID. Using the **New Issue (Instant)** source for GitLab as an example, the payload would look something like this: ```json theme={null} { "external_user_id": "abc-123", "id": "gitlab-new-issue", "prop_name": "http", "configured_props": { "gitlab": { "authProvisionId": "apn_kVh9AoD" }, "projectId": 45672541 }, "webhook_url": "https://events.example.com/gitlab-new-issue" } ``` Deploy a source for your users: ```typescript TypeScript theme={null} const deployedTrigger = await client.triggers.deploy({ externalUserId: "abc-123", id: "gitlab-new-issue", configuredProps: { gitlab: { authProvisionId: "apn_kVh9AoD", }, projectId: 45672541, }, webhookUrl: "https://events.example.com/gitlab-new-issue" }); const { id: triggerId, // The unique ID of the deployed trigger name: triggerName, // The name of the deployed trigger owner_id: userId, // The unique ID in Pipedream of your user } = deployedTrigger; // Parse and return the data you need ``` ```sh HTTP (cURL) theme={null} curl -X POST https://api.pipedream.com/v1/connect/{project_id}/components/triggers/deploy \ -H "Content-Type: application/json" \ -H "X-PD-Environment: {environment}" \ -H "Authorization: Bearer {access_token}" \ -d '{ "external_user_id": "abc-123", "id": "gitlab-new-issue", "configured_props": { "gitlab": { "authProvisionId": "apn_kVh9AoD" }, "projectId": 45672541, }, "webhook_url": "https://events.example.com/gitlab-new-issue" }' # Parse and return the data you need ``` If the source deployment succeeds, the response will contain the information regarding the state of the source, including all the component's props metadata, as well as their values. It will also contain its name, creation date, owner, and most importantly its unique ID, which can be used to manage the source in the future (e.g. delete it). The response for the request above would look like this: ```json theme={null} { "data": { "id": "dc_dAuGmW7", "owner_id": "exu_oedidz", "component_id": "sc_3vijzQr", "configurable_props": [ { "name": "gitlab", "type": "app", "app": "gitlab" }, { "name": "db", "type": "$.service.db" }, { "name": "http", "type": "$.interface.http", "customResponse": true }, { "name": "projectId", "type": "integer", "label": "Project ID", "description": "The project ID, as displayed in the main project page", "remoteOptions": true } ], "configured_props": { "gitlab": { "authProvisionId": "apn_kVh9AoD" }, "db": { "type": "$.service.db" }, "http": { "endpoint_url": "https://xxxxxxxxxx.m.pipedream.net" }, "projectId": 45672541 }, "active": true, "created_at": 1734028283, "updated_at": 1734028283, "name": "My first project - exu_oedidz", "name_slug": "my-first-project---exu-oedidz-2" } } ``` In the example above, the source ID is `dc_dAuGmW7`, which can be used to delete, retrieve, or update the source in the future. Refer to the [full Connect API reference](/docs/connect/api-reference/list-components) for questions and additional examples. ## Native trigger examples ### HTTP Webhook Generate a unique HTTP webhook URL for your end users to configure in any other upstream service. ```typescript TypeScript theme={null} const deployedTrigger = await client.triggers.deploy({ externalUserId: "abc-123", id: "http-new-requests", webhook_url: "https://events.example.com/http-new-requests" }); const { id: triggerId, // The unique ID of the deployed trigger endpoint_url: endpointUrl, // The endpoint URL to return to the user } = deployedTrigger; // Parse and return the data you need ``` ```sh HTTP (cURL) theme={null} curl -X POST https://api.pipedream.com/v1/connect/{project_id}/components/triggers/deploy \ -H "Content-Type: application/json" \ -H "X-PD-Environment: {environment}" \ -H "Authorization: Bearer {access_token}" \ -d '{ "external_user_id": "abc-123", "id": "http-new-requests", "webhook_url": "https://events.example.com/http-new-requests" }' # Parse and return the data you need ``` #### Example response ```json theme={null} { "id": "hi_zbGHMx", "key": "xxxxxxxxxx", "endpoint_url": "http://xxxxxxxxxx.m.pipedream.net", "custom_response": true, "created_at": 1744508049, "updated_at": 1744508049 } ``` ### Schedule Deploy a timer to act as a cron job that will emit an event on a custom schedule you or your users define. #### Configured props `cron` (**object**) When defining schedules, you can pass one of the following: * `intervalSeconds`: Define the frequency in seconds * `cron`: Define a custom cron schedule and optionally define the `timezone`. For example: ```json theme={null} "cron": { "cron": "0 * * * *", "timezone": "America/Los_Angeles" // optional, defaults to UTC } ``` ```typescript TypeScript theme={null} const deployedTrigger = await client.triggers.deploy({ externalUserId: "abc-123", id: "schedule-custom-interval", configuredProps: { "cron": { "intervalSeconds": 900 } }, webhook_url: "https://events.example.com/schedule-custom-interval" }); const { id: triggerId, // The unique ID of the deployed trigger } = deployedTrigger; // Parse and return the data you need ``` ```sh HTTP(cURL) theme={null} curl -X POST https://api.pipedream.com/v1/connect/{project_id}/components/triggers/deploy \ -H "Content-Type: application/json" \ -H "X-PD-Environment: {environment}" \ -H "Authorization: Bearer {access_token}" \ -d '{ "external_user_id": "abc-123", "id": "schedule-custom-interval", "configured_props": { "cron": { "intervalSeconds": 900 } }, "webhook_url": "https://events.example.com/schedule-custom-interval" }' # Parse and return the data you need ``` #### Example response ```json theme={null} { "id": "ti_aqGTJ2", "interval_seconds": 900, "cron": null, "timezone": "UTC", "schedule_changed_at": 1744508391, "created_at": 1744508391, "updated_at": 1744508391 } ``` ### New emails received Generate a unique email address for your customers to emit events to ```typescript TypeScript theme={null} const deployedTrigger = await client.triggers.deploy({ externalUserId: "abc-123", id: "email-new-email", webhook_url: "https://events.example.com/email-new-email" }); const { id: triggerId, // The unique ID of the deployed trigger email_address: emailAddress, // The unique email address to return to the user } = deployedTrigger; // Parse and return the data you need ``` ```sh HTTP (cURL) theme={null} curl -X POST https://api.pipedream.com/v1/connect/{project_id}/components/triggers/deploy \ -H "Content-Type: application/json" \ -H "X-PD-Environment: {environment}" \ -H "Authorization: Bearer {access_token}" \ -d '{ "external_user_id": "abc-123", "id": "email-new-email", "webhook_url": "https://events.example.com/email-new-email" }' # Parse and return the data you need ``` #### Example response ```json theme={null} { "id": "ei_QaJTb0", "email_address": "xxxxxxxxxx@upload.pipedream.net", "created_at": 1744499847, "updated_at": 1744499847 } ``` ## Webhook signatures When Pipedream delivers events to your `webhook_url`, each request includes an `x-pd-signature` header you can use to verify the request is authentic. See [Webhook signatures](/docs/connect/webhooks#webhook-signatures) for setup and validation details. # Troubleshooting Source: https://pipedream.com/docs/connect/components/troubleshooting Common issues and solutions when working with Pipedream Connect components. ## Referencing the app prop in configured props payload If you encounter an error like `Cannot read properties of undefined (reading 'oauth_access_token')`, it's likely related to an incorrect reference to the app prop in your configuredProps payload. For example, using `google_sheets` instead of `googleSheets`, or `stripe` instead of `app`. Always use the exact app prop name as returned by the component definition. The app prop name can be found in the component's definition under `configurable_props`: ```javascript theme={null} "configurable_props": [ { "name": "googleSheets", // Use this exact name in your payload "type": "app", "app": "google_sheets" }, ... ] ``` ## Passing dynamic props ID When working with components that use dynamic props, you must track and pass the `dynamicPropsId` in your API calls. After calling the API to reload props as described in the [Configure dynamic props](/docs/connect/components/actions/#configure-dynamic-props) section, you'll receive a response containing a `dynamicProps.id` value that looks like `dyp_6xUyVgQ`. This ID must be included in subsequent API calls to `runAction` or `deployTrigger`. Failing to include it can result in errors like: ```json theme={null} { "name": "Error", "message": "undefined is not an array or an array-like" } ``` or ```json theme={null} { "title": "TypeError", "detail": "Cannot read properties of undefined (reading 'endpoint')" } ``` For example, after receiving the dynamic props ID from the reload props call, include it in your action execution: ```js theme={null} // First, reload props for a component with dynamic props const { dynamicProps } = await client.reloadProps({ … }); // Then use the dynamicProps.id when running the action const resp = await client.runAction({ externalUserId: "abc-123", actionId: "google_sheets-add-single-row", dynamicPropsId: dynamicProps.id, // Must include this configuredProps: { googleSheets: { authProvisionId: account.id, }, sheetId: "1BfWjFF2dTW_YDiLISj5N9nKCUErShgugPS434liyytg", worksheetId: "Sheet1", // ... other configured props } }); ``` Remember to maintain this ID in your application state while the user is configuring the component, and include it in all subsequent API calls related to that particular configuration. ## Checking source logs for deployed triggers If a deployed trigger isn't emitting events as expected, you can examine the source logs to get a better sense of what's happening. Use the following URL to access logs and view emitted events: ``` https://pipedream.com/sources/{dcid} ``` Replace `{dcid}` with your deployed component ID (e.g., `dc_dAuGmW7`). The sources UI contains three tabs: * **Events**: Lists emitted events from the deployed trigger that will be sent to the subscribed webhook or workflow. This helps you verify that events are being properly processed and understand their structure. * **Logs**: Displays execution history for the trigger. For polling sources, this shows each time the trigger checks for updates. For webhook-based instant sources, it shows each time the source receives an event from the upstream API. This tab is especially useful for troubleshooting when events aren't being emitted as expected. * **Configuration**: Provides a read-only view of the deployed source's code and configuration. While you can't modify settings for deployed triggers that belong to external users here, this tab offers insight into how the trigger is configured. > [!NOTE] > > This UI view is currently in beta and has some limitations. Some UI elements may appear unpolished, and the configuration tab has limited functionality. # App Overrides Source: https://pipedream.com/docs/connect/managed-auth/app-overrides Pre-configure app-specific fields so your end users don't have to provide them Some apps need configuration details that your end users don't have, or shouldn't have to enter. An app override lets workspace and project admins define those values once, so end users can connect their accounts without them. ## The problem app overrides solve Take ServiceNow. To connect a ServiceNow account, Pipedream needs: * **Instance name** — the host portion of the instance URL, for example `dev123` in `https://dev123.service-now.com` * **OAuth client ID** * **OAuth client secret** Asking your end users for this is a poor experience: * They often don't have the information, because of permissions or lack of technical context. * They can enter it incorrectly — typos, the wrong host, missing context. * Admins can't make sure that every user connects with the same configuration. With an app override, an admin defines the instance name once, and optionally attaches a custom OAuth client. When an end user connects, Pipedream reads the pre-defined values from the override, asks the user only for the fields that remain, then starts the connection flow. ## How overrides are scoped Each override is owned by a workspace or a project. The `owner_id` field shows which: | Prefix | Owner | | - | - | | `o_` | Workspace | | `proj_` | Project | When you list overrides for a project, the response includes the project's own overrides **and** those of its parent workspace. Override names are unique per owner. ## End-to-end example This example creates a custom OAuth client for ServiceNow, pre-defines the instance name in an override, then connects an end user's account with it. **1. Create a custom OAuth client** Workspaces and projects can use their own OAuth clients instead of Pipedream's official ones. Pipedream calls these **OAuth clients**, and each one stores a client ID and secret, scopes, and a name and description. [Read more about OAuth clients](/docs/connect/managed-auth/oauth-clients/). Skip this step if the app is key-based, or if you want to keep using Pipedream's official OAuth client. The app must also have custom OAuth clients enabled. > [!NOTE] > > The `clientId` and `clientSecret` you pass here are the credentials **ServiceNow** issued to you. They are not your Pipedream OAuth credentials, which you pass to the client constructor. ```typescript TypeScript theme={null} import { PipedreamClient } from "@pipedream/sdk"; const client = new PipedreamClient({ projectEnvironment: "development", projectId: "{your_pipedream_project_id}", clientId: "{your_pipedream_oauth_client_id}", clientSecret: "{your_pipedream_oauth_client_secret}" }); const oauthApp = await client.oauthApps.create({ app: "servicenow", name: "Acme ServiceNow", clientId: "{your_servicenow_client_id}", clientSecret: "{your_servicenow_client_secret}" }); console.log(oauthApp.id); // oa_a1b2c3, use this in the next step console.log(oauthApp.redirectUri); // Register this URI with ServiceNow ``` ```python Python theme={null} from pipedream import Pipedream pd = Pipedream( project_environment="development", project_id="{your_pipedream_project_id}", client_id="{your_pipedream_oauth_client_id}", client_secret="{your_pipedream_oauth_client_secret}" ) oauth_app = pd.oauth_apps.create( app="servicenow", name="Acme ServiceNow", client_id="{your_servicenow_client_id}", client_secret="{your_servicenow_client_secret}" ) print(oauth_app.id) # oa_a1b2c3, use this in the next step print(oauth_app.redirect_uri) # Register this URI with ServiceNow ``` ```sh cURL theme={null} curl -X POST https://api.pipedream.com/v1/connect/{project_id}/oauth_apps \ -H "Authorization: Bearer " \ -H "Content-Type: application/json" \ -d '{ "app": "servicenow", "name": "Acme ServiceNow", "client_id": "{your_servicenow_client_id}", "client_secret": "{your_servicenow_client_secret}" }' ``` Each OAuth client returns a unique `redirect_uri`. Register it with the third-party app so it redirects users back to Pipedream. > [!WARNING] > > The client secret is write-only. Pipedream never returns it in a response. On update, a blank value keeps the existing secret. **2. Find the app's custom fields** An override pre-defines the custom fields that an app declares. Retrieve the app to read them from `custom_fields_json`, which is a JSON string you need to parse. ```typescript TypeScript theme={null} const { data: app } = await client.apps.retrieve("servicenow"); const customFields = JSON.parse(app.customFieldsJson ?? "[]"); console.log(customFields.map((field) => field.name)); // ["instance_name"] ``` ```python Python theme={null} import json app = pd.apps.retrieve(app_id="servicenow").data custom_fields = json.loads(app.custom_fields_json or "[]") print([field["name"] for field in custom_fields]) # ["instance_name"] ``` ```sh cURL theme={null} curl https://api.pipedream.com/v1/connect/apps/servicenow \ -H "Authorization: Bearer " ``` For ServiceNow, the custom field is named `instance_name`. **3. Create the app override** Pass the custom field values in `cfmap`, keyed by the field names from the previous step. Attach the OAuth client from step 1 with `oauthAppId`. ```typescript TypeScript theme={null} const appOverride = await client.appOverrides.create({ app: "servicenow", name: "Acme production instance", oauthAppId: oauthApp.id, // From step 1 cfmap: { instance_name: "dev123" } }); console.log(appOverride.id); // ao_x1y2z3, use this when connecting accounts ``` ```python Python theme={null} app_override = pd.app_overrides.create( app="servicenow", name="Acme production instance", oauth_app_id=oauth_app.id, # From step 1 cfmap={ "instance_name": "dev123" } ) print(app_override.id) # ao_x1y2z3, use this when connecting accounts ``` ```sh cURL theme={null} curl -X POST https://api.pipedream.com/v1/connect/{project_id}/app_overrides \ -H "Authorization: Bearer " \ -H "Content-Type: application/json" \ -d '{ "app": "servicenow", "name": "Acme production instance", "oauth_app_id": "oa_a1b2c3", "cfmap": { "instance_name": "dev123" } }' ``` > [!NOTE] > > Sensitive custom fields, meaning any field of type `password`, can't be pre-defined. The API rejects them in `cfmap`. **4. Connect an account** Pass the override's ID as `appOverrideId` when the end user connects. Pipedream applies the pre-defined field values and the attached OAuth client, then asks the user only for the fields that remain. ```javascript Your frontend theme={null} client.connectAccount({ app: "servicenow", appOverrideId: "ao_x1y2z3", onSuccess: (account) => { console.log(`Account successfully connected: ${account.id}`) }, onError: (err) => { console.error(`Connection error: ${err.message}`) }, }); ``` ```sh Connect Link theme={null} # Add appOverrideId to the query string of the Connect Link URL https://pipedream.com/_static/connect.html?token={token}&connectLink=true&app=servicenow&appOverrideId=ao_x1y2z3 ``` See the [Connect quickstart](/docs/connect/managed-auth/quickstart/) for the full account connection flow, and [Connect Link](/docs/connect/managed-auth/connect-link/) if you don't run JavaScript in your frontend. ## Updating and removing overrides * Update an override to change its `name`, `cfmap`, or `oauthAppId`. * To detach a custom OAuth client and fall back to the official one, set `oauthAppId` to `null` on update. * Deleting an override does not disconnect accounts that were already connected with it. ## API reference > **[App Overrides](/docs/connect/api-reference/list-app-overrides)** > > List, create, retrieve, update, and delete app overrides > **[OAuth Clients](/docs/connect/api-reference/list-oauth-clients)** > > Manage custom OAuth clients through the API # Connect Link Source: https://pipedream.com/docs/connect/managed-auth/connect-link Connect Link provides a Pipedream-hosted link that lets you connect third-party accounts without any frontend implementation in your app. ## When to use Connect Link If you aren’t able to execute JavaScript or open an iFrame in your frontend, or you want to send users a URL to connect accounts via email or SMS, use Connect Link. That URL opens a Pipedream-hosted page that guides the user through the account connection flow. The URL is scoped to the specific end user, and expires after 4 hours. ## How to generate a link See [the Connect quickstart](/docs/connect/managed-auth/quickstart/) for a full tutorial for getting Connect up and running. Here’s a quick overview of how to generate a Connect Link URL: 1. First, [generate a token](/docs/connect/managed-auth/quickstart/#generate-a-short-lived-token) for your users. 2. Extract the `connect_link_url` from the token response. 3. Before returning the URL to your user, add an `app` parameter to the end of the query string: ``` https://pipedream.com/_static/connect.html?token={token}&connectLink=true&app={appSlug} ``` 4. Redirect your users to this URL, or send it to them via email, SMS, and more. **To test this code, check out this workflow:** [https://pipedream.com/new?h=tch\_4RfjXN](https://pipedream.com/new?h=tch_4RfjXN) ## Success and error redirect URLs To automatically redirect users somewhere after they complete the connection flow (or if an error occurs), define the `success_redirect_uri` and `error_redirect_uri` parameters during token creation. [See the API docs](/docs/connect/api-reference/create-connect-token) for details. In the absence of these URLs, Pipedream will redirect the user to a Pipedream-hosted success or error page at the end of the connection flow. # Project Configuration Source: https://pipedream.com/docs/connect/managed-auth/customization By default, your end users will see a primarily Pipedream branded experience when they connect their account. To customize this screen to highlight your application, you can configure your [app’s name](/docs/connect/managed-auth/customization/#application-name), [support email](/docs/connect/managed-auth/customization/#support-email), and [logo](/docs/connect/managed-auth/customization/#logo) in the Pipedream UI. ## Customizing your application details Open your project in the Pipedream UI: [https://pipedream.com/projects](https://pipedream.com/projects) 1. Once you’ve opened your project, click the **Connect** tab in the left sidebar 2. From there, select the **Configuration** tab ![](https://mintcdn.com/pipedream/h8oodpUDiyR1Ssvt/images/3d009426-connect-app-config_th9fqo.png?fit=max\&auto=format\&n=h8oodpUDiyR1Ssvt\&q=85\&s=2bbb91383bb48d239c466802a154562b) ### Application name By default, your end users will see: > We use Pipedream to connect your account Enter the name of your application that you’d like to show instead, so it reads: > \{Application Name} uses Pipedream to connect your account ### Support email In the case of any errors during the account connection flow, by default your users will see: > Connection failed. Please retry or contact support. To give your end users an email address to seek support, enter your support email. We’ll display it: > Connection failed. Please retry or contact support [help@example.com](mailto:help@example.com). ### Logo By default we’ll show Pipedream’s logo alongside the app your user is connecting to. If you’d like to show your own logo instead, upload it here. # Environments Source: https://pipedream.com/docs/connect/managed-auth/environments Pipedream Connect projects support two environments: `development` and `production`. Connected accounts and credentials stored in one environment remain separate from the other. > [!NOTE] > > You can use all of the Connect features in `development` mode **on any plan**. **[Visit the pricing page](https://pipedream.com/pricing?plan=Connect)** to select the right plan when you’re ready to ship your app to production. ## Development mode Development mode provides access to all Connect features while you’re building and testing your integration with the following constraints: * **Maximum of 10 external users**: The development environment is limited to 10 unique external user IDs. If you exceed this limit, you’ll need to [delete some existing users](/docs/connect/managed-auth/users/#deleting-users) before adding new ones. * **Must be signed in to pipedream.com**: When connecting an account in development mode, you must be signed in to pipedream.com in the same browser where you’re connecting your account. * **Personal testing only**: Development mode is intended for your own accounts during testing and development, not for your real end users. > [!WARNING] > > The `development` environment is not intended for production use with your customers. When you’re ready to launch, you should transition to `production`. ![](https://mintcdn.com/pipedream/xnRKrRxEtt3vxd6I/images/d7650517-image.png?fit=max\&auto=format\&n=xnRKrRxEtt3vxd6I\&q=85\&s=ff7e472ec4eef1935fc7b9c0de598668) ## How to specify the environment You specify the environment when [creating a new Connect token](/docs/connect/api-reference/create-connect-token) with the Pipedream SDK or API. When users successfully connect their account, Pipedream saves the account credentials (API key, access token, etc.) for that `external_user_id` in the specified environment. Always set the environment when you create the SDK client: ```js theme={null} import { PipedreamClient } from "@pipedream/sdk"; const client = new PipedreamClient({ projectEnvironment: "development", // change to production if running for a test production account, or in production clientId: "your-oauth-client-id", clientSecret: "your-oauth-client-secret", projectId: "proj_xxxxxxx" }); ``` or pass the `x-pd-environment` header in HTTP requests: ```sh theme={null} curl -X POST https://api.pipedream.com/v1/connect/{project_id}/tokens \ -H "Content-Type: application/json" \ -H "x-pd-environment: development" \ -H "Authorization: Bearer {access_token}" \ -d '{ "external_user_id": "your-external-user-id" }' ``` ## Shipping Connect to production When you’re ready to ship to production: 1. Visit the [pricing page](https://pipedream.com/pricing?plan=Connect) to enable production access 2. Update your environment to `production` in your SDK client configuration and / or API calls > [!NOTE] > > Using Connect in production doesn’t have any user limits and doesn’t require that the end user is signed in to pipedream.com like the development environment does. # OAuth Clients Source: https://pipedream.com/docs/connect/managed-auth/oauth-clients When connecting an account for any OAuth app via Pipedream Connect, we’ll default to using Pipedream’s official OAuth client, which enables you to quickly get up and running. [Read more about OAuth clients in Pipedream here](/docs/apps/oauth-clients/). ## Using Pipedream OAuth There are two types of apps in Pipedream: 1. **Key-based**: These apps require static credentials, like API keys. Pipedream stores these credentials securely and exposes them via API. 2. **OAuth**: These apps require OAuth authorization. Pipedream manages the OAuth flow for these apps, ensuring you always have a fresh access token for requests. > [!NOTE] > > For any OAuth app that supports it, **you can always use your own client.** Your ability to use Pipedream’s OAuth clients in production depends on the use case. See below for details. | Operation | Details | Pipedream | Custom | | - | - | - | - | | Retrieve user credentials | [Fetch the credentials](/docs/connect/api-reference/list-accounts) for your end user from Pipedream’s API to use in your app | ❌ | ✅ | | Invoke workflows | [Trigger any Pipedream workflow](/docs/connect/workflows/) and use the connected account of your end users | ❌ | ✅ | | Embed prebuilt tools | [Run any action and deploy any trigger](/docs/connect/components/) directly from your AI agent or app | ✅ | ✅ | | Proxy API requests | [Write custom code to interface with any integrated API](/docs/connect/api-proxy/) while avoiding dealing with user auth | ✅ | ✅ | ## Using a custom OAuth client 1. Follow the steps [here](/docs/apps/oauth-clients/#configuring-custom-oauth-clients) to create an OAuth client in Pipedream, or [create one with the API](#managing-oauth-clients-with-the-api). 2. When connecting an account either via the [frontend SDK](/docs/connect/managed-auth/quickstart/#use-the-pipedream-sdk-in-your-frontend), make sure to include the `oauthAppId` in `pd.connectAccount()`. 3. If using [Connect Link](/docs/connect/managed-auth/quickstart/#or-use-connect-link), make sure to include the `oauthAppId` in the URL. ### Finding your OAuth app ID [Create your OAuth client in Pipedream](https://pipedream.com/@/accounts/oauth-clients) then click the arrow to the left of the client name to expand the details. ![](https://mintcdn.com/pipedream/xnRKrRxEtt3vxd6I/images/bdd95d1e-image.png?fit=max\&auto=format\&n=xnRKrRxEtt3vxd6I\&q=85\&s=1200001b521cc4adbe8be42481817c68) ## Managing OAuth clients with the API You can also create and manage custom OAuth clients through the Connect API, instead of the Pipedream UI. Clients are owned by either a workspace or a project, and listing them for a project returns the project's own clients **and** those of its parent workspace. > [!NOTE] > > The `clientId` and `clientSecret` you pass when creating a client are the credentials the **third-party app** issued to you. They are not your Pipedream OAuth credentials, which you pass to the client constructor. ```typescript TypeScript theme={null} import { PipedreamClient } from "@pipedream/sdk"; const client = new PipedreamClient({ projectEnvironment: "development", projectId: "{your_pipedream_project_id}", clientId: "{your_pipedream_oauth_client_id}", clientSecret: "{your_pipedream_oauth_client_secret}" }); const oauthApp = await client.oauthApps.create({ app: "servicenow", name: "Acme ServiceNow", clientId: "{your_servicenow_client_id}", clientSecret: "{your_servicenow_client_secret}" }); console.log(oauthApp.id); // oa_a1b2c3 console.log(oauthApp.redirectUri); // Register this URI with the third-party app ``` ```python Python theme={null} from pipedream import Pipedream pd = Pipedream( project_environment="development", project_id="{your_pipedream_project_id}", client_id="{your_pipedream_oauth_client_id}", client_secret="{your_pipedream_oauth_client_secret}" ) oauth_app = pd.oauth_apps.create( app="servicenow", name="Acme ServiceNow", client_id="{your_servicenow_client_id}", client_secret="{your_servicenow_client_secret}" ) print(oauth_app.id) # oa_a1b2c3 print(oauth_app.redirect_uri) # Register this URI with the third-party app ``` ```sh cURL theme={null} curl -X POST https://api.pipedream.com/v1/connect/{project_id}/oauth_apps \ -H "Authorization: Bearer " \ -H "Content-Type: application/json" \ -d '{ "app": "servicenow", "name": "Acme ServiceNow", "client_id": "{your_servicenow_client_id}", "client_secret": "{your_servicenow_client_secret}" }' ``` Each client returns a unique `redirect_uri`. Register it with the third-party app so it redirects users back to Pipedream. The app must have custom OAuth clients enabled. > [!WARNING] > > The client secret is write-only. Pipedream never returns it in a response. On update, a blank value keeps the existing secret. See the [OAuth Clients API reference](/docs/connect/api-reference/list-oauth-clients) for all endpoints. ## Pre-configuring other app fields Some apps need more than OAuth credentials to connect, such as a hostname or instance name. Use an [app override](/docs/connect/managed-auth/app-overrides/) to pre-define those values, and to attach a custom OAuth client to them, so your end users don't have to supply them. # Managed Auth Quickstart Source: https://pipedream.com/docs/connect/managed-auth/quickstart Pipedream Connect is the easiest way for your users to connect to [over 3,000+ APIs](https://pipedream.com/apps), **right in your product**. You can build in-app messaging, CRM syncs, AI agents, [and much more](/docs/connect/use-cases/), all in a few minutes. ## Getting started We’ll walk through these steps below with an interactive demo that lets you see an execute the code directly in the docs. **1. Configure your environment** You’ll need to do two things to add Pipedream Connect to your app: 1. [Connect to the Pipedream API from your server](/docs/connect/managed-auth/quickstart/#generate-a-short-lived-token). This lets you make secure calls to the Pipedream API to initiate the account connection flow and retrieve account credentials. 2. [Add the Pipedream SDK to your frontend](/docs/connect/managed-auth/quickstart/#connect-your-users-account) or redirect your users to [a Pipedream-hosted URL](/docs/connect/managed-auth/connect-link/) to start the account connection flow. If you’re building your own app, you’ll need to provide these credentials to the environment, or retrieve them from your secrets store: ```ini theme={null} # Used to authorize requests to the Pipedream API PIPEDREAM_CLIENT_ID=your_client_id PIPEDREAM_CLIENT_SECRET=your_client_secret PIPEDREAM_ENVIRONMENT=development PIPEDREAM_PROJECT_ID=your_project_id ``` **2. Create a project in Pipedream** 1. Open an existing Pipedream project or create a new one at [pipedream.com/projects](https://pipedream.com/projects) 2. Click the **Settings** tab, then copy your **Project ID** **3. Create a Pipedream OAuth client** Pipedream uses OAuth to authorize requests to the REST API. To create an OAuth client: 1. Visit the [API settings](https://pipedream.com/settings/api) for your workspace 2. Create a new OAuth client and note the client ID and secret You’ll need these when configuring the SDK and making API requests. **4. Generate a short-lived token** To securely initiate account connections for your users, you’ll need to generate a short-lived token for your users and use that in the [account connection flow](/docs/connect/managed-auth/quickstart/#connect-your-users-account). See [the docs on Connect tokens](/docs/connect/managed-auth/tokens/) for a general overview of why we need to create tokens and scope them to end users. Check out the code below and **try it yourself**: ```typescript TypeScript theme={null} import { PipedreamClient } from "@pipedream/sdk"; // This code runs on your server const client = new PipedreamClient({ projectEnvironment: "production", clientId: process.env.PIPEDREAM_CLIENT_ID, clientSecret: process.env.PIPEDREAM_CLIENT_SECRET, projectId: process.env.PIPEDREAM_PROJECT_ID }); // Create a token for a specific user const { token, expiresAt, connectLinkUrl } = await client.tokens.create({ externalUserId: "YOUR_USER_ID", // Replace with your user's ID }); ``` Generate a Connect Token from your server External User ID: Once you have a token, expose an endpoint your frontend can call (the SDK's `tokenCallback` will use it) to start the account connection flow for the user, or redirect them to a Pipedream-hosted URL with [Connect Link](/docs/connect/managed-auth/quickstart/#or-use-connect-link). > [!NOTE] > > Refer to the API docs for [full set of parameters you can pass](/docs/connect/api-reference/create-connect-token) in the `ConnectTokenCreate` call. **5. Connect your user’s account** You have two options when connecting an account for your user: 1. [Use the Pipedream SDK](/docs/connect/managed-auth/quickstart/#use-the-pipedream-sdk-in-your-frontend) in your frontend 2. [Use Connect Link](/docs/connect/managed-auth/quickstart/#or-use-connect-link) to deliver a hosted URL to your user **6. Use the Pipedream SDK in your frontend** Use this method when you want to handle the account connection flow yourself, in your app. For example, you might want to show a **Connect Slack** button in your app that triggers the account connection flow. First, install the [Pipedream SDK](https://www.npmjs.com/package/@pipedream/sdk) in your frontend: ```bash theme={null} npm i --save @pipedream/sdk ``` Configure the `PipedreamClient` with a `tokenCallback` that calls your backend endpoint to create tokens on demand. When the user connects an account, call `connectAccount`. The SDK opens a Pipedream iFrame and automatically refreshes tokens as they expire. > [!NOTE] > > If the Connect popup window doesn't open, try setting `Cross-Origin-Opener-Policy` (COOP) header to `same-origin-allow-popups` on the page that embeds the Connect iFrame. > > The default COOP is `unsafe-none`; only make this change if you explicitly enforce `same-origin`. This relaxes isolation just enough to allow trusted popups (e.g., OAuth) to open from iFrames. Try the interactive demo below to connect an account after generating a token in the previous step: ```jsx Google Sheets theme={null} import { PipedreamClient } from "@pipedream/sdk" const externalUserId = "{YOUR_USER_ID}" // Same user ID you used when generating tokens on the server const client = new PipedreamClient({ projectEnvironment: "production", externalUserId, tokenCallback: async () => { const res = await fetch("/api/connect-token", { method: "POST", headers: { "Content-Type": "application/json" }, body: JSON.stringify({ external_user_id: externalUserId }), }); if (!res.ok) throw new Error("Failed to fetch Connect token"); const { token } = await res.json(); if (!token) throw new Error("Failed to fetch Connect token"); return token; }, }); // This code runs in the frontend; the SDK fetches tokens from your server export default function Home() { function connectAccount() { client.connectAccount({ app: "google_sheets", // oauthAppId: "YOUR_CUSTOM_OAUTH_APP_ID", onSuccess: (account) => { // Handle successful connection console.log(`Account successfully connected: ${account.id}`) }, onError: (err) => { // Handle connection error console.error(`Connection error: ${err.message}`) }, }); } return (
) } ``` ```jsx GitHub theme={null} import { PipedreamClient } from "@pipedream/sdk" const externalUserId = "{YOUR_USER_ID}" // Same user ID you used when generating tokens on the server const client = new PipedreamClient({ projectEnvironment: "production", externalUserId, tokenCallback: async () => { const res = await fetch("/api/connect-token", { method: "POST", headers: { "Content-Type": "application/json" }, body: JSON.stringify({ external_user_id: externalUserId }), }); if (!res.ok) throw new Error("Failed to fetch Connect token"); const { token } = await res.json(); if (!token) throw new Error("Failed to fetch Connect token"); return token; }, }); // This code runs in the frontend; the SDK fetches tokens from your server export default function Home() { function connectAccount() { client.connectAccount({ app: "github", // oauthAppId: "YOUR_CUSTOM_OAUTH_APP_ID", onSuccess: (account) => { // Handle successful connection console.log(`Account successfully connected: ${account.id}`) }, onError: (err) => { // Handle connection error console.error(`Connection error: ${err.message}`) }, }); } return (
) } ``` ```jsx Notion theme={null} import { PipedreamClient } from "@pipedream/sdk" const externalUserId = "{YOUR_USER_ID}" // Same user ID you used when generating tokens on the server const client = new PipedreamClient({ projectEnvironment: "production", externalUserId, tokenCallback: async () => { const res = await fetch("/api/connect-token", { method: "POST", headers: { "Content-Type": "application/json" }, body: JSON.stringify({ external_user_id: externalUserId }), }); if (!res.ok) throw new Error("Failed to fetch Connect token"); const { token } = await res.json(); if (!token) throw new Error("Failed to fetch Connect token"); return token; }, }); // This code runs in the frontend; the SDK fetches tokens from your server export default function Home() { function connectAccount() { client.connectAccount({ app: "notion", // oauthAppId: "YOUR_CUSTOM_OAUTH_APP_ID", onSuccess: (account) => { // Handle successful connection console.log(`Account successfully connected: ${account.id}`) }, onError: (err) => { // Handle connection error console.error(`Connection error: ${err.message}`) }, }); } return (
) } ``` ```jsx Gmail theme={null} import { PipedreamClient } from "@pipedream/sdk" const externalUserId = "{YOUR_USER_ID}" // Same user ID you used when generating tokens on the server const client = new PipedreamClient({ projectEnvironment: "production", externalUserId, tokenCallback: async () => { const res = await fetch("/api/connect-token", { method: "POST", headers: { "Content-Type": "application/json" }, body: JSON.stringify({ external_user_id: externalUserId }), }); if (!res.ok) throw new Error("Failed to fetch Connect token"); const { token } = await res.json(); if (!token) throw new Error("Failed to fetch Connect token"); return token; }, }); // This code runs in the frontend; the SDK fetches tokens from your server export default function Home() { function connectAccount() { client.connectAccount({ app: "gmail", // oauthAppId: "YOUR_CUSTOM_OAUTH_APP_ID", onSuccess: (account) => { // Handle successful connection console.log(`Account successfully connected: ${account.id}`) }, onError: (err) => { // Handle connection error console.error(`Connection error: ${err.message}`) }, }); } return (
) } ``` ```jsx OpenAI theme={null} import { PipedreamClient } from "@pipedream/sdk" const externalUserId = "{YOUR_USER_ID}" // Same user ID you used when generating tokens on the server const client = new PipedreamClient({ projectEnvironment: "production", externalUserId, tokenCallback: async () => { const res = await fetch("/api/connect-token", { method: "POST", headers: { "Content-Type": "application/json" }, body: JSON.stringify({ external_user_id: externalUserId }), }); if (!res.ok) throw new Error("Failed to fetch Connect token"); const { token } = await res.json(); if (!token) throw new Error("Failed to fetch Connect token"); return token; }, }); // This code runs in the frontend; the SDK fetches tokens from your server export default function Home() { function connectAccount() { client.connectAccount({ app: "openai", // oauthAppId: "YOUR_CUSTOM_OAUTH_APP_ID", onSuccess: (account) => { // Handle successful connection console.log(`Account successfully connected: ${account.id}`) }, onError: (err) => { // Handle connection error console.error(`Connection error: ${err.message}`) }, }); } return (
) } ``` **7. Or use Connect Link** Use this option when you can’t execute JavaScript or open an iFrame in your environment (e.g. mobile apps) and instead want to share a URL with your end users. The Connect Link URL opens a Pipedream-hosted page, guiding users through the account connection process. The URL is specific to the user and expires after 4 hours. After generating a token in the [step above](/docs/connect/managed-auth/quickstart/#generate-a-short-lived-token), you can use the resulting Connect Link URL. Try it below: > [!NOTE] > > Make sure to add the `app` parameter to the end of the URL to specify the app. > > Check out the [full API docs](/docs/connect/api-reference/create-connect-token) for all parameters you can pass when creating tokens, including setting redirect URLs for success or error cases. **8. Make authenticated requests** Now that your users have connected an account, you can use their auth in one of a few ways: 1. [Expose 10k+ tools](/docs/connect/components/) to your AI app or agent and call them on behalf of your customers 2. [Send custom requests](/docs/connect/api-proxy/) to any one of the 2500+ APIs using the Connect API proxy 3. [Use Pipedream’s visual workflow builder](/docs/connect/workflows/) to define complex logic to run on behalf of your users 4. [Embed Pipedream components directly in your app](/docs/connect/components/) to run actions and triggers on their behalf **9. Deploy your app to production** * Test end to end in [development](/docs/connect/managed-auth/environments/) * Ship to production! # Connect Tokens Source: https://pipedream.com/docs/connect/managed-auth/tokens When you initiate account connection for your end users, you must either: 1. Generate a secure, short-lived token scoped to the end user, or 2. Use the [Connect Link](/docs/connect/managed-auth/connect-link/) feature to generate a URL that guides the user through the account connection flow without any frontend work on your side. Here, we’ll show you how to generate tokens for your users and return that to your frontend, passing that to the account connection flow. Use tokens when you want to handle the account connection flow yourself, in your app’s UI. For example, you might want to show a **Connect Slack** button in your app that triggers the account connection flow for Slack, or launch the flow in a modal. > [!NOTE] > > Connect tokens currently have a 4-hour expiry, and can only be used once. ## Creating a token See docs on [the `/tokens` endpoint](/docs/connect/api-reference/create-connect-token) to create new tokens. ## Webhooks When you generate a token, you can specify a `webhook_uri` where Pipedream will deliver updates on the account connection flow. This is useful if you want to update your UI based on the status of the account connection flow, get a log of errors, and more. [See the webhooks docs](/docs/connect/webhooks#connection-webhooks) for more information. ## Tokens are scoped to end users and environments When you [create a new Connect token](/docs/connect/api-reference/create-connect-token), you pass an `external_user_id` and an `environment`. See the docs on [environments](/docs/connect/managed-auth/environments/) for more information on passing environment in the SDK and API. Tokens are scoped to this user and environment. When the user successfully connects an account with that token, it will be saved for that `external_user_id` in the specified environment. # Troubleshooting Source: https://pipedream.com/docs/connect/managed-auth/troubleshooting Below are some common errors when connecting your users’ accounts via Pipedream Connect. ### Error creating a Connect token > Error creating token: Error: Failed to obtain OAuth token: Response Error: 401 Unauthorized Authorization to the Pipedream API failed when creating the Connect token. Double-check the client ID or secret for your [Pipedream OAuth client](/docs/connect/api-reference/authentication). ### Error connecting an account Most errors when connecting an account are related to the [Connect token](/docs/connect/managed-auth/tokens/), which Pipedream validates from the Connect iFrame. #### Common errors > This link has expired. Please request a new one from the app developer. > This session has expired. Please refresh the page to try again. #### Troubleshooting steps Pipedream typically returns an explicit error message in the HTTP response of the token validation network call directly from the iFrame in the client. To check for errors, start the account connection flow in a browser and open the developer console to view the network requests. Filter for requests to ``` https://api.pipedream.com/v1/connect/tokens ``` and check the response for error messages. #### Token validation errors > The Pipedream Connect token is invalid. Please generate a new one and try again. Connect tokens expire, and are only able to be used once. Try generating a new token and try again. > App not found. Please check your app id. Double-check the app slug you’re passing [when connecting your user’s account](/docs/connect/managed-auth/quickstart/#connect-your-users-account). ### Connection failed. Please retry or contact support. The user may have closed the OAuth popup window without completing authorization. ### Connect popup doesn't open If the Connect popup window doesn't open, try setting `Cross-Origin-Opener-Policy` (COOP) header to `same-origin-allow-popups` on the page that embeds the Connect iFrame. The default COOP is `unsafe-none`; only make this change if you explicitly enforce `same-origin`. This relaxes isolation just enough to allow trusted popups (e.g., OAuth) to open from iFrames. > [!NOTE] > > If you’re still have trouble or hitting an error that isn’t listed here, [get in touch with us](https://pipedream.com/support). We’d love to help. # Users Source: https://pipedream.com/docs/connect/managed-auth/users To view or delete your users’ connected accounts: 1. Open your project in Pipedream 2. Click the **Connect** tab on the left 3. Click the **Users** tab at the top You’ll see a list of all users, their connected accounts, and the option to delete any accounts from the UI. You can also retrieve and delete all your users via the API ([see the docs for reference](/docs/connect/api-reference/)). ## Connecting multiple accounts Users can connect multiple accounts for many different apps, or for the same app (e.g., I can connect my Notion and Gmail accounts, as well as accounts for multiple Slack workspaces). When retrieving account information [from the API](/docs/connect/api-reference/list-accounts), you can filter by `external_user_id` and / or `app` to retrieve information for a specific user and / or app. > [!WARNING] > > When running workflows on behalf of an end user, right now you can only use a single account for a given app. If there are multiple connected accounts for that app, **Pipedream will use the most recently created account**. See more info on running workflows for your users [here](/docs/connect/workflows/). ## Deleting accounts You can delete an individual connected account or an entire user and all associated accounts and resources from the UI or via the API. ### Deleting individual connected accounts If you need more granular control, you can delete specific connected accounts instead of removing the entire user. #### From the UI 1. Open the project in Pipedream 2. Navigate to the **Users** tab under **Connect** 3. Find the user whose accounts you want to manage 4. View all connected accounts for that user in the expanded section 5. Click the **Delete** button next to the specific account you want to remove This allows for more granular control over which integrated services remain accessible to your users. #### Via the API You can delete specific connected accounts programmatically: ```bash theme={null} curl -X DELETE "https://api.pipedream.com/v1/connect/{project_id}/accounts/{account_id}" \ -H "Authorization: Bearer {access_token}" ``` For complete API details including TypeScript examples, refer to the [API reference](/docs/connect/api-reference/delete-account). ### Deleting users When you delete a user, all of their connected accounts and deployed resources (if any) are permanently removed from Pipedream. There are two ways to delete users: #### From the UI 1. Open the project in Pipedream 2. Navigate to the **Users** tab under **Connect** 3. Locate the user you wish to delete 4. Click the **Delete User** button from the overflow menu at the end of the row Deleting a user is permanent and cannot be undone. All connected accounts for this user will be permanently removed. #### Via the API You can delete a user programmatically using the Pipedream API: ```bash theme={null} curl -X DELETE "https://api.pipedream.com/v1/connect/{project_id}/users/{external_user_id}" \ -H "Authorization: Bearer {access_token}" ``` For complete API details including TypeScript examples, see the [API reference](/docs/connect/api-reference/delete-external-user). # MCP Servers Source: https://pipedream.com/docs/connect/mcp Use Pipedream MCP with popular AI frameworks and LLMs to add 10,000+ tools to your AI application. Pipedream offers a dedicated MCP ([Model Context Protocol](https://modelcontextprotocol.io/)) server for all of our 3,000+ integrated apps. This server enables AI assistants like Claude or ChatGPT to securely access and interact with thousands of APIs through a standardized communication protocol, performing real-world tasks using your or your users’ accounts. Pipedream’s MCP server is powered by [Pipedream Connect](https://pipedream.com/connect) and includes: * Access to 3,000+ apps and APIs through a consistent interface * Over 10,000 pre-built tools * Fully-managed OAuth and secure credential storage > [!NOTE] > > User credentials are encrypted at rest and all requests are made through Pipedream’s servers, never directly exposing credentials to AI models. Read more about how we protect user credentials [here](/docs/privacy-and-security/#third-party-oauth-grants-api-keys-and-environment-variables). ## Available integrations and tools Pipedream provides MCP servers for all our [supported apps](https://mcp.pipedream.com/). Each app has its own dedicated MCP server with tools specific to that API. For example: * **[Slack](https://mcp.pipedream.com/app/slack)**: Send messages, manage channels, create reminders, and more * **[GitHub](https://mcp.pipedream.com/app/github)**: Create issues, manage pull requests, search repositories * **[Google Sheets](https://mcp.pipedream.com/app/google-sheets)**: Read and write data, format cells, create charts Explore the full list of available MCP servers at [mcp.pipedream.com](https://mcp.pipedream.com) and learn more about [app discovery](/docs/connect/app-discovery). ## Getting started You can use Pipedream's MCP servers in two ways: 1. **[As a developer](/docs/connect/mcp/developers/)**: Add Pipedream MCP to your app or agent to make tool calls on behalf of your users 2. **[As an end user](/docs/connect/mcp/users/)**: Connect your accounts through Pipedream MCP at [mcp.pipedream.com](https://mcp.pipedream.com) > [!NOTE] > > **Try out Pipedream MCP in our chat app at [chat.pipedream.com](https://chat.pipedream.com)** ## Security Like the rest of Pipedream Connect, MCP servers follow strict security best practices: * **Credential isolation**: Each user’s credentials are stored securely and isolated from other users * **No credential exposure**: Credentials are never exposed to AI models or your client-side code * **Revocable access**: Users can revoke access to their connected accounts at any time For more information on security, see our [security documentation](/docs/privacy-and-security/). ## Use cases Pipedream MCP enables AI assistants to perform a wide range of tasks: * **Productivity automation**: Schedule meetings, send emails, create documents * **Data analysis**: Query databases, analyze spreadsheets, generate reports * **Content creation**: Post social media updates, create marketing materials * **Customer support**: Respond to inquiries, create tickets, update CRM records * **Developer workflows**: Create issues, review code, deploy applications ## Supported tools * Each MCP server provides tools specific to that app. Tools are automatically created based on Pipedream’s [registry of pre-built actions](https://github.com/PipedreamHQ/pipedream/tree/master/components) * You can find the supported tools for a given app on its MCP server page or search for specific actions here: [pipedream.com/explore](https://pipedream.com/explore#popular-actions) ## Pricing * Anyone can use Pipedream’s hosted MCP servers for their own use **for free** * To use Pipedream MCP in your own app or agent to make tool calls on behalf of your users, you can get started for free in development mode * [Visit the pricing page](https://pipedream.com/pricing?plan=Connect) when you’re ready to ship to production ## Additional resources * [MCP official spec](https://modelcontextprotocol.io/) * [MCP inspector tool](https://modelcontextprotocol.io/tools/inspector/) # Pipedream MCP with Anthropic Source: https://pipedream.com/docs/connect/mcp/ai-frameworks/anthropic Use Pipedream MCP with Anthropic's MCP connectors > [!NOTE] > > Make sure to complete the [setup steps](/docs/connect/mcp/developers#prerequisites) before continuing. ## Installation ```bash TypeScript/JavaScript theme={null} npm install @anthropic-ai/sdk @pipedream/sdk ``` ```bash Python theme={null} pip install anthropic pipedream ``` Set your Anthropic API key: ```ini theme={null} ANTHROPIC_API_KEY=your_anthropic_api_key ``` ## Basic Usage Claude's MCP connector connects directly to Pipedream's remote MCP server through the Messages API: ```typescript TypeScript theme={null} import { Anthropic } from '@anthropic-ai/sdk'; import { PipedreamClient } from '@pipedream/sdk'; // Environment variables const ANTHROPIC_API_KEY = process.env.ANTHROPIC_API_KEY!; const PIPEDREAM_CLIENT_ID = process.env.PIPEDREAM_CLIENT_ID!; const PIPEDREAM_CLIENT_SECRET = process.env.PIPEDREAM_CLIENT_SECRET!; const PIPEDREAM_PROJECT_ID = process.env.PIPEDREAM_PROJECT_ID!; const PIPEDREAM_ENVIRONMENT = process.env.PIPEDREAM_ENVIRONMENT as 'development' | 'production'; async function runClaudeWithMCP() { // Initialize Pipedream SDK client const pd = new PipedreamClient({ projectEnvironment: PIPEDREAM_ENVIRONMENT, clientId: PIPEDREAM_CLIENT_ID, clientSecret: PIPEDREAM_CLIENT_SECRET, projectId: PIPEDREAM_PROJECT_ID }); // Get access token for MCP authentication const accessToken = await pd.rawAccessToken; const externalUserId = 'user-123'; // Your user's unique ID const appSlug = 'notion'; // App to use // Initialize Anthropic client const anthropic = new Anthropic({ apiKey: ANTHROPIC_API_KEY, }); const serverUrl = `https://remote.mcp.pipedream.net/v3?projectId=${PIPEDREAM_PROJECT_ID}&environment=${PIPEDREAM_ENVIRONMENT}&externalUserId=${externalUserId}&app=${appSlug}`; const response = await anthropic.beta.messages.create({ model: "claude-sonnet-4-20250514", max_tokens: 1000, messages: [ { role: "user", content: "Find my most recent Notion page and summarize it", }, ], mcp_servers: [ { type: "url", url: serverUrl, name: "pipedream", authorization_token: accessToken, }, ], betas: ["mcp-client-2025-04-04"], }); console.log('Claude response:', response.content); } runClaudeWithMCP().catch(console.error); ``` ```python Python theme={null} import anthropic import os from pipedream import Pipedream # Initialize Pipedream client pd = Pipedream( project_id=os.environ['PIPEDREAM_PROJECT_ID'], project_environment=os.environ['PIPEDREAM_ENVIRONMENT'], client_id=os.environ['PIPEDREAM_CLIENT_ID'], client_secret=os.environ['PIPEDREAM_CLIENT_SECRET'], ) # Get access token access_token = await pd.raw_access_token external_user_id = 'user-123' app_slug = 'notion' # Initialize Anthropic client client = anthropic.Anthropic( api_key=os.environ['ANTHROPIC_API_KEY'] ) project_id = os.environ['PIPEDREAM_PROJECT_ID'] environment = os.environ['PIPEDREAM_ENVIRONMENT'] server_url = f"https://remote.mcp.pipedream.net/v3?projectId={project_id}&environment={environment}&externalUserId={external_user_id}&app={app_slug}" response = client.beta.messages.create( model="claude-sonnet-4-20250514", max_tokens=1000, messages=[{ "role": "user", "content": "Find my most recent Notion page and summarize it" }], mcp_servers=[{ "type": "url", "url": server_url, "name": "pipedream", "authorization_token": access_token, }], betas=["mcp-client-2025-04-04"] ) print("Claude response:", response.content) ``` # Pipedream MCP with Gemini Source: https://pipedream.com/docs/connect/mcp/ai-frameworks/gemini Use Pipedream MCP with Google Gemini > [!NOTE] > > Make sure to complete the [setup steps](/docs/connect/mcp/developers#prerequisites) before continuing. > **[Try Gemini Agent](https://github.com/philschmid/gemini-samples/blob/main/scripts/gemini-mcp-pipedream.py)** > > Check out the Gemini Agent built by the Gemini team, featured [here](https://x.com/_philschmid/status/1948025573403492621) ## Installation ```bash JavaScript theme={null} npm install @google/generativeai @modelcontextprotocol/sdk @pipedream/sdk ``` ```bash Python theme={null} pip install google-genai fastmcp pipedream ``` Set your Google API key: ```ini theme={null} GOOGLE_API_KEY=your_google_api_key ``` ## Basic Usage ```typescript TypeScript theme={null} import { GoogleGenerativeAI } from '@google/generativeai'; import { Client } from '@modelcontextprotocol/sdk/client/index.js'; import { StreamableHTTPClientTransport } from '@modelcontextprotocol/sdk/client/streamableHttp.js'; import { PipedreamClient } from '@pipedream/sdk'; // Environment variables const GOOGLE_API_KEY = process.env.GOOGLE_API_KEY!; const PIPEDREAM_CLIENT_ID = process.env.PIPEDREAM_CLIENT_ID!; const PIPEDREAM_CLIENT_SECRET = process.env.PIPEDREAM_CLIENT_SECRET!; const PIPEDREAM_PROJECT_ID = process.env.PIPEDREAM_PROJECT_ID!; const PIPEDREAM_ENVIRONMENT = process.env.PIPEDREAM_ENVIRONMENT as 'development' | 'production'; async function runGeminiWithMCP() { // Initialize Pipedream SDK client const pdClient = new PipedreamClient({ projectEnvironment: PIPEDREAM_ENVIRONMENT, clientId: PIPEDREAM_CLIENT_ID, clientSecret: PIPEDREAM_CLIENT_SECRET, projectId: PIPEDREAM_PROJECT_ID }); // Get access token for MCP authentication const accessToken = await pdClient.rawAccessToken; const externalUserId = 'user-123'; // Your user's unique ID const appSlug = 'gmail,google_calendar'; // Apps to use // Create MCP transport const transport = new StreamableHTTPClientTransport( new URL('https://remote.mcp.pipedream.net/v3'), { requestInit: { headers: { 'Authorization': `Bearer ${accessToken}`, 'x-pd-project-id': PIPEDREAM_PROJECT_ID, 'x-pd-environment': PIPEDREAM_ENVIRONMENT, 'x-pd-external-user-id': externalUserId, 'x-pd-app-slug': appSlug, } } } ); // Initialize MCP client const mcpClient = new Client({ name: 'gemini-pipedream-client', version: '1.0.0', }); await mcpClient.connect(transport); // Initialize Gemini client const genAI = new GoogleGenerativeAI(GOOGLE_API_KEY); try { // Get available tools from MCP const toolsResponse = await mcpClient.listTools(); const mcpTools = toolsResponse.tools || []; // Convert MCP tools to Gemini function calling format const geminiTools = mcpTools.map((tool: any) => ({ function_declarations: [{ name: tool.name, description: tool.description, parameters: tool.inputSchema, }] })); // Create model with tools const model = genAI.getGenerativeModel({ model: 'gemini-pro', tools: geminiTools, systemInstruction: `You are a helpful AI assistant with access to powerful tools. The current date is ${new Date().toISOString().split('T')[0]}. Use the available tools to help users accomplish their tasks effectively. If you encounter any errors, explain what happened and suggest alternatives.` }); // Start chat const chat = model.startChat({ history: [], }); const userMessage = "Check my recent emails and summarize the important ones"; console.log(`User: ${userMessage}`); // Send message and handle tool calls const result = await chat.sendMessage(userMessage); const response = await result.response; // Handle function calls if present if (response.functionCalls?.length > 0) { console.log('Executing tools...'); const functionResults = []; for (const functionCall of response.functionCalls) { try { const result = await mcpClient.callTool({ name: functionCall.name, arguments: functionCall.args, }); functionResults.push({ name: functionCall.name, response: result, }); console.log(`✅ ${functionCall.name}: Success`); } catch (error) { console.error(`❌ ${functionCall.name}: ${error}`); functionResults.push({ name: functionCall.name, response: { error: String(error) }, }); } } // Send function results back to Gemini const finalResult = await chat.sendMessage([{ functionResponse: { name: functionResults[0].name, response: functionResults[0].response, } }]); console.log(`Gemini: ${finalResult.response.text()}`); } else { console.log(`Gemini: ${response.text()}`); } } finally { // Clean up MCP client await mcpClient.close(); } } // Run the example runGeminiWithMCP().catch(console.error); ``` ```python Python theme={null} import os import asyncio from datetime import datetime from google import genai from fastmcp import Client from pipedream import Pipedream async def run_gemini_with_mcp(): # Initialize Pipedream client and get access token pd = Pipedream( project_id=os.environ.get('PIPEDREAM_PROJECT_ID'), project_environment=os.environ.get('PIPEDREAM_ENVIRONMENT'), client_id=os.environ.get('PIPEDREAM_CLIENT_ID'), client_secret=os.environ.get('PIPEDREAM_CLIENT_SECRET'), ) access_token = await pd.raw_access_token # Initialize Gemini client client = genai.Client(api_key=os.environ.get('GOOGLE_API_KEY')) # Initialize MCP client with Pipedream mcp_client = Client({ "mcpServers": { "pipedream": { "transport": "http", "url": "https://remote.mcp.pipedream.net/v3", "headers": { "Authorization": f"Bearer {access_token}", "x-pd-project-id": os.environ.get('PIPEDREAM_PROJECT_ID'), "x-pd-environment": os.environ.get('PIPEDREAM_ENVIRONMENT'), "x-pd-external-user-id": "user-123", # Your user's unique ID "x-pd-app-slug": "gmail, google_calendar", # Apps to use }, } } }) async with mcp_client: # Configure Gemini with MCP tools and system instructions config = genai.types.GenerateContentConfig( temperature=0, tools=[mcp_client.session], system_instruction=f"""You are a helpful AI assistant with access to powerful tools. Very important: The user's timezone is {datetime.now().strftime("%Z")}. The current date is {datetime.now().strftime("%Y-%m-%d")}. Use the available tools to help users accomplish their tasks effectively. If you encounter any errors, explain what happened and suggest alternatives.""", ) # Create chat session chat = client.aio.chats.create(model="gemini-2.0-flash-exp", config=config) # Send user message user_message = "Check my recent emails and summarize the important ones" print(f"User: {user_message}") # Generate response with automatic tool calling response = await chat.send_message(user_message) print(f"Gemini: {response.text}") # Continue conversation if needed follow_up = "Can you schedule a meeting based on the most important email?" print(f"User: {follow_up}") response = await chat.send_message(follow_up) print(f"Gemini: {response.text}") if __name__ == "__main__": asyncio.run(run_gemini_with_mcp()) ``` # OpenAI Integration Source: https://pipedream.com/docs/connect/mcp/ai-frameworks/openai Use Pipedream MCP with OpenAI's API and playground. OpenAI provides [native MCP support](https://platform.openai.com/guides/tools-remote-mcp) for tool calling. ## Testing in OpenAI’s API Playground OpenAI provides an API playground for developers to test prompts and tool calling, which provides an easy way to test Pipedream MCP. Get started below. ![](https://mintcdn.com/pipedream/nKh6d_6A4aXFb6xD/images/f10d1976-CleanShot_2025-05-29_at_13.09.23_4_2x_yujxkt.png?fit=max\&auto=format\&n=nKh6d_6A4aXFb6xD\&q=85\&s=7e36ce9a0b80b1ee662f9077bf415f77) **1. Open the playground** Navigate to [OpenAI’s playground](https://platform.openai.com/chat/edit) and sign in with your OpenAI account. **2. Add Pipedream MCP** Click the **Create** button in the **Tools** section, then select **Pipedream**. **3. Enter your access token** Generate a temporary access token Generate token **4. Select an app** Search for an app Browse all available apps at [mcp.pipedream.com](https://mcp.pipedream.com) **5. Click Connect** Enter a prompt and start chatting! > [!NOTE] > > Refer to the instructions below when you’re ready to use Pipedream MCP in your app. ## Using Pipedream MCP in your app Set your OpenAI API key: ```ini theme={null} OPENAI_API_KEY=your_openai_api_key ``` Other environment variables are covered in the [setup guide](/docs/connect/mcp). ## Generate responses with Pipedream MCP Below is an end to end example showing how to: 1. Initialize the Pipedream SDK 2. Find the relevant MCP server 3. Send a prompt to OpenAI with the MCP server as a tool call ```typescript TypeScript theme={null} import OpenAI from 'openai'; import { PipedreamClient } from "@pipedream/sdk"; // Initialize the Pipedream SDK client const pd = new PipedreamClient({ projectEnvironment: PIPEDREAM_ENVIRONMENT, clientId: PIPEDREAM_CLIENT_ID, clientSecret: PIPEDREAM_CLIENT_SECRET, projectId: PIPEDREAM_PROJECT_ID }); // Find the app to use for the MCP server // For this example, we'll use Notion const apps = await pd.apps.list({ q: "notion" }); const appSlug = apps.data[0].name_slug; // e.g., "notion" // Get access token for MCP server auth const accessToken = await pd.rawAccessToken; // Send the unique ID that you use to identify this user in your system const externalUserId = 'abc-123'; // Used in MCP URL to identify the user // Initialize OpenAI client const openaiClient = new OpenAI(); // Make the OpenAI request with the MCP server const response = await openaiClient.responses.create({ model: 'gpt-4.1', tools: [ { type: 'mcp', server_label: appSlug, server_url: `https://remote.mcp.pipedream.net/v3`, headers: { Authorization: `Bearer ${accessToken}`, "x-pd-project-id": PIPEDREAM_PROJECT_ID, "x-pd-environment": PIPEDREAM_ENVIRONMENT, "x-pd-external-user-id": externalUserId, "x-pd-app-slug": appSlug, }, require_approval: 'never' } ], input: 'Summarize my most recently created Notion doc for me and help draft an email to our customers' }); console.log(response); ``` ```python Python theme={null} import openai from pipedream import Pipedream # Initialize the Pipedream SDK client pd = Pipedream( project_id=PIPEDREAM_PROJECT_ID, project_environment=PIPEDREAM_ENVIRONMENT, client_id=PIPEDREAM_CLIENT_ID, client_secret=PIPEDREAM_CLIENT_SECRET, ) # Find the app to use for the MCP server # For this example, we'll use Notion apps = pd.apps.list(q="notion") app_slug = apps.data[0].name_slug # e.g., "notion" # Get access token for MCP server auth access_token = await pd.raw_access_token # Send the unique ID that you use to identify this user in your system external_user_id = 'abc-123' # Used in MCP URL to identify the user # Initialize OpenAI client openai_client = openai.OpenAI() # Make the OpenAI request with the MCP server response = openai_client.responses.create( model='gpt-4.1', tools=[ { "type": "mcp", "server_label": app_slug, "server_url": "https://remote.mcp.pipedream.net/v3", "headers": { "Authorization": f"Bearer {access_token}", "x-pd-project-id": PIPEDREAM_PROJECT_ID, "x-pd-environment": PIPEDREAM_ENVIRONMENT, "x-pd-external-user-id": external_user_id, "x-pd-app-slug": app_slug, }, "require_approval": "never" } ], input='Summarize my most recently created Notion doc for me and help draft an email to our customers' ) print(response) ``` ```sh cURL theme={null} # Step 1: Get access token from Pipedream ACCESS_TOKEN=$(curl -s -X POST https://api.pipedream.com/v1/oauth/token \ -H "Content-Type: application/json" \ -d '{ "grant_type": "client_credentials", "client_id": "'$PIPEDREAM_CLIENT_ID'", "client_secret": "'$PIPEDREAM_CLIENT_SECRET'" }' | jq -r .access_token) # Step 2: Find the app to use for MCP server # Search for the Notion app APP_SLUG=$(curl -s -X GET "https://api.pipedream.com/v1/apps?q=notion" \ -H "Authorization: Bearer $ACCESS_TOKEN" | jq -r '.data[0].name_slug') # Step 3: Make request to OpenAI with MCP tool curl -X POST https://api.openai.com/v1/responses \ -H "Content-Type: application/json" \ -H "Authorization: Bearer $OPENAI_API_KEY" \ -d '{ "model": "gpt-4.1", "input": "Summarize my most recently created Notion doc for me and help draft an email to our customers", "tools": [ { "type": "mcp", "server_label": "Notion", "server_url": "https://remote.mcp.pipedream.net/v3", "headers": { "Authorization": "Bearer '"$ACCESS_TOKEN"'", "x-pd-project-id": "'"$PIPEDREAM_PROJECT_ID"'", "x-pd-environment": "'"$PIPEDREAM_ENVIRONMENT"'", "x-pd-external-user-id": "abc-123", "x-pd-app-slug": "'"$APP_SLUG"'" }, "require_approval": "never" } ] }' ``` # Pipedream MCP with Vercel's AI SDK Source: https://pipedream.com/docs/connect/mcp/ai-frameworks/vercel-ai-sdk Use Pipedream MCP with the Vercel AI SDK > [!NOTE] > > Make sure to complete the [setup steps](/docs/connect/mcp/developers#prerequisites) before continuing. > **[Try chat.pipedream.com](https://chat.pipedream.com)** > > Check out our chat app built with the AI SDK. ## Installation ```bash theme={null} npm install ai @ai-sdk/openai @pipedream/sdk @modelcontextprotocol/sdk ``` ## Basic Usage Complete example showing Pipedream MCP with the Vercel AI SDK: ```typescript TypeScript theme={null} import { openai } from '@ai-sdk/openai'; import { UIMessage, convertToModelMessages, experimental_createMCPClient, generateText, stepCountIs } from 'ai'; import { StreamableHTTPClientTransport } from '@modelcontextprotocol/sdk/client/streamableHttp'; import { PipedreamClient } from '@pipedream/sdk'; // Environment variables const PIPEDREAM_CLIENT_ID = process.env.PIPEDREAM_CLIENT_ID!; const PIPEDREAM_CLIENT_SECRET = process.env.PIPEDREAM_CLIENT_SECRET!; const PIPEDREAM_PROJECT_ID = process.env.PIPEDREAM_PROJECT_ID!; const PIPEDREAM_ENVIRONMENT = process.env.PIPEDREAM_ENVIRONMENT as 'development' | 'production'; async function runAIWithMCP() { // Initialize Pipedream SDK client const pd = new PipedreamClient({ projectEnvironment: PIPEDREAM_ENVIRONMENT, clientId: PIPEDREAM_CLIENT_ID, clientSecret: PIPEDREAM_CLIENT_SECRET, projectId: PIPEDREAM_PROJECT_ID }); // Get access token for MCP authentication const accessToken = await pd.rawAccessToken; const externalUserId = 'user-123'; // Your user's unique ID const appSlug = 'notion'; // The app you want to use // Create MCP transport with authentication headers const transport = new StreamableHTTPClientTransport( new URL('https://remote.mcp.pipedream.net/v3'), { requestInit: { headers: { 'Authorization': `Bearer ${accessToken}`, 'x-pd-project-id': PIPEDREAM_PROJECT_ID, 'x-pd-environment': PIPEDREAM_ENVIRONMENT, 'x-pd-external-user-id': externalUserId, 'x-pd-app-slug': appSlug, } } } ); // Create MCP client using AI SDK const mcpClient = await experimental_createMCPClient({ transport, }); const messages: UIMessage[] = [ { id: 'system-1', role: 'system', parts: [ { type: 'text', text: 'You are a helpful assistant that can use Pipedream tools to help users with their tasks.' }, ], }, { id: 'user-1', role: 'user', parts: [ { type: 'text', text: 'Find my most recent Notion page and summarize it for me' }, ], }, ]; try { // Generate response with tools available from MCP const result = await generateText({ model: openai('gpt-4'), // Convert UI messages (with parts) into model messages required by generateText messages: convertToModelMessages(messages), tools: await mcpClient.tools(), // Automatically loads all available tools stopWhen: stepCountIs(5), // Equivalent to allowing up to 5 tool-call steps }); console.log('AI Response:', result.text); // Log any tool calls that were made if (result.toolCalls.length > 0) { console.log('\nTool calls made:'); result.toolCalls.forEach((toolCall, index) => { console.log(`${index + 1}. ${toolCall.toolName}`); console.log(` Input: ${JSON.stringify(toolCall.input, null, 2)}`); }); console.log('\nTool results:'); result.toolResults.forEach((toolResult, index) => { console.log(`${index + 1}. ${JSON.stringify(toolResult.output, null, 2)}`); }); } } finally { // Clean up MCP client await mcpClient.close(); } } // Run the example runAIWithMCP().catch(console.error); ``` # Develop with Pipedream MCP Source: https://pipedream.com/docs/connect/mcp/developers Add Pipedream MCP to your app or agent to make tool calls on behalf of your users to 3,000+ APIs and 10,000+ tools. ## Overview Pipedream Connect includes [built-in user authentication](#user-account-connections) for [more than 3,000 APIs](https://mcp.pipedream.com) via MCP, which means you don’t need to build any authorization flows or deal with token storage and refresh in order to make authenticated requests on behalf of your users. ## Examples * **MCP Chat App**: Check out our [chat app](https://chat.pipedream.com) built with Vercel's AI SDK and Pipedream MCP * **CLI Examples**: Load tools dynamically [using either OpenAI or Vercel's AI SDK](https://github.com/PipedreamHQ/pipedream-connect-examples/tree/master/mcp) * **Gemini Agent**: Use Pipedream MCP with [Google Gemini](https://github.com/philschmid/gemini-samples/blob/main/scripts/gemini-mcp-pipedream.py) ([built by the Gemini team](https://x.com/_philschmid/status/1948025573403492621)) ## AI Frameworks Use Pipedream MCP with popular AI frameworks and LLMs: > **[Vercel AI SDK](/docs/connect/mcp/ai-frameworks/vercel-ai-sdk)** > > Streamlined MCP integration with automatic tool execution > **[OpenAI](/docs/connect/mcp/ai-frameworks/openai)** > > Direct integration with OpenAI's API and playground > **[Anthropic Claude](/docs/connect/mcp/ai-frameworks/anthropic)** > > Native MCP connector through Claude's Messages API > **[Google Gemini](/docs/connect/mcp/ai-frameworks/gemini)** > > Multimodal AI with text, image, and tool capabilities ### Key Pipedream concepts to understand **`external_user_id`** * This is your user's ID, in your system: whatever you use to uniquely identify them * Requests made for that user ID are coupled to that end user and their connected accounts ([learn more](/docs/connect/managed-auth/users)) **`app`** * The app's "name slug" (the unique identifier for the app) * Check out the [app discovery](/docs/connect/app-discovery) docs to learn how to discover and use available apps ## Prerequisites To use either the remote or self-hosted MCP server, you’ll need: 1. A [Pipedream account](https://pipedream.com/auth/signup) 2. A [Pipedream project](/docs/projects/#creating-projects). Accounts connected via MCP will be stored here. 3. [Pipedream OAuth credentials](/docs/connect/api-reference/authentication) ### Set up your environment Set the following environment variables: ```ini theme={null} PIPEDREAM_CLIENT_ID=your_client_id PIPEDREAM_CLIENT_SECRET=your_client_secret PIPEDREAM_PROJECT_ID=your_project_id # proj_xxxxxxx PIPEDREAM_ENVIRONMENT=development # development | production ``` Learn more about [environments in Pipedream Connect](/docs/connect/managed-auth/environments/). ## Authentication ### Developer authentication Your application authenticates with Pipedream using client credential OAuth. [See below](/docs/connect/mcp/developers/#api-authentication) for details. ### User account connections One of the core features of Pipedream Connect and the MCP server is the ability for your users to easily connect their accounts without having to build any of the authorization flow or handle token storage. You can handle account connections in one of two ways in your app: #### Add a button in your UI * Use Pipedream’s [frontend SDK](/docs/connect/managed-auth/quickstart/#use-the-pipedream-sdk-in-your-frontend) to let users connect their account directly in your UI * You can see an example of this when you connect any account in [mcp.pipedream.com](https://mcp.pipedream.com) #### Return a link * Use [Connect Link](/docs/connect/managed-auth/quickstart/#or-use-connect-link) to let your users connect their account in a new browser tab * This is handled automatically by Pipedream's MCP server and **there’s no additional implementation required** * If a user doesn’t have a connected account that’s required for a given tool call, the server will return a URL in the tool call response: ```sh theme={null} https://pipedream.com/_static/connect.html?token=ctok_xxxxxxx&connectLink=true&app={appSlug} ``` ## Discover available integrations Pipedream provides [3,000+ APIs as MCP servers](https://mcp.pipedream.com). Each server corresponds to an app integration (like Notion, Gmail, or Slack) and has its own specific set of tools. For detailed information on discovering apps and enabling automatic app discovery, check out [app discovery](/docs/connect/app-discovery) section. ## Getting started ### Use Pipedream’s remote MCP server ### Supported transport types The Pipedream MCP server supports both SSE and streamable HTTP transport types dynamically, with no configuration required by the developer or MCP client. ### Base URL ```sh theme={null} https://remote.mcp.pipedream.net/v3 ``` ### API Authentication To authenticate requests to Pipedream’s MCP server, you need to include an access token with every HTTP request. Here’s how to get it: ```typescript TypeScript theme={null} import { PipedreamClient } from "@pipedream/sdk"; // Initialize the Pipedream SDK client const client = new PipedreamClient({ projectEnvironment: PIPEDREAM_ENVIRONMENT, clientId: PIPEDREAM_CLIENT_ID, clientSecret: PIPEDREAM_CLIENT_SECRET, projectId: PIPEDREAM_PROJECT_ID }); // Get access token for MCP server auth const accessToken = await client.rawAccessToken; console.log(accessToken); ``` ```python Python theme={null} from pipedream import Pipedream # Initialize the Pipedream SDK client pd = Pipedream( project_id=PIPEDREAM_PROJECT_ID, project_environment=PIPEDREAM_ENVIRONMENT, client_id=PIPEDREAM_CLIENT_ID, client_secret=PIPEDREAM_CLIENT_SECRET, ) # Get access token for MCP server auth access_token = await pd.raw_access_token print(access_token) ``` ```sh cURL theme={null} curl -s -X POST https://api.pipedream.com/v1/oauth/token \ -H "Content-Type: application/json" \ -d '{ "grant_type": "client_credentials", "client_id": "'$PIPEDREAM_CLIENT_ID'", "client_secret": "'$PIPEDREAM_CLIENT_SECRET'" }' ``` ### Params * Below are params that you should send with every HTTP request to Pipedream’s MCP server. * You can pass them as HTTP headers or as query parameters on the URL. | Header | Query Param | Value | Required? | | - | - | - | - | | `x-pd-project-id` | `projectId` | `proj_xxxxxxx` | Yes | | `x-pd-environment` | `environment` | `development` \| `production` | Yes | | `x-pd-external-user-id` | `externalUserId` | `` | Yes | | `x-pd-app-slug` | `app` | `linear`, `notion`, etc | Yes | | `x-pd-account-id` | `accountId` | `apn_xxxxxxx` | No | | `x-pd-oauth-app-id` | `oauthAppId` | `oa_xxxxxxx` | No | | `x-pd-registry` | `registry` | `public` \| `private` \| `all` | No | ### Example request ```typescript TypeScript theme={null} import { StreamableHTTPClientTransport } from "@modelcontextprotocol/sdk/client/streamableHttp.js"; import { PipedreamClient } from "@pipedream/sdk"; // Initialize the Pipedream SDK client const client = new PipedreamClient({ projectEnvironment: PIPEDREAM_ENVIRONMENT, clientId: PIPEDREAM_CLIENT_ID, clientSecret: PIPEDREAM_CLIENT_SECRET, projectId: PIPEDREAM_PROJECT_ID }); // Retrieve your developer access token via the Pipedream SDK const accessToken = await client.rawAccessToken; const serverUrl = MCP_SERVER_URL || `https://remote.mcp.pipedream.net/v3`; const transport = new StreamableHTTPClientTransport(new URL(serverUrl), { requestInit: { headers: { "Authorization": `Bearer ${accessToken}`, "x-pd-project-id": PIPEDREAM_PROJECT_ID, // proj_xxxxxxx "x-pd-environment": PIPEDREAM_ENVIRONMENT, // development | production "x-pd-external-user-id": EXTERNAL_USER_ID, // the user's ID from your system "x-pd-app-slug": APP_SLUG, // notion, linear, gmail, etc } } }); ``` ```python Python theme={null} from mcp import ClientSession from mcp.client.streamable_http import streamablehttp_client from pipedream import Pipedream # Initialize the Pipedream SDK client pd = Pipedream( project_id=PIPEDREAM_PROJECT_ID, project_environment=PIPEDREAM_ENVIRONMENT, client_id=PIPEDREAM_CLIENT_ID, client_secret=PIPEDREAM_CLIENT_SECRET, ) # Retrieve your developer access token via the Pipedream SDK access_token = await pd.raw_access_token server_url = MCP_SERVER_URL or "https://remote.mcp.pipedream.net/v3" # Configure MCP client with authentication headers headers = { "Authorization": f"Bearer {access_token}", "x-pd-project-id": PIPEDREAM_PROJECT_ID, # proj_xxxxxxx "x-pd-environment": PIPEDREAM_ENVIRONMENT, # development | production "x-pd-external-user-id": EXTERNAL_USER_ID, # the user's ID from your system "x-pd-app-slug": APP_SLUG, # notion, linear, gmail, etc } # Create MCP client connection async with streamablehttp_client(server_url, headers=headers) as (read, write, _): async with ClientSession(read, write) as session: await session.initialize() # Now you can use the session to call tools tools = await session.list_tools() ``` ### Using the MCP inspector The [MCP inspector](https://modelcontextprotocol.io/tools/inspector) can be helpful when debugging tool calls. ```sh theme={null} npx @modelcontextprotocol/inspector ``` Enter the server URL: ``` https://remote.mcp.pipedream.net/v3?externalUserId={external_user_id}&app={app_slug} ``` ## Error handling When a tool call fails, Pipedream's MCP server returns a result with `isError: true`, following the [MCP spec for tool execution errors](https://modelcontextprotocol.io/specification/2025-06-18/server/tools#error-handling). This lets the LLM see the error and decide how to respond, rather than surfacing it as a protocol-level error. The error result includes the same `error` object with an `attribution` field that's returned when [running actions](/docs/connect/components/actions#error-responses), which classifies where the error originated (for example, in the tool's code, the upstream API, or the network layer). See [error responses](/docs/connect/components/actions#error-responses) for the full list of attribution origins and details on how attribution works. ## Using custom tools Publish [custom tools](/docs/connect/components/custom-tools/) to your Pipedream workspace to use them with Pipedream's MCP server. This lets you add custom and unique functionality that may not be available in the public registry. # Using Pipedream MCP as an End User Source: https://pipedream.com/docs/connect/mcp/users Add 10,000+ tools from 3,000+ APIs to ChatGPT, Claude, Cursor, and more, with Pipedream MCP Pipedream MCP lets you connect ChatGPT, Claude, Cursor, or any other chatbot to all the tools you already use. Explore the available apps and tools at [mcp.pipedream.com](https://mcp.pipedream.com). > [!NOTE] > > If you're a developer looking to use Pipedream MCP to make tool calls on behalf of your users in an app you're building, check out the [developer docs](/docs/connect/mcp/developers). ## Getting started **1. Copy the MCP server URL** ``` https://mcp.pipedream.net/v2 ``` **2. Select your MCP client** > **[ChatGPT](#chatgpt)** > > Connect ChatGPT to Pipedream MCP > **[Claude](#claude)** > > Connect Claude to Pipedream MCP > **[Cursor](#cursor)** > > Connect Cursor to Pipedream MCP > **[VS Code](#vs-code)** > > Connect VS Code to Pipedream MCP > **[Other](#other)** > > Connect any MCP-compatible client **3. Connect to Pipedream, select the apps to enable** * When prompted, sign in or sign up for a free account * Select the apps you want to enable for Pipedream MCP * Authorize access for the MCP client > [!NOTE] > > Pipedream MCP accounts are currently separate from your [pipedream.com](https://pipedream.com) account. **4. Start chatting** Once connected, ask the chatbot or agent to do whatever you want with the apps you enabled. For example: * "Help me draft a product update based on my team's recently completed Linear tickets" ([Linear](https://mcp.pipedream.com/app/linear)) * “Help me prep for external meetings tomorrow by telling me about who I'm meeting with" ([Google Calendar](https://mcp.pipedream.com/app/google_calendar)) * “Explore my PostgreSQL database and tell me about the most recent 10 customers” ([PostgreSQL](https://mcp.pipedream.com/app/postgres)) * “Get yesterday's revenue from Stripe and send me a Slack message with the summary” ([Stripe](https://mcp.pipedream.com/app/stripe), [Slack](https://mcp.pipedream.com/app/slack)) ## MCP Clients Pipedream MCP works out of the box for any chat app or AI agent that supports MCP. > [!NOTE] > > **MCP tool name character limits**: The [official MCP specification](https://modelcontextprotocol.io/specification/draft/server/tools#tool-names) recommends a 128-character limit for tool names, but each client can define its own limit. > > Tool names include the MCP server name you choose when adding it - for example, naming the server *"My Pipedream Automation MCP Server"* adds 34 characters to every tool name, while naming it *"PD"* only adds 2. If you encounter tool name length issues, try using a shorter server name. ### ChatGPT > [!NOTE] > > Custom connectors in [ChatGPT](https://chatgpt.com) are available for certain plans. Refer to [their docs](https://platform.openai.com/docs/guides/developer-mode) for the latest information. **1. Open Settings** Sign in to your ChatGPT account and open the [Connectors settings](https://chatgpt.com/#settings/Connectors). **2. Enable Developer Mode** Select **Advanced Settings** at the bottom, then enable **Developer Mode**. **3. Create New Connector** Go back to the connectors page and click the **Create** button. **4. Add Pipedream MCP URL** Add the following URL: ``` https://mcp.pipedream.net/v2 ``` **5. Authorize Access** Click **Create** and authorize access when prompted. **6. Enable Pipedream in Chat** In the main chat window, click the **+** button, select **More**, then **Developer Mode**, and select and enable **Pipedream**. **7. Start Using** Start chatting with access to Pipedream's 10,000+ tools! ### Claude > [!NOTE] > > Custom connectors in [Claude](https://claude.ai) are available for certain plans. Refer to [their docs](https://support.claude.com/en/articles/11175166-getting-started-with-custom-connectors-using-remote-mcp) for the latest information. **1. Open Connector Settings** Sign in to your Claude account open the [Connector settings](https://claude.ai/settings/connectors). **2. Add Custom Connector** Select **Add Custom Connector**. **3. Add Pipedream MCP URL** Add the following URL: ``` https://mcp.pipedream.net/v2 ``` **4. Authorize Access** Click **Add** and authorize access when prompted. **5. Enable Pipedream in Chat** In the main chat window, click the settings button and make sure **Pipedream** is enabled. **6. Start Using** Start chatting with access to Pipedream's 10,000+ tools! ### Cursor **1. Add to Cursor** ![Cursor](https://cursor.com/assets/images/logo.svg) Add to Cursor > [!NOTE] > > 1-click installation requires Cursor v1 or greater. See [below](#other) for manual configuration. **2. Authorize access** Authorize access when prompted. ### VS Code **1. Add to VS Code** Add to VS Code > [!NOTE] > > 1-click installation requires VS Code with MCP extension. See [below](#other) for manual configuration. **2. Authorize access** Authorize access when prompted. ### Any other MCP-compatible client Add the following JSON to your client's configuration: ```json theme={null} { "mcpServers": { "pipedream": { "url": "https://mcp.pipedream.net/v2" } } } ``` # Connect Quickstart Source: https://pipedream.com/docs/connect/quickstart Get started with Pipedream Connect in minutes using the CLI Pipedream Connect provides a developer toolkit that lets you add 3,000+ integrations to your app or AI agent. The fastest way to get started is with the Pipedream CLI. In this quickstart, you'll: * Install the Pipedream CLI * Create a Connect project * Set up a Pipedream OAuth client to authenticate API requests * Run the [SDK playground](https://pipedream.com/connect/demo) locally to explore the Pipedream SDK and pre-built tools ## Set up Connect with the CLI **1. Install the Pipedream CLI** **macOS** **Using Homebrew:** ```bash theme={null} brew tap pipedreamhq/pd-cli brew install pipedreamhq/pd-cli/pipedream ``` **From source:** ```bash theme={null} curl https://cli.pipedream.com/install | sh ``` **Linux** ```bash theme={null} curl https://cli.pipedream.com/install | sh ``` **Windows** Download the [Windows build](https://cli.pipedream.com/windows/amd64/latest/pd.zip), unzip it, and add `pd.exe` to your PATH. Verify the installation: ```bash theme={null} pd --version ``` **2. Log in to your account** Authenticate with your Pipedream account: ```bash theme={null} pd login ``` This opens your browser to complete sign in. **3. Initialize a Connect project** Run the [Connect initialization command](/docs/cli/reference/#pd-init-connect): ```bash theme={null} pd init connect ``` This command walks you through: * Creating a new project (or selecting an existing one) * Setting up a Pipedream OAuth client to authenticate requests to the Connect API * Choosing one of the available demo apps to get started: * **[Next.js app for managed auth](https://github.com/PipedreamHQ/pipedream-connect-examples/tree/master/managed-auth-basic-next-app)**: a basic Next.js application demonstrating how your users can connect their accounts * **[SDK Playground](https://github.com/PipedreamHQ/pipedream-connect-examples/tree/master/connect-react-demo)**: an interactive playground that highlights both the frontend `connect-react` and backend `@pipedream/sdk` libraries for integrating 10,000+ pre-built triggers and actions * **[MCP Chat App](https://github.com/PipedreamHQ/mcp-chat)**: an AI chat application powered by Pipedream's MCP server > [!NOTE] > > The CLI automatically creates a `.env` file with your OAuth client credentials and project ID. Keep this file secure and don't commit it to version control. **4. Start your chosen demo app** After initialization, start the demo app you selected: ```bash theme={null} cd your-project-name npm run dev ``` Open [http://localhost:3000](http://localhost:3000) to see your app running. **Next.js with Managed Auth** This demo showcases: * **User authentication** - Sign in flows for your end users * **Account connections** - Connect user accounts to 3,000+ apps * **Basic integration patterns** - Common use cases and implementation examples **React SDK Playground** This interactive playground demonstrates: * **Component browser** - Explore 10,000+ pre-built API operations (triggers and actions) * **Managed auth** - Connect your users' accounts to 3,000+ apps * **Component configuration** - Configure and test components with real API data * **Live execution** - Run actions and see the results in real-time **MCP Chat App** This AI chat application features: * **Model Context Protocol (MCP)** - Pipedream's MCP integration for AI agents * **Integrated tools** - All 3,000+ apps available as chat tools * **Live demo** - See the production version at [chat.pipedream.com](https://chat.pipedream.com) * **AI-powered workflows** - Execute actions through natural language commands **5. Run the demo app** Follow the instructions in the CLI to set up your local environment and run the app. ## Next steps * Send custom requests with the [Connect Proxy](/docs/connect/api-proxy) * Explore the [Connect API](/docs/connect/api-reference/introduction) * Learn more about [Pipedream MCP](/docs/connect/mcp) # Pipedream Connect Use Cases Source: https://pipedream.com/docs/connect/use-cases Developers use Pipedream Connect to build customer-facing API integrations into their products. It lets you build [in-app messaging](/docs/connect/use-cases/#in-app-messaging), [CRM syncs](/docs/connect/use-cases/#crm-syncs), [AI-driven products](/docs/connect/use-cases/#ai-products), and much more, all in a few minutes. ## Core value to app developers In 20 years of building software, we’ve seen a common theme. No matter the product, your customers end up needing to connect your app to third-party APIs. You might build real-time notifications with messaging apps, export customer data to databases or spreadsheets, ingest data from CRMs, or connect to any of the thousands of APIs and SaaS services your customers are using. These features are often tied to large contracts and Enterprise customers. But it’s hard to justify the engineering effort required for these integrations. They’re a distraction from the core product. Once built, they’re hard to maintain. You have to securely manage auth, learn the nuances of each API, and improve the integration as your customers ask for new features. Managing these integrations is a huge context switch for any engineer. Most teams have trouble scaling this. At Pipedream, our customers tell us a variant of this story every day. Pipedream Connect helps you build these features **in minutes**, for any app. Once you add the core integration UI to your app, non-technical employees can also help to manage [the workflows](/docs/workflows/building-workflows/) that drive the backend logic. For example, if you’re building [in-app messaging](/docs/connect/use-cases/#in-app-messaging), once you add the UI to let users connect Slack, Discord, and other tools, anyone on your team can build workflows that format and deliver messages to your customers. This is a huge plus for many orgs: you still get to build a bespoke UI, directly in your app, suited to your customer need. But anyone in the company can collaborate on the workflows that power it. ## Value to your customers Shipping new customer-facing integrations can happen in minutes. ## How customers are using Connect ### In-app messaging Most apps build email notifications, since it’s easy. But most teams work in Slack, Discord, Microsoft Teams, or a variety of other messaging apps. Sometimes you want to send messages via SMS or push notifications. It’s hard to maintain integrations for all the apps your customers are using. Pipedream makes this simple. ### CRM syncs Sync data between your app and Salesforce, HubSpot, or any CRM. Pipedream lets your customers connect their accounts directly from your UI, define the sync logic, and run it on Pipedream’s infrastructure. Pull data from your customers’ CRMs in real-time, or push data from your app. ### AI products Talk to any AI API or LLM. Build chat apps or interact in real-time with your users. Or run asynchronous tasks in the background, like image classification, article summarization, or other tasks you want to offload to an AI agent. You can use built-in functions like [`$.flow.suspend`](/docs/workflows/building-workflows/code/nodejs/rerun/#flowsuspend) to send a message to your team, or directly to the user, to approve specific actions. ### Spreadsheet integrations Sync data between your app and Google Sheets, Airtable, or any spreadsheet. Pipedream Connect lets your users auth with any app, select the sheet, and define custom sync logic. ### And much more Building an app with Pipedream and want to be profiled here (anonymously or otherwise)? Email `connect@pipedream.com` to let us know! # Webhooks Source: https://pipedream.com/docs/connect/webhooks Receive webhook notifications for account connection events and trigger event deliveries Connect supports two categories of webhooks: * **[Connection webhooks](#connection-webhooks)** notify you when an end user connects or fails to connect an account. You define these webhooks when creating a [Connect token](/docs/connect/managed-auth/tokens/). * **[Trigger webhooks](#trigger-webhooks)** deliver events emitted by [deployed triggers](/docs/connect/components/triggers/). You define these per trigger, or set a default at the project level. ## Connection webhooks When you [create a Connect token](/docs/connect/api-reference/create-connect-token), you can pass a `webhook_uri`. Pipedream sends a POST request to this URL when the end user successfully connects an account, or if an error occurs during the flow. ### Events * `CONNECTION_SUCCESS` — the user successfully connected their account * `CONNECTION_ERROR` — an error occurred during the connection flow ### Payload #### Successful connection User credentials are **not** included in the webhook payload. Use the [Retrieve Account](/docs/connect/api-reference/retrieve-account) endpoint with the `account.id` from the payload to fetch credentials. ```json theme={null} { "event": "CONNECTION_SUCCESS", "connect_token": "ctok_xxxxxxx", "environment": "production", "connect_session_id": 1.4058728083872854e+38, "account": { "id": "apn_xxxxxxx", "name": "jane@example.com", "external_id": "user-abc-123", "healthy": true, "dead": null, "app": { "id": "oa_xxxxxxx", "name_slug": "google_sheets", "name": "Google Sheets", "auth_type": "oauth", "description": "Use Google Sheets to create and edit online spreadsheets. Get insights together with secure sharing in real-time and from any device.", "img_src": "https://assets.pipedream.net/s.v0/app_168hvn/logo/orig", "custom_fields_json": "[]", "categories": [ "Productivity" ], "featured_weight": 1000000098, "connect": { "allowed_domains": [ "www.googleapis.com", "sheets.googleapis.com" ], "base_proxy_target_url": "https://sheets.googleapis.com", "proxy_enabled": true } }, "created_at": "2026-03-25T17:49:15.000Z", "updated_at": "2026-03-25T17:49:15.000Z" } } ``` #### Error ```json theme={null} { "event": "CONNECTION_ERROR", "connect_token": "ctok_xxxxxxx", "environment": "production", "connect_session_id": 1.4058727315359677e+38, "error": "Test request failed. Please verify your credentials and try again." } ``` ## Trigger webhooks When you [deploy a trigger](/docs/connect/components/triggers/) with a `webhook_url`, Pipedream delivers that trigger's emitted events to your URL via a POST request. ### Setting a webhook URL You can define a webhook destination on an individual trigger, or a project. If both are set, the **trigger-level URL takes precedence**. #### Project-level Set a default webhook URL for all triggers in a project. You can configure separate URLs for each environment. **UI** In your [project settings](https://pipedream.com/projects), add webhook URLs under the **Webhooks** section for each environment. When you save a new webhook URL, we'll display the signing key for you to copy and use to validate signatures. Note that we will never show the signing key again, so make sure to note it down. You can also regenerate the signing key and delete or update the webhook URL at any time. **API** Use the [Set Project Environment Webhook](/docs/connect/api-reference/set-project-environment-webhook) endpoint: ```sh theme={null} curl -X PUT https://api.pipedream.com/v1/connect/{project_id}/webhook \ -H "Content-Type: application/json" \ -H "Authorization: Bearer {access_token}" \ -H "x-pd-environment: production" \ -d '{ "webhook_url": "https://events.example.com/pipedream" }' ``` Pipedream returns a signing key in the response. Store it securely — you'll need it to [validate signatures](#validating-signatures). #### Trigger-level Pass `webhook_url` when you [deploy a trigger](/docs/connect/api-reference/deploy-trigger), or update it later with the [Update Trigger Webhooks](/docs/connect/api-reference/update-trigger-webhooks) endpoint. Pipedream returns a signing key in the response. ### Webhook signatures Pipedream signs every trigger webhook delivery using HMAC-SHA256. Each request includes an `x-pd-signature` header: ``` t=1616000000,v1=5257a869e7ecebeda32affa62cdca3fa51cad7e77a0e56ff536d0ce8e108d8bd ``` * `t` — UNIX timestamp (seconds) when the signature was generated * `v1` — HMAC-SHA256 hex digest of the signed payload The signed payload is generated from the timestamp, a `.`, and the raw request body: ``` {timestamp}.{raw_body} ``` ### Validating signatures Compute the expected signature with your signing key and compare it to the `x-pd-signature` header value. ```javascript Node.js theme={null} import crypto from "crypto"; function verifyWebhookSignature(signingKey, signatureHeader, rawBody) { const [tPart, v1Part] = signatureHeader.split(","); const timestamp = tPart.split("=")[1]; const receivedSig = v1Part.split("=")[1]; const signedPayload = `${timestamp}.${rawBody}`; const expectedSig = crypto .createHmac("sha256", signingKey) .update(signedPayload) .digest("hex"); return crypto.timingSafeEqual( Buffer.from(receivedSig, "hex"), Buffer.from(expectedSig, "hex") ); } // Express example app.post("/webhook", express.raw({ type: "application/json" }), (req, res) => { const signingKey = process.env.PD_SIGNING_KEY; const signatureHeader = req.headers["x-pd-signature"]; const rawBody = req.body.toString(); if (!verifyWebhookSignature(signingKey, signatureHeader, rawBody)) { return res.status(401).send("Invalid signature"); } // Process the event res.status(200).send("OK"); }); ``` ```python Python theme={null} import hashlib import hmac import os def verify_webhook_signature(signing_key, signature_header, raw_body): t_part, v1_part = signature_header.split(",") timestamp = t_part.split("=")[1] received_sig = v1_part.split("=")[1] signed_payload = f"{timestamp}.{raw_body}" expected_sig = hmac.new( signing_key.encode("utf-8"), signed_payload.encode("utf-8"), hashlib.sha256, ).hexdigest() return hmac.compare_digest(received_sig, expected_sig) # Flask example @app.route("/webhook", methods=["POST"]) def webhook(): signing_key = os.environ["PD_SIGNING_KEY"] signature_header = request.headers.get("x-pd-signature") raw_body = request.get_data(as_text=True) if not verify_webhook_signature(signing_key, signature_header, raw_body): return "Invalid signature", 401 # Process the event return "OK", 200 ``` > [!WARNING] > > Always use a constant-time comparison function (`crypto.timingSafeEqual` in Node.js, `hmac.compare_digest` in Python) to prevent timing attacks. ### Preventing replay attacks Check the timestamp in the signature header and reject requests that are too old: ```javascript theme={null} const MAX_AGE_SECONDS = 300; // 5 minutes const currentTime = Math.floor(Date.now() / 1000); const signatureAge = currentTime - parseInt(timestamp, 10); if (signatureAge > MAX_AGE_SECONDS) { // Reject the request } ``` # Pipedream Glossary Source: https://pipedream.com/docs/glossary Below you’ll find a glossary of Pipedream-specific terms. We use these in the product, docs, and other content, so if you’re seeing a term for the first time, you’ll probably find it below. All terms that aren’t in this doc hold their standard technical meaning. If you see a term missing, please [reach out](https://pipedream.com/support). > [!NOTE] > > **Looking for a workflow term?** Workflows and String are shutting down on March 31, 2027, so this glossary no longer lists terms that apply only to Workflows. See the [Workflows docs](/docs/workflows/overview) and the [shutdown notice](/docs/workflows). [0-9](/docs/glossary/#0---9) | [A](/docs/glossary/#a) | [B](/docs/glossary/#b) | [C](/docs/glossary/#c) | [D](/docs/glossary/#d) | [E](/docs/glossary/#e) | [F](/docs/glossary/#f) | [G](/docs/glossary/#g) | [H](/docs/glossary/#h) | [I](/docs/glossary/#i) | [J](/docs/glossary/#j) | [K](/docs/glossary/#k) | [L](/docs/glossary/#l) | [M](/docs/glossary/#m) | [N](/docs/glossary/#n) | [O](/docs/glossary/#o) | [P](/docs/glossary/#p) | [Q](/docs/glossary/#q) | [R](/docs/glossary/#r) | [S](/docs/glossary/#s) | [T](/docs/glossary/#t) | [U](/docs/glossary/#u) | [V](/docs/glossary/#v) | [W-Z](/docs/glossary/#w-z) ## 0 - 9 ### 2FA Short for [two-factor authentication](/docs/glossary/#two-factor-authentication-2fa). ## A ### Account Synonym for [connected account](/docs/glossary/#connected-account). ### Action Actions are reusable, prebuilt operations against an API, written as [Pipedream components](/docs/glossary/#component). You can [run actions](/docs/connect/components/actions/) for your end users with Pipedream Connect. ### Advanced plan Pipedream’s plan for individuals and teams running production integrations. [See the pricing page](https://pipedream.com/pricing) for more details. ## B ### Basic plan Pipedream’s plan for individuals who need higher limits and the option to scale usage. [See the pricing page](https://pipedream.com/pricing) for more details. ### Business plan Pipedream’s plan for teams with security, compliance, and support needs. [See the pricing page](https://pipedream.com/pricing) for more details. ## C ### Component Components are Node.js modules that run on Pipedream’s serverless infrastructure. [Sources](/docs/glossary/#source) and [actions](/docs/glossary/#action) are two types of components. See [the component API](/docs/components/contributing/api/) for more details. ### Component API The programming interface for creating [components](/docs/glossary/#component) in Pipedream. ### Component guidelines Guidelines applied to components submitted to [the Pipedream component registry](/docs/glossary/#component-registry). ### Component registry The public registry of [components](/docs/glossary/#component) available to Pipedream users, [available on GitHub](https://github.com/PipedreamHQ/pipedream). ### Connected account A specific account or credentials used to connect to a Pipedream [integration](/docs/glossary/#integrations). If both you and your team member have an account with OpenAI, for example, you would connect each account as a distinct connected account. [See the docs](/docs/apps/connected-accounts/) for more details. ### Connected account access control You can restrict access to connected accounts to specific individuals or share with the entire workspace. [See the docs](/docs/apps/connected-accounts/#access-control) for more details. ### Credit Pipedream’s billable unit of compute, charged per 30 seconds of compute time. In Pipedream Connect, credits are consumed by action executions, tool calls, deployed trigger emits, and proxy requests. [See the docs](/docs/pricing/#how-credits-work-in-connect) for more details. ### Custom source An [event source](/docs/glossary/#event-source) that you create using custom code, or by modifying a [registry source](/docs/glossary/#registry-source). ## D ## E ### Environment variable Pipedream supports two types of environment variables: * [Project variables](/docs/glossary/#project-variable), available within a specific project * [Workspace variables](/docs/glossary/#workspace-variable), available across all projects in a workspace ### Event Events are emitted by [sources](/docs/glossary/#event-source) and delivered to [listeners](/docs/glossary/#listener). Events can be triggered by a variety of sources, including HTTP requests, cron schedules, and third-party APIs. Events can be passed to actions, which can process the event data and perform a variety of operations, including making HTTP requests, sending emails, and interacting with third-party APIs. ### Event source [Components](/docs/glossary/#component) that watch for events from a third-party data source, emitting those events to [listeners](/docs/glossary/#listener). ### Execution A single run of a Pipedream component on an event, like an action execution or an event source execution. ### Execution environment [The virtual machine](/docs/privacy-and-security/#execution-environment) and internal Pipedream platform code that runs code on your behalf, including actions and custom tools. An instance of an execution environment is called a [worker](/docs/glossary/#worker). ### External credentials [Connected accounts](/docs/glossary/#connected-account) are accounts that users link directly in Pipedream. External credentials are credentials that users store in their own database or service, and reference in Pipedream at runtime. [See the docs](/docs/apps/external-auth/) for more details. ## F ### Free plan Pipedream’s free plan. [See the pricing docs](/docs/pricing/#free-plan) for more details. ## G ### Global search Press `Ctrl + K` or `Cmd + K` to open the global search bar in the Pipedream UI. ## H ### Helper functions [Built-in actions](https://pipedream.com/apps/helper-functions) that convert data types, format dates, and more. ### Hooks [Hooks](/docs/components/contributing/api/#hooks) are functions executed as a part of the [event source](/docs/glossary/#event-source) lifecycle. They can be used to perform setup tasks before the source is deployed, or teardown tasks after the source is destroyed. ## I ### Integrations When Pipedream adds a new third-party service to our marketplace of apps, we often have to handle details of the OAuth process and authentication, and build [sources](/docs/glossary/#event-source) and [actions](/docs/glossary/#action) for the API. These details are abstracted from the user, and the app configuration is referred to as an **integration**. ## J ## K ### Key-based account A [connected account](/docs/glossary/#connected-account) that uses static credentials, like API keys. ## L ### Listener A resource that listens for events emitted by [triggers](/docs/glossary/#trigger) and [event sources](/docs/glossary/#event-source). Listeners can be webhook URLs, event sources, and more. ## M ## N ### Node.js runtime Pipedream’s internal code in the [execution environment](/docs/glossary/#execution-environment) responsible for running Node.js code. ## O ### Organization Synonym for [workspaces](/docs/glossary/#workspace). ### OAuth account A [connected account](/docs/glossary/#connected-account) that uses OAuth to authenticate with a third-party service. ## P ### Premium apps Pipedream’s built-in [integrations](/docs/glossary/#integrations) that require a paid plan to use. [See the pricing page](https://pipedream.com/pricing) for more details and the [full list of premium apps](/docs/apps/#premium-apps). ### Project A container for connected accounts, secrets, and other resources in Pipedream. [See the docs](/docs/projects/) for more details. ### Project-based access control You can restrict access to projects to specific individuals or share with the entire workspace. [See the docs](/docs/projects/access-controls/) for more details. ### Project secret Users can add both standard project variables and secrets to a project. The values of secrets are encrypted and cannot be read from the UI once added. ### Project settings Project-specific configuration, available in a project’s settings. ### Project variable Project-specific environment variables, available to the resources in a project. ### Props [Props](/docs/components/contributing/api/#props) allow you to pass input to [components](/docs/glossary/#component). ## Q ## R ### Registry Synonym for [component registry](/docs/glossary/#component-registry). ### Registry source An [event source](/docs/glossary/#event-source) available in the [component registry](/docs/glossary/#component-registry). Registry sources are reviewed and approved by Pipedream. ## S ### Single sign-on (SSO) Users can [configure SSO](/docs/workspaces/sso/) to authenticate with Pipedream using their identity provider. ### Source Synonym for [event source](/docs/glossary/#event-source). ### Subscription A connection between a [listener](/docs/glossary/#listener) and an emitter that allows the listener to receive events from the emitter. ## T ### Trigger Triggers watch for events from third-party APIs and emit [events](/docs/glossary/#event) to [listeners](/docs/glossary/#listener). With Pipedream Connect, you [deploy triggers](/docs/connect/components/triggers/) for your end users and receive the emitted events at a webhook URL. ### Two-factor authentication (2FA) Two-factor authentication. [Configure 2FA](/docs/account/user-settings/#two-factor-authentication) to add an extra layer of security to your Pipedream account. ## U ## V ### VPC (Virtual Private Cloud) VPCs are dedicated, isolated networks with a static outbound egress IP address that’s unique to your workspace. [See the docs](/docs/connect/vpc/) for more details. ## W-Z ### Worker An instance of an [execution environment](/docs/glossary/#execution-environment) available to process [events](/docs/glossary/#event). ### Workspace You create a workspace when you sign up for Pipedream. Workspaces contain projects and other resources. [See the docs](/docs/workspaces/) for more details. ### Workspace admin A workspace can have multiple [admins](/docs/workspaces/#promoting-a-member-to-admin), who can administer the workspace, manage billing, and more. ### Workspace member A user invited to a workspace. Members can create projects and other resources in the workspace, but cannot manage billing or administer the workspace. ### Workspace owner The user who created the workspace. ### Workspace settings Workspace settings let [workspace admins](/docs/glossary/#workspace-admin) configure settings like membership, [SSO](/docs/glossary/#single-sign-on-sso), and more. ### Workspace variable An environment variable available across all projects in a workspace. [Troubleshooting](/docs/troubleshooting/ "Troubleshooting") # Introduction to Pipedream Source: https://pipedream.com/docs/index Pipedream provides the toolkit to add thousands of integrations to your app and enables you to automate any process. > **[Get started with Connect](/docs/connect)** > > Add thousands of customer-facing integrations to your app or AI agent The Pipedream platform includes: * SDKs to handle [user authentication](/docs/connect/) for 3,000+ APIs * Source-available [triggers](/docs/workflows/building-workflows/triggers/) and [actions](/docs/workflows/building-workflows/actions/) for [thousands of integrated apps](https://pipedream.com/explore/) * One-click [OAuth and key-based authentication](/docs/apps/connected-accounts/) for more than 3,000 APIs (use tokens directly in code or with pre-built actions) ## Getting Started To get started, [sign up for a free account](https://pipedream.com/auth/signup) (no credit card required): * **Building integrations for your app?** Follow our [Connect quickstart](/docs/connect/quickstart) to add integrations using the CLI * **Building workflows?** Follow our [workflow quickstart](/docs/workflows/quickstart) to create your first automation > [!NOTE] > > Learn how to provide Pipedream's documentation as context for your AI assistant or IDE [here](/docs/ai-tooling). ## Use Cases Pipedream supports use cases from prototype to production and is trusted by more than 1 million developers from startups to Fortune 500 companies: ![](https://mintcdn.com/pipedream/h8oodpUDiyR1Ssvt/images/2edb6b2f-logos_kcbviz.png?fit=max\&auto=format\&n=h8oodpUDiyR1Ssvt\&q=85\&s=44586ae8cbfb4ab4bc1678700ec2a17e) The platform processes billions of events and is built and [priced](https://pipedream.com/pricing/) for use at scale. Our team has built internet scale applications and managed data pipelines in excess of 10 million events per second (EPS) at startups and high-growth environments like BrightRoll, Yahoo!, Affirm, and Dropbox. Our [community](https://pipedream.com/support) uses Pipedream for a wide variety of use cases including: * AI agents and chatbots * Workflow builders and SaaS automation * API orchestration and automation * Database automations * Custom notifications and alerting * Event queueing and concurrency management * Webhook inspection and routing * Prototyping and demos ## Source-available Pipedream maintains a [source-available component registry](https://github.com/PipedreamHQ/pipedream) on GitHub so you can avoid writing boilerplate code for common API integrations. Use components as no code building blocks in workflows, or use them to scaffold code that you can customize. You can also [create a PR to contribute new components](/docs/components/contributing/#contribution-process) via GitHub. ## Contributing We hope that by providing a generous free tier, you will not only get value from Pipedream, but you will give back to help us improve the product for the entire community and grow the platform by: * [Contributing components](/docs/components/contributing/) to the [Pipedream registry](https://github.com/PipedreamHQ/pipedream) or sharing via your own GitHub repo * Asking and answering questions in our [public community](https://pipedream.com/community/) * [Reporting bugs](https://pipedream.com/community/c/bugs/9) and [requesting features](https://github.com/PipedreamHQ/pipedream/issues/new?assignees=\&labels=enhancement\&template=feature_request.md\&title=%5BFEATURE%5D+) that help us build a better product * Following us on [Twitter](https://twitter.com/pipedream) and starring our [GitHub repo](https://github.com/PipedreamHQ/pipedream) * Recommending us to your friends and colleagues Learn about [all the ways you can contribute](https://pipedream.com/contributing). ## Support & Community If you have any questions or feedback, please [reach out in our community forum](https://pipedream.com/community) or [to our support team](https://pipedream.com/support). ## Service Status Pipedream operates a status page at [https://status.pipedream.com](https://status.pipedream.com/). That page displays the uptime history and current status of every Pipedream service. When incidents occur, updates are published to the **#incidents** channel of [Pipedream’s Slack Community](https://pipedream.com/support) and to the [@PipedreamStatus](https://twitter.com/PipedreamStatus) account on Twitter. On the status page itself, you can also subscribe to updates directly. # Plans and Pricing Source: https://pipedream.com/docs/pricing We believe anyone should be able to prototype and get to value before having to pay Pipedream any money. We also hope that you [share the components you build](/docs/components/contributing/) — sources, actions, and other integrations — so that other Pipedream users benefit from your work. To support these goals, Pipedream offers a generous [free plan](/docs/pricing/#free-plan) and free access to Pipedream Connect [while in `development`](/docs/connect/managed-auth/environments). If you exceed the limits of the free plan, you can upgrade to one of our [paid plans](/docs/pricing/#paid-plans). [Read more about our plans and pricing here](https://pipedream.com/pricing). ## Free plan Workspaces on the Free plan have access to many of the Pipedream features, including [Connect](/docs/connect/). However, the free plan includes several limitations: **General:** * **Daily credit limit**: Free workspaces have a daily limit of free credits that cannot be exceeded * **Connected accounts**: Limited number of connected accounts (like Slack, Google Sheets, GitHub, etc.) * **Support**: Community support is available via our [community forum](https://pipedream.com/community) and [Slack](https://pipedream.com/join-slack) **Connect:** * **Development environment**: Access all the features of Connect while in [development mode](/docs/connect/managed-auth/environments) To lift the daily credit limit, access additional features, or use Connect in production, [upgrade to a paid plan](https://pipedream.com/pricing). ## Paid plans [Visit our pricing page](https://pipedream.com/pricing) to learn more about the details of our paid plans. ## Pipedream Connect Pipedream Connect provides SDKs and APIs to let you easily add 3,000+ integrations to your app or AI agent. Connect pricing is based on two inputs: 1. **[API usage](/docs/pricing/#how-credits-work-in-connect)**: Credits consumed by action executions, tool calls, and other operations 2. **[End users](/docs/pricing/#end-users)**: Referred to as “external users” throughout the docs and API, this is the number of unique users in your application who connect accounts ### How credits work in Connect API operations that consume credits (1 credit per 30 seconds of compute time): * **Action executions** * **Tool calls via MCP** * **Trigger emits for deployed triggers** (when an event is broadcast from a deployed trigger to the subscribed webhook) * **Requests to the Connect proxy** API operations that do **not** consume credits: * **Listing apps, actions, and triggers** * **Listing accounts** * **Configuring actions and triggers** * **Trigger emits** (only emitted events to subscribed webhooks consume credits) * **Other management operations** ### End users End (external) users are a core billing component for Connect pricing, separate from credit usage: * **End user definition**: A unique end user in your application who connects one or more accounts through Connect * **User to account relationship**: Each end user can have multiple connected accounts (e.g., one user might connect their Slack, Gmail, and GitHub accounts) * **Billing impact**: For standard plans, you're billed based on the number of unique external users, not the number of connected accounts ### Tracking usage Use the [List usage records API](/docs/connect/api-reference/list-usage-records) to retrieve detailed Connect usage data for a given time window, including credit consumption and end user counts. ## Credits and billing Pipedream uses a number of terms to describe platform metrics and details of our plans. See the definitions of key terms in the [glossary](/docs/glossary/). ### Included credits When you sign up for a paid plan, you pay a platform fee at the start of each [billing period](/docs/pricing/#billing-period). This minimum monthly charge grants you a base of included credits that you can use for the rest of your billing period (see your [Billing and Usage Settings](https://pipedream.com/settings/billing) for your exact quota). If you have been granted any additional credit increases by Pipedream, that is added to the included credits. ### Additional credits Any credits you run over your included credits are called **additional credits**. This usage is added to the invoice for your next [billing period](/docs/pricing/#billing-period), according to the [invoicing cycle described here](/docs/pricing/faq/#when-am-i-billed-for-paid-plans). ## Pipedream Workflows > [!WARNING] > > **Workflows and String are shutting down on March 31, 2027.** Pipedream Connect is not affected and remains fully supported. [Learn more](/docs/workflows) Pipedream Workflows uses a credit-based pricing model where you pay for compute time used during workflow execution. ### How credits work for Workflows Pipedream charges one credit per 30 seconds of compute time at 256MB megabytes of memory (the default) per [workflow segment](/docs/workflows/building-workflows/control-flow/#workflow-segments). Credits are also charged for [dedicated workers](/docs/workflows/building-workflows/settings/#eliminate-cold-starts). Unlike some other platforms, Pipedream does not charge for usage based on the number of steps. Credits are not charged for workflows during development or testing. Adding additional memory capacity to workflows will increase credit usage in intervals of 256 megabytes. For example, doubling the memory of a workflow from 256MB to 512MB will double the cost of credits in the same execution time. **Scenarios** > [!NOTE] > > Developing a workflow with test events in the Pipedream workflow builder is > free. No credit usage is incurred. > [!NOTE] > > If an active workflow isn’t executed in a billing period no credit usage is > incurred. Pipedream only charges credits for workflow executions. **Workflow segments configured to use 256MB memory (default)** | Scenario | Credits Used | | - | - | | Simple linear workflow - 1 second of compute | 1 credit | | Simple linear workflow - 15 seconds of compute | 1 credit | | Simple linear workflow - 35 seconds of compute | 2 credits | | Linear workflow with a delay- 15 seconds before the delay- 15 seconds after execution resumes | 2 credits | | Workflow with a branch - 3 seconds before the branch- 15 seconds within the executed branch | 2 credits | | Workflow with a branch - 3 seconds before the branch, 15 seconds within the executed branch, 3 seconds after the branch in the parent flow | 3 credits | **Workflow segments configured to use 1GB memory** | Scenario | Credits Used | | - | - | | Simple linear workflow - 1 second of compute | 4 credit | | Simple linear workflow - 15 seconds of compute | 4 credit | | Simple linear workflow - 35 seconds of compute | 8 credits | | Linear workflow with a delay- 15 seconds before the delay- 15 seconds after execution resumes | 8 credits | | Workflow with a branch - 3 seconds before the branch- 15 seconds within the executed branch | 8 credits | | Workflow with a branch - 3 seconds before the branch, 15 seconds within the executed branch, 3 seconds after the branch in the parent flow | 24 credits | ### Source credit usage When an [event source](/docs/workflows/building-workflows/triggers/) triggers a workflow, **the source execution is included for free.** This includes workspaces on the [Free plan](/docs/pricing/#free-plan). When a source is configured as a workflow trigger, the core value is in the workflow. You won’t be charged for two credits (one to run the source, one to run the workflow) when the workflow contains the core logic. > [!NOTE] > > This free credit per execution **only** applies to sources from the [Pipedream public registry](/docs/workflows/building-workflows/triggers/). If you deploy a private custom source to your account, then all computation time including the initial 30 seconds for that private source counts toward credits. > [!NOTE] > > A polling source finishing under 30 seconds per execution > > For example, a source that polls an API for new events like [Airtable - New Row Added](https://pipedream.com/apps/airtable/triggers/new-records) only takes \~5 seconds to poll and emit events to subscribing workflows. > > This would result in **0 credits** per run because the **Airtable - New Row Added** source is a [publicly available component](https://pipedream.com/apps/airtable/triggers/new-records). > [!NOTE] > > A polling source finishing over 30 seconds per execution > > Consider a source (like **RSS - New Item in Feed** for instance) that takes 60 seconds total to finish polling, per execution. > > Each execution of this source would result in **0 credits** because the **RSS - New Item in Feed** source is a [publicly available component](https://pipedream.com/apps/rss/triggers/new-item-in-feed). > [!NOTE] > > A custom source that finished under 30 seconds per execution > > This would result in **1 credit** per execution because the initial free credit only applies to Pipedream Public Registry sources attached to at least one workflow. ### Data store keys A Data Store key represents a single record in a Data Store. In the example below, there are two records in the Data Store, and therefore there are two keys total. ![](https://mintcdn.com/pipedream/NF77kliJSewMqg65/images/289c70e9-CleanShot_2023-01-12_at_10.25.25_z6yg8t.png?fit=max\&auto=format\&n=NF77kliJSewMqg65\&q=85\&s=824e2cb2096d876f1cec0716dbef053c) Example of a Data Store with two keys ## Managing your plan To cancel, upgrade or downgrade your plan, open the [pricing page](https://pipedream.com/pricing). To update your billing details, such as your VAT number, email address, etc. use the **Manage Billing Information** button in your [workspace billing settings](https://pipedream.com/settings/billing) to change your plan. Within this portal you can cancel, upgrade or downgrade your plan at any time. ### Billing period Many of the usage statistics for paid users are tied to a **billing period**. Your billing period starts when you sign up for a paid plan, and recurs roughly once a month for the duration of your subscription. For example, if you sign up on Jan 1st, your first billing period will last one month, ending around Feb 1st, at which point you’ll start a new billing period. Your invoices are tied to your billing period. [Read more about invoicing / billing here](/docs/pricing/faq/#when-am-i-billed-for-paid-plans). ### Upgrading Upgrading your subscription instantly activates the features available to your workspace. For example, if you upgrade your workspace from Free to Basic, that workspace will immediately be able to connect more accounts and use Connect in production. ### Downgrading Downgrades will apply at the end of your billing cycle, and any integrations that use features outside the new billing plan will be automatically disabled. Additionally, resource limits such as the number of connected accounts will also be enforced at this same time. ### Cancelling your plan To cancel your plan, open the [pricing page](https://pipedream.com/pricing) and click **Cancel** beneath your current plan. Cancelling your subscription will apply at the end of your current billing period. Connected accounts and sources will be deactivated from newest to oldest until the Free limits have been reached. ## Detailed pricing information Refer to our [pricing page](https://pipedream.com/pricing) for detailed pricing information. # FAQ Source: https://pipedream.com/docs/pricing/faq ## Are there any limits on paid tiers? **You can run any number of credits for any amount of compute time** on any paid tier. Other platform limits apply. ## When am I billed for paid plans? When you upgrade to a paid tier, Stripe will immediately charge your payment method on file for the platform fee tied to your plan (see [https://pipedream.com/pricing](https://pipedream.com/pricing)) If you accrue any [additional credits](/docs/pricing/#additional-credits), that usage is reported to Stripe throughout the [billing period](/docs/pricing/#billing-period). That overage, as well as the next platform fee, is charged at the start of the *next* billing period. ## Do any plans support payment by invoice, instead of credit / debit card? Yes, Pipedream can issue invoices on the Business Plan. [Please reach out to support](https://pipedream.com/support) ## How does Pipedream secure my credit card data? Pipedream stores no information on your payment method and uses Stripe as our payment processor. [See our security docs](/docs/privacy-and-security/#payment-processor) for more information. ## Are unused credits rolled over from one period to the next? **No**. On the Free tier, unused included daily credits under the daily limit are **not** rolled over to the next day. On paid tiers, unused included credits are also **not** rolled over to the next month. ## How do I change my billing payment method? Please visit your [Stripe customer portal](https://pipedream.com/settings/billing?rtsbp=1) to change your payment method. ## How can I view my past invoices? Invoices are emailed to your billing email address. You can also visit your [Stripe customer portal](https://pipedream.com/settings/billing?rtsbp=1) to view past invoices. ## Can I retrieve my billing information via API? Yes. You can retrieve your usage and billing metadata from the [/users/me](/docs/rest-api/#get-current-user-info) endpoint in the Pipedream REST API. ## How do I cancel my paid plan? You can cancel your plan in your [Billing and Usage Settings](https://pipedream.com/settings/billing). You will have access to your paid plan through the end of your current billing period. Pipedream does not prorate plans cancelled within a billing period. If you’d like to process your cancellation immediately, and downgrade to the free tier, please [reach out](https://pipedream.com/support). ## How do I change the billing email, VAT, or other company details tied to my invoice? You can update your billing information in your [Stripe customer portal](https://pipedream.com/settings/billing?rtsbp=1). ## How do I contact the Pipedream team with other questions? You can start a support ticket [on our support page](https://pipedream.com/support). Select the **Billing Issues** category to start a billing related ticket. # Privacy and Security at Pipedream Source: https://pipedream.com/docs/privacy-and-security Pipedream is committed to the privacy and security of your data. Below, we outline how we handle specific data and what we do to secure it. This is not an exhaustive list of practices, but an overview of key policies and procedures. It is also your responsibility as a customer to ensure you’re securing the code and data you run on Pipedream. See our [security best practices](/docs/privacy-and-security/best-practices/) for more information. Pipedream has demonstrated SOC 2 compliance and can provide a SOC 2 Type 2 report upon request (please [submit a support ticket](https://pipedream.com/support)). If you have any questions related to data privacy, please email [privacy@pipedream.com](mailto:privacy@pipedream.com). If you have any security-related questions, or if you’d like to report a suspected vulnerability, please email [security@pipedream.com](mailto:security@pipedream.com). ## Reporting a Vulnerability If you’d like to report a suspected vulnerability, please contact [security@pipedream.com](mailto:security@pipedream.com). If you need to encrypt sensitive data as part of your report, you can use our security team’s [PGP key](/docs/privacy-and-security/pgp-key/). ## Reporting abuse If you suspect Pipedream resources are being used for illegal purposes, or otherwise violate [the Pipedream Terms](https://pipedream.com/terms), [report abuse here](/docs/abuse/). ## Compliance ### SOC 2 Pipedream undergoes annual third-party audits. We have demonstrated SOC 2 compliance and can provide a SOC 2 Type 2 report upon request. Please [submit a support ticket](https://pipedream.com/support) to request the latest report. We use [Drata](https://drata.com) to continuously monitor our infrastructure’s compliance with standards like SOC 2, and you can visit our [Security Report](https://app.drata.com/security-report/b45c2f79-1968-496b-8a10-321115b55845/27f61ebf-57e1-4917-9536-780faed1f236) to see a list of policies and processes we implement and track within Drata. ### Annual penetration test Pipedream performs annual pen tests with a third-party security firm. Please [submit a support ticket](https://pipedream.com/support) to request the latest report. ### GDPR #### Data Protection Addendum Pipedream is considered both a Controller and a Processor as defined by the GDPR. As a Processor, Pipedream implements policies and practices that secure the personal data you send to the platform, and includes a [Data Protection Addendum](https://pipedream.com/dpa) as part of our standard [Terms of Service](https://pipedream.com/terms). The Pipedream Data Protection Addendum includes the [Standard Contractual Clauses (SCCs)](https://ec.europa.eu/info/law/law-topic/data-protection/international-dimension-data-protection/standard-contractual-clauses-scc_en). These clarify how Pipedream handles your data, and they update our GDPR policies to cover the latest standards set by the European Commission. You can find a list of Pipedream subprocessors [here](/docs/subprocessors/). #### Submitting a GDPR deletion request When you [delete your account](/docs/account/user-settings/#delete-account), Pipedream deletes all personal data we hold on you in our system and our vendors. If you need to delete data on behalf of one of your users, you can delete the event data yourself in your workflow or event source (for example, by deleting the events, or by removing the data from data stores). Your customer event data is automatically deleted from Pipedream subprocessors. ### HIPAA Pipedream can sign Business Associate Addendum (BAAs) for customers intending to pass PHI to Pipedream. We can also provide a third-party SOC 2 report detailing our HIPAA-related controls. See our [dedicated HIPAA docs](/docs/privacy-and-security/hipaa/) for more details. ## Hosting Details Pipedream is hosted on the [Amazon Web Services](https://aws.amazon.com/) (AWS) platform in the `us-east-1` region. The physical hardware powering Pipedream, and the data stored by our platform, is hosted in data centers controlled and secured by AWS. You can read more about AWS’s security practices and compliance certifications [here](https://aws.amazon.com/security/). Pipedream further secures access to AWS resources through a series of controls, including but not limited to: using multi-factor authentication to access AWS, hosting services within a private network inaccessible to the public internet, and more. ## Intrusion Detection and Prevention Pipedream uses AWS WAF, GuardDuty, CloudTrail, CloudWatch, Datadog, and other custom alerts to monitor and block suspected attacks against Pipedream infrastructure, including DDoS attacks. Pipedream reacts to potential threats quickly based on [our incident response policy](/docs/privacy-and-security/#incident-response). ## User Accounts, Authentication and Authorization When you sign up for a Pipedream account, you can choose to link your Pipedream login to either an existing [Google](https://google.com) or [GitHub](https://github.com) account, or create an account directly with Pipedream. Pipedream also supports [single-sign on](/docs/workspaces/#configuring-single-sign-on-sso). When you link your Pipedream login to an existing identity provider, Pipedream does not store any passwords tied to your user account —that information is secured with the identity provider. We recommend you configure two-factor authentication in the provider to further protect access to your Pipedream account. When you create an account on Pipedream directly, with a username and password, Pipedream implements account security best practices (for example: Pipedream hashes your password, and the hashed password is encrypted in our database, which resides in a private network accessible only to select Pipedream employees). ## Third party OAuth grants, API keys, and environment variables When you link an account from a third party application, you may be asked to either authorize a Pipedream OAuth application access to your account, or provide an API key or other credentials. This section describes how we handle these grants and keys. When a third party application supports an [OAuth integration](https://oauth.net/2/), Pipedream prefers that interface. The OAuth protocol allows Pipedream to request scoped access to specific resources in your third party account without you having to provide long-term credentials directly. Pipedream must request short-term access tokens at regular intervals, and most applications provide a way to revoke Pipedream’s access to your account at any time. Some third party applications do not provide an OAuth interface. To access these services, you must provide the required authorization mechanism (often an API key). As a best practice, if your application provides such functionality, Pipedream recommends you limit that API key’s access to only the resources you need access to within Pipedream. Pipedream encrypts all OAuth grants, key-based credentials, and environment variables at rest in our production database. That database resides in a private network. Backups of that database are encrypted. The key used to encrypt this database is managed by [AWS KMS](https://aws.amazon.com/kms/) and controlled by Pipedream. KMS keys are 256 bit in length and use the Advanced Encryption Standard (AES) in Galois/Counter Mode (GCM). Access to administer these keys is limited to specific members of our team. Keys are automatically rotated once a year. KMS has achieved SOC 1, 2, 3, and ISO 9001, 27001, 27017, 27018 compliance. Copies of these certifications are available from Amazon on request. When you link credentials to a specific source, workflow, or action, the credentials are loaded into that program’s [execution environment](/docs/privacy-and-security/#execution-environment), which runs in its own virtual machine, with access to RAM and disk isolated from other users’ code. No credentials are logged in your source or workflow by default. If you log their values or export data from a step, you can always delete the data for that execution from your source or workflow. These logs will also be deleted automatically based on the event retention for your account. You can delete your OAuth grants or key-based credentials at any time by visiting [https://pipedream.com/accounts](https://pipedream.com/accounts). Deleting OAuth grants within Pipedream **do not** revoke Pipedream’s access to your account. You must revoke that access wherever you manage OAuth grants in your third party application. ## Pipedream REST API security, OAuth clients The Pipedream API supports two methods of authentication: [OAuth](/docs/rest-api/auth/#oauth) and [User API keys](/docs/rest-api/auth/#user-api-keys). **We recommend using OAuth clients** for a few reasons: ✅ OAuth clients are tied to the workspace, administered by workspace admins\ ✅ Tokens are short-lived\ ✅ OAuth clients support scopes, limiting access to specific operations When testing the API or using the CLI, you can use your user API key. This key is tied to your user account and provides full access to any resources your user has access to, across workspaces. ### OAuth clients Pipedream supports client credentials OAuth clients, which exchange a client ID and client secret for a short-lived access token. These clients are not tied to individual end users, and are meant to be used server-side. You must store these credentials securely on your server, never allowing them to be exposed in client-side code. Client secrets are salted and hashed before being saved to the database. The hashed secret is encrypted at rest. Pipedream does not store the client secret in plaintext. OAuth clients can also authenticate with a public key instead of a client secret ([private key JWT](/docs/connect/api-reference/authentication#private-key-jwt), RFC 7523). Pipedream stores only the public key, so no shared secret exists. Your server signs a short-lived, single-use JWT with the private key for each token request, and the private key can stay in your key management service. You can revoke a specific client secret at any time by visiting [https://pipedream.com/settings/api](https://pipedream.com/settings/api). ### OAuth tokens Since Pipedream uses client credentials grants, access tokens must not be shared with end users or stored anywhere outside of your server environment. Access tokens are issued as JWTs, signed with an ED25519 private key. The public key used to verify these tokens is available at [https://api.pipedream.com/.well-known/jwks.json](https://api.pipedream.com/.well-known/jwks.json). See [this workflow template](https://pipedream.com/new?h=tch_rBf76M) for example code you can use to validate these tokens. Access tokens are hashed before being saved in the Pipedream database, and are encrypted at rest. Access tokens expire after 1 hour. Tokens can be revoked at any time. ## Pipedream Connect [Pipedream Connect](/docs/connect/) is the easiest way for your users to connect to [over 3,000+ APIs](https://pipedream.com/apps), **right in your product**. ### Data storage and logging Pipedream does not store or log request payloads or response bodies when you use Connect via API or MCP. When your users make requests through Connect (for example, sending a message with Slack), Pipedream processes the request and returns the response, but we do not persist any of the request payload or response body. This ensures that your users' data remains private and is not retained on Pipedream's infrastructure. ### Client-side SDK Pipedream provides a [client-side SDK](/docs/connect/api-reference/introduction) to initiate authorization or accept API keys on behalf of your users in environments that can run JavaScript. You can see the code for that SDK [here](https://github.com/PipedreamHQ/pipedream-sdk-typescript). When you initiate authorization, you must: 1. [Create a server-side token for a specific end user](/docs/connect/api-reference/create-connect-token) 2. Initiate auth with that token, connecting an account for a specific user These tokens can only initiate the auth connection flow. They have no permissions to access credentials or perform other operations against the REST API. They are meant to be scoped to a specific user, for use in clients that need to initiate auth flows. Tokens expire after 4 hours, at which point you must create a new token for that specific user. ### Connect Link You can also use [Connect Link](/docs/connect/managed-auth/connect-link/) to generate a URL that initiates the authorization flow for a specific user. This is useful when you want to initiate the auth flow from a client-side environment that can’t run JavaScript, or include the link in an email, chat message, etc. Like tokens, Connect Links are coupled to specific users, and expire after 4 hours. ### REST API The Pipedream Connect API is a subset of the [Pipedream REST API](/docs/rest-api/). See the [REST API Security](/docs/privacy-and-security/#pipedream-rest-api-security-oauth-clients) section for more information on how we secure the API. ## Execution environment The **execution environment** refers to the environment in which the code Pipedream runs on your behalf — including actions, custom tools, sources, and workflows — is executed. Each version of a source or workflow is deployed to its own virtual machine in AWS. This means your execution environment has its own RAM and disk, isolated from other users’ environments. You can read more about the details of the virtualization and isolation mechanisms used to secure your execution environment [here](https://firecracker-microvm.github.io/). Instances of running VMs are called **workers**. If Pipedream spins up three VMs to handle multiple, concurrent requests for a single workflow, we’re running three **workers**. Each worker runs the same Pipedream execution environment. Workers are ephemeral —AWS will shut them down within \~5 minutes of inactivity. ## Controlling egress traffic from Pipedream By default, outbound traffic shares the same network as other AWS services deployed in the `us-east-1` region. That means network requests from the code Pipedream runs on your behalf (e.g. an HTTP request or a connection to a database) originate from the standard range of AWS IP addresses. [Pipedream VPCs](/docs/connect/vpc/) enable you to run your workloads in dedicated and isolated networks with static outbound egress IP addresses that are unique to your workspace (unlike other platforms that provide static IPs common to all customers on the platform). Outbound network requests that run in a VPC will originate from these IP addresses, and only resources in your workspace will run there. ## Encryption of data in transit, TLS (SSL) Certificates When you use the Pipedream web application at [https://pipedream.com](https://pipedream.com), traffic between your client and Pipedream services is encrypted in transit. When you create an HTTP interface in Pipedream, the Pipedream UI defaults to displaying the HTTPS endpoint, which we recommend you use when sending HTTP traffic to Pipedream so that your data is encrypted in transit. All Pipedream-managed certificates, including those we create for custom domains, are created using [AWS Certificate Manager](https://aws.amazon.com/certificate-manager/). This eliminates the need for our employees to manage certificate private keys: these keys are managed and secured by Amazon. Certificate renewal is also handled by Amazon. ## Encryption of data at rest Pipedream encrypts customer data at rest in our databases and data stores. We use [AWS KMS](https://aws.amazon.com/kms/) to manage encryption keys, and all keys are controlled by Pipedream. KMS keys are 256 bit in length and use the Advanced Encryption Standard (AES) in Galois/Counter Mode (GCM). Access to administer these keys is limited to specific members of our team. Keys are automatically rotated once a year. KMS has achieved SOC 1, 2, 3, and ISO 9001, 27001, 27017, 27018 compliance. Copies of these certifications are available from Amazon on request. ## Email Security Pipedream delivers emails to users for the purpose of email verification, error notifications, and more. Pipedream implements [SPF](https://en.wikipedia.org/wiki/Sender_Policy_Framework) and [DMARC](https://en.wikipedia.org/wiki/DMARC) DNS records to guard against email spoofing / forgery. You can review these records by using a DNS lookup tool like `dig`: ``` # SPF dig pipedream.com TXT +short # DMARC dig _dmarc.pipedream.com TXT +short ``` ## Incident Response Pipedream implements incident response best practices for identifying, documenting, resolving and communicating incidents. Pipedream publishes incident notifications to a status page at [status.pipedream.com](https://status.pipedream.com/) and to the [@PipedreamStatus Twitter account](https://twitter.com/pipedreamstatus). Pipedream notifies customers of any data breaches according to our [Data Protection Addendum](https://pipedream.com/dpa). ## Software Development Pipedream uses GitHub to store and version all production code. Employee access to Pipedream’s GitHub organization is protected by multi-factor authentication. Only authorized employees are able to deploy code to production. Deploys are tested and monitored before and after release. ## Vulnerability Management Pipedream monitors our code, infrastructure and core application for known vulnerabilities and addresses critical vulnerabilities in a timely manner. ## Corporate Security ### Background Checks Pipedream performs background checks on all new hires. ### Workstation Security Pipedream provides hardware to all new hires. These machines run a local agent that sets configuration of the operating system to hardened standards, including: * Automatic OS updates * Hard disk encryption * Anti-malware software * Screen lock and more. ### System Access Employee access to systems is granted on a least-privilege basis. This means that employees only have access to the data they need to perform their job. System access is reviewed quarterly, on any change in role, or upon termination. ### Security Training Pipedream provides annual security training to all employees. Developers go through a separate, annual training on secure software development practices. ## Data Retention Pipedream retains data only for as long as necessary to provide the core service. Pipedream stores the code and configuration you create, along with other data, indefinitely, until you choose to delete it. Event data and the logs associated with executions are stored according to the retention rules on your account. Pipedream deletes most internal application logs and logs tied to subprocessors within 30 days. We retain a subset of logs for longer periods where required for security investigations. ## Data Deletion If you choose to delete your Pipedream account, Pipedream deletes all customer data and event data associated with your account. We also make a request to all subprocessors to delete any data those vendors store on our behalf. Pipedream deletes customer data in backups within 30 days. ## Payment Processor Pipedream uses [Stripe](https://stripe.com) as our payment processor. When you sign up for a paid plan, the details of your payment method are transmitted to and stored by Stripe [according to their security policy](https://stripe.com/security/stripe). Pipedream stores no information about your payment method. # Security Best Practices Source: https://pipedream.com/docs/privacy-and-security/best-practices Pipedream implements a range of [privacy and security measures](/docs/privacy-and-security/) meant to secure resources and protect your data from unauthorized access. But since [actions](/docs/connect/components/actions/), [triggers](/docs/connect/components/triggers/), and [custom tools](/docs/connect/components/custom-tools/) run code and process data on behalf of your end users, you also have a responsibility to ensure you handle that code and data securely. We’ve outlined a handful of (non-exhaustive) best practices for that below. > [!NOTE] > > **Running Pipedream Workflows?** See [Workflow security best practices](/docs/workflows/security-best-practices). Workflows and String are shutting down on March 31, 2027 ([learn more](/docs/workflows)). ## Store secrets as connected accounts or project secrets Never store secrets like API keys directly in code. These secrets should be stored in one of two ways: * [If Pipedream integrates with the app](https://pipedream.com/apps), use [connected accounts](/docs/apps/connected-accounts/) to link your apps / APIs. * If you need to store credentials for an app Pipedream doesn’t support, or you need to store arbitrary configuration data, use [project variables and secrets](/docs/projects/secrets/). Read more about how Pipedream secures connected accounts and environment variables [here](/docs/privacy-and-security/#third-party-oauth-grants-api-keys-and-environment-variables). ## Keep your Pipedream credentials server-side Your [OAuth client](/docs/connect/api-reference/authentication) ID and secret grant access to the resources in your workspace. Store these credentials securely on your server, never allowing them to be exposed in client-side code, and make Connect API calls from your backend. For anything that runs in your end users’ browsers, use a [Connect token](/docs/connect/managed-auth/tokens/) or a [Connect Link](/docs/connect/managed-auth/connect-link/). Both are scoped to a single end user, can only initiate the account connection flow, and are short-lived. Let your users connect their own accounts through [managed auth](/docs/connect/managed-auth/quickstart) instead of collecting their third-party credentials in your application. Pipedream encrypts and stores the credentials, and you reference the account by ID. ## Deliver data to and from Pipedream securely Always send data over HTTPS to Pipedream endpoints. When you connect to APIs through the [Connect proxy](/docs/connect/api-proxy), or receive events at your own endpoints, encrypt that data in transit by using HTTPS endpoints. ## Validate webhook signatures Pipedream [signs every trigger webhook delivery](/docs/connect/webhooks/#webhook-signatures) with HMAC-SHA256. Validate the `x-pd-signature` header with your signing key before you process an event, compare signatures with a constant-time function, and reject requests with old timestamps to prevent replay attacks. See [validating signatures](/docs/connect/webhooks/#validating-signatures) for Node.js and Python examples. Many third-party apps also pass a **signature** with event data delivered via webhooks. The signature is an opaque value computed from the incoming event data and a secret that only you and the app know. Signatures are specific to the app sending the data, and the app should provide instructions for signature validation. **Not all apps compute signatures, but when they do, you should always verify them**. When you [deploy a Pipedream trigger](/docs/connect/components/triggers/), Pipedream verifies the app’s signature for you. You can always [audit the code behind the component](/docs/privacy-and-security/best-practices/#audit-the-code-and-packages-you-use) to confirm this, and suggest further security improvements that you find. ## Audit the code and packages you use Pipedream components are just code. Pipedream provides prebuilt triggers and actions that facilitate common use cases, but these are written and run as code, and you can examine them in [our GitHub repo](https://github.com/PipedreamHQ/pipedream/tree/master/components). We encourage auditing this code as a best practice. Even code authored by Pipedream can be improved, and if you notice a vulnerability or other issue, you can submit a patch or raise an issue. When you [publish a custom tool](/docs/connect/components/custom-tools), you can include any third-party package supported in the runtime. It’s your responsibility to keep these packages up-to-date and review them for vulnerabilities. Before you use a new package, review its page on npm and its repo, if available. Good packages should have recent updates, a healthy number of downloads and related activity (like GitHub stars), and an author who is responsive to issues raised by the community. If you don’t observe these signals, be wary of using the package. ## Limit what you log Pipedream [does not store or log request payloads or response bodies](/docs/privacy-and-security/#data-storage-and-logging) when your users make requests through Connect via API or MCP. What your own application logs is up to you: if you cannot retain specific data for privacy or security reasons, don’t log the requests you send to Pipedream or the responses you receive, and remove any logging of credentials or end user data from the code you publish as a custom tool. # HIPAA Compliance Source: https://pipedream.com/docs/privacy-and-security/hipaa Pipedream can [sign Business Associate Addendums (BAAs)](/docs/privacy-and-security/hipaa/#signing-a-business-associate-addendum) for Business customers intending to pass PHI to Pipedream. We can also provide a third-party SOC 2 report detailing our HIPAA-related controls. ## HIPAA-eligible services * Workflows * Event sources * Data stores * Destinations * [Pipedream Connect](/docs/connect/) ### Ineligible services Any service not listed in the [HIPAA-eligible services](/docs/privacy-and-security/hipaa/#hipaa-eligible-services) section is not eligible for use with PHI under HIPAA. Please reach out to [Pipedream support](https://pipedream.com/support) if you have questions about a specific service. The following services are explicitly not eligible for use with PHI under HIPAA. * [v1 workflows](/docs/deprecated/migrate-from-v1/) * File stores ## Your obligations as a customer If you are a covered entity or business associate under HIPAA, you must ensure that [you have a BAA in place with Pipedream](/docs/privacy-and-security/hipaa/#signing-a-business-associate-addendum) before passing PHI to Pipedream. You must also ensure that you are using Pipedream in a manner that complies with HIPAA. This includes: * You may only use [HIPAA-eligible services](/docs/privacy-and-security/hipaa/#hipaa-eligible-services) to process or store PHI * You may not include PHI in Pipedream resource names, like the names of projects or workflows ## Signing a Business Associate Addendum Pipedream is considered a Business Associate under HIPAA regulations. If you are a Covered Entity or Business Associate under HIPAA, you must have a Business Associate Agreement (BAA) in place with Pipedream before passing PHI to Pipedream. This agreement is an addendum to our standard terms, and outlines your obligations as a customer and Pipedream’s obligations as a Business Associate under HIPAA. Please request a BAA by visiting [https://pipedream.com/support](https://pipedream.com/support). ## Requesting information on HIPAA controls Please request compliance reports from [https://pipedream.com/support](https://pipedream.com/support). Pipedream can provide a SOC 2 Type II report covering Security controls, and a SOC 2 Type I report for Confidentiality and Availability. In 2025, Pipedream plans to include Confidentiality and Availability controls in our standard Type II audit. # PGP Key Source: https://pipedream.com/docs/privacy-and-security/pgp-key If you’d like to encrypt sensitive information in communications to Pipedream, use this PGP key. * Key ID: `3C85BC49602873EB` * Fingerprint: `E0AD ABAC 0597 5F51 8BF5 3ECC 3C85 BC49 6028 73EB` * User ID: `Pipedream Security ` ``` -----BEGIN PGP PUBLIC KEY BLOCK----- mQINBF9n4TABEACxKdiysQswLHSg7u1uUtY3evSNeuqU4DGNxLwVmPLUt4CRd170 EgeCnGpLXQtbQI6HccZapD2emAF0PHXXvx/Q6VB+8iuIZorYGfafIvXsaZhIakrp xAkSY/eZ/YVWNnnqCpwHxjccFjpIfWph/MVoJ853Eg42IwEGLF7fPMPdcZ1W6S/q kZzRLMKW60sLvyeTdyemUd/sza72ouv0FioP5zNOmZx8mawVvVeVrM2TD14cJ454 zmYUkxlyvLnHxIF+kZUoLk628qGjTzvEnWlIrLiTQRvTyefzpBBcVz+px35zOFz9 1DdQXz6EFgP46zeLVa8m8dDBkadJPoGFWgMOKlRhYxfdlZlVHSXJcwTl7jN4EW6G +Oagp36oQvVALtpakP7TUyZ7iKi1gU/i2nAgb885hdMO3bRX8vtg8RYan/3wzKOm Ky/8rOAq9tFporqCU/EQWbalbBWT6yIn0zxmO33199B8cvIZPg9ZMsrMtSqKu83L 9vqGTK6pVSKEBCqSqmOhveKjgV+gsniKj+0ZiudxMQ8YzSa40dbBPTj0d5GB8Ceo HVzzZZVcsOFbWU3mEqyhus1q81B58DjAouQlH5RoQ4U/MgsZnbghPTxkir3wttPB kbbN3DnEHwOPI9ErvBU5UEcA39VqJaMSWImsX450GGfX/sSUNOw2wSXV7QARAQAB tCtQaXBlZHJlYW0gU2VjdXJpdHkgPHNlY3VyaXR5QHBpcGVkcmVhbS5jb20+iQJO BBMBCAA4FiEE4K2rrAWXX1GL9T7MPIW8SWAoc+sFAl9n4TACGwMFCwkIBwIGFQoJ CAsCBBYCAwECHgECF4AACgkQPIW8SWAoc+vIjA//ZMkS6qnWhEygSBoKV2ZRfCF+ vsKCaimMD369w+pGSldJ9cNA7EKbGzs7cp+jkOaq9yruevy+OuHupSUJUEsaOhzk fnSHdo0EO/47AJ6yWNrziS1IsHU/aZYA++wfbrn90RCmlCbfErgarkDSsKkFhMra bWRNj/OXcIOJsBEHwALTpgMLjDXngGU6iwM6hFgvqIVeuBFQjbYwTLbBwfuXrxWF o3olmqgRL4KE6wKzu3nQDBlxHrumF8+34V2P7DSgDCDZzbZOcYZ+erroQrhq8hkL D1gf2TopHzdjiVXR6VgV0a4qOKniQU5weiiV7ESeuOnNKdGjq5JWHnI6XmEPeAvv f87PFArbqde75Mv258BF+TTMa6Kt3Uv8wIwvVo78LRsOENja89Q+v3bUn064lWCP 6XLROQD5zaapnMOzFLVW0KDq2z0edud+0W6lNRgB9tgXZ59OgbMvEVah1rf+BnTv OZ0In/KBsg5Xl3+OapWrspTk9WCVnZ5KOdMYM6s1pN1P5ocDTnvBkDjs2gBUCUZ8 bSjnoAaoji/DqXGWEWD5soZRbGoVjLqMCPQyMjTCrt9IH9EAAgrRkmkjeACGVXtk FFkY+nZ/7z1Jd6wBd482H65gPjQf/wJmaBdgGX9yfG7bQJKxEYZUnCv/9yt551Jw aE9s4B/LAHI3S7BeQDO5Ag0EX2fhMAEQAN7Rn6TfP79WOMcweATB2cLlfqAF77xf Dh2nVdpWG6IDF2Bke2IU4hhz/Egkx+mR6Av8beufrUeaMZXevBnuWfT94Qk/nBvx RWJbSkvYK1q7hMW5QqJgPcp+kJX6WLVMRNkCJjjyd24kdIneZ0X1oudREXO5HOBw A68bzIwsJqzXfINt0GFJjGQ71COoStMI+/GqGlKsee8ajwzI03yBkI7nWDIx9UkJ QFR/34jnf0QSpfE65cl3dwI5f0a9oQoBsg4XqcIAjjqJzismEfScVCyj/ru97e+g jdAJWdEhZDyv5IDHX6+Jyc7JUl+6+chufqzeKwns7OFEBebmyKB2vVzQnah6xtJu w+VsVk4EepIRXIC2vY/+ZRiLaO5R0U4WefJZEJS1YrKaJ7nGkEICfPnVu+d6f3jb aed/k9S7zfIugcqX42mmac4+hKm4rJ/9/W0dqbqQnQfdRilGax6Poco9LSEzY6zQ 7Bgnkz7/gTBBC4/YyTxZNnxil+mRg6uePlUBA4/p224FMx65K0WVgKCnalELY68f a5z7fVUmfLCKLzeMwSRvhWSjVgMJ6XB8ngkci6OtsI0eBJutGxFhcBD+GqafBOWC KP7Me8DJRx8F6bPbpJqj+T1+hROerLTFQRfm6IuL5LjzlNGteD+ZwcIMql++22/q ta7Pfac/+rOfABEBAAGJAjYEGAEIACAWIQTgrausBZdfUYv1Psw8hbxJYChz6wUC X2fhMAIbDAAKCRA8hbxJYChz6+tGEACGVCcVmXpKFveN6lhSvuJG3J9eddEQgx0g DKirFTzgXDbVc91+hRHcNK6Dk6udL7iZM79pAy26oYqP7VAkA6VwU91xG/0Sdk4a f0/i3BkbmE2kaKiJj4pn8F3ZihEKbSgbn7VsXkvE+9k1zkLKg6c7BBn2U6s4rW5g mBWf92bhxnp3mstP5Ci7duJoEM8xMf/BCiCJGksjIStLOmxCn+I6N0diAa1CPcA9 U34Cj1sPv8R9sB1sLjdanWLRL5aViE7Zo4bavX70oQXZWATuMoVgDcSCHD7K9iwg ZZIVlvRF5Otq9JpE70toH4VVnkru2R0JpNwkGVm2+gp5sieNTHTB2J36/fxr0+O7 hPiE/bfOjZb/GpS8ppvKyCBB/K0pfhzl5+QsNhMFLrMF1YVHb2WImnQDz3G9mtBi O/wgCUrBQG8lf6G50Tq1hklGPnh4VoAeJBrjojKh/Cuep8ZE6z5XYo2sYX7qKCi+ fzJDhiKbFco16Njg0kpxAJl2Qb8zn3HOwrc1Np7K79LA92Gopve/poqQLPQn46Dh p0o5ixKvUW8yCPQDajGAFGdzcr3q75fySNkX0pBdY8IwqpFptH3BQgjZFg8M2E8x TOmmirEWCFx1F+4Aj+iU+ustTialkqQd8D3tnR3I/uFgNmaNjqpf4K12HGwIIU1j XLQIwNRYZw== =SOPy -----END PGP PUBLIC KEY BLOCK----- ``` # Projects Source: https://pipedream.com/docs/projects A workspace can contain one or more *projects*. Projects are a way to organize your workflows into specific groupings or categories. ![](https://mintcdn.com/pipedream/anb6FA0wpd8jtdUB/images/5a1c3cdc-New_Project_5_zep4ii.png?fit=max\&auto=format\&n=anb6FA0wpd8jtdUB\&q=85\&s=4f3b8f4eb28f60bc513435da5f0096a3) ## Getting started with projects ### Creating projects To create a new project, first [open the Projects section in the dashboard](https://pipedream.com/projects). Then click **Create project** to start a new project. Enter in your desired name for the project in the prompt, then click **Create**. That’s it, you now have a dedicated new project created within your workspace. Now you can create workflows within this project, or move workflows into it or create folders for further organization. ### Creating folders and workflows in projects Within a given project, you can create folders for your workflows. Open your project, and then click the **New** button for a dropdown to create a workflow in your current project. > [!NOTE] > > Helpful hotkeys to speed up your development > > * `C then F` creates a new folder. > * `C then W` creates a new workflow. Folders can also contain sub-folders, which allows you to create a filing system to organize your workflows. ### Moving workflows into folders To move workflows into folders, simply drag and drop the workflow into the folder. You can move workflows or folders up a level by dragging and dropping the workflow to the folder icon at the top of the list. ### Importing workflows into projects > [!NOTE] > > This only applies to Pipedream accounts that created workflows before the projects feature was released. To import a workflow from the general **Workflows** area of your dashboard into a project: 1. Open the Workflows area in the dashboard 2. Select one or more workflows you’d like to import into a project 3. Click *Move* in the top right and select a project to move them to ![](https://mintcdn.com/pipedream/Acz4Z1ch6TM7-aI8/images/a3cd3803-image.png?fit=max\&auto=format\&n=Acz4Z1ch6TM7-aI8\&q=85\&s=8acb75abda0e623749260b5c268d7cc3) ### Moving workflows between projects To move a workflow from one project to another project, first check the workflow and then click **Move** to open a dropdown of projects. Select the project to move this workflow to, and click **Move** once more to complete the move. ![](https://mintcdn.com/pipedream/h8oodpUDiyR1Ssvt/images/3936d65d-CleanShot_2023-09-25_at_13.23.38_2x_dyrtlv.png?fit=max\&auto=format\&n=h8oodpUDiyR1Ssvt\&q=85\&s=32d20e34dfb5127e0d52c7150bcc45ee) > [!WARNING] > > GitHub Sync limitation > > At this time it’s not possible to move workflows out of GitHub Synchronized Projects. ## Finding your project ID Visit your project’s **Settings** and copy the project ID. # Access Controls Source: https://pipedream.com/docs/projects/access-controls The [projects list view](https://pipedream.com/projects) contains **Owner** and **Access** columns. **Owner** indicates who within the workspace owns each project. This is typically the person who created the project. ![](https://mintcdn.com/pipedream/NF77kliJSewMqg65/images/11ae1995-image.png?fit=max\&auto=format\&n=NF77kliJSewMqg65\&q=85\&s=24f634f9bde40f669c19bb30f4da5180) > [!WARNING] > > Projects created before February 2024 don’t automatically have owners, which has no functional impact. **Access** indicates which workspace members have access to each project, and this can be displayed as “me”, “Workspace”, or “N members”. ![](https://mintcdn.com/pipedream/xnRKrRxEtt3vxd6I/images/d2aecba9-image.png?fit=max\&auto=format\&n=xnRKrRxEtt3vxd6I\&q=85\&s=5ae2e3bc05bb08dc4aa35e22695a20c5) ## Permissions Workspace owners and admins are able to perform all actions in projects, whereas workspace members are restricted from performing certain actions in projects. | Operation | Project creator | Workspace members | | - | - | - | | View in [projects listing](https://pipedream.com/projects) | ✅ | ✅ | | View in [Event History](https://pipedream.com/event-history) | ✅ | ✅ | | View in global search | ✅ | ✅ | | Manage project workflows | ✅ | ✅ | | Manage project files | ✅ | ✅ | | Manage project variables | ✅ | ✅ | | Manage member access | ✅ | ❌ | | Manage GitHub Sync settings | ✅ | ❌ | | Delete project | ✅ | ❌ | > [!NOTE] > > **Workspace admins and owners have the same permissions as project creators for all projects in the workspace.** ## Managing access > [!NOTE] > > By default, all projects are accessible to all workspace members. Workspaces on the [Business plan](https://pipedream.com/pricing) can restrict access for individual projects to specific workspace members. You can easily modify the access rules for a project directly from the [project list view](https://pipedream.com/projects), either by clicking the access badge in the project row (fig 1) or clicking the 3 dots to open the action menu, then selecting **Manage Access** (fig 2). Via the access badge (fig 1): ![](https://mintcdn.com/pipedream/NF77kliJSewMqg65/images/01b7c218-image.png?fit=max\&auto=format\&n=NF77kliJSewMqg65\&q=85\&s=a047fb81cafe2cc543d8597d0db847db) Via the action menu (fig 2): ![](https://mintcdn.com/pipedream/nKh6d_6A4aXFb6xD/images/fe9589a7-image.png?fit=max\&auto=format\&n=nKh6d_6A4aXFb6xD\&q=85\&s=0f892714f0934f23853b5e67d93f0350) From here, a slideout drawer reveals the access management configuration: ![](https://mintcdn.com/pipedream/Acz4Z1ch6TM7-aI8/images/bcd7bbaf-image.png?fit=max\&auto=format\&n=Acz4Z1ch6TM7-aI8\&q=85\&s=d27622a47f953efaf83bbc6a981f2dfb) Toggle the **Restrict access to this project** switch to manage access: ![](https://mintcdn.com/pipedream/anb6FA0wpd8jtdUB/images/5933f304-image.png?fit=max\&auto=format\&n=anb6FA0wpd8jtdUB\&q=85\&s=adebccb7e4587d7399d3bdbaff78c394) Select specific members of the workspace to grant access: ![](https://mintcdn.com/pipedream/xnRKrRxEtt3vxd6I/images/c251d0ca-image.png?fit=max\&auto=format\&n=xnRKrRxEtt3vxd6I\&q=85\&s=1f26579efd039e60e07eae86ad1a860a) You can always see who has access and remove access if necessary: ![](https://mintcdn.com/pipedream/NF77kliJSewMqg65/images/13812ecb-image.png?fit=max\&auto=format\&n=NF77kliJSewMqg65\&q=85\&s=3145898c2a4e95487d9976b3bc32d058) # Project Variables and Secrets Source: https://pipedream.com/docs/projects/secrets Environment variables defined at the global workspace level are accessible to all workspace members and workflows within the workspace. To restrict access to sensitive variables or secrets, define them at the project-level and [configure access controls for the project](/docs/projects/access-controls/#managing-access). [See here](/docs/workflows/environment-variables/) for info on creating, managing, and using environment variables and secrets. > [!NOTE] > > **Project variables override workspace variables**. When the same variable is defined at both the workspace and project levels (for example, `process.env.BASE_DOMAIN`), the **project** variable takes precedence. # Subprocessors Source: https://pipedream.com/docs/subprocessors Below, you’ll find a list of Pipedream’s Subprocessors in our capacity as a Processor (as defined by our Data Protection Addendum). Please check this list frequently for any updates. | Company/Service | Scope of Subprocessing | | - | - | | [Amazon Web Services](https://aws.amazon.com/financial-services/security-compliance/compliance-center/?country-compliance-center-cards.sort-by=item.additionalFields.headline\&country-compliance-center-cards.sort-order=asc\&awsf.country-compliance-center-master-filter=*all) | Cloud hosting | | [Anthropic](https://www.anthropic.com/) | AI services (chat support, code gen, and more) | | [Datadog](https://www.datadoghq.com/security/) | Application monitoring | | [Google Cloud Platform](https://cloud.google.com/security/compliance) | Cloud hosting | | [Langfuse](https://www.langfuse.com/) | AI services (application monitoring) | | [Looker Data Sciences, Inc.](https://looker.com/trust-center/compliance) | Business analytics | | [OpenAI](https://openai.com/) | AI services (chat support, code gen, and more) | | [Redis Labs](https://redislabs.com/company/compliance-and-privacy/) | Cloud hosting | | [Sentry](https://sentry.io/security/) | Application monitoring | | [Snowflake Computing](https://www.snowflake.com/snowflakes-security-compliance-reports/) | Business analytics | | **Workday** | Application monitoring and Support | Last updated August 20, 2025 # Troubleshooting Common Issues Source: https://pipedream.com/docs/troubleshooting This doc describes some common solutions for fixing issues with [pipedream.com](https://pipedream.com) or with Pipedream Connect. ## A feature isn’t working on pipedream.com If you’re seeing an issue with [pipedream.com](https://pipedream.com) (for example, the site won’t load, or you think you’ve found a bug), try each of the following steps, checking to see if they fix the problem: 1. [Hard refresh](https://fabricdigital.co.nz/blog/how-to-hard-refresh-your-browser-and-clear-cache) pipedream.com in your browser. 2. Log out of your pipedream.com account, and log back in. 3. [Disable your browser extensions](https://www.computerhope.com/issues/ch001411.htm) or use features like [Chrome Guest mode](https://support.google.com/chrome/answer/6130773?hl=en\&co=GENIE.Platform%3DAndroid) to browse pipedream.com without any existing extensions / cookies / cache. If you’re still seeing the issue after trying these steps, please [report a bug](https://github.com/PipedreamHQ/pipedream/issues/new?assignees=\&labels=bug\&template=bug_report.md\&title=%5BBUG%5D+). ## Connect Connect has dedicated troubleshooting guides for the two most common areas: * **[Managed auth](/docs/connect/managed-auth/troubleshooting)**: connect tokens, account connection failures, and environment issues * **[Components](/docs/connect/components/troubleshooting)**: configuring and running actions, deploying triggers, and reading error responses ## How do I contact Pipedream Support? Start by filling out the request form at [https://pipedream.com/support](https://pipedream.com/support), providing detailed information about your issue. If your issue involves a specific project, open your **Project Settings** and share the project with Pipedream Support. Include the URL from your browser’s address bar in the request so we can find the resource quickly. > [!NOTE] > > **Troubleshooting a workflow or event source?** See [Workflow troubleshooting](/docs/workflows/troubleshooting). Workflows and String are shutting down on March 31, 2027 ([learn more](/docs/workflows)). # Workflows and String Are Shutting Down on March 31, 2027 Source: https://pipedream.com/docs/workflows > [!NOTE] > > **Pipedream Connect is not affected by this change** > > If you're using our Connect API, MCP Servers, or API Proxy, nothing changes for you. Connect is where our focus is going forward, it remains fully supported and actively developed. Thank you so much for your support and for being a valued part of our community over the past 7 years. We want to let you know that Pipedream Workflows and String will shut down on March 31, 2027. This wasn't an easy decision. Over the past two years we’ve built and grown two products, Workflows and Connect. We’ve decided we’re focusing on being the integration layer companies rely on to connect AI to the outside world, and Workflows falls outside that focus. We know this may be disruptive, especially if Workflows is running important parts of your business. We also know that migrating to a new solution takes time, which is why we're giving you a full six months to find an alternative and migrate. Workflows are now in maintenance mode. Your existing workflows will keep running normally through March 31, 2027, but we're no longer accepting signups or subscriptions, and we won't be shipping new features for Workflows. ## Workflow data All Workflows data will be permanently deleted by April 30, 2027, including the credentials and OAuth tokens for your connected accounts. If you'd like to disconnect sooner, you can do that anytime from your dashboard, or delete your account manually from your settings. To help you with the transition, we've built an [export tool](/docs/workflows/export-workflows) that lets you download the structure of your workflows as JSON, one project at a time. Only data related to Workflows will be automatically deleted. Pipedream Connect settings and credentials will not be affected. ## Billing All subscriptions will remain active until March 31, 2027. On that date, we’ll automatically cancel it and issue a prorated refund, with no action needed from you. If you'd like to cancel sooner: * Monthly subscribers can cancel via self-service from your account settings. * Annual subscribers can contact support for an early cancellation and a prorated refund. Thanks for all your support,\ The Pipedream Team # Actions Source: https://pipedream.com/docs/workflows/building-workflows/actions > [!WARNING] > > **Workflows and String are shutting down on March 31, 2027.** [Learn more](/docs/workflows) Actions are reusable code steps that integrate your apps, data and APIs. For example, you can send HTTP requests to an external service using our HTTP actions, or use our Google Sheets actions to add new data. You can use thousands of actions across 3,000+ apps today. Typically, integrating with these services requires custom code to manage connection logic, error handling, and more. Actions handle that for you. You only need to specify the parameters required for the action. For example, the HTTP `GET` Request action requires you enter the URL whose data you want to retrieve. You can also [create your own actions](/docs/workflows/building-workflows/actions/#creating-your-own-actions) that can be shared across your own workflows, or published to all Pipedream users. ## Using Existing Actions Adding existing actions to your workflow is easy: 1. Click the **+** button below any step. 2. Search for the app you’re looking for and select it from the list. 3. Search for the action and select it to add it to your workflow. For example, here’s how to add the HTTP `GET` Request action: ![](https://mintcdn.com/pipedream/NF77kliJSewMqg65/images/0afb3439-CleanShot_2024-03-15_at_09.30.51_lquom2.gif?s=61aaa9b8b5ebb02cff5fed15686338fe) ## Updating actions to the latest version When you use existing actions or create your own, you’ll often want to update an action you added to a workflow to the newest version. For example, the community might publish a new feature or bug fix that you want to use. In your code steps with out of date actions, you’ll see a button appear that will update your action to the latest version. Click on this button to update your code step: ![](https://mintcdn.com/pipedream/nKh6d_6A4aXFb6xD/images/e44883e8-image.png?fit=max\&auto=format\&n=nKh6d_6A4aXFb6xD\&q=85\&s=1d4960c8f5fc55a17dc375a5e71f6b23) ## Creating your own actions You can author your own actions on Pipedream, too. Anytime you need to reuse the same code across steps, consider making that an action. Start with our [action development quickstart](/docs/components/contributing/actions-quickstart/). You can read more about all the capabilities of actions in [our API docs](/docs/components/contributing/api/), and review [example actions here](/docs/components/contributing/api/#example-components). You can also publish actions to [the Pipedream registry](/docs/components/contributing/), which makes them available for anyone on Pipedream to use. ## Reporting a bug / feature request If you’d like to report a bug, request a new action, or submit a feature request for an existing action, [open an issue in our GitHub repo](https://github.com/PipedreamHQ/pipedream). # Build with AI Source: https://pipedream.com/docs/workflows/building-workflows/build-with-ai Build, configure, test and deploy Pipedream workflows with AI in String.com > [!WARNING] > > **Workflows and String are shutting down on March 31, 2027.** [Learn more](/docs/workflows) ## Create with AI Build new agents and automations using AI at [String.com](https://string.com). ![String.com interface for creating new agents and automations](https://mintcdn.com/pipedream/2iCuK7QAKkz01qI8/workflows/building-workflows/images/string-com.png?fit=max\&auto=format\&n=2iCuK7QAKkz01qI8\&q=85\&s=08f36904f278ac51439e08131daf10ca) ## Edit Existing Workflows with AI Click the **Edit with AI** button in the header of the builder or inspector. ![Edit with AI button in workflow header](https://mintcdn.com/pipedream/2iCuK7QAKkz01qI8/workflows/building-workflows/images/edit-workflow-with-ai.png?fit=max\&auto=format\&n=2iCuK7QAKkz01qI8\&q=85\&s=95cfbe7e6aab0c0f081b401472e28dc0) Within any code step, click the **Edit with AI** button. ![Edit with AI button in code step](https://mintcdn.com/pipedream/2iCuK7QAKkz01qI8/workflows/building-workflows/images/edit-code-with-ai.png?fit=max\&auto=format\&n=2iCuK7QAKkz01qI8\&q=85\&s=f688506ce7b900bc57fda3d6157143f5) When you encounter an error in your workflow, click the **Debug with AI** button in the step results to get AI-powered debugging assistance. ![Debug with AI button in error results](https://mintcdn.com/pipedream/2iCuK7QAKkz01qI8/workflows/building-workflows/images/debug-with-ai.png?fit=max\&auto=format\&n=2iCuK7QAKkz01qI8\&q=85\&s=3c4a44701bce2d126670533c7fd7a218) ## Limitations Workflows with the following features cannot be edited in String.com: * **Control flow** - Workflows using if/else, switch, or other control flow steps * **GitHub Sync** - Workflows synchronized with GitHub repositories * **Python code steps** - Workflows containing Python code (Node.js is supported) * **Pipedream Connect** - Workflows using Pipedream Connect features * **Multiple triggers** - Workflows with more than one trigger ## Working in String.com Once you click any of the Edit with AI buttons, you'll be redirected to String.com where you can: ### Edit Your Workflow Use natural language to describe the changes you want to make to your workflow: * Add new steps or modify existing ones * Change the logic or flow of your workflow * Integrate new services or APIs * Optimize performance and error handling ### Configure Steps The AI assistant helps you: * Set up authentication and connections * Configure step parameters and options * Map data between steps * Handle edge cases and errors ### Test Your Changes String.com provides a comprehensive testing environment where you can: * Run test executions with sample data * Debug issues in real-time * Preview results before deployment * Iterate quickly based on test outcomes ### Deploy to Production Once you're satisfied with your changes: * Deploy directly from String.com to your Pipedream account * Changes are automatically synced * Your workflow is ready to run in production ## Best Practices ### Clear Instructions When working with AI in String.com, provide clear and specific instructions: > [!TIP] > > **Good prompt**: "Add error handling to the HTTP request step that retries 3 times with exponential backoff when receiving a 429 status code" > > **Less effective**: "Fix the error handling" ### Iterative Development Work iteratively with the AI: 1. Start with high-level requirements 2. Test and validate each change 3. Refine based on results 4. Deploy when ready ## Related Resources > **[Workflow Basics](/docs/workflows/overview)** > > Learn the fundamentals of Pipedream workflows > **[Code Steps](/docs/workflows/building-workflows/code)** > > Understanding code steps in workflows > **[Error Handling](/docs/workflows/building-workflows/errors)** > > Best practices for error handling # Overview Source: https://pipedream.com/docs/workflows/building-workflows/code > [!WARNING] > > **Workflows and String are shutting down on March 31, 2027.** [Learn more](/docs/workflows) Pipedream comes with thousands of prebuilt [triggers](/docs/workflows/building-workflows/triggers/) and [actions](/docs/components/contributing/#actions) for [hundreds of apps](https://pipedream.com/apps). Often, these will be sufficient for building simple workflows. But sometimes you need to run your own custom logic. You may need to make an API request to fetch additional metadata about the event, transform data into a custom format, or end the execution of a workflow early under some conditions. **Code steps let you do this and more**. Code steps let you execute [Node.js v](https://nodejs.org/)20 (JavaScript) code, Python, Go or even Bash right in a workflow. Choose a language to get started: > [Open](/docs/workflows/building-workflows/code/nodejs/) > [Open](/docs/workflows/building-workflows/code/python) > [Open](/docs/workflows/building-workflows/code/go/) > [Open](/docs/workflows/building-workflows/code/bash/) If you’d like to see another, specific language supported, please [let us know](https://pipedream.com/community). # Bash Source: https://pipedream.com/docs/workflows/building-workflows/code/bash > [!WARNING] > > **Workflows and String are shutting down on March 31, 2027.** [Learn more](/docs/workflows) Prefer to write quick scripts in Bash? We’ve got you covered. You can run any Bash in a Pipedream step within your workflows. Within a Bash step, you can [share data between steps](/docs/workflows/building-workflows/code/bash/#sharing-data-between-steps) and [access environment variables](/docs/workflows/building-workflows/code/bash/#using-environment-variables). But you can’t connect accounts, return HTTP responses, or take advantage of other features available in the [Node.js](/docs/workflows/building-workflows/code/nodejs/) environment at this time. ## Adding a Bash code step 1. Click the + icon to add a new step 2. Click **Custom Code** 3. In the new step, select the `bash` runtime in language dropdown ## Logging and debugging When it comes to debugging Bash scripts, `echo` is your friend. Your `echo` statements will print their output in the workflow step results: ```bash theme={null} MESSAGE='Hello world' # The message will now be available in the "Result > Logs" area in the workflow step echo $MESSAGE ``` ## Available binaries Bash steps come with many common and useful binaries preinstalled and available in `$PATH` for you to use out of the box. These binaries include but aren’t limited to: * `curl` for making HTTP requests * `jq` for manipulating and viewing JSON data * `git` for interacting with remote repositories If you need a package pre-installed in your Bash steps, [just ask us](https://pipedream.com/support). Otherwise, you can use the `/tmp` directory to download and install software from source. ## Sharing data between steps A step can accept data from other steps in the same workflow, or pass data downstream to others. ### Using data from another step In Bash steps, data from the initial workflow trigger and other steps are available in the `$PIPEDREAM_STEPS` environment variable. In this example, we’ll pretend this data is coming into our HTTP trigger via a POST request. ```json theme={null} { "id": 1, "name": "Bulbasaur", "type": "plant" } ``` In our Bash script, we can access this data via the `$PIPEDREAM_STEPS` file. Specifically, this data from the POST request into our workflow is available in the `trigger` object. ```bash theme={null} cat $PIPEDREAM_STEPS | jq .trigger.event # Results in { id: 1, name: "Bulbasaur", type: "plant" } ``` > [!NOTE] > > The period (`.`) in front the `trigger.event` in the example is not a typo. This is to define the starting point for `jq` to traverse down the JSON in the HTTP response. ### Sending data downstream to other steps To share data for future steps to use downstream, append it to the `$PIPEDREAM_EXPORTS` file. ```bash theme={null} # Retrieve the data from an API and store it in a variable DATA=`curl --silent https://pokeapi.co/api/v2/pokemon/charizard` # Write data to $PIPEDREAM_EXPORTS to share with steps downstream EXPORT="key:json=${DATA}" echo $EXPORT >> $PIPEDREAM_EXPORTS ``` > [!WARNING] > > Not all data types can be stored in the `$PIPEDREAM_EXPORTS` data shared between workflow steps. > > You can only export JSON-serializable data from Bash steps. ## Using environment variables You can leverage any [environment variables defined in your Pipedream account](/docs/workflows/environment-variables/) in a bash step. This is useful for keeping your secrets out of code as well as keeping them flexible to swap API keys without having to update each step individually. To access them, just append the `$` in front of the environment variable name. ```bash theme={null} echo $POKEDEX_API_KEY ``` Or an even more useful example, using the stored environment variable to make an authenticated API request. ```bash theme={null} curl --silent -X POST -h "Authorization: Bearer $TWITTER_API_KEY" https://api.twitter.com/2/users/@pipedream/mentions ``` ## Making a `GET` request You can use `curl` to perform `GET` requests. ```bash theme={null} # Get the current weather in San Francisco WEATHER=`curl --silent https://wttr.in/San\ Francisco\?format=3` echo $WEATHER # Produces: # San Francisco: 🌫 +48°F ``` > [!NOTE] > > Use the `--silent` flag with `curl` to suppress extra diagnostic information that `curl` produces when making requests. > > This enables you to only worry about the body of the response so you can visualize it with tools like `echo` or `jq`. ## Making a `POST` request ```bash theme={null} curl --silent -X POST https://postman-echo.com/post -d 'name=Bulbasaur&id=1' # To store the API response in a variable, interpolate the response into a string and store it in variable RESPONSE=`curl --silent -X POST https://postman-echo.com/post -d 'name=Bulbasaur&id=1'` # Now the response is stored as a variable echo $RESPONSE ``` ## Using API key authentication Some APIs require you to authenticate with a secret API key. `curl` has an `-h` flag where you can pass your API key as a token. For example, here’s how to retrieve mentions from the Twitter API: ```bash theme={null} # Define the "Authorization" header to include your Twitter API key curl --silent -X POST -h "Authorization: Bearer $()" https://api.twitter.com/2/users/@pipedream/mentions ``` ## Raising exceptions You may need to stop your step immediately. You can use the normal `exit` function available in Bash to quit the step prematurely. ```bash theme={null} echo "Exiting now!" 1>&2 exit 1 ``` > [!WARNING] > > Using `exit` to quit a Bash step early *won’t* stop the execution of the rest of the workflow. > > Exiting a Bash step will only apply that particular step in the workflow. This will exit the step and output the error message to `stderr` which will appear in the results of the step in the workflow. ## File storage If you need to download and store files, you can write them to the `/tmp` directory. ### Writing a file to /tmp Download a file to `/tmp` using `curl` ```bash theme={null} # Download the current weather in Cleveland in PNG format curl --silent https://wttr.in/Cleveland.png --output /tmp/weather.png # Output the contents of /tmp to confirm the file is there ls /tmp ``` > [!WARNING] > > The `/tmp` directory does not have unlimited storage. Please refer to the [disk limits](/docs/workflows/limits/#disk) for details. # Go Source: https://pipedream.com/docs/workflows/building-workflows/code/go > [!WARNING] > > **Workflows and String are shutting down on March 31, 2027.** [Learn more](/docs/workflows) Pipedream supports [Go v1.21.5](https://go.dev) in workflows. You can use any of the [Go packages available](https://pkg.go.dev/) with a simple `import` — no `go get` needed. When you write Go code on Pipedream, you can [share data between steps](/docs/workflows/building-workflows/code/bash/#sharing-data-between-steps) and [access environment variables](/docs/workflows/building-workflows/code/bash/#using-environment-variables). However, you can’t connect accounts, return HTTP responses, or take advantage of other features available in the [Node.js](/docs/workflows/building-workflows/code/nodejs/) environment at this time. If you have any feedback on the Go runtime, please let us know in [our community](https://pipedream.com/support). ## Adding a Go code step 1. Click the + icon to add a new step 2. Click “Custom Code” 3. In the new step, select the `golang` language runtime in language dropdown ## Logging and debugging You can use `fmt.Println` at any time to log information as the script is running. The output for the `fmt.Println` **Logs** will appear in the `Results` section just beneath the code editor. > [!NOTE] > > Don’t forget to import the `fmt` package in order to run `fmt.Println`. > > ```go highlight={3} theme={null} > package main > > import "fmt" > > func main() { > fmt.Println("Hello World!") > } > ``` ## Using third party packages You can use any packages from [Go package registry](https://pkg.go.dev). This includes popular choices such as: * [`net/http` for making HTTP requests](https://pkg.go.dev/net/http#pkg-overview/) * [`encoding/json` for encoding and decoding JSON](https://pkg.go.dev/encoding/json) * [`database/sql` for reading and writing to SQL databases](https://pkg.go.dev/database/sql@go1.17.6) To use a Go package, just `import` it in your step’s code: ```go theme={null} import "net/http" ``` And that’s it. ## Sending files You can send files stored in the `/tmp` directory in an HTTP request: ```go theme={null} package main import ( "os" "log" "mime/multipart" "bytes" "io" "net/http" ) func main() { // Instantiate a new HTTP client, body and form writer client := http.Client{} body := &bytes.Buffer{} writer := multipart.NewWriter(body) // Create an empty file to start fw, _:= writer.CreateFormFile("file", "go-logo.svg") // Retrieve a previously saved file from workflow storage file, _ := os.Open("/tmp/go-logo.svg") // Close multipart form writer writer.Close() _, _ = io.Copy(fw, file) // Send the POST request req, _:= http.NewRequest("POST", "https://postman-echo.com/post", bytes.NewReader(body.Bytes())) req.Header.Set("Content-Type", writer.FormDataContentType()) _, err := client.Do(req) if err != nil { log.Fatalln(err) } } ``` ## Sharing data between steps A step can accept data from other steps in the same workflow, or pass data downstream to others. This makes your steps even more powerful, you can compose new workflows and reuse steps. ### Using data from another step Data from the initial workflow trigger and other steps are available in the `pipedream-go` package. In this example, we’ll pretend this data is coming into our HTTP trigger via POST request. ```json theme={null} { "id": 1, "name": "Bulbasaur", "type": "plant" } ``` You can access this data in the `Steps` variable from the `pd` package. Specifically, this data from the POST request into our workflow is available in the `trigger` map. ```go theme={null} package main import ( "fmt" "github.com/PipedreamHQ/pipedream-go" ) func main() { // Access previous step data using pd.Steps fmt.Println(pd.Steps["trigger"]) } ``` ### Sending data downstream to other steps To share data for future steps to use, call the Export function from pd package: ```go theme={null} package main import ( "encoding/json" "github.com/PipedreamHQ/pipedream-go" "io/ioutil" "net/http" ) func main() { // Use a GET request to look up the latest data on Charizard resp, _ := http.Get("https://pokeapi.co/api/v2/pokemon/charizard") body, _ := ioutil.ReadAll(resp.Body) // Unmarshal the JSON into a struct var data map[string]interface{} json.Unmarshal(body, &data) // Expose the pokemon data downstream to others steps in the "pokemon" key from this step pd.Export("pokemon", data) } ``` Now this `pokemon` data is accessible to downstream steps within `pd.Steps["code"]["pokemon"]` > [!WARNING] > > Not all data types can be stored in the `Steps` data shared between workflow steps. > > For the best experience, we recommend only [exporting structs that can be marshalled into JSON](https://go.dev/blog/json). ## Using environment variables You can leverage any [environment variables defined in your Pipedream account](/docs/workflows/environment-variables/) in a Go step. This is useful for keeping your secrets out of code as well as keeping them flexible to swap API keys without having to update each step individually. To access them, use the `os` package. ```go theme={null} package main import ( "log" "os" ) func main() { log.PrintLn(os.Getenv('TWITTER_API_KEY')) } ``` ### Using API key authentication If a particular service requires you to use an API key, you can pass it via the HTTP request. This proves your identity to the service so you can interact with it: ```go theme={null} package main import ( "os" "bytes" "encoding/json" "io/ioutil" "log" "net/http" "fmt" ) func main() { // Access the Twitter API key from the environment const apiKey := os.Getenv('TWITTER_API_KEY')) // JSON encode our payload payload, _ := json.Marshal(map[string]string{ "name": "Bulbasaur", }) payloadBuf:= bytes.NewBuffer(payload) // Send the POST request req, err := http.NewRequest("POST", "https://api.twitter.com/2/users/@pipedream/mentions'", payloadBuf) // Build the headers in order to authenticate properly req.Header = http.Header{ "Content-Type": []string{"application/json"}, "Authorization": []string{fmt.Sprintf("Bearer %s", apiKey)}, } client := http.Client{} resp, err := client.Do(req) if err != nil { log.Fatalln(err) } // Don't forget to close the request after the function is finished defer resp.Body.Close() // Read the response body body, err := ioutil.ReadAll(resp.Body) if err != nil { log.Fatalln(err) } // Convert the body into a string sb := string(body) // Log the body to our Workflow Results log.Println(sb) } ``` ## Making a `GET` request You’ll typically use `GET` requests to retrieve data from an API: ```go theme={null} package main import ( "net/http" // HTTP client "io/ioutil" // Reads the body of the response "log" // Logger ) func main() { resp, err := http.Get("https://swapi.dev/api/people/1") if err != nil { log.Fatalln(err) } defer resp.Body.Close() body, err := ioutil.ReadAll(resp.Body) if err != nil { log.Fatalln(err) } // The response status code is logged in your Pipedream step results: log.Println(resp.Status) // The response is logged in your Pipedream step results: sb := string(body) log.Println(sb) } ``` ## Making a `POST` request ```go theme={null} package main import ( "bytes" "encoding/json" "io/ioutil" "log" "net/http" ) func main() { // JSON encode our payload payload, _ := json.Marshal(map[string]string{ "name": "Bulbasaur", }) payloadBuf:= bytes.NewBuffer(payload) // Send the POST request resp, err := http.Post("https://postman-echo.com/post", "application/json", payloadBuf) if err != nil { log.Fatalln(err) } defer resp.Body.Close() // Read the response body body, err := ioutil.ReadAll(resp.Body) if err != nil { log.Fatalln(err) } // Convert the body into a string sb := string(body) // Log the body to our Workflow Results log.Println(sb) } ``` ## Handling errors You may need to exit a workflow early, use the `os.Exit` to exit the `main` function with a specific error code. ```go theme={null} package main import ( "fmt" "os" ) func main() { os.Exit(1) fmt.Println("This message will not be logged.") } ``` The step will quit at the time `os.Exit` is called. In this example, the exit code `1` will appear in the **Results** of the step. ## File storage You can also store and read files with Go steps. This means you can upload photos, retrieve datasets, accept files from an HTTP request and more. The `/tmp` directory is accessible from your workflow steps for saving and retrieving files. You have full access to read and write both files in `/tmp`. ### Writing a file to `/tmp` ```go theme={null} package main import ( "io" "net/http" "os" "fmt" ) func main() { // Define where the file is and where to save it fileUrl := "https://golangcode.com/go-logo.svg" filePath := "/tmp/go-logo.svg" // Download the file resp, err := http.Get(fileUrl) if err != nil { fmt.Println(err) } // Don't forget to the close the HTTP connection at the end of the function defer resp.Body.Close() // Create the empty file out, err := os.Create(filePath) if err != nil { fmt.Println(err) } // Don't forget to close the file defer out.Close() // Write the file data to file _, err = io.Copy(out, resp.Body) if err != nil { fmt.Println(err) } } ``` Now `/tmp/go-logo.svg` holds the official Go logo. ### Reading a file from /tmp You can also open files you have previously stored in the `/tmp` directory. Let’s open the `go-logo.svg` file. ```go theme={null} package main import ( "os" "log" ) func main() { // Open the file data, err := os.ReadFile("/tmp/go-logo.svg") if e != nil { log.Fatalln(e) } // Print it's contents to the logs log.Println(string(data)) } ``` ### `/tmp` limitations The `/tmp` directory can store up to 2GB of storage. Also the storage may be wiped or may not exist between workflow executions. To avoid errors, assume that the `/tmp` directory is empty between workflow runs. # Running Node.js in Workflows Source: https://pipedream.com/docs/workflows/building-workflows/code/nodejs > [!WARNING] > > **Workflows and String are shutting down on March 31, 2027.** [Learn more](/docs/workflows) Pipedream supports writing Node.js v20 at any point of a workflow. Anything you can do with Node.js, you can do in a workflow. This includes using most of [npm’s 400,000+ packages](/docs/workflows/building-workflows/code/nodejs/#using-npm-packages). JavaScript is one of the [most used](https://insights.stackoverflow.com/survey/2019#technology-_-programming-scripting-and-markup-languages) [languages](https://github.blog/2018-11-15-state-of-the-octoverse-top-programming-languages/) in the world, with a thriving community and extensive package ecosystem. If you work on websites and know JavaScript well, Pipedream makes you a full stack engineer. If you’ve never used JavaScript, see the [resources below](/docs/workflows/building-workflows/code/nodejs/#new-to-javascript). > [!NOTE] > > It’s important to understand the core difference between Node.js and the JavaScript that runs in your web browser: **Node doesn’t have access to some of the things a browser expects, like the HTML on the page, or its URL**. If you haven’t used Node before, be aware of this limitation as you search for JavaScript examples on the web. ## Adding a code step 1. Click the **+** button below any step of your workflow. 2. Select the option to **Run custom code**. Note that new code steps will default to Node.js v20. You can add any Node.js code in the editor that appears. For example, try: ```javascript theme={null} export default defineComponent({ async run({ steps, $ }) { console.log("This is Node.js code"); $.export("test", "Some test data"); return "Test data"; }, }); ``` Code steps use the same editor ([Monaco](https://microsoft.github.io/monaco-editor/)) used in Microsoft’s [VS Code](https://code.visualstudio.com/), which supports syntax highlighting, automatic indentation, and more. ## Sharing data between steps A Node.js step can use data from other steps using [step exports](/docs/workflows/overview/#step-exports), it can also export data for other steps to use. ### Using data from another step In Node.js steps, data from the initial workflow trigger and other steps are available in the `steps` argument passed to the `run({ steps, $ })` function. In this example, we’ll pretend this data is coming into our HTTP trigger via POST request. ```json theme={null} { "id": 1, "name": "Bulbasaur", "type": "plant" } ``` In our Node.js step, we can access this data in the `steps` variable Specifically, this data from the POST request into our workflow is available in the `trigger` property. ```javascript theme={null} export default defineComponent({ async run({ steps, $ }) { const pokemonName = steps.trigger.event.name; const pokemonType = steps.trigger.event.type; console.log(`${pokemonName} is a ${pokemonType} type Pokemon`); }, }); ``` ### Sending data downstream to other steps To share data created, retrieved, transformed or manipulated by a step to others downstream you can simply `return` it. ```javascript theme={null} // This step is named "code" in the workflow import axios from "axios"; export default defineComponent({ async run({ steps, $ }) { const response = await axios.get( "https://pokeapi.co/api/v2/pokemon/charizard" ); // Store the response's JSON contents into a variable called "pokemon" const pokemon = response.data; // Expose the pokemon data downstream to other steps in the $return_value from this step return pokemon; }, }); ``` ### Using \$.export Alternatively, use the built in `$.export` helper instead of returning data. The `$.export` creates a *named* export with the given value. ```javascript theme={null} // This step is named "code" in the workflow import axios from "axios"; export default defineComponent({ async run({ steps, $ }) { const response = await axios.get( "https://pokeapi.co/api/v2/pokemon/charizard" ); // Store the response's JSON contents into a variable called "pokemon" const pokemon = response.data; // Expose the pokemon data downstream to other steps in the pokemon export from this step $.export("pokemon", pokemon); }, }); ``` Now this `pokemon` data is accessible to downstream steps within `steps.code.pokemon` > [!WARNING] > > You can only export JSON-serializable data from steps. Things like: > > * strings > * numbers > * objects > > You cannot export functions or other complex objects that don’t serialize to JSON. [You can save that data to a file in the `/tmp` directory](/docs/workflows/building-workflows/code/nodejs/working-with-files/). ## Passing props to code steps You can make code steps reusable by allowing them to accept props. Instead of hard-coding the values of variables within the code itself, you can pass them to the code step as arguments or parameters *entered in the workflow builder*. For example, let’s define a `firstName` prop. This will allow us to freely enter text from the workflow builder. ```javascript theme={null} export default defineComponent({ props: { firstName: { type: "string", label: "Your first name", default: "Dylan", }, }, async run({ steps, $ }) { console.log( `Hello ${this.firstName}, congrats on crafting your first prop!` ); }, }); ``` The workflow builder now can accept text input to populate the `firstName` to this particular step only: ![](https://mintcdn.com/pipedream/anb6FA0wpd8jtdUB/images/65d647d5-image.png?fit=max\&auto=format\&n=anb6FA0wpd8jtdUB\&q=85\&s=efdf8cc674b89442f2a2ef92fd4673d0) Accepting a single string is just one example, you can build a step to accept arrays of strings through a dropdown presented in the workflow builder. [Read the props reference for the full list of options](/docs/components/contributing/api/#props). ## How Pipedream Node.js components work When you add a new Node.js code step or use the examples in this doc, you’ll notice a common structure to the code: ```javascript theme={null} export default defineComponent({ async run({ steps, $ }) { // this Node.js code will execute when the step runs }, }); ``` This defines [a Node.js component](/docs/components/contributing/api/). Components let you: * Pass input to steps using [props](/docs/workflows/building-workflows/code/nodejs/#passing-props-to-code-steps) * [Connect an account to a step](/docs/apps/connected-accounts/#from-a-code-step) * [Issue HTTP responses](/docs/workflows/building-workflows/triggers/#http-responses) * Perform workflow-level flow control, like [ending a workflow early](/docs/workflows/building-workflows/code/nodejs/#ending-a-workflow-early) When the step runs, Pipedream executes the `run` method: * Any asynchronous code within a code step [**must** be run synchronously](/docs/workflows/building-workflows/code/nodejs/async/), using the `await` keyword or with a Promise chain, using `.then()`, `.catch()`, and related methods. * Pipedream passes the `steps` variable to the run method. `steps` is also an object, and contains the [data exported from previous steps](/docs/workflows/overview/#step-exports) in your workflow. * You also have access to the `$` variable, which gives you access to methods like `$.respond`, `$.export`, [and more](/docs/components/contributing/api/#actions). If you’re using [props](/docs/workflows/building-workflows/code/nodejs/#passing-props-to-code-steps) or [connect an account to a step](/docs/apps/connected-accounts/#from-a-code-step), the component exposes them in the variable `this`, which refers to the current step: ```javascript theme={null} export default defineComponent({ async run({ steps, $ }) { // `this` refers to the running component. Props, connected accounts, etc. are exposed here console.log(this); }, }); ``` When you [connect an account to a step](/docs/apps/connected-accounts/#from-a-code-step), Pipedream exposes the auth info in the variable [`this.appName.$auth`](/docs/workflows/building-workflows/code/nodejs/auth/#accessing-connected-account-data-with-thisappnameauth). ## Logs You can call `console.log` or `console.error` to add logs to the execution of a code step. These logs will appear just below the associated step. `console.log` messages appear in black, `console.error` in red. ### `console.dir` If you need to print the contents of JavaScript objects, use `console.dir`: ```javascript theme={null} export default defineComponent({ async run({ steps, $ }) { console.dir({ name: "Luke", }); }, }); ``` ## Syntax errors Pipedream will attempt to catch syntax errors when you’re writing code, highlighting the lines where the error occurred in red. > [!WARNING] > > While you can save a workflow with syntax errors, it’s unlikely to run correctly on new events. Make sure to fix syntax errors before running your workflow. ## Using `npm` packages [npm](https://www.npmjs.com/) hosts JavaScript packages: libraries of code someone else wrote and packaged for others to use. npm has over 400,000 packages and counting. ### Just `import` it To use an npm package on Pipedream, simply `import` it: ```javascript theme={null} import axios from "axios"; ``` By default, workflows don’t have any packages installed. Just import any package in this manner to make it available in the step. If a package only supports the [CommonJS module format](https://nodejs.org/api/modules.html), you may have to `require` it: ```javascript theme={null} const axios = require("axios"); ``` **Within a single step, you can only use `import` or `require` statements, not both**. See [this section](/docs/workflows/building-workflows/code/nodejs/#require-is-not-defined) for more details. When Pipedream runs your workflow, we download the associated npm package for you before running your code steps. If you’ve used Node before, you’ll notice there’s no `package.json` file to upload or edit. We want to make package management simple, so just `import` or `require` the module like you would in your code, after package installation, and get to work. ### Third-party package limitations Some packages require access to a web browser to run, and don’t work with Node.js. Often this limitation is documented on the package `README`, but often it’s not. If you’re not sure and need to use it, we recommend just trying to `import` or `require` it. Other packages require access to binaries or system libraries that aren’t installed in the Pipedream execution environment. If you’re seeing any issues with a specific package, please [let us know](https://pipedream.com/support/) and we’ll try to help you make it work. ### Pinning package versions Each time you deploy a workflow with Node.js code, Pipedream downloads the npm packages you `import` in your step. **By default, Pipedream deploys the latest version of the npm package each time you deploy a change**. There are many cases where you may want to specify the version of the packages you’re using. If you’d like to use a *specific* version of a package in a workflow, you can add that version in the `import` string, for example: ```javascript theme={null} import axios from "axios@0.19.2"; ``` You can also pass the version specifiers used by npm to support [semantic version](https://semver.org/) upgrades. For example, to allow for future patch version upgrades: ```javascript theme={null} import axios from "axios@~0.20.0"; ``` To allow for patch and minor version upgrades, use: ```javascript theme={null} import got from "got@^11.0.0"; ``` > [!WARNING] > > The behavior of the caret (`^`) operator is different for 0.x versions, for which it will only match patch versions, and not minor versions. You can also specify different versions of the same package in different steps. Each step will used the associated version. Note that this also increases the size of your deployment, which can affect cold start times. ### CommonJS vs. ESM imports In Node.js, you may be used to importing third-party packages using the `require` statement: ```javascript theme={null} const axios = require("axios"); ``` In this example, we’re including the `axios` [CommonJS module](https://nodejs.org/api/modules.html) published to npm. You import CommonJS modules using the `require` statement. But you may encounter this error in workflows: `Error Must use import to load ES Module` This means that the package you’re trying to `require` uses a different format to export their code, called [ECMAScript modules](https://nodejs.org/api/esm.html#esm_modules_ecmascript_modules) (**ESM**, or **ES modules**, for short). With ES modules, you instead need to `import` the package: ```javascript theme={null} import got from "got"; ``` Most package publish both CommonJS and ESM versions, so **if you always use `import`, you’re less likely to have problems**. In general, refer to the documentation for your package for instructions on importing it correctly. ### `require` is not defined This error means that you cannot use CommonJS and ESM imports in the same step. For example, if you run code like this: ```javascript theme={null} import fetch from "node-fetch"; const axios = require("axios"); ``` your workflow will throw a `require is not defined` error. There are two solutions: 1. Try converting your CommonJS `require` statement into an ESM `import` statement. For example, convert this: ```javascript theme={null} const axios = require("axios"); ``` to this: ```javascript theme={null} import axios from "axios"; ``` 2. If the `import` syntax fails to work, separate your imports into different steps, using only CommonJS requires in one step, and only ESM imports in another. ## Variable scope Any variables you create within a step are scoped to that step. That is, they cannot be referenced in any other step. Within a step, the [normal rules of JavaScript variable scope](https://developer.mozilla.org/en-US/Glossary/Scope) apply. **When you need to share data across steps, use [step exports](/docs/workflows/overview/#step-exports).** ## Making HTTP requests from your workflow There are two ways to make HTTP requests in code steps: * Use any HTTP client that works with Node.js. [See this example guide for how to use `axios` to make HTTP requests](/docs/workflows/building-workflows/code/nodejs/http-requests/). * [Use `$.send.http()`](/docs/workflows/data-management/destinations/http/#using-sendhttp-in-workflows), a Pipedream-provided method for making asynchronous HTTP requests. In general, if you just need to make an HTTP request but don’t care about the response, [use `$.send.http()`](/docs/workflows/data-management/destinations/http/#using-sendhttp-in-workflows). If you need to operate on the data in the HTTP response in the rest of your workflow, [use `axios`](/docs/workflows/building-workflows/code/nodejs/http-requests/). ## Returning HTTP responses You can return HTTP responses from [HTTP-triggered workflows](/docs/workflows/building-workflows/triggers/#http) using the [`$.respond()` function](/docs/workflows/building-workflows/triggers/#http-responses). ## Invoke another workflow > [!WARNING] > > This is an alpha feature and is subject to change without prior notice. You can invoke another workflow in your workspace with `$.flow.trigger`: ```javascript theme={null} await $.flow.trigger( workflowId, // your Pipedream workflow ID, e.g. p_abc123 payload, // any JSON-serializable data ) ``` [Find your workflow’s ID here.](/docs/workflows/troubleshooting/#where-do-i-find-my-workflows-id) This invokes the workflow directly — you don’t need to configure a trigger, and the request does not leave the platform. We also provide a [Trigger Workflow](https://pipedream.com/apps/helper-functions/actions/trigger-workflow) action in the [Helper Functions](https://pipedream.com/apps/helper-functions) app so you don’t need to do it by code! ## Ending a workflow early Sometimes you want to end your workflow early, or otherwise stop or cancel the execution or a workflow under certain conditions. For example: * You may want to end your workflow early if you don’t receive all the fields you expect in the event data. * You only want to run your workflow for 5% of all events sent from your source. * You only want to run your workflow for users in the United States. If you receive a request from outside the U.S., you don’t want the rest of the code in your workflow to run. * You may use the `user_id` contained in the event to look up information in an external API. If you can’t find data in the API tied to that user, you don’t want to proceed. **In any code step, calling `return $.flow.exit()` will end the execution of the workflow immediately.** No remaining code in that step, and no code or destination steps below, will run for the current event. > [!NOTE] > > It’s a good practice to use `return $.flow.exit()` to immediately exit the workflow. In contrast, `$.flow.exit()` on its own will end the workflow only after executing all remaining code in the step. ```javascript theme={null} export default defineComponent({ async run({ steps, $ }) { return $.flow.exit(); console.log( "This code will not run, since $.flow.exit() was called above it" ); }, }); ``` You can pass any string as an argument to `$.flow.exit()`: ```javascript theme={null} export default defineComponent({ async run({ steps, $ }) { return $.flow.exit("End message"); }, }); ``` Or exit the workflow early within a conditional: ```javascript theme={null} export default defineComponent({ async run({ steps, $ }) { // Flip a coin, running $.flow.exit() for 50% of events if (Math.random() > 0.5) { return $.flow.exit(); } console.log("This code will only run 50% of the time"); }, }); ``` ## Errors [Errors](https://nodejs.org/dist/latest-v10.x/api/errors.html#errors_errors) raised in a code step will stop the execution of code or destinations that follow. ### Configuration Error Throwing a `ConfigurationError` in a Node.js step will display the error message in a dedicated area. This is useful for providing feedback during validation of `props`. In the example below, a required Header value is missing from the Google Sheets action: ![](https://mintcdn.com/pipedream/anb6FA0wpd8jtdUB/images/61896840-image.png?fit=max\&auto=format\&n=anb6FA0wpd8jtdUB\&q=85\&s=abc08c66a44e5f810c77fe86907d9404) Or you can use it for validating the format of a given `email` prop: ```javascript theme={null} import { ConfigurationError } from "@pipedream/platform"; export default defineComponent({ props: { email: { type: "string" }, }, async run({ steps, $ }) { // if the email address doesn't include a @, it's not valid if (!this.email.includes("@")) { throw new ConfigurationError("Provide a valid email address"); } }, }); ``` ## Using secrets in code Workflow code is private. Still, we recommend you don’t include secrets — API keys, tokens, or other sensitive values — directly in code steps. Pipedream supports [environment variables](/docs/workflows/environment-variables/) for keeping secrets separate from code. Once you create an environment variable in Pipedream, you can reference it in any workflow using `process.env.VARIABLE_NAME`. The values of environment variables are private. See the [Environment Variables](/docs/workflows/environment-variables/) docs for more information. ## Limitations of code steps Code steps operate within the [general constraints on workflows](/docs/workflows/limits/#workflows). As long as you stay within those limits and abide by our [acceptable use policy](/docs/workflows/limits/#acceptable-use), you can add any number of code steps in a workflow to do virtually anything you’d be able to do in Node.js. If you’re trying to run code that doesn’t work or you have questions about any limits on code steps, [please reach out](https://pipedream.com/support/). ## Editor settings We use the [Monaco Editor](https://microsoft.github.io/monaco-editor/), which powers VS Code and other web-based editors. We also let you customize the editor. For example, you can enable Vim mode, and change the default tab size for indented code. Visit your [Settings](https://pipedream.com/settings) to modify these settings. ## Keyboard Shortcuts We use the [Monaco Editor](https://microsoft.github.io/monaco-editor/), which powers VS Code. As a result, many of the VS Code [keyboard shortcuts](https://code.visualstudio.com/getstarted/keybindings) should work in the context of the editor. For example, you can use shortcuts to search for text, format code, and more. ## New to JavaScript? We understand many of you might be new to JavaScript, and provide resources for you to learn the language below. When you’re searching for how to do something in JavaScript, some of the code you try might not work in Pipedream. This could be because the code expects to run in a browser, not a Node.js environment. The same goes for [npm packages](/docs/workflows/building-workflows/code/nodejs/#using-npm-packages). ### I’m new to programming Many of the most basic JavaScript tutorials are geared towards writing code for a web browser to run. This is great for learning — a webpage is one of the coolest things you can build with code. We recommend starting with these general JavaScript tutorials and trying the code you learn on Pipedream: * [JavaScript For Cats](https://jsforcats.com/) * [Mozilla - JavaScript First Steps](https://developer.mozilla.org/en-US/docs/Learn_web_development/Core/Scripting) * [Stack Overflow](https://stackoverflow.com/) operates a programming Q\&A site that typically has the first Google result when you’re searching for something specific. It’s a great place to find answers to common questions. ### I know how to code, but don’t know JavaScript * [JavaScript overview on MDN](https://developer.mozilla.org/en-US/docs/Web/JavaScript/Guide/Language_overview) * [Eloquent JavaScript](https://eloquentjavascript.net/) * [NodeSchool](https://nodeschool.io/) * [You Don’t Know JS](https://github.com/getify/You-Dont-Know-JS) # Using AI to Generate Code Source: https://pipedream.com/docs/workflows/building-workflows/code/nodejs/ai-code-generation > [!WARNING] > > **Workflows and String are shutting down on March 31, 2027.** [Learn more](/docs/workflows) Tell Pipedream the code you want, we generate it for you. Pipedream’s [built-in actions](/docs/workflows/building-workflows/actions/) are great for running common API operations without having to write code, but sometimes you need code-level control in a workflow. You can [write this code yourself](/docs/workflows/building-workflows/code/), or you can let Pipedream generate it for you with AI. This feature is new, and [we welcome feedback](https://pipedream.com/support). Please let us know what we can improve or add to make this more useful for you. ## Getting Started Access the feature either from within a Node.js code cell or from any app in the step selector. ![](https://mintcdn.com/pipedream/Acz4Z1ch6TM7-aI8/images/a305491c-image.png?fit=max\&auto=format\&n=Acz4Z1ch6TM7-aI8\&q=85\&s=526875a9bf935d5c9c9ba72471b3536e) A window should pop up and ask for your prompt. Write exactly what you want to do within that step. **Be verbose** and see our tips for [getting the best results](/docs/workflows/building-workflows/code/nodejs/ai-code-generation/#getting-the-best-results). * **Bad**: “Send a Slack message” * **Good**: “Send a Slack message in the following format: `Hello, ${name}`. Let me select the channel from a list of available options.” Once you’re done, hit **Enter** or click **Generate**. Code will immediately start streaming to the editor. You can modify the prompt and re-generate the code if it doesn’t look right, or click **Use this code** to add it to your code cell and test it. Pipedream will automatically refresh the step to show connected accounts and any input fields (props) above the step. ![](https://mintcdn.com/pipedream/nKh6d_6A4aXFb6xD/images/feabc2db-ai-generated-code_uzsr8q.png?fit=max\&auto=format\&n=nKh6d_6A4aXFb6xD\&q=85\&s=58793275e673a9f6816131d0ce7fbfd6) Edit the code however you’d like. Once you’re done, test the code. You’ll see the option to provide a :+1: or :-1: on the code, which helps us learn what’s working and what’s not. ## Editing existing code You can also edit existing code with AI. Click the **Edit with AI** button at the top-right of any Node.js code step. You’ll see the code gen window appear with the original code from your step. Enter a prompt to suggest an edit, and we’ll give you the modified code. ## Getting the best results **Generating code works best with clear, precise, and detailed instructions of what you want to do in your step.** The code gen service understands the [Pipedream component API](/docs/components/contributing/api/) and references the API docs of [integrated apps](https://pipedream.com/apps). For example, you can tell it to include specific [props](/docs/components/contributing/api/#props) (input) or [async options](/docs/components/contributing/api/#async-options-example), and reference specific API endpoints you want to use for the selected app. ### Examples #### Slack Send a message to the `#general` channel that says, “This message was sent with AI-generate code!” Format it as a Slack block, with a header named, “Hello, world!” **Output**: ```javascript theme={null} import { axios } from "@pipedream/platform"; export default defineComponent({ props: { slack: { type: "app", app: "slack", }, }, async run({ steps, $ }) { return await axios($, { method: "POST", url: `https://slack.com/api/chat.postMessage`, headers: { Authorization: `Bearer ${this.slack.$auth.oauth_access_token}`, }, data: { channel: "#general", blocks: [ { type: "header", text: { type: "plain_text", text: "Hello, world!", }, }, { type: "section", text: { type: "mrkdwn", text: "This message was sent with AI-generated code!", }, }, ], }, }); }, }); ``` #### Stripe Get the subscription information about a specific customer based on their email address **Output:** ```javascript theme={null} import { axios } from "@pipedream/platform"; export default defineComponent({ props: { stripe: { type: "app", app: "stripe", }, email: { type: "string", label: "Email Address", description: "The email address of the customer to get subscription information for", }, }, async run({ steps, $ }) { const customerResponse = await axios($, { method: "GET", url: `https://api.stripe.com/v1/customers`, headers: { Authorization: `Bearer ${this.stripe.$auth.api_key}`, }, params: { email: this.email, }, }); if (customerResponse.data.length === 0) { throw new Error("Customer not found"); } const customerId = customerResponse.data[0].id; return await axios($, { method: "GET", url: `https://api.stripe.com/v1/subscriptions`, headers: { Authorization: `Bearer ${this.stripe.$auth.api_key}`, }, params: { customer: customerId, }, }); }, }); ``` ## Current limitations, and what we’re working on next * Currently supports Pipedream actions, not triggers * Only supports Node.js output. Python coming soon. * It supports single steps, and not entire workflows (also coming soon) # Running Asynchronous Code in Node.js Source: https://pipedream.com/docs/workflows/building-workflows/code/nodejs/async > [!WARNING] > > **Workflows and String are shutting down on March 31, 2027.** [Learn more](/docs/workflows) If you’re not familiar with asynchronous programming concepts like [callback functions](https://developer.mozilla.org/en-US/Glossary/Callback_function) or [Promises](https://developer.mozilla.org/en-US/Web/JavaScript/Guide/Using_promises), see [this overview](https://eloquentjavascript.net/11_async.html). ## The problem **Any asynchronous code within a Node.js code step must complete before the next step runs**. This ensures future steps have access to its data. If Pipedream detects that code is still running by the time the step completes, you’ll see the following warning below the code step: > **This step was still trying to run code when the step ended. Make sure you await all Promises, or promisify callback functions.** As the warning notes, this often arises from one of two issues: * You forgot to `await` a Promise. [All Promises must be awaited](/docs/workflows/building-workflows/code/nodejs/async/#await-all-promises) within a step so they resolve before the step finishes. * You tried to run a callback function. Since callback functions run asynchronously, they typically will not finish before the step ends. [You can wrap your function in a Promise](/docs/workflows/building-workflows/code/nodejs/async/#wrap-callback-functions-in-a-promise) to make sure it resolves before the step finishes. ## Solutions ### `await` all Promises Most Node.js packages that run async code return Promises as the result of method calls. For example, [`axios`](/docs/workflows/building-workflows/code/nodejs/http-requests/#basic-axios-usage-notes) is an HTTP client. If you make an HTTP request like this in a Pipedream code step: ```javascript theme={null} const resp = axios({ method: "GET", url: `https://swapi.dev/api/films/`, }); ``` It won’t send the HTTP request, since **`axios` returns a Promise**. Instead, add an `await` in front of the call to `axios`: ```javascript theme={null} const resp = await axios({ method: "GET", url: `https://swapi.dev/api/films/`, }); ``` In short, always do this: ```javascript theme={null} const res = await runAsyncCode(); ``` instead of this: ```javascript theme={null} // This code may not finish by the time the workflow finishes runAsyncCode(); ``` ### Wrap callback functions in a Promise Before support for Promises was widespread, [callback functions](https://developer.mozilla.org/en-US/Glossary/Callback_function) were a popular way to run some code asynchronously, after some operation was completed. For example, [PDFKit](https://pdfkit.org/) lets you pass a callback function that runs when certain events fire, like when the PDF has been finalized: ```javascript theme={null} import PDFDocument from "pdfkit"; import fs from "fs"; let doc = new PDFDocument({ size: "A4", margin: 50 }); this.fileName = `tmp/test.pdf`; let file = fs.createWriteStream(this.fileName); doc.pipe(file); doc.text("Hello world!"); // Finalize PDF file doc.end(); file.on("finish", () => { console.log(fs.statSync(this.fileName)); }); ``` This is the callback function: ```javascript theme={null} () => { console.log(fs.statSync(this.fileName)); }; ``` and **it will not run**. By running a callback function in this way, we’re saying that we want the function to be run asynchronously. But on Pipedream, this code must finish by the time the step ends. **You can wrap this callback function in a Promise to make sure that happens**. Instead of running: ```javascript theme={null} file.on("finish", () => { console.log(fs.statSync(this.fileName)); }); ``` run: ```javascript theme={null} // Wait for PDF to finalize await new Promise((resolve) => file.on("finish", resolve)); // Once done, get stats const stats = fs.statSync(this.filePath); ``` This is called “[promisification](https://javascript.info/promisify)”. You can often promisify a function in one line using Node.js’ [`util.promisify` function](https://2ality.com/2017/05/util-promisify.html). ### Other solutions If a specific library doesn’t support Promises, you can often find an equivalent library that does. For example, many older HTTP clients like `request` didn’t support Promises natively, but the community [published packages that wrapped it with a Promise-based interface](https://www.npmjs.com/package/request#promises--asyncawait) (note: `request` has been deprecated, this is just an example). ## False positives This warning can also be a false positive. If you’re successfully awaiting all Promises, Pipedream could be throwing the warning in error. If you observe this, please [file a bug](https://github.com/PipedreamHQ/pipedream/issues/new?assignees=\&labels=bug\&template=bug_report.md\&title=%5BBUG%5D+). Packages that make HTTP requests or read data from disk (for example) fail to resolve Promises at the right time, or at all. This means that Pipedream is correctly detecting that code is still running, but there’s also no issue - the library successfully ran, but just failed to resolve the Promise. You can safely ignore the error if all relevant operations are truly succeeding. # Connecting Apps in Node.js Source: https://pipedream.com/docs/workflows/building-workflows/code/nodejs/auth > [!WARNING] > > **Workflows and String are shutting down on March 31, 2027.** [Learn more](/docs/workflows) When you use [prebuilt actions](/docs/components/contributing/#actions) tied to apps, you don’t need to write the code to authorize API requests. Just [connect your account](/docs/apps/connected-accounts/#connecting-accounts) for that app and run your workflow. But sometimes you’ll need to [write your own code](/docs/workflows/building-workflows/code/nodejs/). You can also connect apps to custom code steps, using the auth information to authorize requests to that app. For example, you may want to send a Slack message from a step. We use Slack’s OAuth integration to authorize sending messages from your workflows. To wire up a Slack account to a workflow, define it as a `prop` to the workflow. ```javascript theme={null} import { WebClient } from '@slack/web-api' export default defineComponent({ props: { // This creates a connection called "slack" that connects a Slack account. slack: { type: 'app', app: 'slack' } }, async run({ steps, $ }) { const web = new WebClient(this.slack.$auth.oauth_access_token) return await web.chat.postMessage({ text: "Hello, world!", channel: "#general", }) } }); ``` Then click the **Refresh fields** button in the editor to render the Slack field based on the `slack` prop: ![](https://mintcdn.com/pipedream/nKh6d_6A4aXFb6xD/images/ec396062-image.png?fit=max\&auto=format\&n=nKh6d_6A4aXFb6xD\&q=85\&s=baff18259241058d8615242cb3546528) Now the step in the workflow builder will allow you to connect your Slack account: ![](https://mintcdn.com/pipedream/anb6FA0wpd8jtdUB/images/55361776-image.png?fit=max\&auto=format\&n=anb6FA0wpd8jtdUB\&q=85\&s=c0f770f89b7f6c2c551778c07b66b847) ## Accessing connected account data with `this.appName.$auth` In our Slack example above, we created a Slack `WebClient` using the Slack OAuth access token: ```javascript theme={null} const web = new WebClient(this.slack.$auth.oauth_access_token); ``` Where did `this.slack` come from? Good question. It was generated by the definition we made in `props`: ```javascript highlight={4-9} theme={null} export default defineComponent({ props: { // the name of the app from the key of the prop, in this case it's "slack" slack: { // define that this prop is an app type: 'app', // define that this app connects to Slack app: 'slack' } } // ... rest of the Node.js step ``` The Slack access token is generated by Pipedream, and is available to this step in the `this.slack.$auth` object: ```javascript highlight={11} theme={null} export default defineComponent({ props: { slack: { type: 'app', app: 'slack' } }, async run({ steps, $ }) { async (steps, $) => { // Authentication details for all of your apps are accessible under the special $ variable: console.log(this.slack.$auth); } }) }); ``` `this.appName.$auth` contains named properties for each account you connect to the associated step. Here, we connected Slack, so `this.slack.$auth` contains the Slack auth info (the `oauth_access_token`). The names of the properties for each connected account will differ with the account. Pipedream typically exposes OAuth access tokens as `oauth_access_token`, and API keys under the property `api_key`. But if there’s a service-specific name for the tokens (for example, if the service calls it `server_token`), we prefer that name, instead. To list the `this.[app name].$auth` properties available to you for a given app, run `Object.keys` on the app: ```javascript theme={null} console.log(Object.keys(this.slack.$auth)) // Replace this.slack with your app's name ``` and run your workflow. You’ll see the property names in the logs below your step. ## Writing custom steps to use `this.appName.$auth` You can write code that utilizes connected accounts in a few different ways: ### Using the code templates tied to apps When you write custom code that connects to an app, you can start with a code snippet Pipedream provides for each app. This is called the **test request**. When you search for an app in a step: 1. Click the **+** button below any step. 2. Search for the app you’re looking for and select it from the list. 3. Select the option to **Use any \ API**. This code operates as a template you can extend, and comes preconfigured with the connection to the target app and the code for authorizing requests to the API. You can modify this code however you’d like. ### Manually connecting apps to steps See the Connected Accounts docs for [connecting an account to a code step](/docs/apps/connected-accounts/#from-a-code-step). ## Custom auth tokens / secrets When you want to connect to a 3rd party service that isn’t supported by Pipedream, you can store those secrets in [Environment Variables](/docs/workflows/environment-variables/). ## Learn more about `props` Not only can `props` be used to connect apps to workflow steps, but they can also be used to [collect properties collected from user input](/docs/workflows/building-workflows/code/nodejs/#passing-props-to-code-steps) and [save data between workflow runs](/docs/workflows/building-workflows/code/nodejs/using-data-stores/). # Browser Automation with Node.js Source: https://pipedream.com/docs/workflows/building-workflows/code/nodejs/browser-automation > [!WARNING] > > **Workflows and String are shutting down on March 31, 2027.** [Learn more](/docs/workflows) You can leverage headless browser automations within Pipedream workflows for web scraping, generating screenshots, or programmatically interacting with websites - even those that make heavy usage of frontend JavaScript. Pipedream manages a [specialized package](https://www.npmjs.com/package/@pipedream/browsers) that includes Puppeteer and Playwright bundled with a specialized Chromium instance that’s compatible with Pipedream’s Node.js Execution Environment. All that’s required is importing the [`@pipedream/browsers`](https://www.npmjs.com/package/@pipedream/browsers) package into your Node.js code step and launch a browser. Pipedream will start Chromium and launch a Puppeteer or Playwright Browser instance for you. ## Usage The `@pipedream/browsers` package exports two modules: `puppeteer` & `playwright`. Both modules share the same interface: * `browser(opts?)` - method to instantiate a new browser (returns a browser instance) * `launch(opts?)` - an alias to browser() * `newPage()` - creates a new page instance and returns both the page & browser ### Puppeteer First import the `puppeteer` module from `@pipedream/browsers` and use `browser()` or `launch()` method to instantiate a browser. Then using this browser you can open new [Pages](https://pptr.dev/api/puppeteer.page), which have individual controls to open URLs: ```javascript theme={null} import { puppeteer } from '@pipedream/browsers'; export default defineComponent({ async run({steps, $}) { const browser = await puppeteer.browser(); // Interact with the web page programmatically // See Puppeeter's Page documentation for available methods: // https://pptr.dev/api/puppeteer.page const page = await browser.newPage(); await page.goto('https://pipedream.com/'); const title = await page.title(); const content = await page.content(); $.export('title', title); $.export('content', content); // The browser needs to be closed, otherwise the step will hang await browser.close(); }, }) ``` #### Screenshot a webpage Puppeteer can take a full screenshot of a webpage rendered with Chromium. For full options [see the Puppeteer Screenshot method documentation.](https://pptr.dev/api/puppeteer.page.screenshot) **Save screenshot to `/tmp`** Save a screenshot within the local `/tmp` directory: ```javascript theme={null} import { puppeteer } from '@pipedream/browsers'; export default defineComponent({ async run({ $ }) { const browser = await puppeteer.launch(); const page = await browser.newPage(); await page.goto('https://pipedream.com'); await page.screenshot({ path: '/tmp/screenshot.png' }); await browser.close(); }, }); ``` **Return screenshot as a base64 encoded string** Save the screenshot as a base 64 encoded string: ```javascript theme={null} import { puppeteer } from '@pipedream/browsers'; export default defineComponent({ async run({ $ }) { const browser = await puppeteer.browser(); const page = await browser.newPage(); await page.goto('https://pipedream.com/'); const screenshot = await page.screenshot({ encoding: 'base64' }); await browser.close(); return screenshot; }, }); ``` #### Generate a PDF of a webpage Puppeteer can render a PDF of a webpage. For full options [see the Puppeteer Screenshot method documentation.](https://pptr.dev/api/puppeteer.page.pdf) **Save PDF to `/tmp`** Save the PDF locally to `/tmp`: ```javascript theme={null} import { puppeteer } from '@pipedream/browsers'; export default defineComponent({ async run({ $ }) { const browser = await puppeteer.launch(); const page = await browser.newPage(); await page.goto('https://pipedream.com'); await page.pdf({ path: '/tmp/screenshot.pdf' }); await browser.close(); }, }); ``` **Return the PDF as a base64 encoded string** Save the PDF as a base 64 encoded string: ```javascript theme={null} import { puppeteer } from '@pipedream/browsers'; export default defineComponent({ async run({ $ }) { const browser = await puppeteer.browser(); const page = await browser.newPage(); await page.goto('https://pipedream.com'); const pdfBuffer = await page.pdf(); const pdfBase64 = pdfBuffer.toString('base64'); await browser.close(); return pdfBase64; }, }); ``` #### Scrape content from a webpage Puppeteer can scrape individual elements or return all content of a webpage. **Extract the h1 tag from a webpage** Extract individual elements with a CSS selector: ```javascript theme={null} import { puppeteer } from '@pipedream/browsers'; export default defineComponent({ async run({ $ }) { const browser = await puppeteer.browser(); const page = await browser.newPage(); await page.goto('https://pipedream.com'); const h1Content = await page.$eval('h1', el => el.textContent); await browser.close(); return h1Content; }, }); ``` **Retrieve all HTML content from a webpage** Extract all HTML content form a webpage: ```javascript theme={null} import { puppeteer } from '@pipedream/browsers'; export default defineComponent({ async run({ $ }) { const browser = await puppeteer.browser(); const page = await browser.newPage(); await page.goto('https://pipedream.com'); const content = await page.content(); await browser.close(); return content; }, }); ``` #### Submit a form Puppeteer can also programmatically click and type on a webpage. **With `Page.type`** `Page.type` accepts a CSS selector and a string to type into the field. ```javascript theme={null} import { puppeteer } from '@pipedream/browsers'; export default defineComponent({ async run({ steps, $ }) { const browser = await puppeteer.browser(); const page = await browser.newPage(); await page.goto('https://example.com/contact'); await page.type('input[name=email]', 'pierce@pipedream.com'); await page.type('input[name=name]', 'Dylan Pierce'); await page.type('textarea[name=message]', "Hello, from a Pipedream workflow."); await page.click('input[type=submit]'); await browser.close(); }, }); ``` **With `Page.click` and `Page.keyboard.type`** `Page.click` will click on the element to focus on it, then `Page.keyboard.type` emulates keyboard keystrokes. ```javascript theme={null} import { puppeteer } from '@pipedream/browsers'; export default defineComponent({ async run({ steps, $ }) { const browser = await puppeteer.browser(); const page = await browser.newPage(); await page.goto('https://example.com/contact'); await page.click('input[name=email]') await page.keyboard.type('pierce@pipedream.com'); await page.click('input[name=name]') await page.keyboard.type('Dylan Pierce'); await page.click('textarea[name=message]') await page.keyboard.type("Hello, from a Pipedream workflow."); await page.click('input[type=submit]'); await browser.close(); }, }); ``` ### Playwright First import the `playwright` module from `@pipedream/browsers` and use `browser()` or `launch()` method to instantiate a browser. Then using this browser you can open new [Pages](https://playwright.dev/api/class-page), which have individual controls to open URLs, click elements, generate screenshots and type and more: ```javascript theme={null} import { playwright } from '@pipedream/browsers'; export default defineComponent({ async run({steps, $}) { const browser = await playwright.browser(); // Interact with the web page programmatically // See Playwright's Page documentation for available methods: // https://playwright.dev/api/class-page const page = await browser.newPage(); await page.goto('https://pipedream.com/'); const title = await page.title(); const content = await page.content(); $.export('title', title); $.export('content', content); // The browser context and browser needs to be closed, otherwise the step will hang await page.context().close(); await browser.close(); }, }) ``` > [!NOTE] > > **Don’t forget to close the browser context** > > Playwright differs from Puppeteer slightly in that you have to close the page’s browser context before closing the browser itself. > > ```javascript theme={null} > // Close the context & browser before returning results > // Otherwise the step will hang > await page.context().close(); > await browser.close(); > ``` #### Screenshot a webpage Playwright can take a full screenshot of a webpage rendered with Chromium. For full options [see the Playwright Screenshot method documentation.](https://playwright.dev/api/class-page#page-screenshot) **Save screenshot to `/tmp`** Save a screenshot within the local `/tmp` directory: ```javascript theme={null} import { playwright } from '@pipedream/browsers'; export default defineComponent({ async run({ $ }) { const browser = await playwright.launch(); const page = await browser.newPage(); await page.goto('https://pipedream.com'); await page.screenshot({ path: '/tmp/screenshot.png' }); await page.context().close(); await browser.close(); }, }); ``` **Return screenshot as a base64 encoded string** Save the screenshot as a base 64 encoded string: ```javascript theme={null} import { playwright } from '@pipedream/browsers'; export default defineComponent({ async run({ $ }) { const browser = await playwright.launch(); const page = await browser.newPage(); await page.goto('https://pipedream.com/'); const screenshotBuffer = await page.screenshot(); const screenshotBase64 = screenshotBuffer.toString('base64'); await page.context().close(); await browser.close(); return screenshotBase64; }, }); ``` #### Generate a PDF of a webpage Playwright can render a PDF of a webpage. For full options [see the Playwright Screenshot method documentation.](https://playwright.dev/api/class-page#page-pdf) **Save PDF to `/tmp`** Save a PDF locally to `/tmp`: ```javascript theme={null} import { playwright } from '@pipedream/browsers'; export default defineComponent({ async run({ $ }) { const browser = await playwright.launch(); const page = await browser.newPage(); await page.goto('https://pipedream.com'); await page.pdf({ path: '/tmp/screenshot.pdf' }); await page.context().close(); await browser.close(); }, }); ``` **Return screenshot as a base64 encoded string** Save the screenshot as a base 64 encoded string: ```javascript theme={null} import { playwright } from '@pipedream/browsers'; export default defineComponent({ async run({ $ }) { const browser = await playwright.launch(); const page = await browser.newPage(); await page.goto('https://pipedream.com/'); const screenshotBuffer = await page.pdf(); const screenshotBase64 = screenshotBuffer.toString('base64'); await page.context().close(); await browser.close(); return screenshotBase64; }, }); ``` #### Scrape content from a webpage Playwright can scrape individual elements or return all content of a webpage. **Extract the h1 tag from a webpage** Extract individual HTML elements using a CSS Selector: ```javascript theme={null} import { playwright } from '@pipedream/browsers'; export default defineComponent({ async run({ $ }) { const browser = await playwright.browser(); const page = await browser.newPage(); await page.goto('https://pipedream.com'); const h1Content = await page.$eval('h1', el => el.textContent); await page.context().close(); await browser.close(); return h1Content; }, }); ``` **Retrieve all HTML content from a webpage** Extract all HTML content from a webpage with `Page.content`: ```javascript theme={null} import { playwright } from '@pipedream/browsers'; export default defineComponent({ async run({ $ }) { const browser = await playwright.browser(); const page = await browser.newPage(); await page.goto('https://pipedream.com'); const content = await page.content(); await page.context().close(); await browser.close(); return content; }, }); ``` #### Submit a form Playwright can also programmatically click and type on a webpage. **With `Page.type`** `Page.type` accepts a CSS selector and a string to type into the selected element. ```javascript theme={null} import { playwright } from '@pipedream/browsers'; export default defineComponent({ async run({ steps, $ }) { const browser = await playwright.browser(); const page = await browser.newPage(); await page.goto('https://example.com/contact'); await page.type('input[name=email]', 'pierce@pipedream.com'); await page.type('input[name=name]', 'Dylan Pierce'); await page.type('textarea[name=message]', "Hello, from a Pipedream workflow."); await page.click('input[type=submit]'); await page.context().close(); await browser.close(); }, }); ``` **With `Page.click` and `Page.keyboard.type`** `Page.click` will click on the element to focus on it, then `Page.keyboard.type` emulates keyboard keystrokes. ```javascript theme={null} import { playwright } from '@pipedream/browsers'; export default defineComponent({ async run({ steps, $ }) { const browser = await playwright.browser(); const page = await browser.newPage(); await page.goto('https://example.com/contact'); await page.click('input[name=email]') await page.keyboard.type('pierce@pipedream.com'); await page.click('input[name=name]') await page.keyboard.type('Dylan Pierce'); await page.click('textarea[name=message]') await page.keyboard.type("Hello, from a Pipedream workflow."); await page.click('input[type=submit]'); await page.context().close(); await browser.close(); }, }); ``` ## FAQ ### Can I use this package in sources or actions? Yes, the same `@pipedream/browsers` package can be used in [actions](/docs/components/contributing/actions-quickstart/) as well as [sources](/docs/components/contributing/sources-quickstart/). The steps are the same as usage in Node.js code. Open a browser, create a page, and close the browser at the end of the code step. > [!WARNING] > > **Memory limits** > > At this time it’s not possible to configure the allocated memory to a Source. You may experience a higher rate of Out of Memory errors on Sources that use Puppeteer or Playwright due to the high usage of memory required by Chromium. ### Workflow exited before step finished execution Remember to close the browser instance *before* the step finishes. Otherwise, the browser will keep the step “open” and not transfer control to the next step. ### Out of memory errors or slow starts For best results, we recommend increasing the amount of memory available to your workflow to 2 gigabytes. You can adjust the available memory in the [workflow settings](/docs/workflows/building-workflows/settings/#memory). ### Which browser are these packages using? The `@pipedream/browsers` package includes a specific version of Chromium that is compatible with Pipedream Node.js execution environments that run your code. For details on the specific versions of Chromium, puppeter and playwright bundled in this package, visit the package’s [README](https://github.com/PipedreamHQ/pipedream/tree/master/packages/browsers). ### How to customize `puppeteer.launch()`? To pass arguments to `puppeteer.launch()` to customize the browser instance, you can pass them directly to `puppeteer.browser()`. For example, you can alter the `protocolTimeout` length just by passing it as an argument: ```javascript theme={null} import { puppeteer } from '@pipedream/browsers'; export default defineComponent({ async run({steps, $}) { // passing a `protocolTimeout` argument to increase the timeout length for a puppeteer instance const browser = await puppeteer.browser({ protocolTimeout: 480000 }); // rest of code }, }) ``` Please see the [`@pipedream/browsers` source code](https://github.com/PipedreamHQ/pipedream/blob/17888e631857259a6535f9bd13c23a1e7ff95381/packages/browsers/index.mjs#L14) for the default arguments that Pipedream provides. ### How do I use `puppeteer.connect()`? To use `puppeteer.connect()` to connect to a remote browser instance, you can use the [`puppeteer-core`](https://github.com/puppeteer/puppeteer/tree/main?tab=readme-ov-file#puppeteer-core) package: ```javascript theme={null} import puppeteer from "puppeteer-core"; ``` `puppeteer-core` does not download Chrome when installed, which decreases the size of your deployment and can improve cold start times. To connect to a remote browser instance using Playwright, you can use the [`playwright-core`](https://www.npmjs.com/package/playwright-core) package, which is the no-browser Playwright package: ```javascript theme={null} import playwright from "playwright-core"; ``` # Delaying a Workflow Source: https://pipedream.com/docs/workflows/building-workflows/code/nodejs/delay > [!WARNING] > > **Workflows and String are shutting down on March 31, 2027.** [Learn more](/docs/workflows) Use `$.flow.delay` to [delay a step in a workflow](/docs/workflows/building-workflows/control-flow/delay/). These docs show you how to write Node.js code to handle delays. If you don’t need to write code, see [our built-in delay actions](/docs/workflows/building-workflows/control-flow/delay/#delay-actions). ## Using `$.flow.delay` `$.flow.delay` takes one argument: the number of **milliseconds** you’d like to pause your workflow until the next step executes. You can pause your workflow for as little as one millisecond, or as long as one year. Note that [delays happen at the end of the step where they’re called](/docs/workflows/building-workflows/code/nodejs/delay/#when-delays-happen). ```javascript theme={null} export default defineComponent({ async run({ steps, $ }) { // Delay a workflow for 60 seconds (60,000 ms) $.flow.delay(60 * 1000) // Delay a workflow for 15 minutes $.flow.delay(15 * 60 * 1000) // Delay a workflow based on the value of incoming event data, // or default to 60 seconds if that variable is undefined $.flow.delay(steps.trigger.event?.body?.delayMs ?? 60 * 1000) // Delay a workflow a random amount of time $.flow.delay(Math.floor(Math.random() * 1000)) } }); ``` > [!NOTE] > > Paused workflow state > > When `$.flow.delay` is executed in a Node.js step, the workflow itself will enter a **Paused** state. > > While the workflow is paused, it will not incur any credits towards compute time. You can also [view all paused workflows in the Event History](/docs/workflows/event-history/#filtering-by-status). ### Credit usage The length of time a workflow is delayed from `$.flow.delay` does *not* impact your credit usage. For example, delaying a 256 megabyte workflow for five minutes will **not** incur ten credits. However, using `$.flow.delay` in a workflow will incur two credits. One credit is used to initially start the workflow, then the second credit is used when the workflow resumes after its pause period has ended. > [!NOTE] > > Exact credit usage depends on duration and memory configuration > > If your workflow’s [execution timeout limit](/docs/workflows/building-workflows/settings/#execution-timeout-limit) is set to longer than [default limit](/docs/workflows/limits/#time-per-execution), it may incur more than two [credits](/docs/pricing/#credits-and-billing) when using `pd.flow.delay`. ## `cancel_url` and `resume_url` Both the built-in **Delay** actions and `$.flow.delay` return a `cancel_url` and `resume_url` that lets you cancel or resume paused executions. These URLs are specific to a single execution of your workflow. While the workflow is paused, you can load these in your browser or send an HTTP request to either: * Hitting the `cancel_url` will immediately cancel that execution * Hitting the `resume_url` will immediately resume that execution early [Since Pipedream pauses your workflow at the *end* of the step where you run call `$.flow.delay`](/docs/workflows/building-workflows/code/nodejs/delay/#when-delays-happen), you can send these URLs to third party systems, via email, or anywhere else you’d like to control the execution of your workflow. ```javascript theme={null} import axios from 'axios' export default defineComponent({ async run({ steps, $ }) { const { cancel_url, resume_url } = $.flow.delay(15 * 60 * 1000) // Send the URLs to a system you own await axios({ method: "POST", url: `https://example.com`, data: { cancel_url, resume_url }, }); // Email yourself the URLs. Click on the links to cancel / resume $.send.email({ subject: `Workflow execution ${steps.trigger.context.id}`, text: `Cancel your workflow here: ${cancel_url} . Resume early here: ${resume_url}`, }); } }); // Delay happens at the end of this step ``` ## When delays happen **Pipedream pauses your workflow at the *end* of the step where you call `$.flow.delay`**. This lets you [send the `cancel_url` and `resume_url` to third-party systems](/docs/workflows/building-workflows/code/nodejs/delay/#cancel_url-and-resume_url). ```javascript theme={null} export default defineComponent({ async run({ steps, $ }) { const { cancel_url, resume_url } = $.flow.delay(15 * 60 * 1000) // ... run any code you want here } }); // Delay happens at the end of this step ``` ## Delays and HTTP responses You cannot run `$.respond` after running `$.flow.delay`. Pipedream ends the original execution of the workflow when `$.flow.delay` is called and issues the following response to the client to indicate this state: > \$.respond() not called for this invocation > > If you need to set a delay on an HTTP request triggered workflow, consider using [`setTimeout`](/docs/workflows/building-workflows/code/nodejs/delay/#settimeout) instead. > > ## `setTimeout` Alternatively, you can use `setTimeout` instead of using `$.flow.delay` to delay individual workflow steps. However, there are some drawbacks to using `setTimeout` instead of `$.flow.delay`. `setTimeout` will count towards your workflow’s compute time, for example: ```javascript theme={null} export default defineComponent({ async run({ steps, $ }) { // delay this step for 30 seconds const delay = 30000; return new Promise((resolve, reject) => { setTimeout(() => { resolve('timer ended') }, delay) }) } }); ``` The Node.js step above will hold the workflow’s execution for this step for 30 seconds; however, 30 seconds will also *contribute* to your credit usage. Also consider that workflows have a hard limit of 750 seconds. # Make HTTP Requests with Node.js Source: https://pipedream.com/docs/workflows/building-workflows/code/nodejs/http-requests > [!WARNING] > > **Workflows and String are shutting down on March 31, 2027.** [Learn more](/docs/workflows) HTTP requests are fundamental to working with APIs or other web services. You can make HTTP requests to retrieve data from APIs, fetch HTML from websites, or do pretty much anything your web browser can do. **Below, we’ll review how to make HTTP requests using Node.js code on Pipedream.** We’ll use the [`axios`](https://github.com/axios/axios) and [`got`](https://github.com/sindresorhus/got) HTTP clients in the examples below, but [you can use any npm package you’d like](/docs/workflows/building-workflows/code/nodejs/#using-npm-packages) on Pipedream, so feel free to experiment with other clients, too. If you’re developing Pipedream components, you may find the [`@pipedream/platform` version of `axios`](/docs/workflows/building-workflows/http/#platform-axios) helpful for displaying error data clearly in the Pipedream UI. If you’re new to HTTP, see our [glossary of HTTP terms](https://requestbin.com/blog/working-with-webhooks/#webhooks-glossary-common-terms) for a helpful introduction. ## Basic `axios` usage notes To use `axios` on Pipedream, you’ll just need to import the `axios` npm package: ```javascript theme={null} import axios from "axios"; ``` You make HTTP requests by passing a [JavaScript object](https://developer.mozilla.org/en-US/Web/JavaScript/Guide/Working_with_Objects) to `axios` that defines the parameters of the request. For example, you’ll typically want to define the HTTP method and the URL you’re sending data to: ```javascript theme={null} { method: "GET", url: `https://swapi.dev/api/films/` } ``` `axios` returns a [Promise](https://developer.mozilla.org/en-US/Web/JavaScript/Guide/Using_promises), which is just a fancy way of saying that it makes the HTTP request in the background (asynchronously) while the rest of your code runs. On Pipedream, [all asynchronous code must be run synchronously](/docs/workflows/building-workflows/code/nodejs/async/), which means you’ll need to wait for the HTTP request to finish before moving on to the next step. You do this by adding an `await` in front of the call to `axios`. **Putting all of this together, here’s how to make a basic HTTP request on Pipedream:** ```javascript theme={null} const resp = await axios({ method: "GET", url: `https://swapi.dev/api/films/`, }); ``` The response object `resp` contains a lot of information about the response: its data, headers, and more. Typically, you just care about the data, which you can access in the `data` property of the response: ```javascript theme={null} const resp = await axios({ method: "GET", url: `https://swapi.dev/api/films/`, }); // HTTP response data is in the data property const data = resp.data; ``` Alternatively, you can access the data using [object destructuring](https://developer.mozilla.org/en-US/Web/JavaScript/Reference/Operators/Destructuring_assignment#Object_destructuring), which is equivalent to the above and preferred in modern JavaScript: ```javascript theme={null} const { data } = resp; ``` ## Send a `GET` request to fetch data Make a request to retrieve Star Wars films from the Star Wars API: ```javascript axios theme={null} import axios from "axios"; export default defineComponent({ async run({ steps, $ }) { // Make an HTTP GET request using axios const res = await axios({ method: "GET", url: `https://swapi.dev/api/films/`, }); // Retrieve just the data from the response const { data } = res; } }); ``` ```javascript http-request prop theme={null} export default defineComponent({ props: { httpRequest: { type: "http_request", label: "Star Wars API request", default: { method: "GET", url: "https://swapi.dev/api/films/" } }, }, async run({ steps, $ }) { // Make an HTTP GET request using the http-request const res = await this.httpRequest.execute(); // Retrieve just the data from the response const { data } = res; }, }) ``` **Produces** ![](https://mintcdn.com/pipedream/NF77kliJSewMqg65/images/1fa5ca68-CleanShot_2022-04-14_at_14.34.16_2x_c0urph.png?fit=max\&auto=format\&n=NF77kliJSewMqg65\&q=85\&s=fafc744f9b053f1fdadc867df461c748) ## Send a `POST` request to submit data POST sample JSON to [JSONPlaceholder](https://jsonplaceholder.typicode.com/), a free mock API service: ```javascript axios theme={null} import axios from "axios"; export default defineComponent({ async run({ steps, $ }) { // Make an HTTP POST request using axios const resp = await axios({ method: "POST", url: `https://jsonplaceholder.typicode.com/posts`, data: { name: "Luke", }, }); // Retrieve just the data from the response const { data } = resp; } }); ``` ```javascript http-request prop theme={null} export default defineComponent({ props: { httpRequest: { type: "http_request", label: "JSON Placeholder API request", default: { method: "POST", url: "https://jsonplaceholder.typicode.com/posts", body: { contentType: "application/json", fields: [{ name: "Luke" }] } } }, }, async run({ steps, $ }) { // Make an HTTP GET request using the http-request const res = await this.httpRequest.execute(); // Retrieve just the data from the response const { data } = res; }, }) ``` When you make a `POST` request, you pass `POST` as the `method`, and include the data you’d like to send in the `data` object. ## Pass query string parameters to a `GET` request Retrieve fake comment data on a specific post using [JSONPlaceholder](https://jsonplaceholder.typicode.com/), a free mock API service. Here, you fetch data from the `/comments` resource, retrieving data for a specific post by query string parameter: `/comments?postId=1`. **axios** ```javascript theme={null} import axios from "axios"; export default defineComponent({ async run({ steps, $ }) { // Make an HTTP GET request using axios const resp = await axios({ method: "GET", url: `https://jsonplaceholder.typicode.com/comments`, params: { postId: 1, }, }); // Retrieve just the data from the response const { data } = resp; } }); ``` **http-request prop** ```javascript theme={null} export default defineComponent({ props: { httpRequest: { type: "http_request", label: "JSON Placeholder API request", default: { method: "GET", url: "https://jsonplaceholder.typicode.com/comments", params: { fields: [{ postId: 1 }] } } }, }, async run({ steps, $ }) { // Make an HTTP GET request using the http-request const res = await this.httpRequest.execute(); // Retrieve just the data from the response const { data } = res; }, }) ``` You should pass query string parameters using the `params` object, like above. When you do, `axios` automatically [URL-encodes](https://www.w3schools.com/tags/ref_urlencode.ASP) the parameters for you, which you’d otherwise have to do manually. ## Send a request with HTTP headers You pass HTTP headers in the `headers` object of the `axios` request: ```javascript theme={null} import axios from "axios"; // Make an HTTP POST request using axios const resp = await axios({ method: "POST", url: `https://jsonplaceholder.typicode.com/posts`, headers: { "Content-Type": "application/json", }, data: { name: "Luke", }, }); ``` ## Send a request with a secret or API key Most APIs require you authenticate HTTP requests with an API key or other token. **Please review the docs for your service to understand how they accept this data.** Here’s an example showing an API key passed in an HTTP header: ```javascript theme={null} import axios from "axios"; // Make an HTTP POST request using axios const resp = await axios({ method: "POST", url: `https://jsonplaceholder.typicode.com/posts`, headers: { "Content-Type": "application/json", "X-API-Key": "123", // API KEY }, data: { name: "Luke", }, }); ``` [Copy this workflow to run this code on Pipedream](https://pipedream.com/@dylburger/send-an-http-request-with-headers-p_q6ClzO/edit). ## Send multiple HTTP requests in sequence There are many ways to make multiple HTTP requests. This code shows you a simple example that sends the numbers `1`, `2`, and `3` in the body of an HTTP POST request: ```javascript theme={null} import axios from "axios"; export default defineComponent({ async run({ steps, $ }) { // We'll store each response and return them in this array const responses = []; for await (const num of [1, 2, 3]) { const resp = await axios({ method: "POST", url: "https://example.com", data: { num, // Will send the current value of num in the loop }, }); responses.push(resp.data); } return responses; }, }); ``` This sends each HTTP request *in sequence*, one after another, and returns an array of response data returned from the URL to which you send the POST request. If you need to make requests *in parallel*, [see these docs](/docs/workflows/building-workflows/code/nodejs/http-requests/#send-multiple-http-requests-in-parallel). [Copy this workflow](https://pipedream.com/@dylburger/iterate-over-a-pipedream-step-export-sending-multiple-http-requests-p_ljCAPN/edit) and fill in your destination URL to see how this works. **This workflow iterates over the value of a Pipedream [step export](/docs/workflows/overview/#step-exports)** - data returned from a previous step. Since you often want to iterate over data returned from a Pipedream action or other code step, this is a common use case. ## Send multiple HTTP requests in parallel Sometimes you’ll want to make multiple HTTP requests in parallel. If one request doesn’t depend on the results of another, this is a nice way to save processing time in a workflow. It can significantly cut down on the time you spend waiting for one request to finish, and for the next to begin. To make requests in parallel, you can use two techniques. By default, we recommend using [`promise.allSettled`](https://developer.mozilla.org/en-US/Web/JavaScript/Reference/Global_Objects/Promise/allSettled), which makes all HTTP requests and returns data on their success / failure. If an HTTP request fails, all other requests will proceed. ```javascript theme={null} import axios from "axios"; export default defineComponent({ async run({ steps, $ }) { const arr = [ "https://www.example.com", "https://www.cnn.com", "https://www.espn.com", ]; const promises = arr.map((url) => axios.get(url)); return Promise.allSettled(promises); }, }); ``` First, we generate an array of `axios.get` requests (which are all [Promises](https://developer.mozilla.org/en-US/Web/JavaScript/Reference/Global_Objects/Promise)), and then call `Promise.allSettled` to run them in parallel. When you want to stop future requests when *one* of the requests fails, you can use [`Promise.all`](https://developer.mozilla.org/en-US/Web/JavaScript/Reference/Global_Objects/Promise/all), instead: ```javascript theme={null} import axios from "axios"; export default defineComponent({ async run({ steps, $ }) { const arr = [ "https://www.example.com", "https://www.cnn.com", "https://www.espn.com", ]; const promises = arr.map((url) => axios.get(url)); return Promise.all(promises); }, }); ``` The Mozilla docs expand on the difference between these methods, and when you may want to use one or the other: > The `Promise.allSettled()` method returns a promise that resolves after all of the given promises have either fulfilled or rejected, with an array of objects that each describes the outcome of each promise.\ > It is typically used when you have multiple asynchronous tasks that are not dependent on one another to complete successfully, or you’d always like to know the result of each promise.\ > In comparison, the Promise returned by `Promise.all()` may be more appropriate if the tasks are dependent on each other / if you’d like to immediately reject upon any of them rejecting. ## Send a `multipart/form-data` request ```javascript axios theme={null} import axios from "axios"; import FormData from "form-data"; export default defineComponent({ async run({ steps, $ }) { const formData = new FormData(); formData.append("name", "Luke Skywalker"); const headers = formData.getHeaders(); const config = { method: "POST", url: "https://example.com", headers, data: formData, }; return await axios(config); } }); ``` ```javascript http-request prop theme={null} export default defineComponent({ props: { httpRequest: { type: "http_request", label: "Example Multipart Form Request", default: { method: "POST", url: "https://example.com", headers: { contentType: "multipart/form-data", fields: [{ name: "Luke Skywalker" }] } } }, }, async run({ steps, $ }) { // Make an HTTP GET request using the http-request const res = await this.httpRequest.execute(); // Retrieve just the data from the response const { data } = res; }, }) ``` [Copy this workflow](https://pipedream.com/@dylburger/send-a-multipart-form-data-request-p_WxCQRyr/edit) to run this example. ## Download a file to the `/tmp` directory This example shows you how to download a file to a file in [the `/tmp` directory](/docs/workflows/building-workflows/code/nodejs/working-with-files/). This can be especially helpful for downloading large files: it streams the file to disk, minimizing the memory the workflow uses when downloading the file. ```javascript theme={null} import { pipeline } from "stream/promises"; import fs from "fs"; import got from "got"; export default defineComponent({ async run({ steps, $ }) { // Download the webpage HTML file to /tmp return await pipeline( got.stream("https://example.com"), fs.createWriteStream('/tmp/file.html') ); } }) ``` [Copy this workflow](https://pipedream.com/new?h=tch_wqKfoW) to run this example. ## Upload a file from the `/tmp` directory This example shows you how to make a `multipart/form-data` request with a file as a form part. You can store and read any files from [the `/tmp` directory](/docs/workflows/building-workflows/code/nodejs/working-with-files/#the-tmp-directory). This can be especially helpful for uploading large files: it streams the file from disk, minimizing the memory the workflow uses when uploading the file. ```javascript theme={null} import axios from "axios"; import fs from "fs"; import FormData from "form-data"; export default defineComponent({ async run({ steps, $ }) { const formData = new FormData(); formData.append("file", fs.createReadStream('/tmp/file.pdf')); const headers = formData.getHeaders(); const config = { method: "POST", url: "https://example.com", headers, data: formData, }; return await axios(config); } }); ``` [Copy this workflow](https://pipedream.com/new?h=tch_Oknf4r) to run this example. ## IP addresses for HTTP requests made from Pipedream workflows By default, [HTTP requests made from Pipedream can come from a large range of IP addresses](/docs/privacy-and-security/#hosting-details). **If you need to restrict the IP addresses HTTP requests come from, you have two options**: * [Use a Pipedream VPC](/docs/workflows/vpc/) to route all outbound HTTP requests through a single IP address * If you don’t need to access the HTTP response data, you can [use `$send.http()`](/docs/workflows/data-management/destinations/http/) to send requests from a [limited set of IP addresses](/docs/workflows/data-management/destinations/http/#ip-addresses-for-pipedream-http-requests). ## Use an HTTP proxy to proxy requests through another host By default, HTTP requests made from Pipedream can come from a range of IP addresses. **If you need to make requests from a single IP address, you can route traffic through an HTTP proxy**: ```javascript theme={null} import axios from "axios"; import httpsProxyAgent from "https-proxy-agent"; export default defineComponent({ props: { user: { type: 'string', label: 'Username', description: 'The username for the HTTP proxy authentication', }, pass: { type: 'string', label: 'Password', secret: true, description: 'The password for the HTTP proxy authentication', }, host: { type: 'string', label: "HTTP Proxy Host", description: "The URL for the HTTP proxy", }, port: { type: "string", label: "Port", description: "The port the HTTP proxy is accepting requests at", }, target_host: { type: 'string', label: "Target Host", description: "The URL for the end target to reach through the proxy", }, method: { type: 'string', default: 'GET', label: "HTTP method", description: "The HTTP method to use to reach the end target host" }, body: { type: 'object', label: "HTTP body", description: "The HTTP body payload to send to the end target host" } }, async run({ steps, $ }) { const { user, pass, host, port, target_host, method } = this; const agent = new httpsProxyAgent(`http://${user}:${pass}@${host}:${port}`); const config = { method, url: target_host, body, httpsAgent: agent, }; return await axios.request(config); } }); ``` [Copy this workflow to run this code on Pipedream](https://pipedream.com/new?h=tch_mypfby). ## Stream a downloaded file directly to another URL Sometimes you need to upload a downloaded file directly to another service, without processing the downloaded file. You could [download the file](/docs/workflows/building-workflows/code/nodejs/http-requests/#download-a-file-to-the-tmp-directory) and then [upload it](/docs/workflows/building-workflows/code/nodejs/http-requests/#upload-a-file-from-the-tmp-directory) to the other URL, but these intermediate steps are unnecessary: you can just stream the download to the other service directly, without saving the file to disk. This method is especially effective for large files that exceed the [limits of the `/tmp` directory](/docs/workflows/limits/#disk). [Copy this workflow](https://pipedream.com/@dylburger/stream-download-to-upload-p_5VCLoa1/edit) or paste this code into a [new Node.js code step](/docs/workflows/building-workflows/code/nodejs/): ```javascript theme={null} import stream from "stream"; import { promisify } from "util"; import got from "got"; export default defineComponent({ async run({ steps, $ }) { const pipeline = promisify(stream.pipeline); await pipeline( got.stream("https://example.com"), got.stream.post("https://example2.com") ); } }); ``` You’ll want to replace `https://example.com` with the URL you’d like to stream data from, and replace `https://example2.com` with the URL you’d like to send the data *to*. `got` streams the content directly, downloading the file using a `GET` request and uploading it as a `POST` request. If you need to modify this behavior, [see the `got` Stream API](https://github.com/sindresorhus/got#gotstreamurl-options). ## Catch and process HTTP errors By default, `axios` throws an error when the HTTP response code is in the 400-500 range (a client or server error). If you’d like to process the error data instead of throwing an error, you can pass a custom function to the `validateStatus` property: ```javascript theme={null} import axios from "axios"; export default defineComponent({ async run({ steps, $ }) { const resp = await axios({ url: "https://httpstat.us/400", validateStatus: () => true, // will not throw error when axios gets a 400+ status code (the default behavior) }); if (resp.status >= 400) { this.debug = resp; throw new Error(JSON.stringify(resp.data)); // This can be modified to throw any error you'd like } return resp; } }); ``` See [the `axios` docs](https://github.com/axios/axios#request-config) for more details. ## Paginating API requests When you fetch data from an API, the API may return records in “pages”. For example, if you’re trying to fetch a list of 1,000 records, the API might return those in groups of 100 items. Different APIs paginate data in different ways. You’ll need to consult the docs of your API provider to see how they suggest you paginate through records. ## Send GraphQL request Make a GraphQL request using the `graphql-request` npm package: ```javascript theme={null} import { graphql } from 'graphql' import { request, gql } from 'graphql-request' export default defineComponent({ async run({ steps, $ }) { const document = gql` query samplePokeAPIquery { generations: pokemon_v2_generation { name pokemon_species: pokemon_v2_pokemonspecies_aggregate { aggregate { count } } } } ` return await request('https://beta.pokeapi.co/graphql/v1beta', document) }, }) ``` > [!NOTE] > > The graphql package is required > > The `graphql` package is required for popular GraphQL clients to function, like `graphql-request` and `urql`. > > Even though you will not need to use the `graphql` code itself in your code step, it’s required to import it in order for `graphql-request` to function. ### Send an authenticated GraphQL request Authenticate your connected accounts in Pipedream with GraphQL requests using the `app` prop: ```javascript theme={null} import { graphql } from 'graphql' import { GraphQLClient, gql } from 'graphql-request' export default defineComponent({ props: { github: { type: 'app', app: 'github' } }, async run({ steps, $ }) { const me = gql` query { viewer { login } } ` const client = new GraphQLClient('https://api.github.com/graphql', { headers: { authorization: `Bearer ${this.github.$auth.oauth_access_token}`, }, }) return await client.request(me) }, }) ``` Alternatively, you can use Environment Variables as well for simple API key based GraphQL APIs. # Pause, Resume, and Rerun a Workflow Source: https://pipedream.com/docs/workflows/building-workflows/code/nodejs/rerun > [!WARNING] > > **Workflows and String are shutting down on March 31, 2027.** [Learn more](/docs/workflows) You can use `$.flow.suspend` and `$.flow.rerun` to pause a workflow and resume it later. This is useful when you want to: * Pause a workflow until someone manually approves it * Poll an external API until some job completes, and proceed with the workflow when it’s done * Trigger an external API to start a job, pause the workflow, and resume it when the external API sends an HTTP callback We’ll cover all of these examples below. ## `$.flow.suspend` Use `$.flow.suspend` when you want to pause a workflow and proceed with the remaining steps only when manually approved or cancelled. For example, you can suspend a workflow and send yourself a link to manually resume or cancel the rest of the workflow: ```javascript theme={null} export default defineComponent({ async run({ $ }) { const { resume_url, cancel_url } = $.flow.suspend(); $.send.email({ subject: "Please approve this important workflow", text: `Click here to approve the workflow: ${resume_url}, and cancel here: ${cancel_url}`, }); // Pipedream suspends your workflow at the end of the step }, }); ``` You’ll receive an email like this: ![](https://mintcdn.com/pipedream/nKh6d_6A4aXFb6xD/images/e970ce4a-approve-workflow_oc06k3.png?fit=max\&auto=format\&n=nKh6d_6A4aXFb6xD\&q=85\&s=35a084406b8d3f88d428adf4a62bff5d) And can resume or cancel the rest of the workflow by clicking on the appropriate link. ### `resume_url` and `cancel_url` In general, calling `$.flow.suspend` returns a `cancel_url` and `resume_url` that lets you cancel or resume paused executions. Since Pipedream pauses your workflow at the *end* of the step, you can pass these URLs to any external service before the workflow pauses. If that service accepts a callback URL, it can trigger the `resume_url` when its work is complete. These URLs are specific to a single execution of your workflow. While the workflow is paused, you can load these in your browser or send any HTTP request to them: * Sending an HTTP request to the `cancel_url` will cancel that execution * Sending an HTTP request to the `resume_url` will resume that execution If you resume a workflow, any data sent in the HTTP request is passed to the workflow and returned in the `$resume_data` [step export](/docs/workflows/overview/#step-exports) of the suspended step. For example, if you call `$.flow.suspend` within a step named `code`, the `$resume_data` export should contain the data sent in the `resume_url` request: ![](https://mintcdn.com/pipedream/xnRKrRxEtt3vxd6I/images/c9712a37-resume_data_lafhxr.png?fit=max\&auto=format\&n=xnRKrRxEtt3vxd6I\&q=85\&s=215b09447a5b7900949c2347b5e74d4c) Requests to the `resume_url` have [the same limits as any HTTP request to Pipedream](/docs/workflows/limits/#http-request-body-size), but you can send larger payloads using our [large payload](/docs/workflows/building-workflows/triggers/#sending-large-payloads) or [large file](/docs/workflows/building-workflows/triggers/#large-file-support) interfaces. ### Default timeout of 24 hours By default, `$.flow.suspend` will automatically cancel the workflow after 24 hours. You can set your own timeout (in milliseconds) as the first argument: ```javascript theme={null} export default defineComponent({ async run({ $ }) { // 7 days const TIMEOUT = 1000 * 60 * 60 * 24 * 7; $.flow.suspend(TIMEOUT); }, }); ``` ## `$.flow.rerun` Use `$.flow.rerun` when you want to run a specific step of a workflow multiple times. This is useful when you need to start a job in an external API and poll for its completion, or have the service call back to the step and let you process the HTTP request within the step. ### Retrying a Failed API Request `$.flow.rerun` can be used to conditionally retry a failed API request due to a service outage or rate limit reached. Place the `$.flow.rerun` call within a `catch` block to only retry the API request if an error is thrown: ```javascript theme={null} import { axios } from "@pipedream/platform"; export default defineComponent({ props: { openai: { type: "app", app: "openai", }, }, async run({ steps, $ }) { try { return await axios($, { url: `https://api.openai.com/v1/completions`, method: "post", headers: { Authorization: `Bearer ${this.openai.$auth.api_key}`, }, data: { model: "text-davinci-003", prompt: "Say this is a test", max_tokens: 7, temperature: 0, }, }); } catch (error) { const MAX_RETRIES = 3; const DELAY = 1000 * 30; // Retry the request every 30 seconds, for up to 3 times $.flow.rerun(DELAY, null, MAX_RETRIES); } }, }); ``` ### Polling for the status of an external job Sometimes you need to poll for the status of an external job until it completes. `$.flow.rerun` lets you rerun a specific step multiple times: ```javascript theme={null} import axios from "axios"; export default defineComponent({ async run({ $ }) { const MAX_RETRIES = 3; // 10 seconds const DELAY = 1000 * 10; const { run } = $.context; // $.context.run.runs starts at 1 and increments when the step is rerun if (run.runs === 1) { // $.flow.rerun(delay, context (discussed below), max retries) $.flow.rerun(DELAY, null, MAX_RETRIES); } else if (run.runs === MAX_RETRIES + 1) { throw new Error("Max retries exceeded"); } else { // Poll external API for status const { data } = await axios({ method: "GET", url: "https://example.com/status", }); // If we're done, continue with the rest of the workflow if (data.status === "DONE") return data; // Else retry later $.flow.rerun(DELAY, null, MAX_RETRIES); } }, }); ``` `$.flow.rerun` accepts the following arguments: ```javascript theme={null} $.flow.rerun( delay, // The number of milliseconds until the step will be rerun context, // JSON-serializable data you need to pass between runs maxRetries // The total number of times the step will rerun. Defaults to 10 ); ``` ### Accept an HTTP callback from an external service When you trigger a job in an external service, and that service can send back data in an HTTP callback to Pipedream, you can process that data within the same step using `$.flow.rerun`: ```javascript theme={null} import axios from "axios"; export default defineComponent({ async run({ steps, $ }) { const TIMEOUT = 86400 * 1000; const { run } = $.context; // $.context.run.runs starts at 1 and increments when the step is rerun if (run.runs === 1) { const { cancel_url, resume_url } = $.flow.rerun(TIMEOUT, null, 1); // Send resume_url to external service await axios({ method: "POST", url: "your callback URL", data: { resume_url, cancel_url, }, }); } // When the external service calls back into the resume_url, you have access to // the callback data within $.context.run.callback_request else if (run.callback_request) { return run.callback_request; } }, }); ``` ### Passing `context` to `$.flow.rerun` Within a Node.js code step, `$.context.run.context` contains the `context` passed from the prior call to `rerun`. This lets you pass data from one run to another. For example, if you call: ```javascript theme={null} $.flow.rerun(1000, { hello: "world" }); ``` `$.context.run.context` will contain: ![](https://mintcdn.com/pipedream/xnRKrRxEtt3vxd6I/images/da6c184e-Screen_Shot_2022-06-14_at_11.32.06_PM_dmzgkh.png?fit=max\&auto=format\&n=xnRKrRxEtt3vxd6I\&q=85\&s=e634f74069415264dfd45803c6a5fb83) ### `maxRetries` By default, `maxRetries` is **10**. When you exceed `maxRetries`, the workflow proceeds to the next step. If you need to handle this case with an exception, `throw` an error from the step: ```javascript theme={null} export default defineComponent({ async run({ $ }) { const MAX_RETRIES = 3; const { run } = $.context; if (run.runs === 1) { $.flow.rerun(1000, null, MAX_RETRIES); } else if (run.runs === MAX_RETRIES + 1) { throw new Error("Max retries exceeded"); } }, }); ``` ## Behavior when testing When you’re building a workflow and test a step with `$.flow.suspend` or `$.flow.rerun`, it will not suspend the workflow, and you’ll see a message like the following: > Workflow execution canceled — this may be due to `$.flow.suspend()` usage (not supported in test) These functions will only suspend and resume when run in production. ## Credits when using `suspend` / `rerun` You are not charged for the time your workflow is suspended during a `$.flow.rerun` or `$.flow.suspend`. Only when workflows are resumed will compute time count toward [credit usage](/docs/pricing/#credits-and-billing). > [!WARNING] > > When a suspended workflow reawakens, it will reset the credit counter. > > Each rerun or reawakening from a suspension will count as a new fresh credit. # Sharing Code Across Workflows Source: https://pipedream.com/docs/workflows/building-workflows/code/nodejs/sharing-code > [!WARNING] > > **Workflows and String are shutting down on March 31, 2027.** [Learn more](/docs/workflows) [Actions](/docs/components/contributing/#actions) are reusable steps. When you author an action, you can add it to your workflow like you would other actions, by clicking the **+** button below any step. Pipedream provides two ways to share code across workflows: * **Publish an action from a Node.js code step**. [Publish any Node.js code step as a reusable action](/docs/workflows/building-workflows/code/nodejs/sharing-code/#publish-an-action-from-a-nodejs-code-step) from the Pipedream dashboard. * **Create an action from code**. Develop your action code on your local filesystem and [publish to your Pipedream account using the Pipedream CLI](/docs/components/contributing/actions-quickstart/). ## Publish an action from a Node.js code step You can publish any of your Node.js code steps into a reusable action. This enables you to write a Node.js code step once, and reuse it across many workflows without rewriting it. To convert a Node.js code step into an publishable action, make sure to include the below properties in your Node.js step: * `version` * `name` * `key` * `type` ```js highlight={6-9} theme={null} // Adding properties to a regular Node.js code step make it publishable import { parseISO, format } from 'date-fns'; // Returns a formatted datetime string export default defineComponent({ name: 'Format Date', version: '0.0.1', key: 'format-date', type: 'action', props: { date: { type: "string", label: "Date", description: "Date to be formatted", }, format: { type: 'string', label: "Format", description: "Format to apply to the date. [See date-fns format](https://date-fns.org/v2.29.3/format) as a reference." } }, async run({ $ }) { const formatted = format(parseISO(this.date), this.format); return formatted; }, }) ``` Click **Test** to verify the step is working as expected. Only actions that have been successfully tested are to be published. Then open the menu in the top right hand corner of the code step and select **Publish to My Actions**: ![](https://mintcdn.com/pipedream/grEzwYhEB2vZSwGw/images/838c5822-CleanShot_2022-10-03_at_10.03.08_2x_lpbjjs.png?fit=max\&auto=format\&n=grEzwYhEB2vZSwGw\&q=85\&s=a88d49623504ec5cfae2746422bb28a1) And now you’ve successfully saved a custom Node.js code step to your account. You’ll be able to use this code step in any of your workflows. > [!NOTE] > > **Why can’t I use the `steps` variable in published Node.js code steps?** > > The `steps` variable contains the *workflows* step exports. > > When you publish a Node.js code step as an action, it becomes reusable across many workflows. > > This means that the step exports available vary depending on the workflow it’s running on. > > Defining props is a way to map inputs to actions and allow individual workflows to define which exports should be used. ## Using your published actions To use your custom action, create a new step in your workflow and select **My Actions**. ![](https://mintcdn.com/pipedream/grEzwYhEB2vZSwGw/images/7cc577e8-CleanShot_2022-10-03_at_10.08.42_2x_qt1ht3.png?fit=max\&auto=format\&n=grEzwYhEB2vZSwGw\&q=85\&s=fa8561624e60c004f2cd7f4a38ec92ef) From there you’ll be able to view and select any of your published actions and use them as steps. ## Updating published Node.js code step actions If you need to make a change and update the underlying code to your published Node.js code step, you can do so by incrementing the `version` field on the Node.js code step. Every instance of your published action from a code step is editable. In any workflow where you’ve reused a published action, open the menu on the right side of the action and click **Edit action** button. This will open up the code editor for this action, even if this wasn’t the original code step. Now increment the `version` field in the code: ```js highlight={6} theme={null} import { parseISO, format } from 'date-fns'; // The version field on a Node.js action is versioned export default defineComponent({ name: 'Format Date', version: '0.0.2', key: 'format-date', type: 'action', props: { date: { type: "string", label: "Date", description: "Date to be formatted", }, format: { type: 'string', label: "Format", description: "Format to apply to the date. [See date-fns format](https://date-fns.org/v2.29.3/format) as a reference." } }, async run({ $ }) { const formatted = format(parseISO(this.date), this.format); return formatted; }, }) ``` Finally use the **Publish to My Actions** button in the right hand side menu to publish this new version. > [!NOTE] > > **I’m not seeing an Edit Action button option in my step** > > The **Edit Action** button is only available for actions that are published from Node.js code steps. > > Actions submitted to the public component registry can contain multiple files. At this time it’s not possible to edit multi-file components direct in a code step. > [!NOTE] > > **Will publishing a new version of an action automatically update all other steps using it?** > > No, a new version of an action doesn’t automatically update all instances of the same action across your workflows. This gives you the control to gradually update. After publishing a new version, all other steps using this same action will have the option to [update to the latest version](/docs/workflows/building-workflows/actions/#updating-actions-to-the-latest-version). ## Differences between publishing actions from workflow Node.js code steps and directly from code Publishing reusable actions from Node.js code steps allows you to quickly scaffold and publish Node.js code steps without leaving the Pipedream dashboard. The result is the same as publishing actions from code using the Pipedream CLI. However, there are some differences. 1. Node.js code step actions cannot make use of [app files to further reduce redundancy](/docs/components/contributing/guidelines/#promoting-reusability). 2. Node.js code step actions cannot be published to the [Pipedream Component Registry](/docs/components/contributing/). 3. Node.js code step actions have a slightly different structure than [action components](/docs/components/contributing/api/#component-api). # Using Data Stores Source: https://pipedream.com/docs/workflows/building-workflows/code/nodejs/using-data-stores > [!WARNING] > > **Workflows and String are shutting down on March 31, 2027.** [Learn more](/docs/workflows) In Node.js (JavaScript) code steps, you can also store and retrieve data within code steps without connecting a 3rd party database. Add data stores to steps as props. By adding the store as a prop, it’s available under `this`. For example, you can define a data store as a dataStore prop, and reference it at `this.dataStore`: ```javascript theme={null} export default defineComponent({ props: { // Define that the "dataStore" variable in our component is a data store dataStore: { type: "data_store" }, }, async run({ steps, $ }) { // Now we can access the data store at "this.dataStore" await this.dataStore.get("email"); }, }); ``` > [!NOTE] > > **`props` injects variables into `this`**. See how we declared the `dataStore` prop in the `props` object, and then accessed it at `this.dataStore` in the `run` method. > [!WARNING] > > All data store operations are asynchronous, so must be `await`ed. ## Using the data store Once you’ve defined a data store prop for your component, then you’ll be able to create a new data store or use an existing one from your account. ![](https://mintcdn.com/pipedream/grEzwYhEB2vZSwGw/images/7acb3159-image.png?fit=max\&auto=format\&n=grEzwYhEB2vZSwGw\&q=85\&s=2ca53b2efb88584b1fecaf7534e27416) ## Saving data Data Stores are key-value stores. Save data within a Data Store using the `this.dataStore.set` method. The first argument is the *key* where the data should be held, and the second argument is the *value* assigned to that key. ```javascript theme={null} export default defineComponent({ props: { dataStore: { type: "data_store" }, }, async run({ steps, $ }) { // Store a timestamp each time this step is executed in the workflow await this.dataStore.set("lastRanAt", new Date()); }, }); ``` ### Setting expiration (TTL) for records You can set an expiration time for a record by passing a TTL (Time-To-Live) option as the third argument to the `set` method. The TTL value is specified in seconds: ```javascript theme={null} export default defineComponent({ props: { dataStore: { type: "data_store" }, }, async run({ steps, $ }) { // Store a temporary value that will expire after 1 hour (3600 seconds) await this.dataStore.set("temporaryToken", "abc123", { ttl: 3600 }); // Store a value that will expire after 1 day await this.dataStore.set("dailyMetric", 42, { ttl: 86400 }); }, }); ``` When the TTL period elapses, the record will be automatically deleted from the data store. ### Updating TTL for existing records You can update the TTL for an existing record using the `setTtl` method: ```javascript theme={null} export default defineComponent({ props: { dataStore: { type: "data_store" }, }, async run({ steps, $ }) { // Update an existing record to expire after 30 minutes await this.dataStore.setTtl("temporaryToken", 1800); // Remove expiration from a record await this.dataStore.setTtl("temporaryToken", null); }, }); ``` This is useful for extending the lifetime of temporary data or removing expiration from records that should now be permanent. ## Retrieving keys Fetch all the keys in a given Data Store using the `keys` method: ```javascript theme={null} export default defineComponent({ props: { dataStore: { type: "data_store" }, }, async run({ steps, $ }) { // Return a list of all the keys in a given Data Store return await this.dataStore.keys(); }, }); ``` ## Checking for the existence of specific keys If you need to check whether a specific `key` exists in a Data Store, you can pass the `key` to the `has` method to get back a `true` or `false`: ```javascript theme={null} export default defineComponent({ props: { dataStore: { type: "data_store" }, }, async run({ steps, $ }) { // Check if a specific key exists in your Data Store return await this.dataStore.has("lastRanAt"); }, }); ``` ## Retrieving data You can retrieve data with the Data Store using the `get` method. Pass the *key* to the `get` method to retrieve the content that was stored there with `set`. ```javascript theme={null} export default defineComponent({ props: { dataStore: { type: "data_store" }, }, async run({ steps, $ }) { // Check if the lastRanAt key exists const lastRanAt = await this.dataStore.get("lastRanAt"); }, }); ``` ## Retrieving all records Use an async iterator to efficiently retrieve all records or keys in your data store: ```javascript theme={null} export default defineComponent({ props: { dataStore: { type: "data_store" }, }, async run({ steps, $ }) { const records = {}; for await (const [k,v] of this.dataStore) { records[k] = v; } return records; }, }); ``` ## Deleting or updating values within a record To delete or update the *value* of an individual record, use the `set` method for an existing `key` and pass either the new value or `''` as the second argument to remove the value but retain the key. ```javascript theme={null} export default defineComponent({ props: { dataStore: { type: "data_store" }, }, async run({ steps, $ }) { // Update the value associated with the key, myKey await this.dataStore.set("myKey", "newValue"); // Remove the value but retain the key await this.dataStore.set("myKey", ""); }, }); ``` ## Deleting specific records To delete individual records in a Data Store, use the `delete` method for a specific `key`: ```javascript theme={null} export default defineComponent({ props: { dataStore: { type: "data_store" }, }, async run({ steps, $ }) { // Delete the lastRanAt record const lastRanAt = await this.dataStore.delete("lastRanAt"); }, }); ``` ## Deleting all records from a specific Data Store If you need to delete all records in a given Data Store, you can use the `clear` method. **Note that this is an irreversible change, even when testing code in the workflow builder.** ```javascript theme={null} export default defineComponent({ props: { dataStore: { type: "data_store" }, }, async run({ steps, $ }) { // Delete all records from a specific Data Store return await this.dataStore.clear(); }, }); ``` ## Viewing store data You can view the contents of your data stores in your [Pipedream dashboard](https://pipedream.com/stores). From here you can also manually edit your data store’s data, rename stores, delete stores or create new stores. ## Using multiple data stores in a single code step It is possible to use multiple data stores in a single code step, just make a unique name per store in the `props` definition. Let’s define 2 separate `customers` and `orders` data sources and leverage them in a single code step: ```javascript theme={null} export default defineComponent({ props: { customers: { type: "data_store" }, orders: { type: "data_store" }, }, async run({ steps, $ }) { // Retrieve the customer from our customer store const customer = await this.customer.get(steps.trigger.event.customer_id); // Retrieve the order from our order data store const order = await this.orders.get(steps.trigger.event.order_id); }, }); ``` ## Workflow counter example You can use a data store as a counter. For example, this code counts the number of times the workflow runs: ```javascript theme={null} export default defineComponent({ props: { dataStore: { type: "data_store" }, }, async run({ steps, $ }) { // By default, all database entries are undefined. // It's wise to set a default value so our code as an initial value to work with const counter = (await this.dataStore.get("counter")) ?? 0; // On the first run "counter" will be 0 and we'll increment it to 1 // The next run will increment the counter to 2, and so forth await this.dataStore.set("counter", counter + 1); }, }); ``` ## Dedupe data example Data Stores are also useful for storing data from prior runs to prevent acting on duplicate data, or data that’s been seen before. For example, this workflow’s trigger contains an email address from a potential new customer. But we want to track all emails collected so we don’t send a welcome email twice: ```javascript theme={null} export default defineComponent({ props: { dataStore: { type: "data_store" }, }, async run({ steps, $ }) { const email = steps.trigger.event.body.new_customer_email; // Retrieve the past recorded emails from other runs const emails = (await this.dataStore.get("emails")) ?? []; // If the current email being passed from our webhook is already in our list, exit early if (emails.includes(email)) { return $.flow.exit("Already welcomed this user"); } // Add the current email to the list of past emails so we can detect it in the future runs await this.dataStore.set("emails", [...emails, email]); }, }); ``` ## TTL use case: temporary caching and rate limiting TTL functionality is particularly useful for implementing temporary caching and rate limiting. Here’s an example of a simple rate limiter that prevents a user from making more than 5 requests per hour: ```javascript theme={null} export default defineComponent({ props: { dataStore: { type: "data_store" }, }, async run({ steps, $ }) { const userId = steps.trigger.event.userId; const rateKey = `ratelimit:${userId}`; // Try to get current rate limit counter let requests = await this.dataStore.get(rateKey); if (requests === undefined) { // First request from this user in the time window await this.dataStore.set(rateKey, 1, { ttl: 3600 }); // Expire after 1 hour return { allowed: true, remaining: 4 }; } if (requests >= 5) { // Rate limit exceeded return { allowed: false, error: "Rate limit exceeded", retryAfter: "1 hour" }; } // Increment the counter await this.dataStore.set(rateKey, requests + 1); return { allowed: true, remaining: 4 - requests }; }, }); ``` This pattern can be extended for various temporary caching scenarios like: * Session tokens with automatic expiration * Short-lived feature flags * Temporary access grants * Time-based promotional codes ### Supported data types Data stores can hold any JSON-serializable data within the storage limits. This includes data types including: * Strings * Objects * Arrays * Dates * Integers * Floats But you cannot serialize Functions, Classes, or other more complex objects. # Working with the Filesystem in Node.js Source: https://pipedream.com/docs/workflows/building-workflows/code/nodejs/working-with-files > [!WARNING] > > **Workflows and String are shutting down on March 31, 2027.** [Learn more](/docs/workflows) You’ll commonly need to work with files in a workflow, for example: downloading content from some service to upload to another. This doc explains how to work with files in Pipedream workflows and provides some sample code for common operations. ## The `/tmp` directory Within a workflow, you have full read-write access to the `/tmp` directory. You have 2GB of available space in `/tmp` to save any file. ### Managing `/tmp` across workflow runs The `/tmp` directory is stored on the virtual machine that runs your workflow. We call this the execution environment (“EE”). More than one EE may be created to handle high-volume workflows. And EEs can be destroyed at any time (for example, after about 10 minutes of receiving no events). This means that you should not expect to have access to files across executions. At the same time, files *may* remain, so you should clean them up to make sure that doesn’t affect your workflow. **Use [the `tmp-promise` package](https://github.com/benjamingr/tmp-promise) to cleanup files after use, or [delete the files manually](/docs/workflows/building-workflows/code/nodejs/working-with-files/#delete-a-file).** ### Reading a file from `/tmp` This example uses [step exports](/docs/workflows/overview/#step-exports) to return the contents of a test file saved in `/tmp` as a string: ```javascript theme={null} import fs from "fs"; export default defineComponent({ async run({ steps, $ }) { return (await fs.promises.readFile('/tmp/your-file')).toString() } }); ``` ### Writing a file to `/tmp` Use the [`fs` module](https://nodejs.org/api/fs.html) to write data to `/tmp`: ```javascript theme={null} import fs from "fs" import { file } from 'tmp-promise' export default defineComponent({ async run({ steps, $ }) { const { path, cleanup } = await file(); await fs.promises.appendFile(path, Buffer.from("hello, world")) await cleanup(); } }); ``` ### Listing files in `/tmp` Return a list of the files saved in `/tmp`: ```javascript theme={null} import fs from "fs"; export default defineComponent({ async run({ steps, $ }) { return fs.readdirSync("/tmp"); } }); ``` ### Delete a file ```javascript theme={null} import fs from "fs"; export default defineComponent({ async run({ steps, $ }) { return await fs.promises.unlink('/tmp/your-file'); } }); ``` ### Download a file to `/tmp` [See this example](/docs/workflows/building-workflows/code/nodejs/http-requests/#download-a-file-to-the-tmp-directory) to learn how to download a file to `/tmp`. ### Upload a file from `/tmp` [See this example](/docs/workflows/building-workflows/code/nodejs/http-requests/#upload-a-file-from-the-tmp-directory) to learn how to upload a file from `/tmp` in an HTTP request. ### Download a file, uploading it in another `multipart/form-data` request [This workflow](https://pipedream.com/@dylburger/download-file-then-upload-file-via-multipart-form-data-request-p_QPCx7p/edit) provides an example of how to download a file at a specified **Download URL**, uploading that file to an **Upload URL** as form data. ### Download email attachments to `/tmp`, upload to Amazon S3 [This workflow](https://pipedream.com/@dylan/upload-email-attachments-to-s3-p_V9CGAQ/edit) is triggered by incoming emails. When copied, you’ll get a workflow-specific email address you can send any email to. This workflow takes any attachments included with inbound emails, saves them to `/tmp`, and uploads them to Amazon S3. You should also be aware of the [inbound payload limits](/docs/workflows/limits/#email-triggers) associated with the email trigger. ### Downloading and uploading files from File Stores Within Node.js code steps, you can download files from a File Store to the `/tmp` directory and vice versa. The `$.files` helper includes methods to upload and download files from the Project’s File Store. [Read the File Stores `$.files` helper documentation.](/docs/workflows/data-management/file-stores/#managing-file-stores-from-workflows) # Python Source: https://pipedream.com/docs/workflows/building-workflows/code/python > [!WARNING] > > **Workflows and String are shutting down on March 31, 2027.** [Learn more](/docs/workflows) Pipedream supports [Python v](https://www.python.org)3.12 in workflows. Run any Python code, use any [PyPI package](https://pypi.org/), connect to APIs, and more. ## Adding a Python code step 1. Click the + icon to add a new step 2. Click **Custom Code** 3. In the new step, select the `python` language runtime in language dropdown ## Python Code Step Structure A new Python Code step will have the following structure: ```python theme={null} def handler(pd: "pipedream"): # Reference data from previous steps print(pd.steps["trigger"]["context"]["id"]) # Return data for use in future steps return {"foo": {"test": True}} ``` You can also perform more complex operations, including [leveraging your connected accounts to make authenticated API requests](/docs/workflows/building-workflows/code/python/auth/), [accessing Data Stores](/docs/workflows/building-workflows/code/python/using-data-stores/) and [installing PyPI packages](/docs/workflows/building-workflows/code/python/#using-third-party-packages). * [Install PyPI Packages](/docs/workflows/building-workflows/code/python/#using-third-party-packages) * [Import data exported from other steps](/docs/workflows/building-workflows/code/python/#using-data-from-another-step) * [Export data to downstream steps](/docs/workflows/building-workflows/code/python/#sending-data-downstream-to-other-steps) * [Retrieve data from a data store](/docs/workflows/building-workflows/code/python/using-data-stores/#retrieving-data) * [Store data into a data store](/docs/workflows/building-workflows/code/python/using-data-stores/#saving-data) * [Access API credentials from connected accounts](/docs/workflows/building-workflows/code/python/auth/) ## Logging and debugging You can use `print` at any time in a Python code step to log information as the script is running. The output for the `print` **logs** will appear in the `Results` section just beneath the code editor. ![](https://mintcdn.com/pipedream/NF77kliJSewMqg65/images/13a73e92-image.png?fit=max\&auto=format\&n=NF77kliJSewMqg65\&q=85\&s=d518f03fe61ec77a40daf94a88a5fc1a) ## Using third party packages You can use any packages from [PyPI](https://pypi.org) in your Pipedream workflows. This includes popular choices such as: * [`requests` for making HTTP requests](https://pypi.org/project/requests/) * [`sqlalchemy`for retrieving or inserting data in a SQL database](https://pypi.org/project/sqlalchemy/) * [`pandas` for working with complex datasets](https://pypi.org/project/pandas/) To use a PyPI package, just include it in your step’s code: ```javascript theme={null} import requests ``` And that’s it. No need to update a `requirements.txt` or specify elsewhere in your workflow of which packages you need. Pipedream will automatically install the dependency for you. ### If your package’s `import` name differs from its PyPI package name Pipedream’s package installation uses [the `pipreqs` package](https://github.com/bndr/pipreqs) to detect package imports and install the associated package for you. Some packages, like [`python-telegram-bot`](https://python-telegram-bot.org/), use an `import` name that differs from their PyPI name: ```sh theme={null} pip install python-telegram-bot ``` vs. ```javascript theme={null} import telegram ``` Use the built in [magic comment system to resolve these mismatches](/docs/workflows/building-workflows/code/python/import-mappings/): ```python theme={null} # pipedream add-package python-telegram-bot import telegram ``` ### Pinning package versions Each time you deploy a workflow with Python code, Pipedream downloads the PyPI packages you `import` in your step. **By default, Pipedream deploys the latest version of the PyPI package each time you deploy a change**. There are many cases where you may want to specify the version of the packages you’re using. If you’d like to use a *specific* version of a package in a workflow, you can add that version in a [magic comment](/docs/workflows/building-workflows/code/python/import-mappings/), for example: ```python theme={null} # pipedream add-package pandas==2.0.0 import pandas ``` > [!WARNING] > > Currently, you cannot use different versions of the same package in different steps in a workflow. ## Making an HTTP request We recommend using the popular `requests` HTTP client package available in Python to send HTTP requests. No need to run `pip install`, just `import requests` at the top of your step’s code and it’s available for your code to use. See the [Making HTTP Requests with Python](/docs/workflows/building-workflows/code/python/http-requests/) docs for more information. ## Returning HTTP responses You can return HTTP responses from [HTTP-triggered workflows](/docs/workflows/building-workflows/triggers/#http) using the `pd.respond()` method: ```python theme={null} def handler(pd: "pipedream"): pd.respond({ "status": 200, "body": { "message": "Everything is ok" } }) ``` Please note to always include at least the `body` and `status` keys in your `pd.respond` argument. The `body` must also be a JSON serializable object or dictionary. > [!WARNING] > > Unlike the Node.js equivalent, the Python `pd.respond` helper does not yet support responding with Streams. > [!NOTE] > > *Don’t forget* to [configure your workflow’s HTTP trigger to allow a custom response](/docs/workflows/building-workflows/triggers/#http-responses). Otherwise your workflow will return the default response. ## Sharing data between steps A step can accept data from other steps in the same workflow, or pass data downstream to others. ### Using data from another step In Python steps, data from the initial workflow trigger and other steps are available in the `pd.steps` object. In this example, we’ll pretend this data is coming into our workflow’s HTTP trigger via POST request. ```json theme={null} // POST .m.pipedream.net { "id": 1, "name": "Bulbasaur", "type": "plant" } ``` In our Python step, we can access this data in the `pd.steps` object passed into the `handler`. Specifically, this data from the POST request into our workflow is available in the `trigger` dictionary item. ```python theme={null} def handler(pd: "pipedream"): # retrieve the data from the HTTP request in the initial workflow trigger pokemon_name = pd.steps["trigger"]["event"]["name"] pokemon_type = pd.steps["trigger"]["event"]["type"] print(f"{pokemon_name} is a {pokemon_type} type Pokemon") ``` ### Sending data downstream to other steps To share data created, retrieved, transformed or manipulated by a step to others downstream, `return` the data in the `handler` function: ```python theme={null} # This step is named "code" in the workflow import requests def handler(pd: "pipedream"): r = requests.get("https://pokeapi.co/api/v2/pokemon/charizard") # Store the JSON contents into a variable called "pokemon" pokemon = r.json() # Expose the data to other steps in the "pokemon" key from this step return { "pokemon": pokemon } ``` Now this `pokemon` data is accessible to downstream steps within `pd.steps["code"]["pokemon"]` > [!WARNING] > > You can only export JSON-serializable data from steps. Things like: > > * strings > * numbers > * lists > * dictionaries ## Using environment variables You can leverage any [environment variables defined in your Pipedream account](/docs/workflows/environment-variables/) in a Python step. This is useful for keeping your secrets out of code as well as keeping them flexible to swap API keys without having to update each step individually. To access them, use the `os` module. ```python theme={null} import os def handler(pd: "pipedream"): token = os.environ["AIRTABLE_API_KEY"] print(token) ``` Or an even more useful example, using the stored environment variable to make an authenticated API request. ### Using API key authentication If an particular service requires you to use an API key, you can pass it via the headers of the request. This proves your identity to the service so you can interact with it: ```python theme={null} import requests import os def handler(pd: "pipedream"): token = os.environ["AIRTABLE_API_KEY"] url = "https://api.airtable.com/v0/your-airtable-base/your-table" headers = { "Authorization": f"Bearer {token}"} r = requests.get(url, headers=headers) print(r.text) ``` > [!NOTE] > > There are 2 different ways of using the `os` module to access your environment variables. > > `os.environ["ENV_NAME_HERE"]` will raise an error that stops your workflow if that key doesn’t exist in your Pipedream account. > > Whereas `os.environ.get("ENV_NAME_HERE")` will *not* throw an error and instead returns an empty string. > > If your code relies on the presence of a environment variable, consider using `os.environ["ENV_NAME_HERE"]` instead. ## Handling errors You may need to exit a workflow early. In a Python step, just a `raise` an error to halt a step’s execution. ```python theme={null} raise NameError("Something happened that should not. Exiting early.") ``` All exceptions from your Python code will appear in the **logs** area of the results. ## Ending a workflow early Sometimes you want to end your workflow early, or otherwise stop or cancel the execution of a workflow under certain conditions. For example: * You may want to end your workflow early if you don’t receive all the fields you expect in the event data. * You only want to run your workflow for 5% of all events sent from your source. * You only want to run your workflow for users in the United States. If you receive a request from outside the U.S., you don’t want the rest of the code in your workflow to run. * You may use the `user_id` contained in the event to look up information in an external API. If you can’t find data in the API tied to that user, you don’t want to proceed. **In any code step, calling `return pd.flow.exit()` will end the execution of the workflow immediately.** No remaining code in that step, and no code or destination steps below, will run for the current event. > [!NOTE] > > It’s a good practice to use `return pd.flow.exit()` to immediately exit the workflow. In contrast, `pd.flow.exit()` on its own will end the workflow only after executing all remaining code in the step. ```python theme={null} def handler(pd: "pipedream"): return pd.flow.exit("reason") print("This code will not run, since pd.flow.exit() was called above it") ``` You can pass any string as an argument to `pd.flow.exit()`: ```python theme={null} def handler(pd: "pipedream"): return pd.flow.exit("Exiting early. Goodbye.") print("This code will not run, since pd.flow.exit() was called above it") ``` Or exit the workflow early within a conditional: ```python theme={null} import random def handler(pd: "pipedream"): # Flip a coin, running pd.flow.exit() for 50% of events if random.randint(0, 100) <= 50: return pd.flow.exit("reason") print("This code will only run 50% of the time"); ``` ## File storage You can also store and read files with Python steps. This means you can upload photos, retrieve datasets, accept files from an HTTP request and more. The `/tmp` directory is accessible from your workflow steps for saving and retrieving files. You have full access to read and write both files in `/tmp`. See the [Working with the filesystem in Python](/docs/workflows/building-workflows/code/python/working-with-files/) docs for more information. ## FAQ ### What’s the difference between `def handler(pd)` and the `pipedream` package for Python code steps? The pd object passed to the handler method lets you exit the [workflow early](/docs/workflows/building-workflows/code/python/#ending-a-workflow-early), [integrate a Data Store](/docs/workflows/building-workflows/code/python/using-data-stores/), and [use connected accounts](/docs/workflows/building-workflows/code/python/auth/) into your Python code steps. However, at this time there are issues with our Python interpreter that is causing an `ECONNRESET` error. If you need [to use data from other steps](/docs/workflows/building-workflows/code/python/#using-data-from-another-step) or [export data to other steps](/docs/workflows/building-workflows/code/python/#sending-data-downstream-to-other-steps) in your workflow, we recommend using the `pipedream` package module. If you need to use a Data Store in your workflow, we recommend using a [pre-built action](/docs/workflows/data-management/data-stores/) to retrieve or store data or [Node.js’s Data Store](/docs/workflows/building-workflows/code/nodejs/using-data-stores/) capabilities. ### I’ve tried installing a Python package with a normal import and the magic comment system, but I still can’t. What can I do? Some Python packages require binaries present within the environment in order to function properly. Or they include binaries but those binaries are not compatible with the Pipedream workflow environment. Unfortunately we cannot support these types of packages at this time, but if you have an issue importing a PyPI package into a Python code step [please open a issue](https://github.com/PipedreamHQ/pipedream/issues/new/choose). ### Can I publish my Python code as a reusable pre-built action or trigger like you can with Node.js? Not at this time. Pipedream only supports Python as a code step language. The Components system only supports Node.js at this time. You can still duplicate Python code steps within the same workflow, but to reuse a code step, you’ll need to copy and paste the Python code to another workflow. # Connecting Apps in Python Source: https://pipedream.com/docs/workflows/building-workflows/code/python/auth > [!WARNING] > > **Workflows and String are shutting down on March 31, 2027.** [Learn more](/docs/workflows) When you use [prebuilt actions](/docs/components/contributing/#actions) tied to apps, you don’t need to write the code to authorize API requests. Just [connect your account](/docs/apps/connected-accounts/#connecting-accounts) for that app and run your workflow. But sometimes you’ll need to [write your own code](/docs/workflows/building-workflows/code/python/). You can also connect apps to custom code steps, using the auth information to authorize requests to that app. For example, you may want to send a Slack message from a step. We use Slack’s OAuth integration to authorize sending messages from your workflows. Add Slack as an app on the Python step, then connect your Slack account. Then within the Python code step, `pd.inputs["slack"]["$auth"]["oauth_access_token"]` will contain your Slack account OAuth token. With that token, you can make authenticated API calls to Slack: ```python theme={null} from slack_sdk import WebClient def handler(pd: "pipedream"): # Your Slack OAuth token is available under pd.inputs token = pd.inputs["slack"]["$auth"]["oauth_access_token"] # Instantiate a new Slack client with your token client = WebClient(token=token) # Use the client to send messages to Slack channels response = client.chat_postMessage( channel='#general', text='Hello from Pipedream!' ) # Export the Slack response payload for use in future steps pd.export("response", response.data) ``` ## Accessing connected account data with `pd.inputs[appName]["$auth"]` In our Slack example above, we created a Slack `WebClient` using the Slack OAuth access token: ```python theme={null} # Instantiate a new Slack client with your token client = WebClient(token=token) ``` Where did `pd.inputs["slack"]` come from? Good question. It was generated when we connected Slack to our Python step. ![](https://mintcdn.com/pipedream/Acz4Z1ch6TM7-aI8/images/b56470ea-image.png?fit=max\&auto=format\&n=Acz4Z1ch6TM7-aI8\&q=85\&s=5d24128b59838971722078e34580a0a3) The Slack access token is generated by Pipedream, and is available to this step in the `pd.inputs[appName]["$auth"]` object: ```python theme={null} from slack_sdk import WebClient def handler(pd: "pipedream"): token = pd.inputs["slack"]["$auth"]["oauth_access_token"] # Authentication details for all of your apps are accessible under the special pd.inputs["slack"] variable: console.log(pd.inputs["slack"]["$auth"]) ``` `pd.inputs["slack"]["$auth"]` contains named properties for each account you connect to the associated step. Here, we connected Slack, so `this.slack.$auth` contains the Slack auth info (the `oauth_access_token`). The names of the properties for each connected account will differ with the account. Pipedream typically exposes OAuth access tokens as `oauth_access_token`, and API keys under the property `api_key`. But if there’s a service-specific name for the tokens (for example, if the service calls it `server_token`), we prefer that name, instead. To list the `pd.inputs["slack"]["$auth"]` properties available to you for a given app, just print the contents of the `$auth` property: ```python theme={null} print(pd.inputs["slack"]["$auth"]) # Replace "slack" with your app's name ``` and run your workflow. You’ll see the property names in the logs below your step. ### Using the code templates tied to apps When you write custom code that connects to an app, you can start with a code snippet Pipedream provides for each app. This is called the **test request**. When you search for an app in a step: 1. Click the **+** button below any step. 2. Search for the app you’re looking for and select it from the list. 3. Select the option to **Run Python with any \[app] API**. ![](https://mintcdn.com/pipedream/Acz4Z1ch6TM7-aI8/images/b1abdb1e-image.png?fit=max\&auto=format\&n=Acz4Z1ch6TM7-aI8\&q=85\&s=deff55d95befb337599971bac7367315) This code operates as a template you can extend, and comes preconfigured with the connection to the target app and the code for authorizing requests to the API. You can modify this code however you’d like. ## Custom auth tokens / secrets When you want to connect to a 3rd party service that isn’t supported by Pipedream, you can store those secrets in [Environment Variables](/docs/workflows/environment-variables/). # Delaying a Workflow Source: https://pipedream.com/docs/workflows/building-workflows/code/python/delay > [!WARNING] > > **Workflows and String are shutting down on March 31, 2027.** [Learn more](/docs/workflows) Use `pd.flow.delay` to [delay a step in a workflow](/docs/workflows/building-workflows/control-flow/delay/). These docs show you how to write Python code to handle delays. If you don’t need to write code, see [our built-in delay actions](/docs/workflows/building-workflows/control-flow/delay/#delay-actions). ## Using `pd.flow.delay` `pd.flow.delay` takes one argument: the number of **milliseconds** you’d like to pause your workflow until the next step executes. You can pause your workflow for as little as one millisecond, or as long as one year. Note that [delays happen at the end of the step where they’re called](/docs/workflows/building-workflows/code/python/delay/#when-delays-happen). ```python theme={null} import random def handler(pd: 'pipedream'): # Delay a workflow for 60 seconds (60,000 ms) pd.flow.delay(60 * 1000) # Delay a workflow for 15 minutes pd.flow.delay(15 * 60 * 1000) # Delay a workflow based on the value of incoming event data, # or default to 60 seconds if that variable is undefined default = 60 * 1000 delayMs = pd.steps["trigger"].get("event", {}).get("body", {}).get("delayMs", default) pd.flow.delay(delayMs) # Delay a workflow a random amount of time pd.flow.delay(random.randint(0, 999)) ``` > [!NOTE] > > Paused workflow state > > When `pd.flow.delay` is executed in a Python step, the workflow itself will enter a **Paused** state. > > While the workflow is paused, it will not incur any credits towards compute time. You can also [view all paused workflows in the Event History](/docs/workflows/event-history/#filtering-by-status). ### Credit usage The length of time a workflow is delayed from `pd.flow.delay` does *not* impact your credit usage. For example, delaying a 256 megabyte workflow for five minutes will **not** incur ten credits. However, using `pd.flow.delay` in a workflow will incur two credits. One credit is used to initially start the workflow, then the second credit is used when the workflow resumes after its pause period has ended. > [!NOTE] > > Exact credit usage depends on duration and memory configuration > > If your workflow’s [execution timeout limit](/docs/workflows/building-workflows/settings/#execution-timeout-limit) is set to longer than [default limit](/docs/workflows/limits/#time-per-execution), it may incur more than two [credits](/docs/pricing/#credits-and-billing) when using `pd.flow.delay`. ## `cancel_url` and `resume_url` Both the built-in **Delay** actions and `pd.flow.delay` return a `cancel_url` and `resume_url` that lets you cancel or resume paused executions. These URLs are specific to a single execution of your workflow. While the workflow is paused, you can load these in your browser or send an HTTP request to either: * Hitting the `cancel_url` will immediately cancel that execution * Hitting the `resume_url` will immediately resume that execution early [Since Pipedream pauses your workflow at the *end* of the step where you run call `pd.flow.delay`](/docs/workflows/building-workflows/code/python/delay/#when-delays-happen), you can send these URLs to third party systems, via email, or anywhere else you’d like to control the execution of your workflow. ```python theme={null} import requests def handler(pd: 'pipedream'): links = pd.flow.delay(15 * 60 * 1000) # links contains a dictionary with two entries: resume_url and cancel_url # Send the URLs to a system you own requests.post("https://example.com", json=links) # Email yourself the URLs. Click on the links to cancel / resume pd.send.email( subject=f"Workflow execution {pd.steps['trigger']['context']['id']}", text=f"Cancel your workflow here: {links['cancel_url']} . Resume early here: {links['resume_url']}", html=None ) # Delay happens at the end of this step ``` > [!WARNING] > > In `pd.send.email`, the `html` argument defaults to `""`, so it overrides the email `text` unless explicitly set to `None`. ## When delays happen **Pipedream pauses your workflow at the *end* of the step where you call `pd.flow.delay`**. This lets you send the `cancel_url` and `resume_url` to third-party systems. ```python theme={null} def handler(pd: 'pipedream'): urls = pd.flow.delay(15 * 60 * 1000) cancel_url, resume_url = urls["cancel_url"], urls["resume_url"] # ... run any code you want here # Delay happens at the end of this step ``` ## Delays and HTTP responses You cannot run `pd.respond` after running `pd.flow.delay`. Pipedream ends the original execution of the workflow when `pd.flow.delay` is called and issues the following response to the client to indicate this state: > \$.respond() not called for this invocation If you need to set a delay on an HTTP request triggered workflow, consider using [`time.sleep`](/docs/workflows/building-workflows/code/python/delay/#timesleep) instead. ## `time.sleep` Alternatively, you can use `time.sleep` instead of using `pd.flow.delay` to delay individual workflow steps. However, there are some drawbacks to using `time.sleep` instead of `pd.flow.delay`. `time.sleep` will count towards your workflow’s compute time, for example: ```python theme={null} import time def handler(pd: 'pipedream'): # delay this step for 30 seconds delay = 30 time.sleep(delay) ``` The Python step above will hold the workflow’s execution for this step for 30 seconds; however, 30 seconds will also *contribute* to your credit usage. Also consider that workflows have a hard limit of 750 seconds. # Making HTTP Requests with Python Source: https://pipedream.com/docs/workflows/building-workflows/code/python/http-requests > [!WARNING] > > **Workflows and String are shutting down on March 31, 2027.** [Learn more](/docs/workflows) HTTP requests are fundamental to working with APIs or other web services. You can make HTTP requests to retrieve data from APIs, fetch HTML from websites, or do pretty much anything your web browser can do. **Below, we’ll review how to make HTTP requests using Python code on Pipedream.** We recommend using the popular `requests` HTTP client package available in Python to send HTTP requests, but [you can use any PyPI package you’d like on Pipedream](/docs/workflows/building-workflows/code/python/#using-third-party-packages). ## Basic `requests` usage notes No need to run `pip install`, just `import requests` at the top of your step’s code and it’s available for your code to use. To use `requests` on Pipedream, you’ll just need to import the `requests` PyPI package: ```python theme={null} import requests ``` You make HTTP requests by passing a URL and optional request parameters to one of [Requests’ 7 HTTP request methods](https://requests.readthedocs.io/en/latest/api/#main-interface). **Here’s how to make a basic HTTP request on Pipedream:** ```python theme={null} r = requests.get('https://swapi.dev/api/films/') ``` The [Response](https://requests.readthedocs.io/en/latest/api/#requests.Response) object `r` contains a lot of information about the response: its content, headers, and more. Typically, you just care about the content, which you can access in the `text` property of the response: ```python theme={null} r = requests.get('https://swapi.dev/api/films/') # HTTP response content is in the text property r.text ``` Requests automatically decodes the content of the response based on its encoding, `r.encoding`, which is determined based on the HTTP headers. If you’re dealing with JSON data, you can call `r.json()` to decode the content as JSON: ```python theme={null} r = requests.get('https://swapi.dev/api/films/') # The json-encoded content of a response, if any r.json() ``` If JSON decoding fails, `r.json()` raises an exception. ## Making a `GET` request GET requests typically are for retrieving data from an API. Below is an example. ```python theme={null} import requests def handler(pd: "pipedream"): url = "https://swapi.dev/api/people/1" r = requests.get(url) # The response is logged in your Pipedream step results: print(r.text) # The response status code is logged in your Pipedream step results: print(r.status_code) ``` ## Making a `POST` request ```python theme={null} import requests def handler(pd: "pipedream"): # This a POST request to this URL will echo back whatever data we send to it url = "https://postman-echo.com/post" data = {"name": "Bulbasaur"} r = requests.post(url, data=data) # The response is logged in your Pipedream step results: print(r.text) # The response status code is logged in your Pipedream step results: print(r.status_code) ``` When you make a `POST` request, pass a dictionary with the data you’d like to send to the `data` argument. Requests automatically form-encodes the data when the request is made. > [!NOTE] > > The code example above will NOT set the `Content-Type` header, meaning it will NOT be set to `application/json`. > > If you want the header set to `application/json` and don’t want to encode the `dict` yourself, you can pass it using the `json` parameter and it will be encoded automatically: > > ```python theme={null} > url = "https://postman-echo.com/post" > data = {"name": "Bulbasaur"} > r = requests.post(url, json=data) > ``` ## Passing query string parameters to a `GET` request Retrieve fake comment data on a specific post using [JSONPlaceholder](https://jsonplaceholder.typicode.com/), a free mock API service. Here, you fetch data from the `/comments` resource, retrieving data for a specific post by query string parameter: `/comments?postId=1`. ```python theme={null} import requests def handler(pd: "pipedream"): url = "https://jsonplaceholder.typicode.com/comments" params = {"postId": 1} # Make an HTTP GET request using requests r = requests.get(url, params=params) # Retrieve the content of the response data = r.text ``` You should pass query string parameters as a dictionary using the `params` keyword argument, like above. When you do, `requests` automatically [URL-encodes](https://www.w3schools.com/tags/ref_urlencode.ASP) the parameters for you, which you’d otherwise have to do manually. ## Sending a request with HTTP headers To add HTTP headers to a request, pass a dictionary to the `headers` parameter: ```python theme={null} import requests import json def handler(pd: "pipedream"): url = "https://jsonplaceholder.typicode.com/posts" headers = {"Content-Type": "application/json"} data = {"name": "Luke"} # Make an HTTP POST request using requests r = requests.post(url, headers=headers, data=json.dumps(data)) ``` ## Sending a request with a secret or API key Most APIs require you authenticate HTTP requests with an API key or other token. **Please review the docs for your service to understand how they accept this data.** Here’s an example showing an API key passed in an HTTP header: ```python theme={null} import requests def handler(pd: "pipedream"): url = "https://jsonplaceholder.typicode.com/posts" headers = {"X-API-KEY": "123"} # API KEY data = {"name": "Luke"} # Make an HTTP POST request using requests r = requests.post(url, headers=headers, json=data) ``` ## Sending files An example of sending a previously stored file in the workflow’s `/tmp` directory: ```python theme={null} import requests def handler(pd: "pipedream"): # Retrieving a previously saved file from workflow storage files = {"image": open("/tmp/python-logo.png", "rb")} r = requests.post(url="https://api.imgur.com/3/image", files=files) ``` ## Downloading a file to the `/tmp` directory This example shows you how to download a file to a file in [the `/tmp` directory](/docs/workflows/building-workflows/code/python/working-with-files/). This can be especially helpful for downloading large files: it streams the file to disk, minimizing the memory the workflow uses when downloading the file. ```python theme={null} import requests def handler(pd: "pipedream"): # Download the webpage HTML file to /tmp with requests.get("https://example.com", stream=True) as response: # Check if the request was successful response.raise_for_status() # Open the new file /tmp/file.html in binary write mode with open("/tmp/file.html", "wb") as file: for chunk in response.iter_content(chunk_size=8192): # Write the chunk to file file.write(chunk) ``` ## Uploading a file from the `/tmp` directory This example shows you how to make a `multipart/form-data` request with a file as a form part. You can store and read any files from [the `/tmp` directory](/docs/workflows/building-workflows/code/python/working-with-files/#the-tmp-directory). This can be especially helpful for uploading large files: it streams the file from disk, minimizing the memory the workflow uses when uploading the file. ```python theme={null} import requests from requests_toolbelt.multipart.encoder import MultipartEncoder def handler(pd: "pipedream"): m = MultipartEncoder(fields={ 'file': ('filename', open('/tmp/file.pdf', 'rb'), 'application/pdf') }) r = requests.post("https://example.com", data=m, headers={'Content-Type': m.content_type}) ``` ## IP addresses for HTTP requests made from Pipedream workflows By default, [HTTP requests made from Pipedream can come from a large range of IP addresses](/docs/privacy-and-security/#hosting-details). **If you need to restrict the IP addresses HTTP requests come from, you can [Use a Pipedream VPC](/docs/workflows/vpc/) to route all outbound HTTP requests through a single IP address.** ## Using an HTTP proxy to proxy requests through another host By default, HTTP requests made from Pipedream can come from a range of IP addresses. **If you need to make requests from a single IP address, you can route traffic through an HTTP proxy**: ```python theme={null} import requests def handler(pd: "pipedream"): user = "USERNAME" # Replace with your HTTP proxy username password = "PASSWORD" # Replace with your HTTP proxy password host = "10.10.1.10" # Replace with the HTTP proxy URL port = 1080 # Replace with the port of the HTTP proxy proxies = { "https": f"http://{user}:{password}@{host}:{port}", } r = requests.request("GET", "https://example.com", proxies=proxies) ``` ## Paginating API requests When you fetch data from an API, the API may return records in “pages”. For example, if you’re trying to fetch a list of 1,000 records, the API might return those in groups of 100 items. Different APIs paginate data in different ways. You’ll need to consult the docs of your API provider to see how they suggest you paginate through records. ## Sending a GraphQL request Construct a GraphQL query as a string and then using the requests library to send it to the GraphQL server: ```python theme={null} import requests def handler(pd: "pipedream"): url = "https://beta.pokeapi.co/graphql/v1beta" query = """ query samplePokeAPIquery { generations: pokemon_v2_generation { name pokemon_species: pokemon_v2_pokemonspecies_aggregate { aggregate { count } } } } """ r = requests.post(url, json={"query": query}) return r.json() ``` ### Sending an authenticated GraphQL request Authenticate your connected accounts in Pipedream with GraphQL requests using `pd.inputs[appName]["$auth"]`: ```python theme={null} import requests def handler(pd: "pipedream"): url = "https://api.github.com/graphql" query = """ query { viewer { login } } """ token = pd.inputs["github"]["$auth"]["oauth_access_token"] headers = {"authorization": f"Bearer {token}"} r = requests.post(url, json={"query": query}, headers=headers) return r.json() ``` Alternatively, you can use Environment Variables as well for simple API key based GraphQL APIs. # Use PyPI Packages with Differing Import Names Source: https://pipedream.com/docs/workflows/building-workflows/code/python/import-mappings > [!WARNING] > > **Workflows and String are shutting down on March 31, 2027.** [Learn more](/docs/workflows) When a Python package’s name matches its import name, you can use it in your Python code steps without any special configuration. But some package names do not match their import names. Use [the `add-package` comment](/docs/workflows/building-workflows/code/python/import-mappings/#using-magic-comments) to work with these packages. ## Using Magic Comments When a package’s name doesn’t match the import name, you can install the package with the `add-package` comment above your imports. For example the `google.cloud` package exports `bigquery`, but you can still use it in your Python code steps in workflows: ```python theme={null} # pipedream add-package google-cloud-bigquery from google.cloud import bigquery ``` When using multiple imports that need magic comments, ensure all comments are at the start of the code. Example: ```python theme={null} # pipedream add-package google-auth # pipedream add-package google-cloud-compute from google.oauth2 import service_account from google.cloud import compute_v1 ``` ## Search mappings Search by package name, and you’ll find both the `add-package` comment and the `import` statement you’ll need to use for the package. Search by package name | PyPI Package Name | Import into Pipedream with | | - | - | | [# pipedream add-package ShopifyAPI](https://pypi.org/project/ShopifyAPI) | import shopify | | [# pipedream add-package google-cloud-bigquery](https://pypi.org/project/google-cloud-bigquery) | import bigquery | | [# pipedream add-package carbon3d-client](https://pypi.org/project/carbon3d-client) | import carbon3d | | [# pipedream add-package python-telegram-bot](https://pypi.org/project/python-telegram-bot) | import telegram | | [# pipedream add-package pyAFQ](https://pypi.org/project/pyAFQ) | import AFQ | | [# pipedream add-package agpy](https://pypi.org/project/agpy) | import AG\_fft\_tools | | [# pipedream add-package pexpect](https://pypi.org/project/pexpect) | import screen | | [# pipedream add-package Adafruit\_Libraries](https://pypi.org/project/Adafruit_Libraries) | import Adafruit | | [# pipedream add-package Zope2](https://pypi.org/project/Zope2) | import webdav | | [# pipedream add-package py\_Asterisk](https://pypi.org/project/py_Asterisk) | import Asterisk | | [# pipedream add-package bitbucket\_jekyll\_hook](https://pypi.org/project/bitbucket_jekyll_hook) | import BB\_jekyll\_hook | | [# pipedream add-package Banzai\_NGS](https://pypi.org/project/Banzai_NGS) | import Banzai | | [# pipedream add-package BeautifulSoup](https://pypi.org/project/BeautifulSoup) | import BeautifulSoupTests | | [# pipedream add-package biopython](https://pypi.org/project/biopython) | import BioSQL | | [# pipedream add-package BuildbotEightStatusShields](https://pypi.org/project/BuildbotEightStatusShields) | import BuildbotStatusShields | | [# pipedream add-package ExtensionClass](https://pypi.org/project/ExtensionClass) | import MethodObject | | [# pipedream add-package pycryptodome](https://pypi.org/project/pycryptodome) | import Crypto | | [# pipedream add-package pycryptodomex](https://pypi.org/project/pycryptodomex) | import Cryptodome | | [# pipedream add-package 51degrees\_mobile\_detector\_v3\_wrapper](https://pypi.org/project/51degrees_mobile_detector_v3_wrapper) | import FiftyOneDegrees | | [# pipedream add-package pyfunctional](https://pypi.org/project/pyfunctional) | import functional | | [# pipedream add-package GeoBasesDev](https://pypi.org/project/GeoBasesDev) | import GeoBases | | [# pipedream add-package ipython](https://pypi.org/project/ipython) | import IPython | | [# pipedream add-package astro\_kittens](https://pypi.org/project/astro_kittens) | import Kittens | | [# pipedream add-package python\_Levenshtein](https://pypi.org/project/python_Levenshtein) | import Levenshtein | | [# pipedream add-package MySQL-python](https://pypi.org/project/MySQL-python) | import MySQLdb | | [# pipedream add-package PyOpenGL](https://pypi.org/project/PyOpenGL) | import OpenGL | | [# pipedream add-package pyOpenSSL](https://pypi.org/project/pyOpenSSL) | import OpenSSL | | [# pipedream add-package Pillow](https://pypi.org/project/Pillow) | import PIL | | [# pipedream add-package astLib](https://pypi.org/project/astLib) | import PyWCSTools | | [# pipedream add-package astro\_pyxis](https://pypi.org/project/astro_pyxis) | import Pyxides | | [# pipedream add-package PySide](https://pypi.org/project/PySide) | import pysideuic | | [# pipedream add-package s3cmd](https://pypi.org/project/s3cmd) | import S3 | | [# pipedream add-package pystick](https://pypi.org/project/pystick) | import SCons | | [# pipedream add-package PyStemmer](https://pypi.org/project/PyStemmer) | import Stemmer | | [# pipedream add-package topzootools](https://pypi.org/project/topzootools) | import TopZooTools | | [# pipedream add-package DocumentTemplate](https://pypi.org/project/DocumentTemplate) | import TreeDisplay | | [# pipedream add-package aspose\_pdf\_java\_for\_python](https://pypi.org/project/aspose_pdf_java_for_python) | import WorkingWithDocumentConversion | | [# pipedream add-package auto\_adjust\_display\_brightness](https://pypi.org/project/auto_adjust_display_brightness) | import aadb | | [# pipedream add-package abakaffe\_cli](https://pypi.org/project/abakaffe_cli) | import abakaffe | | [# pipedream add-package abiosgaming.py](https://pypi.org/project/abiosgaming.py) | import abiosgaming | | [# pipedream add-package abiquo\_api](https://pypi.org/project/abiquo_api) | import abiquo | | [# pipedream add-package abl.cssprocessor](https://pypi.org/project/abl.cssprocessor) | import abl | | [# pipedream add-package abl.robot](https://pypi.org/project/abl.robot) | import abl | | [# pipedream add-package abl.util](https://pypi.org/project/abl.util) | import abl | | [# pipedream add-package abl.vpath](https://pypi.org/project/abl.vpath) | import abl | | [# pipedream add-package abo\_generator](https://pypi.org/project/abo_generator) | import abo | | [# pipedream add-package abris](https://pypi.org/project/abris) | import abris\_transform | | [# pipedream add-package abstract.jwrotator](https://pypi.org/project/abstract.jwrotator) | import abstract | | [# pipedream add-package abu.admin](https://pypi.org/project/abu.admin) | import abu | | [# pipedream add-package AC\_Flask\_HipChat](https://pypi.org/project/AC_Flask_HipChat) | import ac\_flask | | [# pipedream add-package anikom15](https://pypi.org/project/anikom15) | import acg | | [# pipedream add-package acme.dchat](https://pypi.org/project/acme.dchat) | import acme | | [# pipedream add-package acme.hello](https://pypi.org/project/acme.hello) | import acme | | [# pipedream add-package acted.projects](https://pypi.org/project/acted.projects) | import acted | | [# pipedream add-package ActionServer](https://pypi.org/project/ActionServer) | import action | | [# pipedream add-package actionbar.panel](https://pypi.org/project/actionbar.panel) | import actionbar | | [# pipedream add-package afn](https://pypi.org/project/afn) | import activehomed | | [# pipedream add-package ActivePapers.Py](https://pypi.org/project/ActivePapers.Py) | import activepapers | | [# pipedream add-package address\_book\_lansry](https://pypi.org/project/address_book_lansry) | import address\_book | | [# pipedream add-package adi.commons](https://pypi.org/project/adi.commons) | import adi | | [# pipedream add-package adi.devgen](https://pypi.org/project/adi.devgen) | import adi | | [# pipedream add-package adi.fullscreen](https://pypi.org/project/adi.fullscreen) | import adi | | [# pipedream add-package adi.init](https://pypi.org/project/adi.init) | import adi | | [# pipedream add-package adi.playlist](https://pypi.org/project/adi.playlist) | import adi | | [# pipedream add-package adi.samplecontent](https://pypi.org/project/adi.samplecontent) | import adi | | [# pipedream add-package adi.slickstyle](https://pypi.org/project/adi.slickstyle) | import adi | | [# pipedream add-package adi.suite](https://pypi.org/project/adi.suite) | import adi | | [# pipedream add-package adi.trash](https://pypi.org/project/adi.trash) | import adi | | [# pipedream add-package aDict2](https://pypi.org/project/aDict2) | import adict | | [# pipedream add-package aditam.agent](https://pypi.org/project/aditam.agent) | import aditam | | [# pipedream add-package aditam.core](https://pypi.org/project/aditam.core) | import aditam | | [# pipedream add-package adium\_sh](https://pypi.org/project/adium_sh) | import adiumsh | | [# pipedream add-package AdjectorClient](https://pypi.org/project/AdjectorClient) | import adjector | | [# pipedream add-package AdjectorTracPlugin](https://pypi.org/project/AdjectorTracPlugin) | import adjector | | [# pipedream add-package Banner\_Ad\_Toolkit](https://pypi.org/project/Banner_Ad_Toolkit) | import adkit | | [# pipedream add-package django\_admin\_tools](https://pypi.org/project/django_admin_tools) | import admin\_tools | | [# pipedream add-package adminish\_categories](https://pypi.org/project/adminish_categories) | import adminishcategories | | [# pipedream add-package django\_admin\_sortable](https://pypi.org/project/django_admin_sortable) | import adminsortable | | [# pipedream add-package adspygoogle.adwords](https://pypi.org/project/adspygoogle.adwords) | import adspygoogle | | [# pipedream add-package agtl](https://pypi.org/project/agtl) | import advancedcaching | | [# pipedream add-package Adytum\_PyMonitor](https://pypi.org/project/Adytum_PyMonitor) | import adytum | | [# pipedream add-package affinitic.docpyflakes](https://pypi.org/project/affinitic.docpyflakes) | import affinitic | | [# pipedream add-package affinitic.recipe.fakezope2eggs](https://pypi.org/project/affinitic.recipe.fakezope2eggs) | import affinitic | | [# pipedream add-package affinitic.simplecookiecuttr](https://pypi.org/project/affinitic.simplecookiecuttr) | import affinitic | | [# pipedream add-package affinitic.verifyinterface](https://pypi.org/project/affinitic.verifyinterface) | import affinitic | | [# pipedream add-package affinitic.zamqp](https://pypi.org/project/affinitic.zamqp) | import affinitic | | [# pipedream add-package afpy.xap](https://pypi.org/project/afpy.xap) | import afpy | | [# pipedream add-package agate\_sql](https://pypi.org/project/agate_sql) | import agatesql | | [# pipedream add-package ageliaco.recipe.csvconfig](https://pypi.org/project/ageliaco.recipe.csvconfig) | import ageliaco | | [# pipedream add-package agent.http](https://pypi.org/project/agent.http) | import agent\_http | | [# pipedream add-package Agora\_Client](https://pypi.org/project/Agora_Client) | import agora | | [# pipedream add-package Agora\_Fountain](https://pypi.org/project/Agora_Fountain) | import agora | | [# pipedream add-package Agora\_Fragment](https://pypi.org/project/Agora_Fragment) | import agora | | [# pipedream add-package Agora\_Planner](https://pypi.org/project/Agora_Planner) | import agora | | [# pipedream add-package Agora\_Service\_Provider](https://pypi.org/project/Agora_Service_Provider) | import agora | | [# pipedream add-package agoraplex.themes.sphinx](https://pypi.org/project/agoraplex.themes.sphinx) | import agoraplex | | [# pipedream add-package agsci.blognewsletter](https://pypi.org/project/agsci.blognewsletter) | import agsci | | [# pipedream add-package agx.core](https://pypi.org/project/agx.core) | import agx | | [# pipedream add-package agx.dev](https://pypi.org/project/agx.dev) | import agx | | [# pipedream add-package agx.generator.buildout](https://pypi.org/project/agx.generator.buildout) | import agx | | [# pipedream add-package agx.generator.dexterity](https://pypi.org/project/agx.generator.dexterity) | import agx | | [# pipedream add-package agx.generator.generator](https://pypi.org/project/agx.generator.generator) | import agx | | [# pipedream add-package agx.generator.plone](https://pypi.org/project/agx.generator.plone) | import agx | | [# pipedream add-package agx.generator.pyegg](https://pypi.org/project/agx.generator.pyegg) | import agx | | [# pipedream add-package agx.generator.sql](https://pypi.org/project/agx.generator.sql) | import agx | | [# pipedream add-package agx.generator.uml](https://pypi.org/project/agx.generator.uml) | import agx | | [# pipedream add-package agx.generator.zca](https://pypi.org/project/agx.generator.zca) | import agx | | [# pipedream add-package agx.transform.uml2fs](https://pypi.org/project/agx.transform.uml2fs) | import agx | | [# pipedream add-package agx.transform.xmi2uml](https://pypi.org/project/agx.transform.xmi2uml) | import agx | | [# pipedream add-package aimes.bundle](https://pypi.org/project/aimes.bundle) | import aimes | | [# pipedream add-package aimes.skeleton](https://pypi.org/project/aimes.skeleton) | import aimes | | [# pipedream add-package aio.app](https://pypi.org/project/aio.app) | import aio | | [# pipedream add-package aio.config](https://pypi.org/project/aio.config) | import aio | | [# pipedream add-package aio.core](https://pypi.org/project/aio.core) | import aio | | [# pipedream add-package aio.signals](https://pypi.org/project/aio.signals) | import aio | | [# pipedream add-package aio\_hs2](https://pypi.org/project/aio_hs2) | import aiohs2 | | [# pipedream add-package aio\_routes](https://pypi.org/project/aio_routes) | import aioroutes | | [# pipedream add-package aio\_s3](https://pypi.org/project/aio_s3) | import aios3 | | [# pipedream add-package airbrake\_flask](https://pypi.org/project/airbrake_flask) | import airbrake | | [# pipedream add-package airship\_icloud](https://pypi.org/project/airship_icloud) | import airship | | [# pipedream add-package airship\_steamcloud](https://pypi.org/project/airship_steamcloud) | import airship | | [# pipedream add-package edgegrid\_python](https://pypi.org/project/edgegrid_python) | import akamai | | [# pipedream add-package alation\_api](https://pypi.org/project/alation_api) | import alation | | [# pipedream add-package alba\_client\_python](https://pypi.org/project/alba_client_python) | import alba\_client | | [# pipedream add-package alburnum\_maas\_client](https://pypi.org/project/alburnum_maas_client) | import alburnum | | [# pipedream add-package alchemist.audit](https://pypi.org/project/alchemist.audit) | import alchemist | | [# pipedream add-package alchemist.security](https://pypi.org/project/alchemist.security) | import alchemist | | [# pipedream add-package alchemist.traversal](https://pypi.org/project/alchemist.traversal) | import alchemist | | [# pipedream add-package alchemist.ui](https://pypi.org/project/alchemist.ui) | import alchemist | | [# pipedream add-package alchemyapi\_python](https://pypi.org/project/alchemyapi_python) | import alchemyapi | | [# pipedream add-package alerta\_server](https://pypi.org/project/alerta_server) | import alerta | | [# pipedream add-package Alexandria\_Upload\_Utils](https://pypi.org/project/Alexandria_Upload_Utils) | import alexandria\_upload | | [# pipedream add-package alibaba\_python\_sdk](https://pypi.org/project/alibaba_python_sdk) | import alibaba | | [# pipedream add-package aliyun\_python\_sdk](https://pypi.org/project/aliyun_python_sdk) | import aliyun | | [# pipedream add-package alicloudcli](https://pypi.org/project/alicloudcli) | import aliyuncli | | [# pipedream add-package aliyun\_python\_sdk\_acs](https://pypi.org/project/aliyun_python_sdk_acs) | import aliyunsdkacs | | [# pipedream add-package aliyun\_python\_sdk\_batchcompute](https://pypi.org/project/aliyun_python_sdk_batchcompute) | import aliyunsdkbatchcompute | | [# pipedream add-package aliyun\_python\_sdk\_bsn](https://pypi.org/project/aliyun_python_sdk_bsn) | import aliyunsdkbsn | | [# pipedream add-package aliyun\_python\_sdk\_bss](https://pypi.org/project/aliyun_python_sdk_bss) | import aliyunsdkbss | | [# pipedream add-package aliyun\_python\_sdk\_cdn](https://pypi.org/project/aliyun_python_sdk_cdn) | import aliyunsdkcdn | | [# pipedream add-package aliyun\_python\_sdk\_cms](https://pypi.org/project/aliyun_python_sdk_cms) | import aliyunsdkcms | | [# pipedream add-package aliyun\_python\_sdk\_core](https://pypi.org/project/aliyun_python_sdk_core) | import aliyunsdkcore | | [# pipedream add-package aliyun\_python\_sdk\_crm](https://pypi.org/project/aliyun_python_sdk_crm) | import aliyunsdkcrm | | [# pipedream add-package aliyun\_python\_sdk\_cs](https://pypi.org/project/aliyun_python_sdk_cs) | import aliyunsdkcs | | [# pipedream add-package aliyun\_python\_sdk\_drds](https://pypi.org/project/aliyun_python_sdk_drds) | import aliyunsdkdrds | | [# pipedream add-package aliyun\_python\_sdk\_ecs](https://pypi.org/project/aliyun_python_sdk_ecs) | import aliyunsdkecs | | [# pipedream add-package aliyun\_python\_sdk\_ess](https://pypi.org/project/aliyun_python_sdk_ess) | import aliyunsdkess | | [# pipedream add-package aliyun\_python\_sdk\_ft](https://pypi.org/project/aliyun_python_sdk_ft) | import aliyunsdkft | | [# pipedream add-package aliyun\_python\_sdk\_mts](https://pypi.org/project/aliyun_python_sdk_mts) | import aliyunsdkmts | | [# pipedream add-package aliyun\_python\_sdk\_ocs](https://pypi.org/project/aliyun_python_sdk_ocs) | import aliyunsdkocs | | [# pipedream add-package aliyun\_python\_sdk\_oms](https://pypi.org/project/aliyun_python_sdk_oms) | import aliyunsdkoms | | [# pipedream add-package aliyun\_python\_sdk\_ossadmin](https://pypi.org/project/aliyun_python_sdk_ossadmin) | import aliyunsdkossadmin | | [# pipedream add-package aliyun\_python\_sdk\_r\_kvstore](https://pypi.org/project/aliyun_python_sdk_r_kvstore) | import aliyunsdkr-kvstore | | [# pipedream add-package aliyun\_python\_sdk\_ram](https://pypi.org/project/aliyun_python_sdk_ram) | import aliyunsdkram | | [# pipedream add-package aliyun\_python\_sdk\_rds](https://pypi.org/project/aliyun_python_sdk_rds) | import aliyunsdkrds | | [# pipedream add-package aliyun\_python\_sdk\_risk](https://pypi.org/project/aliyun_python_sdk_risk) | import aliyunsdkrisk | | [# pipedream add-package aliyun\_python\_sdk\_ros](https://pypi.org/project/aliyun_python_sdk_ros) | import aliyunsdkros | | [# pipedream add-package aliyun\_python\_sdk\_slb](https://pypi.org/project/aliyun_python_sdk_slb) | import aliyunsdkslb | | [# pipedream add-package aliyun\_python\_sdk\_sts](https://pypi.org/project/aliyun_python_sdk_sts) | import aliyunsdksts | | [# pipedream add-package aliyun\_python\_sdk\_ubsms](https://pypi.org/project/aliyun_python_sdk_ubsms) | import aliyunsdkubsms | | [# pipedream add-package aliyun\_python\_sdk\_yundun](https://pypi.org/project/aliyun_python_sdk_yundun) | import aliyunsdkyundun | | [# pipedream add-package AllAttachmentsMacro](https://pypi.org/project/AllAttachmentsMacro) | import allattachments | | [# pipedream add-package allocine\_wrapper](https://pypi.org/project/allocine_wrapper) | import allocine | | [# pipedream add-package django\_allowedsites](https://pypi.org/project/django_allowedsites) | import allowedsites | | [# pipedream add-package alm.solrindex](https://pypi.org/project/alm.solrindex) | import alm | | [# pipedream add-package aloft.py](https://pypi.org/project/aloft.py) | import aloft | | [# pipedream add-package alpaca](https://pypi.org/project/alpaca) | import alpacalib | | [# pipedream add-package alphabetic\_simple](https://pypi.org/project/alphabetic_simple) | import alphabetic | | [# pipedream add-package alphasms\_client](https://pypi.org/project/alphasms_client) | import alphasms | | [# pipedream add-package altered.states](https://pypi.org/project/altered.states) | import altered | | [# pipedream add-package alterootheme.busycity](https://pypi.org/project/alterootheme.busycity) | import alterootheme | | [# pipedream add-package alterootheme.intensesimplicity](https://pypi.org/project/alterootheme.intensesimplicity) | import alterootheme | | [# pipedream add-package alterootheme.lazydays](https://pypi.org/project/alterootheme.lazydays) | import alterootheme | | [# pipedream add-package alurinium\_image\_processing](https://pypi.org/project/alurinium_image_processing) | import alurinium | | [# pipedream add-package alx](https://pypi.org/project/alx) | import alxlib | | [# pipedream add-package amara3\_iri](https://pypi.org/project/amara3_iri) | import amara3 | | [# pipedream add-package amara3\_xml](https://pypi.org/project/amara3_xml) | import amara3 | | [# pipedream add-package AmazonAPIWrapper](https://pypi.org/project/AmazonAPIWrapper) | import amazon | | [# pipedream add-package python\_amazon\_simple\_product\_api](https://pypi.org/project/python_amazon_simple_product_api) | import amazon | | [# pipedream add-package ambikesh1349\_1](https://pypi.org/project/ambikesh1349_1) | import ambikesh1349-1 | | [# pipedream add-package AmbilightParty](https://pypi.org/project/AmbilightParty) | import ambilight | | [# pipedream add-package amifs\_core](https://pypi.org/project/amifs_core) | import amifs | | [# pipedream add-package ami\_organizer](https://pypi.org/project/ami_organizer) | import amiorganizer | | [# pipedream add-package amitu.lipy](https://pypi.org/project/amitu.lipy) | import amitu | | [# pipedream add-package amitu\_putils](https://pypi.org/project/amitu_putils) | import amitu | | [# pipedream add-package amitu\_websocket\_client](https://pypi.org/project/amitu_websocket_client) | import amitu | | [# pipedream add-package amitu\_zutils](https://pypi.org/project/amitu_zutils) | import amitu | | [# pipedream add-package AMLT\_learn](https://pypi.org/project/AMLT_learn) | import amltlearn | | [# pipedream add-package amocrm\_api](https://pypi.org/project/amocrm_api) | import amocrm | | [# pipedream add-package amqp\_dispatcher](https://pypi.org/project/amqp_dispatcher) | import amqpdispatcher | | [# pipedream add-package AMQP\_Storm](https://pypi.org/project/AMQP_Storm) | import amqpstorm | | [# pipedream add-package analytics\_python](https://pypi.org/project/analytics_python) | import analytics | | [# pipedream add-package AnalyzeDirectory](https://pypi.org/project/AnalyzeDirectory) | import analyzedir | | [# pipedream add-package ancientsolutions\_crypttools](https://pypi.org/project/ancientsolutions_crypttools) | import ancientsolutions | | [# pipedream add-package anderson.paginator](https://pypi.org/project/anderson.paginator) | import anderson\_paginator | | [# pipedream add-package android\_resource\_remover](https://pypi.org/project/android_resource_remover) | import android\_clean\_app | | [# pipedream add-package AnelPowerControl](https://pypi.org/project/AnelPowerControl) | import anel\_power\_control | | [# pipedream add-package angus\_sdk\_python](https://pypi.org/project/angus_sdk_python) | import angus | | [# pipedream add-package Annalist](https://pypi.org/project/Annalist) | import annalist\_root | | [# pipedream add-package ANNOgesic](https://pypi.org/project/ANNOgesic) | import annogesiclib | | [# pipedream add-package ansible\_role\_apply](https://pypi.org/project/ansible_role_apply) | import ansible-role-apply | | [# pipedream add-package ansible\_playbook\_debugger](https://pypi.org/project/ansible_playbook_debugger) | import ansibledebugger | | [# pipedream add-package ansible\_docgen](https://pypi.org/project/ansible_docgen) | import ansibledocgen | | [# pipedream add-package ansible\_flow](https://pypi.org/project/ansible_flow) | import ansibleflow | | [# pipedream add-package ansible\_inventory\_grapher](https://pypi.org/project/ansible_inventory_grapher) | import ansibleinventorygrapher | | [# pipedream add-package ansible\_lint](https://pypi.org/project/ansible_lint) | import ansiblelint | | [# pipedream add-package ansible\_roles\_graph](https://pypi.org/project/ansible_roles_graph) | import ansiblerolesgraph | | [# pipedream add-package ansible\_tools](https://pypi.org/project/ansible_tools) | import ansibletools | | [# pipedream add-package anthill.exampletheme](https://pypi.org/project/anthill.exampletheme) | import anthill | | [# pipedream add-package anthill.skinner](https://pypi.org/project/anthill.skinner) | import anthill | | [# pipedream add-package anthill.tal.macrorenderer](https://pypi.org/project/anthill.tal.macrorenderer) | import anthill | | [# pipedream add-package AnthraxDojoFrontend](https://pypi.org/project/AnthraxDojoFrontend) | import anthrax | | [# pipedream add-package AnthraxHTMLInput](https://pypi.org/project/AnthraxHTMLInput) | import anthrax | | [# pipedream add-package AnthraxImage](https://pypi.org/project/AnthraxImage) | import anthrax | | [# pipedream add-package antiweb](https://pypi.org/project/antiweb) | import antisphinx | | [# pipedream add-package antispoofing.evaluation](https://pypi.org/project/antispoofing.evaluation) | import antispoofing | | [# pipedream add-package antlr4\_python2\_runtime](https://pypi.org/project/antlr4_python2_runtime) | import antlr4 | | [# pipedream add-package antlr4\_python3\_runtime](https://pypi.org/project/antlr4_python3_runtime) | import antlr4 | | [# pipedream add-package antlr4\_python\_alt](https://pypi.org/project/antlr4_python_alt) | import antlr4 | | [# pipedream add-package anybox.buildbot.openerp](https://pypi.org/project/anybox.buildbot.openerp) | import anybox | | [# pipedream add-package anybox.nose.odoo](https://pypi.org/project/anybox.nose.odoo) | import anybox | | [# pipedream add-package anybox.paster.odoo](https://pypi.org/project/anybox.paster.odoo) | import anybox | | [# pipedream add-package anybox.paster.openerp](https://pypi.org/project/anybox.paster.openerp) | import anybox | | [# pipedream add-package anybox.recipe.sysdeps](https://pypi.org/project/anybox.recipe.sysdeps) | import anybox | | [# pipedream add-package anybox.scripts.odoo](https://pypi.org/project/anybox.scripts.odoo) | import anybox | | [# pipedream add-package google\_api\_python\_client](https://pypi.org/project/google_api_python_client) | import googleapiclient | | [# pipedream add-package google\_apitools](https://pypi.org/project/google_apitools) | import apitools | | [# pipedream add-package arpm](https://pypi.org/project/arpm) | import apm | | [# pipedream add-package django\_appdata](https://pypi.org/project/django_appdata) | import app\_data | | [# pipedream add-package django\_appconf](https://pypi.org/project/django_appconf) | import appconf | | [# pipedream add-package AppDynamicsDownloader](https://pypi.org/project/AppDynamicsDownloader) | import appd | | [# pipedream add-package AppDynamicsREST](https://pypi.org/project/AppDynamicsREST) | import appd | | [# pipedream add-package appdynamics\_bindeps\_linux\_x64](https://pypi.org/project/appdynamics_bindeps_linux_x64) | import appdynamics\_bindeps | | [# pipedream add-package appdynamics\_bindeps\_linux\_x86](https://pypi.org/project/appdynamics_bindeps_linux_x86) | import appdynamics\_bindeps | | [# pipedream add-package appdynamics\_bindeps\_osx\_x64](https://pypi.org/project/appdynamics_bindeps_osx_x64) | import appdynamics\_bindeps | | [# pipedream add-package appdynamics\_proxysupport\_linux\_x64](https://pypi.org/project/appdynamics_proxysupport_linux_x64) | import appdynamics\_proxysupport | | [# pipedream add-package appdynamics\_proxysupport\_linux\_x86](https://pypi.org/project/appdynamics_proxysupport_linux_x86) | import appdynamics\_proxysupport | | [# pipedream add-package appdynamics\_proxysupport\_osx\_x64](https://pypi.org/project/appdynamics_proxysupport_osx_x64) | import appdynamics\_proxysupport | | [# pipedream add-package Appium\_Python\_Client](https://pypi.org/project/Appium_Python_Client) | import appium | | [# pipedream add-package applibase](https://pypi.org/project/applibase) | import appliapps | | [# pipedream add-package broadwick](https://pypi.org/project/broadwick) | import appserver | | [# pipedream add-package archetypes.kss](https://pypi.org/project/archetypes.kss) | import archetypes | | [# pipedream add-package archetypes.multilingual](https://pypi.org/project/archetypes.multilingual) | import archetypes | | [# pipedream add-package archetypes.schemaextender](https://pypi.org/project/archetypes.schemaextender) | import archetypes | | [# pipedream add-package ansible\_role\_manager](https://pypi.org/project/ansible_role_manager) | import arm | | [# pipedream add-package armor\_api](https://pypi.org/project/armor_api) | import armor | | [# pipedream add-package armstrong.apps.related\_content](https://pypi.org/project/armstrong.apps.related_content) | import armstrong | | [# pipedream add-package armstrong.apps.series](https://pypi.org/project/armstrong.apps.series) | import armstrong | | [# pipedream add-package armstrong.cli](https://pypi.org/project/armstrong.cli) | import armstrong | | [# pipedream add-package armstrong.core.arm\_access](https://pypi.org/project/armstrong.core.arm_access) | import armstrong | | [# pipedream add-package armstrong.core.arm\_layout](https://pypi.org/project/armstrong.core.arm_layout) | import armstrong | | [# pipedream add-package armstrong.core.arm\_sections](https://pypi.org/project/armstrong.core.arm_sections) | import armstrong | | [# pipedream add-package armstrong.core.arm\_wells](https://pypi.org/project/armstrong.core.arm_wells) | import armstrong | | [# pipedream add-package armstrong.dev](https://pypi.org/project/armstrong.dev) | import armstrong | | [# pipedream add-package armstrong.esi](https://pypi.org/project/armstrong.esi) | import armstrong | | [# pipedream add-package armstrong.hatband](https://pypi.org/project/armstrong.hatband) | import armstrong | | [# pipedream add-package armstrong.templates.standard](https://pypi.org/project/armstrong.templates.standard) | import armstrong | | [# pipedream add-package armstrong.utils.backends](https://pypi.org/project/armstrong.utils.backends) | import armstrong | | [# pipedream add-package armstrong.utils.celery](https://pypi.org/project/armstrong.utils.celery) | import armstrong | | [# pipedream add-package arstecnica.raccoon.autobahn](https://pypi.org/project/arstecnica.raccoon.autobahn) | import arstecnica | | [# pipedream add-package arstecnica.sqlalchemy.async](https://pypi.org/project/arstecnica.sqlalchemy.async) | import arstecnica | | [# pipedream add-package article\_downloader](https://pypi.org/project/article_downloader) | import article-downloader | | [# pipedream add-package artifact\_cli](https://pypi.org/project/artifact_cli) | import artifactcli | | [# pipedream add-package arvados\_python\_client](https://pypi.org/project/arvados_python_client) | import arvados | | [# pipedream add-package arvados\_cwl\_runner](https://pypi.org/project/arvados_cwl_runner) | import arvados\_cwl | | [# pipedream add-package arvados\_node\_manager](https://pypi.org/project/arvados_node_manager) | import arvnodeman | | [# pipedream add-package AsanaToGithub](https://pypi.org/project/AsanaToGithub) | import asana\_to\_github | | [# pipedream add-package AsciiBinaryConverter](https://pypi.org/project/AsciiBinaryConverter) | import asciibinary | | [# pipedream add-package AdvancedSearchDiscovery](https://pypi.org/project/AdvancedSearchDiscovery) | import asd | | [# pipedream add-package askbot\_tuan](https://pypi.org/project/askbot_tuan) | import askbot | | [# pipedream add-package askbot\_tuanpa](https://pypi.org/project/askbot_tuanpa) | import askbot | | [# pipedream add-package asnhistory\_redis](https://pypi.org/project/asnhistory_redis) | import asnhistory | | [# pipedream add-package aspen\_jinja2](https://pypi.org/project/aspen_jinja2) | import aspen\_jinja2\_renderer | | [# pipedream add-package aspen\_tornado](https://pypi.org/project/aspen_tornado) | import aspen\_tornado\_engine | | [# pipedream add-package asprise\_ocr\_sdk\_python\_api](https://pypi.org/project/asprise_ocr_sdk_python_api) | import asprise\_ocr\_api | | [# pipedream add-package aspy.refactor\_imports](https://pypi.org/project/aspy.refactor_imports) | import aspy | | [# pipedream add-package aspy.yaml](https://pypi.org/project/aspy.yaml) | import aspy | | [# pipedream add-package asterisk\_ami](https://pypi.org/project/asterisk_ami) | import asterisk | | [# pipedream add-package add\_asts](https://pypi.org/project/add_asts) | import asts | | [# pipedream add-package asymmetricbase.enum](https://pypi.org/project/asymmetricbase.enum) | import asymmetricbase | | [# pipedream add-package asymmetricbase.fields](https://pypi.org/project/asymmetricbase.fields) | import asymmetricbase | | [# pipedream add-package asymmetricbase.logging](https://pypi.org/project/asymmetricbase.logging) | import asymmetricbase | | [# pipedream add-package asymmetricbase.utils](https://pypi.org/project/asymmetricbase.utils) | import asymmetricbase | | [# pipedream add-package asyncio\_irc](https://pypi.org/project/asyncio_irc) | import asyncirc | | [# pipedream add-package asyncmongoorm\_je](https://pypi.org/project/asyncmongoorm_je) | import asyncmongoorm | | [# pipedream add-package asyncssh\_unofficial](https://pypi.org/project/asyncssh_unofficial) | import asyncssh | | [# pipedream add-package athletelistyy](https://pypi.org/project/athletelistyy) | import athletelist | | [# pipedream add-package automium](https://pypi.org/project/automium) | import atm | | [# pipedream add-package atmosphere\_python\_client](https://pypi.org/project/atmosphere_python_client) | import atmosphere | | [# pipedream add-package gdata](https://pypi.org/project/gdata) | import atom | | [# pipedream add-package AtomicWrite](https://pypi.org/project/AtomicWrite) | import atomic | | [# pipedream add-package atomisator.db](https://pypi.org/project/atomisator.db) | import atomisator | | [# pipedream add-package atomisator.enhancers](https://pypi.org/project/atomisator.enhancers) | import atomisator | | [# pipedream add-package atomisator.feed](https://pypi.org/project/atomisator.feed) | import atomisator | | [# pipedream add-package atomisator.indexer](https://pypi.org/project/atomisator.indexer) | import atomisator | | [# pipedream add-package atomisator.outputs](https://pypi.org/project/atomisator.outputs) | import atomisator | | [# pipedream add-package atomisator.parser](https://pypi.org/project/atomisator.parser) | import atomisator | | [# pipedream add-package atomisator.readers](https://pypi.org/project/atomisator.readers) | import atomisator | | [# pipedream add-package atreal.cmfeditions.unlocker](https://pypi.org/project/atreal.cmfeditions.unlocker) | import atreal | | [# pipedream add-package atreal.filestorage.common](https://pypi.org/project/atreal.filestorage.common) | import atreal | | [# pipedream add-package atreal.layouts](https://pypi.org/project/atreal.layouts) | import atreal | | [# pipedream add-package atreal.mailservices](https://pypi.org/project/atreal.mailservices) | import atreal | | [# pipedream add-package atreal.massloader](https://pypi.org/project/atreal.massloader) | import atreal | | [# pipedream add-package atreal.monkeyplone](https://pypi.org/project/atreal.monkeyplone) | import atreal | | [# pipedream add-package atreal.override.albumview](https://pypi.org/project/atreal.override.albumview) | import atreal | | [# pipedream add-package atreal.richfile.preview](https://pypi.org/project/atreal.richfile.preview) | import atreal | | [# pipedream add-package atreal.richfile.qualifier](https://pypi.org/project/atreal.richfile.qualifier) | import atreal | | [# pipedream add-package atreal.usersinout](https://pypi.org/project/atreal.usersinout) | import atreal | | [# pipedream add-package atsim.potentials](https://pypi.org/project/atsim.potentials) | import atsim | | [# pipedream add-package attract\_sdk](https://pypi.org/project/attract_sdk) | import attractsdk | | [# pipedream add-package audio.bitstream](https://pypi.org/project/audio.bitstream) | import audio | | [# pipedream add-package audio.coders](https://pypi.org/project/audio.coders) | import audio | | [# pipedream add-package audio.filters](https://pypi.org/project/audio.filters) | import audio | | [# pipedream add-package audio.fourier](https://pypi.org/project/audio.fourier) | import audio | | [# pipedream add-package audio.frames](https://pypi.org/project/audio.frames) | import audio | | [# pipedream add-package audio.lp](https://pypi.org/project/audio.lp) | import audio | | [# pipedream add-package audio.psychoacoustics](https://pypi.org/project/audio.psychoacoustics) | import audio | | [# pipedream add-package audio.quantizers](https://pypi.org/project/audio.quantizers) | import audio | | [# pipedream add-package audio.shrink](https://pypi.org/project/audio.shrink) | import audio | | [# pipedream add-package audio.wave](https://pypi.org/project/audio.wave) | import audio | | [# pipedream add-package auf\_refer](https://pypi.org/project/auf_refer) | import aufrefer | | [# pipedream add-package auslfe.formonline.content](https://pypi.org/project/auslfe.formonline.content) | import auslfe | | [# pipedream add-package auspost\_apis](https://pypi.org/project/auspost_apis) | import auspost | | [# pipedream add-package auth0\_python](https://pypi.org/project/auth0_python) | import auth0 | | [# pipedream add-package AuthServerClient](https://pypi.org/project/AuthServerClient) | import auth\_server\_client | | [# pipedream add-package AuthorizeSauce](https://pypi.org/project/AuthorizeSauce) | import authorize | | [# pipedream add-package AuthzPolicyPlugin](https://pypi.org/project/AuthzPolicyPlugin) | import authzpolicy | | [# pipedream add-package autobahn\_rce](https://pypi.org/project/autobahn_rce) | import autobahn | | [# pipedream add-package geonode\_avatar](https://pypi.org/project/geonode_avatar) | import avatar | | [# pipedream add-package android\_webview](https://pypi.org/project/android_webview) | import awebview | | [# pipedream add-package azure\_common](https://pypi.org/project/azure_common) | import azure | | [# pipedream add-package azure\_mgmt\_common](https://pypi.org/project/azure_mgmt_common) | import azure | | [# pipedream add-package azure\_mgmt\_compute](https://pypi.org/project/azure_mgmt_compute) | import azure | | [# pipedream add-package azure\_mgmt\_network](https://pypi.org/project/azure_mgmt_network) | import azure | | [# pipedream add-package azure\_mgmt\_nspkg](https://pypi.org/project/azure_mgmt_nspkg) | import azure | | [# pipedream add-package azure\_mgmt\_resource](https://pypi.org/project/azure_mgmt_resource) | import azure | | [# pipedream add-package azure\_mgmt\_storage](https://pypi.org/project/azure_mgmt_storage) | import azure | | [# pipedream add-package azure\_nspkg](https://pypi.org/project/azure_nspkg) | import azure | | [# pipedream add-package azure\_servicebus](https://pypi.org/project/azure_servicebus) | import azure | | [# pipedream add-package azure\_servicemanagement\_legacy](https://pypi.org/project/azure_servicemanagement_legacy) | import azure | | [# pipedream add-package azure\_storage](https://pypi.org/project/azure_storage) | import azure | | [# pipedream add-package b2g\_commands](https://pypi.org/project/b2g_commands) | import b2gcommands | | [# pipedream add-package b2gperf\_v1.3](https://pypi.org/project/b2gperf_v1.3) | import b2gperf | | [# pipedream add-package b2gperf\_v1.4](https://pypi.org/project/b2gperf_v1.4) | import b2gperf | | [# pipedream add-package b2gperf\_v2.0](https://pypi.org/project/b2gperf_v2.0) | import b2gperf | | [# pipedream add-package b2gperf\_v2.1](https://pypi.org/project/b2gperf_v2.1) | import b2gperf | | [# pipedream add-package b2gperf\_v2.2](https://pypi.org/project/b2gperf_v2.2) | import b2gperf | | [# pipedream add-package b2gpopulate\_v1.3](https://pypi.org/project/b2gpopulate_v1.3) | import b2gpopulate | | [# pipedream add-package b2gpopulate\_v1.4](https://pypi.org/project/b2gpopulate_v1.4) | import b2gpopulate | | [# pipedream add-package b2gpopulate\_v2.0](https://pypi.org/project/b2gpopulate_v2.0) | import b2gpopulate | | [# pipedream add-package b2gpopulate\_v2.1](https://pypi.org/project/b2gpopulate_v2.1) | import b2gpopulate | | [# pipedream add-package b2gpopulate\_v2.2](https://pypi.org/project/b2gpopulate_v2.2) | import b2gpopulate | | [# pipedream add-package b3j0f.annotation](https://pypi.org/project/b3j0f.annotation) | import b3j0f | | [# pipedream add-package b3j0f.aop](https://pypi.org/project/b3j0f.aop) | import b3j0f | | [# pipedream add-package b3j0f.conf](https://pypi.org/project/b3j0f.conf) | import b3j0f | | [# pipedream add-package b3j0f.sync](https://pypi.org/project/b3j0f.sync) | import b3j0f | | [# pipedream add-package b3j0f.utils](https://pypi.org/project/b3j0f.utils) | import b3j0f | | [# pipedream add-package Babel](https://pypi.org/project/Babel) | import babel | | [# pipedream add-package BabelGladeExtractor](https://pypi.org/project/BabelGladeExtractor) | import babelglade | | [# pipedream add-package backplane2\_pyclient](https://pypi.org/project/backplane2_pyclient) | import backplane | | [# pipedream add-package backport\_collections](https://pypi.org/project/backport_collections) | import backport\_abcoll | | [# pipedream add-package backports.functools\_lru\_cache](https://pypi.org/project/backports.functools_lru_cache) | import backports | | [# pipedream add-package backports.inspect](https://pypi.org/project/backports.inspect) | import backports | | [# pipedream add-package backports.pbkdf2](https://pypi.org/project/backports.pbkdf2) | import backports | | [# pipedream add-package backports.shutil\_get\_terminal\_size](https://pypi.org/project/backports.shutil_get_terminal_size) | import backports | | [# pipedream add-package backports.socketpair](https://pypi.org/project/backports.socketpair) | import backports | | [# pipedream add-package backports.ssl](https://pypi.org/project/backports.ssl) | import backports | | [# pipedream add-package backports.ssl\_match\_hostname](https://pypi.org/project/backports.ssl_match_hostname) | import backports | | [# pipedream add-package backports.statistics](https://pypi.org/project/backports.statistics) | import backports | | [# pipedream add-package badgekit\_api\_client](https://pypi.org/project/badgekit_api_client) | import badgekit | | [# pipedream add-package BadLinksPlugin](https://pypi.org/project/BadLinksPlugin) | import badlinks | | [# pipedream add-package bael.project](https://pypi.org/project/bael.project) | import bael | | [# pipedream add-package baidupy](https://pypi.org/project/baidupy) | import baidu | | [# pipedream add-package buildtools](https://pypi.org/project/buildtools) | import balrog | | [# pipedream add-package baluhn\_redux](https://pypi.org/project/baluhn_redux) | import baluhn | | [# pipedream add-package bamboo.pantrybell](https://pypi.org/project/bamboo.pantrybell) | import bamboo | | [# pipedream add-package bamboo.scaffold](https://pypi.org/project/bamboo.scaffold) | import bamboo | | [# pipedream add-package bamboo.setuptools\_version](https://pypi.org/project/bamboo.setuptools_version) | import bamboo | | [# pipedream add-package bamboo\_data](https://pypi.org/project/bamboo_data) | import bamboo | | [# pipedream add-package bamboo\_server](https://pypi.org/project/bamboo_server) | import bamboo | | [# pipedream add-package bambu\_codemirror](https://pypi.org/project/bambu_codemirror) | import bambu | | [# pipedream add-package bambu\_dataportability](https://pypi.org/project/bambu_dataportability) | import bambu | | [# pipedream add-package bambu\_enqueue](https://pypi.org/project/bambu_enqueue) | import bambu | | [# pipedream add-package bambu\_faq](https://pypi.org/project/bambu_faq) | import bambu | | [# pipedream add-package bambu\_ffmpeg](https://pypi.org/project/bambu_ffmpeg) | import bambu | | [# pipedream add-package bambu\_grids](https://pypi.org/project/bambu_grids) | import bambu | | [# pipedream add-package bambu\_international](https://pypi.org/project/bambu_international) | import bambu | | [# pipedream add-package bambu\_jwplayer](https://pypi.org/project/bambu_jwplayer) | import bambu | | [# pipedream add-package bambu\_minidetect](https://pypi.org/project/bambu_minidetect) | import bambu | | [# pipedream add-package bambu\_navigation](https://pypi.org/project/bambu_navigation) | import bambu | | [# pipedream add-package bambu\_notifications](https://pypi.org/project/bambu_notifications) | import bambu | | [# pipedream add-package bambu\_payments](https://pypi.org/project/bambu_payments) | import bambu | | [# pipedream add-package bambu\_pusher](https://pypi.org/project/bambu_pusher) | import bambu | | [# pipedream add-package bambu\_saas](https://pypi.org/project/bambu_saas) | import bambu | | [# pipedream add-package bambu\_sites](https://pypi.org/project/bambu_sites) | import bambu | | [# pipedream add-package Bananas](https://pypi.org/project/Bananas) | import banana | | [# pipedream add-package banana.maya](https://pypi.org/project/banana.maya) | import banana | | [# pipedream add-package bangtext](https://pypi.org/project/bangtext) | import bang | | [# pipedream add-package barcode\_generator](https://pypi.org/project/barcode_generator) | import barcode | | [# pipedream add-package bark\_ssg](https://pypi.org/project/bark_ssg) | import bark | | [# pipedream add-package BarkingOwl](https://pypi.org/project/BarkingOwl) | import barking\_owl | | [# pipedream add-package bart\_py](https://pypi.org/project/bart_py) | import bart | | [# pipedream add-package basalt\_tasks](https://pypi.org/project/basalt_tasks) | import basalt | | [# pipedream add-package base\_62](https://pypi.org/project/base_62) | import base62 | | [# pipedream add-package basemap\_Jim](https://pypi.org/project/basemap_Jim) | import basemap | | [# pipedream add-package bash\_toolbelt](https://pypi.org/project/bash_toolbelt) | import bash | | [# pipedream add-package Python\_Bash\_Utils](https://pypi.org/project/Python_Bash_Utils) | import bashutils | | [# pipedream add-package BasicHttp](https://pypi.org/project/BasicHttp) | import basic\_http | | [# pipedream add-package basil\_daq](https://pypi.org/project/basil_daq) | import basil | | [# pipedream add-package azure\_batch\_apps](https://pypi.org/project/azure_batch_apps) | import batchapps | | [# pipedream add-package python\_bcrypt](https://pypi.org/project/python_bcrypt) | import bcrypt | | [# pipedream add-package Beaker](https://pypi.org/project/Beaker) | import beaker | | [# pipedream add-package beets](https://pypi.org/project/beets) | import beetsplug | | [# pipedream add-package begins](https://pypi.org/project/begins) | import begin | | [# pipedream add-package bench\_it](https://pypi.org/project/bench_it) | import benchit | | [# pipedream add-package beproud.utils](https://pypi.org/project/beproud.utils) | import beproud | | [# pipedream add-package burrito\_fillings](https://pypi.org/project/burrito_fillings) | import bfillings | | [# pipedream add-package BigJob](https://pypi.org/project/BigJob) | import pilot | | [# pipedream add-package billboard.py](https://pypi.org/project/billboard.py) | import billboard | | [# pipedream add-package anaconda\_build](https://pypi.org/project/anaconda_build) | import binstar\_build\_client | | [# pipedream add-package anaconda\_client](https://pypi.org/project/anaconda_client) | import binstar\_client | | [# pipedream add-package biocommons.dev](https://pypi.org/project/biocommons.dev) | import biocommons | | [# pipedream add-package birdhousebuilder.recipe.conda](https://pypi.org/project/birdhousebuilder.recipe.conda) | import birdhousebuilder | | [# pipedream add-package birdhousebuilder.recipe.docker](https://pypi.org/project/birdhousebuilder.recipe.docker) | import birdhousebuilder | | [# pipedream add-package birdhousebuilder.recipe.redis](https://pypi.org/project/birdhousebuilder.recipe.redis) | import birdhousebuilder | | [# pipedream add-package birdhousebuilder.recipe.supervisor](https://pypi.org/project/birdhousebuilder.recipe.supervisor) | import birdhousebuilder | | [# pipedream add-package pymeshio](https://pypi.org/project/pymeshio) | import blender26-meshio | | [# pipedream add-package borg.localrole](https://pypi.org/project/borg.localrole) | import borg | | [# pipedream add-package bagofwords](https://pypi.org/project/bagofwords) | import bow | | [# pipedream add-package bpython](https://pypi.org/project/bpython) | import bpdb | | [# pipedream add-package bisque\_api](https://pypi.org/project/bisque_api) | import bqapi | | [# pipedream add-package django\_braces](https://pypi.org/project/django_braces) | import braces | | [# pipedream add-package briefs\_caster](https://pypi.org/project/briefs_caster) | import briefscaster | | [# pipedream add-package brisa\_media\_server\_plugins](https://pypi.org/project/brisa_media_server_plugins) | import brisa\_media\_server/plugins | | [# pipedream add-package brkt\_sdk](https://pypi.org/project/brkt_sdk) | import brkt\_requests | | [# pipedream add-package broadcast\_logging](https://pypi.org/project/broadcast_logging) | import broadcastlogging | | [# pipedream add-package brocade\_tool](https://pypi.org/project/brocade_tool) | import brocadetool | | [# pipedream add-package bronto\_python](https://pypi.org/project/bronto_python) | import bronto | | [# pipedream add-package Brownie](https://pypi.org/project/Brownie) | import brownie | | [# pipedream add-package browsermob\_proxy](https://pypi.org/project/browsermob_proxy) | import browsermobproxy | | [# pipedream add-package brubeck\_mysql](https://pypi.org/project/brubeck_mysql) | import brubeckmysql | | [# pipedream add-package brubeck\_oauth](https://pypi.org/project/brubeck_oauth) | import brubeckoauth | | [# pipedream add-package brubeck\_service](https://pypi.org/project/brubeck_service) | import brubeckservice | | [# pipedream add-package brubeck\_uploader](https://pypi.org/project/brubeck_uploader) | import brubeckuploader | | [# pipedream add-package beautifulsoup4](https://pypi.org/project/beautifulsoup4) | import bs4 | | [# pipedream add-package pymongo](https://pypi.org/project/pymongo) | import gridfs | | [# pipedream add-package bst.pygasus.core](https://pypi.org/project/bst.pygasus.core) | import bst | | [# pipedream add-package bst.pygasus.datamanager](https://pypi.org/project/bst.pygasus.datamanager) | import bst | | [# pipedream add-package bst.pygasus.demo](https://pypi.org/project/bst.pygasus.demo) | import bst | | [# pipedream add-package bst.pygasus.i18n](https://pypi.org/project/bst.pygasus.i18n) | import bst | | [# pipedream add-package bst.pygasus.resources](https://pypi.org/project/bst.pygasus.resources) | import bst | | [# pipedream add-package bst.pygasus.scaffolding](https://pypi.org/project/bst.pygasus.scaffolding) | import bst | | [# pipedream add-package bst.pygasus.security](https://pypi.org/project/bst.pygasus.security) | import bst | | [# pipedream add-package bst.pygasus.session](https://pypi.org/project/bst.pygasus.session) | import bst | | [# pipedream add-package bst.pygasus.wsgi](https://pypi.org/project/bst.pygasus.wsgi) | import bst | | [# pipedream add-package btable\_py](https://pypi.org/project/btable_py) | import btable | | [# pipedream add-package bananatag\_api](https://pypi.org/project/bananatag_api) | import btapi | | [# pipedream add-package btce\_api](https://pypi.org/project/btce_api) | import btceapi | | [# pipedream add-package btce\_bot](https://pypi.org/project/btce_bot) | import btcebot | | [# pipedream add-package btsync.py](https://pypi.org/project/btsync.py) | import btsync | | [# pipedream add-package buck.pprint](https://pypi.org/project/buck.pprint) | import buck | | [# pipedream add-package bud.nospam](https://pypi.org/project/bud.nospam) | import bud | | [# pipedream add-package budy\_api](https://pypi.org/project/budy_api) | import budy | | [# pipedream add-package buffer\_alpaca](https://pypi.org/project/buffer_alpaca) | import buffer | | [# pipedream add-package bug.gd](https://pypi.org/project/bug.gd) | import buggd | | [# pipedream add-package bugle\_sites](https://pypi.org/project/bugle_sites) | import bugle | | [# pipedream add-package bug\_spots](https://pypi.org/project/bug_spots) | import bugspots | | [# pipedream add-package python\_bugzilla](https://pypi.org/project/python_bugzilla) | import bugzilla | | [# pipedream add-package bugzscout\_py](https://pypi.org/project/bugzscout_py) | import bugzscout | | [# pipedream add-package ajk\_ios\_buildTools](https://pypi.org/project/ajk_ios_buildTools) | import buildTools | | [# pipedream add-package BuildNotify](https://pypi.org/project/BuildNotify) | import buildnotifylib | | [# pipedream add-package buildout.bootstrap](https://pypi.org/project/buildout.bootstrap) | import buildout | | [# pipedream add-package buildout.disablessl](https://pypi.org/project/buildout.disablessl) | import buildout | | [# pipedream add-package buildout.dumppickedversions](https://pypi.org/project/buildout.dumppickedversions) | import buildout | | [# pipedream add-package buildout.dumppickedversions2](https://pypi.org/project/buildout.dumppickedversions2) | import buildout | | [# pipedream add-package buildout.dumprequirements](https://pypi.org/project/buildout.dumprequirements) | import buildout | | [# pipedream add-package buildout.eggnest](https://pypi.org/project/buildout.eggnest) | import buildout | | [# pipedream add-package buildout.eggscleaner](https://pypi.org/project/buildout.eggscleaner) | import buildout | | [# pipedream add-package buildout.eggsdirectories](https://pypi.org/project/buildout.eggsdirectories) | import buildout | | [# pipedream add-package buildout.eggtractor](https://pypi.org/project/buildout.eggtractor) | import buildout | | [# pipedream add-package buildout.extensionscripts](https://pypi.org/project/buildout.extensionscripts) | import buildout | | [# pipedream add-package buildout.locallib](https://pypi.org/project/buildout.locallib) | import buildout | | [# pipedream add-package buildout.packagename](https://pypi.org/project/buildout.packagename) | import buildout | | [# pipedream add-package buildout.recipe.isolation](https://pypi.org/project/buildout.recipe.isolation) | import buildout | | [# pipedream add-package buildout.removeaddledeggs](https://pypi.org/project/buildout.removeaddledeggs) | import buildout | | [# pipedream add-package buildout.requirements](https://pypi.org/project/buildout.requirements) | import buildout | | [# pipedream add-package buildout.sanitycheck](https://pypi.org/project/buildout.sanitycheck) | import buildout | | [# pipedream add-package buildout.sendpickedversions](https://pypi.org/project/buildout.sendpickedversions) | import buildout | | [# pipedream add-package buildout.threatlevel](https://pypi.org/project/buildout.threatlevel) | import buildout | | [# pipedream add-package buildout.umask](https://pypi.org/project/buildout.umask) | import buildout | | [# pipedream add-package buildout.variables](https://pypi.org/project/buildout.variables) | import buildout | | [# pipedream add-package buildbot\_slave](https://pypi.org/project/buildbot_slave) | import buildslave | | [# pipedream add-package pies2overrides](https://pypi.org/project/pies2overrides) | import xmlrpc | | [# pipedream add-package bumper\_lib](https://pypi.org/project/bumper_lib) | import bumper | | [# pipedream add-package bumple\_downloader](https://pypi.org/project/bumple_downloader) | import bumple | | [# pipedream add-package bundesliga\_cli](https://pypi.org/project/bundesliga_cli) | import bundesliga | | [# pipedream add-package bundlemanager](https://pypi.org/project/bundlemanager) | import bundlemaker | | [# pipedream add-package burp\_ui](https://pypi.org/project/burp_ui) | import burpui | | [# pipedream add-package busyflow.pivotal](https://pypi.org/project/busyflow.pivotal) | import busyflow | | [# pipedream add-package buttercms\_django](https://pypi.org/project/buttercms_django) | import buttercms-django | | [# pipedream add-package buzz\_python\_client](https://pypi.org/project/buzz_python_client) | import buzz | | [# pipedream add-package buildout\_versions\_checker](https://pypi.org/project/buildout_versions_checker) | import bvc | | [# pipedream add-package bvg\_grabber](https://pypi.org/project/bvg_grabber) | import bvggrabber | | [# pipedream add-package BYONDTools](https://pypi.org/project/BYONDTools) | import byond | | [# pipedream add-package Bugzilla\_ETL](https://pypi.org/project/Bugzilla_ETL) | import bzETL | | [# pipedream add-package bugzillatools](https://pypi.org/project/bugzillatools) | import bzlib | | [# pipedream add-package bzr](https://pypi.org/project/bzr) | import bzrlib | | [# pipedream add-package bzr\_automirror](https://pypi.org/project/bzr_automirror) | import bzrlib | | [# pipedream add-package bzr\_bash\_completion](https://pypi.org/project/bzr_bash_completion) | import bzrlib | | [# pipedream add-package bzr\_colo](https://pypi.org/project/bzr_colo) | import bzrlib | | [# pipedream add-package bzr\_killtrailing](https://pypi.org/project/bzr_killtrailing) | import bzrlib | | [# pipedream add-package bzr\_pqm](https://pypi.org/project/bzr_pqm) | import bzrlib | | [# pipedream add-package c2c.cssmin](https://pypi.org/project/c2c.cssmin) | import c2c | | [# pipedream add-package c2c.recipe.closurecompile](https://pypi.org/project/c2c.recipe.closurecompile) | import c2c | | [# pipedream add-package c2c.recipe.cssmin](https://pypi.org/project/c2c.recipe.cssmin) | import c2c | | [# pipedream add-package c2c.recipe.jarfile](https://pypi.org/project/c2c.recipe.jarfile) | import c2c | | [# pipedream add-package c2c.recipe.msgfmt](https://pypi.org/project/c2c.recipe.msgfmt) | import c2c | | [# pipedream add-package c2c.recipe.pkgversions](https://pypi.org/project/c2c.recipe.pkgversions) | import c2c | | [# pipedream add-package c2c.sqlalchemy.rest](https://pypi.org/project/c2c.sqlalchemy.rest) | import c2c | | [# pipedream add-package c2c.versions](https://pypi.org/project/c2c.versions) | import c2c | | [# pipedream add-package c2c.recipe.facts](https://pypi.org/project/c2c.recipe.facts) | import c2c\_recipe\_facts | | [# pipedream add-package cabalgata\_silla\_de\_montar](https://pypi.org/project/cabalgata_silla_de_montar) | import cabalgata | | [# pipedream add-package cabalgata\_zookeeper](https://pypi.org/project/cabalgata_zookeeper) | import cabalgata | | [# pipedream add-package django\_cache\_utils](https://pypi.org/project/django_cache_utils) | import cache\_utils | | [# pipedream add-package django\_recaptcha](https://pypi.org/project/django_recaptcha) | import captcha | | [# pipedream add-package Cartridge](https://pypi.org/project/Cartridge) | import cartridge | | [# pipedream add-package cassandra\_driver](https://pypi.org/project/cassandra_driver) | import cassandra | | [# pipedream add-package CassandraLauncher](https://pypi.org/project/CassandraLauncher) | import cassandralauncher | | [# pipedream add-package 42qucc](https://pypi.org/project/42qucc) | import cc42 | | [# pipedream add-package Cerberus](https://pypi.org/project/Cerberus) | import cerberus | | [# pipedream add-package cfn-lint](https://pypi.org/project/cfn-lint) | import cfnlint | | [# pipedream add-package Chameleon](https://pypi.org/project/Chameleon) | import chameleon | | [# pipedream add-package charm\_tools](https://pypi.org/project/charm_tools) | import charmtools | | [# pipedream add-package PyChef](https://pypi.org/project/PyChef) | import chef | | [# pipedream add-package c8d](https://pypi.org/project/c8d) | import chip8 | | [# pipedream add-package python\_cjson](https://pypi.org/project/python_cjson) | import cjson | | [# pipedream add-package django\_classy\_tags](https://pypi.org/project/django_classy_tags) | import classytags | | [# pipedream add-package ConcurrentLogHandler](https://pypi.org/project/ConcurrentLogHandler) | import cloghandler | | [# pipedream add-package virtualenv\_clone](https://pypi.org/project/virtualenv_clone) | import clonevirtualenv | | [# pipedream add-package al\_cloudinsight](https://pypi.org/project/al_cloudinsight) | import cloud-insight | | [# pipedream add-package adminapi](https://pypi.org/project/adminapi) | import cloud\_admin | | [# pipedream add-package python\_cloudservers](https://pypi.org/project/python_cloudservers) | import cloudservers | | [# pipedream add-package cerebrod](https://pypi.org/project/cerebrod) | import tasksitter | | [# pipedream add-package django\_cms](https://pypi.org/project/django_cms) | import cms | | [# pipedream add-package ba\_colander](https://pypi.org/project/ba_colander) | import colander | | [# pipedream add-package ansicolors](https://pypi.org/project/ansicolors) | import colors | | [# pipedream add-package bf\_lc3](https://pypi.org/project/bf_lc3) | import compile | | [# pipedream add-package docker\_compose](https://pypi.org/project/docker_compose) | import compose | | [# pipedream add-package django\_compressor](https://pypi.org/project/django_compressor) | import compressor | | [# pipedream add-package futures](https://pypi.org/project/futures) | import concurrent | | [# pipedream add-package ConfigArgParse](https://pypi.org/project/ConfigArgParse) | import configargparse | | [# pipedream add-package PyContracts](https://pypi.org/project/PyContracts) | import contracts | | [# pipedream add-package weblogo](https://pypi.org/project/weblogo) | import weblogolib | | [# pipedream add-package Couchapp](https://pypi.org/project/Couchapp) | import couchapp | | [# pipedream add-package CouchDB](https://pypi.org/project/CouchDB) | import couchdb | | [# pipedream add-package couchdb\_python\_curl](https://pypi.org/project/couchdb_python_curl) | import couchdbcurl | | [# pipedream add-package coursera\_dl](https://pypi.org/project/coursera_dl) | import courseradownloader | | [# pipedream add-package cow\_framework](https://pypi.org/project/cow_framework) | import cow | | [# pipedream add-package python\_creole](https://pypi.org/project/python_creole) | import creole | | [# pipedream add-package Creoleparser](https://pypi.org/project/Creoleparser) | import creoleparser | | [# pipedream add-package django\_crispy\_forms](https://pypi.org/project/django_crispy_forms) | import crispy\_forms | | [# pipedream add-package python\_crontab](https://pypi.org/project/python_crontab) | import crontab | | [# pipedream add-package tff](https://pypi.org/project/tff) | import ctff | | [# pipedream add-package pycups](https://pypi.org/project/pycups) | import cups | | [# pipedream add-package elasticsearch\_curator](https://pypi.org/project/elasticsearch_curator) | import curator | | [# pipedream add-package pycurl](https://pypi.org/project/pycurl) | import curl | | [# pipedream add-package python\_daemon](https://pypi.org/project/python_daemon) | import daemon | | [# pipedream add-package DARE](https://pypi.org/project/DARE) | import dare | | [# pipedream add-package python\_dateutil](https://pypi.org/project/python_dateutil) | import dateutil | | [# pipedream add-package DAWG](https://pypi.org/project/DAWG) | import dawg | | [# pipedream add-package python\_debian](https://pypi.org/project/python_debian) | import debian | | [# pipedream add-package python-decouple](https://pypi.org/project/python-decouple) | import decouple | | [# pipedream add-package webunit](https://pypi.org/project/webunit) | import demo | | [# pipedream add-package PySynth](https://pypi.org/project/PySynth) | import pysynth\_samp | | [# pipedream add-package juju\_deployer](https://pypi.org/project/juju_deployer) | import deployer | | [# pipedream add-package filedepot](https://pypi.org/project/filedepot) | import depot | | [# pipedream add-package tg.devtools](https://pypi.org/project/tg.devtools) | import devtools | | [# pipedream add-package 2gis](https://pypi.org/project/2gis) | import dgis | | [# pipedream add-package pyDHTMLParser](https://pypi.org/project/pyDHTMLParser) | import dhtmlparser | | [# pipedream add-package python\_digitalocean](https://pypi.org/project/python_digitalocean) | import digitalocean | | [# pipedream add-package discord.py](https://pypi.org/project/discord.py) | import discord | | [# pipedream add-package ez\_setup](https://pypi.org/project/ez_setup) | import distribute\_setup | | [# pipedream add-package Distutils2](https://pypi.org/project/Distutils2) | import distutils2 | | [# pipedream add-package Django](https://pypi.org/project/Django) | import django | | [# pipedream add-package amitu\_hstore](https://pypi.org/project/amitu_hstore) | import django\_hstore | | [# pipedream add-package django\_bower](https://pypi.org/project/django_bower) | import djangobower | | [# pipedream add-package django\_celery](https://pypi.org/project/django_celery) | import djcelery | | [# pipedream add-package django\_kombu](https://pypi.org/project/django_kombu) | import djkombu | | [# pipedream add-package djorm\_ext\_pgarray](https://pypi.org/project/djorm_ext_pgarray) | import djorm\_pgarray | | [# pipedream add-package dnspython](https://pypi.org/project/dnspython) | import dns | | [# pipedream add-package ansible\_docgenerator](https://pypi.org/project/ansible_docgenerator) | import docgen | | [# pipedream add-package docker\_py](https://pypi.org/project/docker_py) | import docker | | [# pipedream add-package dogpile.cache](https://pypi.org/project/dogpile.cache) | import dogpile | | [# pipedream add-package dogpile.core](https://pypi.org/project/dogpile.core) | import dogpile | | [# pipedream add-package dogapi](https://pypi.org/project/dogapi) | import dogshell | | [# pipedream add-package pydot](https://pypi.org/project/pydot) | import dot\_parser | | [# pipedream add-package pydot2](https://pypi.org/project/pydot2) | import dot\_parser | | [# pipedream add-package pydot3k](https://pypi.org/project/pydot3k) | import dot\_parser | | [# pipedream add-package python-dotenv](https://pypi.org/project/python-dotenv) | import dotenv | | [# pipedream add-package dpkt\_fix](https://pypi.org/project/dpkt_fix) | import dpkt | | [# pipedream add-package python\_ldap](https://pypi.org/project/python_ldap) | import ldif | | [# pipedream add-package django\_durationfield](https://pypi.org/project/django_durationfield) | import durationfield | | [# pipedream add-package datazilla](https://pypi.org/project/datazilla) | import dzclient | | [# pipedream add-package easybuild\_framework](https://pypi.org/project/easybuild_framework) | import easybuild | | [# pipedream add-package python\_editor](https://pypi.org/project/python_editor) | import editor | | [# pipedream add-package azure\_elasticluster](https://pypi.org/project/azure_elasticluster) | import elasticluster | | [# pipedream add-package azure\_elasticluster\_current](https://pypi.org/project/azure_elasticluster_current) | import elasticluster | | [# pipedream add-package pyelftools](https://pypi.org/project/pyelftools) | import elftools | | [# pipedream add-package Elixir](https://pypi.org/project/Elixir) | import elixir | | [# pipedream add-package empy](https://pypi.org/project/empy) | import emlib | | [# pipedream add-package pyenchant](https://pypi.org/project/pyenchant) | import enchant | | [# pipedream add-package cssutils](https://pypi.org/project/cssutils) | import encutils | | [# pipedream add-package python\_engineio](https://pypi.org/project/python_engineio) | import engineio | | [# pipedream add-package enum34](https://pypi.org/project/enum34) | import enum | | [# pipedream add-package pyephem](https://pypi.org/project/pyephem) | import ephem | | [# pipedream add-package abl.errorreporter](https://pypi.org/project/abl.errorreporter) | import errorreporter | | [# pipedream add-package beaker\_es\_plot](https://pypi.org/project/beaker_es_plot) | import esplot | | [# pipedream add-package adrest](https://pypi.org/project/adrest) | import example | | [# pipedream add-package tweepy](https://pypi.org/project/tweepy) | import examples | | [# pipedream add-package pycassa](https://pypi.org/project/pycassa) | import ez\_setup | | [# pipedream add-package Fabric](https://pypi.org/project/Fabric) | import fabric | | [# pipedream add-package Faker](https://pypi.org/project/Faker) | import faker | | [# pipedream add-package python\_fedora](https://pypi.org/project/python_fedora) | import fedora | | [# pipedream add-package ailove\_django\_fias](https://pypi.org/project/ailove_django_fias) | import fias | | [# pipedream add-package 51degrees\_mobile\_detector](https://pypi.org/project/51degrees_mobile_detector) | import fiftyone\_degrees | | [# pipedream add-package five.customerize](https://pypi.org/project/five.customerize) | import five | | [# pipedream add-package five.globalrequest](https://pypi.org/project/five.globalrequest) | import five | | [# pipedream add-package five.intid](https://pypi.org/project/five.intid) | import five | | [# pipedream add-package five.localsitemanager](https://pypi.org/project/five.localsitemanager) | import five | | [# pipedream add-package five.pt](https://pypi.org/project/five.pt) | import five | | [# pipedream add-package android\_flasher](https://pypi.org/project/android_flasher) | import flasher | | [# pipedream add-package Flask](https://pypi.org/project/Flask) | import flask | | [# pipedream add-package Frozen\_Flask](https://pypi.org/project/Frozen_Flask) | import flask\_frozen | | [# pipedream add-package Flask\_And\_Redis](https://pypi.org/project/Flask_And_Redis) | import flask\_redis | | [# pipedream add-package Flask\_Bcrypt](https://pypi.org/project/Flask_Bcrypt) | import flaskext | | [# pipedream add-package vnc2flv](https://pypi.org/project/vnc2flv) | import flvscreen | | [# pipedream add-package django\_followit](https://pypi.org/project/django_followit) | import followit | | [# pipedream add-package pyforge](https://pypi.org/project/pyforge) | import forge | | [# pipedream add-package FormEncode](https://pypi.org/project/FormEncode) | import formencode | | [# pipedream add-package django\_formtools](https://pypi.org/project/django_formtools) | import formtools | | [# pipedream add-package 4ch](https://pypi.org/project/4ch) | import fourch | | [# pipedream add-package allegrordf](https://pypi.org/project/allegrordf) | import franz | | [# pipedream add-package freetype\_py](https://pypi.org/project/freetype_py) | import freetype | | [# pipedream add-package python\_frontmatter](https://pypi.org/project/python_frontmatter) | import frontmatter | | [# pipedream add-package ftp\_cloudfs](https://pypi.org/project/ftp_cloudfs) | import ftpcloudfs | | [# pipedream add-package librabbitmq](https://pypi.org/project/librabbitmq) | import funtests | | [# pipedream add-package fusepy](https://pypi.org/project/fusepy) | import fuse | | [# pipedream add-package Fuzzy](https://pypi.org/project/Fuzzy) | import fuzzy | | [# pipedream add-package tiddlyweb](https://pypi.org/project/tiddlyweb) | import gabbi | | [# pipedream add-package 3d\_wallet\_generator](https://pypi.org/project/3d_wallet_generator) | import gen\_3dwallet | | [# pipedream add-package android\_gendimen](https://pypi.org/project/android_gendimen) | import gendimen | | [# pipedream add-package Genshi](https://pypi.org/project/Genshi) | import genshi | | [# pipedream add-package python\_geohash](https://pypi.org/project/python_geohash) | import quadtree | | [# pipedream add-package GeoNode](https://pypi.org/project/GeoNode) | import geonode | | [# pipedream add-package gsconfig](https://pypi.org/project/gsconfig) | import geoserver | | [# pipedream add-package Geraldo](https://pypi.org/project/Geraldo) | import geraldo | | [# pipedream add-package django\_getenv](https://pypi.org/project/django_getenv) | import getenv | | [# pipedream add-package gevent\_websocket](https://pypi.org/project/gevent_websocket) | import geventwebsocket | | [# pipedream add-package python\_gflags](https://pypi.org/project/python_gflags) | import gflags | | [# pipedream add-package GitPython](https://pypi.org/project/GitPython) | import git | | [# pipedream add-package PyGithub](https://pypi.org/project/PyGithub) | import github | | [# pipedream add-package github3.py](https://pypi.org/project/github3.py) | import github3 | | [# pipedream add-package git\_py](https://pypi.org/project/git_py) | import gitpy | | [# pipedream add-package globusonline\_transfer\_api\_client](https://pypi.org/project/globusonline_transfer_api_client) | import globusonline | | [# pipedream add-package protobuf](https://pypi.org/project/protobuf) | import google | | [# pipedream add-package grace\_dizmo](https://pypi.org/project/grace_dizmo) | import grace-dizmo | | [# pipedream add-package anovelmous\_grammar](https://pypi.org/project/anovelmous_grammar) | import grammar | | [# pipedream add-package graphenelib](https://pypi.org/project/graphenelib) | import grapheneapi | | [# pipedream add-package scales](https://pypi.org/project/scales) | import greplin | | [# pipedream add-package grokcore.component](https://pypi.org/project/grokcore.component) | import grokcore | | [# pipedream add-package gsutil](https://pypi.org/project/gsutil) | import gslib | | [# pipedream add-package PyHamcrest](https://pypi.org/project/PyHamcrest) | import hamcrest | | [# pipedream add-package HARPy](https://pypi.org/project/HARPy) | import harpy | | [# pipedream add-package PyHawk\_with\_a\_single\_extra\_commit](https://pypi.org/project/PyHawk_with_a_single_extra_commit) | import hawk | | [# pipedream add-package django\_haystack](https://pypi.org/project/django_haystack) | import haystack | | [# pipedream add-package mercurial](https://pypi.org/project/mercurial) | import hgext | | [# pipedream add-package hg\_git](https://pypi.org/project/hg_git) | import hggit | | [# pipedream add-package python\_hglib](https://pypi.org/project/python_hglib) | import hglib | | [# pipedream add-package pisa](https://pypi.org/project/pisa) | import sx | | [# pipedream add-package amarokHola](https://pypi.org/project/amarokHola) | import hola | | [# pipedream add-package Hoover](https://pypi.org/project/Hoover) | import hoover | | [# pipedream add-package python\_hostlist](https://pypi.org/project/python_hostlist) | import hostlist | | [# pipedream add-package nosehtmloutput](https://pypi.org/project/nosehtmloutput) | import htmloutput | | [# pipedream add-package django\_hvad](https://pypi.org/project/django_hvad) | import hvad | | [# pipedream add-package hydra-core](https://pypi.org/project/hydra-core) | import hydra | | [# pipedream add-package 199Fix](https://pypi.org/project/199Fix) | import i99fix | | [# pipedream add-package python\_igraph](https://pypi.org/project/python_igraph) | import igraph | | [# pipedream add-package IMDbPY](https://pypi.org/project/IMDbPY) | import imdb | | [# pipedream add-package impyla](https://pypi.org/project/impyla) | import impala | | [# pipedream add-package ambition\_inmemorystorage](https://pypi.org/project/ambition_inmemorystorage) | import inmemorystorage | | [# pipedream add-package backport\_ipaddress](https://pypi.org/project/backport_ipaddress) | import ipaddress | | [# pipedream add-package jaraco.timing](https://pypi.org/project/jaraco.timing) | import jaraco | | [# pipedream add-package jaraco.util](https://pypi.org/project/jaraco.util) | import jaraco | | [# pipedream add-package Jinja2](https://pypi.org/project/Jinja2) | import jinja2 | | [# pipedream add-package jira\_cli](https://pypi.org/project/jira_cli) | import jiracli | | [# pipedream add-package johnny\_cache](https://pypi.org/project/johnny_cache) | import johnny | | [# pipedream add-package JPype1](https://pypi.org/project/JPype1) | import jpypex | | [# pipedream add-package django\_jsonfield](https://pypi.org/project/django_jsonfield) | import jsonfield | | [# pipedream add-package aino\_jstools](https://pypi.org/project/aino_jstools) | import jstools | | [# pipedream add-package jupyter\_pip](https://pypi.org/project/jupyter_pip) | import jupyterpip | | [# pipedream add-package PyJWT](https://pypi.org/project/PyJWT) | import jwt | | [# pipedream add-package asana\_kazoo](https://pypi.org/project/asana_kazoo) | import kazoo | | [# pipedream add-package line\_profiler](https://pypi.org/project/line_profiler) | import kernprof | | [# pipedream add-package python\_keyczar](https://pypi.org/project/python_keyczar) | import keyczar | | [# pipedream add-package django\_keyedcache](https://pypi.org/project/django_keyedcache) | import keyedcache | | [# pipedream add-package python\_keystoneclient](https://pypi.org/project/python_keystoneclient) | import keystoneclient | | [# pipedream add-package kickstart](https://pypi.org/project/kickstart) | import kickstarter | | [# pipedream add-package krbV](https://pypi.org/project/krbV) | import krbv | | [# pipedream add-package kss.core](https://pypi.org/project/kss.core) | import kss | | [# pipedream add-package Kuyruk](https://pypi.org/project/Kuyruk) | import kuyruk | | [# pipedream add-package AdvancedLangConv](https://pypi.org/project/AdvancedLangConv) | import langconv | | [# pipedream add-package lava\_utils\_interface](https://pypi.org/project/lava_utils_interface) | import lava | | [# pipedream add-package lazr.authentication](https://pypi.org/project/lazr.authentication) | import lazr | | [# pipedream add-package lazr.restfulclient](https://pypi.org/project/lazr.restfulclient) | import lazr | | [# pipedream add-package lazr.uri](https://pypi.org/project/lazr.uri) | import lazr | | [# pipedream add-package adpasswd](https://pypi.org/project/adpasswd) | import ldaplib | | [# pipedream add-package 2or3](https://pypi.org/project/2or3) | import lib2or3 | | [# pipedream add-package 3to2](https://pypi.org/project/3to2) | import lib3to2 | | [# pipedream add-package Aito](https://pypi.org/project/Aito) | import libaito | | [# pipedream add-package bugs\_everywhere](https://pypi.org/project/bugs_everywhere) | import libbe | | [# pipedream add-package bucket](https://pypi.org/project/bucket) | import libbucket | | [# pipedream add-package apache\_libcloud](https://pypi.org/project/apache_libcloud) | import libcloud | | [# pipedream add-package future](https://pypi.org/project/future) | import winreg | | [# pipedream add-package generateDS](https://pypi.org/project/generateDS) | import libgenerateDS | | [# pipedream add-package mitmproxy](https://pypi.org/project/mitmproxy) | import libmproxy | | [# pipedream add-package 7lk\_ocr\_deploy](https://pypi.org/project/7lk_ocr_deploy) | import libsvm | | [# pipedream add-package lisa\_server](https://pypi.org/project/lisa_server) | import lisa | | [# pipedream add-package aspose\_words\_java\_for\_python](https://pypi.org/project/aspose_words_java_for_python) | import loadingandsaving | | [# pipedream add-package locustio](https://pypi.org/project/locustio) | import locust | | [# pipedream add-package Logbook](https://pypi.org/project/Logbook) | import logbook | | [# pipedream add-package buildbot\_status\_logentries](https://pypi.org/project/buildbot_status_logentries) | import logentries | | [# pipedream add-package logilab\_mtconverter](https://pypi.org/project/logilab_mtconverter) | import logilab | | [# pipedream add-package python\_magic](https://pypi.org/project/python_magic) | import magic | | [# pipedream add-package Mako](https://pypi.org/project/Mako) | import mako | | [# pipedream add-package ManifestDestiny](https://pypi.org/project/ManifestDestiny) | import manifestparser | | [# pipedream add-package marionette\_client](https://pypi.org/project/marionette_client) | import marionette | | [# pipedream add-package Markdown](https://pypi.org/project/Markdown) | import markdown | | [# pipedream add-package pytest\_marks](https://pypi.org/project/pytest_marks) | import marks | | [# pipedream add-package MarkupSafe](https://pypi.org/project/MarkupSafe) | import markupsafe | | [# pipedream add-package pymavlink](https://pypi.org/project/pymavlink) | import mavnative | | [# pipedream add-package python\_memcached](https://pypi.org/project/python_memcached) | import memcache | | [# pipedream add-package AllPairs](https://pypi.org/project/AllPairs) | import metacomm | | [# pipedream add-package Metafone](https://pypi.org/project/Metafone) | import metaphone | | [# pipedream add-package metlog\_py](https://pypi.org/project/metlog_py) | import metlog | | [# pipedream add-package Mezzanine](https://pypi.org/project/Mezzanine) | import mezzanine | | [# pipedream add-package sqlalchemy\_migrate](https://pypi.org/project/sqlalchemy_migrate) | import migrate | | [# pipedream add-package python\_mimeparse](https://pypi.org/project/python_mimeparse) | import mimeparse | | [# pipedream add-package minitage.paste](https://pypi.org/project/minitage.paste) | import minitage | | [# pipedream add-package minitage.recipe.common](https://pypi.org/project/minitage.recipe.common) | import minitage | | [# pipedream add-package android\_missingdrawables](https://pypi.org/project/android_missingdrawables) | import missingdrawables | | [# pipedream add-package 2lazy2rest](https://pypi.org/project/2lazy2rest) | import mkrst\_themes | | [# pipedream add-package mockredispy](https://pypi.org/project/mockredispy) | import mockredis | | [# pipedream add-package python\_modargs](https://pypi.org/project/python_modargs) | import modargs | | [# pipedream add-package django\_model\_utils](https://pypi.org/project/django_model_utils) | import model\_utils | | [# pipedream add-package asposebarcode](https://pypi.org/project/asposebarcode) | import models | | [# pipedream add-package asposestorage](https://pypi.org/project/asposestorage) | import models | | [# pipedream add-package moksha.common](https://pypi.org/project/moksha.common) | import moksha | | [# pipedream add-package moksha.hub](https://pypi.org/project/moksha.hub) | import moksha | | [# pipedream add-package moksha.wsgi](https://pypi.org/project/moksha.wsgi) | import moksha | | [# pipedream add-package py\_moneyed](https://pypi.org/project/py_moneyed) | import moneyed | | [# pipedream add-package MongoAlchemy](https://pypi.org/project/MongoAlchemy) | import mongoalchemy | | [# pipedream add-package MonthDelta](https://pypi.org/project/MonthDelta) | import monthdelta | | [# pipedream add-package Mopidy](https://pypi.org/project/Mopidy) | import mopidy | | [# pipedream add-package MoPyTools](https://pypi.org/project/MoPyTools) | import mopytools | | [# pipedream add-package django\_mptt](https://pypi.org/project/django_mptt) | import mptt | | [# pipedream add-package python-mpv](https://pypi.org/project/python-mpv) | import mpv | | [# pipedream add-package mr.bob](https://pypi.org/project/mr.bob) | import mrbob | | [# pipedream add-package msgpack\_python](https://pypi.org/project/msgpack_python) | import msgpack | | [# pipedream add-package aino\_mutations](https://pypi.org/project/aino_mutations) | import mutations | | [# pipedream add-package amazon\_mws](https://pypi.org/project/amazon_mws) | import mws | | [# pipedream add-package mysql\_connector\_repackaged](https://pypi.org/project/mysql_connector_repackaged) | import mysql | | [# pipedream add-package django\_native\_tags](https://pypi.org/project/django_native_tags) | import native\_tags | | [# pipedream add-package ndg\_httpsclient](https://pypi.org/project/ndg_httpsclient) | import ndg | | [# pipedream add-package trytond\_nereid](https://pypi.org/project/trytond_nereid) | import nereid | | [# pipedream add-package baojinhuan](https://pypi.org/project/baojinhuan) | import nested | | [# pipedream add-package Amauri](https://pypi.org/project/Amauri) | import nester | | [# pipedream add-package abofly](https://pypi.org/project/abofly) | import nester | | [# pipedream add-package bssm\_pythonSig](https://pypi.org/project/bssm_pythonSig) | import nester | | [# pipedream add-package python\_novaclient](https://pypi.org/project/python_novaclient) | import novaclient | | [# pipedream add-package alauda\_django\_oauth](https://pypi.org/project/alauda_django_oauth) | import oauth2\_provider | | [# pipedream add-package oauth2client](https://pypi.org/project/oauth2client) | import oauth2client | | [# pipedream add-package odfpy](https://pypi.org/project/odfpy) | import odf | | [# pipedream add-package Parsley](https://pypi.org/project/Parsley) | import ometa | | [# pipedream add-package python\_openid](https://pypi.org/project/python_openid) | import openid | | [# pipedream add-package ali\_opensearch](https://pypi.org/project/ali_opensearch) | import opensearchsdk | | [# pipedream add-package oslo.i18n](https://pypi.org/project/oslo.i18n) | import oslo\_i18n | | [# pipedream add-package oslo.serialization](https://pypi.org/project/oslo.serialization) | import oslo\_serialization | | [# pipedream add-package oslo.utils](https://pypi.org/project/oslo.utils) | import oslo\_utils | | [# pipedream add-package alioss](https://pypi.org/project/alioss) | import oss | | [# pipedream add-package aliyun\_python\_sdk\_oss](https://pypi.org/project/aliyun_python_sdk_oss) | import oss | | [# pipedream add-package aliyunoss](https://pypi.org/project/aliyunoss) | import oss | | [# pipedream add-package cashew](https://pypi.org/project/cashew) | import output | | [# pipedream add-package OWSLib](https://pypi.org/project/OWSLib) | import owslib | | [# pipedream add-package nwdiag](https://pypi.org/project/nwdiag) | import rackdiag | | [# pipedream add-package paho\_mqtt](https://pypi.org/project/paho_mqtt) | import paho | | [# pipedream add-package django\_paintstore](https://pypi.org/project/django_paintstore) | import paintstore | | [# pipedream add-package django\_parler](https://pypi.org/project/django_parler) | import parler | | [# pipedream add-package PasteScript](https://pypi.org/project/PasteScript) | import paste | | [# pipedream add-package forked\_path](https://pypi.org/project/forked_path) | import path | | [# pipedream add-package path.py](https://pypi.org/project/path.py) | import path | | [# pipedream add-package patricia-trie](https://pypi.org/project/patricia-trie) | import patricia | | [# pipedream add-package Paver](https://pypi.org/project/Paver) | import paver | | [# pipedream add-package ProxyTypes](https://pypi.org/project/ProxyTypes) | import peak | | [# pipedream add-package anderson.picasso](https://pypi.org/project/anderson.picasso) | import picasso | | [# pipedream add-package django-picklefield](https://pypi.org/project/django-picklefield) | import picklefield | | [# pipedream add-package pivotal\_py](https://pypi.org/project/pivotal_py) | import pivotal | | [# pipedream add-package peewee](https://pypi.org/project/peewee) | import pwiz | | [# pipedream add-package plivo](https://pypi.org/project/plivo) | import plivoxml | | [# pipedream add-package plone.alterego](https://pypi.org/project/plone.alterego) | import plone | | [# pipedream add-package plone.api](https://pypi.org/project/plone.api) | import plone | | [# pipedream add-package plone.app.blob](https://pypi.org/project/plone.app.blob) | import plone | | [# pipedream add-package plone.app.collection](https://pypi.org/project/plone.app.collection) | import plone | | [# pipedream add-package plone.app.content](https://pypi.org/project/plone.app.content) | import plone | | [# pipedream add-package plone.app.contentlisting](https://pypi.org/project/plone.app.contentlisting) | import plone | | [# pipedream add-package plone.app.contentmenu](https://pypi.org/project/plone.app.contentmenu) | import plone | | [# pipedream add-package plone.app.contentrules](https://pypi.org/project/plone.app.contentrules) | import plone | | [# pipedream add-package plone.app.contenttypes](https://pypi.org/project/plone.app.contenttypes) | import plone | | [# pipedream add-package plone.app.controlpanel](https://pypi.org/project/plone.app.controlpanel) | import plone | | [# pipedream add-package plone.app.customerize](https://pypi.org/project/plone.app.customerize) | import plone | | [# pipedream add-package plone.app.dexterity](https://pypi.org/project/plone.app.dexterity) | import plone | | [# pipedream add-package plone.app.discussion](https://pypi.org/project/plone.app.discussion) | import plone | | [# pipedream add-package plone.app.event](https://pypi.org/project/plone.app.event) | import plone | | [# pipedream add-package plone.app.folder](https://pypi.org/project/plone.app.folder) | import plone | | [# pipedream add-package plone.app.i18n](https://pypi.org/project/plone.app.i18n) | import plone | | [# pipedream add-package plone.app.imaging](https://pypi.org/project/plone.app.imaging) | import plone | | [# pipedream add-package plone.app.intid](https://pypi.org/project/plone.app.intid) | import plone | | [# pipedream add-package plone.app.layout](https://pypi.org/project/plone.app.layout) | import plone | | [# pipedream add-package plone.app.linkintegrity](https://pypi.org/project/plone.app.linkintegrity) | import plone | | [# pipedream add-package plone.app.locales](https://pypi.org/project/plone.app.locales) | import plone | | [# pipedream add-package plone.app.lockingbehavior](https://pypi.org/project/plone.app.lockingbehavior) | import plone | | [# pipedream add-package plone.app.multilingual](https://pypi.org/project/plone.app.multilingual) | import plone | | [# pipedream add-package plone.app.portlets](https://pypi.org/project/plone.app.portlets) | import plone | | [# pipedream add-package plone.app.querystring](https://pypi.org/project/plone.app.querystring) | import plone | | [# pipedream add-package plone.app.redirector](https://pypi.org/project/plone.app.redirector) | import plone | | [# pipedream add-package plone.app.registry](https://pypi.org/project/plone.app.registry) | import plone | | [# pipedream add-package plone.app.relationfield](https://pypi.org/project/plone.app.relationfield) | import plone | | [# pipedream add-package plone.app.textfield](https://pypi.org/project/plone.app.textfield) | import plone | | [# pipedream add-package plone.app.theming](https://pypi.org/project/plone.app.theming) | import plone | | [# pipedream add-package plone.app.users](https://pypi.org/project/plone.app.users) | import plone | | [# pipedream add-package plone.app.uuid](https://pypi.org/project/plone.app.uuid) | import plone | | [# pipedream add-package plone.app.versioningbehavior](https://pypi.org/project/plone.app.versioningbehavior) | import plone | | [# pipedream add-package plone.app.viewletmanager](https://pypi.org/project/plone.app.viewletmanager) | import plone | | [# pipedream add-package plone.app.vocabularies](https://pypi.org/project/plone.app.vocabularies) | import plone | | [# pipedream add-package plone.app.widgets](https://pypi.org/project/plone.app.widgets) | import plone | | [# pipedream add-package plone.app.workflow](https://pypi.org/project/plone.app.workflow) | import plone | | [# pipedream add-package plone.app.z3cform](https://pypi.org/project/plone.app.z3cform) | import plone | | [# pipedream add-package plone.autoform](https://pypi.org/project/plone.autoform) | import plone | | [# pipedream add-package plone.batching](https://pypi.org/project/plone.batching) | import plone | | [# pipedream add-package plone.behavior](https://pypi.org/project/plone.behavior) | import plone | | [# pipedream add-package plone.browserlayer](https://pypi.org/project/plone.browserlayer) | import plone | | [# pipedream add-package plone.caching](https://pypi.org/project/plone.caching) | import plone | | [# pipedream add-package plone.contentrules](https://pypi.org/project/plone.contentrules) | import plone | | [# pipedream add-package plone.dexterity](https://pypi.org/project/plone.dexterity) | import plone | | [# pipedream add-package plone.event](https://pypi.org/project/plone.event) | import plone | | [# pipedream add-package plone.folder](https://pypi.org/project/plone.folder) | import plone | | [# pipedream add-package plone.formwidget.namedfile](https://pypi.org/project/plone.formwidget.namedfile) | import plone | | [# pipedream add-package plone.formwidget.recurrence](https://pypi.org/project/plone.formwidget.recurrence) | import plone | | [# pipedream add-package plone.i18n](https://pypi.org/project/plone.i18n) | import plone | | [# pipedream add-package plone.indexer](https://pypi.org/project/plone.indexer) | import plone | | [# pipedream add-package plone.intelligenttext](https://pypi.org/project/plone.intelligenttext) | import plone | | [# pipedream add-package plone.keyring](https://pypi.org/project/plone.keyring) | import plone | | [# pipedream add-package plone.locking](https://pypi.org/project/plone.locking) | import plone | | [# pipedream add-package plone.memoize](https://pypi.org/project/plone.memoize) | import plone | | [# pipedream add-package plone.namedfile](https://pypi.org/project/plone.namedfile) | import plone | | [# pipedream add-package plone.outputfilters](https://pypi.org/project/plone.outputfilters) | import plone | | [# pipedream add-package plone.portlet.collection](https://pypi.org/project/plone.portlet.collection) | import plone | | [# pipedream add-package plone.portlet.static](https://pypi.org/project/plone.portlet.static) | import plone | | [# pipedream add-package plone.portlets](https://pypi.org/project/plone.portlets) | import plone | | [# pipedream add-package plone.protect](https://pypi.org/project/plone.protect) | import plone | | [# pipedream add-package plone.recipe.zope2install](https://pypi.org/project/plone.recipe.zope2install) | import plone | | [# pipedream add-package plone.registry](https://pypi.org/project/plone.registry) | import plone | | [# pipedream add-package plone.resource](https://pypi.org/project/plone.resource) | import plone | | [# pipedream add-package plone.resourceeditor](https://pypi.org/project/plone.resourceeditor) | import plone | | [# pipedream add-package plone.rfc822](https://pypi.org/project/plone.rfc822) | import plone | | [# pipedream add-package plone.scale](https://pypi.org/project/plone.scale) | import plone | | [# pipedream add-package plone.schema](https://pypi.org/project/plone.schema) | import plone | | [# pipedream add-package plone.schemaeditor](https://pypi.org/project/plone.schemaeditor) | import plone | | [# pipedream add-package plone.session](https://pypi.org/project/plone.session) | import plone | | [# pipedream add-package plone.stringinterp](https://pypi.org/project/plone.stringinterp) | import plone | | [# pipedream add-package plone.subrequest](https://pypi.org/project/plone.subrequest) | import plone | | [# pipedream add-package plone.supermodel](https://pypi.org/project/plone.supermodel) | import plone | | [# pipedream add-package plone.synchronize](https://pypi.org/project/plone.synchronize) | import plone | | [# pipedream add-package plone.theme](https://pypi.org/project/plone.theme) | import plone | | [# pipedream add-package plone.transformchain](https://pypi.org/project/plone.transformchain) | import plone | | [# pipedream add-package plone.uuid](https://pypi.org/project/plone.uuid) | import plone | | [# pipedream add-package plone.z3cform](https://pypi.org/project/plone.z3cform) | import plone | | [# pipedream add-package plonetheme.barceloneta](https://pypi.org/project/plonetheme.barceloneta) | import plonetheme | | [# pipedream add-package pypng](https://pypi.org/project/pypng) | import png | | [# pipedream add-package django\_polymorphic](https://pypi.org/project/django_polymorphic) | import polymorphic | | [# pipedream add-package python\_postmark](https://pypi.org/project/python_postmark) | import postmark | | [# pipedream add-package bash\_powerprompt](https://pypi.org/project/bash_powerprompt) | import powerprompt | | [# pipedream add-package django-prefetch](https://pypi.org/project/django-prefetch) | import prefetch | | [# pipedream add-package AndrewList](https://pypi.org/project/AndrewList) | import printList | | [# pipedream add-package progressbar2](https://pypi.org/project/progressbar2) | import progressbar | | [# pipedream add-package progressbar33](https://pypi.org/project/progressbar33) | import progressbar | | [# pipedream add-package django\_oauth2\_provider](https://pypi.org/project/django_oauth2_provider) | import provider | | [# pipedream add-package pure\_sasl](https://pypi.org/project/pure_sasl) | import puresasl | | [# pipedream add-package pylzma](https://pypi.org/project/pylzma) | import py7zlib | | [# pipedream add-package pyAMI\_core](https://pypi.org/project/pyAMI_core) | import pyAMI | | [# pipedream add-package arsespyder](https://pypi.org/project/arsespyder) | import pyarsespyder | | [# pipedream add-package asdf](https://pypi.org/project/asdf) | import pyasdf | | [# pipedream add-package aspell\_python\_ctypes](https://pypi.org/project/aspell_python_ctypes) | import pyaspell | | [# pipedream add-package pybbm](https://pypi.org/project/pybbm) | import pybb | | [# pipedream add-package pybloomfiltermmap](https://pypi.org/project/pybloomfiltermmap) | import pybloomfilter | | [# pipedream add-package Pyccuracy](https://pypi.org/project/Pyccuracy) | import pyccuracy | | [# pipedream add-package PyCK](https://pypi.org/project/PyCK) | import pyck | | [# pipedream add-package python\_crfsuite](https://pypi.org/project/python_crfsuite) | import pycrfsuite | | [# pipedream add-package PyDispatcher](https://pypi.org/project/PyDispatcher) | import pydispatch | | [# pipedream add-package pygeocoder](https://pypi.org/project/pygeocoder) | import pygeolib | | [# pipedream add-package Pygments](https://pypi.org/project/Pygments) | import pygments | | [# pipedream add-package python\_graph\_core](https://pypi.org/project/python_graph_core) | import pygraph | | [# pipedream add-package pyjon.utils](https://pypi.org/project/pyjon.utils) | import pyjon | | [# pipedream add-package python\_jsonrpc](https://pypi.org/project/python_jsonrpc) | import pyjsonrpc | | [# pipedream add-package Pykka](https://pypi.org/project/Pykka) | import pykka | | [# pipedream add-package PyLogo](https://pypi.org/project/PyLogo) | import pylogo | | [# pipedream add-package adhocracy\_Pylons](https://pypi.org/project/adhocracy_Pylons) | import pylons | | [# pipedream add-package libmagic](https://pypi.org/project/libmagic) | import pymagic | | [# pipedream add-package Amalwebcrawler](https://pypi.org/project/Amalwebcrawler) | import pymycraawler | | [# pipedream add-package AbakaffeNotifier](https://pypi.org/project/AbakaffeNotifier) | import pynma | | [# pipedream add-package Pyphen](https://pypi.org/project/Pyphen) | import pyphen | | [# pipedream add-package AEI](https://pypi.org/project/AEI) | import pyrimaa | | [# pipedream add-package adhocracy\_pysqlite](https://pypi.org/project/adhocracy_pysqlite) | import pysqlite2 | | [# pipedream add-package pysqlite](https://pypi.org/project/pysqlite) | import pysqlite2 | | [# pipedream add-package python\_gettext](https://pypi.org/project/python_gettext) | import pythongettext | | [# pipedream add-package python\_json\_logger](https://pypi.org/project/python_json_logger) | import pythonjsonlogger | | [# pipedream add-package PyUtilib](https://pypi.org/project/PyUtilib) | import pyutilib | | [# pipedream add-package Cython](https://pypi.org/project/Cython) | import pyximport | | [# pipedream add-package qserve](https://pypi.org/project/qserve) | import qs | | [# pipedream add-package django\_quickapi](https://pypi.org/project/django_quickapi) | import quickapi | | [# pipedream add-package nose\_quickunit](https://pypi.org/project/nose_quickunit) | import quickunit | | [# pipedream add-package radical.pilot](https://pypi.org/project/radical.pilot) | import radical | | [# pipedream add-package radical.utils](https://pypi.org/project/radical.utils) | import radical | | [# pipedream add-package readability\_lxml](https://pypi.org/project/readability_lxml) | import readability | | [# pipedream add-package gnureadline](https://pypi.org/project/gnureadline) | import readline | | [# pipedream add-package django\_recaptcha\_works](https://pypi.org/project/django_recaptcha_works) | import recaptcha\_works | | [# pipedream add-package RelStorage](https://pypi.org/project/RelStorage) | import relstorage | | [# pipedream add-package django\_reportapi](https://pypi.org/project/django_reportapi) | import reportapi | | [# pipedream add-package Requests](https://pypi.org/project/Requests) | import requests | | [# pipedream add-package requirements\_parser](https://pypi.org/project/requirements_parser) | import requirements | | [# pipedream add-package djangorestframework](https://pypi.org/project/djangorestframework) | import rest\_framework | | [# pipedream add-package py\_restclient](https://pypi.org/project/py_restclient) | import restclient | | [# pipedream add-package async\_retrial](https://pypi.org/project/async_retrial) | import retrial | | [# pipedream add-package django\_reversion](https://pypi.org/project/django_reversion) | import reversion | | [# pipedream add-package rhaptos2.common](https://pypi.org/project/rhaptos2.common) | import rhaptos2 | | [# pipedream add-package robotframework](https://pypi.org/project/robotframework) | import robot | | [# pipedream add-package django\_robots](https://pypi.org/project/django_robots) | import robots | | [# pipedream add-package rosdep](https://pypi.org/project/rosdep) | import rosdep2 | | [# pipedream add-package RSFile](https://pypi.org/project/RSFile) | import rsbackends | | [# pipedream add-package ruamel.base](https://pypi.org/project/ruamel.base) | import ruamel | | [# pipedream add-package pysaml2](https://pypi.org/project/pysaml2) | import xmlenc | | [# pipedream add-package saga\_python](https://pypi.org/project/saga_python) | import saga | | [# pipedream add-package aws-sam-translator](https://pypi.org/project/aws-sam-translator) | import samtranslator | | [# pipedream add-package libsass](https://pypi.org/project/libsass) | import sassutils | | [# pipedream add-package alex\_sayhi](https://pypi.org/project/alex_sayhi) | import sayhi | | [# pipedream add-package scalr](https://pypi.org/project/scalr) | import scalrtools | | [# pipedream add-package scikits.talkbox](https://pypi.org/project/scikits.talkbox) | import scikits | | [# pipedream add-package scratchpy](https://pypi.org/project/scratchpy) | import scratch | | [# pipedream add-package pyScss](https://pypi.org/project/pyScss) | import scss | | [# pipedream add-package dict.sorted](https://pypi.org/project/dict.sorted) | import sdict | | [# pipedream add-package android\_sdk\_updater](https://pypi.org/project/android_sdk_updater) | import sdk\_updater | | [# pipedream add-package django\_sekizai](https://pypi.org/project/django_sekizai) | import sekizai | | [# pipedream add-package pysendfile](https://pypi.org/project/pysendfile) | import sendfile | | [# pipedream add-package pyserial](https://pypi.org/project/pyserial) | import serial | | [# pipedream add-package astor](https://pypi.org/project/astor) | import setuputils | | [# pipedream add-package pyshp](https://pypi.org/project/pyshp) | import shapefile | | [# pipedream add-package Shapely](https://pypi.org/project/Shapely) | import shapely | | [# pipedream add-package ahonya\_sika](https://pypi.org/project/ahonya_sika) | import sika | | [# pipedream add-package pysingleton](https://pypi.org/project/pysingleton) | import singleton | | [# pipedream add-package scikit\_bio](https://pypi.org/project/scikit_bio) | import skbio | | [# pipedream add-package scikit\_learn](https://pypi.org/project/scikit_learn) | import sklearn | | [# pipedream add-package slackclient](https://pypi.org/project/slackclient) | import slack | | [# pipedream add-package unicode\_slugify](https://pypi.org/project/unicode_slugify) | import slugify | | [# pipedream add-package smk\_python\_sdk](https://pypi.org/project/smk_python_sdk) | import smarkets | | [# pipedream add-package ctypes\_snappy](https://pypi.org/project/ctypes_snappy) | import snappy | | [# pipedream add-package gevent\_socketio](https://pypi.org/project/gevent_socketio) | import socketio | | [# pipedream add-package sockjs\_tornado](https://pypi.org/project/sockjs_tornado) | import sockjs | | [# pipedream add-package SocksiPy\_branch](https://pypi.org/project/SocksiPy_branch) | import socks | | [# pipedream add-package solrpy](https://pypi.org/project/solrpy) | import solr | | [# pipedream add-package Solution](https://pypi.org/project/Solution) | import solution | | [# pipedream add-package sorl\_thumbnail](https://pypi.org/project/sorl_thumbnail) | import sorl | | [# pipedream add-package South](https://pypi.org/project/South) | import south | | [# pipedream add-package Sphinx](https://pypi.org/project/Sphinx) | import sphinx | | [# pipedream add-package ATD\_document](https://pypi.org/project/ATD_document) | import sphinx\_pypi\_upload | | [# pipedream add-package sphinxcontrib\_programoutput](https://pypi.org/project/sphinxcontrib_programoutput) | import sphinxcontrib | | [# pipedream add-package SQLAlchemy](https://pypi.org/project/SQLAlchemy) | import sqlalchemy | | [# pipedream add-package atlas](https://pypi.org/project/atlas) | import src | | [# pipedream add-package auto\_mix\_prep](https://pypi.org/project/auto_mix_prep) | import src | | [# pipedream add-package bw\_stats\_toolkit](https://pypi.org/project/bw_stats_toolkit) | import stats\_toolkit | | [# pipedream add-package dogstatsd\_python](https://pypi.org/project/dogstatsd_python) | import statsd | | [# pipedream add-package python\_stdnum](https://pypi.org/project/python_stdnum) | import stdnum | | [# pipedream add-package StoneageHTML](https://pypi.org/project/StoneageHTML) | import stoneagehtml | | [# pipedream add-package django\_storages](https://pypi.org/project/django_storages) | import storages | | [# pipedream add-package mox](https://pypi.org/project/mox) | import stubout | | [# pipedream add-package suds\_jurko](https://pypi.org/project/suds_jurko) | import suds | | [# pipedream add-package python\_swiftclient](https://pypi.org/project/python_swiftclient) | import swiftclient | | [# pipedream add-package pytabix](https://pypi.org/project/pytabix) | import test | | [# pipedream add-package django\_taggit](https://pypi.org/project/django_taggit) | import taggit | | [# pipedream add-package django\_tastypie](https://pypi.org/project/django_tastypie) | import tastypie | | [# pipedream add-package teamcity\_messages](https://pypi.org/project/teamcity_messages) | import teamcity | | [# pipedream add-package pyTelegramBotAPI](https://pypi.org/project/pyTelegramBotAPI) | import telebot | | [# pipedream add-package Tempita](https://pypi.org/project/Tempita) | import tempita | | [# pipedream add-package Tenjin](https://pypi.org/project/Tenjin) | import tenjin | | [# pipedream add-package python\_termstyle](https://pypi.org/project/python_termstyle) | import termstyle | | [# pipedream add-package treeherder\_client](https://pypi.org/project/treeherder_client) | import thclient | | [# pipedream add-package django\_threaded\_multihost](https://pypi.org/project/django_threaded_multihost) | import threaded\_multihost | | [# pipedream add-package 3color\_Press](https://pypi.org/project/3color_Press) | import threecolor | | [# pipedream add-package pytidylib](https://pypi.org/project/pytidylib) | import tidylib | | [# pipedream add-package 3lwg](https://pypi.org/project/3lwg) | import tlw | | [# pipedream add-package toredis\_fork](https://pypi.org/project/toredis_fork) | import toredis | | [# pipedream add-package tornado\_redis](https://pypi.org/project/tornado_redis) | import tornadoredis | | [# pipedream add-package ansible\_tower\_cli](https://pypi.org/project/ansible_tower_cli) | import tower\_cli | | [# pipedream add-package Trac](https://pypi.org/project/Trac) | import tracopt | | [# pipedream add-package android\_localization\_helper](https://pypi.org/project/android_localization_helper) | import translation\_helper | | [# pipedream add-package django\_treebeard](https://pypi.org/project/django_treebeard) | import treebeard | | [# pipedream add-package trytond\_stock](https://pypi.org/project/trytond_stock) | import trytond | | [# pipedream add-package tsuru\_circus](https://pypi.org/project/tsuru_circus) | import tsuru | | [# pipedream add-package python\_tvrage](https://pypi.org/project/python_tvrage) | import tvrage | | [# pipedream add-package tw2.core](https://pypi.org/project/tw2.core) | import tw2 | | [# pipedream add-package tw2.d3](https://pypi.org/project/tw2.d3) | import tw2 | | [# pipedream add-package tw2.dynforms](https://pypi.org/project/tw2.dynforms) | import tw2 | | [# pipedream add-package tw2.excanvas](https://pypi.org/project/tw2.excanvas) | import tw2 | | [# pipedream add-package tw2.forms](https://pypi.org/project/tw2.forms) | import tw2 | | [# pipedream add-package tw2.jit](https://pypi.org/project/tw2.jit) | import tw2 | | [# pipedream add-package tw2.jqplugins.flot](https://pypi.org/project/tw2.jqplugins.flot) | import tw2 | | [# pipedream add-package tw2.jqplugins.gritter](https://pypi.org/project/tw2.jqplugins.gritter) | import tw2 | | [# pipedream add-package tw2.jqplugins.ui](https://pypi.org/project/tw2.jqplugins.ui) | import tw2 | | [# pipedream add-package tw2.jquery](https://pypi.org/project/tw2.jquery) | import tw2 | | [# pipedream add-package tw2.sqla](https://pypi.org/project/tw2.sqla) | import tw2 | | [# pipedream add-package Twisted](https://pypi.org/project/Twisted) | import twisted | | [# pipedream add-package python\_twitter](https://pypi.org/project/python_twitter) | import twitter | | [# pipedream add-package transifex\_client](https://pypi.org/project/transifex_client) | import txclib | | [# pipedream add-package 115wangpan](https://pypi.org/project/115wangpan) | import u115 | | [# pipedream add-package Unidecode](https://pypi.org/project/Unidecode) | import unidecode | | [# pipedream add-package ansible\_universe](https://pypi.org/project/ansible_universe) | import universe | | [# pipedream add-package pyusb](https://pypi.org/project/pyusb) | import usb | | [# pipedream add-package useless.pipes](https://pypi.org/project/useless.pipes) | import useless | | [# pipedream add-package auth\_userpass](https://pypi.org/project/auth_userpass) | import userpass | | [# pipedream add-package automakesetup.py](https://pypi.org/project/automakesetup.py) | import utilities | | [# pipedream add-package aino\_utkik](https://pypi.org/project/aino_utkik) | import utkik | | [# pipedream add-package uWSGI](https://pypi.org/project/uWSGI) | import uwsgidecorators | | [# pipedream add-package ab](https://pypi.org/project/ab) | import valentine | | [# pipedream add-package configobj](https://pypi.org/project/configobj) | import validate | | [# pipedream add-package chartio](https://pypi.org/project/chartio) | import version | | [# pipedream add-package ar\_virtualenv\_api](https://pypi.org/project/ar_virtualenv_api) | import virtualenvapi | | [# pipedream add-package brocade\_plugins](https://pypi.org/project/brocade_plugins) | import vyatta | | [# pipedream add-package WebOb](https://pypi.org/project/WebOb) | import webob | | [# pipedream add-package websocket\_client](https://pypi.org/project/websocket_client) | import websocket | | [# pipedream add-package WebTest](https://pypi.org/project/WebTest) | import webtest | | [# pipedream add-package Werkzeug](https://pypi.org/project/Werkzeug) | import werkzeug | | [# pipedream add-package wheezy.caching](https://pypi.org/project/wheezy.caching) | import wheezy | | [# pipedream add-package wheezy.core](https://pypi.org/project/wheezy.core) | import wheezy | | [# pipedream add-package wheezy.http](https://pypi.org/project/wheezy.http) | import wheezy | | [# pipedream add-package tiddlywebwiki](https://pypi.org/project/tiddlywebwiki) | import wikklytext | | [# pipedream add-package pywinrm](https://pypi.org/project/pywinrm) | import winrm | | [# pipedream add-package Alfred\_Workflow](https://pypi.org/project/Alfred_Workflow) | import workflow | | [# pipedream add-package WSME](https://pypi.org/project/WSME) | import wsmeext | | [# pipedream add-package WTForms](https://pypi.org/project/WTForms) | import wtforms | | [# pipedream add-package wtf\_peewee](https://pypi.org/project/wtf_peewee) | import wtfpeewee | | [# pipedream add-package pyxdg](https://pypi.org/project/pyxdg) | import xdg | | [# pipedream add-package pytest\_xdist](https://pypi.org/project/pytest_xdist) | import xdist | | [# pipedream add-package xmpppy](https://pypi.org/project/xmpppy) | import xmpp | | [# pipedream add-package XStatic\_Font\_Awesome](https://pypi.org/project/XStatic_Font_Awesome) | import xstatic | | [# pipedream add-package XStatic\_jQuery](https://pypi.org/project/XStatic_jQuery) | import xstatic | | [# pipedream add-package XStatic\_jquery\_ui](https://pypi.org/project/XStatic_jquery_ui) | import xstatic | | [# pipedream add-package PyYAML](https://pypi.org/project/PyYAML) | import yaml | | [# pipedream add-package z3c.autoinclude](https://pypi.org/project/z3c.autoinclude) | import z3c | | [# pipedream add-package z3c.caching](https://pypi.org/project/z3c.caching) | import z3c | | [# pipedream add-package z3c.form](https://pypi.org/project/z3c.form) | import z3c | | [# pipedream add-package z3c.formwidget.query](https://pypi.org/project/z3c.formwidget.query) | import z3c | | [# pipedream add-package z3c.objpath](https://pypi.org/project/z3c.objpath) | import z3c | | [# pipedream add-package z3c.pt](https://pypi.org/project/z3c.pt) | import z3c | | [# pipedream add-package z3c.relationfield](https://pypi.org/project/z3c.relationfield) | import z3c | | [# pipedream add-package z3c.traverser](https://pypi.org/project/z3c.traverser) | import z3c | | [# pipedream add-package z3c.zcmlhook](https://pypi.org/project/z3c.zcmlhook) | import z3c | | [# pipedream add-package pyzmq](https://pypi.org/project/pyzmq) | import zmq | | [# pipedream add-package zopyx.textindexng3](https://pypi.org/project/zopyx.textindexng3) | import zopyx | # Pause, Resume, and Rerun a Workflow Source: https://pipedream.com/docs/workflows/building-workflows/code/python/rerun > [!WARNING] > > **Workflows and String are shutting down on March 31, 2027.** [Learn more](/docs/workflows) You can use `pd.flow.suspend` and `pd.flow.rerun` to pause a workflow and resume it later. This is useful when you want to: * Pause a workflow until someone manually approves it * Poll an external API until some job completes, and proceed with the workflow when it’s done * Trigger an external API to start a job, pause the workflow, and resume it when the external API sends an HTTP callback We’ll cover all of these examples below. ## `pd.flow.suspend` Use `pd.flow.suspend` when you want to pause a workflow and proceed with the remaining steps only when manually approved or cancelled. For example, you can suspend a workflow and send yourself a link to manually resume or cancel the rest of the workflow: ```python theme={null} def handler(pd: 'pipedream'): urls = pd.flow.suspend() pd.send.email( subject="Please approve this important workflow", text=f"Click here to approve the workflow: ${urls["resume_url"]}, and cancel here: ${urls["cancel_url"]}" ) # Pipedream suspends your workflow at the end of the step ``` You’ll receive an email like this: ![](https://mintcdn.com/pipedream/nKh6d_6A4aXFb6xD/images/e970ce4a-approve-workflow_oc06k3.png?fit=max\&auto=format\&n=nKh6d_6A4aXFb6xD\&q=85\&s=35a084406b8d3f88d428adf4a62bff5d) And can resume or cancel the rest of the workflow by clicking on the appropriate link. ### `resume_url` and `cancel_url` In general, calling `pd.flow.suspend` returns a `cancel_url` and `resume_url` that lets you cancel or resume paused executions. Since Pipedream pauses your workflow at the *end* of the step, you can pass these URLs to any external service before the workflow pauses. If that service accepts a callback URL, it can trigger the `resume_url` when its work is complete. These URLs are specific to a single execution of your workflow. While the workflow is paused, you can load these in your browser or send any HTTP request to them: * Sending an HTTP request to the `cancel_url` will cancel that execution * Sending an HTTP request to the `resume_url` will resume that execution If you resume a workflow, any data sent in the HTTP request is passed to the workflow and returned in the `$resume_data` [step export](/docs/workflows/overview/#step-exports) of the suspended step. For example, if you call `pd.flow.suspend` within a step named `code`, the `$resume_data` export should contain the data sent in the `resume_url` request: ![](https://mintcdn.com/pipedream/xnRKrRxEtt3vxd6I/images/c9712a37-resume_data_lafhxr.png?fit=max\&auto=format\&n=xnRKrRxEtt3vxd6I\&q=85\&s=215b09447a5b7900949c2347b5e74d4c) ### Default timeout of 24 hours By default, `pd.flow.suspend` will automatically cancel the workflow after 24 hours. You can set your own timeout (in milliseconds) as the first argument: ```python theme={null} def handler(pd: 'pipedream'): # 7 days TIMEOUT = 1000 * 60 * 60 * 24 * 7 pd.flow.suspend(TIMEOUT) ``` ## `pd.flow.rerun` Use `pd.flow.rerun` when you want to run a specific step of a workflow multiple times. This is useful when you need to start a job in an external API and poll for its completion, or have the service call back to the step and let you process the HTTP request within the step. ### Polling for the status of an external job Sometimes you need to poll for the status of an external job until it completes. `pd.flow.rerun` lets you rerun a specific step multiple times: ```python theme={null} import requests def handler(pd: 'pipedream'): MAX_RETRIES = 3 # 10 seconds DELAY = 1000 * 10 run = pd.context['run'] print(pd.context) # pd.context.run.runs starts at 1 and increments when the step is rerun if run['runs'] == 1: # pd.flow.rerun(delay, context (discussed below), max retries) pd.flow.rerun(DELAY, None, MAX_RETRIES) elif run['runs'] == MAX_RETRIES + 1: raise Exception("Max retries exceeded") else: # Poll external API for status response = requests.get("https://example.com/status") # If we're done, continue with the rest of the workflow if response.json().status == "DONE": return response.json() # Else retry later pd.flow.rerun(DELAY, None, MAX_RETRIES) ``` `pd.flow.rerun` accepts the following arguments: ```python theme={null} pd.flow.rerun( delay, # The number of milliseconds until the step will be rerun context, # JSON-serializable data you need to pass between runs maxRetries, # The total number of times the step will rerun. Defaults to 10 ) ``` ### Accept an HTTP callback from an external service When you trigger a job in an external service, and that service can send back data in an HTTP callback to Pipedream, you can process that data within the same step using `pd.flow.retry`: ```python theme={null} import requests def handler(pd: 'pipedream'): TIMEOUT = 86400 * 1000 run = pd.context['run'] # pd.context['run']['runs'] starts at 1 and increments when the step is rerun if run['runs'] == 1: links = pd.flow.rerun(TIMEOUT, None, 1) # links contains a dictionary with two entries: resume_url and cancel_url # Send resume_url to external service await request.post("your callback URL", json=links) # When the external service calls back into the resume_url, you have access to # the callback data within pd.context.run['callback_request'] elif 'callback_request' in run: return run['callback_request'] ``` ### Passing `context` to `pd.flow.rerun` Within a Python code step, `pd.context.run.context` contains the `context` passed from the prior call to `rerun`. This lets you pass data from one run to another. For example, if you call: ```python theme={null} pd.flow.rerun(1000, { "hello": "world" }) ``` `pd.context.run.context` will contain: ![](https://mintcdn.com/pipedream/xnRKrRxEtt3vxd6I/images/da6c184e-Screen_Shot_2022-06-14_at_11.32.06_PM_dmzgkh.png?fit=max\&auto=format\&n=xnRKrRxEtt3vxd6I\&q=85\&s=e634f74069415264dfd45803c6a5fb83) ### `maxRetries` By default, `maxRetries` is **10**. When you exceed `maxRetries`, the workflow proceeds to the next step. If you need to handle this case with an exception, `raise` an Exception from the step: ```python theme={null} def handler(pd: 'pipedream'): MAX_RETRIES = 3 run = pd.context['run'] if run['runs'] == 1: pd.flow.rerun(1000, None, MAX_RETRIES) else if (run['runs'] == MAX_RETRIES + 1): raise Exception("Max retries exceeded") ``` ## Behavior when testing When you’re building a workflow and test a step with `pd.flow.suspend` or `pd.flow.rerun`, it will not suspend the workflow, and you’ll see a message like the following: > Workflow execution canceled — this may be due to `pd.flow.suspend()` usage (not supported in test) These functions will only suspend and resume when run in production. ## Credits usage when using `pd.flow.suspend` / `pd.flow.rerun` You are not charged for the time your workflow is suspended during a `pd.flow.suspend` or `pd.flow.rerun`. Only when workflows are resumed will compute time count toward [credit usage](/docs/pricing/#credits-and-billing). > [!WARNING] > > When a suspended workflow reawakens, it will reset the credit counter. > > Each rerun or reawakening from a suspension will count as a new fresh credit. # Using Data Stores Source: https://pipedream.com/docs/workflows/building-workflows/code/python/using-data-stores > [!WARNING] > > **Workflows and String are shutting down on March 31, 2027.** [Learn more](/docs/workflows) You can store and retrieve data from [Data Stores](/docs/workflows/data-management/data-stores/) in Python without connecting to a 3rd party database. Add a data store as a input to a Python step, then access it in your Python `handler` with `pd.inputs["data_store"]`. ```python theme={null} def handler(pd: "pipedream"): # Access the data store under the pd.inputs data_store = pd.inputs["data_store"] # Store a value under a key data_store["key"] = "Hello World" # Retrieve the value and print it to the step's Logs print(data_store["key"]) ``` ## Adding a Data Store Click *Add Data Store* near the top of a Python step. This will add the selected data store to your Python code step. ## Saving data Data stores are key-value stores. Saving data within a data store is just like setting a property on a dictionary: ```python theme={null} from datetime import datetime def handler(pd: "pipedream"): # Access the data store under the pd.inputs data_store = pd.inputs["data_store"] # Store a timestamp data_store["last_ran_at"] = datetime.now().isoformat() ``` ### Setting expiration (TTL) for records You can set an expiration time for a record by passing a TTL (Time-To-Live) option as the third argument to the `set` method. The TTL value is specified in seconds: ```python theme={null} def handler(pd: "pipedream"): # Access the data store under the pd.inputs data_store = pd.inputs["data_store"] # Store a temporary value that will expire after 1 hour (3600 seconds) data_store.set("temporaryToken", "abc123", ttl=3600) # Store a value that will expire after 1 day data_store.set("dailyMetric", 42, ttl=86400) ``` When the TTL period elapses, the record will be automatically deleted from the data store. ### Updating TTL for existing records You can update the TTL for an existing record using the `set_ttl` method: ```python theme={null} def handler(pd: "pipedream"): # Access the data store under the pd.inputs data_store = pd.inputs["data_store"] # Update an existing record to expire after 30 minutes data_store.set_ttl("temporaryToken", ttl=1800) # Remove expiration from a record data_store.set_ttl("temporaryToken", ttl=None) ``` This is useful for extending the lifetime of temporary data or removing expiration from records that should now be permanent. ## Retrieving keys Fetch all the keys in a given data store using the `keys` method: ```python theme={null} def handler(pd: "pipedream"): # Access the data store under the pd.inputs data_store = pd.inputs["data_store"] # Retrieve all keys in the data store keys = pd.inputs["data_store"].keys() # Print a comma separated string of all keys print(*keys, sep=",") ``` > [!WARNING] > > The `data_store.keys()` method does not return a list, but instead it returns a `Keys` iterable object. You cannot export a `data_store` or `data_store.keys()` from a Python code step at this time. > > Instead, build a dictionary or list when using the `data_store.keys()` method. ## Checking for the existence of specific keys If you need to check whether a specific `key` exists in a data store, use `if` and `in` as a conditional: ```python theme={null} def handler(pd: "pipedream"): # Access the data store under the pd.inputs data_store = pd.inputs["data_store"] # Search for a key in a conditional if "last_ran_at" in data_store: print(f"Last ran at {data_store['last_ran_at']}") ``` ## Retrieving data Data stores are very performant at retrieving single records by keys. However you can also use key iteration to retrieve all records within a Data Store as well. > [!NOTE] > > Data stores are intended to be a fast and convenient data storage option for quickly adding data storage capability to your workflows without adding another database dependency. > > However, if you need more advanced querying capabilities for querying records with nested dictionaries or filtering based on a record value - consider using a full fledged database. Pipedream can integrate with MySQL, Postgres, DynamoDb, MongoDB and more. ### Get a single record You can retrieve single records from a data store by key: ```python theme={null} def handler(pd: "pipedream"): # Access the data store under the pd.inputs data_store = pd.inputs["data_store"] # Retrieve the timestamp value by the key name last_ran_at = data_store["last_ran_at"] # Print the timestamp print(f"Last ran at {last_ran_at}") ``` Alternatively, use the `data_store.get()` method to retrieve a specific key’s contents: ```python theme={null} def handler(pd: "pipedream"): # Access the data store under the pd.inputs data_store = pd.inputs["data_store"] # Retrieve the timestamp value by the key name last_ran_at = data_store.get("last_ran_at") # Print the timestamp print(f"Last ran at {last_ran_at}") ``` > [!NOTE] > > What’s the difference between `data_store["key"]` and `data_store.get("key")`? > > * `data_store["key"]` will throw a `TypeError` if the key doesn’t exist in the data store. > * `data_store.get("key")` will instead return `None` if the key doesn’t exist in the data store. > * `data_store.get("key", "default_value")` will return `"default_value"` if the key doesn’t exist on the data store. ### Retrieving all records You can retrieve all records within a data store by using an async iterator: ```python theme={null} def handler(pd: "pipedream"): data_store = pd.inputs["data_store"] records = {} for k,v in data_store.items(): records[k] = v return records ``` This code step example exports all records within the data store as a dictionary. ## Deleting or updating values within a record To delete or update the *value* of an individual record, assign `key` a new value or `''` to remove the value but retain the key. ```python theme={null} def handler(pd: "pipedream"): # Access the data store under the pd.inputs data_store = pd.inputs["data_store"] # Assign a new value to the key data_store["myKey"] = "newValue" # Remove the value but retain the key data_store["myKey"] = "" ``` ### Working with nested dictionaries You can store dictionaries within a record. This allows you to create complex records. However, to update specific attributes within a nested dictionary, you’ll need to replace the record entirely. For example, the code the below will **not** update the `name` attribute on the stored dictionary stored under the key `pokemon`: ```python theme={null} def handler(pd: "pipedream"): # The current dictionary looks like this: # pokemon: { # "name": "Charmander" # "type": "fire" # } # You'll see "Charmander" in the logs print(pd.inputs['data_store']['pokemon']['name']) # attempting to overwrite the pokemon's name will not apply pd.inputs['data_store']['pokemon']['name'] = 'Bulbasaur' # Exports "Charmander" return pd.inputs['data_store']['pokemon']['name'] ``` Instead, *overwrite* the entire record to modify attributes: ```python theme={null} def handler(pd: "pipedream"): # retrieve the record item by it's key first pokemon = pd.inputs['data_store']['pokemon'] # now update the record's attribute pokemon['name'] = 'Bulbasaur' # and out right replace the record with the new modified dictionary pd.inputs['data_store']['pokemon'] = pokemon # Now we'll see "Bulbasaur" exported return pd.inputs['data_store']['pokemon']['name'] ``` ## Deleting specific records To delete individual records in a data store, use the `del` operation for a specific `key`: ```python theme={null} def handler(pd: "pipedream"): # Access the data store under the pd.inputs data_store = pd.inputs["data_store"] # Delete the last_ran_at timestamp key del data_store["last_ran_at"] ``` ## Deleting all records from a specific data store If you need to delete all records in a given data store, you can use the `clear` method. ```python theme={null} def handler(pd: "pipedream"): # Access the data store under the pd.inputs data_store = pd.inputs["data_store"] # Delete the entire contents of the datas store data_store.clear() ``` > [!WARNING] > > `data_store.clear()` is an **irreversible** change, **even when testing code** in the workflow builder. ## Viewing store data You can view the contents of your data stores in your [Pipedream dashboard](https://pipedream.com/stores). From here you can also manually edit your data store’s data, rename stores, delete stores or create new stores. ## Workflow counter example You can use a data store as a counter. For example, this code counts the number of times the workflow runs: ```python theme={null} def handler(pd: "pipedream"): # Access the data store under the pd.inputs data_store = pd.inputs["data_store"] # if the counter doesn't exist yet, start it at one if data_store.get("counter") == None: data_store["counter"] = 1 # Otherwise, increment it by one else: count = data_store["counter"] data_store["counter"] = count + 1 ``` ## Dedupe data example Data Stores are also useful for storing data from prior runs to prevent acting on duplicate data, or data that’s been seen before. For example, this workflow’s trigger contains an email address from a potential new customer. But we want to track all emails collected so we don’t send a welcome email twice: ```python theme={null} def handler(pd: "pipedream"): # Access the data store data_store = pd.inputs["data_store"] # Reference the incoming email from the HTTP request new_email = pd.steps["trigger"]["event"]["body"]["new_customer_email"] # Retrieve the emails stored in our data store emails = data_store.get('emails', []) # If this email has been seen before, exit early if new_email in emails: print(f"Already seen {new_email}, exiting") return False # This email is new, append it to our list else: print(f"Adding new email to data store {new_email}") emails.append(new_email) data_store["emails"] = emails return new_email ``` ## TTL use case: temporary caching and rate limiting TTL functionality is particularly useful for implementing temporary caching and rate limiting. Here’s an example of a simple rate limiter that prevents a user from making more than 5 requests per hour: ```python theme={null} def handler(pd: "pipedream"): # Access the data store data_store = pd.inputs["data_store"] user_id = pd.steps["trigger"]["event"]["user_id"] rate_key = f"ratelimit:{user_id}" # Try to get current rate limit counter requests_num = data_store.get("rate_key") if not requests_num: # First request from this user in the time window data_store.set(rate_key, 1, ttl=3600) # Expire after 1 hour return { "allowed": True, "remaining": 4 } if requests_num >= 5: # Rate limit exceeded return { "allowed": False, "error": "Rate limit exceeded", "retry_after": "1 hour" } # Increment the counter data_store["rate_key"] = requests_num + 1 return { "allowed": True, "remaining": 4 - requests_num } ``` This pattern can be extended for various temporary caching scenarios like: * Session tokens with automatic expiration * Short-lived feature flags * Temporary access grants * Time-based promotional codes ### Supported data types Data stores can hold any JSON-serializable data within the storage limits. This includes data types including: * Strings * Dictionaries * Lists * Integers * Floats But you cannot serialize Modules, Functions, Classes, or other more complex objects. # Working with the Filesystem in Python Source: https://pipedream.com/docs/workflows/building-workflows/code/python/working-with-files > [!WARNING] > > **Workflows and String are shutting down on March 31, 2027.** [Learn more](/docs/workflows) You can work with files within a workflow. For instance, downloading content from some service to upload to another. Here are some sample code for common file operations. ## The `/tmp` directory Within a workflow, you have full read-write access to the `/tmp` directory. You have 2GB of available space in `/tmp` to save any file. ### Managing `/tmp` across workflow runs The `/tmp` directory is stored on the virtual machine that runs your workflow. We call this the execution environment (“EE”). More than one EE may be created to handle high-volume workflows. And EEs can be destroyed at any time (for example, after about 10 minutes of receiving no events). This means that you should not expect to have access to files across executions. At the same time, files *may* remain, so you should clean them up to make sure that doesn’t affect your workflow. **Use [the `tempfile` module](https://docs.python.org/3/library/tempfile.html) to cleanup files after use, or [delete the files manually](/docs/workflows/building-workflows/code/python/working-with-files/#deleting-a-file).** ## Writing a file to `/tmp` ```python theme={null} import requests def handler(pd: "pipedream"): # Download the Python logo r = requests.get("https://www.python.org/static/img/python-logo@2x.png") # Create a new file python-logo.png in the /tmp/data directory with open("/tmp/python-logo.png", "wb") as f: # Save the content of the HTTP response into the file f.write(r.content) ``` Now `/tmp/python-logo.png` holds the official Python logo. ## Reading a file from `/tmp` You can also open files you have previously stored in the `/tmp` directory. Let’s open the `python-logo.png` file. ```python theme={null} import os def handler(pd: "pipedream"): with open("/tmp/python-logo.png") as f: # Store the contents of the file into a variable file_data = f.read() ``` ## Listing files in `/tmp` If you need to check what files are currently in `/tmp` you can list them and print the results to the **Logs** section of **Results**: ```python theme={null} import os def handler(pd: "pipedream"): # Prints the files in the tmp directory print(os.listdir("/tmp")) ``` ## Deleting a file ```python theme={null} import os def handler(pd: "pipedream"): print(os.unlink("/tmp/your-file")) ``` ## Downloading a file to `/tmp` [See this example](/docs/workflows/building-workflows/code/python/http-requests/#downloading-a-file-to-the-tmp-directory) to learn how to download a file to `/tmp`. ## Uploading a file from `/tmp` [See this example](/docs/workflows/building-workflows/code/python/http-requests/#uploading-a-file-from-the-tmp-directory) to learn how to upload a file from `/tmp` in an HTTP request. ## Downloading a file, uploading it in another `multipart/form-data` request ```python theme={null} import requests from requests_toolbelt.multipart.encoder import MultipartEncoder import os def handler(pd: "pipedream"): download_url = "https://example.com" upload_url = "http://httpbin.org/post" file_path = "/tmp/index.html" content_type = "text/html" # DOWNLOAD with requests.get(download_url, stream=True) as response: response.raise_for_status() with open(file_path, "wb") as file: for chunk in response.iter_content(chunk_size=8192): file.write(chunk) # UPLOAD multipart_data = MultipartEncoder(fields={ 'file': (os.path.basename(file_path), open(file_path, 'rb'), content_type) }) response = requests.post( upload_url, data=multipart_data, headers={'Content-Type': multipart_data.content_type} ) ``` ## `/tmp` limitations The `/tmp` directory can store up to 2GB of storage. Also the storage may be wiped or may not exist between workflow executions. To avoid errors, assume that the `/tmp` directory is empty between workflow runs. Please refer to the [disk limits](/docs/workflows/limits/#disk) for details. > [!WARNING] > > Are File Stores helpers available for Python to download, upload and manage files? > > At this time no, only Node.js includes a helper to interact with the [File Store](/docs/workflows/data-management/file-stores/) programmatically within workflows. # Overview Source: https://pipedream.com/docs/workflows/building-workflows/control-flow > [!WARNING] > > **Workflows and String are shutting down on March 31, 2027.** [Learn more](/docs/workflows) Pipedream is adding powerful control flow operators so you can build and run non-linear workflows to unlock use cases that require advanced orchestration. ## Operators | Operator | Description | | - | - | | [If/Else (beta)](/docs/workflows/building-workflows/control-flow/ifelse/) | Supports single-path, logical branching orchestration. | | [Delay](/docs/workflows/building-workflows/control-flow/delay/) | Add a delay from 1 millisecond to 1 year before the next step of your workflow proceeds. | | [Filter](/docs/workflows/building-workflows/control-flow/filter/) | Define rules to stop or continue workflow execution. | | [End Workflow](/docs/workflows/building-workflows/control-flow/end-workflow/) | Terminate the workflow prior to the last step. | More operators (including parallel and looping) are coming soon. ## Key Capabilities * Orchestrate execution of linear and non-linear workflows * Normalize results and continue after a non-linear operation * Nest control flow operators for advanced use cases * Return HTTP responses during or after most non-linear operations * Execute long running workflows (workflow timeout resets at each control flow boundary) ## Execution Path ### Context The execution path represents the specific steps (and the order of steps) that run when a workflow is triggered. * Simple linear workflows are executed from top to bottom — every step is in the execution path. ![](https://mintcdn.com/pipedream/h8oodpUDiyR1Ssvt/images/3f08589d-image.png?fit=max\&auto=format\&n=h8oodpUDiyR1Ssvt\&q=85\&s=9f16b6180c41105ecfeaeac416ee0cc4) * With the introduction of non-linear workflows, steps may or may not be executed depending on the rules configured for control flow operators and the results exported from prior steps. ![](https://mintcdn.com/pipedream/NF77kliJSewMqg65/images/07791db0-image.png?fit=max\&auto=format\&n=NF77kliJSewMqg65\&q=85\&s=0cc4d46d5b699b96466c7f1001ea4205) Therefore, we introduced new patterns to signal the execution path and help you build, test and inspect workflows. ### Executed Path Step borders, backgrounds and connectors now highlight the **executed path** — the steps that are executed on the execution path. If a non-execution path step is tested, it will not be reflected as being on the execution path. ![](https://mintcdn.com/pipedream/anb6FA0wpd8jtdUB/images/6c5c8a70-image.png?fit=max\&auto=format\&n=anb6FA0wpd8jtdUB\&q=85\&s=a17016b505595d2e7c486d2df3e1e1ac) ### Building and Testing in an Unknown or Non-Execution Path You may add and test steps in any path. However, Pipedream highlights that the results may not be reliable if the step is outside the executed path; the results may not match the outcome if the steps were in a known execution path and may lead to invalid or misleading results. ![](https://mintcdn.com/pipedream/h8oodpUDiyR1Ssvt/images/41c5a455-image.png?fit=max\&auto=format\&n=h8oodpUDiyR1Ssvt\&q=85\&s=15f046dcf0e091d0d3d7cc302593644c) ### Signaling Steps are “Out of Date” If prior steps in a workflow are modified or retested, Pipedream marks later steps in the execution path as *stale* to signal that the results may be out of date. In the non-linear model, Pipedream only marks steps that are in the confirmed execution path as stale. * If a change is made to a prior step, then the executed path is cleared. ![](https://mintcdn.com/pipedream/NF77kliJSewMqg65/images/2046f94c-image.gif?s=d3509f58d865a821cfb0446e13d944e9) * Steps in the known execution path are immediately marked as stale * State within conditional blocks is not updated until the start phase is tested and execution path is identified. ![](https://mintcdn.com/pipedream/xnRKrRxEtt3vxd6I/images/d5a6e35c-image.gif?s=c3d2ddc2871ca26170846c47c34f6e0e) ### Test State vs Execution Path Steps may be tested whether or not they are in the execution path. The test state for a step reflects whether a step was successfully tested or needs attention (the step may have errored, the results may be out of date, etc) and is denoted by the icon at the top left of each step. * Last test was successful ![](https://mintcdn.com/pipedream/xnRKrRxEtt3vxd6I/images/d052e2df-image.png?fit=max\&auto=format\&n=xnRKrRxEtt3vxd6I\&q=85\&s=497bc16ad4786fbe04c389d9af30833d) * Results may be stale, step may be untested, etc ![](https://mintcdn.com/pipedream/Acz4Z1ch6TM7-aI8/images/b093e7e0-image.png?fit=max\&auto=format\&n=Acz4Z1ch6TM7-aI8\&q=85\&s=9aba60d442a5f9f50fe31ae8458d3217) * **Step has an error or is not configured** ![](https://mintcdn.com/pipedream/xnRKrRxEtt3vxd6I/images/de5c22ac-image.png?fit=max\&auto=format\&n=xnRKrRxEtt3vxd6I\&q=85\&s=92618ace0999ca5c596a85b0c343a724) ## Workflow Segments ### Context Workflow segments are a linear series of steps that with no control flow operators. * A simple linear workflow is composed of a single workflow segment. ![](https://mintcdn.com/pipedream/xnRKrRxEtt3vxd6I/images/d052e2df-image.png?fit=max\&auto=format\&n=xnRKrRxEtt3vxd6I\&q=85\&s=497bc16ad4786fbe04c389d9af30833d) * When a control flow operator is introduced, then the workflow contains multiple segments. For example, when a Delay operator is added to the simple linear workflow above the workflow goes from 1 to 2 segments. ![](https://mintcdn.com/pipedream/anb6FA0wpd8jtdUB/images/58480aaf-image.png?fit=max\&auto=format\&n=anb6FA0wpd8jtdUB\&q=85\&s=e55c7e96be162bb6b132f48c4db554f4) * The following example using If/Else contains 5 workflow segments. However, since only 1 branch within the If/Else control flow block is run on each workflow execution, the maximum number of segments that will be executed for each trigger event is 3. ![](https://mintcdn.com/pipedream/grEzwYhEB2vZSwGw/images/9097daa2-image.png?fit=max\&auto=format\&n=grEzwYhEB2vZSwGw\&q=85\&s=0c2aff6e16e0f810a7695945f1899d39) ### Billing Pipedream compiles each workflow segment into an executable function to optimize performance and reduce credit usage; credit usage is calculated independently for each workflow segment independent of the number of steps (rather than per step like many other platforms). * For example, the two workflow segments below both use a single credit: * **Trigger + 1 step workflow segment (1 credit)** ![](https://mintcdn.com/pipedream/NF77kliJSewMqg65/images/1e5d642d-image.png?fit=max\&auto=format\&n=NF77kliJSewMqg65\&q=85\&s=e150bcf1759fc0ba22720ab96425dad7) * **Trigger + 5 step workflow segment (1 credit)** ![](https://mintcdn.com/pipedream/Acz4Z1ch6TM7-aI8/images/ba0eb7d2-image.png?fit=max\&auto=format\&n=Acz4Z1ch6TM7-aI8\&q=85\&s=ccb5f81a6e74af14f4bcea8ca636f55f) * The If/Else example above that contains 5 workflow segments, but only 3 workflow segments in any given execution path will only incur 3 credits of usage per execution. ![](https://mintcdn.com/pipedream/Acz4Z1ch6TM7-aI8/images/b9ca2dd4-image.png?fit=max\&auto=format\&n=Acz4Z1ch6TM7-aI8\&q=85\&s=0011dc876193a5933a26edf22e40ae59) ### Timeout and Memory For the preview, all workflow segments inherit the global timeout and memory settings. In the future, Pipedream will support customization of timeout and memory settings for each segment. For example, if you need expanded memory for select steps, you will be able to restrict higher memory execution to that segment instead of having to run the entire workflow with the higher memory settings. This can help you reduce credit usage. ### Long Running Workflows Users may create long running workflows that greatly exceed the upper bound timeout of 12 minutes for current workflow (each workflow segment has an upper bound of 12 minutes). ### `/tmp` directory access `tmp` directory access is scoped per workflow segment (since each segment is executed as an independent function). If you need to persist files across multiple segments (or workflow executions) use File Stores. ### Warm Workers Warm workers are globally configured per segment. For example, if you have a workflow with 3 segments and you configure your workflow to use 1 warm worker per segment, 3 warm workers will be used. ### Segment Relationships Steps may only reference prior steps in the same workflow segment or it’s direct ancestors. | Type | Description | | - | - | | Root | The root segment is the top level for a workflow — it may have children but no parents. If you do not include any control flow blocks in your workflow, your entire workflow definition is contained within the root segment. | | Parent | A segment that has a child. | | Child | A flow that has a parent. | ## Blocks ### Context **Blocks** are compound steps that are composed of a **start** and an **end** phase. Blocks may contain one or more workflow segments between the phases. * Most non-linear control flow operators will be structured as blocks (vs. standard steps) * You may add steps or blocks to [workflow segments](/docs/workflows/building-workflows/control-flow/#workflow-segments) between start and end phases of a block * The start and end phases are independently testable * The start phase evaluates the rules/configuration for a block; the results may influence the execution path * The end phase exports results from the control flow block that can be referenced in future workflow steps * For example, for the If/Else control flow operator, the start phase evaluates the branching rules while the end phase exports the results from the executed branch. ### Testing When building a workflow with a control flow block, we recommend testing the start phase, followed by steps in the execution path followed by the end phase. ![](https://mintcdn.com/pipedream/NF77kliJSewMqg65/images/23d25642-image.gif?s=999a2e381b8be4de5d79683b05988310) For a conditional operator like if/else, we then recommend generating events that trigger alternate conditions and testing those. ![](https://mintcdn.com/pipedream/NF77kliJSewMqg65/images/0305731a-image.gif?s=15c582ad343834bee336d38d1781ccec) #### Passing data to steps in a control flow block Steps may only reference prior steps in the same workflow segment or it’s direct ancestors. In the following example, `step_c` and `step_d` (within the if/else control flow block) can directly reference any exports from `trigger`, `step_a`, or `step_b` (in the parent/root workflow segment) via the steps object. `step_c` and `step_d` are siblings and cannot reference exports from each other. ![](https://mintcdn.com/pipedream/h8oodpUDiyR1Ssvt/images/3d96c51a-image.png?fit=max\&auto=format\&n=h8oodpUDiyR1Ssvt\&q=85\&s=28ad09d47ffd14b80a39efa3e4de25f7) #### Referencing data from steps in a previous block Steps after the end phase may not directly reference steps within a control flow block (between the start and end phases). E.g., in the following workflow there are two branches: ![](https://mintcdn.com/pipedream/h8oodpUDiyR1Ssvt/images/340d4c22-image.png?fit=max\&auto=format\&n=h8oodpUDiyR1Ssvt\&q=85\&s=c70fe1872588736c26db82bdda1d05bd) In this example, `step_f` is executed after a control flow block. It can directly reference prior steps in the root workflow segment (`trigger`, `step_a` and `step_b` using the `steps` object). However, `step_f` cannot reference directly reference data exported by `step_c` or `step_d`. The reason is that due to the non-linear execution, `step_c` and `step_d` are not guaranteed to execute for every event. **To reference data from a control flow block, reference the exports of the end phase.** Refer to the documentation to understand how data is exported for each control flow operator (e.g., for if/else, the exports of the last step in the branch are returned as the exports for the end phase; you can easily normalize the results across branches using a code step). In this example, `step_f` can reference the exported data for an executed branch by referencing `steps.ifelse.$return_value`. ### Nesting Control flow blocks may be nested within other control flow blocks: * If/Else blocks may be nested within other If/Else blocks * In the future, Loops may be nested within If/Else blocks and vice versa. There is currently no limit on the number of nested elements. ![](https://mintcdn.com/pipedream/h8oodpUDiyR1Ssvt/images/2a2b9582-image.png?fit=max\&auto=format\&n=h8oodpUDiyR1Ssvt\&q=85\&s=f9b2870ddf51bb775a90b708904326fc) ## Rule Builder ### Context Pipedream is introducing a rule builder for comparative operations. The rule builder is currently only supported by the If/Else operator, but it will be extended to other operators including Switch and Filter. ![](https://mintcdn.com/pipedream/grEzwYhEB2vZSwGw/images/76436b3d-image.png?fit=max\&auto=format\&n=grEzwYhEB2vZSwGw\&q=85\&s=13303dc321d84ca2263736d23109a148) ### Simple conditions Compare values using supported operators. ![](https://mintcdn.com/pipedream/xnRKrRxEtt3vxd6I/images/dc12c9c1-image.png?fit=max\&auto=format\&n=xnRKrRxEtt3vxd6I\&q=85\&s=562b35e74454f1ca0a73bdfa8b68c7d6) ### Combine multiple conditions using AND / OR Click “Add condition” using the menu on the right to add multiple conditions. Click on AND / OR to toggle the operator. ![](https://mintcdn.com/pipedream/grEzwYhEB2vZSwGw/images/74b858f6-image.png?fit=max\&auto=format\&n=grEzwYhEB2vZSwGw\&q=85\&s=1339de7288f27da334521d4c7cc01b2c) ### Test for multiple conditions using Groups Create and manage groups using the menu options to “Add group”, “Make condition into group”, “Nest group” and “Remove group”. ![](https://mintcdn.com/pipedream/grEzwYhEB2vZSwGw/images/8557546e-image.png?fit=max\&auto=format\&n=grEzwYhEB2vZSwGw\&q=85\&s=a6ef6293260e07667d0a5a13bf8796f2) ### Supported Operators * Exists * Doesn’t exist * String * Equals * Doesn’t equal * Is blank * Is not blank * Starts with * Contains * Ends with * Number * Equals * Does not equal * Is greater than * Is greater than or equal to * Is less than * Is less than or equal to * Boolean (equals) * Type checks * Is null * Is not null * Is string * Is not a string * Is a number * Is not a number * Is a boolean * Is not a boolean * Value checks * Is true * Is false # Delay Source: https://pipedream.com/docs/workflows/building-workflows/control-flow/delay > [!WARNING] > > **Workflows and String are shutting down on March 31, 2027.** [Learn more](/docs/workflows) ### Delay Sometimes you need to wait a specific amount of time before the next step of your workflow proceeds. Pipedream supports this in one of two ways: 1. The built-in **Delay** actions 2. The `$.flow.delay` function in Node.js You can pause your workflow for as little as one millisecond, or as long as one year. For example, we at Pipedream use this functionality to delay welcome emails to our customers until they’ve had a chance to use the product. #### Delay actions You can pause your workflow without writing code using the **Delay** actions: 1. Click the **+** button below any step 2. Search for the **Delay** app 3. Select the **Delay Workflow** action 4. Configure the action to delay any amount of time, up to one year ![](https://mintcdn.com/pipedream/anb6FA0wpd8jtdUB/images/615bd561-image.png?fit=max\&auto=format\&n=anb6FA0wpd8jtdUB\&q=85\&s=d1628d8a70670e2a3ac375b55add9671) #### `$.flow.delay` If you need to delay a workflow within Node.js code, or you need detailed control over how delays occur, [see the docs on `$.flow.delay`](/docs/workflows/building-workflows/code/nodejs/delay/). #### The state of delayed executions Delayed executions can hold one of three states: * **Paused**: The execution is within the delay window, and the workflow is still paused * **Resumed**: The workflow has been resumed at the end of its delay window automatically, or resumed manually * **Cancelled**: The execution was cancelled manually You’ll see the current state of an execution by [viewing its event data](/docs/workflows/building-workflows/inspect/). #### Cancelling or resuming execution manually The [**Delay** actions](/docs/workflows/building-workflows/control-flow/delay/#delay-actions) and [`$.flow.delay`](/docs/workflows/building-workflows/code/nodejs/delay/) return two URLs each time they run: ![](https://mintcdn.com/pipedream/h8oodpUDiyR1Ssvt/images/4b451f7e-Screen_Shot_2022-05-02_at_9.16.11_PM_ahw7tu.png?fit=max\&auto=format\&n=h8oodpUDiyR1Ssvt\&q=85\&s=935c687ab557a962aa62fe78c59513fa) These URLs are specific to a single execution of your workflow. While the workflow is paused, you can load these in your browser or send an HTTP request to either: * Hitting the `cancel_url` will immediately cancel that execution * Hitting the `resume_url` will immediately resume that execution early If you use [`$.flow.delay`](/docs/workflows/building-workflows/code/nodejs/delay/), you can send these URLs to your own system to handle cancellation / resumption. You can even email your customers to let them cancel / resume workflows that run on their behalf. # End Workflow Source: https://pipedream.com/docs/workflows/building-workflows/control-flow/end-workflow > [!WARNING] > > **Workflows and String are shutting down on March 31, 2027.** [Learn more](/docs/workflows) To terminate the workflow prior to the last step, use the **End Workflow** pre-built action or `$.flow.exit()` in code. ![](https://mintcdn.com/pipedream/h8oodpUDiyR1Ssvt/images/3f0ef77c-image.png?fit=max\&auto=format\&n=h8oodpUDiyR1Ssvt\&q=85\&s=173ecee80f60abef92ede3fc6a295dbd) ## End Workflow Using a Pre-Built Action * Select and configure the End Workflow action from the step selector * When the step runs, the workflow execution will stop * You may configure an optional reason for ending the workflow execution. This reason will be surfaced when inspecting the event execution. ![](https://mintcdn.com/pipedream/nKh6d_6A4aXFb6xD/images/e88769bc-image.png?fit=max\&auto=format\&n=nKh6d_6A4aXFb6xD\&q=85\&s=f0cbbb9e80d84b5780bd857d3c34be41) ## End Workflow in Code Check the reference for your preferred language to learn how to end the workflow execution in code. * [Ending a workflow in Node.js](/docs/workflows/building-workflows/code/nodejs/#ending-a-workflow-early) * [Ending a workflow in Python](/docs/workflows/building-workflows/code/python/#ending-a-workflow-early) # Filter Source: https://pipedream.com/docs/workflows/building-workflows/control-flow/filter > [!WARNING] > > **Workflows and String are shutting down on March 31, 2027.** [Learn more](/docs/workflows) ### Filter Use the Filter action to quickly stop or continue workflows on certain conditions. ![](https://mintcdn.com/pipedream/nKh6d_6A4aXFb6xD/images/ebe4c539-CleanShot_2022-05-03_at_13.51.17_za1skw.gif?s=cce4659a1e41e5fd3bfacd3f1092e46a) Add a filter action to your workflow by searching for the **Filter** app in a new step. The **Filter** app includes several built-in actions: Continue Workflow on Condition, Exit Workflow on Condition and Exit Workflow on Custom Condition. In each of these actions, the **Value** is the subject of the condition, and the **Condition** is the operand to compare the value against. For example, to only process orders with a `status = ready` #### Continue Workflow on Condition With this action, only when values that *pass* a set condition will the workflow continue to execute steps after this filter. # If/Else Source: https://pipedream.com/docs/workflows/building-workflows/control-flow/ifelse > [!WARNING] > > **Workflows and String are shutting down on March 31, 2027.** [Learn more](/docs/workflows) ## Overview **If/Else** is single path branching operator. You can create multiple execution branches, but Pipedream will execute the **first** branch that matches the configured rules. **The order in which rules are defined will affect the path of execution.** If/Else operator is useful when you need to branch based on the value of **multiple input variables**. You must define both the input variable and condition to evaluate for every rule. If you only need to test for the value of a **single input variable** (e.g., if you are branching based on the path of an inbound request), the [Switch operator](/docs/workflows/building-workflows/control-flow/switch/) may be a better choice. ![](https://mintcdn.com/pipedream/anb6FA0wpd8jtdUB/images/63f35f8b-image.png?fit=max\&auto=format\&n=anb6FA0wpd8jtdUB\&q=85\&s=72847b2ee4e327d21922239428230330) ## Capabilities * Define rules to conditionally execute one of many branches * Evaluate one or more expressions for each condition (use boolean operators to combine multiple rules) * Use the **Else** condition as a fallback * Merge and continue execution in the parent flow after the branching operation > [!NOTE] > > If you disable the **Else** branch and there are no matching cases, the workflow will continue execution in the parent workflow after the **end** phase of the If/Else block > [!NOTE] > > The If/Else operator is a control flow **Block** with **start** and **end** phases. [Learn more about Blocks](/docs/workflows/building-workflows/control-flow/#blocks). ## Getting Started **1. Generate a test event** Add a trigger and generate an event to help you build and test your workflow: ![](https://mintcdn.com/pipedream/nKh6d_6A4aXFb6xD/images/e7b7f0b7-image.gif?s=2cf0cda8214cfc4f4516f67175b179ec) **2. Add the If/Else control flow block** Click the + button to add a step to the canvas and select If/Else from the Control Flow section on the right. In the “start” phase, configure rules for each branch (optionally toggle the else branch) and then test the step. ![](https://mintcdn.com/pipedream/NF77kliJSewMqg65/images/129d3ce6-image.gif?s=c2ccb4bd0185698934a9d5162647eee6) > [!NOTE] > > **IMPORTANT:** If you disable the **Else** condition and an event does not match any of the rules, the workflow will continue to the next step after the **If/Else** section. If you want to end workflow execution if no other conditions evaluate to `true`, enable the Else condition and add a **Terminate Workflow** action. **3. Build and test along the execution path** Add a step to the success branch and test it ![](https://mintcdn.com/pipedream/anb6FA0wpd8jtdUB/images/650cd513-image.gif?s=115adb98a09dc6056ebdcefc27cd2032) **4. Merge and continue the parent flow after the branching operation** Test the end phase to export results from the If/Else control flow block. ![](https://mintcdn.com/pipedream/xnRKrRxEtt3vxd6I/images/dc66b832-image.gif?s=d0eef56a110cb2f0f5d445bb339bdcc0) Add a step and reference the exports from `ifelse` using the steps object. ![](https://mintcdn.com/pipedream/Acz4Z1ch6TM7-aI8/images/bc77e2b1-image.gif?s=6abd7d566290d6680e14638d62762abb) **5. Build and test alternate paths** Generate or select an alternate event to generate data to help you test other branches as you build. When you select a new event, the steps in the root workflow segments go stale. Steps in control flow blocks will only go stale if they are in the known path of execution; i.e., if you test a start phase, the steps in the success path will become stale. ![](https://mintcdn.com/pipedream/xnRKrRxEtt3vxd6I/images/daa47168-image.gif?s=894ee219a0ebe24ea5f1563c2d6282fb) Build, test and deploy the workflow. ![](https://mintcdn.com/pipedream/anb6FA0wpd8jtdUB/images/4ddd0d4a-image.gif?s=a383805287da95e75babbab736690a7b) **6. Test the deployed workflow** Generate test events to trigger the deployed workflow and inspect the executions. ![](https://mintcdn.com/pipedream/anb6FA0wpd8jtdUB/images/5eb73756-image.gif?s=639e2c776f1e3b855ac744a4c5d1bf6e) # Parallel Source: https://pipedream.com/docs/workflows/building-workflows/control-flow/parallel > [!WARNING] > > **Workflows and String are shutting down on March 31, 2027.** [Learn more](/docs/workflows) ## Overview **Parallel** is multi-path branching operator. It allows you to create multiple execution branches with optional filtering rules and Pipedream will execute **all** matching branches. Unlike [Switch](/docs/workflows/building-workflows/control-flow/switch/) and [If/Else](/docs/workflows/building-workflows/control-flow/ifelse/), the order in which rules are defined will not affect the path of execution. ![](https://mintcdn.com/pipedream/NF77kliJSewMqg65/images/138f6007-image.png?fit=max\&auto=format\&n=NF77kliJSewMqg65\&q=85\&s=15b7281eb17c7bac59a776f45338ab2c) ## Capabilities * Create non-linear workflows that execute steps in parallel branches * Define when branches run — always, conditionally or never (to disable a branch) * Merge and continue execution in the parent flow after the branching operation > [!NOTE] > > The Parallel operator is a control flow **Block** with **start** and **end** phases. [Learn more about Blocks](/docs/workflows/building-workflows/control-flow/#blocks). ### Add Parallel operator to workflow Select **Parallel** from the **Control Flow** section of the step selector: ![](https://mintcdn.com/pipedream/xnRKrRxEtt3vxd6I/images/c00b4f12-image.png?fit=max\&auto=format\&n=xnRKrRxEtt3vxd6I\&q=85\&s=c6b7463f4a17907c977cad06c4897bc0) ### Create Branches To create new branches, click the `+` button: ![](https://mintcdn.com/pipedream/xnRKrRxEtt3vxd6I/images/c0c411a7-image.png?fit=max\&auto=format\&n=xnRKrRxEtt3vxd6I\&q=85\&s=b0279d5e194de1f1e7c62895b40e23f2) ### Rename Branches Edit the branch’s nameslug on the canvas or in the right pane after selecting the **Start** phase of the parallel block. The nameslug communicates the branch’s purpose and affects workflow execution—the end phase exports an object, with each key corresponding to a branch name. ![](https://mintcdn.com/pipedream/nKh6d_6A4aXFb6xD/images/f41b18cc-image.png?fit=max\&auto=format\&n=nKh6d_6A4aXFb6xD\&q=85\&s=6cb93ced713e92b1e6cb93846a370cdf) ### Export Data to the Parent Flow You can export data from a parallel operation and continue execution in the parent flow. * The parallel block exports data as a JSON object * Branch exports are assigned to a key corresponding to the branch name slug (in the object exported from the block) * Only the exports from the last step of each executed branch are included in the parallel block’s return value * To preview the exported data, test the **End** phase of the parallel block ### Beta Limitations Workflow queue settings (concurrency, execution rate) may not work as expected with workflows using the parallel operator. ## Getting Started **1. Generate a test event** Add a trigger and generate an event to help you build and test your workflow: ![](https://mintcdn.com/pipedream/xnRKrRxEtt3vxd6I/images/d57964b7-image.gif?s=c65823a030a4f7f6bd83652d875cffc3) **2. Add the Parallel control flow block** Click the + button to add a step to the canvas and select Parallel from the Control Flow section on the right. You can optionally add or remove branches and configure conditions defining when each branch should run. ![](https://mintcdn.com/pipedream/anb6FA0wpd8jtdUB/images/6a3de974-image.gif?s=c637b9746ab08453fac47d57916806e7) **3. Test to identify the execution path(s)** Test the **Start** phase to identify which branches will execute for the current event. ![](https://mintcdn.com/pipedream/grEzwYhEB2vZSwGw/images/84029e1c-image.gif?s=6150a57caffce56af6f3b305e519c70a) **4. Add steps to branches** Add steps to the branches. These steps will be executed in parallel when the workflow runs. ![](https://mintcdn.com/pipedream/h8oodpUDiyR1Ssvt/images/382b338a-image.gif?s=671b484163f85321d61c5954ca0a8f79) **5. Optionally merge and continue to the parent flow** Test the **End** phase to export the results of the last step of each branch that was executed. This makes data from the branches available to reference in the parent flow. ![](https://mintcdn.com/pipedream/anb6FA0wpd8jtdUB/images/64bc6a7e-image.gif?s=35136d765678a18f6896a8c1b0e9c872) **6. Use exports in parent flow** Optionally add steps after the parallel block and use data from individual branches by referencing the return value of the **End** phase. ![](https://mintcdn.com/pipedream/NF77kliJSewMqg65/images/13b91cd2-image.gif?s=de322586ed3222fd0bf483ec44369602) **7. Deploy and test the live workflow** Deploy the workflow and trigger it to inspect the executions. ![](https://mintcdn.com/pipedream/grEzwYhEB2vZSwGw/images/8d9ba823-image.gif?s=0f333305831b50a60834ce09fd01af49) # Switch Source: https://pipedream.com/docs/workflows/building-workflows/control-flow/switch > [!WARNING] > > **Workflows and String are shutting down on March 31, 2027.** [Learn more](/docs/workflows) ## Overview **Switch** is single path branching operator. You can create multiple execution branches, but Pipedream will execute the **first** branch that matches the configured rules. **The order in which rules are defined will affect the path of execution.** Switch is useful when you need to make a branching decision based on the value of a **single input variable** (e.g., based on the path of an inbound request). You can define the input variable once and then branch based on the value(s). If you need to branch based on the values of **multiple input variables** use the [If/Else operator](/docs/workflows/building-workflows/control-flow/ifelse/). ![](https://mintcdn.com/pipedream/Acz4Z1ch6TM7-aI8/images/b50a91f3-image.png?fit=max\&auto=format\&n=Acz4Z1ch6TM7-aI8\&q=85\&s=c2c24eff02fe8579482ead726153dfd3) ## Capabilities * Define cases to conditionally execute one of many branches * Define the expression to evaluate once and configure cases to compare values (use boolean operators to combine multiple rules for each case) * Use the **Default** case as a fallback * Merge and continue execution in the parent flow after the branching operation > [!NOTE] > > If you disable the **Default** branch and there are no matching cases, the workflow will continue execution in the parent workflow after the **end** phase of the Switch block > [!NOTE] > > The Switch operator is a control flow **Block** with **start** and **end** phases. [Learn more about Blocks](/docs/workflows/building-workflows/control-flow/#blocks). ## Getting Started **1. Generate a test event** Add a trigger and generate an event to help you build and test your workflow: ![](https://mintcdn.com/pipedream/grEzwYhEB2vZSwGw/images/833a5739-image.gif?s=2405f323461a6a2cf00968aa549b7cb4) **2. Add the Switch control flow block** Click the + button to add a step to the canvas and select Switch from the Control Flow section on the right. In the “start” phase, configure rules for a case. ![](https://mintcdn.com/pipedream/Acz4Z1ch6TM7-aI8/images/a9c2ad3e-image.gif?s=2368c4997e6cef82b5d1753a024971f8) **IMPORTANT:** If you disable the **Default** condition and an event does not match any of the rules, the workflow will continue to the next step after the **Switch** section. If you want to end workflow execution if no other conditions evaluate to `true`, enable the Default condition and add a **Terminate Workflow** action. **3. Optionally add additional cases** To add additional cases, click the **+** button. ![](https://mintcdn.com/pipedream/anb6FA0wpd8jtdUB/images/60155fa5-image.gif?s=8e2c3b81f1b0c09f940d97d04e9df394) **4. Test and build along the execution path** Test the **start** phase and add a step to the branch in the execution path, ![](https://mintcdn.com/pipedream/nKh6d_6A4aXFb6xD/images/e20cbcf0-image.gif?s=bc77061c38e7527fd3ecd875afde43f3) **5. Optionally merge and continue the parent flow** Test the **end** phase to export the results of the last step in the execution path. This makes them available to reference in the parent flow. ![](https://mintcdn.com/pipedream/xnRKrRxEtt3vxd6I/images/c792ab29-image.gif?s=f74a8c8a265451eb9175f9f03d3f0e24) **6. Scaffold alternate paths** You may add steps to alternate paths and test them. Pipedream will signal that the results may not be reliable if the branch is not in the execution path. ![](https://mintcdn.com/pipedream/xnRKrRxEtt3vxd6I/images/d53f39d1-image.gif?s=54a97e423aa6adb1dc672e9e9cf8e779) **7. Validate alternate paths** Generate or select alternate events to trigger and validate alternate paths. ![](https://mintcdn.com/pipedream/grEzwYhEB2vZSwGw/images/884374c0-image.gif?s=5ae3745fe0e7e611e9b6da729783899b) **8. Deploy and test the live workflow** Deploy the workflow and trigger it to inspect the executions. ![](https://mintcdn.com/pipedream/grEzwYhEB2vZSwGw/images/913de555-image.gif?s=74ba48bc6d35d609a46f186c952317de) # Handling Errors Source: https://pipedream.com/docs/workflows/building-workflows/errors > [!WARNING] > > **Workflows and String are shutting down on March 31, 2027.** [Learn more](/docs/workflows) Two types of errors are raised in Pipedream workflows: * **Workflow errors** — Errors in the workflow execution environment, like [Timeouts](/docs/workflows/troubleshooting/#timeout) or [Out of Memory](/docs/workflows/troubleshooting/#out-of-memory) errors. Often, you can change your workflow’s configuration to fix them. You can find more details on these errors [in our troubleshooting guide](/docs/workflows/troubleshooting/). * **Step errors** — Errors raised by individual [code](/docs/workflows/building-workflows/code/) or [action](/docs/workflows/building-workflows/actions/) steps. These can be syntax errors, errors raised by the Node or Python runtime, errors with input data, and more. Pipedream will surface details about the error and the stack trace, and you can even [debug these errors with AI](/docs/workflows/building-workflows/errors/#debug-with-ai). Both types of errors will trigger [error notifications](/docs/workflows/building-workflows/errors/#error-notifications), can be handled by [custom error handlers](/docs/workflows/building-workflows/errors/#handle-errors-with-custom-logic), and will show up in [the REST API](/docs/workflows/building-workflows/errors/#poll-the-rest-api-for-workflow-errors). ## Auto-retry You can [automatically retry events](/docs/workflows/building-workflows/settings/#auto-retry-errors) that yield an error. This can help for transient errors that occur when making API requests, like when a service is down or your request times out. ## Apply conditional logic Many errors result from the data you’re processing. You might only receive certain data from a webhook under certain conditions, or have malformed data in the payload that causes an error. You can apply conditional logic in code, or using the [If / Else operator](/docs/workflows/building-workflows/control-flow/ifelse/), handling these conditions accordingly. ## Error notifications By default, [Pipedream sends an email](/docs/workflows/building-workflows/errors/#default-system-emails) when a workflow throws an unhandled error. But you can: * Send error notifications to Slack * Handle errors from one workflow in a specific way * Fetch errors asynchronously using the REST API, instead of handling the event in real-time These docs describe the default error behavior, and how to handle custom use cases like these. > [!NOTE] > > Email notifications are sent to the address specified in your [workspace settings](https://pipedream.com/settings/account) under the **Notifications** section. We recommend using a group email address so everyone can monitor workflow errors. Before you jump into the examples below, remember that all Pipedream workflows are just code. You can always use the built-in error handling logic native to your programming language, for example: using JavaScript’s [`try / catch` statement](https://developer.mozilla.org/en-US/Web/JavaScript/Reference/Statements/try...catch). In the future, Pipedream plans to support this kind of error-handling for built-in actions, as well. ### Default system emails Any time your workflow throws an unhandled error, you’ll receive an email like this: ![](https://mintcdn.com/pipedream/nKh6d_6A4aXFb6xD/images/ebd90792-Screen_Shot_2022-06-29_at_6.20.42_PM_kmsjbr.png?fit=max\&auto=format\&n=nKh6d_6A4aXFb6xD\&q=85\&s=9d8e32d912d2073abc07675587645f3f) This email includes a link to the error so you can see the data and logs associated with the run. When you inspect the data in the Pipedream UI, you’ll see details on the error below the step that threw the error, e.g. the full stack trace. #### Duplicate errors do not trigger duplicate emails High-volume errors can lead to lots of notifications, so Pipedream only sends at most one email, per error, per workflow, per 24 hour period. For example, if your workflow throws a `TypeError`, we’ll send you an email, but if it continues to throw that same `TypeError`, we won’t email you about the duplicate errors until the next day. If a different workflow throws a `TypeError`, you **will** receive an email about that. ### Test mode vs. live mode When you’re editing and testing your workflow, any unhandled errors will **not** raise errors as emails, nor are they forwarded to [error listeners](/docs/workflows/building-workflows/errors/#handle-errors-with-custom-logic). Error notifications are only sent when a deployed workflow encounters an error on a live event. ## Debug with AI You can debug errors in [code](/docs/workflows/building-workflows/code/) or [action](/docs/workflows/building-workflows/actions/) steps with AI by pressing the **Debug with AI** button at the bottom of any error. ### Data we send with errors When you debug an error with AI, Pipedream sends the following information to OpenAI: * The error code, message, and stack trace * The step’s code * The input added to the step configuration. This **does not** contain the event data that triggered your workflow, just the static input entered in the step configuration, like the URL of an HTTP request, or the names of [step exports](/docs/workflows/overview/#step-exports). We explicitly **do not** send the event data that triggered the error, or any other information about your account or workflow. ## Handle errors with custom logic Pipedream exposes a global stream of all errors, raised from all workflows. You can subscribe to this stream, triggering a workflow on every event. This lets you handle errors in a custom way. Instead of sending all errors to email, you can send them to Slack, Discord, AWS, or any other service, and handle them in any custom way. To do this: 1. Create a new workflow. 2. Add a new trigger. Search for the `Pipedream` app. 3. Select the custom source `Workspace $error events`. 4. Generate an error in a live version of any workflow (errors raised while you’re testing your workflow [do not send errors to the `$errors` stream](/docs/workflows/building-workflows/errors/#test-mode-vs-live-mode)). You should see this error trigger the workflow in step #1. From there, you can build any logic you want to handle errors across workflows. ### Duplicate errors *do* trigger duplicate error events on custom workflows Unlike [the default system emails](/docs/workflows/building-workflows/errors/#duplicate-errors-do-not-trigger-duplicate-emails), duplicate errors are sent to any workflow listeners. ## Poll the REST API for workflow errors Pipedream provides a REST API endpoint to [list the most recent 100 workflow errors](/docs/rest-api/#get-workflow-errors) for any given workflow. For example, to list the errors from workflow `p_abc123`, run: ```sh theme={null} curl 'https://api.pipedream.com/v1/workflows/p_abc123/$errors/event_summaries?expand=event' \ -H 'Authorization: Bearer ' ``` By including the `expand=event` query string param, Pipedream will return the full error data, along with the original event that triggered your workflow: ```json theme={null} { "page_info": { "total_count": 100, "start_cursor": "1606370816223-0", "end_cursor": "1606370816223-0", "count": 1 }, "data": [ { "id": "1606370816223-0", "indexed_at_ms": 1606370816223, "event": { "original_event": { "name": "Luke", "title": "Jedi" }, "original_context": { "id": "2po8fyMMKF4SZFrOThm0Ex4zv6M", "ts": "2024-12-05T17:52:54.117Z", "pipeline_id": null, "workflow_id": "p_abc1234", "deployment_id": "d_abc1234", "source_type": "COMPONENT", "verified": false, "hops": null, "test": false, "replay": false, "owner_id": "o_abc1234", "platform_version": "3.50.4", "workflow_name": "error", "resume": null, "emitter_id": "hi_abc1234", "external_user_id": null, "external_user_environment": null, "trace_id": "2po8fwtzKHVr0VZpJc3EUmdTAms", "project_id": "proj_abc1234" }, "error": { "code": "InternalFailure", "cellId": "c_abc123", "ts": "2020-11-26T06:06:56.077Z", "stack": " at Request.extractError ..." } }, "metadata": { "emitter_id": "p_abc123", "emit_id": "1kodKnAdWGeJyhqYbqyW6lEXVAo", "name": "$errors" } } ] } ``` By listing these errors, you may be able to replay them against your workflow programmatically. For example, if your workflow is triggered by HTTP requests, you can send an HTTP request with the data found in `event.original_event` (see the example above) for every event that errored. # HTTP Source: https://pipedream.com/docs/workflows/building-workflows/http > [!WARNING] > > **Workflows and String are shutting down on March 31, 2027.** [Learn more](/docs/workflows) Integrate and automate any API using Pipedream workflows. Use app specific pre-built actions, or an HTTP request action for a no code interface. If you need more control over error handling, then use your same connected accounts with code in Node.js or Python. ## Pre-built actions Pre-built actions are the most convenient option for integrating your workflow with an API. Pre-built actions can use your connected accounts to perform API requests, and are configured through props. Pre-built actions are the fastest way to get started building workflows, but they may not fit your use case if a prop is missing or is handling data in a way that doesn’t fit your needs. For example, to send a message using Slack just search for Slack and use the **Send Message to a Public Channel** action: ![](https://mintcdn.com/pipedream/h8oodpUDiyR1Ssvt/images/431f5f23-image.png?fit=max\&auto=format\&n=h8oodpUDiyR1Ssvt\&q=85\&s=c66dc7efb5d8ad8237a8408f60498d42) Then connect your Slack account, select a channel and write your message: ![](https://mintcdn.com/pipedream/anb6FA0wpd8jtdUB/images/71b71df8-image.png?fit=max\&auto=format\&n=anb6FA0wpd8jtdUB\&q=85\&s=c7fe0429ef4a49451ae4d3a04a815d5e) Now with a few clicks and some text you’ve integrated Slack into a Pipedream workflow. > [!NOTE] > > Pre-built actions are open source > > All pre-built actions are published from the [Pipedream Component Registry](/docs/components/contributing/), so you can read and modify their source code. You can even publish your own from [Node.js code steps privately to your own workspace](/docs/workflows/building-workflows/code/nodejs/sharing-code/). ## HTTP Request Action The HTTP request action is the next most convenient option. Use a Postman-like interface to configure an HTTP request - including the headers, body, and even connecting an account. ![](https://mintcdn.com/pipedream/anb6FA0wpd8jtdUB/images/5ed98566-image.png?fit=max\&auto=format\&n=anb6FA0wpd8jtdUB\&q=85\&s=10a27b1f632e23fff4bd2314f4c73b19) Selecting this action will display an HTTP request builder, with the Slack app slot to connect your account with. ![](https://mintcdn.com/pipedream/anb6FA0wpd8jtdUB/images/693199cb-image.png?fit=max\&auto=format\&n=anb6FA0wpd8jtdUB\&q=85\&s=d3b76358889c3c99ca85f78d8e6d9efe) Once you connect your account to the step, it will automatically configure the authorization headers to match. For example, the Slack API expects a Bearer token with the `Authorization` header. So Pipedream automatically configures this HTTP request to pass your token to that specific header: ![](https://mintcdn.com/pipedream/nKh6d_6A4aXFb6xD/images/ea756024-image.png?fit=max\&auto=format\&n=nKh6d_6A4aXFb6xD\&q=85\&s=f48a5243622166d58bacca2582fa0bad) The configuration of the request and management of your token is automatically handled for you. So you can simply modify the request to match the API endpoint you’re seeking to interact with. ### Adding apps to an HTTP request builder action You can also attach apps to the *Send any HTTP Request* action from the action selection menu. After adding a new step to your workflow, select the *Send any HTTP Request* action: ![](https://mintcdn.com/pipedream/anb6FA0wpd8jtdUB/images/4f860397-image.png?fit=max\&auto=format\&n=anb6FA0wpd8jtdUB\&q=85\&s=a083f61fa53d8182bf68a42ed402d633) Then within the HTTP request builder, click the *Authorization Type* dropdown to select a method, and click **Select an app**: ![](https://mintcdn.com/pipedream/h8oodpUDiyR1Ssvt/images/33a07ed2-CleanShot_2023-05-16_at_13.50.53_fv3caw.png?fit=max\&auto=format\&n=h8oodpUDiyR1Ssvt\&q=85\&s=9fb6202bd360ca82aa1c579d81d56c32) Then you can choose **Slack** as the service to connect the HTTP request with: ![](https://mintcdn.com/pipedream/anb6FA0wpd8jtdUB/images/6b68952d-CleanShot_2023-05-18_at_10.35.41_dxyipl.png?fit=max\&auto=format\&n=anb6FA0wpd8jtdUB\&q=85\&s=a5bb26c7e1b8b166e84ad230a1526bb3) The HTTP request action will automatically be configured with the Slack connection, you’ll just need to select your account to finish the authentication. Then it’s simply updating the URL to send a message which is [`https://slack.com/api/chat.postMessage`](https://api.slack.com/methods/chat.postMessage): ![](https://mintcdn.com/pipedream/nKh6d_6A4aXFb6xD/images/e6ef0440-CleanShot_2023-05-16_at_14.35.05_mame6o.png?fit=max\&auto=format\&n=nKh6d_6A4aXFb6xD\&q=85\&s=3742f7eca5c9411386f88763e5601a1f) Finally modify the body of the request to specify the `channel` and `message` for the request: ![](https://mintcdn.com/pipedream/h8oodpUDiyR1Ssvt/images/33e85256-CleanShot_2023-05-16_at_14.34.56_kpk2vp.png?fit=max\&auto=format\&n=h8oodpUDiyR1Ssvt\&q=85\&s=faa52bf42c6a04b635278fc413caa5f3) HTTP Request actions can be used to quickly scaffold API requests, but are not as flexible as code for a few reasons: * Conditionally sending requests - The HTTP request action will always request, to send requests conditionally you’ll need to use code. * Workflow execution halts - if an HTTP request fails, the entire workflow cancels * Automatically retrying - `$.flow.retry` isn’t available in the HTTP Request action to retry automatically if the request fails * Error handling - It’s not possible to set up a secondary action if an HTTP request fails. ## HTTP Requests in code When you need more control, use code. You can use your connected accounts with Node.js or Python code steps. This gives you the flexibility to catch errors, use retries, or send multiple API requests in a single step. First, connect your account to the code step: * [Connecting any account to a Node.js step](/docs/workflows/building-workflows/code/nodejs/auth/#accessing-connected-account-data-with-thisappnameauth) * [Connecting any account to a Python step](/docs/workflows/building-workflows/code/python/auth/) ### Conditionally sending an API Request You may only want to send a Slack message on a certain condition, in this example we’ll only send a Slack message if the HTTP request triggering the workflow passes a special variable: `steps.trigger.event.body.send_message` ```javascript theme={null} import { axios } from "@pipedream/platform" export default defineComponent({ props: { slack: { type: "app", app: "slack", } }, async run({steps, $}) { // only send the Slack message if the HTTP request has a `send_message` property in the body if(steps.trigger.body.send_message) { return await axios($, { headers: { Authorization: `Bearer ${this.slack.$auth.oauth_access_token}`, }, url: `https://slack.com/api/chat.postMessage`, method: 'post', data: { channel: 'C123456', text: 'Hi from a Pipedream Node.js code step' } }) } }, }) ``` ### Error Handling The other advantage of using code is handling error messages using `try...catch` blocks. In this example, we’ll only send a Slack message if another API request fails: ```javascript theme={null} import { axios } from "@pipedream/platform" export default defineComponent({ props: { openai: { type: "app", app: "openai" }, slack: { type: "app", app: "slack", } }, async run({steps, $}) { try { return await axios($, { url: `https://api.openai.com/v1/completions`, method: 'post', headers: { Authorization: `Bearer ${this.openai.$auth.api_key}`, }, data: { "model": "text-davinci-003", "prompt": "Say this is a test", "max_tokens": 7, "temperature": 0 } }) } catch(error) { return await axios($, { url: `https://slack.com/api/chat.postMessage`, method: 'post', headers: { Authorization: `Bearer ${this.slack.$auth.oauth_access_token}`, }, data: { channel: 'C123456', text: `OpenAI returned an error: ${error}` } }) } }, }) ``` > [!NOTE] > > Subscribing to all errors > > [You can use a subscription](/docs/rest-api/#subscriptions) to subscribe a workflow to all errors through the `$errors` channel, instead of handling each error individually. ### Automatically retrying an HTTP request You can leverage `$.flow.rerun` within a `try...catch` block in order to retry a failed API request. [See the example in the `$.flow.rerun` docs](/docs/workflows/building-workflows/code/nodejs/rerun/#pause-resume-and-rerun-a-workflow) for Node.js. ## Platform axios ### Why `@pipedream/platform` axios? `axios` is an HTTP client for Node.js ([see these docs](/docs/workflows/building-workflows/code/nodejs/http-requests/) for usage examples). `axios` has a simple programming API and works well for most use cases. But its default error handling behavior isn’t easy to use. When you make an HTTP request and the server responds with an error code in the 4XX or 5XX range of status codes, `axios` returns this stack trace: ![](https://mintcdn.com/pipedream/h8oodpUDiyR1Ssvt/images/441ffc12-image.png?fit=max\&auto=format\&n=h8oodpUDiyR1Ssvt\&q=85\&s=cb53edd1f0d145ba348e9f216f271e39) This only communicates the error code, and not any other information (like the body or headers) returned from the server. Pipedream publishes an `axios` wrapper as a part of [the `@pipedream/platform` package](https://github.com/PipedreamHQ/pipedream/tree/master/platform). This presents the same programming API as `axios`, but implements two helpful features: 1. When the HTTP request succeeds (response code \< `400`), it returns only the `data` property of the response object — the HTTP response body. This is typically what users want to see when they make an HTTP request: ![](https://mintcdn.com/pipedream/h8oodpUDiyR1Ssvt/images/2dd5b98b-image.png?fit=max\&auto=format\&n=h8oodpUDiyR1Ssvt\&q=85\&s=f3b708577bed9b9548f9a7072a110374) 2. When the HTTP request *fails* (response code >= `400`), it displays a detailed error message in the Pipedream UI (the HTTP response body), and returns the whole `axios` response object so users can review details on the HTTP request and response: ![](https://mintcdn.com/pipedream/NF77kliJSewMqg65/images/0b4c51be-image.png?fit=max\&auto=format\&n=NF77kliJSewMqg65\&q=85\&s=4e332f4e4281a111cbfe56c1bd726bd9) ### Using `@pipedream/platform` axios in component actions To use `@pipedream/platform` axios in component actions, import it: ```javascript theme={null} import { axios } from "@pipedream/platform" ``` `@pipedream/platform` axios uses methods [provided by the `$` object](/docs/components/contributing/api/#actions), so you’ll need to pass that as the first argument to `axios` when making HTTP requests, and pass the [standard `axios` request config](https://github.com/axios/axios#request-config) as the second argument. Here’s an example action: ```javascript theme={null} import { axios } from "@pipedream/platform" export default { key: "my-test-component", name: "My Test component", version: "0.0.1", type: "action", async run({ $ }) { return await axios($, { url: "https://httpstat.us/200", }) } } ``` # Inspect Events Source: https://pipedream.com/docs/workflows/building-workflows/inspect > [!WARNING] > > **Workflows and String are shutting down on March 31, 2027.** [Learn more](/docs/workflows) [The inspector](/docs/workflows/building-workflows/inspect/#the-inspector) lists the events you send to a [workflow](/docs/workflows/building-workflows/). Once you choose a [trigger](/docs/workflows/building-workflows/triggers/) and send events to it, you’ll see those events in the inspector, to the left of your workflow. Clicking on an event from the list lets you [review the incoming event data and workflow execution logs](/docs/workflows/building-workflows/triggers/#examining-event-data) for that event. You can use the inspector to replay events, delete them, and more. ## The inspector The inspector lists your workflow’s events: ![](https://mintcdn.com/pipedream/anb6FA0wpd8jtdUB/images/5246bc92-CleanShot_2022-03-31_at_16.45.52_vwwhaj.png?fit=max\&auto=format\&n=anb6FA0wpd8jtdUB\&q=85\&s=40cce7fb7211efe54510cefcf89d67e9) ## Event Duration The duration shown when clicking an individual event notes the time it took to run your code, in addition to the time it took Pipedream to handle the execution of that code and manage its output. Specifically, **Duration = Time Your Code Ran + Pipedream Execution Time** ## Replaying and deleting events Hover over an event, and you’ll see two buttons: ![](https://mintcdn.com/pipedream/anb6FA0wpd8jtdUB/images/72821e4e-CleanShot_2022-03-31_at_16.49.24_ska5vo.gif?s=b838aeb3c0c9d0abd6cb7c69ae53920d) The blue button with the arrow **replays** the event against the newest version of your workflow. The red button with the X **deletes** the event. ## Messages Any `console.log()` statements or other output of code steps is attached to the associated code cells. But [`$.flow.exit()`](/docs/workflows/building-workflows/code/nodejs/#ending-a-workflow-early) or [errors](/docs/workflows/building-workflows/code/nodejs/#errors) end a workflow’s execution, so their details appear in the inspector. ## Limits Pipedream retains a limited history of events for a given workflow. See the [limits docs](/docs/workflows/limits/#event-history) for more information. # Settings Source: https://pipedream.com/docs/workflows/building-workflows/settings > [!WARNING] > > **Workflows and String are shutting down on March 31, 2027.** [Learn more](/docs/workflows) You can control workflow-specific settings in your workflow’s **Settings**: 1. Visit your workflow 2. Click on Workflow Settings on the top left > [!NOTE] > > You can also open the workflow settings using `CMD` + `,` on Mac, or `Ctrl` + `,` on Windows. ## Enable Workflow If you’d like to pause your workflow from executing completely, you can disable it or re-enable it here. ## Error Handling By default, you’ll receive notifications when your workflow throws an unhandled error. See the [error docs](/docs/workflows/building-workflows/errors/) for more detail on these notifications. You can disable these notifications for your workflow by disabling the **Notify me on errors** toggle: ![](https://mintcdn.com/pipedream/h8oodpUDiyR1Ssvt/images/40fa3a1f-Screen_Shot_2022-06-30_at_4.30.44_PM_oauty4.png?fit=max\&auto=format\&n=h8oodpUDiyR1Ssvt\&q=85\&s=4f18d96290e23ac19d8bda915d9ad4a8) ![](https://mintcdn.com/pipedream/h8oodpUDiyR1Ssvt/images/40fa3a1f-Screen_Shot_2022-06-30_at_4.30.44_PM_oauty4.png?fit=max\&auto=format\&n=h8oodpUDiyR1Ssvt\&q=85\&s=4f18d96290e23ac19d8bda915d9ad4a8) ## Auto-retry Errors > [!NOTE] > > **Out of Memory and Timeout Errors** > > Pipedream will not automatically retry if an execution fails due to an Out of Memory (OOM) error or a timeout. If you encounter these errors frequently, consider increasing the configuration settings for your workflow. Customers on the [Advanced Plan](https://pipedream.com/pricing) can automatically retry workflows on errors. If any step in your workflow throws an error, Pipedream will retry the workflow from that failed step, re-rerunning the step up to 8 times over a 10 hour span with an [exponential backoff](https://en.wikipedia.org/wiki/Exponential_backoff) strategy. On error, the step will export a `$summary` property that tells you how many times the step has been retried, and an `$attempt` object with the following properties: 1. `error` — All the details of the error the step threw — the error, the stack, etc. 2. `cancel_url` — You can call this URL to cancel the retry 3. `rerun_url` — You can call this URL to proceed with the execution immediately 4. `resume_ts` — An ISO 8601 timestamp that tells you the timestamp of the next retry ![](https://mintcdn.com/pipedream/nKh6d_6A4aXFb6xD/images/f074d2e5-Screen_Shot_2023-02-22_at_6.29.08_PM_ssnzsi.png?fit=max\&auto=format\&n=nKh6d_6A4aXFb6xD\&q=85\&s=698e20c9842cdd1a852044d5ab90d700) If the step execution succeeds during any retry, the execution will proceed to the next step of the workflow. If the step fails on all 8 retries and throws a final error, you’ll receive [an error notification](/docs/workflows/building-workflows/errors/) through your standard notification channel. ### Send error notifications on the first error By default, if a step fails on all 8 retries, and throws a final error, you’ll receive [an error notification](/docs/workflows/building-workflows/errors/) through your standard notification channel. But sometimes you need to investigate errors as soon as they happen. If you’re connecting to your database, and receive an error that the DB is down, you may want to investigate that immediately. On any workflow with auto-retry enabled, you can optionally choose to **Send notification on first error**. This is disabled by default so you don’t get emails for transient errors, but you can enable for critical workflows where you want visibility into all errors. For custom control over error handling, you can implement error logic in code steps (e.g. `try` / `catch` statements in Node.js code), or [create your own custom error workflow](/docs/workflows/building-workflows/errors/#handle-errors-with-custom-logic). ## Data Retention Controls By default, Pipedream stores exports, logs, and other data tied to workflow executions. You can view these logs in two places: 1. [The workflow inspector](/docs/workflows/building-workflows/inspect/#the-inspector) 2. [Event History](/docs/workflows/event-history/) But if you’re processing sensitive data, you may not want to store those logs. You can **Disable data retention** in your workflow settings to disable **all** logging. Since Pipedream stores no workflow logs with this setting enabled, you’ll see no logs in the inspector or event history UI. ![](https://mintcdn.com/pipedream/Acz4Z1ch6TM7-aI8/images/a6ee1e54-image.png?fit=max\&auto=format\&n=Acz4Z1ch6TM7-aI8\&q=85\&s=4736195aa2e48782f65b047feb8efee6) Refer to our [pricing page](https://pipedream.com/pricing) to understand the latest limits based on your plan. ### Constraints * **Data Retention Controls do not apply to sources**: Even with data retention disabled on your workflow, Pipedream will still log inbound events for the source. * **No events will be shown in the UI**: When data retention is disabled for your workflow, the Pipedream UI will not show any new events in the inspector or Event History for that workflow. > [!NOTE] > > **Avoid surfacing events in the builder** > > Even with data retention disabled on your workflow, the builder will still surface inbound events when in build mode. To avoid surfacing potentially sensitive data here as well, refer to [these docs](/docs/workflows/building-workflows/triggers/#pipedream-specific-request-parameters). ## Execution Controls ### Execution Timeout Limit Workflows have a default [execution limit](/docs/workflows/limits/#time-per-execution), which defines the time the workflow can run for a single execution until it’s timed out. If your workflow times out, and needs to run for longer than the [default limit](/docs/workflows/limits/#time-per-execution), you can change that limit here. ### Memory By default, workflows run with 256MB of memory. If you’re processing a lot of data in memory, you might need to raise that limit. Here, you can increase the memory of your workflow up to 10GB. Increasing your workflow’s memory gives you a proportional increase in CPU, so increasing your workflow’s memory can reduce its overall runtime and make it more performant. > [!NOTE] > > **How can my workflow run faster?** > > See [our guide on running workflows faster](/docs/workflows/troubleshooting/#how-can-my-workflow-run-faster). **Pipedream charges credits proportional to your memory configuration**. When you modify your memory settings, Pipedream will show you the number of credits you’ll be charged per execution. [Read more here](/docs/pricing/#how-credits-work-for-workflows). ### Concurrency and Throttling [Manage the concurrency and rate](/docs/workflows/building-workflows/settings/concurrency-and-throttling/) at which events from a source trigger your workflow code. ## Eliminate cold starts A **cold start** refers to the delay between the invocation of workflow and the execution of the workflow code. Cold starts happen when Pipedream spins up a new [execution environment](/docs/privacy-and-security/#execution-environment) to handle incoming events. Specifically, cold starts occur on the first request to your workflow after a period of inactivity (roughly 5 minutes), or if your initial worker is already busy and a new worker needs to be initialized. In these cases, Pipedream creates a new execution environment to process your event. **Initializing this environment takes a few seconds, which delays the execution of this first event**. You can reduce cold starts by configuring a number of dedicated **workers**: 1. Visit your workflow’s **Settings** 2. Under **Execution Controls**, select the toggle to **Eliminate cold starts** 3. Configure [the appropriate number of workers](/docs/workflows/building-workflows/settings/#how-many-workers-should-i-configure) for your use case ![](https://mintcdn.com/pipedream/h8oodpUDiyR1Ssvt/images/33d59c4a-Screenshot_2023-06-06_at_12.24.03_PM_zctp50.png?fit=max\&auto=format\&n=h8oodpUDiyR1Ssvt\&q=85\&s=9e81283c1a3bed6ee6e0cf78292baa20) When you configure workers for a specific workflow, Pipedream initializes dedicated workers — virtual machines that run Pipedream’s [execution environment](/docs/privacy-and-security/#execution-environment). [It can take a few minutes](/docs/workflows/building-workflows/settings/#how-long-does-it-take-to-spin-up-a-dedicated-worker) for new dedicated workers to deploy. Once deployed, these workers are available at all times to respond to workflow executions, with no cold starts. > [!WARNING] > > You may need to configure [multiple dedicated workers](/docs/workflows/building-workflows/settings/#how-many-workers-should-i-configure) to handle multiple, concurrent requests. > > Pipedream also performs some initialization operations on new workflow runs, so you may still observe a small startup time (typically around 50ms per workflow step) on dedicated workers. ### When should I configure dedicated workers? You should configure dedicated workers when you need to process requests as soon as possible, with no latency. For example, you may build an HTTP-triggered workflow that returns a synchronous HTTP response to a user, without delay. Or you may be building a Slack bot and need to respond to Slack’s webhook within a few seconds. Since these workflows need to respond quickly, they’re good cases to use dedicated workers. ### How many workers should I configure? Incoming requests are handled by a single worker, one at a time. If you only receive one request a minute, and the workflow finishes execution in a few seconds, you may only need one worker. But you might have a higher-volume app that receives two concurrent requests. In that case, Pipedream spins up **two** workers to handle each request. For many user-facing (even internal) applications, the number of requests over time can be modeled with a [Poisson distrubution](https://en.wikipedia.org/wiki/Poisson_distribution). You can use that distribution to estimate the number of workers you need at an average time, or set it higher if you want to ensure a specific percentage of requests hit a dedicated worker. You can also save a record of all workflow runs to your own database, with the timestamp they ran ([see `steps.trigger.context.ts`](/docs/workflows/building-workflows/triggers/#stepstriggercontext)), and look at your own pattern of requests, to compute the optimal number of workers. ### Do compute budgets apply to dedicated workers? No, compute budgets do not apply to dedicated workers, they only apply to credits incurred by compute from running workflows, sources, etc. ### How long does it take to spin up a dedicated worker? It can take 5-10 minutes for Pipedream to fully configure a new dedicated worker. Before that time, you may still observe cold starts with new incoming requests. ### Pricing for dedicated workers You’re charged 5 credits for every 10 minutes a dedicated worker is live, per worker, per 256MB memory. You can view the credits used by dedicated workers [in your billing settings](https://pipedream.com/settings/billing): ![](https://mintcdn.com/pipedream/grEzwYhEB2vZSwGw/images/91aa1910-Screenshot_2023-06-05_at_6.26.53_PM_stlljl.png?fit=max\&auto=format\&n=grEzwYhEB2vZSwGw\&q=85\&s=4ca2a2ebe134ea77f4f8caa4ffa58b96) For example, if you run a single dedicated worker for 24 hours, that would cost 720 credits: ```python theme={null} 5 credits per 10 min * 6 10-min periods per hour * 24 hours = 720 credits ``` 10 minutes is the *minimum* interval that Pipedream charges for usage. If you have a dedicated worker live for 1 minute, Pipedream will still charge 5 credits. Additionally, any change to dedicated worker configuration, (including worklow deploys) will result in an extra 5 credits of usage. ![](https://mintcdn.com/pipedream/NF77kliJSewMqg65/images/18b7c0f7-Screenshot_2023-06-06_at_12.23.03_PM_mpsqek.png?fit=max\&auto=format\&n=NF77kliJSewMqg65\&q=85\&s=c0cde9793b606c38b6710ef6c339ad9b) ### Limits Each attachment is limited to `25MB` in size. The total size of all attachments within a single workflow cannot exceed `200MB`. # Concurrency and Throttling Source: https://pipedream.com/docs/workflows/building-workflows/settings/concurrency-and-throttling > [!WARNING] > > **Workflows and String are shutting down on March 31, 2027.** [Learn more](/docs/workflows) Pipedream makes it easy to manage the concurrency and rate at which events trigger your workflow code using execution controls. ## Overview Workflows listen for events and execute as soon as they are triggered. While this behavior is expected for many use cases, there can be unintended consequences. ### Concurrency Without restricting concurrency, events can be processed in parallel and there is no guarantee that they will execute in the order in which they were received. This can cause race conditions. For example, if two workflow events try to add data to Google Sheets simultaneously, they may both attempt to write data to the same row. As a result, one event can overwrite data from another event. The diagram below illustrates this example — both `Event 1` and `Event 2` attempt to write data to Google Sheets concurrently — as a result, they will both write to the same row and the data for one event will be overwritten and lost (and no error will be thrown). ![](https://mintcdn.com/pipedream/Acz4Z1ch6TM7-aI8/images/b210c2af-image.png?fit=max\&auto=format\&n=Acz4Z1ch6TM7-aI8\&q=85\&s=9afb42755a538295b36d98fdd9a2884d) You can avoid race conditions like this by limiting workflow concurrency to a single “worker”. What this means is that only one event will be processed at a time, and the next event will not start processing until the first is complete (unprocessed events will be maintained in a queue and processed by the workflow in order). The following diagram illustrates how the events in the last diagram would executed if concurrency was limited to a single worker. ![](https://mintcdn.com/pipedream/grEzwYhEB2vZSwGw/images/8c2db97e-image.png?fit=max\&auto=format\&n=grEzwYhEB2vZSwGw\&q=85\&s=4f7491aed260ab8e5127de3b2aa0af97) While the first example resulted in only two rows of data in Google Sheets, this time data for all three events are recorded to three separate rows. ### Throttling If your workflow integrates with any APIs, then you may need to limit the rate at which your workflow executes to avoid hitting rate limits from your API provider. Since event-driven workflows are stateless, you can’t manage the rate of execution from within your workflow code. Pipedream’s execution controls solve this problem by allowing you to control the maximum number of times a workflow may be invoked over a specific period of time (e.g., up to 1 event every second). > [!NOTE] > > Pipedream controls the frequency of workflow invocations over a specified time interval using fixed window throttling. For example, if the execution rate limit is set at 1 execution every 5 seconds, this means that your workflow will be invoked no more than once within a fixed 5-second time box. This doesn’t mean that executions will occur 5 seconds apart. ## Usage Events emitted from a source to a workflow are placed in a queue, and Pipedream triggers your workflow with events from the queue based on your concurrency and throttling settings. These settings may be customized per workflow (so the same events may be processed at different rates by different workflows). ![](https://mintcdn.com/pipedream/Acz4Z1ch6TM7-aI8/images/a27eb1fb-image.png?fit=max\&auto=format\&n=Acz4Z1ch6TM7-aI8\&q=85\&s=340d660293342541eeb328b13f49e374) The maximum number of events Pipedream will queue per workflow depends on your account type. * Up to 100 events will be queued per workflow for the workspaces on the free tier. * Workflows owned by paid plans may have custom limits. If you need a larger queue size, [see here](/docs/workflows/building-workflows/settings/concurrency-and-throttling/#increasing-the-queue-size-for-a-workflow). **IMPORTANT:** If the number of events emitted to a workflow exceeds the queue size, events will be lost. If that happens, you’ll see an error in your workflow, and you’ll receive an error email. ### Where Do I Manage Concurrency and Throttling? Concurrency and throttling can be managed in the **Execution Controls** section of your **Workflow Settings**. Event queues are currently supported for any workflow that is triggered by an event source. Event queues are not currently supported for native workflow triggers (native HTTP, cron, SDK and email). ![](https://mintcdn.com/pipedream/grEzwYhEB2vZSwGw/images/79d58ce6-image.png?fit=max\&auto=format\&n=grEzwYhEB2vZSwGw\&q=85\&s=d332c127a1edb8ba56622fdebc7b7583) ### Managing Event Concurrency Concurrency controls define how many events can be executed in parallel. To enforce serialized, in-order execution, limit concurrency to `1` worker. This guarantees that each event will only be processed once the execution for the previous event is complete. To execute events in parallel, increase the number of workers (the number of workers defines the maximum number of concurrent events that may be processed), or disable concurrency controls for unlimited parallelization. ### Throttling Workflow Execution To throttle workflow execution, enable it in your workflow settings and configure the **limit** and **interval**. The limit defines how many events (from `0-10000`) to process in a given time period. The interval defines the time period over which the limit will be enforced. You may specify the time period as a number of seconds, minutes or hours (ranging from `1-10000`) ### Applying Concurrency and Throttling Together The conditions for both concurrency and throttling must be met in order for a new event to trigger a workflow execution. Here are some examples: | Concurrency | Throttling | Result | | - | - | - | | Off | Off | Events will trigger your workflow **as soon as they are received**. Events may execute in parallel. | | 1 Worker | Off | Events will trigger your workflow in a **serialized pattern** (a maximum of 1 event will be processed at a time). As soon as one event finishes processing, the next event in the queue will be processed. | | 1 Worker | 1 Event per Second | Events will trigger your workflow in a **serialized pattern** at a **maximum rate** of 1 event per second. If an event takes *less* than one second to finish processing, the next event in the queue will not being processing until 1 second from the start of the most recently processed event. If an event takes *longer* than one second to process, the next event in the queue will begin processing immediately. | | 1 Worker | 10 Events per Minute | Events will trigger your workflow in a **serialized pattern** at a **maximum rate** of 10 events per minute. If an event takes *less* than one minute to finish processing, the next event in the queue immediately begin processing. If 10 events been processed in less than one minute, the remaining events will be queued until 1 minute from the start of the initial event. | | 5 Workers | Off | Up to 5 events will trigger your workflow in parallel as soon as they are received. If more events arrive while 5 events are being processed, they will be queued and executed in order as soon as an event completes processing. | ### Pausing Workflow Execution To stop the queue from invoking your workflow, throttle workflow execution and set the limit to `0`. ### Increasing the queue size for a workflow By default, your workflow can hold up to 100 events in its queue at once. Any events that arrive once the queue is full will be dropped, and you’ll see an [Event Queue Full](/docs/workflows/troubleshooting/#event-queue-full) error. For example, if you serialize the execution of your workflow by setting a concurrency of `1`, but receive 200 events from your workflow’s event source at once, the workflow’s queue can only hold the first 100 events. The last 100 events will be dropped. Users on [paid tiers](https://pipedream.com/pricing) can increase their queue size up to 10,000 events for a given workflow, just below the **Concurrency** section of your **Execution Controls** settings: ![](https://mintcdn.com/pipedream/h8oodpUDiyR1Ssvt/images/427b69e5-image.png?fit=max\&auto=format\&n=h8oodpUDiyR1Ssvt\&q=85\&s=6297eb084edeaba940ac41087cb2b176) # Sharing Workflows Source: https://pipedream.com/docs/workflows/building-workflows/sharing > [!WARNING] > > **Workflows and String are shutting down on March 31, 2027.** [Learn more](/docs/workflows) You can share your workflows as templates with other Pipedream accounts with a unique shareable link. Creating a share link for your workflow will allow anyone with the link to create a template version of your workflow in their own Pipedream account. This will allow others to use your workflow with their own Pipedream account and also their own connected accounts. [Here’s an example of a workflow](https://pipedream.com/new?h=tch_OYWfjz) that sends you a daily SMS message with today’s schedule: ![](https://mintcdn.com/pipedream/h8oodpUDiyR1Ssvt/images/3cb292b5-New_Project_6_n63kju.png?fit=max\&auto=format\&n=h8oodpUDiyR1Ssvt\&q=85\&s=1cf0286e8cf98b6fdf33412b94d6467a) Click **Deploy to Pipedream** below to create a copy of this workflow in your own Pipedream account. > Deploy to Pipedream > > [Open](https://pipedream.com/new?h=tch_OYWfjz) The copied workflow includes the same trigger, steps, and connected account configuration, but it has a separate event history and versioning from the original. > [!WARNING] > > Steps that are paused within your workflow will be omitted from the generated share link. ## Creating a share link for a workflow To share a workflow, open the workflow in your browser. Then in the top right menu, select **Create Share Link**. ![](https://mintcdn.com/pipedream/h8oodpUDiyR1Ssvt/images/3f019305-image.png?fit=max\&auto=format\&n=h8oodpUDiyR1Ssvt\&q=85\&s=7542ff6023e888936226fe86d5e3cce2) Now you can define which prop values should be included in this shareable link. ### Including props Optionally, you can include the actual individual prop configurations as well. This helps speed up workflow development if the workflow relies on specific prop values to function properly. You can choose to **Include all** prop values if you’d like, or only select specific props. For the daily schedule reminder workflow, we included the props for filtering Google Calendar events, but we did *not* include the SMS number to send the message to. This is because the end user of this workflow will use their own phone number instead: ![](https://mintcdn.com/pipedream/Acz4Z1ch6TM7-aI8/images/acaac04b-image.png?fit=max\&auto=format\&n=Acz4Z1ch6TM7-aI8\&q=85\&s=6185fbc32b89b5578f78841aae363897) > [!NOTE] > > **Your connected accounts are not shared.** When other users configure your workflow from the shared link they’ll be prompted to connect their own accounts. ### Versioning * When you create a shared link for your workflow, that link is frozen to the version of your workflow at the time the link was created * If you make changes to the original workflow, those changes will *not* be included in the shared workflow link, nor in any workflows copied from the original shared link * To push out new changes to a workflow, you’ll need to generate a new share link > [!NOTE] > > **Share links persist**. You can create multiple share links for the same workflow with different prop configurations, or even different steps. Share links do not expire, nor do newly created link overwrite existing ones. ## FAQ ### If changes are made to the original workflow, will copied versions of the workflow from the shared link also change? No, workflows copied from a shared link will have separate version histories from the original workflow. You can modify your original workflow and it will not affect copied workflows. The only exception is if you use a share link within your own workspace, which is not recommended (you should copy the workflow directly instead). There is a known issue in this case where changes in the new workflow's trigger can impact the existing workflow's trigger. ### Will my connected accounts be shared with the workflow? No, your connected accounts are not shared. Instead, copied workflows display a slot in actions that require a connected account, so the user of the copied workflow can provide their own accounts instead. For example, if one of your steps relies on a Slack connected account to send a message, then the copied workflow will display the need to connect a Slack account. ### I haven’t made any changes to my workflow, but if I generate another shared link will it override my original link? No, if the steps and prop configuration of the workflow is exactly the same, then the shared link URL will also be exactly the same. The shared workflow link is determined by the configuration of your workflow, it’s not a randomly generated ID. ### Will generating new shared links disable or delete old links? No, each link you generate will be available even if you create new versions based on changes or included props from the original workflow. ### What plan is this feature available on? Sharing workflows via link is available on all plans, including the Free plan. ### Do users of my workflow need to have a subscription? To copy a workflow, a subscription is not required. However, the copied workflow is subject to the current workspace’s plan limits. For example, if a workflow requires more connected accounts than what’s available on the [Free plan](/docs/pricing/#free-plan), then users of your workflow will require a plan to run the workflow properly. ### Will copies of my workflow use my credits? No. Copied workflows have entirely separate versioning, connected accounts, and billing. Sharing workflow copies is free, and the user of the copy usage is responsible for credit usage. Your original workflow is entirely separate from the copy. ### How can I transfer all of my workflows from one account to another? It’s only possible to share a single workflow at time with a link at this time. ### Are step notes included when I share a workflow? Yes any [step notes](/docs/workflows/overview/#step-notes) you’ve added to your workflow are included in the copied version. # Triggers Source: https://pipedream.com/docs/workflows/building-workflows/triggers > [!WARNING] > > **Workflows and String are shutting down on March 31, 2027.** [Learn more](/docs/workflows) **Triggers** define the type of event that runs your workflow. For example, HTTP triggers expose a URL where you can send any HTTP requests. Pipedream will run your workflow on each request. The Scheduler trigger runs your workflow on a schedule, like a cron job. Today, we support the following triggers: * [Triggers for apps like Twitter, GitHub, and more](/docs/workflows/building-workflows/triggers/#app-based-triggers) * [HTTP / Webhook](/docs/workflows/building-workflows/triggers/#http) * [Schedule](/docs/workflows/building-workflows/triggers/#schedule) * [Email](/docs/workflows/building-workflows/triggers/#email) * [RSS](/docs/workflows/building-workflows/triggers/#rss) If there’s a specific trigger you’d like supported, please [let us know](https://pipedream.com/support/). ## App-based Triggers You can trigger a workflow on events from apps like Twitter, Google Calendar, and more using [event sources](/docs/workflows/building-workflows/triggers/). Event sources run as separate resources from your workflow, which allows you to trigger *multiple* workflows using the same source. Here, we’ll refer to event sources and workflow triggers interchangeably. When you create a workflow, click **Add Trigger** to view the available triggers: ![](https://mintcdn.com/pipedream/xnRKrRxEtt3vxd6I/images/c223818e-image.png?fit=max\&auto=format\&n=xnRKrRxEtt3vxd6I\&q=85\&s=888738847789814036d90d70e6e955a9) This will open a new menu to search and choose a trigger for your workflow: ![](https://mintcdn.com/pipedream/h8oodpUDiyR1Ssvt/images/3b97c96b-image.png?fit=max\&auto=format\&n=h8oodpUDiyR1Ssvt\&q=85\&s=dd1d36fc586b2c002803c27450952993) Search by **app name** to find triggers associated with your app. For Google Calendar, for example, you can run your workflow every time a new event is **added** to your calendar, each time an event **starts**, **ends**, and more: ![](https://mintcdn.com/pipedream/NF77kliJSewMqg65/images/0eb031e4-image.png?fit=max\&auto=format\&n=NF77kliJSewMqg65\&q=85\&s=e8fe25920a9060b1a9f5e4f56f83b541) Once you select your trigger, you’ll be asked to connect any necessary accounts (for example, Google Calendar sources require you authorize Pipedream access to your Google account), and enter the values for any configuration settings. Some sources are configured to retrieve an initial set of events when they’re created. Others require you to generate events in the app to trigger your workflow. If your source generates an initial set of events, you’ll see them appear in the **Select events** dropdown in the **Select Event** step: ![](https://mintcdn.com/pipedream/NF77kliJSewMqg65/images/0401e401-CleanShot_2022-03-22_at_09.55.57_2x_upj35r.png?fit=max\&auto=format\&n=NF77kliJSewMqg65\&q=85\&s=45ced1089dee7989683d226775fac13a) Then you can select a specific test event and manually trigger your workflow with that event data by clicking **Send Test Event**. Now you’re ready to build your workflow with the selected test event. ### What’s the difference between an event source and a trigger? You’ll notice the docs use the terms **event source** and **trigger** interchangeably above. It’s useful to clarify the distinction in the context of workflows. [Event sources](/docs/workflows/building-workflows/triggers/) run code that collects events from some app or service and emits events as the source produces them. An event source can be used to **trigger** any number of workflows. For example, you might create a single source to listen for new Twitter mentions for a keyword, then trigger multiple workflows each time a new tweet is found: one to [send new tweets to Slack](https://pipedream.com/@pravin/twitter-mentions-slack-p_dDCA5e/edit), another to [save those tweets to an Amazon S3 bucket](https://pipedream.com/@dylan/twitter-to-s3-p_KwCZGA/readme), etc. **This model allows you to separate the data produced by a service (the event source) from the logic to process those events in different contexts (the workflow)**. Moreover, you can access events emitted by sources using Pipedream’s [SSE](/docs/workflows/data-management/destinations/sse/) and [REST APIs](/docs/rest-api/). This allows you to access these events in your own app, outside Pipedream’s platform. ### Can I add multiple triggers to a workflow? Yes, you can add any number of triggers to a workflow. Click the top right menu in the trigger step and select **Add trigger**. ![](https://mintcdn.com/pipedream/grEzwYhEB2vZSwGw/images/899a0814-image.png?fit=max\&auto=format\&n=grEzwYhEB2vZSwGw\&q=85\&s=aef5f14b7355700d74261032761db207) ### Shape of the `steps.trigger.event` object In all workflows, you have access to [event data](/docs/workflows/building-workflows/triggers/#event-format) using the variable `steps.trigger.event`. The shape of the event is specific to the source. For example, RSS sources produce events with a `url` and `title` property representing the data provided by new items from a feed. Google Calendar sources produce events with a meeting title, start date, etc. ## HTTP When you select the **HTTP** trigger: ![](https://mintcdn.com/pipedream/xnRKrRxEtt3vxd6I/images/d7aa472c-image.png?fit=max\&auto=format\&n=xnRKrRxEtt3vxd6I\&q=85\&s=5899d83eab2e4e1f0334cbf53e3d1c0e) Pipedream creates a URL endpoint specific to your workflow: ![](https://mintcdn.com/pipedream/h8oodpUDiyR1Ssvt/images/300c019f-image.png?fit=max\&auto=format\&n=h8oodpUDiyR1Ssvt\&q=85\&s=81385af20a15240c238cf3928ac529eb) You can send any HTTP requests to this endpoint, from anywhere on the web. You can configure the endpoint as the destination URL for a webhook or send HTTP traffic from your application - we’ll accept any [valid HTTP request](/docs/workflows/building-workflows/triggers/#valid-requests). > [!NOTE] > > Pipedream also supports [custom domains](/docs/workflows/domains/). This lets you host endpoints on `https://endpoint.yourdomain.com` instead of the default `*.m.pipedream.net` domain. ### Accessing HTTP request data You can access properties of the HTTP request, like the method, payload, headers, and more, in [the `event` object](/docs/workflows/building-workflows/triggers/#event-format), accessible in any [code](/docs/workflows/building-workflows/code/) or [action](/docs/components/contributing/#actions) step. ### Valid Requests You can send a request to your endpoint using any valid HTTP method: `GET`, `POST`, `HEAD`, and more. We default to generating HTTPS URLs in the UI, but will accept HTTP requests against the same endpoint URL. You can send data to any path on this host, with any query string parameters. You can access the full URL in the `event` object if you’d like to write code that interprets requests with different URLs differently. You can send data of any [Media Type](https://www.iana.org/assignments/media-types/media-types.xhtml) in the body of your request. The primary limit we impose is on the size of the request body: we’ll issue a `413 Payload Too Large` status when the body [exceeds our specified limit](/docs/workflows/building-workflows/triggers/#request-entity-too-large). ### Authorizing HTTP requests By default, HTTP triggers are public and require no authorization to invoke. Anyone with the endpoint URL can trigger your workflow. When possible, we recommend adding authorization. HTTP triggers support two built-in authorization types in the **Authorization** section of the HTTP trigger configuration: a [static, custom token](/docs/workflows/building-workflows/triggers/#custom-token) and [OAuth](/docs/workflows/building-workflows/triggers/#oauth). #### Custom token To configure a static, custom token for HTTP auth: 1. Open the **Configure** section of the HTTP trigger 2. Select **Custom token**. 3. Enter whatever secret you’d like and click **Save and Continue**. ![](https://mintcdn.com/pipedream/grEzwYhEB2vZSwGw/images/915c7c73-Google_Chrome_-_Untitled_Workflow_-_10-24-2024_10-30_AM_-_Build_-_Pipedream_2024-10-24_at_10.31.01_AM_pkh8dk.png?fit=max\&auto=format\&n=grEzwYhEB2vZSwGw\&q=85\&s=ee8b8f2d7c05c6e72e017ca0281c3d7e) When making HTTP requests, pass the custom token as a `Bearer` token in the `Authorization` header: ```bash theme={null} curl -H 'Authorization: Bearer ' https://myendpoint.m.pipedream.net ``` #### OAuth You can also authorize requests using [Pipedream OAuth clients](/docs/rest-api/auth/#oauth): 1. Open the **Configure** section of the HTTP trigger. 2. Select **OAuth**. 3. If you don’t have an existing OAuth client, [create one in your workspace’s API settings](/docs/rest-api/auth/#creating-an-oauth-client). ![](https://mintcdn.com/pipedream/Acz4Z1ch6TM7-aI8/images/9c43dae5-Google_Chrome_-_Untitled_Workflow_-_10-24-2024_10-30_AM_-_Build_-_Pipedream_2024-10-24_at_10.36.04_AM_ujx34e.png?fit=max\&auto=format\&n=Acz4Z1ch6TM7-aI8\&q=85\&s=a00bb7e6f8efd4494869cba6605f0d7f) Next, you’ll need to [generate an OAuth access token](/docs/rest-api/auth/#how-to-get-an-access-token). When making HTTP requests, pass the OAuth access token as a `Bearer` token in the `Authorization` header: ```bash theme={null} curl -H 'Authorization: Bearer ' https://myendpoint.m.pipedream.net ``` You can use the Pipedream SDK to automatically refresh access tokens and invoke workflows, or make HTTP requests directly to the workflow’s URL: ```javascript JavaScript theme={null} import { PipedreamClient } from "@pipedream/sdk"; // These secrets should be saved securely and passed to your environment const client = new PipedreamClient({ clientId: "{oauth_client_id}", clientSecret: "{oauth_client_secret}", projectId: "{project_id}", projectEnvironment: "development" // or "production" }); await client.workflows.invokeForExternalUser( "enabc123", // pass the endpoint ID or full URL here "{external_user_id}", // The end user's ID in your system "POST", // HTTP method { key: "value", } // request body ) ``` ```bash cURL theme={null} # First, obtain an OAuth access token curl -X POST https://api.pipedream.com/v1/oauth/token \ -H "Content-Type: application/json" \ -d '{ "grant_type": "client_credentials", "client_id": "{oauth_client_id}", "client_secret": "{oauth_client_secret}" }' # The response will include an access_token. Use it in the Authorization header below. curl -X POST https://{your-endpoint-url} \ -H "Content-Type: application/json" \ -H "Authorization: Bearer {access_token}" \ -d '{ "message": "Hello, world" }' ``` #### Implement your own authorization logic Since you have access to the entire request object, and can issue any HTTP response from a workflow, you can implement custom logic to validate requests. For example, you could require JWT tokens and validate those tokens using the [`jsonwebtoken` package](https://www.npmjs.com/package/jsonwebtoken) at the start of your workflow. ### Custom domains To configure endpoints on your own domain, e.g. `endpoint.yourdomain.com` instead of the default `*.m.pipedream.net` domain, see the [custom domains](/docs/workflows/domains/) docs. ### How Pipedream handles JSON payloads When you send JSON in the HTTP payload, or when JSON data is sent in the payload from a webhook provider, **Pipedream converts that JSON to its equivalent JavaScript object**. The trigger data can be referenced using [the `steps` object](/docs/workflows/building-workflows/triggers/#shape-of-the-stepstriggerevent-object). In the [Inspector](/docs/workflows/building-workflows/inspect/), we present `steps.trigger.event` cleanly, indenting nested properties, to make the payload easy to read. Since `steps.trigger.event` is a JavaScript object, it’s easy to reference and manipulate properties of the payload using dot-notation. ### How Pipedream handles `multipart/form-data` When you send [form data](https://ec.haxx.se/http/http-multipart) to Pipedream using a `Content-Type` of `multipart/form-data`, Pipedream parses the payload and converts it to a JavaScript object with a property per form field. For example, if you send a request with two fields: ```bash theme={null} curl -F 'name=Leia' -F 'title=General' https://myendpoint.m.pipedream.net ``` Pipedream will convert that to a JavaScript object, `event.body`, with the following shape: ```javascript theme={null} { name: "Leia", title: "General", } ``` ### How Pipedream handles HTTP headers HTTP request headers will be available in the `steps.trigger.event.headers` steps export in your downstream steps. Pipedream will automatically lowercase header keys for consistency. ### Pipedream-specific request parameters These params can be set as headers or query string parameters on any request to a Pipedream HTTP endpoint. #### `x-pd-nostore` Set to `1` to prevent logging any data for this execution. Pipedream will execute all steps of the workflow, but no data will be logged to Pipedream. No event will show up in the inspector or the Event History UI. If you need to disable logging for *all* requests, use the workflow’s [Data Retention controls](/docs/workflows/building-workflows/settings/#data-retention-controls), instead. #### `x-pd-notrigger` Set to `1` to send an event to the workflow for testing. Pipedream will **not** trigger the production version of the workflow, but will display the event in the [list of test events](/docs/workflows/building-workflows/triggers/#selecting-a-test-event) on the HTTP trigger. #### Limits You can send any content, up to the [HTTP payload size limit](/docs/workflows/limits/#http-request-body-size), as a part of the form request. The content of uploaded images or other binary files does not contribute to this limit — the contents of the file will be uploaded at a Pipedream URL you have access to within your source or workflow. See the section on [Large File Support](/docs/workflows/building-workflows/triggers/#large-file-support) for more detail. ### Sending large payloads *If you’re uploading files, like images or videos, you should use the [large file upload interface](/docs/workflows/building-workflows/triggers/#large-file-support), instead*. By default, the body of HTTP requests sent to a source or workflow is limited to 512KB. **But you can send an HTTP payload of any size to a [workflow](/docs/workflows/building-workflows/) or an [event source](/docs/workflows/building-workflows/triggers/) by including the `pipedream_upload_body=1` query string or an `x-pd-upload-body: 1` HTTP header in your request**. ```bash theme={null} curl -d '{ "name": "Yoda" }' \ https://endpoint.m.pipedream.net\?pipedream_upload_body\=1 curl -d '{ "name": "Yoda" }' \ -H "x-pd-upload-body: 1" \ https://endpoint.m.pipedream.net ``` In workflows, Pipedream saves the raw payload data in a file whose URL you can reference in the variable `steps.trigger.event.body.raw_body_url`. ![](https://mintcdn.com/pipedream/xnRKrRxEtt3vxd6I/images/ccaee50d-CleanShot_2022-03-21_at_16.42.01_2x_w6dmqk.png?fit=max\&auto=format\&n=xnRKrRxEtt3vxd6I\&q=85\&s=2fad1cff81857bdd4e4ed793212eb302) Within your workflow, you can download the contents of this data using the **Send HTTP Request** action, or [by saving the data as a file to the `/tmp` directory](/docs/workflows/building-workflows/code/nodejs/working-with-files/). #### Example: Download the HTTP payload using the Send HTTP Request action *Note: you can only download payloads at most* 6MB *in size using this method. Otherwise, you may encounter a [Function Payload Limit Exceeded](/docs/workflows/troubleshooting/#function-payload-limit-exceeded) error.* You can download the large HTTP payload using the **Send HTTP Request** action. [Copy this workflow to see how this works](https://pipedream.com/new?h=tch_egfAby). The payload from the trigger of the workflow is exported to the variable `steps.retrieve_large_payload.$return_value`: ![](https://mintcdn.com/pipedream/NF77kliJSewMqg65/images/07182686-image.png?fit=max\&auto=format\&n=NF77kliJSewMqg65\&q=85\&s=3c49406301f10ba0d7efd7063f605be2) #### Example: Download the HTTP payload to the `/tmp` directory [This workflow](https://pipedream.com/new?h=tch_5ofXkX) downloads the HTTP payload, saving it as a file to the [`/tmp` directory](/docs/workflows/building-workflows/code/nodejs/working-with-files/#the-tmp-directory). ```javascript theme={null} import stream from "stream"; import { promisify } from "util"; import fs from "fs"; import got from "got"; export default defineComponent({ async run({ steps, $ }) { const pipeline = promisify(stream.pipeline); await pipeline( got.stream(steps.trigger.event.body.raw_body_url), fs.createWriteStream(`/tmp/raw_body`) ); }, }) ``` You can [read this file](/docs/workflows/building-workflows/code/nodejs/working-with-files/#reading-a-file-from-tmp) in subsequent steps of your workflow. #### How the payload data is saved Your raw payload is saved to a Pipedream-owned [Amazon S3 bucket](https://aws.amazon.com/s3/). Pipedream generates a [signed URL](https://docs.aws.amazon.com/AmazonS3/latest/dev/ShareObjectPreSignedURL.html) that allows you to access to that file for up to 30 minutes. After 30 minutes, the signed URL will be invalidated, and the file will be deleted. #### Limits **You can upload payloads up to 5TB in size**. However, payloads that large may trigger [other Pipedream limits](/docs/workflows/limits/). Please [reach out](https://pipedream.com/support/) with any specific questions or issues. ### Large File Support *This interface is best used for uploading large files, like images or videos. If you’re sending JSON or other data directly in the HTTP payload, and encountering a **Request Entity Too Large** error, review the section above for [sending large payloads](/docs/workflows/building-workflows/triggers/#sending-large-payloads)*. You can upload any file to a [workflow](/docs/workflows/building-workflows/) or an [event source](/docs/workflows/building-workflows/triggers/) by making a `multipart/form-data` HTTP request with the file as one of the form parts. **Pipedream saves that file to a Pipedream-owned [Amazon S3 bucket](https://aws.amazon.com/s3/), generating a [signed URL](https://docs.aws.amazon.com/AmazonS3/latest/dev/ShareObjectPreSignedURL.html) that allows you to access to that file for up to 30 minutes**. After 30 minutes, the signed URL will be invalidated, and the file will be deleted. In workflows, these file URLs are provided in the `steps.trigger.event.body` variable, so you can download the file using the URL within your workflow, or pass the URL on to another third-party system for it to process. ![](https://mintcdn.com/pipedream/anb6FA0wpd8jtdUB/images/60d97667-image.png?fit=max\&auto=format\&n=anb6FA0wpd8jtdUB\&q=85\&s=1b7f3b1a8a6f942f301c6dce6b96172e) Within your workflow, you can download the contents of this data using the **Send HTTP Request** action, or [by saving the data as a file to the `/tmp` directory](/docs/workflows/building-workflows/code/nodejs/working-with-files/). #### Example: upload a file using `cURL` For example, you can upload an image to a workflow using `cURL`: ```bash theme={null} curl -F 'image=@my_image.png' https://myendpoint.m.pipedream.net ``` The `-F` tells `cURL` we’re sending form data, with a single “part”: a field named `image`, with the content of the image as the value (the `@` allows `cURL` to reference a local file). When you send this image to a workflow, Pipedream [parses the form data](/docs/workflows/building-workflows/triggers/#how-pipedream-handles-multipartform-data) and converts it to a JavaScript object, `event.body`. Select the event from the [inspector](/docs/workflows/building-workflows/inspect/#the-inspector), and you’ll see the `image` property under `event.body`: ![](https://mintcdn.com/pipedream/xnRKrRxEtt3vxd6I/images/c61ae423-image.png?fit=max\&auto=format\&n=xnRKrRxEtt3vxd6I\&q=85\&s=728c7fcb6fd6fb41d12a9aeeb44ec63f) When you upload a file as a part of the form request, Pipedream saves it to a Pipedream-owned [Amazon S3 bucket](https://aws.amazon.com/s3/), generating a [signed URL](https://docs.aws.amazon.com/AmazonS3/latest/dev/ShareObjectPreSignedURL.html) that allows you to access to that file for up to 30 minutes. After 30 minutes, the signed URL will be invalidated, and the file will be deleted. Within the `image` property of `event.body`, you’ll see the value of this URL in the `url` property, along with the `filename` and `mimetype` of the file. Within your workflow, you can download the file, or pass the URL to a third party system to handle, and more. #### Example: Download this file to the `/tmp` directory [This workflow](https://pipedream.com/@dylburger/example-download-an-image-to-tmp-p_KwC2Ad/edit) downloads an image passed in the `image` field in the form request, saving it to the [`/tmp` directory](/docs/workflows/building-workflows/code/nodejs/working-with-files/#the-tmp-directory). ```javascript theme={null} import stream from "stream"; import { promisify } from "util"; import fs from "fs"; import got from "got"; const pipeline = promisify(stream.pipeline); await pipeline( got.stream(steps.trigger.event.body.image.url), fs.createWriteStream(`/tmp/${steps.trigger.event.body.image.filename}`) ); ``` #### Example: Upload image to your own Amazon S3 bucket [This workflow](https://pipedream.com/@dylburger/example-save-uploaded-file-to-amazon-s3-p_o7Cm9z/edit) streams the uploaded file to an Amazon S3 bucket you specify, allowing you to save the file to long-term storage. #### Limits Since large files are uploaded using a `Content-Type` of `multipart/form-data`, the limits that apply to [form data](/docs/workflows/building-workflows/triggers/#how-pipedream-handles-multipartform-data) also apply here. The content of the file itself does not contribute to the HTTP payload limit imposed for forms. **You can upload files up to 5TB in size**. However, files that large may trigger [other Pipedream limits](/docs/workflows/limits/). Please [reach out](https://pipedream.com/support/) with any specific questions or issues. ### Cross-Origin HTTP Requests We return the following headers on HTTP `OPTIONS` requests: ```http theme={null} Access-Control-Allow-Origin: * Access-Control-Allow-Methods: GET,HEAD,PUT,PATCH,POST,DELETE ``` Thus, your endpoint will accept [cross-origin HTTP requests](https://developer.mozilla.org/en-US/Web/HTTP/CORS) from any domain, using any standard HTTP method. ### HTTP Responses #### Default HTTP response By default, when you send a [valid HTTP request](/docs/workflows/building-workflows/triggers/#valid-requests) to your endpoint URL, you should expect to receive a `200 OK` status code with the following payload: ```html theme={null}

Success!

To customize this response, check out our docs here

``` When you’re processing HTTP requests, you often don’t need to issue any special response to the client. We issue this default response so you don’t have to write any code to do it yourself. > [!NOTE] > > **How can my workflow run faster?** > > See [our guide on running workflows faster](/docs/workflows/troubleshooting/#how-can-my-workflow-run-faster). #### Customizing the HTTP response If you need to issue a custom HTTP response from a workflow, you can either: * Use the **Return HTTP response** action, available on the **HTTP / Webhook** app, or * **Use the `$.respond()` function in a Code or Action step**. #### Using the HTTP Response Action The HTTP Response action lets you return HTTP responses without the need to write code. You can customize the response status code, and optionally specify response headers and body. This action uses `$.respond()` and will always [respond immediately](/docs/workflows/building-workflows/triggers/#returning-a-response-immediately) when called in your workflow. A [response error](/docs/workflows/building-workflows/triggers/#errors-with-http-responses) will still occur if your workflow throws an Error before this action runs. #### Using custom code with `$.respond()` You can return HTTP responses in Node.js code with the `$.respond()` function. `$.respond()` takes a single argument: an object with properties that specify the body, headers, and HTTP status code you’d like to respond with: ```javascript theme={null} defineComponent({ async run({ steps, $ }) { await $.respond({ status: 200, headers: { "my-custom-header": "value" }, body: { message: "My custom response" }, // This can be any string, object, Buffer, or Readable stream }); }, }); ``` The value of the `body` property can be either a string, object, a [Buffer](https://nodejs.org/api/buffer.html#buffer_buffer) (binary data), or a [Readable stream](https://nodejs.org/api/stream.html#stream_readable_streams). Attempting to return any other data may yield an error. In the case where you return a Readable stream: * You must `await` the `$.respond` function (`await $.respond({ ... }`) * The stream must close and be finished reading within your [workflow execution timeout](/docs/workflows/limits/#time-per-execution). * You cannot return a Readable and use the [`immediate: true`](/docs/workflows/building-workflows/triggers/#returning-a-response-immediately) property of `$.respond`. #### Timing of `$.respond()` execution You may notice some response latency calling workflows that use `$.respond()` from your HTTP client. By default, `$.respond()` is called at the end of your workflow, after all other code is done executing, so it may take some time to issue the response back. If you need to issue an HTTP response in the middle of a workflow, see the section on [returning a response immediately](/docs/workflows/building-workflows/triggers/#returning-a-response-immediately). #### Returning a response immediately You can issue an HTTP response within a workflow, and continue the rest of the workflow execution, by setting the `immediate` property to `true`: ```javascript theme={null} defineComponent({ async run({ steps, $ }) { await $.respond({ immediate: true, status: 200, headers: { "my-custom-header": "value" }, body: { message: "My custom response" }, }); }, }); ``` Passing `immediate: true` tells `$.respond()` to issue a response back to the client at this point in the workflow. After the HTTP response has been issued, the remaining code in your workflow runs. This can be helpful, for example, when you’re building a Slack bot. When you send a message to a bot, Slack requires a `200 OK` response be issued immediately, to confirm receipt: ```javascript theme={null} defineComponent({ async run({ steps, $ }) { await $.respond({ immediate: true, status: 200, body: "", }); }, }); ``` Once you issue the response, you’ll probably want to process the message from the user and respond back with another message or data requested by the user. [Here’s an example workflow](https://pipedream.com/@dylburger/issue-http-response-immediately-continue-running-workflow-p_pWCWGJ) that shows how to use `immediate: true` and run code after the HTTP response is issued. #### Errors with HTTP Responses If you use `$.respond()` in a workflow, **you must always make sure `$.respond()` is called in your code**. If you make an HTTP request to a workflow, and run code where `$.respond()` is *not* called, your endpoint URL will issue a `400 Bad Request` error with the following body: ```txt theme={null} No $.respond called in workflow ``` This might happen if: * You call `$.respond()` conditionally, where it does not run under certain conditions. * Your workflow throws an Error before you run `$.respond()`. * You return data in the `body` property that isn’t a string, object, or Buffer. If you can’t handle the `400 Bad Request` error in the application calling your workflow, you can implement `try` / `finally` logic to ensure `$.respond()` always gets called with some default message. For example: ```javascript theme={null} defineComponent({ async run({ steps, $ }) { try { // Your code here that might throw an exception or not run throw new Error("Whoops, something unexpected happened."); } finally { await $.respond({ status: 200, body: { msg: "Default response", }, }); } }, }); ``` ### Errors Occasionally, you may encounter errors when sending requests to your endpoint: #### Request Entity Too Large The endpoint will issue a `413 Payload Too Large` status code when the body of your request exceeds 512KB. In this case, the request will still appear in the inspector, with information on the error. #### API key does not exist Your API key is the host part of the endpoint, e.g. the `eniqtww30717` in `eniqtww30717.m.pipedream.net`. If you attempt to send a request to an endpoint that does not exist, we’ll return a `404 Not Found` error. We’ll also issue a 404 response on workflows with an HTTP trigger that have been disabled. #### Too Many Requests If you send too many requests to your HTTP source within a small period of time, we may issue a `429 Too Many Requests` response. [Review our limits](/docs/workflows/limits/) to understand the conditions where you might be throttled. You can also [reach out](https://pipedream.com/support/) to inquire about raising this rate limit. If you control the application sending requests, you should implement [a backoff strategy](https://medium.com/clover-platform-blog/conquering-api-rate-limiting-dcac5552714d) to temporarily slow the rate of events. ## Schedule Pipedream allows you to run hosted scheduled jobs — commonly-referred to as a “cron job” — [for free](/docs/pricing/). You can think of workflows like scripts that run on a schedule. You can write scheduled job to send an HTTP request, send a scheduled email, run any Node.js or Python code, connect to any API, and much more. Pipedream manages the servers where these jobs run, so you don’t have to worry about setting up a server of your own or operating some service just to run code on a schedule. You write the workflow, we take care of the rest. ### Choosing a Schedule trigger To create a new scheduled job, create a new workflow and search for the **Schedule** trigger: ![](https://mintcdn.com/pipedream/nKh6d_6A4aXFb6xD/images/e1e437d8-image.png?fit=max\&auto=format\&n=nKh6d_6A4aXFb6xD\&q=85\&s=245954109b33c2b7c038d7cf742a7920) By default, your trigger will be turned **Off**. **To enable it, select either of the scheduling options**: * **Every** : run the job every N days, hours, minutes (e.g. every 1 day, every 3 hours). * **Cron Expression** : schedule your job using a cron expression. For example, the expression `0 0 * * *` will run the job every day at midnight. Cron expressions can be tied to any timezone. ### Testing a scheduled job If you’re running a scheduled job once a day, you probably don’t want to wait until the next day’s run to test your new code. You can manually run the workflow associated with a scheduled job at any time by pressing the **Run Now** button. ### Job History You’ll see the history of job executions under the **Job History** section of the [Inspector](/docs/workflows/building-workflows/inspect/). Clicking on a specific job shows the execution details for that job — all the logs and observability associated with that run of the workflow. ### Trigger a notification to an external service (email, Slack, etc.) You can send yourself a notification — for example, an email or a Slack message — at any point in a workflow by using the relevant [Action](/docs/components/contributing/#actions) or [Destination](/docs/workflows/data-management/destinations/). If you’d like to email yourself when a job finishes successfully, you can use the [Email Destination](/docs/workflows/data-management/destinations/email/). You can send yourself a Slack message using the Slack Action, or trigger an [HTTP request](/docs/workflows/data-management/destinations/http/) to an external service. You can also [write code](/docs/workflows/building-workflows/code/) to trigger any complex notification logic you’d like. ### Troubleshooting your scheduled jobs When you run a scheduled job, you may need to troubleshoot errors or other execution issues. Pipedream offers built-in, step-level logs that show you detailed execution information that should aid troubleshooting. Any time a scheduled job runs, you’ll see a new execution appear in the [Inspector](/docs/workflows/building-workflows/inspect/). This shows you when the job ran, how long it took to run, and any errors that might have occurred. **Click on any of these lines in the Inspector to view the details for a given run**. Code steps show [logs](/docs/workflows/building-workflows/code/nodejs/#logs) below the step itself. Any time you run `console.log()` or other functions that print output, you should see the logs appear directly below the step where the code ran. [Actions](/docs/components/contributing/#actions) and [Destinations](/docs/workflows/data-management/destinations/) also show execution details relevant to the specific Action or Destination. For example, when you use the [HTTP Destination](/docs/workflows/data-management/destinations/http/) to make an HTTP request, you’ll see the HTTP request and response details tied to that Destination step: ## Email When you select the **Email** trigger: ![](https://mintcdn.com/pipedream/grEzwYhEB2vZSwGw/images/9322523d-image.png?fit=max\&auto=format\&n=grEzwYhEB2vZSwGw\&q=85\&s=be819c7ed18bcc7010cae3a51a1c82dc) Pipedream creates an email address specific to your workflow. Any email sent to this address triggers your workflow: ![](https://mintcdn.com/pipedream/Acz4Z1ch6TM7-aI8/images/9cadf478-image.png?fit=max\&auto=format\&n=Acz4Z1ch6TM7-aI8\&q=85\&s=ab2f15dd54dfc26f8f2f4b3f16a7398b) As soon as you send an email to the workflow-specific address, Pipedream parses its body, headers, and attachments into a JavaScript object it exposes in the `steps.trigger.event` variable that you can access within your workflow. This transformation can take a few seconds to perform. Once done, Pipedream will immediately trigger your workflow with the transformed payload. [Read more about the shape of the email trigger event](/docs/workflows/building-workflows/triggers/#email). ### Sending large emails By default, you can send emails up to 30MB in total size (content, headers, attachments). Emails over this size will be rejected, and you will not see them appear in your workflow. **You can send emails up to `{EMAIL_PAYLOAD_SIZE_LIMIT}` in size by sending emails to `[YOUR EMAIL ENDPOINT]@upload.pipedream.net`**. If your workflow-specific email address is `endpoint@pipedream.net`, your “large email address” is `endpoint@upload.pipedream.net`. Emails delivered to this address are uploaded to a private URL you have access to within your workflow, at the variable `steps.trigger.event.mail.content_url`. You can download and parse the email within your workflow using that URL. This content contains the *raw* email. Unlike the standard email interface, you must parse this email on your own - see the examples below. #### Example: Download the email using the Send HTTP Request action *Note: you can only download emails at most* 6MB *in size using this method. Otherwise, you may encounter a [Function Payload Limit Exceeded](/docs/workflows/troubleshooting/#function-payload-limit-exceeded) error.* You can download the email using the **Send HTTP Request** action. [Copy this workflow to see how this works](https://pipedream.com/new?h=tch_1AfMyl). This workflow also parses the contents of the email and exposes it as a JavaScript object using the [`mailparser` library](https://nodemailer.com/extras/mailparser/): ```javascript theme={null} import { simpleParser } from "mailparser"; export default defineComponent({ async run({ steps, $ }) { return await simpleParser(steps.get_large_email_content.$return_value); }, }); ``` #### Example: Download the email to the `/tmp` directory, read it and parse it [This workflow](https://pipedream.com/new?h=tch_jPfaEJ) downloads the email, saving it as a file to the [`/tmp` directory](/docs/workflows/building-workflows/code/nodejs/working-with-files/#the-tmp-directory). Then it reads the same file (as an example), and parses it using the [`mailparser` library](https://nodemailer.com/extras/mailparser/): ```javascript theme={null} import stream from "stream"; import { promisify } from "util"; import fs from "fs"; import got from "got"; import { simpleParser } from "mailparser"; // To use previous step data, pass the `steps` object to the run() function export default defineComponent({ async run({ steps, $ }) { const pipeline = promisify(stream.pipeline); await pipeline( got.stream(steps.trigger.event.mail.content_url), fs.createWriteStream(`/tmp/raw_email`) ); // Now read the file and parse its contents into the `parsed` variable // See https://nodemailer.com/extras/mailparser/ for parsing options const f = fs.readFileSync(`/tmp/raw_email`); return await simpleParser(f); }, }); ``` #### How the email is saved Your email is saved to a Pipedream-owned [Amazon S3 bucket](https://aws.amazon.com/s3/). Pipedream generates a [signed URL](https://docs.aws.amazon.com/AmazonS3/latest/dev/ShareObjectPreSignedURL.html) that allows you to access to that file for up to 30 minutes. After 30 minutes, the signed URL will be invalidated, and the file will be deleted. ### Email attachments You can attach any files to your email, up to [the total email size limit](/docs/workflows/limits/#email-triggers). Attachments are stored in `steps.trigger.event.attachments`, which provides an array of attachment objects. Each attachment in that array exposes key properties: * `contentUrl`: a URL that hosts your attachment. You can [download this file to the `/tmp` directory](/docs/workflows/building-workflows/code/nodejs/http-requests/#download-a-file-to-the-tmp-directory) and process it in your workflow. * `content`: If the attachment contains text-based content, Pipedream renders the attachment in `content`, up to 10,000 bytes. * `contentTruncated`: `true` if the attachment contained text-based content larger than 10,000 bytes. If `true`, the data in `content` will be truncated, and you should fetch the full attachment from `contentUrl`. ### Appending metadata to the incoming email address with `+data` Pipedream provides a way to append metadata to incoming emails by adding a `+` sign to the incoming email key, followed by any arbitrary string: ```txt theme={null} myemailaddr+test@pipedream.net ``` Any emails sent to your workflow-specific email address will resolve to that address, triggering your workflow, no matter the data you add after the `+` sign. Sending an email to both of these addresses triggers the workflow with the address `myemailaddr@pipedream.net`: ```txt theme={null} myemailaddr+test@pipedream.net myemailaddr+unsubscribe@pipedream.net ``` This allows you implement conditional logic in your workflow based on the data in that string. ### Troubleshooting #### I’m receiving an `Expired Token` error when trying to read an email attachment Email attachments are saved to S3, and are accessible in your workflows over [pre-signed URLs](https://docs.aws.amazon.com/AmazonS3/latest/userguide/ShareObjectPreSignedURL.html). If the presigned URL for the attachment has expired, then you’ll need to send another email to create a brand new pre-signed URL. If you’re using email attachments in combination with [`$.flow.delay`](/docs/workflows/building-workflows/code/nodejs/delay/) or [`$.flow.rerun`](/docs/workflows/building-workflows/code/nodejs/rerun/) which introduces a gap of time between steps in your workflow, then there’s a chance the email attachment’s URL will expire. To overcome this, we suggest uploading your email attachments to your Project’s [File Store](/docs/workflows/data-management/file-stores/) for persistent storage. ## RSS Choose the RSS trigger to watch an RSS feed for new items: ![](https://mintcdn.com/pipedream/nKh6d_6A4aXFb6xD/images/f59f9ad8-image.png?fit=max\&auto=format\&n=nKh6d_6A4aXFb6xD\&q=85\&s=9b55218ba660b80be893118e1a2da4dd) This will create an RSS [event source](/docs/workflows/building-workflows/triggers/) that polls the feed for new items on the schedule you select. Every time a new item is found, your workflow will run. ## Events Events trigger workflow executions. The event that triggers your workflow depends on the trigger you select for your workflow: * [HTTP triggers](/docs/workflows/building-workflows/triggers/#http) invoke your workflow on HTTP requests. * [Cron triggers](/docs/workflows/building-workflows/triggers/#schedule) invoke your workflow on a time schedule (e.g., on an interval). * [Email triggers](/docs/workflows/building-workflows/triggers/#email) invoke your workflow on inbound emails. * [Event sources](/docs/workflows/building-workflows/triggers/#app-based-triggers) invoke your workflow on events from apps like Twitter, Google Calendar, and more. ### Selecting a test event When you test any step in your workflow, Pipedream passes the test event you select in the trigger step: ![](https://mintcdn.com/pipedream/xnRKrRxEtt3vxd6I/images/ddf5c7f5-image.png?fit=max\&auto=format\&n=xnRKrRxEtt3vxd6I\&q=85\&s=0f3dcea62057483087ec69a9d7392b4d) You can select any event you’ve previously sent to your trigger as your test event, or send a new one. ### Examining event data When you select an event, you’ll see [the incoming event data](/docs/workflows/building-workflows/triggers/#event-format) and the [event context](/docs/workflows/building-workflows/triggers/#stepstriggercontext) for that event: ![](https://mintcdn.com/pipedream/NF77kliJSewMqg65/images/28fc1516-CleanShot_2022-03-31_at_16.30.37_jwwwdy.png?fit=max\&auto=format\&n=NF77kliJSewMqg65\&q=85\&s=2b470b930bf446962cd34a40df0b15e0) Pipedream parses your incoming data and exposes it in the variable [`steps.trigger.event`](/docs/workflows/building-workflows/triggers/#event-format), which you can access in any [workflow step](/docs/workflows/overview/#steps). ### Copying references to event data When you’re [examining event data](/docs/workflows/building-workflows/triggers/#examining-event-data), you’ll commonly want to copy the name of the variable that points to the data you need to reference in another step. Hover over the property whose data you want to reference, and click the **Copy Path** button to its right: ![](https://mintcdn.com/pipedream/nKh6d_6A4aXFb6xD/images/f94a0e4e-CleanShot_2022-03-31_at_16.39.56_lsus2o.gif?s=8376b5edb14407360063577ea95d911c) ### Copying the values of event data You can also copy the value of specific properties of your event data. Hover over the property whose data you want to copy, and click the **Copy Value** button to its right: ![](https://mintcdn.com/pipedream/Acz4Z1ch6TM7-aI8/images/bc1c8e05-CleanShot_2022-03-31_at_16.41.02_xgzcsa.gif?s=32e3dcfb51c84e46a57f5d814f519dce) ### Event format When you send an event to your workflow, Pipedream takes the trigger data — for example, the HTTP payload, headers, etc. — and adds our own Pipedream metadata to it. **This data is exposed in the `steps.trigger.event` variable. You can reference this variable in any step of your workflow**. You can reference your event data in any [code](/docs/workflows/building-workflows/code/) or [action](/docs/components/contributing/#actions) step. See those docs or the general [docs on passing data between steps](/docs/workflows/overview/#steps) for more information. The specific shape of `steps.trigger.event` depends on the trigger type: #### HTTP | Property | Description | | - | - | | `body` | A string or object representation of the HTTP payload | | `client_ip` | IP address of the client that made the request | | `headers` | HTTP headers, represented as an object | | `method` | HTTP method | | `path` | HTTP request path | | `query` | Query string | | `url` | Request host + path | #### Cron Scheduler | Property | Description | | - | - | | `interval_seconds` | The number of seconds between scheduled executions | | `cron` | When you’ve configured a custom cron schedule, the cron string | | `timestamp` | The epoch timestamp when the workflow ran | | `timezone_configured` | An object with formatted datetime data for the given execution, tied to the schedule’s timezone | | `timezone_utc` | An object with formatted datetime data for the given execution, tied to the UTC timezone | #### Email We use Amazon SES to receive emails for the email trigger. You can find the shape of the event in the [SES docs](https://docs.aws.amazon.com/ses/latest/DeveloperGuide/receiving-email-notifications-contents.html). ### `steps.trigger.context` `steps.trigger.event` contain your event’s **data**. `steps.trigger.context` contains *metadata* about the workflow and the execution tied to this event. You can use the data in `steps.trigger.context` to uniquely identify the Pipedream event ID, the timestamp at which the event invoked the workflow, and more: | Property | Description | | - | - | | `deployment_id` | A globally-unique string representing the current version of the workflow | | `emitter_id` | The ID of the workflow trigger that emitted this event, e.g. the [event source](/docs/workflows/building-workflows/triggers/) ID. | | `id` | A unique, Pipedream-provided identifier for the event that triggered this workflow | | `owner_id` | The Pipedream-assigned [workspace ID](/docs/workspaces/#finding-your-workspaces-id) that owns the workflow | | `platform_version` | The version of the Pipedream execution environment this event ran on | | `replay` | A boolean, whether the event was replayed via the UI | | `trace_id` | Holds the same value for all executions tied to an original event. [See below for more details](/docs/workflows/building-workflows/triggers/#how-do-i-retrieve-the-execution-id-for-a-workflow). | | `ts` | The ISO 8601 timestamp at which the event invoked the workflow | | `workflow_id` | The workflow ID | | `workflow_name` | The workflow name | #### How do I retrieve the execution ID for a workflow? Pipedream exposes two identifies for workflow executions: one for the execution, and one for the “trace”. `steps.trigger.context.id` should be unique for every execution of a workflow. `steps.trigger.context.trace_id` will hold the same value for all executions tied to the same original event, e.g. if you have auto-retry enabled and it retries a workflow three times, the `id` will change, but the `trace_id` will remain the same. For example, if you call `$.flow.suspend()` on a workflow, we run a new execution after the suspend, so you’d see two total executions: `id` will be unique before and after the suspend, but `trace_id` will be the same. You may notice other properties in `context`. These are used internally by Pipedream, and are subject to change. ### Event retention On the Free and Basic plans, each workflow retains at most 100 events or 7 days of history. * After 100 events have been processed, Pipedream will delete the oldest event data as new events arrive, keeping only the last 100 events. * Or if an event is older than 7 days, Pipedream will delete the event data. Other paid plans have longer retention. [See the pricing page](https://pipedream.com/pricing) for details. Events are also stored in [event history](/docs/workflows/event-history/) for up to 30 days, depending on your plan. [See the pricing page](https://pipedream.com/pricing) for the retention on your plan. Events that are [delayed](/docs/workflows/building-workflows/control-flow/delay/) or [suspended](/docs/workflows/building-workflows/code/nodejs/rerun/#flowsuspend) are retained for the duration of the delay. After the delay, the workflow is executed, and the event data is retained according to the rules above. > [!NOTE] > > For an extended history of events across all of your workflows, included processed events, with the ability to filter by status and time range, please see the [Event History](/docs/workflows/event-history/). ## Don’t see a trigger you need? If you don’t see a trigger you’d like us to support, please [let us know](https://pipedream.com/support/). # Using Props Source: https://pipedream.com/docs/workflows/building-workflows/using-props > [!WARNING] > > **Workflows and String are shutting down on March 31, 2027.** [Learn more](/docs/workflows) Props are fields that can be added to code steps in a workflow to abstract data from the code and improve reusability. Most actions use props to capture user input (e.g., to allow users to customize the URL, method and payload for the Send HTTP Request action). Props support the entry of simple values (e.g., `hello world` or `123`) or expressions in `{{ }}` that can reference objects in scope or run basic Node.js code. ## Entering Expressions Expressions make it easy to pass data exported from previous steps into a code step or action via props. For example, if your workflow is triggered on new Tweets and you want to send the Tweet content to an HTTP or webhook destination, you would reference `{{steps.trigger.event.body}}` to do that. While the data expected by each input depends on the data type (e.g., string, integer, array, etc) and the data entry mode (structured or non-structured — if applicable), the format for entering expressions is always the same; expressions are always enclosed in `{{ }}`. There are three ways to enter expressions in a prop field — you can use the object explorer, enter it manually, or paste a reference from a step export. ### Use the object explorer When you click into a prop field, an object explorer expands below the input. You can explore all the objects in scope, filter for keywords (e.g., a key name), and then select the element to insert into the form as an expression. ![](https://mintcdn.com/pipedream/grEzwYhEB2vZSwGw/images/7b2d1c9b-CleanShot_2022-04-05_at_10.35.37_nxykkx.gif?s=b26f8acbc5685756e651058e86d4379b) ### Manually enter or edit an expression To manually enter or edit an expression, just enter or edit a value between double curly braces `{{ }}`. Pipedream provides auto-complete support as soon as you type. ![](https://mintcdn.com/pipedream/NF77kliJSewMqg65/images/07454d28-CleanShot_2024-03-15_at_09.38.09_topm8f.gif?s=78072894b8f191d2879999d0a55e1a0a) You can also run Node.js code in `{{ }}`. For example, if `event.foo` is a JSON object and you want to pass it to a param as a string, you can run `{{JSON.stringify(event.foo)}}`. ### Paste a reference from a step export To paste a reference from a step export, find the reference you want to use, click **Copy Path** and then paste it into the input. ![](https://mintcdn.com/pipedream/grEzwYhEB2vZSwGw/images/88e49519-CleanShot_2024-03-15_at_09.39.18_mfd5wa.gif?s=5957162aef25878a1866ffa084ca7928) # Data Stores Source: https://pipedream.com/docs/workflows/data-management/data-stores > [!WARNING] > > **Workflows and String are shutting down on March 31, 2027.** [Learn more](/docs/workflows) **Data stores** are Pipedream’s built-in key-value store. Data stores are useful for: * Storing and retrieving data at a specific key * Setting automatic expiration times for temporary data (TTL) * Counting or summing values over time * Retrieving JSON-serializable data across workflow executions * Caching and rate limiting * And any other case where you’d use a key-value store You can connect to the same data store across workflows, so they’re also great for sharing state across different services. You can use pre-built, no-code actions to store, update, and clear data, or interact with data stores programmatically in [Node.js](/docs/workflows/building-workflows/code/nodejs/using-data-stores/) or [Python](/docs/workflows/building-workflows/code/python/using-data-stores/). ## Using pre-built Data Store actions Pipedream provides several pre-built actions to set, get, delete, and perform other operations with data stores. ### Inserting data To insert data into a data store: 1. Add a new step to your workflow. 2. Search for the **Data Stores** app and select it. 3. Select the **Add or update a single record** pre-built action. ![](https://mintcdn.com/pipedream/xnRKrRxEtt3vxd6I/images/d68ed100-image.png?fit=max\&auto=format\&n=xnRKrRxEtt3vxd6I\&q=85\&s=120aded5fef4a4a05988d5a7dd157306) Configure the action: 1. **Select or create a Data Store** — create a new data store or choose an existing data store. 2. **Key** - the unique ID for this data that you’ll use for lookup later 3. **Value** - The data to store at the specified `key` 4. **Time to Live (TTL)** - (Optional) The number of seconds until this record expires and is automatically deleted. Leave blank for records that should not expire. ![](https://mintcdn.com/pipedream/xnRKrRxEtt3vxd6I/images/c64ce2f1-image.png?fit=max\&auto=format\&n=xnRKrRxEtt3vxd6I\&q=85\&s=8a0fa4762e4ba6efc0327adc3b253eaf) For example, to store the timestamp when the workflow was initially triggered, set the **Key** to **Triggered At** and the **Value** to `{{steps.trigger.context.ts}}`. The **Key** must evaluate to a string. You can pass a static string, reference [exports](/docs/workflows/overview/#step-exports) from a previous step, or use [any valid expression](/docs/workflows/building-workflows/using-props/#entering-expressions). ![](https://mintcdn.com/pipedream/xnRKrRxEtt3vxd6I/images/cb19db97-image.png?fit=max\&auto=format\&n=xnRKrRxEtt3vxd6I\&q=85\&s=24bfb91572a1898cc87f078d4175b85b) > [!NOTE] > > Need to store multiple records in one action? Use the **Add or update multiple records** action instead. ### Retrieving Data The **Get record** action will retrieve the latest value of a data point in one of your data stores. 1. Add a new step to your workflow. 2. Search for the **Data Stores** app and select it. 3. Select the **Add or update a single record** pre-built action. ![](https://mintcdn.com/pipedream/Acz4Z1ch6TM7-aI8/images/a15f51a4-image.png?fit=max\&auto=format\&n=Acz4Z1ch6TM7-aI8\&q=85\&s=63e58db5c44e0d596e548937c35a7a51) Configure the action: 1. **Select or create a Data Store** — create a new data store or choose an existing data store. 2. **Key** - the unique ID for this data that you’ll use for lookup later 3. **Create new record if key is not found** - if the specified key isn’t found, you can create a new record 4. **Value** - The data to store at the specified `key` ![](https://mintcdn.com/pipedream/h8oodpUDiyR1Ssvt/images/2deed27d-image.png?fit=max\&auto=format\&n=h8oodpUDiyR1Ssvt\&q=85\&s=2af014c26554d219b11601a44461aee1) ### Setting or updating record expiration (TTL) You can set automatic expiration times for records using the **Update record expiration** action: 1. Add a new step to your workflow. 2. Search for the **Data Stores** app and select it. 3. Select the **Update record expiration** pre-built action. Configure the action: 1. **Select a Data Store** - select the data store containing the record to modify 2. **Key** - the key for the record you want to update the expiration for 3. **Expiration Type** - choose from preset expiration times (1 hour, 1 day, 1 week, etc.) or select “Custom value” to enter a specific time in seconds 4. **Custom TTL (seconds)** - (only if “Custom value” is selected) enter the number of seconds until the record expires To remove expiration from a record, select “No expiration” as the expiration type. ### Deleting Data To delete a single record from your data store, use the **Delete a single record** action in a step: ![](https://mintcdn.com/pipedream/nKh6d_6A4aXFb6xD/images/e8479cab-image.png?fit=max\&auto=format\&n=nKh6d_6A4aXFb6xD\&q=85\&s=9f9f16ef4252a3e09598ac107aed4ee6) Then configure the action: 1. **Select a Data Store** - select the data store that contains the record to be deleted 2. **Key** - the key that identifies the individual record For example, you can delete the data at the **Triggered At** key that we’ve created in the steps above: ![](https://mintcdn.com/pipedream/Acz4Z1ch6TM7-aI8/images/abb2f2e7-image.png?fit=max\&auto=format\&n=Acz4Z1ch6TM7-aI8\&q=85\&s=40b0ddfe513bfadbc79b9ff11eace941) Deleting a record does not delete the entire data store. [To delete an entire data store, use the Pipedream Data Stores Dashboard](/docs/workflows/data-management/data-stores/#deleting-data-stores). ## Managing data stores You can view the contents of your data stores at any time in the [Pipedream Data Stores dashboard](https://pipedream.com/data-stores/). You can also add, edit, or delete data store records manually from this view. ### Editing data store values manually 1. Select the data store 2. Click the pencil icon on the far right of the record you want to edit. This will open a text box that will allow you to edit the contents of the value. When you’re finished with your edits, save by clicking the checkmark icon. ![](https://mintcdn.com/pipedream/Acz4Z1ch6TM7-aI8/images/a070776e-CleanShot_2022-03-23_at_15.24.49_err0nt.gif?s=83d66102f47938ae8860caee52d53c95) ### Deleting data stores You can delete a data store from this dashboard as well. On the far right in the data store row, click the trash can icon. ![](https://mintcdn.com/pipedream/grEzwYhEB2vZSwGw/images/74ff6d25-CleanShot_2022-03-23_at_15.29.00_qtvdcz.gif?s=1f318a0c91f925acc3b18edb3741ea24) **Deleting a data store is irreversible**. > [!WARNING] > > If the **Delete** option is greyed out and unclickable, you have workflows using the data store in a step. Click the **>** to the left of the data store’s name to expand the linked workflows. > > ![](https://mintcdn.com/pipedream/grEzwYhEB2vZSwGw/images/843184a5-Screenshot_2023-12-10_at_2.52.21_PM_tw2qwo.png?fit=max\&auto=format\&n=grEzwYhEB2vZSwGw\&q=85\&s=4893ef8ddde6b3047f118a18434c83a6) > > Then remove the data store from any linked steps. ## Using data stores in code steps Refer to the [Node.js](/docs/workflows/building-workflows/code/nodejs/using-data-stores/) and [Python](/docs/workflows/building-workflows/code/python/using-data-stores/) data store docs to learn how to use data stores in code steps. You can get, set, delete and perform any other data store operations in code. You cannot use data stores in [Bash](/docs/workflows/building-workflows/code/bash/) or [Go](/docs/workflows/building-workflows/code/go/) code steps. ## Compression Data saved in data stores is [Brotli-compressed](https://github.com/google/brotli), minimizing storage. The total compression ratio depends on the data being compressed. To test this on your own data, run it through a package that supports Brotli compression and measure the size of the data before and after. ## Data store limits Depending on your plan, Pipedream sets limits on: 1. The total number of data stores 2. The total number of keys across all data stores 3. The total storage used across all data stores, [after compression](/docs/workflows/data-management/data-stores/#compression) You’ll find your workspace’s limits in the **Data Stores** section of usage dashboard in the bottom-left of [https://pipedream.com](https://pipedream.com). ![](https://mintcdn.com/pipedream/anb6FA0wpd8jtdUB/images/54ca2228-image_ryjbrh.png?fit=max\&auto=format\&n=anb6FA0wpd8jtdUB\&q=85\&s=9ebcd956b1be14fd3c1e503de18618f5) ## Atomic operations Data store operations are not atomic or transactional, which can lead to race conditions. To ensure atomic operations, be sure to limit access to a data store key to a [single workflow with a single worker](/docs/workflows/building-workflows/settings/concurrency-and-throttling/) or use a service that supports atomic operations from among our [integrated apps](https://pipedream.com/apps). ## Supported data types Data stores can hold any JSON-serializable data within the storage limits. This includes data types including: * Strings * Objects * Arrays * Dates * Integers * Floats But you cannot serialize functions, classes, sets, maps, or other complex objects. ## Exporting data to an external service In order to stay within the [data store limits](/docs/workflows/data-management/data-stores/#data-store-limits), you may need to export the data in your data store to an external service. The following Node.js example action will export the data in chunks via an HTTP POST request. You may need to adapt the code to your needs. Click on [this link](https://pipedream.com/new?h=tch_egfAMv) to create a copy of the workflow in your workspace. > [!NOTE] > > If the data contained in each key is large, consider lowering the number of `chunkSize`. * Adjust your [workflow memory and timeout settings](/docs/workflows/building-workflows/settings/) according to the size of the data in your data store. Set the memory at 512 MB and timeout to 60 seconds and adjust higher if needed. * Monitor the exports of this step after each execution for any potential errors preventing a full export. Run the step as many times as needed until all your data is exported. > [!WARNING] > > This action deletes the keys that were successfully exported. It is advisable to first run a test without deleting the keys. In case of any unforeseen errors, your data will still be safe. ```javascript theme={null} import { axios } from "@pipedream/platform"; export default defineComponent({ props: { dataStore: { type: "data_store", }, chunkSize: { type: "integer", label: "Chunk Size", description: "The number of items to export in one request", default: 100, }, shouldDeleteKeys: { type: "boolean", label: "Delete keys after export", description: "Whether the data store keys will be deleted after export", default: true, }, }, methods: { async *chunkAsyncIterator(asyncIterator, chunkSize) { let chunk = []; for await (const item of asyncIterator) { chunk.push(item); if (chunk.length === chunkSize) { yield chunk; chunk = []; } } if (chunk.length > 0) { yield chunk; } }, }, async run({ steps, $ }) { const iterator = this.chunkAsyncIterator(this.dataStore, this.chunkSize); for await (const chunk of iterator) { try { // export data to external service await axios($, { url: "https://external_service.com", method: "POST", data: chunk, // may need to add authentication }); // delete exported keys and values if (this.shouldDeleteKeys) { await Promise.all(chunk.map(([key]) => this.dataStore.delete(key))); } console.log( `number of remaining keys: ${(await this.dataStore.keys()).length}` ); } catch (e) { // an error occurred, don't delete keys console.log(`error exporting data: ${e}`); } } }, }); ``` # Connecting to Databases Source: https://pipedream.com/docs/workflows/data-management/databases > [!WARNING] > > **Workflows and String are shutting down on March 31, 2027.** [Learn more](/docs/workflows) Connecting to a database is essential for developing production workflows. Whether you’re storing application data, querying user information, or analyzing event logs, most workflows and serverless functions require querying data at some point. > [!NOTE] > > Pipedream workflows run in the AWS `us-east-1` network, sending requests from standard AWS IP ranges. ## Connecting to Restricted Databases **Unless your database is publicly accessible, you’ll likely need to add specific IPs to its allow-list.** To do this, you can configure your database connection to use either a shared or dedicated static IP address from Pipedream: ### Create a Dedicated Static IP for Outbound Traffic * [Virtual Private Clouds (VPCs)](/docs/workflows/vpc/) in Pipedream let you deploy any workflow to a private network and is the most secure and recommended approach to using a static IP. * Once configured, the VPC will give you a dedicated egress IP that’s unique to your workspace, and is available to any workflow within your workspace. ### Send Requests from a Shared Static IP * When configuring your database connection as a [connected account](/docs/apps/connected-accounts/) to Pipedream, you can choose to route network requests through a static IP block for [any app that’s supported by Pipedream’s SQL Proxy](/docs/workflows/data-management/databases/#supported-databases) * Pipedream’s SQL Proxy routes requests to your database from the IP block below. #### Supported Databases Pipedream’s SQL Proxy, which enables the shared static IP, currently supports [MySQL](https://pipedream.com/apps/mysql), [PostgreSQL](https://pipedream.com/apps/postgresql), and [Snowflake](https://pipedream.com/apps/snowflake). Please let us know if you’d like to see support for other database types. #### Enabling the Shared Static IP Connect your account for one of the [supported database apps](/docs/workflows/data-management/databases/#supported-databases) and set **Use Shared Static IP** to **TRUE**, then click **Test connection** to ensure Pipedream can successfully connect to your database. ![](https://mintcdn.com/pipedream/NF77kliJSewMqg65/images/245ffc8a-test-connection-mysql_bizpqk.png?fit=max\&auto=format\&n=NF77kliJSewMqg65\&q=85\&s=5a816e2410fa81db88db6d1c258cfb08) #### Shared Static IP Block Add the following IP block to your database allow-list: ``` 44.223.89.56/29 ``` ## FAQ ### What’s the difference between using a shared static IP with the SQL Proxy vs a dedicated IP using a VPC? Both the SQL Proxy and VPCs enable secure database connections from a static IP. * VPCs offer enhanced isolation and security by providing a **dedicated** static IP for workflows within your workspace * The SQL proxy routes requests to your database connections through a set of **shared** static IPs # Working with SQL Source: https://pipedream.com/docs/workflows/data-management/databases/working-with-sql > [!WARNING] > > **Workflows and String are shutting down on March 31, 2027.** [Learn more](/docs/workflows) Pipedream makes it easy to interact with SQL databases within your workflows. You can securely connect to your database and use either pre-built no-code triggers and actions to interact with your database, or execute custom SQL queries. ## SQL Editor With the built-in SQL editor, you access linting and auto-complete features typical of modern SQL editors. ![](https://mintcdn.com/pipedream/xnRKrRxEtt3vxd6I/images/d979f2b8-sql-editor_jn2rpn.png?fit=max\&auto=format\&n=xnRKrRxEtt3vxd6I\&q=85\&s=0ced62255519048d4a1d0cb3be7fea19) ## Schema Explorer When querying a database, you need to understand the schema of the tables you’re working with. The schema explorer provides a visual interface to explore the tables in your database, view their columns, and understand the relationships between them. * Once you connect your account with one of the [supported database apps](/docs/workflows/data-management/databases/working-with-sql/#supported-databases), we automatically fetch and display the details of the database schema below * You can **view the columns of a table**, their data types, and relationships between tables * You can also **search and filter** the set of tables that are listed in your schema based on table or column name ![](https://mintcdn.com/pipedream/nKh6d_6A4aXFb6xD/images/f0b69a83-Screenshot_2024-06-02_at_9.23.46_PM_q5lbxo.png?fit=max\&auto=format\&n=nKh6d_6A4aXFb6xD\&q=85\&s=af05658d69105eb60d18c7f12948d117) ## Prepared Statements Prepared statements let you safely execute SQL queries with dynamic inputs that are automatically defined as parameters, in order to help prevent SQL injection attacks. To reference dynamic data in a SQL query, simply use the standard `{{ }}` notation just like any other code step in Pipedream. For example, ```sql theme={null} select * from products where name = {{steps.get_product_info.$return_value.name}} and created_at > {{steps.get_product_info.$return_value.created_at}} ``` **Prepared statement:** ![](https://mintcdn.com/pipedream/h8oodpUDiyR1Ssvt/images/389adfd0-prepared-statement_lh1cat.png?fit=max\&auto=format\&n=h8oodpUDiyR1Ssvt\&q=85\&s=fe03de7a25a11d92440719f4834abc77) **Computed statement:** ![](https://mintcdn.com/pipedream/xnRKrRxEtt3vxd6I/images/d9c3220b-computed-statement_pth31z.png?fit=max\&auto=format\&n=xnRKrRxEtt3vxd6I\&q=85\&s=9ed4aef65e71373eec78be39c66e59a4) > [!NOTE] > > When you include step references in your SQL query, Pipedream automatically converts your query to a prepared statement using placeholders with an array of params. Below your query input, you can toggle between the computed and prepared statements. ## Getting Started **1. Select the Execute SQL Query action** * From the step selector in the builder, select the **Query a Database** action for the [relevant database app](/docs/workflows/data-management/databases/working-with-sql/#supported-databases) ![](https://mintcdn.com/pipedream/nKh6d_6A4aXFb6xD/images/fe2f4d4c-database-actions-step-selector_sbrnzi.png?fit=max\&auto=format\&n=nKh6d_6A4aXFb6xD\&q=85\&s=5fc4d671db804bb6bc1d960f99ab1882) **2. Connect your account** * If you already have a connected account, select it from the dropdown. Otherwise, click **Connect Account** to configure the database connection. * Follow the prompts to connect your account, then click **Test connection** to ensure Pipedream can successfully connect to your database ![](https://mintcdn.com/pipedream/NF77kliJSewMqg65/images/245ffc8a-test-connection-mysql_bizpqk.png?fit=max\&auto=format\&n=NF77kliJSewMqg65\&q=85\&s=5a816e2410fa81db88db6d1c258cfb08) **3. Explore the schema** * Once you’ve successfully connected your account, you can explore the [database schema](/docs/workflows/data-management/databases/working-with-sql/#schema-explorer) to understand the tables and columns in your database **4. Write and execute your query** * Write your SQL query in the editor — read more about [prepared statements](/docs/workflows/data-management/databases/working-with-sql/#prepared-statements) above to reference dynamic data in your query ### Supported Databases The [SQL editor](/docs/workflows/data-management/databases/working-with-sql/#sql-editor), [schema explorer](/docs/workflows/data-management/databases/working-with-sql/#schema-explorer), and support for [prepared statements](/docs/workflows/data-management/databases/working-with-sql/#prepared-statements) are currently supported for these database apps: * [MySQL](https://pipedream.com/apps/mysql) * [PostgreSQL](https://pipedream.com/apps/postgresql) * [Snowflake](https://pipedream.com/apps/snowflake) Need to query a different database type? Let us know! # Destinations Source: https://pipedream.com/docs/workflows/data-management/destinations > [!WARNING] > > **Workflows and String are shutting down on March 31, 2027.** [Learn more](/docs/workflows) **Destinations**, like [actions](/docs/components/contributing/#actions), abstract the delivery and connection logic required to send events to services like Amazon S3, or targets like HTTP and email. However, Destinations are different than actions in two ways: * Events are delivered to the Destinations asynchronously, after your workflow completes. This means you don’t wait for network I/O (e.g. for HTTP requests or connection overhead for data warehouses) within your workflow code, so you can process more events faster. * In the case of data stores like S3, you typically don’t want to send every event on its own. This can be costly and carries little benefit. Instead, you typically want to batch a collection of events together, sending the batch at some frequency. Destinations handle that batching for relevant services. The docs below discuss features common to all Destinations. See the [docs for a given destination](/docs/workflows/data-management/destinations/#available-destinations) for information specific to those destinations. ## Available Destinations * [HTTP](/docs/workflows/data-management/destinations/http/) * [Email](/docs/workflows/data-management/destinations/email/) * [S3](/docs/workflows/data-management/destinations/s3/) * [SSE](/docs/workflows/data-management/destinations/sse/) * [Emit to another listener](/docs/workflows/data-management/destinations/emit/) ## Using destinations ### Using destinations in workflows You can send data to Destinations in [Node.js code steps](/docs/workflows/building-workflows/code/nodejs/), too, using `$.send` functions. `$.send` is an object provided by Pipedream that exposes destination-specific functions like `$.send.http()`, `$.send.s3()`, and more. This allows you to send data to destinations programmatically, if you need more control than the default actions provide. Let’s use `$.send.http()` to send an HTTP POST request like we did in the Action example above. [Add a new action](/docs/workflows/building-workflows/actions/), then search for “**Run custom code**”: Create a new HTTP endpoint URL (try creating a new Pipedream workflow and adding an HTTP trigger), and add the code below to your code step, with the URL you created: ```javascript theme={null} export default defineComponent({ async run({ steps, $}) { $.send.http({ method: "POST", url: "[YOUR URL HERE]", data: { name: "Luke Skywalker", }, }); } }) ``` See the docs for the [HTTP destination](/docs/workflows/data-management/destinations/http/) to learn more about all the options you can pass to the `$.send.http()` function. Again, it’s important to remember that **Destination delivery is asynchronous**. If you iterate over an array of values and send an HTTP request for each: ```javascript theme={null} export default defineComponent({ async run({ steps, $}) { const names = ["Luke", "Han", "Leia", "Obi Wan"]; for (const name of names) { $.send.http({ method: "POST", url: "[YOUR URL HERE]", data: { name, }, }); } } }) ``` you won’t have to `await` the execution of the HTTP requests in your workflow. We’ll collect every `$.send.http()` call and defer those HTTP requests, sending them after your workflow finishes. ### Using destinations in actions If you’re authoring a [component action](/docs/components/contributing/#actions), you can deliver data to destinations, too. `$.send` isn’t directly available to actions like it is for workflow code steps. Instead, you use `$.send` to access the destination-specific functions: ```javascript theme={null} export default { name: "Action Demo", key: "action_demo", version: "0.0.1", type: "action", async run({ $ }) { $.send.http({ method: "POST", url: "[YOUR URL HERE]", data: { name: "Luke Skywalker", }, }); } } ``` [See the component action API docs](/docs/components/contributing/api/#actions) for more details. ## Asynchronous Delivery Events are delivered to destinations *asynchronously* — that is, separate from the execution of your workflow. **This means you’re not waiting for network or connection I/O in the middle of your function, which can be costly**. Some destination payloads, like HTTP, are delivered within seconds. For other destinations, like S3 and SQL, we collect individual events into a batch and send the batch to the destination. See the [docs for a specific destination](/docs/workflows/data-management/destinations/#available-destinations) for the relevant batch delivery frequency. # Email Source: https://pipedream.com/docs/workflows/data-management/destinations/email > [!WARNING] > > **Workflows and String are shutting down on March 31, 2027.** [Learn more](/docs/workflows) The Email Destination allows you send an email to *yourself* — the email address tied to the account you signed up with — at any step of a workflow. You can use this to email yourself when you receive a specific event, for example when a user signs up on your app. You can send yourself an email when a cron job finishes running, or when a job fails. Anywhere you need an email notification, you can use the Email Destination! ## Adding an Email Destination ### Adding an Email Action 1. Add a new step to your workflow 2. Select the **Send Yourself an Email** Action. You can modify the **Subject** and the message (either **Plain Text** or **HTML**) however you want. ### Using `$.send.email` in workflows You can send data to an Email Destination in [Node.js code steps](/docs/workflows/building-workflows/code/nodejs/), too, using the `$.send.email()` function. **This allows you to send emails to yourself programmatically, if you need more control than actions provide**. `$.send.email()` takes the same parameters as the corresponding action: ```javascript theme={null} export default defineComponent({ async run({ steps, $ }) { $.send.email({ subject: "Your subject", text: "Plain text email body", html: "HTML email body" }); } }); ``` The `html` property is optional. If you include both the `text` and `html` properties, email clients that support HTML will prefer that over the plaintext version. Like with any `$.send` function, you can use `$.send.email()` conditionally, within a loop, or anywhere you’d use a function normally in Node.js. ### Using `$.send.email` in component actions If you’re authoring a [component action](/docs/components/contributing/#actions), you can deliver data to an email destination using `$.send.email`. `$.send.email` functions the same as [`$.send.email` in workflow code steps](/docs/workflows/data-management/destinations/email/#using-sendemail-in-workflows): ```javascript theme={null} export default defineComponent({ async run({ steps, $ }) { $.send.email({ subject: "Your subject", text: "Plain text email body", html: "HTML email body" }); } }) ``` ## Delivery details All emails come from **[notifications@pipedream.com](mailto:notifications@pipedream.com)**. # Emit Events Source: https://pipedream.com/docs/workflows/data-management/destinations/emit > [!WARNING] > > **Workflows and String are shutting down on March 31, 2027.** [Learn more](/docs/workflows) Like [event sources](/docs/workflows/building-workflows/triggers/), workflows can emit events. These events can trigger other workflows, or be consumed using Pipedream’s [REST API](/docs/rest-api/#get-workflow-emits). ## Using `$.send.emit()` in workflows You can emit arbitrary events from any [Node.js code steps](/docs/workflows/building-workflows/code/nodejs/) using `$.send.emit()`. ```javascript theme={null} export default defineComponent({ async run({ steps, $ }) { $.send.emit({ name: "Yoda", }); } }); ``` `$.send.emit()` accepts an object with the following properties: ```javascript theme={null} $.send.emit( event, // An object that contains the event you'd like to emit channel, // Optional, a string specifying the channel ); ``` ## Emitting events to channels By default, events are emitted to the default channel. You can optionally emit events to a different channel, and listening sources or workflows can subscribe to events on this channel, running the source or workflow only on events emitted to that channel. Pass the channel as the second argument to `$.send.emit()`: ```javascript theme={null} export default defineComponent({ async run({ steps, $ }) { $.send.emit( { name: "Yoda", }, 'channel_name' ); } }); ``` ## Using `$.send.emit()` in component actions If you’re authoring a [component action](/docs/components/contributing/#actions), you can emit data using `$.send.emit()`. `$.send.emit()` functions the same as [`$.send.emit()` in workflow code steps](/docs/workflows/data-management/destinations/emit/#using-sendemit-in-workflows): ```javascript theme={null} export default defineComponent({ async run({ steps, $ }) { $.send.emit({ name: "Yoda", }); } }) ``` **Destination delivery is asynchronous**: emits are sent after your workflow finishes. You can call `$.send.emit()` multiple times within a workflow, for example: to iterate over an array of values and emit an event for each. ```javascript theme={null} export default defineComponent({ async run({ steps, $ }) { const names = ["Luke", "Han", "Leia", "Obi Wan"]; for (const name of names) { $.send.emit({ name, }); } } }); ``` ## Trigger a workflow from emitted events We call the events you emit from a workflow **emitted events**. Sometimes, you’ll want emitted events to trigger another workflow. This can be helpful when: * You process events from different workflows in the same way. For example, you want to log events from many workflows to Amazon S3 or a logging service. You can write one workflow that handles logging, then `$.send.emit()` events from other workflows that are consumed by the single, logging workflow. This helps remove duplicate logic from the other workflows. * Your workflow is complex and you want to separate it into multiple workflows to group logical functions together. You can `$.send.emit()` events from one workflow to another to chain the workflows together. Here’s how to configure a workflow to listen for emitted events. 1. Currently, you can’t select emitted events as a workflow trigger from the Pipedream UI. We’ll show you how add the trigger via API. First, pick an existing workflow where you’d like to receive emitted events. **If you want to start with a [new workflow](https://pipedream.com/new), just select the HTTP / Webhook trigger**. 2. This workflow is called the **listener**. The workflow where you’ll use `$.send.emit()` is called the **emitter**. If you haven’t created the emitter workflow yet, [do that now](https://pipedream.com/new). 3. Get the workflow IDs of both the listener and emitter workflows. **You’ll find the workflow ID in the workflow’s URL in your browser bar —it’s the `p_abc123` in `https://pipedream.com/@username/p_abc123/`**. 4. You can use the Pipedream REST API to configure the listener to receive events from the emitter. We call this [creating a subscription](/docs/rest-api/#listen-for-events-from-another-source-or-workflow). If your listener’s ID is `p_abc123` and your emitter’s ID is `p_def456`, you can run the following command to create this subscription: ```bash theme={null} curl "https://api.pipedream.com/v1/subscriptions?emitter_id=dc_def456&listener_id=p_abc123" \ -X POST \ -H "Authorization: Bearer " \ -H "Content-Type: application/json" ``` 5. Run your emitter workflow, emitting an event using `$.send.emit()`: ```javascript theme={null} export default defineComponent({ async run({ steps, $ }) { $.send.emit({ name: "Yoda", }); } }); ``` This should trigger your listener, and you should see the same event in [the event inspector](/docs/workflows/building-workflows/inspect/#the-inspector). **Note**: Please upvote [this issue](https://github.com/PipedreamHQ/pipedream/issues/682) to see support for *adding* emitted events as a workflow trigger in the UI. ## Consuming emitted events via REST API `$.send.emit()` can emit any data you’d like. You can retrieve that data using Pipedream’s REST API endpoint for [retrieving emitted events](/docs/rest-api/#get-workflow-emits). This can be helpful when you want a workflow to process data asynchronously using a workflow. You can save the results of your workflow with `$.send.emit()`, and only retrieve the results in batch when you need to using the REST API. ## Emit logs / troubleshooting Below your code step, you’ll see both the data that was sent in the emit. If you ran `$.send.emit()` multiple times within the same code step, you’ll see the data that was emitted for each. # HTTP Source: https://pipedream.com/docs/workflows/data-management/destinations/http > [!WARNING] > > **Workflows and String are shutting down on March 31, 2027.** [Learn more](/docs/workflows) HTTP Destinations allow you to send data to another HTTP endpoint URL outside of Pipedream. This can be an endpoint you own and operate, or a URL tied to a service you use (for example, a [Slack Incoming Webhook](https://api.slack.com/incoming-webhooks)). ## Using `$.send.http` in workflows You can send HTTP requests in [Node.js code steps](/docs/workflows/building-workflows/code/nodejs/) using `$.send.http()`. ```javascript theme={null} export default defineComponent({ async run({ steps, $ }) { $.send.http({ method: "POST", url: "[YOUR URL HERE]", data: { name: "Luke Skywalker", }, }); } }); ``` `$.send.http()` accepts an object with all of the following properties: ```javascript theme={null} export default defineComponent({ async run({ steps, $ }) { $.send.http({ method, // Required, HTTP method, a string, e.g. POST, GET url, // Required, the URL to send the HTTP request to data, // HTTP payload headers, // An object containing custom headers, e.g. { "Content-Type": "application/json" } params, // An object containing query string parameters as key-value pairs auth, // An object that contains a username and password property, for HTTP basic auth }); } }); ``` **Destination delivery is asynchronous**: the HTTP requests are sent after your workflow finishes. This means **you cannot write code that operates on the HTTP response**. These HTTP requests **do not** count against your workflow’s compute time. If you iterate over an array of values and send an HTTP request for each: ```javascript theme={null} export default defineComponent({ async run({ steps, $ }) { const names = ["Luke", "Han", "Leia", "Obi Wan"]; names.forEach((name) => { $.send.http({ method: "POST", url: "[YOUR URL HERE]", data: { name, }, }); }); } }); ``` you won’t have to `await` the execution of the HTTP requests in your workflow. We’ll collect every `$.send.http()` call and defer those HTTP requests, sending them after your workflow finishes. ## Using `$.send.http` in component actions If you’re authoring a [component action](/docs/components/contributing/#actions), you can deliver data to an HTTP destination using `$.send.http`. `$.send.http` functions the same as [`$.send.http` in workflow code steps](/docs/workflows/data-management/destinations/http/#using-sendhttp-in-workflows): ```javascript theme={null} export default defineComponent({ async run({ steps, $ }) { $.send.http({ method: "GET", url: "https://example.com" }) } }); ``` ## HTTP Destination delivery HTTP Destination delivery is handled asynchronously, separate from the execution of a workflow. However, we deliver the specified payload to HTTP destinations for every event sent to your workflow. Generally, this means it should only take a few seconds for us to send the event to the destination you specify. In some cases, delivery will take longer. The time it takes to make HTTP requests sent with `$.send.http()` does not count against your workflow quota. ## HTTP request and response logs Below your code step, you’ll see both the data that was sent in the HTTP request, and the HTTP response that was issued. If you issue multiple HTTP requests, we’ll show the request and response data for each. ## What if I need to access the HTTP response in my workflow? Since HTTP requests sent with `$.send.http()` are sent asynchronously, after your workflow runs, **you cannot access the HTTP response in your workflow**. If you need to access the HTTP response data in your workflow, [use `axios`](/docs/workflows/building-workflows/code/nodejs/http-requests/) or another HTTP client. ## Timeout The timeout on HTTP request sent with `$.send.http()` is currently **5 seconds**. This time includes DNS resolution, connecting to the host, writing the request body, server processing, and reading the response body. Any requests that exceed 5 seconds will yield a `timeout` error. ## Retries Currently, Pipedream will not retry any failed request. If your HTTP destination endpoint is down, or returns an error response, we’ll display that response in the observability associated with the Destination in the relevant step. ## IP addresses for Pipedream HTTP requests > [!NOTE] > > These IP addresses are tied to **requests sent with `$.send.http` only, not other HTTP requests made from workflows**. To whitelist standard HTTP requests from Pipedream workflows, [use VPCs](/docs/workflows/vpc/). When you make an HTTP request using `$.send.http()`, the traffic will come from one of the following IP addresses: ``` 3.208.254.1053.212.246.1733.223.179.1313.227.157.1893.232.105.553.234.187.12618.235.13.18234.225.84.3152.2.233.852.23.40.20852.202.86.952.207.145.19054.86.100.5054.88.18.8154.161.28.250107.22.76.172 ``` This list may change over time. If you’ve previously whitelisted these IP addresses and are having trouble sending HTTP requests to your target service, please check to ensure this list matches your firewall rules. # Amazon S3 Source: https://pipedream.com/docs/workflows/data-management/destinations/s3 > [!WARNING] > > **Workflows and String are shutting down on March 31, 2027.** [Learn more](/docs/workflows) [Amazon S3](https://aws.amazon.com/s3/) — the Simple Storage Service — is a common place to dump data for long-term storage on AWS. Pipedream supports delivery to S3 as a first-class Destination. ## Using `$.send.s3` in workflows You can send data to an S3 Destination in [Node.js code steps](/docs/workflows/building-workflows/code/nodejs/) using `$.send.s3()`. `$.send.s3()` takes the following parameters: ```javascript theme={null} $.send.s3({ bucket: "your-bucket-here", prefix: "your-prefix/", payload: event.body, }); ``` Like with any `$.send` function, you can use `$.send.s3()` conditionally, within a loop, or anywhere you’d use a function normally. ## Using `$.send.s3` in component actions If you’re authoring a [component action](/docs/components/contributing/#actions), you can deliver data to an S3 destination using `$.send.s3`. `$.send.s3` functions the same as [`$.send.s3` in workflow code steps](/docs/workflows/data-management/destinations/s3/#using-sends3-in-workflows): ```javascript theme={null} async run({ $ }) { $.send.s3({ bucket: "your-bucket-here", prefix: "your-prefix/", payload: event.body, }); } ``` ## S3 Bucket Policy In order for us to deliver objects to your S3 bucket, you need to modify its [bucket policy](https://docs.aws.amazon.com/AmazonS3/latest/user-guide/add-bucket-policy.html) to allow Pipedream to upload objects. **Replace `[your bucket name]` with the name of your bucket** near the bottom of the policy. ```json theme={null} { "Version": "2012-10-17", "Id": "allow-pipedream-limited-access", "Statement": [ { "Effect": "Allow", "Principal": { "AWS": "arn:aws:iam::203863770927:role/Pipedream" }, "Action": [ "s3:AbortMultipartUpload", "s3:GetBucketLocation", "s3:PutObject", "s3:PutObjectAcl", "s3:ListBucketMultipartUploads" ], "Resource": [ "arn:aws:s3:::[your bucket name]", "arn:aws:s3:::[your bucket name]/*" ] } ] } ``` This bucket policy provides the minimum set of permissions necessary for Pipedream to deliver objects to your bucket. We use the [Multipart Upload API](https://docs.aws.amazon.com/AmazonS3/latest/dev/uploadobjusingmpu.html) to upload objects, and require the [relevant permissions](https://docs.aws.amazon.com/AmazonS3/latest/dev/mpuAndPermissions.html). ## S3 Destination delivery S3 Destination delivery is handled asynchronously, separate from the execution of a workflow. **Moreover, events sent to an S3 bucket are batched and delivered once a minute**. For example, if you sent 30 events to an S3 Destination within a particular minute, we would collect all 30 events, delimit them with newlines, and write them to a single S3 object. In some cases, delivery will take longer than a minute. ## S3 object format We upload objects using the following format: ```txt theme={null} [PREFIX]/YYYY/MM/DD/HH/YYYY-MM-DD-HH-MM-SS-IDENTIFIER.gz ``` That is — we write objects first to your prefix, then within folders specific to the current date and hour, then upload the object with the same date information in the object, so that it’s easy to tell when it was uploaded by object name alone. For example, if I were writing data to a prefix of `test/`, I might see an object in S3 at this path: ```txt theme={null} test/2019/05/25/16/2019-05-25-16-14-58-8f25b54462bf6eeac3ee8bde512b6c59654c454356e808167a01c43ebe4ee919.gz ``` As noted above, a given object contains all payloads delivered to an S3 Destination within a specific minute. Multiple events within a given object are newline-delimited. ## Limiting S3 Uploads by IP S3 provides a mechanism to [limit operations only from specific IP addresses](https://docs.aws.amazon.com/AmazonS3/latest/dev/example-bucket-policies.html#example-bucket-policies-use-case-3). If you’d like to apply that filter, uploads using `$.send.s3()` should come from one of the following IP addresses: ```txt theme={null} 3.208.254.1053.212.246.1733.223.179.1313.227.157.1893.232.105.553.234.187.12618.235.13.18234.225.84.3152.2.233.852.23.40.20852.202.86.952.207.145.19054.86.100.5054.88.18.8154.161.28.250107.22.76.172 ``` This list may change over time. If you’ve previously whitelisted these IP addresses and are having trouble uploading S3 objects, please check to ensure this list matches your firewall rules. # Server Sent Events (SSE) Source: https://pipedream.com/docs/workflows/data-management/destinations/sse > [!WARNING] > > **Workflows and String are shutting down on March 31, 2027.** [Learn more](/docs/workflows) Pipedream supports [Server-sent events](https://developer.mozilla.org/en-US/Web/API/Server-sent_events) (SSE) as a destination, enabling you to send events from a workflow directly to a client subscribed to the event stream. ## What is SSE? [Server-sent Events](https://developer.mozilla.org/en-US/Web/API/Server-sent_events) (SSE) is a specification that allows servers to send events directly to clients that subscribe to those events, similar to [WebSockets](https://developer.mozilla.org/en-US/Web/API/WebSockets_API) and related server to client push technologies. Unlike WebSockets, SSE enables one-way communication from server to clients (WebSockets enable bidirectional communication between server and client, allowing you to pass messages back and forth). Luckily, if you only need a client to subscribe to events from a server, and don’t require bidirectional communication, SSE is simple way to make that happen. ## What can I do with the SSE destination? SSE is typically used by web developers to update a webpage with new events in real-time, without forcing a user to reload a page to fetch new data. If you’d like to update data on a webpage in that manner, you can subscribe to your workflow’s event stream and handle new events as they come in. Beyond web browsers, any program that’s able to create an [`EventSource` interface](https://developer.mozilla.org/en-US/Web/API/EventSource) can listen for server-sent events delivered from Pipedream. You can run a Node.js script or a Ruby on Rails app that receives server-sent events, for example. ## Sending data to an SSE Destination in workflows You can send data to an SSE Destination in [Node.js code steps](/docs/workflows/building-workflows/code/nodejs/) using the `$.send.sse()` function. 1. Add a new step to your workflow 2. Select the option to **Run custom code** and choose the Node.js runtime. 3. Add this code to that step: ```javascript theme={null} export default defineComponent({ async run({ steps, $ }) { $.send.sse({ channel: "events", // Required, corresponds to the event in the SSE spec payload: { // Required, the event payload name: "Luke Skywalker" } }); } }); ``` **See [this workflow](https://pipedream.com/new?h=tch_mp7f6q)** for an example of how to use `$.send.sse()`. Send a test event to your workflow, then review the section on [Receiving events](/docs/workflows/data-management/destinations/sse/#receiving-events) to see how you can setup an `EventSource` to retrieve events sent to the SSE Destination. **Destination delivery is asynchronous**. If you iterate over an array of values and send an SSE for each: ```javascript theme={null} export default defineComponent({ async run({ steps, $ }) { const names = ["Luke", "Han", "Leia", "Obi Wan"]; names.forEach(name => { $.send.sse({ channel: "names", payload: { name } }); }); } }); ``` you won’t have to `await` the execution of the SSE Destination requests in your workflow. We’ll collect every `$.send.sse()` call and defer those requests, sending them after your workflow finishes. ## Using `$.send.sse` in component actions If you’re authoring a [component action](/docs/components/contributing/#actions), you can send events to an SSE destination using `$.send.sse`. `$.send.sse` functions the same as [`$.send.sse` in workflow code steps](/docs/workflows/data-management/destinations/sse/#sending-data-to-an-sse-destination-in-workflows): ```javascript theme={null} export default defineComponent({ async run({ steps, $ }) { $.send.sse({ channel: "events", payload: { name: "Luke Skywalker" } }); } }); ``` ## Receiving events Once you’ve sent events to an SSE Destination, you can start receiving a stream of those events in a client by configuring an [`EventSource`](https://developer.mozilla.org/en-US/Web/API/EventSource) that connects to the Pipedream SSE stream. ### Retrieving your workflow’s event stream URL First, it’s important to note that all events sent to an SSE destination within a workflow are sent to an SSE event stream specific to that workflow. The event stream is tied to the workflow’s ID, which you can find by examining the URL of the pipeline in the Pipedream UI. For example, the `p_aBcDeF` in this URL is the pipeline ID: ![](https://mintcdn.com/pipedream/anb6FA0wpd8jtdUB/images/52604cbf-image.png?fit=max\&auto=format\&n=anb6FA0wpd8jtdUB\&q=85\&s=2c3cdae30258031a1f0dfe522f437a14) **Note that the `p_` prefix is part of the workflow ID**. Once you have the workflow ID, you can construct the event source URL for your SSE destination. That URL is of the following format: ```txt theme={null} http://sdk.m.pipedream.net/pipelines/[YOUR WORKFLOW ID]/sse ``` In the example above, the URL of our event stream would be: ```txt theme={null} http://sdk.m.pipedream.net/pipelines/p_aBcDeF/sse ``` You should be able to open that URL in your browser. Most modern browsers support connecting to an event stream directly, and will stream events without any work on your part to help you confirm that the stream is working. If you’ve already sent events to your SSE destination, you should see those events here! We’ll return the most recent 100 events delivered to the corresponding SSE destination immediately. This allows your client to catch up with events previously sent to the destination. Then, any new events sent to the SSE destination while you’re connected will be delivered to the client. ### Sample code to connect to your event stream It’s easy to setup a simple webpage to `console.log()` all events from an event stream. You can find a lot more examples of how to work with SSE on the web, but this should help you understand the basic concepts. You’ll need to create two files in the same directory on your machine: an `index.html` file for the HTML. **index.html** ```html theme={null} SSE test
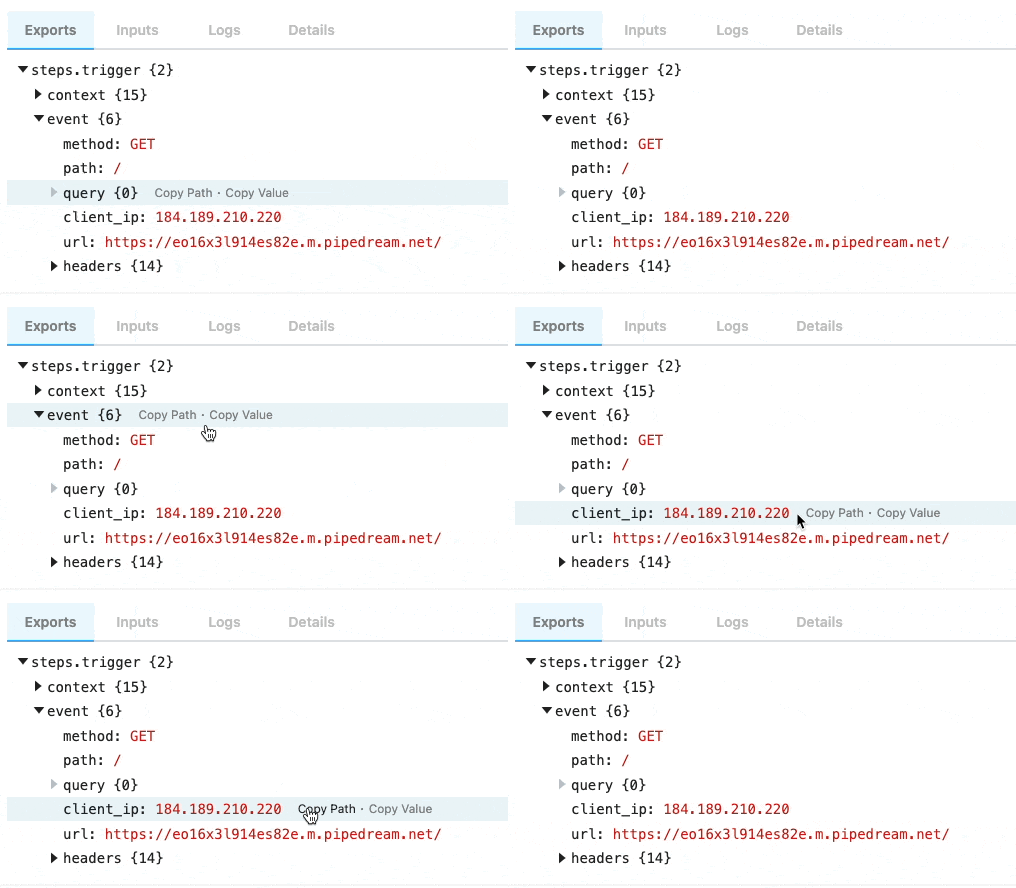
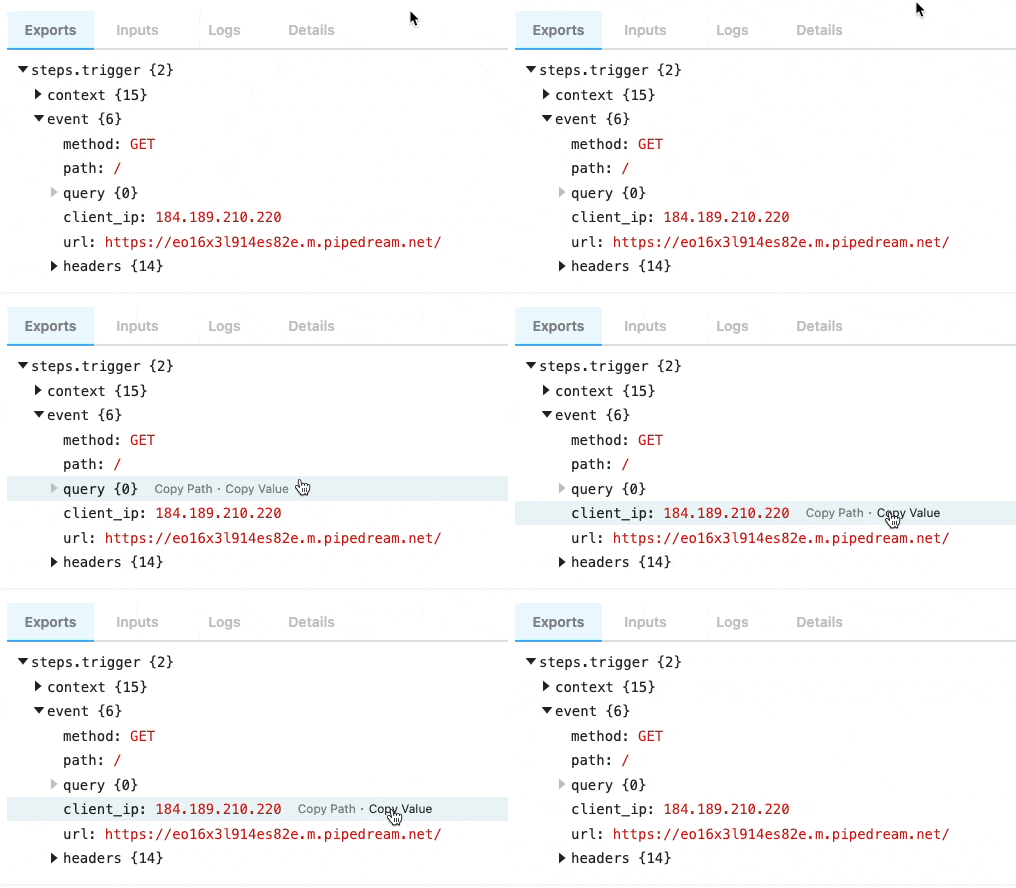
``` **Make sure to add your workflow ID and the name of your channel you specified in your SSE Destination**. Then, open the `index.html` page in your browser. In your browser’s developer tools JavaScript console, you should see new events appear as you send them. Note that the `addEventListener` code will listen specifically for events sent to the **events** `channel` specified in our SSE destination. You can listen for multiple types of events at once by adding multiple event listeners on the client. **Try triggering more test events from your workflow while this page is open to see how this works end-to-end**. ## `:keepalive` messages [The SSE spec](https://www.w3.org/TR/2009/WD-eventsource-20090421/#notes) notes that > Legacy proxy servers are known to, in certain cases, drop HTTP connections after a short timeout. To protect against such proxy servers, authors can include a comment line (one starting with a ’:’ character) every 15 seconds or so. Roughly every 15 seconds, we’ll send a message with the `:keepalive` comment to keep open SSE connections alive. These comments should be ignored when you’re listening for messages using the `EventSource` interface. # File Stores Source: https://pipedream.com/docs/workflows/data-management/file-stores > [!WARNING] > > **Workflows and String are shutting down on March 31, 2027.** [Learn more](/docs/workflows) > [!NOTE] > > In Preview > > File Stores are available in Preview. There may be changes to allowed limits in the future. > > If you have any feedback on File Stores, please let us know in our [community](https://pipedream.com/support). File Stores are a filesystem that are scoped to a Project. All workflows within the same Project have access to the File Stores. You can interact with these files through the Pipedream Dashboard or programmatically through your Project’s workflows. Unlike files stored within a workflow’s `/tmp` directory which are subject to deletion between executions, File Stores are separate cloud storage. Files within a File Store can be long term storage accessible by your workflows. ![](https://mintcdn.com/pipedream/Acz4Z1ch6TM7-aI8/images/95f96196-Untitled_7_cn9njj.png?fit=max\&auto=format\&n=Acz4Z1ch6TM7-aI8\&q=85\&s=71afd2d9017a96706e8fde1e10b283a2) ## Managing File Stores from the Dashboard You can access a File Store by opening the Project and selecting the *File Store* on the left hand navigation menu. ![](https://mintcdn.com/pipedream/xnRKrRxEtt3vxd6I/images/d4af1213-CleanShot_2023-11-02_at_10.21.15_2x_z5q5nt.png?fit=max\&auto=format\&n=xnRKrRxEtt3vxd6I\&q=85\&s=919e3f98a12cf0d5dfdda75e7c04947c) ### Uploading files to the File Store To upload a file, select *New* then select *File*: ![](https://mintcdn.com/pipedream/grEzwYhEB2vZSwGw/images/91ba8bc0-CleanShot_2023-11-02_at_10.16.13_fqjuv4.gif?s=0337f499436df28fed203c56593be4c4) Then in the new pop-up, you can either drag and drop or browser your computer to stage a file for uploading: ![](https://mintcdn.com/pipedream/nKh6d_6A4aXFb6xD/images/ed21ed7f-CleanShot_2023-11-02_at_10.16.19_2x_w7z8wv.png?fit=max\&auto=format\&n=nKh6d_6A4aXFb6xD\&q=85\&s=877b7ebc60817368a582db0561019d2e) Now that the file(s) are staged for uploaded. Click *Upload* to upload them: ![](https://mintcdn.com/pipedream/NF77kliJSewMqg65/images/14b45faf-CleanShot_2023-11-02_at_10.16.49_2x_ha4scn.png?fit=max\&auto=format\&n=NF77kliJSewMqg65\&q=85\&s=7447b54e93ee8112243be1a32e40500a) Finally, click *Done* to close the upload pop-up: ![](https://mintcdn.com/pipedream/Acz4Z1ch6TM7-aI8/images/a8299219-CleanShot_2023-11-02_at_10.17.01_2x_xmfqfi.png?fit=max\&auto=format\&n=Acz4Z1ch6TM7-aI8\&q=85\&s=ab8e5d466a27c09f67523f6a9131ac80) You should now see your file is uploaded and available for use within your Project: ![](https://mintcdn.com/pipedream/h8oodpUDiyR1Ssvt/images/4dcb2da1-CleanShot_2023-11-02_at_10.24.56_2x_ogoh5t.png?fit=max\&auto=format\&n=h8oodpUDiyR1Ssvt\&q=85\&s=1281b30fac9ab5d61caa9c39e7320de6) ### Deleting files from the File Store You can delete individual files from a File Store by clicking the three dot menu on the far right of the file and selecting *Delete*. ![](https://mintcdn.com/pipedream/grEzwYhEB2vZSwGw/images/8a091c52-CleanShot_2023-11-01_at_12.19.20_lb4ddt.png?fit=max\&auto=format\&n=grEzwYhEB2vZSwGw\&q=85\&s=4248b01ef3e1492dc357de6e855c7e71) After confirming that you want to delete the file, it will be permanently deleted. > [!WARNING] > > File deletion is permanent > > Once a file is deleted, it’s not possible to recover it. Please take care when deleting files from File Stores. ## Managing File Stores from Workflows Files uploaded to a File Store are accessible by workflows within that same project. You can access these files programmatically using the `$.files` helper within Node.js code steps. > [!NOTE] > > File Stores are scoped to Projects > > Only workflows within the same project as the File Store can access the files. Workflows outside of the project will not be able to access that project’s File Store. ### Listing files in the File Store The `$.files.dir()` method allows you to list files and directories within the Project’s File Store. By default it will list the files at the root directory. Here’s an example of how to iterate over the files in the root directory and open them as `File` instances: ```javascript theme={null} export default defineComponent({ async run({ steps, $ }) { // list all contents of the root File Stores directory in this project const dirs = $.files.dir(); let files = []; for await(const dir of dirs) { // if this is a file, let's open it if(dir.isFile()) { files.push(dir.path) } } return files }, }) ``` ### Opening files To interact with a file uploaded to the File Store, you’ll first need to open it. Given there’s a file in the File Store called `example.png`, you can open it using the `$.files.open()` method: ```javascript theme={null} export default defineComponent({ async run({ steps, $ }) { // Open the file by it's path in the File Store const file = $.files.open('example.png') // Log the S3 url to access the file publicly return await file.toUrl() }, }) ``` Once the file has been opened, you can [read, write, delete the file and more](/docs/workflows/data-management/file-stores/reference/). ### Uploading files to File Stores You can upload files using Node.js code in your workflows, either from URLs, from the `/tmp` directory in your workflows or directly from streams for high memory efficiency. #### Uploading files from URLs `File.fromUrl()` can upload a file from a public URL to the File Store. First open a new file at a specific path in the File Store, and then pass a URL to the `fromUrl` method on that new file: ```javascript theme={null} export default defineComponent({ async run({ steps, $ }) { // Upload a file to the File Store by a URL const file = await $.files.open('dice.png').fromUrl('https://upload.wikimedia.org/wikipedia/commons/4/47/PNG_transparency_demonstration_1.png') // display the uploaded file's URL from the File Store: console.log(await file.toUrl()) }, }) ``` #### Uploading files from the workflow’s `/tmp` directory `File.fromFile()` can upload a file stored within the workflow’s `/tmp` directory to the File Store. First open a new file at a specific path in the File Store, and then pass a URL to the `fromFile` method on that new file: ```javascript theme={null} export default defineComponent({ async run({ steps, $ }) { // Upload a file to the File Store from the local /tmp/ directory const file = await $.files.open('recording.mp3').fromFile('/tmp/recording.mp3') // Display the URL to the File Store hosted file console.log(await file.toUrl()) }, }) ``` #### Uploading files using streams File Stores also support streaming to write large files. `File.createWriteStream()` creates a write stream for the file to upload to. Then you can pair this stream with a download stream from another remote location: ```javascript theme={null} import { pipeline } from 'stream/promises'; import got from 'got' export default defineComponent({ async run({ steps, $ }) { const writeStream = await $.files.open('logo.png').createWriteStream() const readStream = got.stream('https://pdrm.co/logo') await pipeline(readStream, writeStream); }, }) ``` Additionally, you can pass a `ReadableStream` instance directly to a File instance: ```javascript theme={null} import got from 'got' export default defineComponent({ async run({ steps, $ }) { // Start a new read stream const readStream = got.stream('https://pdrm.co/logo') // Populate the file's content from the read stream await $.files.open("logo.png").fromReadableStream(readStream) }, }) ``` > [!NOTE] > > (Recommended) Pass the contentLength if possible > > If possible, pass a `contentLength` argument, then File Store will be able to efficiently stream to use less memory. Without a `contentLength` argument, the entire file will need to be downloaded to `/tmp/` until it can be uploaded to the File store. ### Downloading files File Stores live in cloud storage by default, but files can be downloaded to your workflows individually. #### Downloading files to the workflow’s `/tmp` directory First open a new file at a specific path in the File Store, and then call the `toFile()` method to download the file to the given path: ```javascript theme={null} import fs from 'fs'; export default defineComponent({ async run({ steps, $ }) { // Download a file from the File Store to the local /tmp/ directory const file = await $.files.open('recording.mp3').toFile('/tmp/README.md') // read the file version of the file stored in /tmp return (await fs.promises.readFile('/tmp/README.md')).toString() }, }) ``` > [!NOTE] > > Only the `/tmp/` directory is readable and writable > > Make sure that your path to `toFile(path)` includes ### Passing files between steps Files can be passed between steps. Pipedream will automatically serialize the file as a JSON *description* of the file. Then when you access the file as a step export as a prop in a Node.js code step, then you can interact with the `File` instance directly. For example, if you have a file stored at the path `logo.png` within your File Store, then within a Node.js code step you can open it: ```javascript theme={null} // "open_file" Node.js code step export default defineComponent({ async run({ steps, $ }) { // Return data to use it in future steps const file = $.files.open('logo.png') return file }, }) ``` Then in a downstream code step, you can use it via the `steps` path: ```javascript theme={null} // "get_file_url" Node.js code step export default defineComponent({ async run({ steps, $ }) { // steps.open_file.$return_value is automatically parsed back into a File instance: return await steps.open_file.$return_value.toUrl() }, }) ``` > [!NOTE] > > Files descriptions are compatible with other workflow helpers > > Files can also be used with `$.flow.suspend()` and `$.flow.delay()`. #### Handling lists of files One limitation of the automatic parsing of files between steps is that it currently doesn’t automatically handle lists of files between steps. For example, if you have a step that returns an array of `File` instances: ```javascript theme={null} // "open_files" Node.js code step export default defineComponent({ async run({ steps, $ }) { // Return data to use it in future steps const file1 = $.files.open('vue-logo.svg') const file2 = $.files.open('react-logo.svg') return [file1, file] }, }) ``` Then you’ll need to use `$.files.openDescriptor` to parse the JSON definition of the files back into `File` instances: ```typescript theme={null} // "parse_files" Node.js code step export default defineComponent({ async run({ steps, $ }) { const files = steps.open_files.$return_value.map(object => $.files.openDescriptor(object)) // log the URL to the first File console.log(await files[0].toUrl()); }, }) ``` ### Deleting files You can call `delete()` on the file to delete it from the File Store. ```javascript theme={null} export default defineComponent({ async run({ steps, $ }) { // Open the file and delete it const file = await $.files.open('example.png').delete() console.log('File deleted.') }, }) ``` > [!WARNING] > > Deleting files is irreversible > > It’s not possible to restore deleted files. Please take care when deleting files. ## FAQ ### Are there size limits for files within File Stores? At this time no, but File Stores are in preview and are subject to change. ### Are helpers available for Python to download, upload and manage files? At this time no, only Node.js includes a helper to interact with the File Store programmatically within workflows. ### Are File Stores generally available? At this time File Stores are only available to Advanced plan and above subscribed workspaces. You can change your plan within the [pricing page](https://pipedream.com/pricing). # File Stores Node.js Reference Source: https://pipedream.com/docs/workflows/data-management/file-stores/reference > [!WARNING] > > **Workflows and String are shutting down on March 31, 2027.** [Learn more](/docs/workflows) The File Stores Node.js helper allows you to manage files within Code Steps and Action components. ## `$.files` The `$.files` helper is the main module to interact with the Project’s File Store. It can instantiate new files, open files from descriptors and list the contents of the File Store. ### `$.files.open(path)` *Sync.* Opens a file from the relative `path`. If the file doesn’t exist, a new empty file is created. ### `$.files.openDescriptor(fileDescriptor)` *Sync.* Creates a new `File` from the JSON friendly description of a file. Useful for recreating a `File` from a step export. For example, export a `File` as a step export which will render the `File` as JSON: ```javascript theme={null} // create_file // Creates a new Project File and uploads an image to it export default defineComponent({ async run({ steps, $ }) { // create the new file and upload the contents to it from a URL const file = await $.files.open("imgur.png").fromUrl("https://i.imgur.com/TVIPgNq.png") // return the file as a step export return file }, } ``` Then in a downstream step recreate the `File` instance from the step export friendly *description*: ```javascript theme={null} // download_file // Opens a file downloaded from a previous step, and saves it. export default defineComponent({ async run({ steps, $ }) { // Convert the the description of the file back into a File instance const file = $.files.openDescriptor(steps.create_file.$return_value) // Download the file to the local /tmp directory await $.file.download('/tmp/example.png') console.log("File downloaded to /tmp") }, }) ``` ### `$.files.dir(?path)` *Sync.* Lists the files & directories at the given `path`. By default it will list the files at the root directory. Here’s an example of how to iterate over the files in the root directory and open them as `File` instances: ```javascript theme={null} export default defineComponent({ async run({ steps, $ }) { // list all contents of the root File Stores directory in this project const dirs = $.files.dir(); let files = []; for await(const dir of dirs) { // if this is a file, let's open it if(dir.isFile()) { files.push(await $.files.open(dir.path)) } } return files }, }) ``` Each item returned by `$.files.dir()` will contain the following properties: * `isDirectory()` - `true` if this instance is a directory. * `isFile()` - `true` if this instance is a file. * `path` - The path to the file. * `size` - The size of the file in bytes. * `modifiedAt` - The last modified at timestamp. ## `File` This class describes an instance of a single file within a File Store. When using `$.files.open` or `$.files.openDescriptor`, you’ll create a new instance of a `File` with helper methods that give you more flexibility to perform programmatic actions with the file. ### `File.toUrl()` *Async.* The pre-signed GET URL to retrieve the file. ```javascript theme={null} export default defineComponent({ async run({ steps, $ }) { // Retrieve the pre-signed GET URL for logo.png const url = await $.files.open('logo.png').toUrl() return url }, }) ``` > [!NOTE] > > Pre-signed GET URLs are short lived. > > The `File.toUrl()` will expire after 30 minutes. ### `File.toFile(path)` *Async.* Downloads the file to the local path in the current workflow. If the file doesn’t exist, a new one will be created at the path specified. > [!NOTE] > > Only `/tmp` is writable in workflow environments > > Only the `/tmp` directory is writable in your workflow’s execution environment. So you must download your file to the `/tmp` directory. ```javascript theme={null} export default defineComponent({ async run({ steps, $ }) { // Download the file in the File Store to the workflow's /tmp/ directory await $.files.open('logo.png').toFile("/tmp/logo.png") }, }) ``` ### `File.toBuffer()` *Async.* Downloads the file as a Buffer to create readable or writeable streams. ```javascript theme={null} export default defineComponent({ async run({ steps, $ }) { // opens a file at the path "hello.txt" and downloads it as a Buffer const buffer = await $.files.open('hello.txt').toBuffer() // Logs the contents of the Buffer as a string console.log(buffer.toString()) }, }) ``` ### `File.fromFile(localFilePath, ?contentType)` *Async.* Uploads a file from the file at the `/tmp` local path. For example, if `localFilePath` is given `/tmp/recording.mp3`, it will upload that file to the current File Store File instance. ```javascript theme={null} export default defineComponent({ async run({ steps, $ }) { // Upload a file to the File Store from the local /tmp/ directory const file = await $.files.open('recording.mp3').fromFile('/tmp/recording.mp3') console.log(file.url) }, }) ``` ### `File.fromUrl(url)` *Async.* Accepts a `url` to read from. ```javascript theme={null} export default defineComponent({ async run({ steps, $ }) { // Upload a file to the File Store by a URL const file = await $.files.open('dice.png').fromUrl('https://upload.wikimedia.org/wikipedia/commons/4/47/PNG_transparency_demonstration_1.png') console.log(file.url) }, }) ``` ### `File.createWriteStream(?contentType, ?contentLength)` *Async.* Creates a write stream to populate the file with. > [!NOTE] > > Pass the content length if possible > > The `contentLength` argument is optional, however we do recommend passing it. Otherwise the entire file will need to be written to the local `/tmp` before it can be uploaded to the File store. ```javascript theme={null} import { pipeline } from 'stream/promises'; import got from 'got' export default defineComponent({ async run({ steps, $ }) { const writeStream = await $.files.open('logo.png').createWriteStream("image/png", 2153) const readStream = got.stream('https://pdrm.co/logo') await pipeline(readStream, writeStream); }, }) ``` ### `File.fromReadableStream(?contentType, ?contentLength)` *Async.* Populates a file’s contents from the `ReadableStream`. > [!NOTE] > > Pass the content length if possible > > The `contentLength` argument is optional, however we do recommend passing it. Otherwise the entire file will need to be written to the local `/tmp` before it can be uploaded to the File store. ```javascript theme={null} import got from 'got' export default defineComponent({ async run({ steps, $ }) { // Start a new read stream const readStream = got.stream('https://pdrm.co/logo') // Populate the file's content from the read stream await $.files.open("logo.png").fromReadableStream(readStream, "image/png", 2153) }, }) ``` ### `File.delete()` *Async.* Deletes the Project File. ```javascript theme={null} export default defineComponent({ async run({ steps, $ }) { // Open the Project File and delete it const file = await $.files.open('example.png').delete() console.log('File deleted.') }, }) ``` > [!WARNING] > > Deleting files is irreversible > > It’s not possible to restore deleted files. Please take care when deleting files. # Custom Domains Source: https://pipedream.com/docs/workflows/domains > [!WARNING] > > **Workflows and String are shutting down on March 31, 2027.** [Learn more](/docs/workflows) By default, all new [Pipedream HTTP endpoints](/docs/workflows/building-workflows/triggers/#http) are hosted on the `*.m.pipedream.net` domain. But you can configure any domain you want: instead of `https://endpoint.m.pipedream.net`, the endpoint would be available on `https://endpoint.example.com`. ## Configuring a new custom domain ### 1. Choose your domain You can configure any domain you own to work with Pipedream HTTP endpoints. For example, you can host Pipedream HTTP endpoints on a dedicated subdomain on your core domain, like `*.eng.example.com` or `*.marketing.example.com`. This can be any domain or subdomain you own. In this example, endpoints would look like: ```txt theme={null} [endpoint_id].eng.example.com [endpoint_id_1].eng.example.com ... ``` where `[endpoint_id]` is a uniquely-generated hostname specific to your Pipedream HTTP endpoint. If you own a domain that you want to *completely* redirect to Pipedream, you can also configure `*.example.com` to point to Pipedream. In this example, endpoints would look like: ```txt theme={null} [endpoint_id].example.com [endpoint_id_1].example.com ... ``` Since all traffic on `*.example.com` points to Pipedream, we can assign hosts on the root domain. This also means that **you cannot use other hosts like [www.example.com](http://www.example.com)** without conflicting with Pipedream endpoints. Choose this option only if you’re serving all traffic from `example.com` from Pipedream. Before you move on, make sure you have access to manage DNS records for your domain. If you don’t, please coordinate with the team at your company that manages DNS records, and feel free to [reach out to our Support team](https://pipedream.com/support) with any questions. #### A note on domain wildcards Note that the records referenced above use the wildcard (`*`) for the host portion of the domain. When you configure DNS records in [step 3](/docs/workflows/domains/#3-add-your-dns-records), this allows you to point all traffic for a specific domain to Pipedream and create any number of Pipedream HTTP endpoints that will work with your domain. ### 2. Reach out to Pipedream Support Once you’ve chosen your domain and are in an [eligible plan](https://pipedream.com/pricing), [reach out to Pipedream Support](https://pipedream.com/support) and let us know what domain you’d like to configure for your workspace. We’ll configure a TLS/SSL certificate for that domain, and give you two DNS CNAME records to add for that domain in [step 3](/docs/workflows/domains/#3-add-your-dns-records). ### 3. Add your DNS records Once we configure your domain, we’ll ask you to create two DNS CNAME records: * [One record to prove ownership of your domain](/docs/workflows/domains/#add-the-cname-validation-record) (a `CNAME` record) * [Another record to point traffic on your domain to Pipedream](/docs/workflows/domains/#add-the-dns-cname-wildcard-record) (a `CNAME` record) #### Add the CNAME validation record Pipedream uses [AWS Certificate Manager](https://aws.amazon.com/certificate-manager/) to create the TLS certificate for your domain. To validate the certificate, you need to add a specific DNS record provided by Certificate Manager. Pipedream will provide the name and value. For example, if you requested `*.eng.example.com` as your custom domain, Pipedream will provide the details of the record, like in this example: * **Type**: `CNAME` * **Name**: `_2kf9s72kjfskjflsdf989234nsd0b.eng.example.com` * **Value**: `_7ghslkjsdfnc82374kshflasfhlf.vvykbvdtpk.acm-validations.aws.` * **TTL (seconds)**: 300 Consult the docs for your DNS service for more information on adding CNAME records. Here’s an example configuration using AWS’s Route53 service: ![](https://mintcdn.com/pipedream/h8oodpUDiyR1Ssvt/images/39ab04f9-Screenshot_2023-08-21_at_2.52.16_PM_gtj3xl.png?fit=max\&auto=format\&n=h8oodpUDiyR1Ssvt\&q=85\&s=1da181b17737d966a6d35eff190b6fd6) #### Add the DNS CNAME wildcard record Now you’ll need to add the wildcard record that points all traffic for your domain to Pipedream. Pipedream will also provide the details of this record, like in this example: * **Type**: `CNAME` * **Name**: `*.eng.example.com` * **Value**: `id123.cd.pdrm.net.` * **TTL (seconds)**: 300 Once you’ve finished adding these DNS records, please **reach out to the Pipedream team**. We’ll validate the records and finalize the configuration for your domain. ### 4. Send a test request to your custom domain Any traffic to existing `*.m.pipedream.net` endpoints will continue to work uninterrupted. To confirm traffic to your new domain works, take any Pipedream endpoint URL and replace the `*.m.pipedream.net` with your custom domain. For example, if you configured a custom domain of `pipedream.example.com` and have an existing endpoint at ```txt theme={null} https://[endpoint_id].m.pipedream.net ``` Try making a test request to ```txt theme={null} https://[endpoint_id].eng.example.com ``` ## Security ### How Pipedream manages the TLS/SSL certificate See our [TLS/SSL security docs](/docs/privacy-and-security/#encryption-of-data-in-transit-tls-ssl-certificates) for more detail on how we create and manage the certificates for custom domains. ### Requests to custom domains are allowed only for your endpoints Custom domains are mapped directly to customer endpoints. This means no other customer can send requests to their endpoints on *your* custom domain. Requests to `example.com` are restricted specifically to HTTP endpoints in your Pipedream workspace. # Environment Variables Source: https://pipedream.com/docs/workflows/environment-variables > [!WARNING] > > **Workflows and String are shutting down on March 31, 2027.** [Learn more](/docs/workflows) Environment variables (env vars) enable you to separate secrets and other static configuration data from your code. You shouldn’t include API keys or other sensitive data directly in your workflow’s code. By referencing the value of an environment variable instead, your workflow includes a reference to that variable — for example, `process.env.API_KEY` instead of the API key itself. You can reference env vars and secrets in [workflow code](/docs/workflows/building-workflows/code/) or in the object explorer when passing data to steps, and you can define them either globally for the entire workspace, or scope them to individual projects. | Scope | Description | | - | - | | **Workspace** | All environment variables are available to all workflows within the workspace. All workspace members can manage workspace-wide variables [in the UI](https://pipedream.com/settings/env-vars). | | **Project** | Environment variables defined within a project are only accessible to the workflows within that project. Only workspace members who have [access to the project](/docs/projects/access-controls/) can manage project variables. | ## Creating and updating environment variables * To manage **global** environment variables for the workspace, navigate to **Settings**, then click **Environment Variables**: [https://pipedream.com/settings/env-vars](https://pipedream.com/settings/env-vars) * To manage environment variables within a project, open the project, then click **Variables** from the project nav on the left ![](https://mintcdn.com/pipedream/grEzwYhEB2vZSwGw/images/82742810-project-vars_ilxq7x.png?fit=max\&auto=format\&n=grEzwYhEB2vZSwGw\&q=85\&s=3cd3652724146c636d97d2dd47ca6a02) Click **New Variable** to add a new environment variable or secret: ![](https://mintcdn.com/pipedream/Acz4Z1ch6TM7-aI8/images/b96b62c1-add-new-var-v2_ocvfoi.png?fit=max\&auto=format\&n=Acz4Z1ch6TM7-aI8\&q=85\&s=2fff06d9c4387da7648f19f28a27ec64) **Configure the required fields**: ![](https://mintcdn.com/pipedream/h8oodpUDiyR1Ssvt/images/3a26bef5-add-var-modal-v2_nvu2eq.png?fit=max\&auto=format\&n=h8oodpUDiyR1Ssvt\&q=85\&s=fcec43f613b784bb8ac939fd22bbec57) | Input field | Description | | - | - | | **Key** | Name of the variable — for example, `CLIENT_ID` | | **Value** | The value, which can contain any string with a max limit of 64KB | | **Description** | Optionally add a description of the variable. This is only visible in the UI, and is not accessible within a workflow. | | **Secret** | New variables default to **secret**. If configured as a secret, the value is never exposed in the UI and cannot be modified. | To edit an environment variable, click the **Edit** button from the three dots to the right of a specific variable. ![](https://mintcdn.com/pipedream/grEzwYhEB2vZSwGw/images/915495c6-edit-env-var_bno34z.png?fit=max\&auto=format\&n=grEzwYhEB2vZSwGw\&q=85\&s=88bbcfe3ac7ee565f27197d5cc0c520f) * Updates to environment variables will be made available to your workflows as soon as the save operation is complete — typically a few seconds after you click **Save**. * If you update the value of an environment variable in the UI, your workflow should automatically use that new value where it’s referenced. * If you delete a variable in the UI, any deployed workflows that reference it will return `undefined`. ## Referencing environment variables in code You can reference the value of any environment variable using the object [`process.env`](https://nodejs.org/dist/latest-v10.x/api/process.html#process_process_env). This object contains environment variables as key-value pairs. For example, let’s say you have an environment variable named `API_KEY`. You can reference its value in Node.js using `process.env.API_KEY`: ```javascript theme={null} const url = `http://yourapi.com/endpoint/?api_key=${process.env.API_KEY}`; ``` Reference the same environment variable in Python: ```python theme={null} import os print(os.environ["API_KEY"]) ``` Variable names are case-sensitive. Use the key name you defined when referencing your variable in `process.env`. Referencing an environment variable that doesn’t exist returns the value `undefined` in Node.js. For example, if you try to reference `process.env.API_KEY` without first defining the `API_KEY` environment variable in the UI, it will return the value `undefined`. ### Using autocomplete to reference env vars When referencing env vars directly in code within your Pipedream workflow, you can also take advantage of autocomplete: ![](https://mintcdn.com/pipedream/nKh6d_6A4aXFb6xD/images/f8998b18-autocomplete-env-vars_yoeaxy.png?fit=max\&auto=format\&n=nKh6d_6A4aXFb6xD\&q=85\&s=2e993c751a70b2e4f21ebf9bffbb2f96) > [!WARNING] > > Logging the value of any environment variables — for example, using `console.log` — will include that value in the logs associated with the cell. Please keep this in mind and take care not to print the values of sensitive secrets. > [!NOTE] > > `process.env` will always return `undefined` when used outside of the `defineComponent` export. ## Referencing environment variables in actions [Actions](/docs/components/contributing/#actions) are pre-built code steps that let you provide input in a form, selecting the correct params to send to the action. You can reference the value of environment variables using `{{process.env.YOUR_ENV_VAR}}`. You’ll see a list of your environment variables in the object explorer when selecting a variable to pass to a step. ![](https://mintcdn.com/pipedream/NF77kliJSewMqg65/images/14bf2f5d-env-vars-object-explorer-v2_x9afzl.png?fit=max\&auto=format\&n=NF77kliJSewMqg65\&q=85\&s=db4c137ab2c510f6ee09dd82d88e6800) > [!NOTE] > > [Private components](/docs/components/contributing/#using-components) (actions or triggers) do not have direct access to workspace or project variables as public components or code steps. Add a prop specifically for the variable you need. For sensitive data like API keys, [configure the prop as a secret](/docs/components/contributing/api/#props). In your prop configuration, set the value to `{{process.env.YOUR_ENV_VAR}}` to securely reference the environment variable. ## FAQ ### What if I define the same variable key in my workspace env vars and project env vars? The project-scoped variable will take priority if the same variable key exists at both the workspace and project level. If a workflow *outside* of the relevant project references that variable, it’ll use the value of the environment variable defined for the workspace. ### What happens if I share a workflow that references an environment variable? If you [share a workflow](/docs/workflows/building-workflows/sharing/) that references an environment variable, **only the reference is included, and not the actual value**. ## Limits * Currently, environment variables are only exposed in Pipedream workflows, [not event sources](https://github.com/PipedreamHQ/pipedream/issues/583). * The value of any environment variable may be no longer than `64KB`. * The names of environment variables must start with a letter or underscore. * Pipedream reserves environment variables that start with `PIPEDREAM_` for internal use. You cannot create an environment variable that begins with that prefix. # Event History Source: https://pipedream.com/docs/workflows/event-history > [!WARNING] > > **Workflows and String are shutting down on March 31, 2027.** [Learn more](/docs/workflows) Monitor all workflow events and their stack traces in one centralized view under the [**Event History**](https://pipedream.com/event-history) section in the dashboard. Within the **Event History**, you’ll be able to filter your events by workflow, execution status, within a specific time range. > [!WARNING] > > Workspace admins are able to view events for all workflows, but members are required to select a workflow since they might not have [access to certain projects](/docs/projects/access-controls/#permissions). ## Filtering Events The filters at the top of the screen allow you to search all events processed by your workflows. You can filter by the event’s **Status**, **time of initiation** or by the **Workflow name**. > [!NOTE] > > The filters are scoped to the current [workspace](/docs/workspaces/). If you’re not seeing the events or workflow you’re expecting, try [switching workspaces](/docs/workspaces/#switching-between-workspaces). ### Filtering by status * The **Status** filter controls which events are shown by their status * For example selecting the **Success** status, you’ll see all workflow events that were successfully executed ![](https://mintcdn.com/pipedream/xnRKrRxEtt3vxd6I/images/d3b5a53b-image.png?fit=max\&auto=format\&n=xnRKrRxEtt3vxd6I\&q=85\&s=3f5695a46b7a24d7fbcf8139b2d70056) #### All failed workflow executions * You can view all failed workflow executions by applying the **Error** status filter * This will only display the failed workflow executions in the selected time period * This view in particular is helpful for identifying trends of errors, or workflows with persistent problems ![](https://mintcdn.com/pipedream/NF77kliJSewMqg65/images/045bb06a-image.png?fit=max\&auto=format\&n=NF77kliJSewMqg65\&q=85\&s=bb31b0995253e547b0eab6dd32de2780) #### All paused workflow executions * Workflow executions that are currently in a suspended state from `$.flow.delay` or `$.flow.suspend` will be shown when this filter is selected ![](https://mintcdn.com/pipedream/NF77kliJSewMqg65/images/08497233-image.png?fit=max\&auto=format\&n=NF77kliJSewMqg65\&q=85\&s=c2a5d95436b862cd1f2fcbf250c1a667) > [!NOTE] > > If you’re using `setTimeout` or `sleep` in Node.js or Python steps, the event will not be considered **Paused**. Using those language native execution holding controls leaves your workflow in a **Executing** state. ### Within a timeframe * Filtering by time frame will include workflow events that *began* execution within the defined range * Using this dropdown, you can select between convenient time ranges, or specify a custom range on the right side ![](https://mintcdn.com/pipedream/anb6FA0wpd8jtdUB/images/518959a5-image.png?fit=max\&auto=format\&n=anb6FA0wpd8jtdUB\&q=85\&s=c329443aa8d663539a2ba69a21fa3b0e) ### Filtering by workflow You can also filter events by a specific workflow. You can search by the workflow’s name in the search bar in the top right. ![](https://mintcdn.com/pipedream/NF77kliJSewMqg65/images/224baa1d-CleanShot_2023-05-10_at_15.39.30_2x_yoa1k6.png?fit=max\&auto=format\&n=NF77kliJSewMqg65\&q=85\&s=8458a751a4ec5634375f7f74c2d21c7e) Alternatively, you can filter by workflow from a specific event. First, open the menu on the far right, then select **Filter By Workflow**. Then only events processed by that workflow will appear. ![](https://mintcdn.com/pipedream/h8oodpUDiyR1Ssvt/images/430a091d-CleanShot_2023-05-10_at_15.41.20_2x_ulvdns.png?fit=max\&auto=format\&n=h8oodpUDiyR1Ssvt\&q=85\&s=0c26b0142096492199a1a769405eeba2) ## Inspecting events * Clicking on an individual event will open a panel that displays the steps executed, their individual configurations, as well as the overall performance and results of the entire workflow. * The top of the event history details will display details including the overall status of that particular event execution and errors if any. * If there is an error message, the link at the bottom of the error message will link to the corresponding workflow step that threw the error. * From here you can easily **Build from event** or **Replay event** ![](https://mintcdn.com/pipedream/Acz4Z1ch6TM7-aI8/images/a4077c02-CleanShot_2023-05-10_at_15.53.44_2x_t30gsb.png?fit=max\&auto=format\&n=Acz4Z1ch6TM7-aI8\&q=85\&s=7f4dc7763d9e2582fe4f37df4bfa2c8a) ## Bulk actions You can select multiple events and perform bulk actions on them. * **Replay**: Replays the selected events. This is useful for example when you have multiple errored events that you want to execute again after fixing a bug in your workflow. * **Delete**: Deletes the selected events. This may be useful if you have certain events you want to scrub from the event history, or when you’ve successfully replayed events that had originally errored. > [!NOTE] > > When you replay multiple events at once, they’ll be replayed in the order they were originally executed. This means the first event that came in will be replayed first, followed by the second, and so on. ## Limits The number of events recorded and available for viewing in the Event History depends on your plan. [Please see the pricing page](https://pipedream.com/pricing) for more details. ## FAQ ### Is Event History available on all plans? Yes, event history is available for all workspace plans, including free plans. However, the length of searchable or viewable history changes depending on your plan. [Please see the pricing page](https://pipedream.com/pricing) for more details. # Export Workflows Source: https://pipedream.com/docs/workflows/export-workflows Download the structure of every workflow in a project as JSON before Workflows shuts down. > [!WARNING] > > **Workflows and String are shutting down on March 31, 2027.** [Learn more](/docs/workflows) You can export the workflows in a project to a ZIP archive. The archive has one JSON file for each workflow, which describes its triggers, steps, code, configured props, and control flow. Use it as a record of what you built, and as a reference when you rebuild your workflows on another platform. Export runs one project at a time. Export each project that has workflows you want to keep before all Workflows data is deleted on April 30, 2027. ## Export a project **1. Open the project settings** Open the project in the [Pipedream dashboard](https://pipedream.com/projects), then select **Settings** in the left navigation. **2. Start the export** Click **Export Workflows** at the bottom of the settings panel. Pipedream builds the archive in the background. **3. Download the archive** When the export finishes, the archive appears in the project's [File Store](/docs/workflows/data-management/file-stores) as `project_export-.zip`. Select **File Store** in the project's left navigation to download it. > [!NOTE] > > Export writes the archive to the project's File Store, so your plan must include File Stores. ### Export again Each project can have one export at a time. To export a project again (for example, after you change a workflow), delete the existing `project_export-.zip` file from the File Store, then click **Export Workflows** again. ## What's in the export The archive keeps the folder structure of your project: ``` project_export-proj_abc123.zip ├── manifest.json ├── sync-leads-to-sheets-p_abc123.json └── Marketing/ └── weekly-digest-p_def456.json ``` ### manifest.json `manifest.json` lists every workflow in the project, including workflows that were not exported, so nothing is left out without a record. ```json theme={null} { "schema": "project-export/2026.01", "workflow_schema": "workflow.json/2026.01", "project_hashid": "proj_abc123", "exported_at": "2026-10-01T17:00:00Z", "truncated": false, "truncated_reason": null, "limits": { "workflows": 500, "bytes": 268435456 }, "workflows": [ { "hashid": "p_abc123", "name": "Sync leads to Sheets", "path": "sync-leads-to-sheets-p_abc123.json", "status": "exported", "warnings": [ "step send_message: secret prop api_key was omitted from the export and must be re-entered after import" ] }, { "hashid": "p_ghi789", "name": "Untitled workflow", "status": "skipped_never_deployed" } ] } ``` Each workflow has one of these statuses: | Status | Meaning | | - | - | | `exported` | The workflow is in the archive at `path`. | | `skipped_never_deployed` | The workflow was never deployed, so there is nothing to export. | | `skipped_export_limit` | The export reached a [limit](#limits) before it got to this workflow. | ### Workflow files Each workflow file contains the latest deployed version of the workflow: | Field | Contents | | - | - | | `name`, `description`, `inactive`, `settings` | Workflow metadata and settings. | | `triggers` | Each trigger's type (`source`, `http`, `timer`, `email`, or `form`) and configuration. HTTP, schedule, and form trigger settings are exported in full. Source triggers include their [configured props](#configured-props). | | `steps` | Each step in order: its name, type, either its code (for code steps) or the component key and version (for actions), and its [configured props](#configured-props). | | `deployments` | The steps inside each control flow branch, such as [if/else](/docs/workflows/building-workflows/control-flow/ifelse) and [switch](/docs/workflows/building-workflows/control-flow/switch) paths. | ### Configured props The export includes the values you configured on each step and source trigger, such as a channel name, a spreadsheet ID, or a message template. Pipedream replaces a value with `` when it is, or can be, a credential: | Prop | What the export contains | | - | - | | Secret props | ``. This includes props declared `secret: true` in code steps. | | App props (connected accounts) | Only the `authProvisionId` of the connected account. Tokens and other credentials are removed. | | HTTP request props | The request configuration. The `auth` object (basic auth and bearer token) is ``. | | Props with no declaration | ``, because Pipedream cannot tell whether the value is a credential. | | System-managed props (for example, `$.service.db` and `$.interface.http`) | ``. These values are created when you deploy. | | All other props | The value as you configured it. | The prop name always stays in the export, so you can see what each step needs. ## What's not in the export The export describes the structure and configuration of your workflows. It does not contain their data or credentials: * **Secret prop values.** See [Configured props](#configured-props). Re-enter these values on your new platform. * **Connected accounts.** Credentials and OAuth tokens are never exported. The `authProvisionId` identifies the account only inside your Pipedream workspace, so connect the account again on your new platform. * **Environment variables.** Re-enter these values on your new platform. * **Event history, data stores, and File Store files.** Download any data you need separately. You can download files from the [File Store](/docs/workflows/data-management/file-stores) directly. * **Code for private multi-file components.** The export includes the component key, but not its code. Keep a copy of the source for any private components you published. The `warnings` list for each workflow in `manifest.json` names each step and prop that you must re-enter or connect again. ## Limits One export includes a maximum of **500 workflows** or **256 MB** of workflow content, whichever comes first. If a project exceeds a limit, `truncated` is `true` in `manifest.json`, and the remaining workflows have the status `skipped_export_limit`. To export the remaining workflows, move some workflows to a different project and export each project. # GitHub Sync Source: https://pipedream.com/docs/workflows/git > [!WARNING] > > **Workflows and String are shutting down on March 31, 2027.** [Learn more](/docs/workflows) When GitHub Syncing is enabled on your project, Pipedream will serialize your workflows and synchronize changes to a GitHub repo. Capabilities include: * Bi-directional GitHub sync (push and pull changes) * Edit in development branches * Track commit and merge history * Link users to commits * Merge from Pipedream or create PRs and merge from GitHub * Edit in Pipedream or use a local editor and synchronize via GitHub (e.g., edit code, find and replace across multiple steps or workflows) * Organize workflows into projects with support for nested folders ## Getting Started ### Create a new project and enable GitHub Sync A project may contain one or more workflows and may be further organized using nested folders. Each project may be synchronized to a single GitHub repo. * Go to [https://pipedream.com/projects](https://pipedream.com/projects) * Create a new project * Enter a project name and check the box to **Configure GitHub Sync** * To use **OAuth** * Select a connected account, GitHub scope and repo name * Pipedream will automatically create a new, empty repo in GitHub ![](https://mintcdn.com/pipedream/grEzwYhEB2vZSwGw/images/7839227e-w860.png?fit=max\&auto=format\&n=grEzwYhEB2vZSwGw\&q=85\&s=ec631d2c0d1eeb6f75e850e49fe05713) * To use **Deploy Keys** * [Create a new repo](https://github.com/new) in GitHub * Copy and paste the URL of your new repo * Follow the instructions to configure the deploy key * Test your setup and create a new project ![](https://mintcdn.com/pipedream/anb6FA0wpd8jtdUB/images/57332d25-w860.png?fit=max\&auto=format\&n=anb6FA0wpd8jtdUB\&q=85\&s=26dc0f06eaf7e4ad5b94b311f759e4b8) ### Create a branch to edit a project > [!NOTE] > > Branches are required to make changes > > All changes to resources in a project must be made in a development branch. > > Examples of changes include creating, editing, deleting, enabling, disabling and renaming workflows. This also includes changing workflow settings like concurrency, VPC assignment and auto-retries. To edit a git-backed project you must create a development branch by clicking **Edit > Create Branch** ![](https://mintcdn.com/pipedream/grEzwYhEB2vZSwGw/images/8cde2d1c-w2000.png?fit=max\&auto=format\&n=grEzwYhEB2vZSwGw\&q=85\&s=40eee3f58a3378970e06b9f26aba89c3) Next, name the branch and click **Create**: ![](https://mintcdn.com/pipedream/h8oodpUDiyR1Ssvt/images/4b629354-w2000.png?fit=max\&auto=format\&n=h8oodpUDiyR1Ssvt\&q=85\&s=c24b93c08d14088a6ea834d15b564871) To exit development mode without merging to production, click **Exit Development Mode**: ![](https://mintcdn.com/pipedream/anb6FA0wpd8jtdUB/images/73383cab-w2000.png?fit=max\&auto=format\&n=anb6FA0wpd8jtdUB\&q=85\&s=d9537e732f2374970f2ab3de395c4a58) Your changes will be saved to the branch, if you choose to revisit them later. ### Merge changes to production Once you’ve committed your changes, you can deploy your changes by merging them into the `production` branch through the Pipedream UI or GitHub. When you merge a Git-backed project to production, all modified resources in the project will be deployed. Multiple workflows may be deployed, modified, or deleted in production through a single merge action. #### Merge via the Pipedream UI To merge changes to production, click on **Merge to production:** ![](https://mintcdn.com/pipedream/nKh6d_6A4aXFb6xD/images/f7005e9a-w2000.png?fit=max\&auto=format\&n=nKh6d_6A4aXFb6xD\&q=85\&s=1326654b2e73b8dce9753b89b3746d11) Pipedream will present a diff between the development branch and the `production` branch. Validate your changes and click **Merge to production** to complete the merge: ![](https://mintcdn.com/pipedream/NF77kliJSewMqg65/images/2061ff03-w2000.png?fit=max\&auto=format\&n=NF77kliJSewMqg65\&q=85\&s=060412a3c2afe6ab2b10609edde84620) #### Create a Pull Request in GitHub To create a pull request in GitHub, either choose **Open GitHub pull request** from the git-actions menu in Pipedream or in GitHub: ![](https://mintcdn.com/pipedream/h8oodpUDiyR1Ssvt/images/2ca2feab-w2000.png?fit=max\&auto=format\&n=h8oodpUDiyR1Ssvt\&q=85\&s=357fb51eb61c1f22b1743be8ea2015b9) You can also review and merge changes directly from GitHub using the standard pull request process. > [!WARNING] > > Pull request reviews cannot be required. That feature is on the roadmap for the Business tier. ### Commit changes To commit changes without merging to production, select **Commit Changes** from the Git Actions menu: ![](https://mintcdn.com/pipedream/xnRKrRxEtt3vxd6I/images/dc0aadde-w2000.png?fit=max\&auto=format\&n=xnRKrRxEtt3vxd6I\&q=85\&s=1d19182c6f238f14f5bf256a32c9a4ef) You can review the diff and enter a commit message: ![](https://mintcdn.com/pipedream/Acz4Z1ch6TM7-aI8/images/a7b35c13-w2000.png?fit=max\&auto=format\&n=Acz4Z1ch6TM7-aI8\&q=85\&s=aba5bd64e21e96aa259474fdb5f4bfbe) ### Pull changes and resolve conflicts If remote changes are detected, you’ll be prompted to pull the changes: ![](https://mintcdn.com/pipedream/xnRKrRxEtt3vxd6I/images/df924b2e-w2000.png?fit=max\&auto=format\&n=xnRKrRxEtt3vxd6I\&q=85\&s=3d819d5446656abfd7a03240ddb8969e) Pipedream will attempt to automatically merge changes. If there are conflicts, you will be prompted to manually resolve it: ![](https://mintcdn.com/pipedream/NF77kliJSewMqg65/images/2277af22-w2000.png?fit=max\&auto=format\&n=NF77kliJSewMqg65\&q=85\&s=d832729b7f9bfffd77f5d435abd7d9cc) ### Move existing workflows to projects > [!WARNING] > > Legacy (v1) workflows are not supported in projects. First, select the workflow(s) you want to move from the [workflows listing page](https://pipedream.com/workflows) and click **Move** in the top action menu: ![](https://mintcdn.com/pipedream/nKh6d_6A4aXFb6xD/images/edc801f1-w2000.png?fit=max\&auto=format\&n=nKh6d_6A4aXFb6xD\&q=85\&s=38688169ee65ea45c8e81c18e4fa1fa6) Then, select the project to move the selected workflows to: ![](https://mintcdn.com/pipedream/anb6FA0wpd8jtdUB/images/54e4232f-w2000.png?fit=max\&auto=format\&n=anb6FA0wpd8jtdUB\&q=85\&s=a3ccc2540ef305d8fd4ca8f4a7d0459c) > [!NOTE] > > Undeployed changes are automatically assigned a development branch > > If any moved workflows have undeployed changes, those changes will staged in a branch prefixed with `undeployed-changes` (e.g., `undeployed-changes-27361`). ### Use the changelog The changelog tracks all git activity (for projects with GitHub sync enabled). If you encounter an error merging your project, go to the changelog and explore the log details to help you troubleshoot issues in your workflows: ![](https://mintcdn.com/pipedream/xnRKrRxEtt3vxd6I/images/c8f82945-w2000.png?fit=max\&auto=format\&n=xnRKrRxEtt3vxd6I\&q=85\&s=68bc288e5f00f1112818d6bd5e45c2d9) ### Local development Projects that use GitHub sync may be edited outside of Pipedream. You can edit and commit directly via GitHub’s UI or clone the repo locally and use your preferred editor (e.g., VSCode). To test external edits in Pipedream: 1. Commit and push local changes to your development branch in GitHub 2. Open the project in Pipedream’s UI and load your development branch 3. Use the Git Actions menu to pull changes from GitHub ## Known Issues Below are a list of known issues that do not currently have solutions, but are in progress: * Project branches on Pipedream cannot be deleted. * If a workflow uses an action that has been deprecated, merging to production will fail. * Legacy (v1) workflows are not supported in projects. * Self-hosted GitHub Server instances are not yet supported. [Please contact us for help](https://pipedream.com/support). * Workflow attachments are not supported ## GitHub Enterprise Cloud If your repository is hosted on a GitHub Enterprise account, you can allow Pipedream’s address range to sync your project changes. [Follow the directions here](https://docs.github.com/en/enterprise-cloud@latest/organizations/keeping-your-organization-secure/managing-security-settings-for-your-organization/managing-allowed-ip-addresses-for-your-organization) and add the following IP range: 44.223.89.56/29 > [!WARNING] > > To use this public IP address and connect to GitHub Enterprise Cloud hosted repositories, you’ll need to have a Pipedream Business plan. [View our plans](https://pipedream.com/pricing). ## FAQ ### How are Pipedream workflows synchronized to GitHub? Pipedream will serialize your project’s workflows and their configuration into a standard YAML format for storage in GitHub. Then Pipedream will commit your changes to your connected GitHub repository. ### Do you have a definition of this YAML? Not yet, please stay tuned! ### Can I sync multiple workflows to a single GitHub repository? Yes, *projects* are synced to a single GitHub repository which allows you to store multiple workflows into a single GitHub repository for easier organization and management. ### Can I use this feature to develop workflows locally? Yes, you can use the GitHub Syncing feature to develop your workflows from YAML files checked into your Pipedream connected GitHub repository. Then pushing changes to the `production` branch will trigger a deploy for your Pipedream workflows. ### Why am I seeing the error “could not resolve step\[index].uses: component-key\@version” when merging to production? This error occurs when a workflow references a [private component](/docs/components/contributing/#using-private-actions) without properly prefixing the component key with your workspace name in the `workflow.yaml` configuration file. Pipedream requires this prefix to correctly identify and resolve components specific to your workspace. For example, if you modified a [registry action](/docs/components/contributing/) and published it privately, the correct component key should be formatted as `@workspacename/component-key@version` (e.g., `@pipedream/github-update-issue@0.1.0`). To resolve this error: 1. Clone your repository locally and create a development branch. 2. Locate the error in your `workflow.yaml` file where the component key is specified. 3. Add your workspace name prefix to the component key, ensuring it follows the format `@workspacename/component-key@version`. 4. Commit your changes and push them to your repository. 5. Open your project in the Pipedream UI and select your development branch. 6. Click on **Merge to Production** and verify the deployment success in the [Changelog](/docs/workflows/git/#use-the-changelog). 7. If the issue persists, [reach out to Pipedream Support](https://pipedream.com/support) for further assistance. ### Why am I seeing an error about “private auth mismatch” when trying to merge a branch to production? ![](https://mintcdn.com/pipedream/grEzwYhEB2vZSwGw/images/9527ea29-private_auth_mismatch_kzdd7e.png?fit=max\&auto=format\&n=grEzwYhEB2vZSwGw\&q=85\&s=8560e481bd54df0a7e93236eed5b99df) This error occurs when **both** of the below conditions are met: 1. The referenced workflow is using a connected account that’s not shared with the entire workspace 2. The change was merged from outside the Pipedream UI (via github.com or locally) Since Pipedream can’t verify the person who merged that change should have access to use the connected account in a workflow in this case, we block these deploys. To resolve this error: 1. Make sure all the connected accounts in the project’s workflows are [accessible to the entire workspace](/docs/apps/connected-accounts/#access-control) 2. Re-trigger a sync with Pipedream by making a nominal change to the workflow **from outside the Pipedream UI** (via github.com or locally), then merge that change to production ### Can I sync an existing GitHub repository with workflows to a new Pipedream Project? No, at this time it’s not possible because of how resources are connected during the bootstrapping process from the workflow YAML specification. However, this is on our roadmap, [please subscribe to this issue](https://github.com/PipedreamHQ/pipedream/issues/9255) for the latest details. ### Migrating GitHub Repositories You can migrate Pipedream project’s GitHub repository to a new repository, while preserving history. You may want to do this when migrating a repository from a personal GitHub account to an organization account, without affecting the workflows within the Pipedream project. #### Assumptions * **Current GitHub repository**: `previous_github_repo` * **New GitHub repository**: `new_github_repo` * Basic familiarity with git and GitHub * Access to a local terminal (e.g., Bash, Zsh, PowerShell) * Necessary permissions to modify both the Pipedream project and associated GitHub repositories #### Steps 1. **Access Project Settings in Pipedream:** * Navigate to your Pipedream project. * Use the dropdown menu on the “Edit” button in the top right corner to access `previous_github_repo` in GitHub. ![](https://mintcdn.com/pipedream/xnRKrRxEtt3vxd6I/images/ca572f33-Screenshot_2024-05-03_at_12.12.36_PM_sxkrng.png?fit=max\&auto=format\&n=xnRKrRxEtt3vxd6I\&q=85\&s=63b2b08e0cbacc97a863bb44eaccd7cc) 2. **Clone the Current Repository Locally:** ```bash theme={null} git clone previous_github_repo_clone_url ``` 3. Reset GitHub Sync in Pipedream: * In Pipedream, go to your project settings. * Click on “Reset GitHub Connection”. ![](https://mintcdn.com/pipedream/xnRKrRxEtt3vxd6I/images/dbeee2f8-Screenshot_2024-05-03_at_12.15.03_PM_icdppb.png?fit=max\&auto=format\&n=xnRKrRxEtt3vxd6I\&q=85\&s=10ecc48f9f0cfea9f9d3e9b85ee31489) 4. Set Up New repository connection: * Configure the project’s GitHub repository to use `new_github_repo`. 5. Clone the new repository locally: ```bash theme={null} git clone new_github_repo_clone_url cd new_github_repo ``` 6. Link to the old repository: ```bash theme={null} git remote add old_github_repo previous_github_repo_clone_url git fetch --all ``` 7. Prepare for migration: * Create and switch to a new branch for migration: ```bash theme={null} git checkout -b migration ``` * Merge the main branch of `old_github_repo` into migration, allowing for unrelated histories: ```bash theme={null} git merge --allow-unrelated-histories old_github_repo/production # Resolve any conflicts, such as in README.md git commit ``` 8. Finalize the migration: * Optionally push the `migration` branch to the remote: ```bash theme={null} git push --set-upstream origin migration ``` * Switch to the `production` branch and merge: ```bash theme={null} git checkout production git merge --no-ff migration git push ``` 9. Cleanup: * Remove the connection to the old repository: ```bash theme={null} git remote remove old_github_repo ``` * Optionally, you may now safely delete `previous_github_repo` from GitHub. ### How does the `production` branch work? Anything merged to the `production` branch will be deployed to your production workflows on Pipedream. From a design perspective, we want to let you manage any branching strategy on your end, since you may be making commits to the repo outside of Pipedream. Once we support managing Pipedream workflows in a monorepo, where you may have other changes, we wanted to use a branch that didn’t conflict with a conventional main branch (like `main` or `master`). In the future, we also plan to support you changing the default branch name. # Limits Source: https://pipedream.com/docs/workflows/limits > [!WARNING] > > **Workflows and String are shutting down on March 31, 2027.** [Learn more](/docs/workflows) Pipedream imposes limits on source and workflow execution, the events you send to Pipedream, and other properties. You’ll receive an error if you encounter these limits. See our [troubleshooting guide](/docs/workflows/troubleshooting/) for more information on these specific errors. Some of these limits apply only on the free tier. For example, Pipedream limits the number of credits and active workflows you can use on the free tier. **On paid tiers, you can run an unlimited number of credits for any amount of execution time (usage charges apply)**. Other limits apply across the free and paid tiers. Please see the details on each limit below. **These limits are subject to change at any time**. ## Number of Workflows The limit of active workflows depends on your current plan. [See our pricing page](https://pipedream.com/pricing) for more details. ## Number of Event Sources **You can run an unlimited number of event sources**, as long as each operates under the limits below. ## Execution Credits Free Pipedream account have a limit on the number of execution credits. Paid plans are not capped but are subject to additional usage charges (you can manually set a usage cap if you want to manage costs).\ \ You can view your credits usage at the bottom-left of [the Pipedream UI](https://pipedream.com). You can also see more detailed usage in [Billing and Usage Settings](https://pipedream.com/settings/billing). Here you’ll find your usage for the last 30 days, broken out by day, by resource (e.g. your source / workflow). ### Included Credits Usage Notifications | Tier | Notifications | | - | - | | Free tiers | You’ll receive an email when you reach 100% of your usage. | | Paid tiers | You’ll receive an email at 80% and 100% of your [included credits](/docs/pricing/#included-credits) for your [billing period](/docs/pricing/#billing-period). | ## Daily workflow testing limit You **do not** use credits testing workflows, but workspaces on the **Free** plan are limited to 750 of test runtime per day. If you exceed this limit when testing in the builder, you’ll see a **Runtime Quota Exceeded** error. ## Data stores Depending on your plan, Pipedream sets limits on: 1. The total number of data stores 2. The total number of keys across all data stores 3. The total storage used across all data stores You’ll find your workspace’s limits in the **Data Stores** section of usage dashboard in the bottom-left of [the Pipedream UI](https://pipedream.com). ![](https://mintcdn.com/pipedream/anb6FA0wpd8jtdUB/images/54ca2228-image_ryjbrh.png?fit=max\&auto=format\&n=anb6FA0wpd8jtdUB\&q=85\&s=9ebcd956b1be14fd3c1e503de18618f5) ## HTTP Triggers The following limits apply to [HTTP triggers](/docs/workflows/building-workflows/triggers/#http). ### HTTP Request Body Size By default, the body of HTTP requests sent to a source or workflow is limited to 512KB. Your endpoint will issue a `413 Payload Too Large` status code when the body of your request exceeds 512KB. **Pipedream supports two different ways to bypass this limit**. Both of these interfaces support uploading data up to `5TB`, though you may encounter other platform limits. * You can send large HTTP payloads by passing the `pipedream_upload_body=1` query string or an `x-pd-upload-body: 1` HTTP header in your HTTP request. [Read more here](/docs/workflows/building-workflows/triggers/#sending-large-payloads). * You can upload multiple large files, like images and videos, using the [large file upload interface](/docs/workflows/building-workflows/triggers/#large-file-support). ### QPS (Queries Per Second) Generally the rate of HTTP requests sent to an endpoint is quantified by QPS, or *queries per second*. A query refers to an HTTP request. **You can send an average of 10 requests per second to your HTTP trigger**. Any requests that exceed that threshold may trigger rate limiting. If you’re rate limited, we’ll return a `429 Too Many Requests` response. If you control the application sending requests, you should retry the request with [exponential backoff](https://cloud.google.com/storage/exponential-backoff) or a similar technique. We’ll also accept short bursts of traffic, as long as you remain close to an average of 10 QPS (e.g. sending a batch of 50 requests every 30 seconds should not trigger rate limiting). **This limit can be raised for paying customers**. To request an increase, [reach out to our Support team](https://pipedream.com/support/) with the HTTP endpoint whose QPS you’d like to increase, with the new, desired limit. ## Email Triggers Currently, most of the [limits that apply to HTTP triggers](/docs/workflows/limits/#http-triggers) also apply to [email triggers](/docs/workflows/building-workflows/triggers/#email). The only limit that differs between email and HTTP triggers is the payload size: the total size of an email sent to a workflow - its body, headers, and attachments - is limited to 30MB. ## Memory By default, workflows run with 256MB of memory. You can modify a workflow’s memory [in your workflow’s Settings](/docs/workflows/building-workflows/settings/#memory), up to 10GB. Increasing your workflow’s memory gives you a proportional increase in CPU. If your workflow is limited by memory or compute, increasing your workflow’s memory can reduce its overall runtime and make it more performant. **Pipedream charges credits proportional to your memory configuration**. [Read more here](/docs/pricing/#how-credits-work-for-workflows). ## Disk Your code, or a third party library, may need access to disk during the execution of your workflow or event source. **You have access to 2GB of disk in the `/tmp` directory**. This limit cannot be raised. ## Workflows ### Time per execution Every event sent to a workflow triggers a new execution of that workflow. Workflows have a default execution limit that varies with the trigger type: * HTTP and Email-triggered workflows default to **30 seconds** per execution. * Cron-triggered workflows default to **60 seconds** per execution. If your code exceeds your workflow-level limit, we’ll throw a **Timeout** error and stop your workflow. Any partial logs and observability associated with code cells that ran successfully before the timeout will be attached to the event in the UI, so you can examine the state of your workflow and troubleshoot where it may have failed. You can increase the timeout limit, up to a max value set by your plan: | Tier | Maximum time per execution | | - | - | | Free tiers | 300 seconds (5 min) | | Paid tiers | 750 seconds (12.5 min) | Events that trigger a **Timeout** error will appear in red in the [Inspector](/docs/workflows/building-workflows/inspect/). You’ll see the timeout error, also in red, in the cell at which the code timed out. ### Event History The [Inspector](/docs/workflows/building-workflows/inspect/#the-inspector) shows the execution history for a given workflow. Events have a limited retention period, depending on your plan: | Tier | Events retained per workflow | | - | - | | Free tiers | 7 days of events | | Paid tiers | [View breakdown of events history per paid plan](https://pipedream.com/pricing/) | The execution details for a specific event also expires after 365 days. ### Logs, Step Exports, and other observability The total size of `console.log()` statements, [step exports](/docs/workflows/overview/#step-exports), and the original event data sent to the workflow cannot exceed a combined size of 6MB. If you produce logs or step exports larger than this - for example, passing around large API responses, CSVs, or other data - you may encounter a **Function Payload Limit Exceeded** in your workflow. This limit cannot be raised. ## Acceptable Use We ask that you abide by our [Acceptable Use](https://pipedream.com/terms/#b-acceptable-use) policy. In short this means: don’t use Pipedream to break the law; don’t abuse the platform; and don’t use the platform to harm others. # What Are Workflows? Source: https://pipedream.com/docs/workflows/overview > [!WARNING] > > **Workflows and String are shutting down on March 31, 2027.** [Learn more](/docs/workflows) Workflows make it easy to integrate your apps, data, and APIs - all with no servers or infrastructure to manage. They’re sequences of [steps](/docs/workflows/overview/#steps) [triggered by an event](/docs/workflows/building-workflows/triggers/), like an HTTP request, or new rows in a Google sheet. You can use [pre-built actions](/docs/workflows/building-workflows/actions/) or custom [Node.js](/docs/workflows/building-workflows/code/nodejs/), [Python](/docs/workflows/building-workflows/code/python/), [Golang](/docs/workflows/building-workflows/code/go/), or [Bash](/docs/workflows/building-workflows/code/bash/) code in workflows and connect to any of our 3,000 integrated apps. Read [our quickstart](/docs/workflows/quickstart/) or watch our videos on [Pipedream University](https://pipedream.com/university) to learn more. ## Steps Steps are the building blocks you use to create workflows. * Use [triggers](/docs/workflows/building-workflows/triggers/), [code](/docs/workflows/building-workflows/code/), and [pre-built actions](/docs/components/contributing/#actions) * Steps are run linearly, in the order they appear in your workflow * You can pass data between steps using [the `steps` object](/docs/workflows/overview/#step-exports) * Observe the logs, errors, timing, and other execution details for every step ### Triggers Every workflow begins with a [trigger](/docs/workflows/building-workflows/triggers/) step. Trigger steps initiate the execution of a workflow; i.e., workflows execute on each trigger event. For example, you can create an [HTTP trigger](/docs/workflows/building-workflows/triggers/#http) to accept HTTP requests. We give you a unique URL where you can send HTTP requests, and your workflow is executed on each request. You can add [multiple triggers](/docs/workflows/building-workflows/triggers/#can-i-add-multiple-triggers-to-a-workflow) to a workflow, allowing you to run it on distinct events. ### Code, Actions [Actions](/docs/components/contributing/#actions) and [code](/docs/workflows/building-workflows/code/) steps drive the logic of your workflow. Anytime your workflow runs, Pipedream executes each step of your workflow in order. Actions are prebuilt code steps that let you connect to hundreds of APIs without writing code. When you need more control than the default actions provide, code steps let you write any custom Node.js code. Code and action steps cannot precede triggers, since they’ll have no data to operate on. Once you save a workflow, we deploy it to our servers. Each event triggers the workflow code, whether you have the workflow open in your browser, or not. ## Step Names Steps have names, which appear at the top of the step: ![](https://mintcdn.com/pipedream/h8oodpUDiyR1Ssvt/images/3858912d-image.png?fit=max\&auto=format\&n=h8oodpUDiyR1Ssvt\&q=85\&s=4ee146d287b2c368271acac9e0036e3e) When you [share data between steps](/docs/workflows/overview/#step-exports), you’ll use this name to reference that shared data. For example, `steps.trigger.event` contains the event that triggered your workflow. If you exported a property called `myData` from this code step, you’d reference that in other steps using `steps.code.myData`. See the docs on [step exports](/docs/workflows/overview/#step-exports) to learn more. You can rename a step by clicking on its name and typing a new one in its place: ![](https://mintcdn.com/pipedream/xnRKrRxEtt3vxd6I/images/c6d4dd2d-CleanShot_2022-03-22_at_10.24.32_zfxrwd.gif?s=6f620f650b36a63f40a1780277f4c991) After changing a step name, you’ll need to update any references to the old step. In this example, you’d now reference this step as `steps.get_data`. > [!NOTE] > > Step names cannot contain spaces or dashes. Please use underscores or camel casing for your step names, like `getData` or `get_data`. ## Passing data to steps from the workflow builder You can generate form based inputs for steps using `props`. This allows the step reuse in across many workflows with different provided arguments - all without changing code. Learn more about using `props` in our [Node.js code step documentation.](/docs/workflows/building-workflows/code/nodejs/#passing-props-to-code-steps) > [!WARNING] > > Passing props from the workflow builder to workflow steps are only available in Node.js code steps. > > We do not currently offer this feature for Python, Bash or Go powered code steps. ## Step Exports Step exports allow you to pass data between steps. Any data exported from a step must be JSON serializable; the data must be able to stored as JSON so it can be read by downstream steps. For examples of supported data types in your steps language, see the examples below. * [Node.js (JavaScript)](/docs/workflows/building-workflows/code/nodejs/#sharing-data-between-steps) * [Python](/docs/workflows/building-workflows/code/python/#sharing-data-between-steps) * [Bash](/docs/workflows/building-workflows/code/bash/#sharing-data-between-steps) * [Go](/docs/workflows/building-workflows/code/go/#sharing-data-between-steps) ## Step Notes Pipedream lets you add notes to individual steps in your workflow so you can include helpful context to other workspace members or even yourself, and you can even write markdown! ![](https://mintcdn.com/pipedream/nKh6d_6A4aXFb6xD/images/fb8c1e04-image.png?fit=max\&auto=format\&n=nKh6d_6A4aXFb6xD\&q=85\&s=2d4d0a4c4d948b66d06aa0b1c82df7c7) ### Adding or editing a note 1. Enter build mode on any workflow 2. Click into the overflow menu (3 dots) at the top right of any step 3. Select **Add note** (or **Edit note** if making changes to an existing note) 4. Add any text or markdown, then click **Update** ![](https://mintcdn.com/pipedream/anb6FA0wpd8jtdUB/images/4e6707a3-add_note_kvvxju.png?fit=max\&auto=format\&n=anb6FA0wpd8jtdUB\&q=85\&s=1917b7765fd3fd4068a4bf45e1cf8c24) ![](https://mintcdn.com/pipedream/anb6FA0wpd8jtdUB/images/5bb75ea1-image.gif?s=01ade3493a890a0ea452ca9f73134064) ### Showing notes Any step that has a note will have a **Note** section in the top panel in the editor pane. ![](https://mintcdn.com/pipedream/nKh6d_6A4aXFb6xD/images/fb8c1e04-image.png?fit=max\&auto=format\&n=nKh6d_6A4aXFb6xD\&q=85\&s=2d4d0a4c4d948b66d06aa0b1c82df7c7) ### Current limitations * Step notes are only accessible in Build mode, not in the Inspector. # Workflow Development Source: https://pipedream.com/docs/workflows/quickstart > [!WARNING] > > **Workflows and String are shutting down on March 31, 2027.** [Learn more](/docs/workflows) Sign up for a [free Pipedream account](https://pipedream.com/auth/signup) (no credit card required) and complete this quickstart guide to learn the basic patterns for workflow development: **1. Create a project** Workflows must be created in **Projects**. Projects make it easy to organize your workflows and collaborate with your team. Go to [https://pipedream.com/projects](https://pipedream.com/projects) and click on **Create Project**. ![](https://mintcdn.com/pipedream/NF77kliJSewMqg65/images/0383dce2-image.png?fit=max\&auto=format\&n=NF77kliJSewMqg65\&q=85\&s=4187df594b32e90d9429e9017f5230b8) Next, enter a project name and click **Create Project**. For this example, we’ll name our project **Getting Started**. You may also click the icon to the right to generate a random project name. ![](https://mintcdn.com/pipedream/nKh6d_6A4aXFb6xD/images/f69659f5-image.png?fit=max\&auto=format\&n=nKh6d_6A4aXFb6xD\&q=85\&s=81e63dfa892ce9a3844bbe71ada12dd5) > [!NOTE] > > [Configure GitHub Sync](/docs/workflows/git/) for projects to enable git-based version control and unlock the ability to develop in branches, commit to or pull changes from GitHub, view diffs, create PRs and more. **2. Create a workflow** After the project is created, use the **New** button to create a new workflow. ![](https://mintcdn.com/pipedream/xnRKrRxEtt3vxd6I/images/d1a8e34a-image.png?fit=max\&auto=format\&n=xnRKrRxEtt3vxd6I\&q=85\&s=72e23ed588f44755fa7f89402392fc39) Name the workflow and click **Create Workflow** to use the default settings. For this example, we’ll name the workflow **Pipedream Quickstart**. ![](https://mintcdn.com/pipedream/NF77kliJSewMqg65/images/080b4cd4-image.png?fit=max\&auto=format\&n=NF77kliJSewMqg65\&q=85\&s=3cfb2cffc7134b232b9875c0f4633721) **3. Add an HTTP / Webhook trigger** Next, Pipedream will launch the workflow builder and prompt you to add a trigger. ![](https://mintcdn.com/pipedream/anb6FA0wpd8jtdUB/images/704d32fb-image.png?fit=max\&auto=format\&n=anb6FA0wpd8jtdUB\&q=85\&s=4d606457eb93ff0a6b3cf054e5b9f009) Clicking the trigger opens a new menu to select the trigger. For this example, select **New HTTP / Webhook Requests**. ![](https://mintcdn.com/pipedream/NF77kliJSewMqg65/images/1561da86-image.png?fit=max\&auto=format\&n=NF77kliJSewMqg65\&q=85\&s=193757b46d7afa227cbf407dc622599f) Click **Save and continue** in the step editor on the right to accept the default settings. ![](https://mintcdn.com/pipedream/anb6FA0wpd8jtdUB/images/536311b8-image.png?fit=max\&auto=format\&n=anb6FA0wpd8jtdUB\&q=85\&s=4987e7681d9d2041553947aa51f2dd40) Pipedream will generate a unique URL to trigger this workflow. Once your workflow is deployed, your workflow will run on every request to this URL. ![](https://mintcdn.com/pipedream/xnRKrRxEtt3vxd6I/images/c3730ea2-image.png?fit=max\&auto=format\&n=xnRKrRxEtt3vxd6I\&q=85\&s=bf2f3cb6936fa1d81d29444f86e56dc2) **4. Generate a test event** Next, generate a test event to help you build the workflow. > [!NOTE] > > The test event will be used to provide autocomplete suggestion as you build your workflow. The data will also be used when testing later steps. You may generate or select a different test event at any time when building a workflow. For this example, let’s use the following test event data: ```json theme={null} { "message": "Pipedream is awesome!" } ``` Pipedream makes it easy to generate test events for your HTTP trigger. Click on **Generate Test Event** to open the HTTP request builder. Copy and paste the JSON data above into the **Raw Request Body** field and click **Send HTTP Request**. ![](https://mintcdn.com/pipedream/grEzwYhEB2vZSwGw/images/925ee912-image.png?fit=max\&auto=format\&n=grEzwYhEB2vZSwGw\&q=85\&s=09dd966c51cdd477bcd20d6b1bf3ae18) Pipedream will automatically select and display the contents of the selected event. Validate that the `message` was received as part the event `body`. ![](https://mintcdn.com/pipedream/h8oodpUDiyR1Ssvt/images/47ea0e36-image.png?fit=max\&auto=format\&n=h8oodpUDiyR1Ssvt\&q=85\&s=148aaaa6654f5851c546b67c22974216) > [!NOTE] > > You may also send live data to the unique URL for your workflow using your favorite HTTP tool or by running a `cURL` command, e.g., > > ```bash theme={null} > curl -d '{"message": "Pipedream is awesome!"}' \ > -H "Content-Type: application/json" \ > YOUR_ENDPOINT_URL > ``` **5. Enrich trigger data using Node.js and npm** Before we send data to Google Sheets, let’s use the npm [`sentiment`](https://www.npmjs.com/package/sentiment) package to generate a sentiment score for our message. To do that, click **Continue** or the **+** button. ![](https://mintcdn.com/pipedream/NF77kliJSewMqg65/images/2175294e-image.png?fit=max\&auto=format\&n=NF77kliJSewMqg65\&q=85\&s=8f3d51045c578afd01d85b8d99a30c14) That will open the **Add a step** menu. Select **Run custom code**. ![](https://mintcdn.com/pipedream/grEzwYhEB2vZSwGw/images/794dfad9-image.png?fit=max\&auto=format\&n=grEzwYhEB2vZSwGw\&q=85\&s=7f0a6a2479ae38134e73936e982cd3c5) Pipedream will add a Node.js code step to the workflow. ![](https://mintcdn.com/pipedream/h8oodpUDiyR1Ssvt/images/3ceefd01-image.png?fit=max\&auto=format\&n=h8oodpUDiyR1Ssvt\&q=85\&s=26ed942e3ad01b838a7974a79815e8f7) Rename the step to **sentiment**. ![](https://mintcdn.com/pipedream/Acz4Z1ch6TM7-aI8/images/9b8b2433-image.gif?s=d9526fb92f6b57818d181a19f636e997) Next, add the following code to the code step: ```javascript theme={null} import Sentiment from "sentiment" export default defineComponent({ async run({ steps, $ }) { let sentiment = new Sentiment() return sentiment.analyze(steps.trigger.event.body.message) }, }) ``` This code imports the npm package, passes the message we sent to our trigger to the `analyze()` function by referencing `steps.trigger.event.body.message` and then returns the result. > [!NOTE] > > To use any npm package on Pipedream, just `import` it. There’s no `npm install` or `package.json` required. > [!NOTE] > > Any data you `return` from a step is exported so it can be inspected and referenced it in future steps via the `steps` object. In this example, return values will be exported to `steps.sentiment.$return_value` because we renamed the step to **sentiment** . Your code step should now look like the screenshot below. To run the step and test the code, click the **Test** button. ![](https://mintcdn.com/pipedream/grEzwYhEB2vZSwGw/images/90fb2b20-image.png?fit=max\&auto=format\&n=grEzwYhEB2vZSwGw\&q=85\&s=c972979095a2aea77cbc6c7e1e887912) You should see the results of the sentiment analysis when the test is complete. ![](https://mintcdn.com/pipedream/NF77kliJSewMqg65/images/242558b3-image.png?fit=max\&auto=format\&n=NF77kliJSewMqg65\&q=85\&s=077b4437043c31dc1e680b8a7f37d39f) > [!NOTE] > > When you **Test** a step, only the current step is executed. Use the caret to test different ranges of steps including the entire workflow. **6. Save data to Google Sheets** Next, create a Google Sheet and add **Timestamp**, **Message** and **Sentiment Score** to the first row. These labels act as our column headers and will help us configure the Google Sheets step of the workflow. ![](https://mintcdn.com/pipedream/grEzwYhEB2vZSwGw/images/8e48dec3-image.png?fit=max\&auto=format\&n=grEzwYhEB2vZSwGw\&q=85\&s=55ebd2b3a8922d118b4b264f00b3d205) Next, let’s add a step to the workflow to send the data to Google Sheets. First, click **+** after the `sentiment` code step and select the **Google Sheets** app. ![](https://mintcdn.com/pipedream/Acz4Z1ch6TM7-aI8/images/bd45e785-image.png?fit=max\&auto=format\&n=Acz4Z1ch6TM7-aI8\&q=85\&s=f35a7ccb07affcb14db6d01bf72f0f19) Then select the **Add Single Row** action. ![](https://mintcdn.com/pipedream/NF77kliJSewMqg65/images/18ee59cb-image.png?fit=max\&auto=format\&n=NF77kliJSewMqg65\&q=85\&s=f184f756b896425dd3e087ea2447e38a) Click to connect you Google Sheets account to Pipedream (or select it from the dropdown if you previously connected an account). ![](https://mintcdn.com/pipedream/NF77kliJSewMqg65/images/0d484497-image.png?fit=max\&auto=format\&n=NF77kliJSewMqg65\&q=85\&s=4dd92e0c0d7c8f8afd49a0458cdf65b3) Pipedream will open Google’s sign in flow in a new window. Sign in with the account you want to connect. ![](https://mintcdn.com/pipedream/Acz4Z1ch6TM7-aI8/images/a1b32d55-image.png?fit=max\&auto=format\&n=Acz4Z1ch6TM7-aI8\&q=85\&s=115007315cfbfa478c363f50d7b3f462) > [!WARNING] > > If prompted, you must check the box for Pipedream to **See, edit, create and delete all of your Google Drive files**. These permissions are required for configure and use the pre-built actions for Google Sheets. ![](https://mintcdn.com/pipedream/Acz4Z1ch6TM7-aI8/images/9d20b830-image.png?fit=max\&auto=format\&n=Acz4Z1ch6TM7-aI8\&q=85\&s=c2c015fc60f03ae5d1183d9fa95ae844) Learn more about Pipedream’s [privacy and security policy](/docs/privacy-and-security/). When you complete connecting your Google account, the window should close and you should return to Pipedream. Your connected account should automatically be selected. Next, select your spreadsheet from the dropdown menu: ![](https://mintcdn.com/pipedream/grEzwYhEB2vZSwGw/images/8de3f441-image.png?fit=max\&auto=format\&n=grEzwYhEB2vZSwGw\&q=85\&s=7008b9f06131e615160245245abd9a09) Then select the sheet name (the default sheet name in Google Sheets is **Sheet1**): ![](https://mintcdn.com/pipedream/grEzwYhEB2vZSwGw/images/76dc4441-image.png?fit=max\&auto=format\&n=grEzwYhEB2vZSwGw\&q=85\&s=e4c82ce66a27f656877b8636fe0aa837) Next, select if the spreadsheet has headers in the first row. When a header row exists, Pipedream will automatically retrieve the header labels to make it easy to enter data (if not, you can manually construct an array of values). Since the sheet for this example contains headers, select **Yes**. ![](https://mintcdn.com/pipedream/h8oodpUDiyR1Ssvt/images/4a8514fa-image.png?fit=max\&auto=format\&n=h8oodpUDiyR1Ssvt\&q=85\&s=84d161fadce2bc97ecd5ca9c0ac3ff1f) Pipedream will retrieve the headers and generate a form to enter data in your sheet: ![](https://mintcdn.com/pipedream/anb6FA0wpd8jtdUB/images/6fc82996-image.png?fit=max\&auto=format\&n=anb6FA0wpd8jtdUB\&q=85\&s=38e8b583e175aa2edb9111f0b4004b09) First, let’s use the object explorer to pass the timestamp for the workflow event as the value for the first column. This data can be found in the context object on the trigger. When you click into the **Timestamp** field, Pipedream will display an object explorer to make it easy to find data. Scroll or search to find the `ts` key under `steps.trigger.context`. ![](https://mintcdn.com/pipedream/Acz4Z1ch6TM7-aI8/images/b4bc3560-image.png?fit=max\&auto=format\&n=Acz4Z1ch6TM7-aI8\&q=85\&s=41967316a6ad49fbeee57c832273db25) Click **select path** to insert a reference to `steps.trigger.context.ts`: ![](https://mintcdn.com/pipedream/anb6FA0wpd8jtdUB/images/50fe1675-image.png?fit=max\&auto=format\&n=anb6FA0wpd8jtdUB\&q=85\&s=0a59a26b5746fa29ac09b4bda79ce2ad) Next, let’s use autocomplete to enter a value for the **Message** column. First, add double braces `{{` — Pipedream will automatically add the closing braces `}}`. Then, type `steps.trigger.event.body.message` between the pairs of braces. Pipedream will provide autocomplete suggestions as you type. Press **Tab** to use a suggestion and then click `.` to get suggestions for the next key. The final value in the **Message** field should be `steps.trigger.event.body.message`. ![](https://mintcdn.com/pipedream/grEzwYhEB2vZSwGw/images/901a453e-image.png?fit=max\&auto=format\&n=grEzwYhEB2vZSwGw\&q=85\&s=7fa20ba34dfa23f27f3c76e171cbca1a) Finally, let’s copy a reference from a previous step. Click on the `sentiment` step to open the results in the editor: ![](https://mintcdn.com/pipedream/Acz4Z1ch6TM7-aI8/images/b2fbad9c-image.png?fit=max\&auto=format\&n=Acz4Z1ch6TM7-aI8\&q=85\&s=32d214dbbd794ec5b935679d0b7d28db) Next, click the **Copy Path** link next to the score. ![](https://mintcdn.com/pipedream/h8oodpUDiyR1Ssvt/images/2d48abd7-image.png?fit=max\&auto=format\&n=h8oodpUDiyR1Ssvt\&q=85\&s=5c63dcedb8b962f7e43b185b2d756993) Click the Google Steps step or click the open tab in the editor. Then paste the value into the **Sentiment Score** field — Pipedream will automatically wrap the reference in double braces `{{ }}`. ![](https://mintcdn.com/pipedream/h8oodpUDiyR1Ssvt/images/2ea2943d-image.png?fit=max\&auto=format\&n=h8oodpUDiyR1Ssvt\&q=85\&s=022371a0ec1f76239d89078ff9d2b0c9) Now that the configuration is complete, click **Test** to validate the configuration for this step. When the test is complete, you will see a success message and a summary of the action performed: ![](https://mintcdn.com/pipedream/nKh6d_6A4aXFb6xD/images/e5d42c23-image.png?fit=max\&auto=format\&n=nKh6d_6A4aXFb6xD\&q=85\&s=22deaa4c5114404688ee23eb9f7b1cd2) If you load your spreadsheet, you should see the data Pipedream inserted. ![](https://mintcdn.com/pipedream/Acz4Z1ch6TM7-aI8/images/a77d4612-image.png?fit=max\&auto=format\&n=Acz4Z1ch6TM7-aI8\&q=85\&s=43d029fd635a4aafeaed957c5dfb25af) Next, return to your workflow and click **Deploy** to run your workflow on every trigger event. ![](https://mintcdn.com/pipedream/h8oodpUDiyR1Ssvt/images/2eb1e11a-image.png?fit=max\&auto=format\&n=h8oodpUDiyR1Ssvt\&q=85\&s=53170ff2f60822ba83af7f4fac7a9d78) When your workflow deploys, you will be redirected to the **Inspector**. Your workflow is now live. ![](https://mintcdn.com/pipedream/NF77kliJSewMqg65/images/1f60b1ec-image.png?fit=max\&auto=format\&n=NF77kliJSewMqg65\&q=85\&s=1f8cc72dbbf5a60a7e1e70b891ad4bff) To validate your workflow is working as expected, send a new request to your workflow: You can edit and run the following `cURL` command: ```bash theme={null} curl -d '{ "message": "Pipedream is awesome!" }' \ -H "Content-Type: application/json" \ YOUR-TRIGGER-URL ``` The event will instantly appear in the event list. Select it to inspect the workflow execution. ![](https://mintcdn.com/pipedream/anb6FA0wpd8jtdUB/images/6b9cb011-image.png?fit=max\&auto=format\&n=anb6FA0wpd8jtdUB\&q=85\&s=f4f43e94a144aee0899395174d0fcf34) Finally, you can return to Google Sheets to validate that the new data was automatically inserted. ![](https://mintcdn.com/pipedream/NF77kliJSewMqg65/images/0fe3c2b4-image.png?fit=max\&auto=format\&n=NF77kliJSewMqg65\&q=85\&s=89138681987b7470880fef5a95e8735c) ## Next Steps Congratulations! You completed the quickstart and should now understand the basic patterns for workflow development. Next, try creating your own [workflows](/docs/workflows/building-workflows/), learn how to [build and run workflows for your users](/docs/connect/workflows/) or check out the rest of the [docs](/docs/)! # Workflow Security Best Practices Source: https://pipedream.com/docs/workflows/security-best-practices > [!WARNING] > > **Workflows and String are shutting down on March 31, 2027.** [Learn more](/docs/workflows) Pipedream implements a range of [privacy and security measures](/docs/privacy-and-security/) meant to secure resources and protect your data from unauthorized access. But since Pipedream [workflows](/docs/workflows/building-workflows/), [event sources](/docs/workflows/building-workflows/triggers/), and other resources can run any code and process any event data, you also have a responsibility to ensure you handle that code and data securely. We’ve outlined a handful of (non-exhaustive) best practices for that below. ## Store secrets as Pipedream connected accounts or environment variables Never store secrets like API keys directly in code. These secrets should be stored in one of two ways: * [If Pipedream integrates with the app](https://pipedream.com/apps), use [connected accounts](/docs/apps/connected-accounts/) to link your apps / APIs. * If you need to store credentials for an app Pipedream doesn’t support, or you need to store arbitrary configuration data, use [environment variables](/docs/workflows/environment-variables/). Read more about how Pipedream secures connected accounts / environment variables [here](/docs/privacy-and-security/#third-party-oauth-grants-api-keys-and-environment-variables). ## Deliver data to Pipedream securely Always send data over HTTPS to Pipedream endpoints. ## Send data out of Pipedream securely When you connect to APIs in a workflow, or deliver data to third-party destinations, encrypt that data in transit. For example, use HTTPS endpoints when sending HTTP traffic to third parties. ## Require authorization for HTTP triggers HTTP triggers are public by default, and require no authorization or token to invoke. For many workflows, you should [configure authorization](/docs/workflows/building-workflows/triggers/#authorizing-http-requests) to ensure that only authorized parties can invoke your HTTP trigger. For third-party services like webhooks, that authorize requests using their own mechanism, use the [Validate Webhook Auth action](https://pipedream.com/apps/http/actions/validate-webhook-auth). This supports common auth options, and you don’t have to write any code to configure it. ## Validate signatures for incoming events, where available Many apps pass a **signature** with event data delivered via webhooks (or other push delivery systems). The signature is an opaque value computed from the incoming event data and a secret that only you and the app know. When you receive the event, you can validate the signature by computing it yourself and comparing it to the signature sent by the app. If the two values match, it verifies that the app sent the data, and not some third party. Signatures are specific to the app sending the data, and the app should provide instructions for signature validation. **Not all apps compute signatures, but when they do, you should always verify them**. When you use a Pipedream [event source](/docs/workflows/building-workflows/triggers/) as your workflow trigger, Pipedream should verify the signature for you. You can always [audit the code behind the event source](/docs/workflows/security-best-practices/#audit-code-you-use-within-a-workflow) to confirm this, and suggest further security improvements that you find. See [Stripe’s signature docs](https://stripe.com/webhooks/signatures) for a real-world example. Pipedream’s Stripe event source [verifies this signature for you](https://github.com/PipedreamHQ/pipedream/blob/bb1ebedf8cbcc6f1f755a8878c759522b8cc145b/components/stripe/sources/custom-webhook-events/custom-webhook-events.js#L49). ## Audit code you use within a workflow Pipedream workflows are just code. Pipedream provides prebuilt triggers and actions that facilitate common use cases, but these are written and run as code within your workflow. You can examine and modify this code in any way you’d like. This also means that you can audit the code for any triggers or actions you use in your workflow. We encourage this as a best practice. Even code authored by Pipedream can be improved, and if you notice a vulnerability or other issue, you can submit a patch or raise an issue [in our GitHub repo](https://github.com/PipedreamHQ/pipedream/tree/master/components). ## Update third-party packages When you use code steps or build your own components, you can include any third-party package supported in the runtime. It's your responsibility to keep these packages up-to-date and review them for vulnerabilities. If you import a package and don't specify a version, Pipedream will download the latest release each time you update the workflow. So you can always update your workflow to update packages. You can also specify a version string on import to fix to a specific version (if, for example, you need to revert to a known working version before a fix is released in latest). Before you use a new package in your workflow, review its page on npm and its repo, if available. Good packages should have recent updates. The package should have a healthy number of downloads and related activity (like GitHub stars), and the package author should be responsive to issues raised by the community. If you don’t observe these signals, be wary of using the package in your workflow. ## Limit what you log and return from steps [Pipedream retains a limited history of event data](/docs/workflows/limits/#event-history) and associated logs for event sources and workflows. But if you cannot log specific data in Pipedream for privacy / security reasons, or if you want to limit risk, remember that **Pipedream only stores data returned from or logged in steps**. Specifically, Pipedream will only store: * The event data emitted from event sources, and any `console` logs / errors * The event data that triggers your workflow, any `console` logs / errors, [step exports](/docs/workflows/overview/#step-exports), and any data included in error stack traces. Variables stored in memory that aren’t logged or returned from steps are not included in Pipedream logs. Since you can modify any code in your Pipedream workflow, if you want to limit what gets logged from a Pipedream action or other step, you can adjust the code accordingly, removing any logs or step exports. # Workflow Troubleshooting Source: https://pipedream.com/docs/workflows/troubleshooting > [!WARNING] > > **Workflows and String are shutting down on March 31, 2027.** [Learn more](/docs/workflows) This doc describes some common solutions for fixing issues with a specific workflow, event source, or workflow error. For issues with [pipedream.com](https://pipedream.com) or Pipedream Connect, see the [troubleshooting guide](/docs/troubleshooting/). ## How do I share my workflow with Support? First, navigate to your **Project Settings** and share your project with Pipedream Support. When filling out the request form at [https://pipedream.com/support](https://pipedream.com/support), please provide detailed information along with the URL from your browser’s address bar, which should look something like: ``` https://pipedream.com/@yourworkspace/projects/proj_abc123/test-workflow-p_abc123/inspect ``` ## Workflows ### Where do I find my workflow’s ID? Open [https://pipedream.com](https://pipedream.com) and visit your workflow. Copy the URL that appears in your browser’s address bar. For example: ``` https://pipedream.com/@yourworkspace/projects/proj_abc123/test-workflow-p_abc123/inspect ``` Your workflow’s ID is the value that starts with `p_`. In this example: `p_abc123`. ### My workflow isn’t working If you’re encountering a specific issue in a workflow, try the following steps, checking to see if they fix the problem: 1. Make a trivial change to your workflow, and **Deploy** your workflow again. 2. Try searching [the community](https://pipedream.com/support) or [the `pipedream` GitHub repo](https://github.com/PipedreamHQ/pipedream/issues) to see if anyone else has solved the same issue. If you’re still seeing the issue after trying these steps, please reach out in [the community](https://pipedream.com/support). ### Error in workflow If you see a generic `Error in workflow` when invoking a webhook-triggered workflow, follow these steps to resolve the issue: 1. Check if your trigger is configured to return a custom HTTP response. 2. Confirm that your workflow is [returning an HTTP response](/docs/workflows/building-workflows/triggers/#customizing-the-http-response) in *every* situation, e.g., by using `$.respond()`. ### How do I invoke another workflow? We provide a [Trigger Workflow](https://pipedream.com/apps/helper-functions/actions/trigger-workflow) action in the [Helper Functions](https://pipedream.com/apps/helper-functions) app. [See more here](/docs/workflows/building-workflows/code/nodejs/#invoke-another-workflow). Another option is to make an HTTP request to a Pipedream HTTP webhook trigger. ## Triggers ### Why is my trigger not saving? If your trigger continuously spins without saving, it might be processing too much data at once or taking longer than expected. This issue often occurs with polling database-related triggers (e.g., PostgreSQL, Snowflake, Notion Databases). To resolve it, try reducing the volume of data fetched, e.g., by limiting the number of rows returned in your query. ### Why is my trigger not emitting events? First, look at your [trigger logs](/docs/workflows/troubleshooting/#where-can-i-find-the-trigger-logs) and check for any errors there. Verify that it has been running, whether on a new webhook event or at the configured polling interval. If your trigger operates on a large amount of data at once, it may fail to log the execution and you won’t see any new events and logs. Try polling more frequently or limiting the number of records being fetched in the API request or Database query. #### Webhook-based instant sources These sources will get triggered immediately. But because events come in in real-time, most will **not** automatically fetch historical events upon creation. To surface test events in your workflow while building, you’ll need to generate an eligible event in the selected app. For example, if you’ve configured the “[Message Updates (Instant)](https://pipedream.com/apps/telegram-bot-api/triggers/message-updates) Telegram source, you’ll need to send a message in the Telegram account you’ve selected in order for an event to appear. ![](https://mintcdn.com/pipedream/Acz4Z1ch6TM7-aI8/images/aa684d77-webhook-triggers-select-event_qj7nlp.png?fit=max\&auto=format\&n=Acz4Z1ch6TM7-aI8\&q=85\&s=e953589700d95a09169cf2ac4c43010f) Select an event Sources for apps like [Telegram](https://pipedream.com/apps/telegram-bot-api/triggers/message-updates) and [Google Sheets](https://pipedream.com/apps/google-sheets/triggers/new-row-added) use webhooks and get triggered immediately. #### Timer-based polling sources These sources will fetch new events on a regular interval, based on a schedule you specify in the trigger configuration. ![](https://mintcdn.com/pipedream/Acz4Z1ch6TM7-aI8/images/af567e68-polling-triggers-timer_ooz26c.png?fit=max\&auto=format\&n=Acz4Z1ch6TM7-aI8\&q=85\&s=da0729bf444ba47cd16c9b1ebb03ba9c) Configure polling timer In most cases, Pipedream will automatically fetch recent historical events to help enable easier workflow development. Sources for apps like [Twitter](https://pipedream.com/apps/twitter/triggers/search-mentions) and [Spotify](https://pipedream.com/apps/spotify/triggers/new-playlist) require we poll their endpoints in order to fetch new events. ### Where do I find my event source’s ID? Open [https://pipedream.com/sources](https://pipedream.com/sources) and click on your event source. Copy the URL that appears in your browser’s address bar. For example: ``` https://pipedream.com/sources/dc_abc123 ``` Your source’s ID is the value that starts with `dc_`. In this example: `dc_abc123`. ### Where can I find the trigger logs? Find your [source](/docs/workflows/troubleshooting/#where-do-i-find-my-event-sources-id), then click on the logs or visit this URL: ``` https://pipedream.com/sources/dc_abc123/logs ``` ### Why is my trigger paused? Pipedream automatically disables sources with a 100% error rate in the past 5 days for accounts on the Free plan. To troubleshoot, you can look at the errors in the [source](/docs/workflows/building-workflows/triggers/) logs, and may need to reconnect your account and re-enable the source for it to run again. If the issue persists, please reach out in [the community](https://pipedream.com/support). ## Warnings Pipedream displays warnings below steps in certain conditions. These warnings do not stop the execution of your workflow, but can signal an issue you should be aware of. ### Code was still running when the step ended This error occurs when Promises or asynchronous code is not properly finished before the next step begins execution. See the [Asynchronous section of the Node.js documentation](/docs/workflows/building-workflows/code/nodejs/async/#the-problem) for more details. ### Undeployed changes — You have made changes to this workflow. Deploy the latest version from the editor On workflows that are not [synced with GitHub](/docs/workflows/git/), you may notice the following warning at the top of your workflow: > **Undeployed changes** — You have made changes to this workflow. Deploy the latest version from the editor This means that you’ve made some changes to your workflow that you haven’t yet deployed. To see a diff of what’s changed, we recommend [enabling GitHub sync](/docs/workflows/git/), where you’ll get a full commit history of changes made to your workflows, synced to your own GitHub repo. ## Errors ### Limit Exceeded Errors Pipedream sets [limits](/docs/workflows/limits/) on runtime, memory, and other execution-related properties. If you exceed these limits, you’ll receive one of the errors below. [See the limits doc](/docs/workflows/limits/) for details on specific limits. ### Quota Exceeded On the Free tier, Pipedream imposes a limit on the [daily credits](/docs/workflows/limits/#execution-credits) across all workflows and sources. If you hit this limit, you’ll see a **Quota Exceeded** error. Paid plans have no credit limit. [Upgrade here](https://pipedream.com/pricing). ### Runtime Quota Exceeded You **do not** use credits testing workflows, but workspaces on the **Free** plan are limited to 750 of test runtime per day. If you exceed this limit when testing in the builder, you’ll see a **Runtime Quota Exceeded** error. ### Timeout Event sources and workflows have a [default time limit on a given execution](/docs/workflows/limits/#time-per-execution). If your code exceeds that limit, you may encounter a **Timeout** error. To address timeouts, you’ll either need to: 1. Figure out why your code is running for longer than expected. It’s important to note that **timeouts are not an issue with Pipedream — they are specific to your workflow**. Often, you’re making a request to a third party API that doesn’t respond in the time you expect, or you’re processing a large amount of data in your workflow, and it doesn’t complete before you hit the execution limit. 2. If it’s expected that your code is taking a long time to run, you can raise the execution limit of a workflow in your [workflow’s settings](/docs/workflows/building-workflows/settings/#execution-timeout-limit). If you need to change the execution limit for an event source, please [reach out to our team](https://pipedream.com/support/). ### Out of Memory Pipedream [limits the default memory](/docs/workflows/limits/#memory) available to workflows and event sources. If you exceed this memory, you’ll see an **Out of Memory** error. **You can raise the memory of your workflow [in your workflow’s Settings](/docs/workflows/building-workflows/settings/#memory)**. ⚠️ Even though the event may appear to have stopped at the trigger, the workflow steps were executed. We currently are unable to pinpoint the exact step where the OOM error occurred. This can happen for two main reasons: 1. Even for small files or objects, avoid loading the entire content into memory (e.g., by saving it in a variable). Always stream files to/from disk to prevent potential memory leaks, using a [technique like this](/docs/workflows/building-workflows/code/nodejs/http-requests/#download-a-file-to-the-tmp-directory). 2. When you have many steps in your Pipedream workflow. When your workflow runs, Pipedream runs a separate process for each step in your workflow. That incurs some memory overhead. Typically this happens when you have more than 8-10 steps. When you see an OOM error on a workflow with many steps, try increasing the memory. ### Rate Limit Exceeded Pipedream limits the number of events that can be processed by a given interface (e.g. HTTP endpoints) during a given interval. This limit is most commonly reached for HTTP interfaces - see the [QPS limits documentation](/docs/workflows/limits/#qps-queries-per-second) for more information on that limit. **This limit can be raised for HTTP endpoints**. [Reach out to our team](https://pipedream.com/support/) to request an increase. ### Request Entity Too Large By default, Pipedream limits the size of incoming HTTP payloads. If you exceed this limit, you’ll see a **Request Entity Too Large** error. Pipedream supports two different ways to bypass this limit. Both of these interfaces support uploading data up to `5TB`, though you may encounter other [platform limits](/docs/workflows/limits/). * You can send large HTTP payloads by passing the `pipedream_upload_body=1` query string or an `x-pd-upload-body: 1` HTTP header in your HTTP request. [Read more here](/docs/workflows/building-workflows/triggers/#sending-large-payloads). * You can upload multiple large files, like images and videos, using the [large file upload interface](/docs/workflows/building-workflows/triggers/#large-file-support). ### Function Payload Limit Exceeded The total size of `console.log()` statements, [step exports](/docs/workflows/overview/#step-exports), and the original event data sent to workflows and sources cannot exceed a combined size of 6MB. If you produce logs or step exports larger than this - for example, passing around large API responses, CSVs, or other data - you may encounter a **Function Payload Limit Exceeded** in your workflow. Often, this occurs when you pass large data between steps using [step exports](/docs/workflows/overview/#step-exports). You can avoid this error by [writing that data to the `/tmp` directory](/docs/workflows/building-workflows/code/nodejs/working-with-files/#writing-a-file-to-tmp) in one step, and [reading the data into another step](/docs/workflows/building-workflows/code/nodejs/working-with-files/#reading-a-file-from-tmp), which avoids the use of step exports and should keep you under the payload limit. Pipedream also compresses the function payload from your workflow, which can yield roughly a 2x-3x increase in payload size (somewhere between `12MB` and `18MB`), depending on the data. ### JSON Nested Property Limit Exceeded Working with nested JavaScript objects that have more than 256 nested objects will trigger a **JSON Nested Property Limit Exceeded** error. Often, objects with this many nested objects result from a programming error that explodes the object in an unexpected way. Please confirm the code you’re using to convert data into an object is correctly parsing the object. ### Event Queue Full Workflows have a maximum event queue size when using concurrency and throttling controls. If the number of unprocessed events exceeds the [maximum queue size](/docs/workflows/building-workflows/settings/concurrency-and-throttling/#increasing-the-queue-size-for-a-workflow), you may encounter an **Event Queue Full** error. [Paid plans](https://pipedream.com/pricing) can [increase their queue size up to 10,000](/docs/workflows/building-workflows/settings/concurrency-and-throttling/#increasing-the-queue-size-for-a-workflow) for a given workflow. ### Credit Budget Exceeded Credit Budgets are configurable limits on your credit usage at the account or workspace level. If you’re receiving this warning on a source or workflow, this means your allocated Credit Budget has been reached for the defined period. You can increase this limit at any time in the [billing area of your settings](https://pipedream.com/settings/billing). ### Pipedream Internal Error A `Pipedream Internal Error` is thrown whenever there’s an exception during the building or executing of a workflow that’s outside the scope of the code for the individual components (steps or actions). There are a few known ways this can be caused and how to solve them. ## Out of date actions or sources Pipedream components are updated continuously. But when new versions of actions and sources are published to the Pipedream Component Registry, your workflows are not updated by default. [An **Update** prompt](/docs/workflows/building-workflows/actions/#updating-actions-to-the-latest-version) is shown in the in the top right of the action if the component has a new version available. Sources do not feature an update button at this time, to receive the latest version, you’ll need to create a new source, then attach it to your workflow. ### New package versions issues If an npm or PyPI package throws an error during either the building of the workflow or during it’s execution, it may cause a `Pipedream Internal Error`. By default, Pipedream automatically updates npm and PyPI packages to the latest version available. This is designed to make sure your workflows receive the latest package updates automatically. However, if a new package version includes bugs, or changes it’s export signature, then this may cause a `Pipedream Internal Error`. You can potentially fix this issue by downgrading packages by pinning in [your Node.js](/docs/workflows/building-workflows/code/nodejs/#pinning-package-versions) or [Python code steps](/docs/workflows/building-workflows/code/python/#pinning-package-versions) to the last known working version. Alternatively, if the error is due to a major release that changes the import signature of a package, then modifying your code to match the signature may help. ⚠️ Some Pipedream components use npm packages Some Pipedream components like pre-built [actions and triggers for Slack use npm packages](https://github.com/PipedreamHQ/pipedream/blob/9aea8653dc65d438d968971df72e95b17f52d51c/components/slack/slack.app.mjs#L1). In order to downgrade these packages, you’ll need to fork the Pipedream GitHub repository and deploy your own changes to test them privately. Then you can [contribute the fix back into the main Pipedream Repository](/docs/components/contributing/#contribution-process). ### Packages consuming all available storage A `Pipedream Internal Error` could be the result of npm or PyPI packages using the entirety of the workflow’s storage capacity. The `lodash` library for example will import the entire package if individual modules are imported with this type of signature: ```javascript theme={null} // This style of import will cause the entire lodash package to be installed, not just the pick module import { pick } from "lodash" ``` Instead, use the specific package that exports the `pick` module alone: ```javascript theme={null} // This style imports only the pick module, since the lodash.pick package only contains this module import pick from "lodash.pick" ``` ## Is there a way to replay workflow events programmatically? Not via the API, but you can bulk select and replay failed events using the [Event History](/docs/workflows/event-history/). ## How do I store and retrieve data across workflow executions? If you operate your own database or data store, you can connect to it directly in Pipedream. Pipedream also operates a [built-in key-value store](/docs/workflows/data-management/data-stores/) that you can use to get and set data across workflow executions and different workflows. ## How do I delay the execution of a workflow? Use Pipedream’s [built-in Delay actions](/docs/workflows/building-workflows/control-flow/delay/) to delay a workflow at any step. ## How can my workflow run faster? Here are a few things that can help your workflow execute faster: 1. **Increase memory:** Increase your [workflow memory](/docs/workflows/building-workflows/settings/#memory) to at least 512 MB. Raising the memory limit will proportionally increase CPU resources, leading to improved performance and reduced latency. 2. **Return static HTTP responses:** If your workflow is triggered by an HTTP source, return a [static HTTP response](/docs/workflows/building-workflows/triggers/#http-responses) directly from the trigger configuration. This ensures the HTTP response is sent to the caller immediately, before the rest of the workflow steps are executed. 3. **Simplify your workflow:** Reduce the number of [steps](/docs/workflows/overview/#code-actions) and [segments](/docs/workflows/building-workflows/control-flow/#workflow-segments) in your workflow, combining multiple steps into one, if possible. This lowers the overhead involved in managing step execution and exports. 4. **Activate warm workers:** Use [warm workers](/docs/workflows/building-workflows/settings/#eliminate-cold-starts) to reduce the startup time of workflows. Set [as many warm workers](/docs/workflows/building-workflows/settings/#how-many-workers-should-i-configure) as you want for high-volume traffic. ## How can I save common functions as steps? You can create your own custom triggers and actions (“components”) on Pipedream using [the Component API](/docs/components/contributing/api/). These components are private to your account and can be used in any workflow. You can also publish common functions in your own package on a public registry like [npm](https://www.npmjs.com/) or [PyPI](https://pypi.org/). ## Is Puppeteer supported in Pipedream? Yes, see [our Puppeteer docs](/docs/workflows/building-workflows/code/nodejs/browser-automation/#puppeteer) for more detail. ## Is Playwright supported in Pipedream? Yes, see [our Playwright docs](/docs/workflows/building-workflows/code/nodejs/browser-automation/#playwright) for more detail. # Virtual Private Clouds Source: https://pipedream.com/docs/workflows/vpc > [!WARNING] > > **Workflows and String are shutting down on March 31, 2027.** [Learn more](/docs/workflows) Pipedream VPCs enable you to run workflows in dedicated and isolated networks with static outbound egress IP addresses that are unique to your workspace (unlike other platforms that provide static IPs common to all customers on the platform). Outbound network requests from workflows that run in a VPC will originate from these static IP addresses, so you can whitelist access to sensitive resources (like databases and APIs) with confidence that the requests will only originate from the Pipedream workflows in your workspace. > [!NOTE] > > Looking for static egress IPs for **Connect** tool calls (action executions)? See [Virtual Private Clouds for Connect](/docs/connect/vpc/). ## Getting started ### Create a new VPC 1. Open the [Virtual Private Clouds tab](https://pipedream.com/settings/networks): ![](https://mintcdn.com/pipedream/Acz4Z1ch6TM7-aI8/images/95e7c149-CleanShot_2023-08-01_at_14.29.24_slx1a7.png?fit=max\&auto=format\&n=Acz4Z1ch6TM7-aI8\&q=85\&s=6fb62c49564665d393e229663ac4bd67) 1. Click on **New VPC** in the upper right of the page: ![](https://mintcdn.com/pipedream/h8oodpUDiyR1Ssvt/images/2ebfb428-CleanShot_2023-08-01_at_14.30.47_okdiyx.png?fit=max\&auto=format\&n=h8oodpUDiyR1Ssvt\&q=85\&s=45bc8f7932f6ef733268fa2b6b09fa37) 2. Enter a network name and click **Create**: ![](https://mintcdn.com/pipedream/anb6FA0wpd8jtdUB/images/725402b6-CleanShot_2023-08-01_at_14.03.24_smxujq.png?fit=max\&auto=format\&n=anb6FA0wpd8jtdUB\&q=85\&s=89e84af091674a7aa3447288e797e27f) 3. It may take 5-10 minutes to complete setting up your network. The status will change to **Available** when complete: ![](https://mintcdn.com/pipedream/Acz4Z1ch6TM7-aI8/images/a940c197-CleanShot_2023-08-01_at_14.04.22_ro2bgx.png?fit=max\&auto=format\&n=Acz4Z1ch6TM7-aI8\&q=85\&s=57da6e37e1218aae5e2072664f4806af) ### Run workflows within a VPC To run workflows in a VPC, check the **Run in Private Network** option in workflow settings and select the network you created. All outbound network requests for the workflow will originate from the static egress IP for the VPC (both when testing a workflow or when running the workflow in production). ![](https://mintcdn.com/pipedream/anb6FA0wpd8jtdUB/images/6b756091-CleanShot_2023-08-01_at_14.18.42_rihwff.png?fit=max\&auto=format\&n=anb6FA0wpd8jtdUB\&q=85\&s=f0ccd5974344cd3203f35713d1f89828) If you don’t see the network listed, the network setup may still be in progress. If the issue persists longer than 10 minutes, please [contact support](https://pipedream.com/support). ### Find the static outbound IP address for a VPC You can view and copy the static outbound IP address for each VPC in your workspace from the [Virtual Private Cloud settings](https://pipedream.com/settings/networks). If you need to restrict access to sensitive resources (e.g., a database) by IP address, copy this address and configure it in your application with the `/32` CIDR block. Network requests from workflows running in the VPC will originate from this address. ![](https://mintcdn.com/pipedream/xnRKrRxEtt3vxd6I/images/c142448c-CleanShot_2023-08-01_at_14.34.56_lp5jt3.png?fit=max\&auto=format\&n=xnRKrRxEtt3vxd6I\&q=85\&s=d7cf3c94bbc3ec1851bdbe5736f4117b) ## Managing a VPC To rename or delete a VPC, navigate to the [Virtual Private Cloud settings](https://pipedream.com/settings/networks) for your workspace and select the option from the menu to the right of the VPC you want to manage. ## Self-hosting and VPC peering If you’re interested in running Pipedream workflows in your own infrastructure, or configure VPC peering to allow Pipedream to communicate to resources in a private network, please reach out to our [Sales team](mailto:sales@pipedream.com). ## Limitations * Only workflows can run in VPCs (other resources like sources or data stores are not currently supported). For example, [sources](/docs/workflows/building-workflows/triggers/) cannot yet run in VPCs. * Creating a new network can take up to 5 minutes. Deploying your first workflow into a new network and testing that workflow for the first time can take up to 1 min. Subsequent operations should be as fast as normal. * VPCs only provide static IPs for outbound network requests. This feature does not provide a static IP for or otherwise restrict inbound requests. * You can’t set a default network for all new workflows in a workspace or project (you must select the network every time you create a new workflow). Please [reach out](https://pipedream.com/support) if you’re interesting in imposing controls like this in your workspace. * Workflows running in a VPC will still route specific requests routed through [the shared Pipedream network](/docs/workflows/data-management/destinations/http/#ip-addresses-for-pipedream-http-requests): * [`$.send.http()`](/docs/workflows/data-management/destinations/http/) requests * Async options requests (these are requests that are made to populate options in drop down menus for actions while a building a workflow — e.g., the option to “select a Google Sheet” when using the “add row to Google Sheets” action) ## FAQ ### Will HTTP requests sent from Node.js, Python and the HTTP request steps use the assigned static IP address? Yes, all steps that send HTTP requests from a workflow assigned to a VPC will use that VPC’s IP address to send HTTP requests. This will also include `axios`, `requests`, `fetch` or any HTTP client you prefer in your language of choice. The only exception are requests sent by `$.send.http()` or the HTTP requests used to populate async options that power props like “Select a Google Sheet” or “Select a Slack channel”. These requests will route through the [standard set of Pipedream IP addresses.](/docs/privacy-and-security/#hosting-details) ### Can a single workflow live within multiple VPCs? No, a VPC can contain many workflows, but a single workflow can only belong to one VPC. ### Can I modify my VPC’s IP address to another address? No, IP addresses are assigned to VPCs for you, and they are not changeable. ### How much will VPCs cost? VPCs are available on the **Business** plan. [Upgrade your plan here](https://pipedream.com/pricing). # Managing workspaces Source: https://pipedream.com/docs/workspaces When you sign up for Pipedream, you’ll either create a new workspace or join an existing one if you signed up from an invitation. You can create and join any number of workspaces. For example, you can create one to work alone and another to collaborate with your team. You can also start working alone, then easily add others into your existing workspace to work together on workflows you’ve already built out. Once you’ve created a new workspace, you can invite your team to create and edit workflows together, and organize them within projects and folders. ## Creating a new workspace To create a new workspace, 1. Open the dropdown menu in the top left of the Pipedream dashboard 2. Select **New workspace** 3. You’ll be prompted to name the workspace (you can [change the name later](/docs/workspaces/#renaming-a-workspace)) ## Workspace settings Find your current [workspace settings](https://pipedream.com/settings/account) like current members, under the **Settings** navigation menu item on the left hand side. This is where you can manage your workspace settings, including the workspace name, members, and member permissions. ### Inviting others to a join a workspace After opening your workspace settings, open the [Membership](https://pipedream.com/settings/users) tab. * Invite people to your workspace by entering their email address and then clicking **Send** * Or create an invite link to more easily share with a larger group (you can limit access to only specific email domains) ![](https://mintcdn.com/pipedream/nKh6d_6A4aXFb6xD/images/f0927ba8-Google_Chrome_-_Settings_-_Users_-_Pipedream_2023-06-29_at_2.28.12_PM_xy33fl.png?fit=max\&auto=format\&n=nKh6d_6A4aXFb6xD\&q=85\&s=45491a8e1801b48dc3819ec35681d663) ### Managing member permissions Pipedream workspaces have three roles: **Owner**, **Admin**, and **Member**. Each role has different levels of access to workspace settings and resources. #### Role overview | Role | Description | | - | - | | **Owner** | Full control over the workspace, including the ability to delete the workspace and manage other owners. A workspace can have multiple owners. | | **Admin** | Can manage workspace settings, members, and security configurations, but cannot delete the workspace or manage owners. | | **Member** | Basic access to view workspace details and work with resources based on project-level permissions. This is the default role for new members. | #### Permissions by role | Action | Owner | Admin | Member | | - | :-: | :-: | :-: | | **Workspace management** | | | | | Delete workspace | ✓ | | | | Update workspace settings (name, notifications) | ✓ | ✓ | | | View workspace details | ✓ | ✓ | ✓ | | **User management** | | | | | Invite users | ✓ | ✓ | ✓ | | Remove non-owners (admins or users) | ✓ | ✓ | | | Remove owners | ✓ | | | | Grant or revoke admin role | ✓ | ✓ | | | Grant or revoke owner role | ✓ | | | | Leave workspace (remove self) | ✓ | ✓ | ✓ | | **Security settings** | | | | | Configure SSO | ✓ | ✓ | | | Require MFA | ✓ | ✓ | | > [!NOTE] > > Project-level permissions use a separate access control system with **Creator**, **Editor**, and **Viewer** roles. See [Project access controls](/docs/projects/access-controls) for details. #### Promoting a member to admin To promote a member to an admin level account in your workspace, click the 3 dots to the right of their email and select “Make Admin”. ![](https://mintcdn.com/pipedream/xnRKrRxEtt3vxd6I/images/caaacf70-making_admin_btkbh7.gif?s=5438be14b975a50489cbbcfd26e1a20f) #### Demoting an admin to a member To demote an admin back to a member, click the 3 dots to the right of their email address and select “Remove Admin”. ![](https://mintcdn.com/pipedream/anb6FA0wpd8jtdUB/images/670dce7f-removing_admin_wez5km.gif?s=7ffa89df1eafec260fd5b178c443bc9d) ### Finding your workspace’s ID Visit your [workspace settings](https://pipedream.com/settings/account) and scroll down to the **API** section. You’ll see your workspace ID here. ### Requiring Two-Factor Authentication As a workspace admin or owner on the [Business plan](https://pipedream.com/pricing), you’re able to **require** that all members in your workspace must enable 2FA on their account. 1. Open the Authentication tab in your [workspace settings](https://pipedream.com/settings/authentication) (you must be an admin or owner to make changes here) 2. Make sure you’re in the [correct workspace](/docs/workspaces/#switching-between-workspaces) 3. Click the toggle under **Require 2FA** — this will open a confirmation modal with some additional information 4. Once you enable the change in the modal, **all workspace members (including admins and owners) will immediately be required to configure 2FA on their account**. All new and existing workspace members will be required to set up 2FA the next time they sign in. ![](https://mintcdn.com/pipedream/grEzwYhEB2vZSwGw/images/891ca758-require_2fa_xha6yc.png?fit=max\&auto=format\&n=grEzwYhEB2vZSwGw\&q=85\&s=b800fee573fb6e0829530d012e9b1262) > [!WARNING] > > Anyone who is currently logged in to Pipedream will be temporarily signed out until they set up 2FA > > If anyone is actively making changes to a workflow, their session may be interrupted. We recommend enabling the 2FA requirement in off hours. ### Configuring Single Sign-On (SSO) Workspaces on the Business plan can configure Single Sign-On, so your users can login to Pipedream using your identity provider. Pipedream supports SSO with Google, Okta, and any provider that supports the SAML protocol. See the guides below to configure SSO for your identity provider: * [Okta](/docs/workspaces/sso/okta/) * [Google](/docs/workspaces/sso/google/) * [Other SAML provider](/docs/workspaces/sso/saml/) ### Renaming a workspace To rename a workspace, open your [workspace settings](https://pipedream.com/settings/account) and navigate to the **General** tab. Click the save button to save the changes. > [!NOTE] > > Only workspace **owners** and **admins** and rename a workspace. ### Deleting a workspace To delete a workspace, open your workspace settings and navigate to the **Danger Zone**. Click the **Delete workspace** button and confirm the action by entering in your workspace name and `delete my workspace` into the text prompt. > [!NOTE] > > Only workspace **owners** can delete a workspace. > [!WARNING] > > Deleting a workspace will delete all **sources**, **workflows**, and other resources in your workspace. > > Deleting a workspace is **irreversible** and permanent. ## Switching between workspaces To switch between workspaces, open the dropdown menu in the top left of the Pipedream dashboard. Select which workspace you’d like to start working within, and your Pipedream dashboard context will change to that workspace. # Domain Verification Source: https://pipedream.com/docs/workspaces/domain-verification Pipedream requires that you verify ownership of your email domain in order to [configure SAML SSO](/docs/workspaces/sso/) for your workspace. If your email is `foo@example.com`, you need to verify ownership of `example.com`. If configuring Google OAuth (not SAML), you can disregard this section. ## Getting started 1. Navigate to the **[Verified Domains](https://pipedream.com/settings/domains)** section of your workspace settings 2. Enter the domain you’d like to use then click **Add Domain** 3. You’ll see a modal with instructions for adding a `TXT` record in the DNS configuration for your domain 4. DNS changes may take between a few minutes and up to 72 hours to propagate. Once they’re live, click the **Verify** button for the domain you’ve entered 5. Once Pipedream verifies the `TXT` record, we’ll show a green checkmark on the domain > [!NOTE] > > Make sure to verify all your domains. There’s no limit on the number of domains you can verify for SSO, so if you use `example.com`, `example.net`, and `foo.example.com`, make sure to verify each one. ![](https://mintcdn.com/pipedream/anb6FA0wpd8jtdUB/images/62914d3c-verified-domains_qcjpnb.png?fit=max\&auto=format\&n=anb6FA0wpd8jtdUB\&q=85\&s=31c76ff6c48eda95b1961c7e20eae2b4) # Single Sign On Overview Source: https://pipedream.com/docs/workspaces/sso Pipedream supports Single Sign-On (SSO) with [Okta](/docs/workspaces/sso/okta/), [Google](/docs/workspaces/sso/google/), or [any provider](/docs/workspaces/sso/saml/) that supports SAML or Google OAuth, which allows IT and workspace administrators easier controls to manage access and security. Using SSO with your Identity Provider (IdP) centralizes user login management and provides a single point of control for IT teams and employees. ## Requirements for SSO * Your workspace must be on a [Business plan](https://pipedream.com/pricing) * If using SAML, your Identity Provider must support SAML 2.0 * Only workspace admins and owners can configure SSO * Your workspace admin or owner must [verify ownership](/docs/workspaces/sso/#verifying-your-email-domain) of the SSO email domain > [!WARNING] > > The below content is for workspace admins and owners. Only workspace admins and owners have access to add verified domains, set up SSO, and configure workspace login methods. ## Verifying your Email Domain In order to configure SAML SSO for your workspace, you first need to verify ownership of the email domain. If configuring Google OAuth (not SAML), you can skip this section. [Refer to the guide here](/docs/workspaces/domain-verification/) to verify your email domain. ## Setting up SSO Navigate to the [Authentication section](https://pipedream.com/settings/domains) in your workspace settings to get started. ### SAML SSO 1. First, make sure you’ve verified the domain(s) you intend to use for SSO ([see above](/docs/workspaces/sso/#verifying-your-email-domain)) 2. Click the **Enable SSO** toggle and select **SAML** 3. If setting up SAML SSO, you’ll need to enter a metadata URL, which contains all the necessary configuration for Pipedream. Refer to the provider-specific docs for the detailed walk-through ([Okta](/docs/workspaces/sso/okta/), [Google Workspace](/docs/workspaces/sso/google/), [any other SAML provider](/docs/workspaces/sso/saml/)). 4. Click **Save** ### Google OAuth 1. Click the **Enable SSO** toggle and select **Google** 2. Enter the domain that you use with Google OAuth. For example, `vandalayindustries.com` 3. Click **Save** ## Restricting Login Methods Once you’ve configured SSO for your workspace, you can restrict the allowed login methods for [non-workspace owners](/docs/workspaces/sso/#workspace-owners-can-always-sign-in-using-any-login-method). ![](https://mintcdn.com/pipedream/anb6FA0wpd8jtdUB/images/6a24bb8b-Google_Chrome_-_Settings_-_Authentication_-_Pipedream_2023-11-13_at_2.27.08_PM_x1ahod.png?fit=max\&auto=format\&n=anb6FA0wpd8jtdUB\&q=85\&s=9ef200f5792255f25d1785e47aaedcfe) | Login Method | Description | | - | - | | **Any login method** | Everyone in the workspace can sign in either using SSO or via the login method they used to create their account (email and password, Google OAuth, GitHub) | | **SSO only** | Workspace members and admins must [sign in using SSO](https://pipedream.com/auth/sso) | | **SSO with guests** | When signing in using a verified email domain, members and admins must [sign in using SSO](https://pipedream.com/auth/sso). If signing in with a different domain (`gmail.com` for example), members (guests) can sign in using any login method. | ### Workspace owners can always sign in using any login method In order to ensure you don’t get locked out of your Pipedream workspace in the event of an outage with your identity provider, workspace owners can always sign in via the login method they used to create the account (email and password, Google, or GitHub). ### Login methods are enforced when signing in to pipedream.com This means if you are a member of 2 workspaces and one of them allows **any login method** but the other **requires SSO**, you will be required to sign in to Pipedream using SSO every time, independent of the workspace you are trying to access. # Configure SSO with Google Workspace Source: https://pipedream.com/docs/workspaces/sso/google Pipedream supports Single Sign-On (SSO) with Google Workspace. This guide shows you how to configure SSO in Pipedream to authenticate with your Google org. ## Requirements * SSO is only supported for [workspaces](/docs/workspaces/) on the Business plan. Visit the [Pipedream pricing page](https://pipedream.com/pricing) to upgrade. * You need an administrator of your Pipedream workspace and someone who can [create SAML apps in Google Workspace](https://apps.google.com/supportwidget/articlehome?hl=en\&article_url=https%3A%2F%2Fsupport.google.com%2Fa%2Fanswer%2F6087519%3Fhl%3Den\&assistant_id=generic-unu\&product_context=6087519\&product_name=UnuFlow\&trigger_context=a) to configure SSO. ## Configuration To configure SSO in Pipedream, you need to set up a [SAML application](https://apps.google.com/supportwidget/articlehome?hl=en\&article_url=https%3A%2F%2Fsupport.google.com%2Fa%2Fanswer%2F6087519%3Fhl%3Den\&assistant_id=generic-unu\&product_context=6087519\&product_name=UnuFlow\&trigger_context=a) in Google Workspace. If you’re a Google Workspace admin, you’re all set. Otherwise, coordinate with a Google Workspace admin before you continue. **1. Find Web and Mobile apps in Google Workspace** In your **Google Workspace** admin console, select **Apps** > **Web and Mobile apps** ![](https://mintcdn.com/pipedream/NF77kliJSewMqg65/images/1deab1af-Screenshot_2023-09-05_at_6.04.53_PM_kr9oe4.png?fit=max\&auto=format\&n=NF77kliJSewMqg65\&q=85\&s=c9e0b3c07a8e13912e2fe486c46483be) **2. Add a custom SAML app** In the **Add app** menu, select the option to **Add custom SAML app**: ![](https://mintcdn.com/pipedream/nKh6d_6A4aXFb6xD/images/ea5ee8a5-Screenshot_2023-09-05_at_6.15.12_PM_jrzszg.png?fit=max\&auto=format\&n=nKh6d_6A4aXFb6xD\&q=85\&s=911079a3c7e390990797ca1bbc4eace3) **3. Configure the app** First, add **Pipedream** as the app name, and an app description that makes sense for your organization: ![](https://mintcdn.com/pipedream/NF77kliJSewMqg65/images/093313a8-Screenshot_2023-09-05_at_6.31.46_PM_ggnyrq.png?fit=max\&auto=format\&n=NF77kliJSewMqg65\&q=85\&s=e0ba534c23c82e29fa584727b74d82a5) **4. Continue past the configuration step** ![](https://mintcdn.com/pipedream/Acz4Z1ch6TM7-aI8/images/9c77ada8-Screenshot_2023-09-05_at_6.35.15_PM_imjbuy.png?fit=max\&auto=format\&n=Acz4Z1ch6TM7-aI8\&q=85\&s=c43b7eae3436f67407dfa4243e1c90e7) **5. Configure the Service provider details** In the **Service provider details**, provide the following values: * **ACS URL** — `https://api.pipedream.com/auth/saml/consume` * **Entity ID** — Pipedream * **Start URL** — `https://api.pipedream.com/auth/saml/` replacing `` with the workspace name at [https://pipedream.com/settings/account](https://pipedream.com/settings/account). For example, if your workspace name is `example-workspace`, your start URL will be `https://api.pipedream.com/auth/saml/example-workspace`. ![](https://mintcdn.com/pipedream/anb6FA0wpd8jtdUB/images/6b3c1a9a-Screenshot_2023-09-05_at_6.38.12_PM_wplrr0.png?fit=max\&auto=format\&n=anb6FA0wpd8jtdUB\&q=85\&s=0f65a925d887c5ce3ef4b632d97ee1dd) In the **Name ID** section, provide these values: * **Name ID format** — `EMAIL` * **Name ID** — Basic Information > Primary email then press **Continue**. ![](https://mintcdn.com/pipedream/grEzwYhEB2vZSwGw/images/939d0674-Screenshot_2023-09-05_at_6.55.40_PM_f9fgyr.png?fit=max\&auto=format\&n=grEzwYhEB2vZSwGw\&q=85\&s=9b81a9a2a1a5d14ba631ef3246d409d9) **6. Configure the Attribute mapping** Once the app is configured, visit the **User access** section to add Google Workspace users to your Pipedream SAML app. See [step 14 of the Google Workspace SAML docs](https://apps.google.com/supportwidget/articlehome?hl=en\&article_url=https%3A%2F%2Fsupport.google.com%2Fa%2Fanswer%2F6087519%3Fhl%3Den\&assistant_id=generic-unu\&product_context=6087519\&product_name=UnuFlow\&trigger_context=a) for more detail. **7. Download and host the SAML metadata** Pipedream requires access to SAML metadata at a publicly-accessible URL. This communicates public metadata about the identity provider (Google Workspace) that Pipedream can use to configure the SAML setup in Pipedream. First, click the **Download Metadata** button on the left of the app configuration page: ![](https://mintcdn.com/pipedream/nKh6d_6A4aXFb6xD/images/f764938e-Screenshot_2023-09-06_at_11.47.33_AM_mez7j1.png?fit=max\&auto=format\&n=nKh6d_6A4aXFb6xD\&q=85\&s=6e2af6bf052f283444f3087134393ac7) **Host this file on a public web server where Pipedream can access it via URL**, for example: `https://example.com/metadata.xml`. You’ll use that URL in the next step. **8. Visit your workspace’s authentication settings** In Pipedream, visit your workspace’s [authentication settings](https://pipedream.com/settings/authentication). **9. Add the SAML metadata URL** In the **Single Sign-On** section, select **SAML**, and add the URL from step 7 above in the **Metadata URL** field, then click Save. ![](https://mintcdn.com/pipedream/anb6FA0wpd8jtdUB/images/608d3932-saml-metadata-url_cxciur.png?fit=max\&auto=format\&n=anb6FA0wpd8jtdUB\&q=85\&s=477a80df389271b8e545b27ed9958136) Any user in your workspace can now log into Pipedream at [https://pipedream.com/auth/sso](https://pipedream.com/auth/sso) by entering your workspaces’s name (found in your [Settings](https://pipedream.com/settings/account)). You can also access your SSO sign in URL directly by visiting [https://pipedream.com/auth/org/your-workspace-name](https://pipedream.com/auth/org), where `your-workspace-name` is the name of your workspace. ## Important details Before you configure the application in Google, make sure all your users have matching email addresses for their Pipedream user profile and their Google Workspace profile. Once SSO is enabled, they will not be able to change their Pipedream email address. If a user’s Pipedream email does not match the email in their Google profile, they will not be able to log in. If existing users signed up for Pipedream using an email and password, they will no longer be able to do so. They will only be able to sign in using SSO. # Configure SSO with Okta Source: https://pipedream.com/docs/workspaces/sso/okta Pipedream supports Single Sign-On (SSO) with Okta. This guide shows you how to configure SSO in Pipedream to authenticate with your Okta org. ## Requirements * SSO is only supported for [workspaces](/docs/workspaces/) on the Business plan. Visit the [Pipedream pricing page](https://pipedream.com/pricing) to upgrade. * You must be an administrator of your Pipedream workspace * You must have an Okta account ## Configuration **1. Visit your Okta dashboard** In your Okta **Admin** dashboard, select the **Applications** section and click **Applications** below that: ![](https://mintcdn.com/pipedream/Acz4Z1ch6TM7-aI8/images/bac60372-image.png?fit=max\&auto=format\&n=Acz4Z1ch6TM7-aI8\&q=85\&s=4243b43948e6492e135eb558a59e0ec5) **2. Browse App Catalog** Click **Browse App Catalog**: ![](https://mintcdn.com/pipedream/h8oodpUDiyR1Ssvt/images/326e546a-step-2_iv1a2c.png?fit=max\&auto=format\&n=h8oodpUDiyR1Ssvt\&q=85\&s=941b97d6ca154cc24ec9b1e497205b2c) **3. Search for Pipedream** Search for “Pipedream” and select the Pipedream app: ![](https://mintcdn.com/pipedream/grEzwYhEB2vZSwGw/images/8b6bb035-step-3_z2buml.png?fit=max\&auto=format\&n=grEzwYhEB2vZSwGw\&q=85\&s=21e1ebd4abc8154596d5a20f80d889c8) **4. Click Add** ![](https://mintcdn.com/pipedream/xnRKrRxEtt3vxd6I/images/d80f8bb6-step-4_mfd5bs.png?fit=max\&auto=format\&n=xnRKrRxEtt3vxd6I\&q=85\&s=3be608ef02cd5863436ab11abde3718d) **5. Configure General Settings** Fill out the **General Settings** that Okta presents, and click **Done**: ![](https://mintcdn.com/pipedream/anb6FA0wpd8jtdUB/images/55dec310-step-5_fqmywz.png?fit=max\&auto=format\&n=anb6FA0wpd8jtdUB\&q=85\&s=c9b93bf5ebb3f1058f5300f065d39cb0) **6. Edit Sign On** Select the **Sign On** tab, and click **Edit** at the top right: ![](https://mintcdn.com/pipedream/xnRKrRxEtt3vxd6I/images/c62f9570-step-6_zzeeul.png?fit=max\&auto=format\&n=xnRKrRxEtt3vxd6I\&q=85\&s=2ea3bc9a9cb51a93a5fe452b5adb4b9a) **7. Configure Default Relay State** Scroll down to the **SAML 2.0** settings. In the **Default Relay State** section, enter `organization_username`: ![](https://mintcdn.com/pipedream/h8oodpUDiyR1Ssvt/images/4c74f713-step-7_dqtq43.png?fit=max\&auto=format\&n=h8oodpUDiyR1Ssvt\&q=85\&s=c928c48bde2ce157e493b9bbca689c2a) **8. Save your configuration** Set any other configuration options you need in that section or in the **Credentials Details** section, and click **Save**. **9. Copy the Identity Provider metadata URL** In the **Sign On** section, you’ll see a section that includes the setup instructions for SAML: ![](https://mintcdn.com/pipedream/grEzwYhEB2vZSwGw/images/802edbf0-step-9-1_ucbq6e.png?fit=max\&auto=format\&n=grEzwYhEB2vZSwGw\&q=85\&s=2df6ddfa773a1f9222c2d1a938d5f5ca) Okta - SAML Click the **Identity Provider metadata** link and copy the URL from your browser’s address bar: ![](https://mintcdn.com/pipedream/h8oodpUDiyR1Ssvt/images/2ed51a1b-step-9-2_nlrois.png?fit=max\&auto=format\&n=h8oodpUDiyR1Ssvt\&q=85\&s=00212be941d4acad76195507fa592e7b) **10. Enable SSO in Pipedream** Visit your [Pipedream workspace authentication settings](https://pipedream.com/settings/authentication). Click the toggle to **Enable SSO**, then click **Edit SSO Configuration**, and add the metadata URL in the **SAML** section and click **Save**: ![](https://mintcdn.com/pipedream/NF77kliJSewMqg65/images/0a43ec81-pipedream.com_settings_authentication_3_dtt5fa.png?fit=max\&auto=format\&n=NF77kliJSewMqg65\&q=85\&s=db493454d8209faa096c83ad03527d73) **11. Assign the application to users** Back in Okta, click on the **Assignments** tab of the Pipedream application. Click on the **Assign** dropdown and select **Assign to People**: ![](https://mintcdn.com/pipedream/grEzwYhEB2vZSwGw/images/875682d5-step-11_i8wm6k.png?fit=max\&auto=format\&n=grEzwYhEB2vZSwGw\&q=85\&s=c23b4006685ef3d1bf32976425c3eef8) Assign the application to the relevant users in Okta, and Pipedream will configure the associated accounts on our end. Users configured in your Okta app can log into Pipedream at [https://pipedream.com/auth/sso](https://pipedream.com/auth/sso) by entering your workspaces’s name (found in your [Settings](https://pipedream.com/settings/account)). You can also access your SSO sign in URL directly by visiting [https://pipedream.com/auth/org/your-workspace-name](https://pipedream.com/auth/org), where `your-workspace-name` is the name of your workspace. ## Important details Before you configure the application in Okta, make sure all your users have matching email addresses for their Pipedream user profile and their Okta profile. Once SSO is enabled, they will not be able to change their Pipedream email address. If a user’s Pipedream email does not match the email in their IDP profile, they will not be able to log in. If existing users signed up for Pipedream using an email and password, they will no longer be able to do so. They will only be able to sign in using SSO. # Configure SSO with Another SAML Provider Source: https://pipedream.com/docs/workspaces/sso/saml Pipedream supports Single Sign-On (SSO) with any identity provider that supports SAML 2.0. This guide shows you how to configure SSO in Pipedream to authenticate with your SAML provider. If you use [Okta](/docs/workspaces/sso/okta/) or [Google Workspace](/docs/workspaces/sso/google/), please review the guides for those apps. ## Requirements * SSO is only supported for [workspaces](/docs/workspaces/) on the Business plan. Visit the [Pipedream pricing page](https://pipedream.com/pricing) to upgrade. * You need an administrator of your Pipedream workspace and someone who can create SAML apps in your identity provider to configure SSO. ## SAML metadata | Name | Other names | Value | | - | - | - | | SP Entity ID | Audience, Audience Restriction, SP URL | `Pipedream` | | SP Assertion Consumer Service (ACS) URL | Reply or destination URL | `https://api.pipedream.com/auth/saml/consume` | | SP Single Sign-on URL | Start URL | `https://api.pipedream.com/auth/saml/` replacing `` with the workspace name at [https://pipedream.com/settings/account](https://pipedream.com/settings/account). For example, if your workspace name is `example-workspace`, your start URL will be `https://api.pipedream.com/auth/saml/example-workspace`. | ## SAML attributes * `NameID` —email ## Providing SAML metadata to Pipedream Pipedream requires access to SAML metadata at a publicly-accessible URL. This communicates public metadata about the identity provider (your SSO provider) that Pipedream can use to configure the SAML setup in Pipedream. Most SSO providers will provide a publicly-accessible metadata URL. If not, they should provide a mechanism to download the SAML metadata XML file. **Once you’ve configured your SAML app using the settings above, host this file on a public web server where Pipedream can access it via URL**, for example: `https://example.com/metadata.xml`. Once you have a publicly-accessible URL that hosts your SAML metadata, visit your workspace’s [authentication settings](https://pipedream.com/settings/authentication) in Pipedream. In the **Single Sign-On** section, select **SAML**, and add your metadata URL to the **Metadata URL** field, then click **Save**. ![](https://mintcdn.com/pipedream/h8oodpUDiyR1Ssvt/images/2de93ddd-pipedream.com_settings_authentication_2_rcbhyn.png?fit=max\&auto=format\&n=h8oodpUDiyR1Ssvt\&q=85\&s=a90505dd64c0ee3a519adf09954222ef) Any user in your workspace can now log into Pipedream at [https://pipedream.com/auth/sso](https://pipedream.com/auth/sso) by entering your workspaces’s name (found in your [Settings](https://pipedream.com/settings/account)). You can also access your SSO sign in URL directly by visiting [https://pipedream.com/auth/org/your-workspace-name](https://pipedream.com/auth/org), where `your-workspace-name` is the name of your workspace. ## Important details Before you configure the application in your IdP, make sure all your users have matching email addresses for their Pipedream user profile and their IdP profile. Once SSO is enabled, they will not be able to change their Pipedream email address. If a user’s Pipedream email does not match the email in their IdP profile, they will not be able to log in. If existing users signed up for Pipedream using an email and password, they will no longer be able to do so. They will only be able to sign in using SSO.